How to Test an Off-Grid Solar System
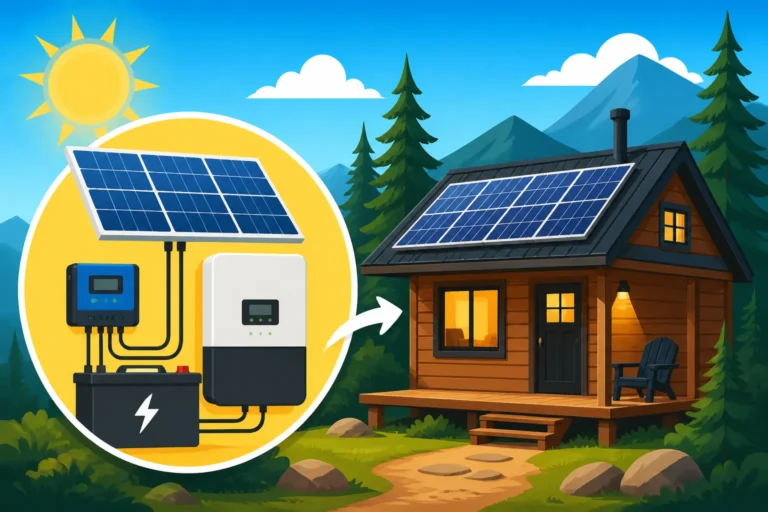
There's nothing quite like the feeling of finally completing your off-grid solar system installation, flipping that main breaker, and watching your lights come to life, powered solely by the sun. It's a huge accomplishment! But the job isn't truly done until you've thoroughly tested every component and the system as a whole. Skipping this crucial step can lead to frustrating, often hard-to-diagnose issues down the road, leaving you in the dark when you least expect it. This comprehensive guide will walk you through exactly how to test an off-grid solar system, from initial checks to full system performance verification, ensuring your hard work delivers reliable, consistent power.
Why Testing Your Off-Grid Solar System Matters
I know, you're eager to just get everything running. But trust me, taking the time to test your off-grid solar system properly is one of the most important steps you can take after installation. It's not just about confirming it turns on; it's about ensuring it works correctly and safely. Many seasoned off-gridders have stories about a small oversight during installation that led to major headaches later, all because they rushed through testing.
Peace of Mind and System Reliability
Imagine you've just finished setting up your remote cabin's solar power. You've installed the panels, wired up the batteries, hooked up the inverter, and everything seems to be working. But then, a few weeks later, during a crucial winter storm, your power suddenly dies. What happened? If you hadn't thoroughly tested the system, you might spend hours or even days trying to figure out if it's a loose connection, a faulty battery, or an underperforming solar panel. Knowing that each component and the entire system has been verified provides an invaluable sense of security. It allows you to trust your power source, which is especially important when you're relying on it completely for heating, cooling, and communication.
Testing helps validate that your system can handle the loads you expect it to, day in and day out. It confirms that the solar panels are producing the expected wattage, that your charge controller is efficiently managing power flow, and that your battery bank is storing energy effectively. Without these assurances, you're just hoping for the best, and when it comes to off-grid power, "hope" isn't a strategy. A properly tested system reduces the likelihood of unexpected failures, giving you more time to enjoy your off-grid lifestyle rather than troubleshooting it.
Catching Issues Early
One of the biggest advantages of thorough testing is identifying potential problems before they escalate into major failures or safety hazards. A loose wire connection might initially cause intermittent power drops, but over time, it could lead to arcing, heat buildup, and even a fire. A misconfigured charge controller could overcharge or undercharge your batteries, drastically shortening their lifespan and leading to expensive replacements. Think of it like a pre-flight check for an airplane – you wouldn't want to discover a problem mid-flight.
By systematically testing each part of your system, you can pinpoint weak links or improper installations right away. This could be anything from a faulty MC4 connector on a solar panel string to an incorrectly programmed inverter setting. Catching these issues early means they can often be fixed with minimal effort and cost, preventing more significant damage to expensive components like batteries or inverters. It’s far easier (and cheaper) to tighten a loose terminal or adjust a setting during commissioning than to replace a fried component because of a preventable error.
Optimizing Performance
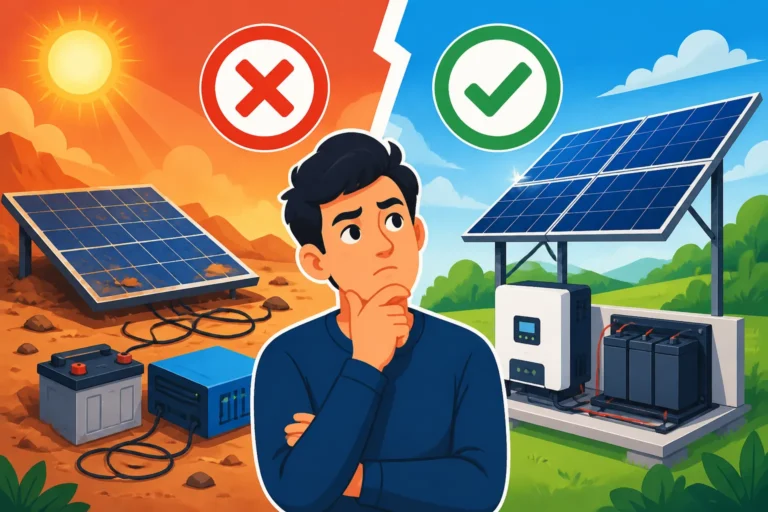
Testing isn't just about finding what's wrong; it's also about ensuring everything is working as efficiently as possible. A system that "works" might not be working optimally. For example, if your solar panels are slightly misaligned, they might still generate power, but not as much as they could. If your charge controller settings aren't perfectly matched to your battery type, you might not be getting the full usable capacity out of your battery bank.
Through detailed performance testing, you can gather data on how your system is actually performing under various conditions. This data can then be used to make adjustments that improve energy harvest, storage, and delivery. Maybe your array needs a slight tilt adjustment to capture more winter sun, or perhaps your inverter's low-voltage disconnect needs to be tweaked to better protect your specific battery chemistry. Understanding your system's real-world output and consumption helps you fine-tune its operation, ensuring you get the most bang for your buck and maximize your energy independence. This proactive approach can significantly extend the life of your equipment and enhance your overall off-grid experience.
Essential Tools for Off-Grid Solar System Testing
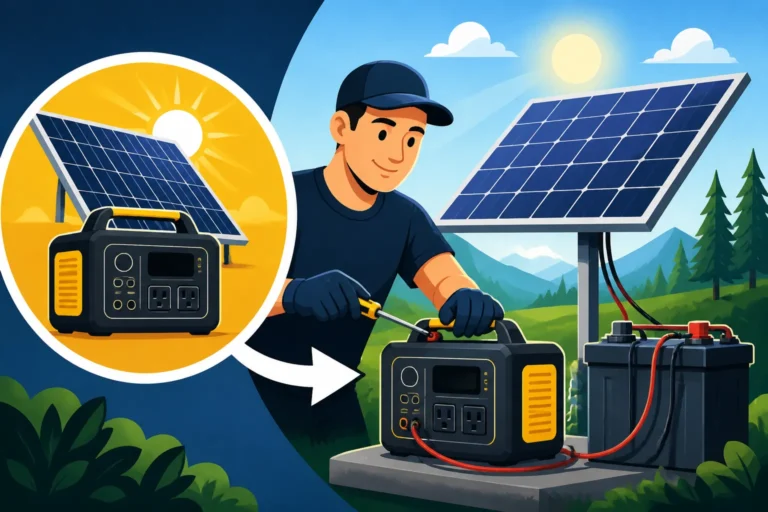
Before you even think about starting your off-grid system, you need to make sure you have the right tools on hand. Trying to test a solar setup without the proper equipment is like trying to bake a cake without measuring cups – it’s a recipe for frustration and likely failure. Having these tools ready will not only make the testing process smoother but also safer and more accurate.
Basic Diagnostic Tools
These are the fundamental tools that every off-grid solar owner should have in their kit. They're not just for installation; they're vital for troubleshooting and ongoing maintenance.
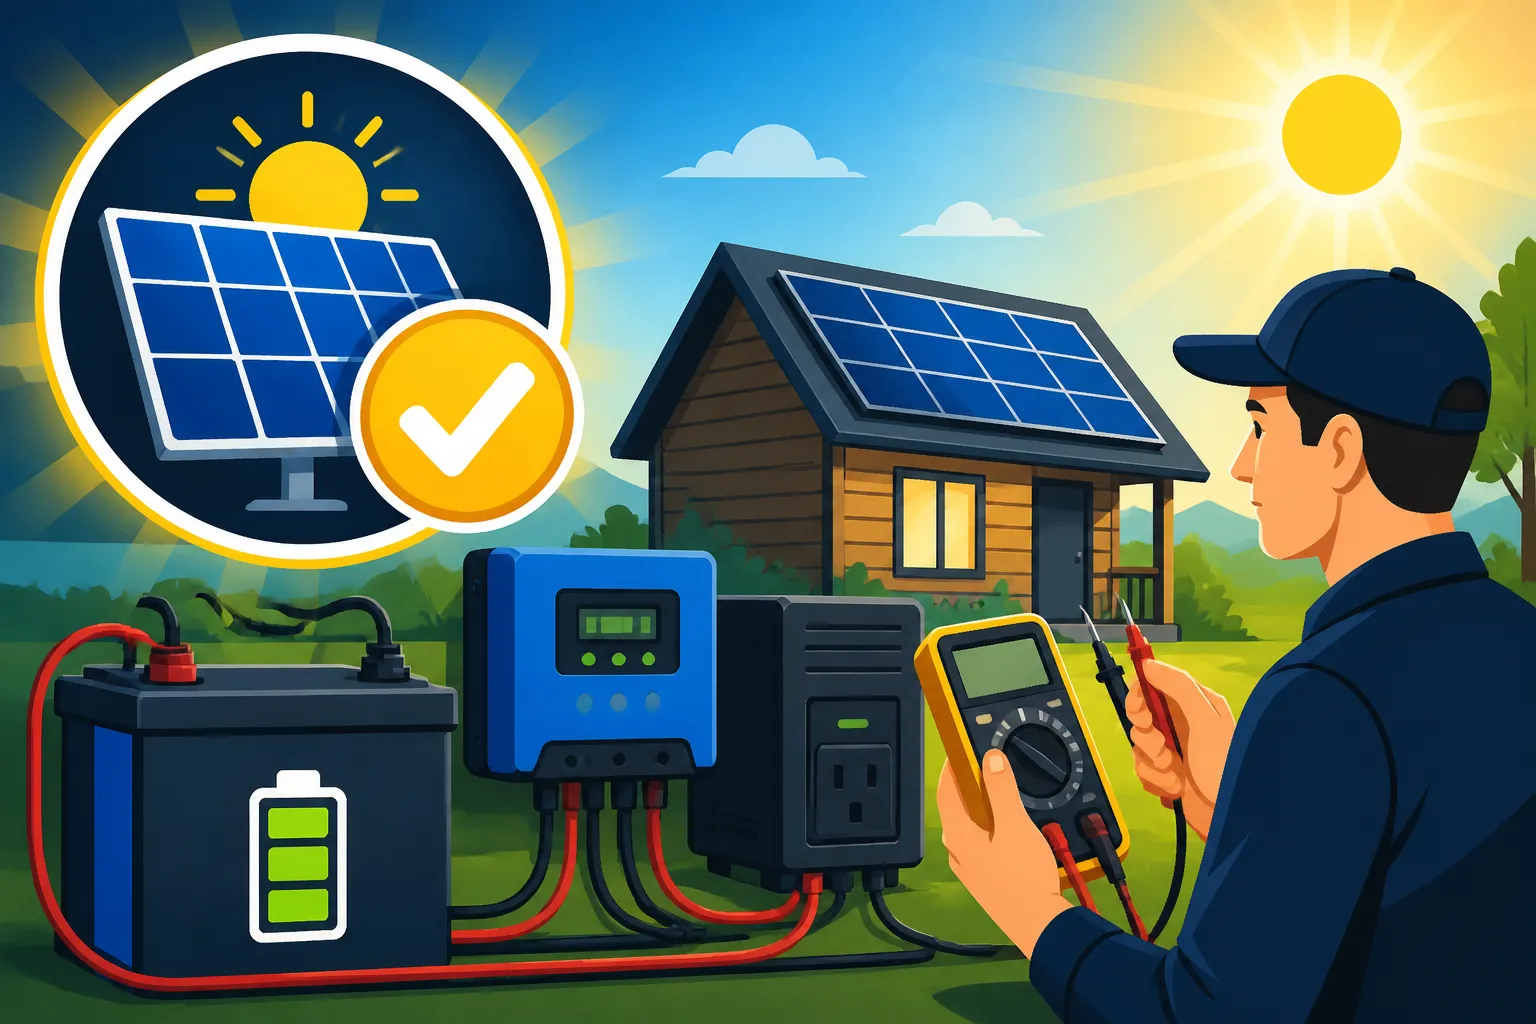
- Multimeter (Digital Volt-Ohm Meter – DVOM): This is your absolute best friend when working with any electrical system. A good digital multimeter can measure voltage (AC and DC), current (amps), and resistance (ohms). For off-grid solar, you'll constantly be using it to check panel voltage, battery voltage, continuity of wires, and current draw from individual devices. Make sure it's rated for the voltages and currents you expect in your system. For instance, if you have a 48V system, ensure your meter can handle at least 60V DC. You don't need the most expensive model out there, but a reliable one from brands like Fluke or Klein Tools is a solid investment. Even a basic model you can pick up on Amazon will do for most simple voltage checks.
- Clamp Meter (DC Amp Clamp): While a standard multimeter measures current by breaking the circuit (which can be a hassle and sometimes unsafe), a clamp meter allows you to measure DC current without disconnecting any wires. You simply clamp it around a single conductor, and it reads the current flowing through it. This is incredibly useful for checking the output of individual solar panels, the charging current going into your batteries, or the current draw of an appliance from your inverter. Ensure it's specifically a DC clamp meter, as many common clamp meters only measure AC current.
- Infrared Thermometer: Heat is often an indicator of problems in electrical systems. A hot connection point, a warm charge controller, or an unusually hot inverter could signal an issue. An infrared thermometer allows you to quickly and safely check the temperature of components and connections without making direct contact. This is particularly useful for identifying loose connections or overloaded circuits before they cause damage.
- Wire Strippers, Crimpers, and Cutters: You'll use these tools constantly for preparing wires and making secure connections. Good quality crimpers, especially for MC4 connectors and battery lugs, are essential for safety and efficiency. Loose or poorly crimped connections are a common source of system failures and fire hazards.
- Terminal Cleaners and Anti-Corrosion Spray: Keeping battery terminals and other connections clean and free of corrosion is vital for optimal performance and longevity. Corrosion adds resistance, which reduces efficiency and can lead to heat buildup.
Advanced Measurement Devices
For those looking for more detailed diagnostics or working with larger, more complex systems, these tools can provide deeper insights.
- Battery Hydrometer (for flooded lead-acid batteries only): If you're using flooded lead-acid batteries, a hydrometer measures the specific gravity of the electrolyte in each cell. This gives you a precise indication of the battery's state of charge and can help identify a weak cell within a battery bank. Remember, this is not for sealed lead-acid (AGM/Gel) or lithium (LiFePO4) batteries.
- Battery Load Tester: This device applies a specific load to a battery and measures its voltage drop under load. It's excellent for testing the actual capacity and health of individual batteries or small battery banks, helping you determine if a battery is truly holding a charge and delivering power as it should.
- Solar Panel String Checker/PV Analyzer: For larger solar arrays, a dedicated PV analyzer can measure the maximum power point (MPP) voltage and current of a solar string or even individual panels. These devices can help diagnose shading issues, panel degradation, or individual panel failures that a basic multimeter might miss. They provide a comprehensive look at your array's performance.
- Digital Oscilloscope: While likely overkill for most DIY off-grid setups, an oscilloscope allows you to visualize electrical waveforms. This can be incredibly useful for diagnosing subtle inverter issues, electrical noise, or intermittent problems that are hard to catch with a standard multimeter. For complex troubleshooting, this is a powerful diagnostic tool.
Safety Gear You Can't Skip
Working with electricity, especially high-voltage DC from solar panels and high-current batteries, can be incredibly dangerous. Never, ever compromise on safety.
- Insulated Tools: Ensure screwdrivers, wrenches, and other hand tools have proper insulation when working on live circuits. This provides a crucial barrier against electrical shock.
- Safety Glasses or Goggles: Protect your eyes from sparks, battery acid (especially with lead-acid batteries), or flying debris.
- Insulated Gloves: Heavy-duty, electrically insulated gloves are a must when working around batteries and high-voltage wiring. Always check their rating to ensure they protect against the maximum voltage of your system.
- Fire Extinguisher (Type ABC): Have an appropriate fire extinguisher readily accessible. Electrical fires can spread quickly, and having a suitable extinguisher nearby is a critical safety measure.
- Non-Conductive Matting: Standing on an insulated mat can provide an additional layer of protection against ground faults, especially when working in damp or outdoor conditions.
- Lockout/Tagout Kit: For larger systems or when working with others, a lockout/tagout system ensures that power cannot be accidentally reconnected while you are working on the system. This involves physically locking disconnect switches in the "off" position and tagging them to indicate who is working on the circuit. This is a critical step in any Off-Grid Solar Installation Guide.
Remember, safety is paramount. Always disconnect power sources before working on components whenever possible, and if you're ever unsure, consult with a qualified electrician.
Pre-Commissioning Checks: Before You Power Up
The excitement is building! Your system is installed, panels are on the roof, batteries are racked, and the inverter is mounted. But hold your horses before you flip that switch. A thorough pre-commissioning check is like a final inspection before the grand opening. It’s your last chance to catch easy-to-fix mistakes and ensure everything is ready for safe and effective operation. This step is vital for preventing damage to your equipment and ensuring the safety of anyone interacting with the system.
Visual Inspection of All Components
Start with a slow, deliberate walk-through of your entire off-grid solar system. Think of yourself as a detective, looking for anything out of place.
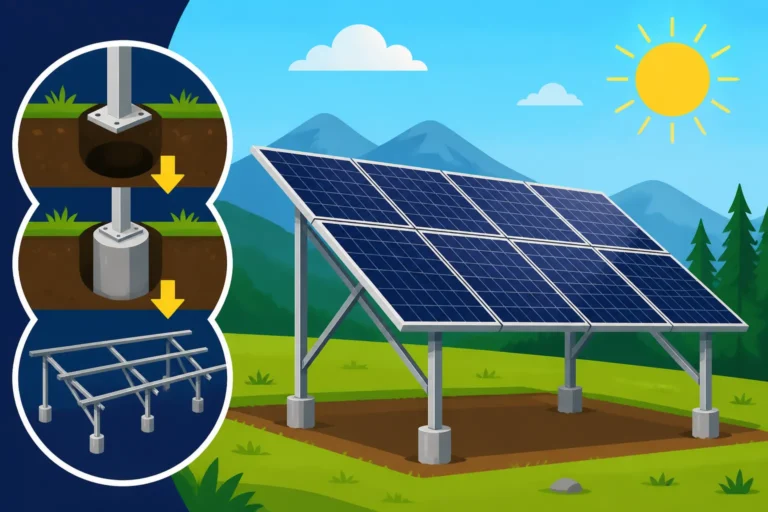
- Solar Panels: Are all panels securely mounted? Are there any visible cracks, chips, or damage to the glass or frames? Check the back of the panels – are the junction boxes sealed properly? Are all the MC4 connectors firmly seated and clicked into place? Look for any kinks or damage to the solar cables running from the panels. Ensure proper grounding of the array structure. Even a small imperfection can lead to reduced output or future failures. You want to confirm that all panels are facing the optimal direction and tilt angle to capture the most sunlight. This also extends to verifying that shading from trees or other structures won't prematurely degrade their performance.
- Wiring and Conduit: Trace every single wire from your solar panels down to your charge controller, from the charge controller to your battery bank, and from your battery bank to your inverter. Are all wires properly sized for the current they'll carry? Are they routed neatly, secured to prevent chafing or sagging, and protected from environmental damage by conduit where necessary? Look for any exposed wire strands, loose insulation, or signs of stress on the connections. Ensure that all wiring is correctly labeled, especially if you have multiple strings or components. This attention to detail will be invaluable during future troubleshooting. Remember to consult an Off-Grid Solar Wiring Diagram Explained to double-check your work.
- Charge Controller, Inverter, and Other Components: Are these devices securely mounted to a solid surface? Are they located in a well-ventilated area, free from moisture and direct sunlight (unless designed for outdoor use)? Check all connection terminals – DC inputs from solar, battery terminals, and AC output terminals on the inverter. Are they tight? There should be no wiggle. Many issues stem from loose connections, which can lead to arcing, heat, and component failure. Look for any visible damage to the casings, screens, or cooling fins.
- Battery Bank: For lead-acid batteries, check for any leaks, swelling, or corrosion on the terminals. Ensure the battery vent caps are properly in place (if applicable). For LiFePO4 batteries, check for any physical damage to the casing. All battery terminals should be clean and tight, with appropriate dielectric grease or terminal protection applied to prevent corrosion. Is the battery bank properly ventilated (especially for lead-acid)? Is it secured to prevent movement? Verify that the battery disconnect switch is easily accessible and in the "off" position.
Verifying Wiring and Connections
This is where your multimeter becomes your best friend. A visual inspection is good, but electrical measurements confirm continuity and correct polarity.
- Continuity Checks: Before connecting anything to your delicate charge controller or inverter, use your multimeter's continuity function (or resistance mode) to check that there are no short circuits in your wiring runs. For example, disconnect your solar panel array from your charge controller. Measure between the positive and negative terminals of your solar array's wiring – you should get an open circuit (very high resistance). If you get a low resistance, you have a short somewhere in your panel wiring. Do the same for your battery cables before connecting them to the charge controller or inverter. This step is crucial for preventing immediate damage upon power-up.
- Polarity Checks: Incorrect polarity is a common and potentially devastating mistake in off-grid solar. Before connecting anything, use your multimeter to check the polarity of every connection point.
- Solar Array Output: Disconnect the solar array from the charge controller. Point the panels at the sun and measure the open-circuit voltage (Voc) at the end of your solar wiring that will connect to the charge controller. Ensure the positive wire is indeed positive and the negative is negative. The voltage should be within the expected range for your panels in series/parallel configuration.
- Battery Bank Output: With your battery bank assembled and connected, measure the voltage at the terminals where it will connect to the charge controller and inverter. Confirm the positive terminal is positive and the negative is negative. The voltage should match your nominal battery bank voltage (e.g., 12V, 24V, 48V).
- Charge Controller/Inverter Inputs: Briefly apply your meter to the input terminals of your charge controller and inverter before making the final connections, just to familiarize yourself with their marked polarities. This ensures you're ready to connect them correctly.
- Grounding: Double-check all grounding connections. Is the solar array frame grounded? Is the inverter chassis grounded? Is the electrical panel grounded? Proper grounding is essential for safety and protects against electrical surges. A good Off-Grid Solar Safety and Grounding guide will elaborate on the specific requirements.
Confirming Component Settings
Many off-grid solar components, especially charge controllers and inverters, come with adjustable settings. Getting these right before powering up is critical for system health and longevity.
- Charge Controller Settings: Most modern MPPT charge controllers need to be configured for your specific battery chemistry (e.g., LiFePO4, AGM, Gel, Flooded Lead-Acid). This includes setting absorption voltage, float voltage, equalization voltage (for flooded lead-acid), and low voltage disconnect (LVD). Incorrect settings can severely damage your batteries, leading to undercharging, overcharging, or reduced lifespan. If you're using a Renogy charge controller, for example, their manuals provide detailed instructions for programming. Make sure these settings align with your battery manufacturer's recommendations. For more details on this, check out How to Set Charge Controller Parameters.
- Inverter Settings: If your inverter has programmable settings, such as battery low voltage cut-off, high voltage cut-off, charge parameters (if it's an inverter/charger), or AC input thresholds, ensure they are correctly configured. A common mistake is not setting the low voltage cut-off high enough for lithium batteries, which can lead to irreversible damage. Read your inverter manual carefully and ensure all settings are appropriate for your battery bank and system design. This is part of learning How to Set Up an Inverter for Off-Grid.
- System Voltage Match: Confirm that all your major components (solar panels, charge controller, batteries, inverter) are compatible with your chosen system voltage (e.g., 12V, 24V, or 48V). Attempting to connect a 12V panel directly to a 48V battery bank (without a proper charge controller) or running a 24V inverter on a 12V battery bank will simply not work and could damage equipment. An Off-Grid Solar System Sizing Guide will help you understand voltage compatibility.
By meticulously going through these pre-commissioning checks, you're building a strong foundation for a reliable and long-lasting off-grid solar system. Don't skip these steps – they are your best defense against future headaches.
Testing the Individual Components of Your System
Once your visual inspections and preliminary checks are complete, it's time to test each major component independently. This systematic approach allows you to isolate any issues before they affect the entire system, making troubleshooting much more straightforward. You want to make sure each piece of the puzzle is performing its intended function.
Solar Panel Array Testing
Your solar panels are the heart of your off-grid system, converting sunlight into electricity. Ensuring they're performing optimally is crucial.
- Open Circuit Voltage (Voc) Test: This test measures the maximum voltage your solar panel or array can produce without any load.
- Disconnect: Ensure your solar array is completely disconnected from the charge controller.
- Measure: Use your multimeter (set to DC voltage) to measure the voltage across the positive and negative terminals of your solar panel array.
- Compare: Compare this reading to the Voc rating listed on your solar panel's specification sheet. Keep in mind that Voc can be higher in colder temperatures and lower in hotter temperatures than the STC (Standard Test Conditions) rating. If your measurement is significantly lower than expected, it could indicate a faulty panel, shading, or a problem with a series connection. If you have multiple strings, test each string individually. This is a fundamental step when you want to How to Test Panel Output.
- Short Circuit Current (Isc) Test: This measures the maximum current your solar panel or array can produce when its terminals are shorted together (under very specific, controlled conditions).
- Safety First: This test should only be performed briefly to avoid overheating the panel or damaging your multimeter if it's not rated for the current. Use a DC clamp meter for safer and more accurate results.
- Measure: With the panels exposed to full sunlight, briefly short the positive and negative terminals (only if using a meter with a high-current fuse or a clamp meter). Use your clamp meter around one of the conductors to measure the current.
- Compare: Compare this reading to the Isc rating on your panel's spec sheet. Similar to Voc, Isc is influenced by sunlight intensity and temperature. A significantly low Isc could indicate dirt on the panels, shading, or a faulty cell.
- Module Inspection: Beyond electrical tests, visually inspect each panel for any physical damage, delamination, or hot spots (which you can detect with your infrared thermometer). Even minor damage can lead to reduced efficiency or premature failure. Ensure that all mounting hardware is secure and that the panels are free from debris like leaves or bird droppings.
Charge Controller Functionality Tests
The charge controller is the brain of your DC system, regulating the power flow from your solar panels to your batteries.
- Battery Connection First: Crucially, always connect your battery bank to the charge controller before connecting the solar panels. This allows the charge controller to sense the battery voltage and configure itself correctly. Connecting panels first can damage some charge controllers.
- Voltage Regulation Check:
- Connect: Once the battery is connected, connect your solar array to the charge controller.
- Monitor: Observe the charge controller's display (if it has one) or use your multimeter to monitor the battery voltage. As the panels start producing power, you should see the battery voltage slowly rise towards the set absorption voltage. The charge controller should actively manage this, preventing the voltage from exceeding the specified limits for your battery type.
- Current Flow: Use your DC clamp meter to measure the current flowing from the solar panels into the charge controller and then from the charge controller into the batteries. These values should be positive, indicating current flow in the correct direction and generally matching your panels' output and your battery's charging needs.
- Load Output Test (if applicable): Some smaller charge controllers have a DC load output. If yours does:
- Connect Load: Connect a small DC load (e.g., a 12V light bulb) to the charge controller's load terminals.
- Verify Functionality: Check that the load powers on and off according to the controller's settings (e.g., low voltage disconnect, timer settings). This confirms the load control feature is working correctly.
- Temperature Compensation (if applicable): If your charge controller has a remote temperature sensor, ensure it's properly installed and connected to the battery bank. Verify that the controller is reading an accurate battery temperature, as this is vital for precise charging in varying climates.
Battery Bank Health Checks
Your batteries are your energy reservoir. Their health directly impacts the reliability and autonomy of your off-grid system.
- Initial Voltage Check: After your battery bank has been fully charged and allowed to rest for a few hours (no charge or discharge), measure the open-circuit voltage across the entire bank. Compare this to the battery manufacturer's full-charge voltage specifications for your battery chemistry.
- State of Charge (SOC) Assessment:
- LiFePO4 (Lithium Iron Phosphate): For LiFePO4 batteries, voltage is a less reliable indicator of SOC, but a full charge voltage will typically be around 13.4-13.6V per 12V battery. A battery monitor (shunt-based) is essential for accurate SOC tracking with LiFePO4. Check that your battery management system (BMS) is reporting correct voltage and current.
- Lead-Acid (AGM, Gel, Flooded): For lead-acid batteries, voltage is a better indicator. A fully charged 12V lead-acid battery will typically rest around 12.7V or higher. If using flooded lead-acid, use your hydrometer to check the specific gravity of the electrolyte in each cell. Consistent readings across all cells indicate a healthy battery. Discrepancies can point to a weak cell.
- Load Test (Optional but Recommended): While it's best to avoid deep discharging new batteries, a controlled load test can confirm your battery bank's capacity.
- Apply Load: Connect a known DC load (e.g., a few DC lights, an inverter running a small AC appliance) and measure the current draw with your clamp meter.
- Monitor: Observe how long the battery bank can sustain this load before reaching your predefined low voltage cut-off. This helps verify that your batteries are delivering their rated capacity. Remember, you don't want to over-discharge your batteries, especially lead-acid. Always adhere to the manufacturer's depth of discharge recommendations.
- Connection Integrity: Double-check all battery terminal connections for tightness and cleanliness. Loose or corroded connections are a major source of voltage drop and power loss. This is an essential part of How to Maintain an Off-Grid Battery Bank.
Inverter Performance Evaluation
The inverter transforms your battery's DC power into usable AC power for your household appliances.
- No-Load Test:
- Connect: Ensure the inverter is connected to your battery bank (with the appropriate fuses/breakers in between) but not connected to any AC loads or your main breaker panel yet.
- Power On: Turn on the inverter. It should power up and display its output voltage and frequency.
- Measure: Use your multimeter (set to AC voltage) to measure the output voltage at the inverter's AC terminals. It should be close to 120V AC (or 240V AC for split-phase systems), and the frequency should be 60Hz. If it's a pure sine wave inverter, the waveform should be clean.
- Load Test (Gradual):
- Connect Small Load: Connect a small AC load (e.g., a table lamp, a phone charger) to one of the inverter's outlets. Verify that the appliance works.
- Gradually Increase Load: Slowly add more loads, observing the inverter's display for voltage, current, and wattage output. Listen for any unusual noises or smells.
- Monitor Battery Voltage: As you increase the AC load, monitor your battery voltage. It will drop under load, but should recover once the load is removed. Keep an eye on the inverter's low voltage alarm.
- Full Load Test (Briefly): If your system is designed for it, briefly run a significant load (e.g., a microwave, a power tool) that pushes the inverter close to its continuous rating. Observe how it handles the surge and continuous draw. A high-quality inverter like a Victron MultiPlus or a Sol-Ark model should handle these surges gracefully.
- Grounding and Safety: Verify that the inverter chassis is properly grounded. Check that all AC outlets are properly wired for polarity and grounding using an outlet tester. This is paramount for safety.
By systematically testing each of these components, you can identify and address any individual issues before integrating everything into a full system test, making the overall commissioning process smoother and more reliable.
System-Wide Performance Testing and Troubleshooting
After confirming that each individual component is pulling its weight, it's time to test your off-grid solar system as a complete, integrated unit. This is where you connect everything, flip those final breakers, and see how your entire off-grid setup performs under real-world conditions. This stage is crucial for understanding your system's capabilities and identifying any bottlenecks or areas for improvement.
Load Testing Your Entire System
This is the moment of truth. You’ll want to simulate a typical day's usage, and then some, to see how your system holds up.
- Initial Power-Up and Monitoring:
- Final Connections: Ensure all major components—solar array, charge controller, battery bank, and inverter—are connected according to your How to Wire an Off-Grid Solar System plan. Double-check all fuses and circuit breakers are in place and correctly rated.
- Energize System: Slowly and carefully energize your system. Start by connecting your batteries to the charge controller, then the solar panels to the charge controller. Finally, turn on your inverter. If you have a main DC breaker, engage that. Then, turn on your AC main breaker from the inverter to your distribution panel.
- Observe Initial Readings: Immediately check the displays on your charge controller and inverter. You should see incoming solar power, charging current, battery voltage, and inverter output voltage. Everything should look stable.
- Simulated Daily Usage:
- Light Loads: Start by turning on a few light loads that you'd typically use, such as LED lights, charging electronics, or a radio. Observe how the system reacts. Check for any unexpected voltage drops on the battery or flickering lights.
- Medium Loads: Gradually introduce medium-sized appliances like a refrigerator, a television, or a coffee maker. Pay close attention to the inverter's wattage display and the battery's voltage. How much power is being drawn? How quickly does the battery voltage drop?
- Heavy/Surge Loads: For a short period, activate your heaviest or surge-sensitive appliances, such as a microwave, a well pump, or a washing machine. Can the inverter handle the surge? Does it recover quickly? This helps you understand its surge capacity and how much it affects your battery bank. Remember that some appliances, like a well pump, have very high startup (surge) requirements. You can also run a dedicated test to see Cost to Run A Well Pump on Off-Grid Solar or Cost to Run An Air Conditioner on Off-Grid Solar.
- Battery Autonomy Test: If you can, run your system for a full cycle where you draw down the batteries to their recommended depth of discharge and then fully recharge them with solar. This will give you a real-world understanding of your battery bank's usable capacity and how many days of autonomy you actually have. Document the time it takes to discharge and recharge, noting the loads used.
Monitoring and Data Analysis
Modern off-grid systems often come with sophisticated monitoring capabilities, which are invaluable for testing and ongoing optimization.
- System Monitoring Apps/Displays: Many reputable brands, like Victron Energy or EG4, offer comprehensive system monitors or smartphone apps that provide real-time data on solar production, battery state of charge (SOC), current flow, and inverter output. These tools are incredibly powerful for understanding exactly what your system is doing at any given moment. Learn How to Install a Battery Monitor to get the most out of your system.
- Data Logging: If your system has data logging capabilities, activate them. This allows you to review historical performance, identify trends, and diagnose intermittent issues that might not be apparent during a short test. You can see daily energy production, consumption patterns, and how your batteries perform over time. This data is critical for fine-tuning your system for year-round living.
- Analyzing Performance Metrics:
- Peak Production: What is the maximum wattage your solar array is producing at different times of the day? Does it align with your expectations given the weather and time of year?
- Charging Efficiency: How much power is making it from your panels to your batteries? Is your charge controller operating efficiently?
- Inverter Efficiency: How much power is lost when converting DC to AC? Inverters are highly efficient, but there's always a small loss.
- Battery Cycling: How often are your batteries being cycled? Are they reaching full charge regularly? Over time, this data helps you understand the long-term health of your battery bank.
- Anomalies: Look for unusual spikes or drops in voltage or current, especially when no major loads are active. These could indicate intermittent faults or parasitic draws.
Common Issues and How to Troubleshoot Them
Even with meticulous planning, issues can arise. Knowing how to approach troubleshooting is key to quickly resolving problems.
- No Power/System Won't Turn On:
- Check Disconnects/Breakers: Are all DC and AC disconnects and breakers in the "on" position?
- Battery Voltage: Is the battery bank voltage too low? Many inverters won't turn on if the battery voltage is below a certain threshold.
- Fuses: Check all fuses (DC and AC). A blown fuse is a common culprit.
- Wiring: Re-check all main wiring connections for tightness and correct polarity. Refer to Common Off-Grid Wiring Mistakes.
- Low Solar Production:
- Shading: Is anything shading your panels (trees, dirt, snow)? Even partial shading can drastically reduce output.
- Dirty Panels: Clean your panels. A layer of dust can significantly reduce efficiency.
- Faulty Panel/Connection: Use your multimeter to test individual panels or strings for Voc and Isc to identify a weak link.
- Charge Controller Issue: Is the charge controller displaying an error? Is it correctly configured for your battery type and system voltage? Check if the solar input voltage is within its operating range.
- Batteries Not Charging Fully / Discharging Too Quickly:
- Insufficient Solar: Is your solar array large enough for your daily energy consumption and charging needs, especially during winter or cloudy periods? You might need more panels. Consider a comprehensive Off-Grid Solar Cost by System Size assessment if this is a recurring problem.
- Incorrect Charge Controller Settings: Double-check your charge controller's absorption, float, and equalization (if applicable) voltage settings. They must match your battery manufacturer's recommendations.
- Battery Health: Are your batteries old or degraded? A load test or hydrometer reading (for flooded lead-acid) can reveal this.
- Parasitic Loads: Are there any constant, unnoticed draws on your battery bank (e.g., phantom loads from appliances, always-on devices)? Use your clamp meter to identify small current draws.
- Inverter Not Providing AC Power:
- Battery Voltage: Is the battery voltage above the inverter's low voltage cut-off?
- Overload: Is the inverter indicating an overload? Disconnect some loads and restart.
- Faulty Inverter: If all else fails, the inverter itself might be faulty. Consult the manual for diagnostic codes.
- High Temperatures:
- Loose Connections: Use your infrared thermometer to check all connections, especially at high-current points (battery terminals, inverter inputs). Hot spots indicate resistance and potential issues.
- Overloading: Are components running consistently near their maximum rated capacity? This generates excessive heat.
- Ventilation: Is there adequate airflow around your charge controller and inverter? Clear any obstructions.
Remember, troubleshooting is a process of elimination. Start with the simplest checks and work your way to more complex diagnostics. A good understanding of How to Troubleshoot Off-Grid Solar can save you a lot of grief. Don't be afraid to take notes, write down readings, and consult your component manuals.
Post-Installation Monitoring and Ongoing Maintenance
Installing and initially testing your off-grid solar system is a fantastic accomplishment, but it's not a "set it and forget it" kind of deal. To truly maximize the lifespan, efficiency, and reliability of your investment, ongoing monitoring and routine maintenance are absolutely essential. Think of it as caring for a living thing – neglect it, and it won't thrive. Proactive care saves you from costly repairs and unexpected power outages down the line.
Establishing a Regular Testing Schedule
Just like changing the oil in your car, your off-grid solar system benefits from a consistent check-up routine. This isn't about daily vigilance, but rather a structured approach to ensure everything is humming along as it should.
- Daily Checks (Quick Glance): If your system has a monitoring display or app (like those offered by Renogy or Victron), make it a habit to quickly check it once a day. Look for:
- Battery State of Charge (SOC): Is it generally where you expect it to be? Is it reaching full charge most days?
- Solar Production: Are your panels producing power? Is the current flow consistent with the sun's intensity?
- Inverter Output: Is the inverter supplying power without any error codes?
- Anomalies: Anything immediately stand out as unusual? A sudden drop in solar production or an unexpected battery drain?
This quick daily check helps you spot developing issues before they become critical.
- Weekly Checks (Slightly More Detail): Once a week, take a few extra minutes for a slightly more in-depth look.
- Visual Inspection: Briefly inspect your battery bank for any signs of corrosion, swelling, or leaks (especially for lead-acid).
- Cable Integrity: Quickly check easily accessible cables and connections for tightness and signs of wear.
- Panel Cleanliness: Look at your solar panels from a distance. Do they appear excessively dirty? Are there any new shadows from growing trees or changes in surrounding structures?
- Charge Cycle Review: If your monitoring system provides historical data, review the past week's charge cycles. Did the batteries fully charge? Were there any unusual discharge events?
- Monthly Checks (Comprehensive Review): Once a month, dedicate more time to a thorough inspection and specific tests.
- Component Visuals: Revisit the detailed visual inspections you did during pre-commissioning. Check all major components (panels, charge controller, inverter, batteries) for any new damage, loose wires, or unusual smells.
- Terminal Tightness: Gently check the tightness of high-current DC connections (battery terminals, charge controller/inverter DC inputs) and AC connections (inverter output, breaker panel). Do not over-tighten, but ensure they are snug.
- Battery Health Specifics:
- Flooded Lead-Acid: Check electrolyte levels and top up with distilled water if needed. Take specific gravity readings with your hydrometer. Equalization charges might be required.
- LiFePO4: Check individual cell voltages if your BMS allows. Ensure cell balance is maintained.
- Solar Panel Production Test: If you have concerns, perform a quick Voc test on your solar array, or at least one string, to ensure consistent output.
- Ventilation: Ensure all vents on charge controllers and inverters are clear of dust and debris.
- Annual Checks (Deep Dive & Cleaning): Once a year, schedule a comprehensive system overhaul.
- Deep Cleaning: Clean your solar panels thoroughly. Dust, grime, pollen, and bird droppings can significantly reduce efficiency. A simple rinse with a hose, followed by a soft brush or cloth with mild soapy water, usually does the trick.
- Battery Capacity Test: For lead-acid batteries, a controlled discharge test can help assess actual capacity. For LiFePO4, a full discharge-charge cycle recorded by your battery monitor can give you an accurate capacity reading.
- Grounding Verification: Check the integrity of all grounding connections throughout your system.
- Software/Firmware Updates: If your components have updateable software (e.g., charge controller, inverter), check with the manufacturer for any recommended updates.
- Documentation Review: Review your system's documentation, wiring diagrams, and manuals. Make sure they are up-to-date and easily accessible.
This routine, detailed in any good Off-Grid Solar Maintenance Guide, is your best defense against unexpected failures and ensures your system continues to provide reliable power for years to come.
Interpreting System Data Over Time
Your off-grid solar system isn't just a collection of parts; it's a dynamic, living entity that generates a wealth of data. Learning to interpret this data is like learning the language of your power system. It empowers you to make informed decisions, optimize performance, and even predict potential issues before they cause trouble.
- Understanding Trends vs. Anomalies:
- Seasonal Changes: You'll notice clear seasonal trends. Solar production will naturally be higher in summer months with longer daylight hours and higher sun angles, and lower in winter. Your battery's capacity and performance can also vary with temperature. Learning to recognize these normal fluctuations helps you distinguish them from actual problems. For example, lower production in December isn't an issue; the same low production in July would be.
- Load Profiles: Over time, you'll see patterns in your energy consumption. Do you use more power in the evenings? On weekends? Understanding your load profile helps you manage your energy usage and identify opportunities to shift heavy loads to times of peak solar production.
- Anomalies: An anomaly is anything that deviates significantly from your established trends. This could be a sudden, unexplained drop in solar production on a clear day, an unusually high discharge rate when few loads are active, or a consistent failure to reach full battery charge. These are red flags that warrant further investigation.
- Key Metrics to Track and Analyze:
- Daily kWh Production: How much energy are your solar panels generating each day? Track this over weeks and months. A consistent drop could indicate dirty panels, shading, or a failing panel.
- Daily kWh Consumption: How much energy are you using? Compare this to your production. If consumption regularly exceeds production, you'll perpetually drain your batteries. This might signal that you need to consider Cost of Expanding an Off-Grid System with more panels or increase your battery capacity.
- Battery Voltage and State of Charge (SOC): Monitor how low your batteries drop during the night and how high they reach during the day. Consistent undercharging or over-discharging (below recommended limits) will shorten battery life. Pay close attention to your Best Off-Grid Solar Batteries specifications.
- Charge/Discharge Cycles: Some battery monitors track the number of cycles your batteries have endured. This data is crucial for predicting battery lifespan and planning for eventual replacements.
- Peak Power Output (Solar & Inverter): Note the highest power your solar array produces and the maximum power your inverter delivers. This helps confirm your system is meeting its design specifications.
- Using Data for Optimization and Prediction:
- Energy Budgeting: By understanding your historical consumption, you can create a realistic energy budget, helping you conserve power during low-sun periods.
- Load Shifting: If you consistently see an energy deficit, you might realize you need to shift high-draw activities (like running a washing machine or power tools) to midday when solar production is at its peak.
- Troubleshooting Clues: If your solar production drops on Tuesdays but not other days, maybe a neighbor's tree casts a shadow on that day. If your batteries never reach 100% SOC, it might point to insufficient solar, incorrect charge controller settings, or a degraded battery.
- System Upgrades: Consistent monitoring data can tell you when it's time to consider expanding your system or replacing components. For example, if your batteries consistently struggle to meet demand even with good solar input, it might be time to increase your battery bank capacity.
- Maintenance Triggers: A sudden drop in solar production could be a trigger to clean your panels. A gradual decrease in battery capacity might tell you that your batteries are nearing the end of their life and it's time to budget for Cost to Replace Off-Grid Solar Batteries.
By diligently monitoring and interpreting the data your off-grid solar system provides, you transform from a passive user to an engaged system manager. This active involvement is the key to ensuring your off-grid power remains reliable, efficient, and truly independent for many years to come.
Disclaimer
The information provided in this guide is for educational and informational purposes only. While we strive to offer accurate and up-to-date advice, off-grid solar system installation and testing involve working with electricity, which can be dangerous. Always prioritize safety, disconnect power sources when working on components, and consult with qualified professionals (e.g., licensed electricians or solar technicians) if you are unsure about any steps or procedures. Local codes and regulations regarding solar installations vary, and it is your responsibility to ensure compliance. The author and publisher are not liable for any loss, injury, or damage arising from the use or misuse of the information contained herein.