How to Set Up an Inverter for Off-Grid
One of the trickiest parts of setting up a reliable off-grid solar system is getting your inverter properly installed and configured. It can feel like you're staring at a spaghetti bowl of wires and a manual written in a foreign language, wondering if you're going to fry your expensive equipment or worse, yourself. This guide is here to walk you through the entire process, making sense of how to set up an inverter for off-grid living, ensuring your system runs smoothly and safely.
Understanding Your Off-Grid Inverter
Before you even think about touching a wire, it’s crucial to understand what your inverter does and the different types available. This isn’t just technical jargon; it’s fundamental to ensuring you pick the right equipment and install it correctly for your specific power needs.
What an Inverter Actually Does
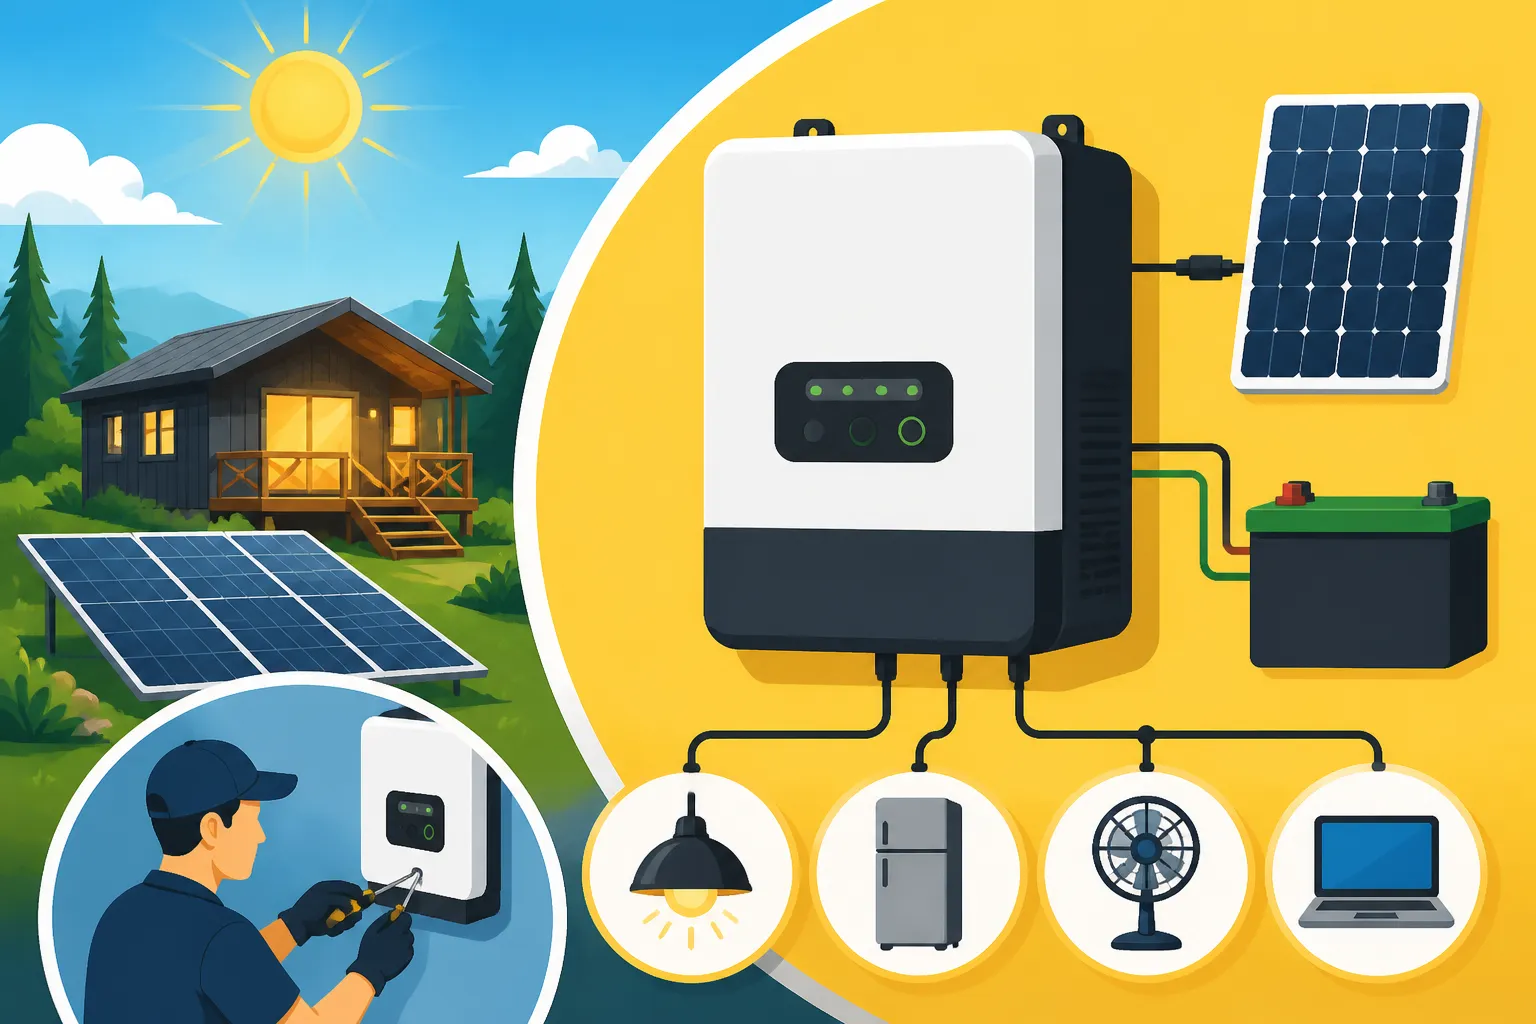
At its core, an inverter is a magical box that takes the direct current (DC) electricity generated by your solar panels and stored in your batteries and transforms it into alternating current (AC) electricity. Why is this important? Because almost every appliance you use in your home or RV – from your refrigerator and microwave to your laptop charger and lights – runs on AC power, just like in a grid-tied house. Without an inverter, your off-grid dreams would be limited to running only low-power DC devices, which simply isn't practical for modern living.
Think of your inverter as the bridge between your solar-charged battery bank and your everyday creature comforts. It’s constantly working to convert that stored energy into usable power for your devices. A well-chosen inverter ensures stable power delivery, protects your appliances, and maximizes the efficiency of your entire off-grid setup. It's a critical piece of the puzzle, and often, it's the most expensive component after your battery bank.
Types of Inverters for Off-Grid Systems
Not all inverters are created equal, and understanding the differences is key to making an informed choice for your specific needs. There are a few main distinctions that will impact performance and cost.
Pure Sine Wave vs. Modified Sine Wave
This is perhaps the most important distinction.
- Pure Sine Wave Inverters: These produce a clean, smooth AC waveform that is identical to the electricity you get from the utility grid. This is what you want for virtually all modern electronics, sensitive equipment, and anything with a motor (like refrigerators, microwaves, or power tools). They protect your electronics from damage, run them more efficiently, and prevent buzzing noises. If you're running a full-time off-grid home or RV, a pure sine wave inverter is a non-negotiable component.
- Modified Sine Wave Inverters: These are a more budget-friendly option, but they produce a "stepped" waveform that isn't as clean as pure sine wave. While they might power some basic appliances (like simple lights or old-school toasters), they can cause problems for sensitive electronics, inductive loads, and anything with microprocessors. You might experience buzzing from appliances, reduced efficiency, or even permanent damage to certain devices. We highly recommend opting for a pure sine wave inverter if your budget allows, as the long-term benefits and protection for your appliances far outweigh the initial cost savings. For more on this, check out our guide on Pure Sine Wave vs Modified Sine Wave Inverters.
High-Frequency vs. Low-Frequency Inverters
This refers to the internal transformer design.
- High-Frequency Inverters: These are smaller, lighter, and generally more affordable. They use electronic switching to convert DC to AC at high frequencies. They are efficient for smaller loads but can struggle with large surge loads (like starting a well pump or an air conditioner) and are often less robust. Many popular portable power stations and smaller RV inverters fall into this category.
- Low-Frequency Inverters: These are larger, heavier, and typically more expensive because they contain a large, heavy copper transformer. This robust design makes them incredibly durable, able to handle large, prolonged surge loads, and generally more reliable for continuous heavy-duty use in a permanent off-grid setup. Brands like Victron Energy often feature low-frequency designs in their higher-end inverter-chargers. If you're planning to run substantial loads or have high surge requirements, a low-frequency inverter is often the superior choice for longevity and performance.
Inverter-Chargers
Many off-grid setups benefit immensely from an inverter-charger, which combines the functionality of a pure sine wave inverter with a multi-stage battery charger. This means if you have a backup generator or another AC power source (like shore power in an RV), the inverter-charger can automatically switch to charge your batteries, providing seamless power management. They are designed for intelligent power flow, prioritizing solar, then battery, and finally a generator or shore power. These integrated units, like the offerings from Renogy or Victron, simplify wiring and offer advanced control over your system's power dynamics. Our guide to Best Off-Grid Solar Inverters provides a deeper dive into specific models and their features.
Key Specifications to Consider
When choosing your inverter, you'll encounter a few critical numbers that directly impact its performance and suitability for your system. Knowing these will help you properly size your inverter, which is a key step in building a reliable system.
- Continuous Wattage (Rated Output): This is the maximum amount of power the inverter can continuously supply to your appliances. You need to calculate the total continuous wattage of all the AC appliances you plan to run simultaneously. For instance, if you want to run a refrigerator (150W), a few LED lights (50W), and charge a laptop (60W) at the same time, you'd need at least 260W of continuous output. Always give yourself a comfortable buffer.
- Surge Capacity: This is the peak power the inverter can deliver for a short period (usually a few seconds) to start motors or other inductive loads. Appliances like refrigerators, well pumps, or power tools have a much higher "starting wattage" (surge) than their "running wattage." If your inverter can't handle these surges, those appliances simply won't start. For example, a refrigerator might run at 150W but could surge to 1000W or more for a split second when the compressor kicks on. You absolutely need to factor in the highest surge requirement of any single appliance you'll be running. Our article on How to Size an Off-Grid Inverter offers comprehensive steps for these calculations.
- Efficiency: Measured as a percentage, efficiency tells you how much of the DC power from your batteries is converted into usable AC power. A higher efficiency rating (e.g., 90-95%) means less energy is lost as heat, making your system more effective and preserving your battery life. While a few percentage points might not seem like much, over time, these small losses add up.
- Input/Output Voltage: Your inverter's input voltage must match your battery bank's voltage (e.g., 12V, 24V, or 48V). It's incredibly important not to mix these up! The output voltage will typically be 120V AC (for North America) or 230V/240V AC (for many other parts of the world), depending on the model and region. For larger systems, a 24V or 48V battery bank is usually more efficient, as it reduces the current flowing through cables and minimizes voltage drop, which translates to fewer losses.
Pre-Installation Checks and Safety First
Before you even think about mounting your inverter or connecting any wires, it's absolutely vital to take safety precautions and double-check your system's compatibility. Skipping these steps can lead to damaged equipment, fire hazards, or even serious injury. Trust me, it’s not worth cutting corners here.
Essential Safety Precautions
Working with electricity, especially high-current DC from battery banks and high-voltage AC from an inverter, is inherently dangerous. You must prioritize safety.
- Disconnect Power: Before starting any work, ensure all power sources are disconnected. This means turning off your solar charge controller's input from the panels, disconnecting your battery bank, and ensuring no AC loads are connected to the inverter. If your inverter has a DC disconnect switch, turn it OFF.
- Personal Protective Equipment (PPE): Always wear appropriate PPE. This includes insulated gloves, safety glasses, and non-conductive shoes. Don't wear jewelry or loose clothing that could get caught or conduct electricity.
- Insulated Tools: Use tools with insulated handles. While it might seem overkill, it's a small investment that can save your life.
- Fire Extinguisher: Have a readily accessible ABC-rated fire extinguisher nearby. Electrical fires can spread rapidly.
- Ventilation: Ensure you're working in a well-ventilated area, especially if you're working with lead-acid batteries, which can produce explosive hydrogen gas when charging. LiFePO4 batteries are safer in this regard but still benefit from good ventilation for cooling.
- Read the Manual: This sounds basic, but seriously, read your inverter's specific manual. Every model has unique quirks, safety warnings, and installation instructions. Don't assume you know everything; your manufacturer's manual is your best friend.
Confirming System Compatibility
You wouldn't try to put diesel in a gas car, right? The same logic applies to your off-grid electrical components. Compatibility is key for performance and safety.
- Battery Voltage and Inverter Input: As mentioned, your inverter's DC input voltage (e.g., 12V, 24V, 48V) must precisely match your battery bank's nominal voltage. Connecting a 12V inverter to a 24V battery bank will likely damage the inverter instantly, and vice versa. Double-check this before anything else.
- Wire Gauge: This is crucial! Undersized wires are a major fire hazard and lead to significant power loss. You need to select the correct wire gauge for both your DC battery cables (from battery bank to inverter) and your AC output wiring. This depends on the current (amps) that will flow through the wires and the length of the cable run. The longer the run and the higher the amperage, the thicker (lower gauge number) the wire needs to be. Consult wiring charts or your inverter manual. Many reputable brands, like Renogy, provide detailed wire sizing recommendations with their equipment.
- Fuses and Breakers: Your DC battery cables must be protected by a properly sized fuse or breaker located as close to the battery bank as possible. This protects the cable and inverter from overcurrents in case of a short circuit. The fuse size should be slightly higher than the inverter's maximum continuous DC input current but lower than the current rating of your cable. Similarly, your AC output should have circuit breakers to protect your AC wiring and appliances. Our article on Off-Grid Solar Safety and Grounding covers these critical protective devices in detail.
Gathering Your Tools and Materials
Having everything laid out and ready before you start will make the installation process much smoother and safer. No one wants to stop mid-wire to search for a tool!
Here’s a general list of what you'll need:
- The Inverter: Obviously!
- DC Disconnect Switch: A highly recommended safety device to easily disconnect your inverter from the battery bank.
- DC Fuses/Breakers: Appropriate size for the inverter's DC input.
- Battery Cables: Properly sized, high-strand copper cables with crimped lug terminals (or the ability to crimp your own).
- AC Circuit Breakers/Panel: To protect your AC circuits.
- AC Wiring: Appropriate gauge for your AC loads.
- Grounding Wire: Bare copper or green insulated wire.
- Crimper: For attaching lug terminals to battery cables.
- Wire Strippers: For both DC and AC wires.
- Multimeter: Essential for checking voltage, current, and continuity.
- Screwdrivers and Wrenches: Various sizes for terminals and mounting.
- Drill: For mounting the inverter.
- Cable Ties/Conduit: For neat and safe wire management.
- Mounting Hardware: Screws, bolts, washers suitable for your mounting surface.
Amazon is a great place to source many of these tools and smaller components, but for critical components like heavy-gauge battery cables, ensure you're getting high-quality, marine-grade or welding cable designed for high current applications.
Step-by-Step Inverter Installation for Off-Grid
Alright, with all your safety checks and compatibility confirmed, it's time to get down to the actual installation. Remember, patience and precision are your best friends here. Don't rush any steps.
Choosing the Right Location
The placement of your inverter isn't just about convenience; it significantly impacts performance, safety, and longevity.
- Proximity to Batteries: The shorter your DC battery cables are, the better. Long runs of high-current DC cable lead to voltage drop and power loss, forcing your inverter to work harder. Aim to place your inverter as close as practically possible to your battery bank, ideally within a few feet.
- Ventilation: Inverters generate heat during operation, especially when under heavy load. They need adequate airflow to dissipate this heat and prevent overheating. Choose a location with good natural ventilation, or consider adding a small fan if necessary. Avoid enclosed spaces without airflow.
- Protection from Elements: Inverters are electronic devices and should be protected from dust, moisture, and extreme temperatures. While some are rated for outdoor use, most residential off-grid inverters are designed for indoor, dry environments. Avoid direct sunlight, which can cause overheating.
- Clearance: Ensure there's enough space around the inverter for proper airflow and for you to easily access its terminals, switches, and display. Leave clearance as recommended by the manufacturer in the manual.
- Secure Mounting: Inverters can be heavy, especially low-frequency models. Mount it securely to a solid, non-combustible surface like a plywood board (fire-rated if possible) attached to wall studs, or a dedicated equipment rack. Use appropriate mounting hardware that can support the inverter's weight.
Connecting to the Battery Bank DC Wiring
This is the most critical connection, as your battery bank holds a massive amount of energy. Extreme caution is needed here.
- Mount the DC Disconnect: Install your appropriately sized DC disconnect switch (or fuse block with a breaker) as close as possible to the battery bank, ideally within 1-2 feet. This ensures the longest cable run (from the battery to the inverter) is protected.
- Run Positive Cable: Connect one end of your positive DC cable (typically red) to the positive terminal of your battery bank (or the positive busbar if you have multiple batteries wired together). Connect the other end to one side of your DC disconnect switch.
- Run Negative Cable: Connect one end of your negative DC cable (typically black) to the negative terminal of your battery bank (or negative busbar). Do not connect this to the inverter yet.
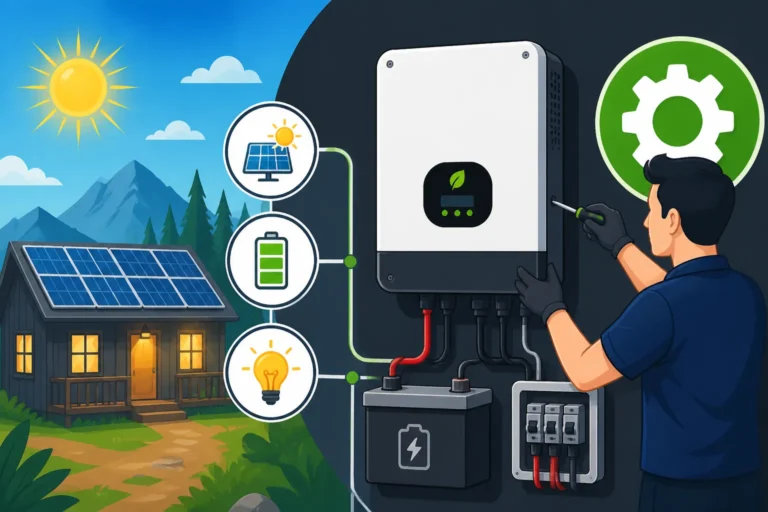
- Connect to Inverter: Connect a short positive cable from the other side of the DC disconnect switch to the positive DC input terminal on your inverter. Then, connect your main negative DC cable (from step 3) directly to the negative DC input terminal on your inverter. Ensure all connections are tight and secure. Loose connections create resistance, generate heat, and can lead to power loss or fire. Our guide on How to Wire a Battery Bank offers more details on properly connecting multiple batteries.
- Verify: Before proceeding, use your multimeter to check the voltage at the inverter's DC input terminals. It should match your battery bank's nominal voltage.
Connecting to Your AC Loads AC Wiring
Once the DC side is secure, you'll connect the inverter's AC output to your loads. This will typically involve connecting to a sub-panel.
- Install AC Sub-Panel/Breakers: Mount a small AC sub-panel or individual AC circuit breakers where you intend to distribute power to your off-grid appliances.
- Connect Inverter AC Output: Run appropriate gauge AC wiring (hot, neutral, and ground) from the AC output terminals of your inverter to the main breaker in your AC sub-panel. The inverter's manual will specify which terminals are for hot (L1, L2 for 240V, or just L for 120V), neutral (N), and ground.
- Wire Outlets/Appliances: From your AC sub-panel, run individual circuits to your outlets, lights, and hardwired appliances, each protected by its own appropriately sized breaker. Ensure your AC wiring adheres to local electrical codes (even if off-grid, it's good practice for safety). For complex setups, referring to an Off-Grid Solar Wiring Diagram Explained can be very helpful.
- Inverter-Charger Specifics: If you have an inverter-charger, you'll also have AC input terminals. This is where you would connect an external AC source like a generator or shore power. Ensure these connections are properly fused or protected by breakers and that the transfer switch functionality (if present) is correctly wired according to the manufacturer's instructions.
Grounding the Inverter
Proper grounding is a non-negotiable safety measure that protects you and your equipment from electrical shock and faults.
- Identify Grounding Terminal: Locate the grounding terminal on your inverter's chassis. It's usually a screw with a ground symbol next to it.
- Run Ground Wire: Connect a properly sized bare copper or green insulated grounding wire from this terminal to a main grounding point. This grounding point could be a dedicated ground rod driven into the earth near your setup, or a common grounding busbar within your main electrical panel if your off-grid system is integrated into a structure.
- Secure Connection: Ensure the grounding wire connection is tight and secure at both ends. The goal is to provide a safe path for fault current to dissipate into the earth in case of a short circuit. Do not skip this step!
Initial Power-Up and Testing
The moment of truth! Don't just flip all the switches at once. Follow a controlled sequence to minimize risk.
- Double-Check All Connections: Visually inspect every single connection – DC, AC, and ground. Tug gently on wires to ensure they are secure. Verify polarity (positive to positive, negative to negative).
- Turn On DC Disconnect: With all AC loads still disconnected (or breakers off), turn on the DC disconnect switch between your batteries and the inverter.
- Power Up Inverter: If your inverter has a power button, turn it on. Listen for any unusual sounds and check the display for error codes. It should typically show your battery voltage.
- Connect Small AC Load: Start with a small, non-critical AC load, like a lamp or a phone charger. Plug it into an outlet powered by the inverter and observe. Does it work? Does the inverter sound normal?
- Gradually Add Loads: If the small load works, gradually connect your other AC appliances, turning on their respective breakers one by one. Monitor the inverter's behavior, paying attention to its fan, any status lights, and its display for wattage output or error messages.
- Check for Overload: If the inverter alarms or shuts down, you've likely exceeded its continuous wattage or surge capacity. Disconnect some loads and re-evaluate your system sizing. This is where a proper load analysis from guides like How to Calculate Off-Grid Solar Needs really pays off.
Programming and Optimizing Your Off-Grid Inverter
Installing the inverter is a big step, but you're not quite done! Most modern inverters, especially inverter-chargers, have programmable settings that allow you to fine-tune their operation for optimal performance and battery health.
Understanding Inverter Settings
Your inverter's manual will detail the specific programmable parameters, but here are some common ones you'll likely encounter:
- Battery Type: It’s crucial to select the correct battery chemistry (e.g., LiFePO4, AGM, Gel, Flooded Lead-Acid). Each battery type has different charging voltage requirements and discharge characteristics. Incorrect settings can severely shorten your battery's lifespan. For instance, charging a LiFePO4 battery with lead-acid settings can damage it.
- Charge Voltage Setpoints: If you have an inverter-charger, you'll need to set Bulk, Absorb, and Float voltages for your battery bank. These precisely control how the inverter-charger charges your batteries when an AC source (like a generator) is available. Again, refer to your battery manufacturer's specifications.
- Low Voltage Disconnect (LVD): This is a critical setting that tells the inverter at what battery voltage it should automatically shut down to protect your batteries from over-discharging. Over-discharging lead-acid batteries can cause permanent damage, while LiFePO4 batteries have a built-in Battery Management System (BMS) that handles this internally, but it's still wise to set an LVD slightly above the BMS cutoff.
- High Voltage Disconnect (HVD): Less common for pure inverters, but relevant for inverter-chargers, this protects against overcharging from an external AC source.
- Search/Standby Mode: Many inverters have a "search" or "power save" mode where they periodically check for an AC load and, if none is detected, go into a low-power standby state. This saves battery power by reducing the inverter's quiescent draw. You can usually adjust the sensitivity (the minimum wattage required to "wake up" the inverter).
- AC Transfer Current/Thresholds: For inverter-chargers, these settings determine when the unit switches from inverter mode (running off batteries) to bypass mode (passing through external AC power) and vice-versa. This is essential for integrating a generator or shore power.
Integrating with Charge Controllers and Generators
An off-grid inverter doesn't operate in a vacuum. It's part of a larger system, and its settings often need to be coordinated with other components.
- Charge Controller Synchronization: If you have a separate solar charge controller (which is usually the case), ensure its battery charging parameters (Bulk, Absorb, Float) are consistent with any charging parameters you set in your inverter-charger. While the charge controller primarily manages solar input, an inverter-charger can also charge from AC, so consistency prevents conflicting charging profiles. Good quality charge controllers and inverter-chargers from brands like Victron Energy often offer advanced communication protocols (like VE.Can or other proprietary networks) that allow them to share data and synchronize settings for optimal system performance.
- Generator Integration: For inverter-chargers, integrating a generator requires careful setup. You'll program the inverter to automatically start and stop the generator based on battery voltage (e.g., start generator when batteries hit 50%, stop when they reach 90%). You also set AC input current limits to prevent overloading your generator. This feature provides true peace of mind, especially during extended cloudy periods or high-demand usage. Knowing How to Add a Generator to Your Design is an important consideration for many off-gridders.
Monitoring and Troubleshooting Common Issues
Even with a perfect setup, issues can arise. Knowing how to monitor your system and troubleshoot basic problems will save you headaches.
- Monitoring: Many inverters come with a built-in display, remote panel, or even Bluetooth/Wi-Fi connectivity to a smartphone app. Monitor your battery voltage, current draw, AC output wattage, and any fault codes. Regular monitoring helps you understand your power consumption and quickly identify anomalies.
- Common Issues:
- Inverter Shutting Down: Often due to low battery voltage (LVD tripped), overload (too many appliances running), or overheating. Check battery levels, reduce loads, and ensure proper ventilation.
- No AC Output: Check DC input connections, DC disconnect switch, inverter power button, and internal AC breakers on the inverter itself.
- Buzzing/Humming Appliances: If you have a modified sine wave inverter, this is normal. If you have a pure sine wave inverter, it could indicate a grounding issue, an overloaded circuit, or a problem with the appliance itself.
- Error Codes: Consult your inverter's manual immediately for specific error codes. They are usually designed to pinpoint the problem.
- Battery Not Charging (Inverter-Charger): If using a generator, check generator output, AC input connections, and charging settings in the inverter.
A multimeter is your best friend for troubleshooting, allowing you to check voltages and continuity at various points in your system. For deeper issues, a guide like How to Troubleshoot Off-Grid Solar can provide more in-depth diagnostics.
Common Off-Grid Inverter Specifications Comparison
| Feature | Pure Sine Wave Inverter | Modified Sine Wave Inverter | Inverter-Charger |
|---|---|---|---|
| AC Waveform | Clean, grid-like | Stepped, rougher | Clean, grid-like (inverter function) |
| Cost | Higher | Lower | Highest (combines functions) |
| Compatibility | Universal (all electronics, motors) | Limited (basic resistive loads, older electronics) | Universal |
| Efficiency | High (typically 90-95%) | Moderate (can be less efficient for some loads) | High (typically 90-95%) |
| Surge Capacity | Varies; generally good, especially low-frequency models | Limited | Excellent, often designed for high surges |
| Additional Features | Basic power conversion | Basic power conversion | Battery charging, automatic transfer, generator start |
| Best Use Case | Full-time off-grid, sensitive electronics, motors | Very basic, temporary, non-sensitive applications | Comprehensive off-grid, generator backup, RV/shore power |
| Example Brand Offerings | Renogy, AIMS Power | Some smaller, older models on Amazon | Victron Energy MultiPlus, Sol-Ark, Growatt |
Disclaimer
The information provided in this guide is for educational and informational purposes only and is not intended as professional electrical advice. Working with electricity can be dangerous. Always consult with a qualified electrician or solar professional before installing or modifying any electrical system. Follow all local and national electrical codes and safety guidelines. The author and publisher are not responsible for any injury, damage, or loss resulting from the use or misuse of this information.