How to Wire a Battery Bank
Learning how to wire a battery bank for your off-grid solar system can feel like deciphering a secret language, full of confusing diagrams and intimidating electrical terms. Many folks worry about making a mistake that could damage their expensive equipment or, even worse, create a safety hazard. But don't you fret! This guide is here to walk you through the entire process, demystifying the ins and outs of connecting your batteries so you can confidently power your off-grid dreams.
Understanding Battery Bank Basics for Off-Grid Systems
Before you even think about connecting wires, it's absolutely crucial to get a solid grasp of what makes a battery bank tick in an off-grid solar setup. This isn't just about knowing where the positive and negative terminals are; it’s about understanding the fundamentals that ensure your system runs safely, efficiently, and reliably for years to come. Skipping this step is like trying to build a house without a foundation – it's just asking for trouble down the line.
Why Proper Wiring is Crucial for Safety and Efficiency
Let's be real, messing with electricity can be scary, and for good reason. Improper battery wiring is not just a minor inconvenience; it can lead to serious hazards like fires, electrical shocks, or even explosions, especially with high-capacity battery banks. A poor connection, a loose wire, or an undersized cable can generate excessive heat, melt components, and rapidly degrade your battery life. Nobody wants to replace a whole battery bank prematurely because of a preventable wiring error!
Beyond safety, efficiency is a massive factor. Your off-grid solar system is designed to convert sunlight into usable electricity, store it, and then deliver it to your appliances. Every weak link in that chain, especially in the battery bank, means wasted energy. If your cables are too thin or your connections are resistant, a significant portion of the power generated by your solar panels will be lost as heat before it even reaches your batteries or appliances. This means less usable power, longer charging times, and ultimately, a less reliable system, which totally defeats the purpose of going off-grid.
Proper wiring ensures that current flows smoothly and without undue resistance, allowing your batteries to charge and discharge optimally. It also helps maintain balanced voltages across individual batteries in a bank, which is vital for the longevity of all battery types, particularly lithium. When all components are correctly matched and connected, your system operates at its peak, providing you with the reliable power you depend on.
Key Battery Parameters to Know
When you're looking at batteries, you'll encounter a few terms that are non-negotiable to understand. These parameters dictate how much power a battery can store, how quickly it can deliver it, and how it will perform in your system. Trying to piece together a battery bank without a firm grasp of these is like trying to bake a cake without knowing the difference between a cup and a teaspoon – you're just not going to get the results you want.
First up is Voltage (V). This is essentially the electrical "pressure" a battery provides. Common individual battery voltages are 6V, 12V, or even 2V for some larger deep-cycle cells. Your entire off-grid system, including your inverter and charge controller, will be designed around a specific system voltage, typically 12V, 24V, or 48V. Knowing your target system voltage is the starting point for deciding how to wire your batteries. For instance, if you have 12V batteries but need a 48V system, you'll clearly need to wire them in series. If you're wondering how to decide, read more on how to choose system voltage.
Next, we have Amp-Hours (Ah). This is the measure of a battery's capacity, or how much current it can deliver over a certain period. A 100Ah battery, for example, can theoretically provide 10 amps for 10 hours. When you wire batteries in parallel, you increase the total amp-hour capacity of your bank. If you're running a whole house, you'll need significantly more amp-hours than if you're just powering a tiny cabin for weekends. This parameter is key when you're figuring out how many batteries you'll need and how to size an off-grid battery bank.
Finally, there's the C-Rating (or discharge rate). This is often overlooked but incredibly important, especially for certain applications. The C-rating indicates how quickly a battery can be safely charged or discharged relative to its total capacity. A 1C rating means a battery can be discharged at a rate equal to its amp-hour capacity in one hour. So, a 100Ah battery with a 1C rating could provide 100 amps for one hour. Higher C-ratings mean faster discharge capabilities, which is crucial if you have appliances with high surge demands, like a well pump or a powerful microwave. Understanding this helps ensure your battery bank can handle the peak loads your off-grid life throws at it.
Common Battery Chemistries and Their Wiring Implications
Not all batteries are created equal, and the type of battery chemistry you choose will absolutely influence how you wire and manage your battery bank. Most off-grid enthusiasts primarily consider two main types: lead-acid and lithium iron phosphate (LiFePO4). Both have their pros and cons, and understanding these differences is vital for a successful and safe installation. If you're still weighing your options, check out our comparison on LiFePO4 vs Lead-Acid Battery Cost.
Lead-Acid Batteries (including flooded, AGM, and Gel) have been the traditional workhorse of off-grid systems for a long time. They are generally more affordable upfront, but they have a few quirks. Flooded lead-acid batteries require regular maintenance (checking water levels) and need to be housed in a well-ventilated area due to off-gassing during charging. AGM (Absorbed Glass Mat) and Gel batteries are sealed, maintenance-free, and don't off-gas, making them safer for indoor installations, though ventilation is still recommended. When wiring lead-acid batteries, it's critical to ensure all batteries are of the same voltage, capacity, and age. Mixing and matching can lead to imbalanced charging and premature failure. They also have a more limited depth of discharge (typically 50%), meaning you need a larger bank to get the same usable energy as a lithium battery. Equalization charges are also a factor for flooded batteries, which is a specific overcharge to balance cells.
Lithium Iron Phosphate (LiFePO4) Batteries are quickly becoming the gold standard for off-grid applications. They are more expensive initially but offer significant advantages: lighter weight, longer lifespan (often 10-15 years), much higher usable capacity (80-100% depth of discharge), and excellent cycle life. LiFePO4 batteries almost always come with an integrated Battery Management System (BMS), which is a crucial component that protects the battery from overcharging, over-discharging, over-current, and temperature extremes. The BMS also balances the cells internally, which simplifies wiring for the user, as you don't have to worry as much about perfectly identical batteries (though it's still best practice to use identical batteries from the same batch for consistency). One key wiring implication is that the BMS itself needs to be correctly integrated, often through specific terminals, and some higher-end LiFePO4 batteries allow for direct communication between multiple batteries and an inverter/charge controller for optimized performance. With LiFePO4, ventilation is less critical as they don't off-gas, but proper cable sizing and fusing are just as important as with lead-acid. For an in-depth understanding, consider exploring how battery choice affects off-grid cost.
Essential Wiring Configurations: Series, Parallel, and Series-Parallel
Alright, now that we've covered the basics, let's dive into the nitty-gritty of how batteries are actually connected. There are three primary ways to wire a battery bank: series, parallel, and a combination of both. Each configuration serves a distinct purpose, either increasing your system's voltage or its usable capacity (amp-hours). Understanding these methods is fundamental to achieving the right power output for your specific off-grid needs.
Wiring Batteries in Series
When you wire batteries in series, you're essentially chaining them together to increase the overall voltage of your battery bank, while the amp-hour capacity remains the same as that of a single battery. Think of it like connecting garden hoses end-to-end to increase the water pressure – the volume of water remains the same, but the force behind it increases. This configuration is vital when your solar inverter and charge controller require a higher operating voltage, such as 24V or 48V, but you only have lower-voltage batteries (like standard 12V deep-cycle batteries).
To wire batteries in series, you connect the positive (+) terminal of one battery to the negative (-) terminal of the next battery. You continue this pattern until you reach your desired voltage. For example, if you have two 12V, 100Ah batteries and you connect the positive of battery A to the negative of battery B, you now have a 24V, 100Ah battery bank. If you were to add a third 12V, 100Ah battery in series (connecting positive of B to negative of C), you'd end up with a 36V, 100Ah bank, and so on. The final main positive and main negative terminals of the entire series string are then connected to your charge controller and inverter. It's crucial that all batteries in a series string are identical in voltage, amp-hour capacity, and ideally, age and brand, to ensure balanced charging and discharging. An imbalance can lead to some batteries being overcharged or undercharged, significantly shortening their lifespan.
Wiring Batteries in Parallel
If your goal is to increase the total amp-hour capacity of your battery bank while keeping the voltage the same, then parallel wiring is your go-to. This is like connecting multiple garden hoses side-by-side to increase the total volume of water flowing at the same pressure. More amp-hours mean more energy storage, allowing you to power your off-grid setup for longer periods or handle higher peak loads. This is particularly useful for smaller 12V systems, like those found in RVs, vans, or small cabins, where you might want extended runtime from your 12V appliances.
To wire batteries in parallel, you connect all the positive (+) terminals together and all the negative (-) terminals together. For instance, if you have two 12V, 100Ah batteries and you connect the positive of battery A to the positive of battery B, and the negative of battery A to the negative of battery B, you now have a 12V battery bank with a total capacity of 200Ah. Adding a third 12V, 100Ah battery in parallel would create a 12V, 300Ah bank. The key here is that the voltage remains constant (12V in this example), but the total available power storage multiplies with each added battery.
Just like with series wiring, it’s absolutely critical that all batteries in a parallel bank are identical in voltage, amp-hour capacity, and type. Mixing different battery types or capacities can lead to charging inefficiencies, where some batteries work harder than others, resulting in uneven wear and reduced overall lifespan. For optimal performance and longevity, always ensure your parallel-wired batteries are a perfect match. Additionally, when wiring in parallel, try to use cables of equal length between each battery to minimize voltage drop and ensure even current distribution. This attention to detail contributes to a healthier and more efficient battery bank.
Combining Series and Parallel (Series-Parallel)
For larger off-grid solar systems, especially those powering a full-size home or a substantial cabin, you'll often need both higher voltage and greater amp-hour capacity. This is where a series-parallel configuration comes into play. It's the best of both worlds, allowing you to achieve a specific system voltage (like 24V or 48V) while simultaneously expanding your total energy storage. This setup can seem a bit more complex, but once you understand the underlying principles, it's quite straightforward.
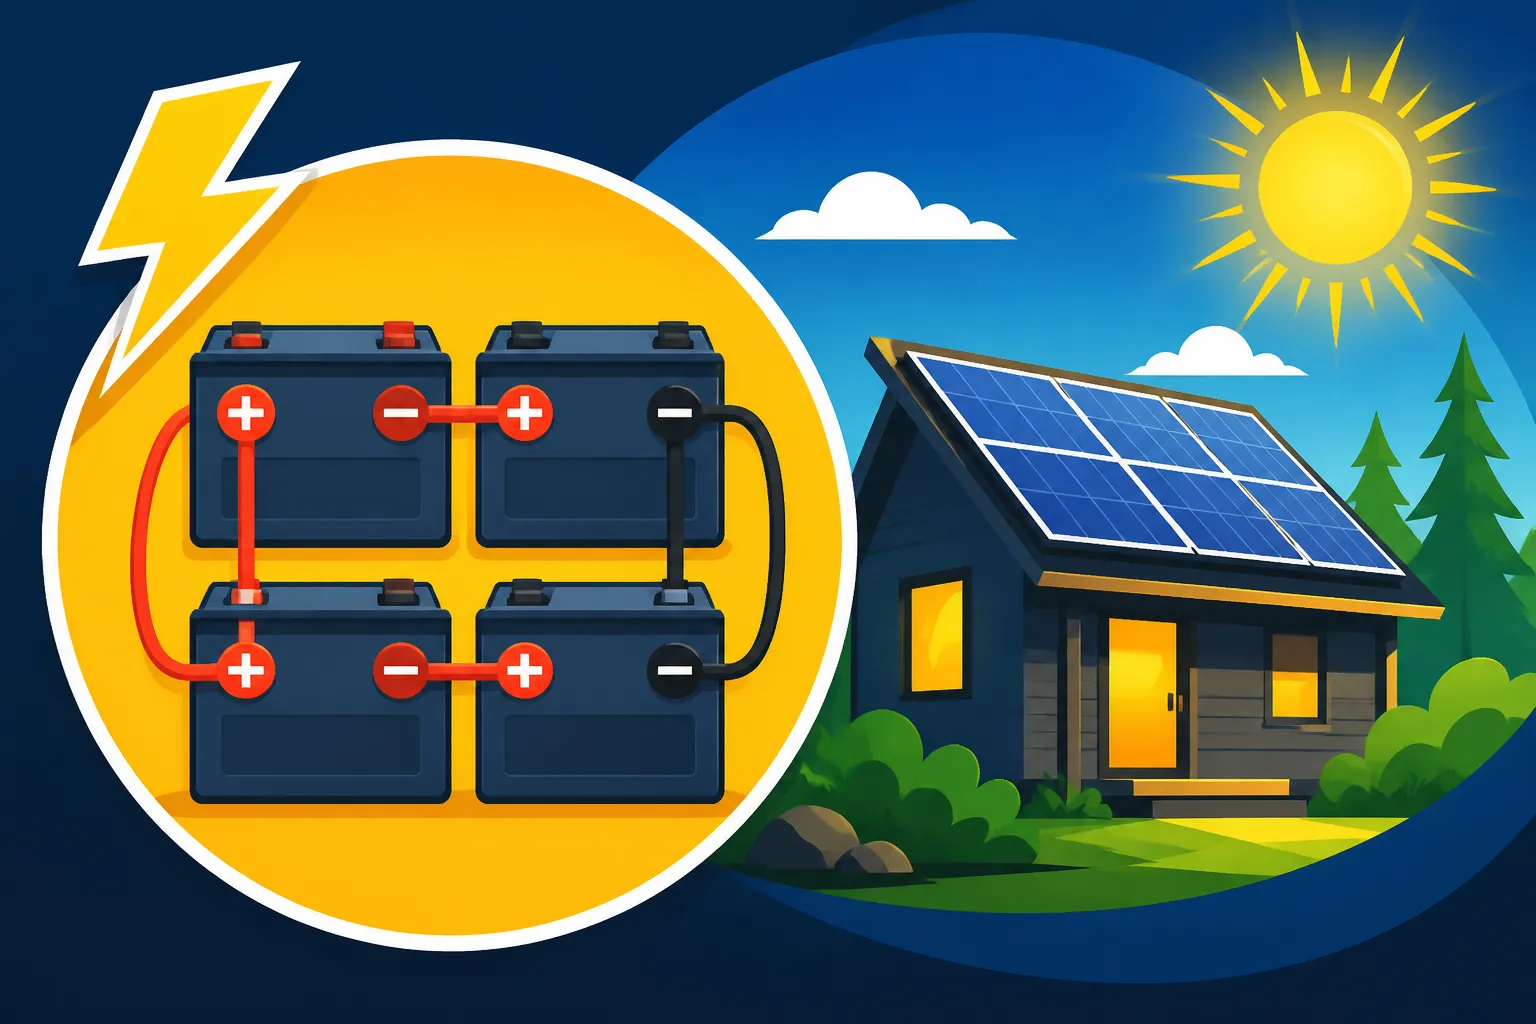
A series-parallel bank is created by first wiring groups of batteries in series to achieve the desired voltage, and then connecting these individual series "strings" in parallel to increase the overall capacity. Let's say you need a 24V system and have four 12V, 100Ah batteries. You would take two 12V batteries and wire them in series (positive to negative) to create one 24V, 100Ah string. Then, you'd take the other two 12V batteries and wire them in series to create a second 24V, 100Ah string. Finally, you would connect the positive terminals of the two 24V strings together and the negative terminals of the two 24V strings together, effectively wiring these two 24V strings in parallel. The result? A 24V battery bank with a total capacity of 200Ah.
This method is incredibly flexible and allows for significant scalability. You can add more series strings in parallel to increase capacity as your energy needs grow. For example, if you wanted 48V and even more capacity, you might use eight 6V batteries: wire four 6V batteries in series to make a 24V string, then two of those 24V strings in series to make a 48V string, and then connect multiple 48V strings in parallel. This combination is essential for optimizing your battery bank for specific inverter and charge controller requirements while also providing ample storage. Just as with simple series or parallel connections, it's paramount that all individual batteries in the bank are identical in type, voltage, and capacity to ensure proper function and maximum lifespan.
Here's a quick comparison of these wiring methods:
| Configuration | What it Does | Example (using 12V, 100Ah batteries) | Best For | Considerations |
|---|---|---|---|---|
| Series | Increases Voltage, Capacity stays same | Two 12V, 100Ah -> One 24V, 100Ah | Matching system voltage (e.g., 24V, 48V) | All batteries must be identical; voltage multiplies. |
| Parallel | Increases Capacity, Voltage stays same | Two 12V, 100Ah -> One 12V, 200Ah | Extending run time for 12V systems (e.g., RVs, small cabins) | All batteries must be identical; capacity adds up. |
| Series-Parallel | Increases both Voltage & Capacity | Four 12V, 100Ah -> Two 24V, 100Ah strings -> One 24V, 200Ah bank | Larger off-grid homes needing specific voltage & high capacity | Combines the rules of both; requires careful planning. |
The Components You'll Need for Your Battery Bank
Wiring a battery bank involves more than just the batteries themselves. You'll need a collection of specialized components that ensure safe, efficient, and reliable operation. Skimping on these parts is a false economy and can jeopardize your entire off-grid investment. Imagine buying a high-performance car and then putting on cheap, worn-out tires – it just doesn't make sense! Let's explore the essential hardware you'll need to complete your battery bank wiring.
Battery Cables and Connectors
These are the lifelines of your battery bank, carrying the substantial currents generated and stored. Choosing the right cables is not just important; it's critical for safety and system performance. The gauge (thickness) of your cable is paramount. Thicker cables (which have a lower gauge number, like 4/0 AWG or 2 AWG) have lower resistance and can carry higher currents without excessive heat buildup and voltage drop. Undersized cables will get hot, waste energy, and pose a fire risk. You need to calculate the maximum current your battery bank will handle and the distance between components to determine the appropriate cable gauge. For instance, a 12V system with a 2000W inverter will draw significantly more current than a 48V system with the same inverter, meaning the 12V system requires much thicker cables. Our guide on how to size wire and cables goes into more detail.
The length of your cables is also important. Strive for the shortest practical runs to minimize voltage drop and ensure efficiency. More importantly, when wiring batteries in series or parallel, it’s vital to use cables of equal length for each connection within the bank. This ensures that current is distributed evenly among the batteries, preventing imbalances that can reduce lifespan. You can find high-quality, pre-made battery cables in various gauges and lengths from reputable brands like Renogy on Amazon, or you can buy bulk cable and crimp your own.
Speaking of crimping, connectors (or lugs) are what terminate your cables, attaching them to battery terminals, busbars, and other components. These must be heavy-duty, made of pure copper, and properly crimped or soldered to the cable. A poor crimp is a source of high resistance, heat, and potential failure. Invest in a good crimping tool and heat shrink tubing to seal and protect your connections from corrosion and accidental shorts. Remember, a chain is only as strong as its weakest link, and often, that weakest link is a poorly made connection.
Busbars and Distribution Blocks
While it might seem tempting to just stack multiple cable lugs onto a single battery terminal, that's generally a bad idea. This is where busbars and distribution blocks come in. These components provide a clean, organized, and safe way to connect multiple battery cables or other system components to a single positive or negative point. Think of them as high-current junction boxes.
A busbar is typically a solid metal strip (usually copper or nickel-plated copper) with multiple threaded studs or bolts where you can attach cable lugs. Using busbars simplifies your wiring, reduces clutter, and provides a much more robust and reliable connection point compared to stacking lugs. They ensure that all cables connected to them have a solid, low-resistance connection, promoting even current distribution throughout your battery bank and to your main inverter and charge controller connections. For example, if you have multiple strings of batteries wired in series-parallel, you'd typically connect the positive ends of each string to a main positive busbar and the negative ends to a main negative busbar, then run larger cables from these main busbars to your inverter and charge controller.
Distribution blocks serve a similar purpose but are often enclosed in a plastic housing for added protection. They can also provide fused outputs for individual circuits, which adds another layer of safety. Both busbars and distribution blocks dramatically improve the neatness and serviceability of your battery wiring, making it easier to diagnose issues and perform maintenance. They are an essential part of a professional and safe off-grid solar installation, helping manage the high currents involved without creating a fire hazard.
Fuses, Breakers, and Disconnects
Safety should always be your top priority, and fuses, breakers, and disconnects are your system's essential guardians against electrical faults. Without them, an overcurrent event – like a short circuit or an overloaded inverter – could lead to catastrophic damage, including fires, component destruction, and severe personal injury. These devices are not optional; they are absolutely mandatory for any safe off-grid solar setup.
Fuses are single-use devices designed to melt and break a circuit when current exceeds a safe level. They are incredibly reliable and react quickly to protect your wiring and equipment. You'll typically need fuses in several key locations: between your solar array and charge controller (PV fuses), between your battery bank and charge controller (battery bank fuse), and between your battery bank and inverter (main inverter fuse). The size of each fuse is determined by the maximum continuous current rating of the wire it protects, ensuring the fuse blows before the wire overheats. Our guide on how to size fuses and breakers can help you determine the correct ratings.
Circuit breakers serve a similar protective function but can be reset after tripping, making them more convenient than fuses in some applications. They often combine overcurrent protection with a manual disconnect switch. For instance, a DC circuit breaker is commonly used as a main disconnect between your battery bank and your inverter, allowing you to easily and safely shut down power for maintenance or emergencies. AC circuit breakers protect the AC output side of your inverter and your household circuits.
Disconnects (both DC and AC) are manual switches that allow you to completely isolate components or sections of your system. A main battery disconnect, often a heavy-duty knife switch or a large DC circuit breaker, is essential for safely working on your battery bank or inverter. Similarly, a PV array disconnect switch allows you to isolate your solar panels from the rest of the system, which is crucial when working on the charge controller or wiring. These disconnects not only provide a safety mechanism but also fulfill electrical code requirements in many regions. Investing in high-quality, appropriately rated fuses, breakers, and disconnects is investing in the long-term safety and integrity of your off-grid power system.
Step-by-Step Wiring Instructions for Different Setups
Now that we understand the components and configurations, let's get into the practical side of things. While the general principles remain the same, the actual wiring can vary slightly depending on your system voltage. Before you begin any wiring, always ensure all power sources are disconnected – this means turning off solar input, any generators, and disconnecting your inverter. Safety first, always!
Wiring a 12V Battery Bank
A 12V battery bank is common for smaller off-grid applications like RVs, vans, small sheds, or basic cabin setups. These systems typically use one or more 12V deep-cycle batteries wired in parallel to achieve the desired amp-hour capacity. The goal here is to maintain the 12V system voltage while providing enough stored energy for your loads.
- Preparation: Before touching any wires, put on your safety gear: gloves, eye protection, and ensure no metallic jewelry is worn. Gather your batteries, correctly sized battery cables (all equal length), lugs, busbars (if using), fuses/breakers, and crimping tool. Make sure your batteries are charged to a similar state to prevent initial current surges between them.
- Parallel Connections: Arrange your 12V batteries next to each other. Connect the positive (+) terminal of the first battery to the positive (+) terminal of the second battery using a short battery cable. Repeat this for all subsequent batteries in your bank. Then, do the same for the negative (-) terminals: connect the negative of the first battery to the negative of the second, and so on.
- Main Connections (Optional Busbars): If you're using busbars, connect a main positive cable from one of the battery's positive terminals (or from your positive busbar) to your main DC positive distribution point (which will eventually go to your inverter and charge controller). Do the same for the negative side. If not using busbars, make sure your main cables for the inverter and charge controller are connected to opposing ends of the battery bank to promote balanced current draw. For example, if you have batteries A, B, C, D in parallel, connect the main positive to battery A's positive and the main negative to battery D's negative.
- Fusing and Disconnects: Install your main battery bank fuse and/or DC disconnect switch between your battery bank's main positive output and your charge controller/inverter. This is a critical safety step. Remember to size the fuse according to the smallest wire gauge it protects in that circuit.
- Final Checks: Double-check all connections for tightness. Verify the voltage of your entire battery bank with a multimeter before connecting it to any other system components. It should read approximately 12V (or slightly higher if fully charged). Once confirmed, you can proceed to connect your charge controller and inverter.
Wiring a 24V Battery Bank
Many mid-sized off-grid systems for cabins, workshops, or larger RVs opt for a 24V system voltage. This is a popular choice because it allows for smaller cable gauges compared to 12V for the same power output, reducing costs and heat loss, while still being manageable for most DIYers. A 24V bank can be achieved by wiring 12V batteries in series or 6V batteries in series.
- Preparation: As always, safety gear on! Have your batteries, correctly sized cables (equal lengths), lugs, busbars (if desired), fuses/breakers, and crimping tool ready. Ensure batteries are at a similar state of charge.
- Series Connections for 24V:
- Using 12V batteries: Take two 12V batteries. Connect the positive (+) terminal of the first 12V battery to the negative (-) terminal of the second 12V battery using a short series cable. The remaining open positive terminal on the first battery and the open negative terminal on the second battery are now your 24V output terminals for this string.
- Using 6V batteries: Take four 6V batteries. Connect positive to negative, positive to negative, and positive to negative across all four batteries. The first battery's open positive and the last battery's open negative will be your 24V output.
- Parallel Connections (for increased Ah capacity): If you need more amp-hours, you'll create multiple 24V series strings and then wire these strings in parallel. For example, if you have four 12V batteries, you'd create two separate 24V series strings as described above. Then, connect the positive output of the first 24V string to the positive output of the second 24V string. Do the same for the negative outputs. This gives you a 24V bank with double the amp-hour capacity of a single 24V string.
- Main Connections & Fusing: Connect your main positive and negative cables from your 24V bank (or main busbars) through a correctly sized battery bank fuse and/or DC disconnect switch to your charge controller and inverter. This fuse should be rated for your 24V system's maximum current draw.
- Verification: With a multimeter, check the voltage across your main positive and negative terminals. It should read approximately 24V. Confirm all connections are tight before powering up the system.
Wiring a 48V Battery Bank
For larger, more robust off-grid homes and substantial power demands, a 48V system is often the most efficient and cost-effective choice in the long run. Higher voltage systems draw less current for the same amount of power, meaning you can use thinner, less expensive cables, and experience less voltage drop across longer runs. This significantly improves overall system efficiency. Most whole-house off-grid inverters operate at 48V.
- Preparation: Safety first! Ensure all components are ready: batteries (often 12V or 6V, or sometimes 2V cells), properly sized cables (equal lengths for inter-battery connections), busbars, heavy-duty fuses/breakers, and a crimping tool. Always start with batteries at a similar charge level.
- Series Connections for 48V:
- Using 12V batteries: You'll need four 12V batteries for each 48V series string. Connect the positive of battery 1 to the negative of battery 2, positive of battery 2 to negative of battery 3, and positive of battery 3 to negative of battery 4. The open positive of battery 1 and the open negative of battery 4 are your 48V string outputs.
- Using 6V batteries: You'll need eight 6V batteries for each 48V series string. Connect them sequentially (positive to negative) for all eight batteries.
- Using 2V cells: For very large, high-end systems, individual 2V cells are often used. You would need 24 of these cells wired in series to achieve a 48V bank (24 cells * 2V/cell = 48V).
- Parallel Connections (for increased Ah capacity): If your power needs demand more amp-hours than a single 48V series string can provide, you will create multiple 48V series strings and connect them in parallel. Just like the 24V example, connect all the positive outputs of your 48V strings together, and all the negative outputs together. This forms your larger 48V battery bank.
- Main Connections & Fusing: Connect the main positive and negative cables from your 48V battery bank (preferably via robust busbars) through a high-current, appropriately rated DC circuit breaker or fuse and disconnect switch. This goes to your 48V charge controller and inverter. Remember, while a 48V system draws less current for the same power, it still handles significant current, so don't skimp on the fuse sizing.
- Final Checks: Use a multimeter to confirm the total voltage across your main battery terminals is approximately 48V. Inspect every connection point for tightness and correctness. Once verified, you can proceed to connect your 48V inverter and charge controller, confident in your robust power source.
Practical Tips for a Clean and Safe Installation
Wiring an off-grid battery bank isn't just about making the right electrical connections; it's also about ensuring the installation is clean, organized, and built to last. A messy or poorly executed wiring job isn't just unsightly; it's a huge safety risk and a recipe for future headaches. Trust me, you don't want to be troubleshooting intermittent power issues in the dark because of a loose wire you couldn't easily spot.
First and foremost, label everything. Seriously. Label every cable, every fuse, every disconnect. Use permanent markers and durable labels. When you're trying to figure out why a certain component isn't working years down the line, clear labeling will be your best friend. Imagine trying to retrace a maze of black wires in a cramped battery compartment without any labels – it's a nightmare!
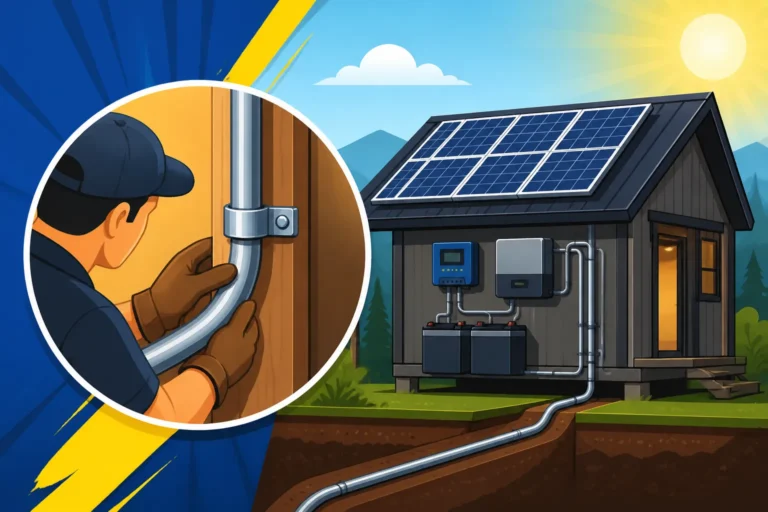
Use appropriate cable management. Don't just let cables dangle or lay haphazardly. Secure them with cable ties, clamps, or conduit. This prevents chafing, keeps connections from pulling loose, and makes your system look professional. Running cables through conduit, especially for longer runs or exposed areas, adds significant protection from physical damage and environmental factors. For example, if you're running cables from your solar array down to your battery bank in a shed, using UV-resistant conduit will protect them from sunlight and critters.
Always ensure proper ventilation, especially for lead-acid batteries. Even though sealed batteries don't off-gas as much as flooded ones, good airflow helps dissipate heat, which is essential for battery longevity. For flooded lead-acid, this is non-negotiable due to explosive hydrogen gas buildup. A dedicated, ventilated battery box or room is ideal.
Keep terminals clean and protected. Corrosion is the enemy of electrical connections. Use anti-corrosion sprays or grease on battery terminals, especially in humid environments. Cover exposed terminals with rubber boots or caps to prevent accidental shorts from tools or other metallic objects. A single wrench dropped across two terminals can create a terrifying spark and significant damage.
Finally, document your entire setup. Draw a wiring diagram, even if it's just a rough sketch. Note the sizes of your wires, fuses, and the order of your connections. Take photos throughout the installation process. This documentation will be invaluable for future maintenance, upgrades, or if you ever need to explain your system to an electrician or fellow off-gridder. Remember, a clean, organized, and documented installation is a safe and reliable installation.
Crucial Safety Considerations and Best Practices
When you're dealing with battery banks, especially the kind that power off-grid homes, you're handling significant amounts of stored energy. This isn't your average AA battery; we're talking about currents that can cause severe burns, start fires, or worse. Approaching battery wiring with anything less than extreme caution is simply irresponsible. Adhering to strict safety protocols and best practices is paramount, not just for the longevity of your system, but for your own well-being and the safety of anyone around your setup.
Tools and Personal Protective Equipment
You absolutely cannot cut corners when it comes to the tools and personal protective equipment (PPE) you use for battery wiring. Having the right gear not only makes the job easier but, more importantly, keeps you safe. First, invest in insulated tools. These are specifically designed to reduce the risk of electric shock if you accidentally touch a live wire. Using a standard wrench on battery terminals can be incredibly dangerous if it slips and shorts across terminals.
Your PPE kit should include heavy-duty leather work gloves to protect against sparks and physical injury, but even better are electrical insulating gloves if you're dealing with high voltage systems. Safety glasses or a face shield are non-negotiable to protect your eyes from sparks, acid splashes (from lead-acid batteries), or debris. It's also a good idea to wear long-sleeved shirts and pants made of natural fibers like cotton, which are less likely to melt onto your skin than synthetics in case of an arc flash. Finally, ensure you have a fire extinguisher (Class C for electrical fires) readily accessible in your workspace before you start any work on the battery bank. An ounce of prevention is worth a pound of cure, and having these items on hand can truly be a lifesaver.
Preventing Short Circuits and Overcurrents
Short circuits and overcurrents are the arch-nemeses of any electrical system, and they are particularly dangerous in high-power battery banks. A short circuit occurs when a low-resistance path is created between the positive and negative terminals, allowing an uncontrolled surge of current. This can instantly generate immense heat, melt wires, damage batteries, and cause fires or explosions. Overcurrent, while perhaps less dramatic, can also overheat wires and damage components over time.
To prevent these scenarios, meticulous attention to detail during wiring is crucial. Always double-check your connections before applying power. Ensure that no stray wire strands are touching opposing terminals. When tightening lugs onto battery posts, make sure they are fully seated and securely fastened, but do not overtighten and strip the posts. If you're working with terminal covers, use them diligently to prevent accidental contact. Furthermore, install fuses and circuit breakers in appropriate locations, as discussed earlier. These are your primary defense against overcurrents and short circuits, designed to sacrifice themselves to protect your expensive batteries and critical components. Always size these protective devices correctly, ensuring they trip before your wiring or equipment is damaged. Finally, when adding new connections, always make the negative connection last and remove it first, to minimize the risk of accidental sparking.
Ventilation and Environmental Factors
Batteries are sensitive to their environment, and proper ventilation and management of environmental factors are crucial for both safety and battery longevity. This is especially true for lead-acid batteries, but even LiFePO4 batteries benefit from a stable environment.
Ventilation is absolutely critical if you are using flooded lead-acid batteries. During charging, these batteries off-gas hydrogen and oxygen, which can form a highly explosive mixture in confined spaces. A dedicated, well-ventilated battery box or room with proper airflow (often achieved with exhaust fans) is essential to safely vent these gases outdoors. Even sealed lead-acid (AGM/Gel) and LiFePO4 batteries produce some heat during charging and discharging, so good airflow helps dissipate this heat, preventing thermal runaway and extending their life. Overheating can significantly reduce battery performance and cycle life, so never install batteries in an unvented, hot space like a small, sealed closet in direct sunlight.
Temperature management is also key. Extreme cold can reduce a battery's usable capacity and prevent lithium batteries from charging safely (their BMS will typically shut them down). Extreme heat accelerates battery degradation for all chemistries. Ideally, batteries should be kept in a climate-controlled environment, or at least in a space where temperatures remain moderate. For cold climates, consider insulating your battery box or adding a small heat source to keep LiFePO4 batteries warm enough to charge. Conversely, in hot climates, ensure adequate shading and airflow to prevent overheating. Additionally, protect your battery bank from direct sunlight, moisture, and dust. Sunlight can overheat batteries and degrade their casings, moisture can cause corrosion and short circuits, and dust can impede cooling and even conduct electricity if mixed with moisture. A sturdy, clean, and appropriately conditioned enclosure is a worthwhile investment. For those in colder regions, learning about off-grid solar cost in cold climates can provide additional insights into protecting your investment.
Troubleshooting Common Battery Bank Wiring Issues
Even with the best intentions and careful installation, sometimes issues crop up. It's frustrating when your power isn't performing as expected, but a methodical approach to troubleshooting can often pinpoint the problem quickly. Most battery bank issues related to wiring can be traced back to a few common culprits. Let's look at what might go wrong and how to fix it.
Imbalanced Battery Voltages
One of the most common and insidious problems, especially in larger series or series-parallel battery banks, is imbalanced battery voltages. This occurs when individual batteries within the bank don't charge or discharge evenly. Over time, some batteries might consistently be overcharged while others are undercharged, even if the overall bank voltage seems correct. This drastically reduces the lifespan of the entire bank because the weaker batteries fail prematurely, dragging down the performance of the healthy ones.
The most frequent causes of imbalanced voltages are using non-identical batteries (different brands, capacities, or ages), or uneven wiring resistance. For example, if the connecting cables between batteries are of different lengths or gauges, or if some terminals have higher resistance due to corrosion or loose connections, current won't flow evenly. For lead-acid batteries, lack of regular equalization charges can also lead to cell imbalance. With LiFePO4 batteries, a properly functioning Battery Management System (BMS) should handle cell balancing internally, but if the BMS itself is faulty or overwhelmed, or if batteries were not balanced before being wired together, issues can arise.
To troubleshoot, you need a good multimeter. Disconnect your charge controller and inverter, and then measure the voltage of each individual battery in your bank. If you find significant discrepancies (e.g., one 12V battery reading 12.8V and another in the same series string reading 12.0V), you have an imbalance. To correct this, for lead-acid batteries, you might need to perform an equalization charge if your charge controller supports it, or charge individual batteries separately until they are balanced. For LiFePO4, ensure your BMS is functioning. In all cases, re-examine all inter-battery cables for consistent length, gauge, and secure, clean connections. Investing in a battery monitor that tracks individual battery voltages can also provide early warnings of imbalance, which is a key part of how to balance a battery bank.
Loose Connections and Corrosion
These two issues are the silent killers of battery bank efficiency and safety. A loose connection or one compromised by corrosion creates resistance, which in turn generates heat. This heat wastes energy, can melt cable insulation, and poses a serious fire risk. It also leads to voltage drop, meaning less power reaches your appliances and your batteries don't charge as effectively. The frustration of an off-grid system that mysteriously underperforms often boils down to these easily preventable problems.
Loose connections can occur over time due to vibrations (especially in mobile setups like RVs or boats), expansion and contraction from temperature changes, or simply from inadequate tightening during installation. Corrosion, typically appearing as a white or bluish powdery substance around lead-acid battery terminals, is caused by chemical reactions with battery acid fumes, often exacerbated by loose connections allowing gas to escape. For LiFePO4, corrosion is less common but can still affect terminals if exposed to moisture or other chemicals.
Troubleshooting involves a thorough visual and physical inspection. Regularly check all battery terminals, cable lugs, and busbar connections for tightness. You shouldn't be able to wiggle any connections by hand. If you find corrosion, carefully disconnect the battery (starting with the negative terminal), clean the terminals and cable lugs thoroughly with a wire brush and a baking soda-water solution, rinse, dry completely, and then reassemble. Apply anti-corrosion grease or terminal protectors after cleaning and tightening to prevent recurrence. If you find any melted insulation or discolored terminals, that's a clear sign of excessive heat from a loose or corroded connection, and you might need to replace the affected cable or lug. A little preventive maintenance here can save you a lot of headache and expense down the road.
System Not Charging or Discharging Properly
Imagine your solar panels are basking in glorious sunshine, but your battery monitor shows little to no charge flowing in, or you flip on your inverter and your lights flicker out almost immediately. This is the epitome of off-grid frustration, and often, the cause can be traced back to wiring issues within the battery bank or its connections to the rest of the system.
If your system isn't charging properly, first check the basic connections between your charge controller and your battery bank. Ensure the positive and negative cables are connected to the correct terminals on both ends. Verify that any fuses or circuit breakers in the battery-to-charge controller circuit haven't blown or tripped. A common mistake is an undersized charge controller that can't handle the current from your solar array, or a battery bank that's too large for your solar input, but often, it's just a loose wire. Make sure your individual battery connections within the bank are secure and that the overall bank voltage is correct for your charge controller's settings. Sometimes, a deeply discharged battery bank can cause a charge controller to refuse to charge, especially if it doesn't detect a minimum voltage.
If your system isn't discharging properly (i.e., your inverter isn't providing power or cuts out quickly), again, start with the main connections from the battery bank to the inverter. Confirm the inverter's positive and negative inputs are correctly wired and that the main battery bank fuse or DC circuit breaker hasn't tripped. An undersized inverter for your load, or a battery bank with insufficient capacity, can cause issues, but often, high resistance from loose or corroded connections between the batteries or to the inverter is the culprit. The inverter might be detecting a significant voltage drop under load, causing it to shut down. Double-check your main cables to the inverter for appropriate gauge, ensuring they can handle the inverter's maximum current draw, particularly its surge current. Always remember to consider your overall system needs, which is why a thorough off-grid solar load calculation explained in advance is so important.
Disclaimer
The information provided in this guide is for general informational and educational purposes only. While we strive to provide accurate and up-to-date information, off-grid solar systems involve high voltages and currents which can be dangerous. Always exercise extreme caution when working with electricity and batteries. If you are unsure about any aspect of wiring or installation, please consult with a qualified and certified electrician or solar professional. Improper installation can lead to equipment damage, fire, serious injury, or death. We are not responsible for any actions taken based on the information in this guide.