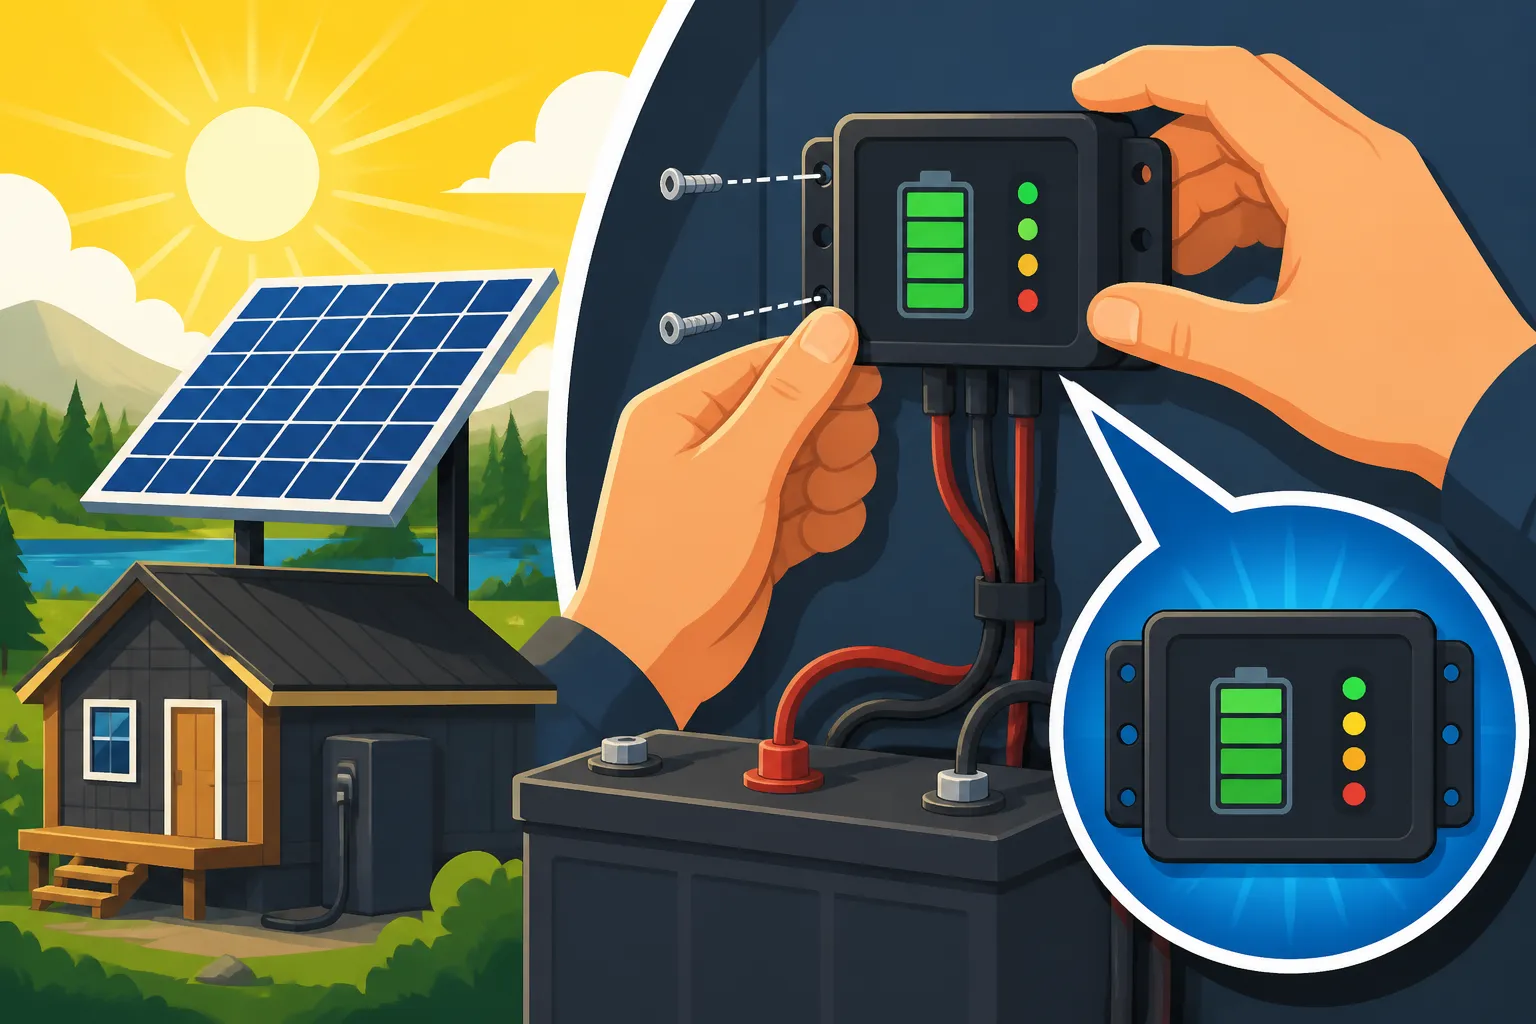
How to Install a Battery Monitor
It's incredibly frustrating, isn't it? You've invested in your off-grid solar system, you're embracing the freedom of generating your own power, but there's this nagging uncertainty about your battery bank. How much juice is really left? Are you running them too low? Are they getting a full charge? Without clear visibility, it feels like flying blind. This comprehensive guide will walk you through the process of installing a battery monitor, demystifying your power reserves and giving you the peace of mind you deserve.
Why a Battery Monitor is Your Off-Grid Best Friend
Living off-grid is all about self-sufficiency and knowing your system inside and out. But often, folks overlook one of the most crucial pieces of the puzzle: a reliable battery monitor. Think of your battery bank as the heart of your off-grid power system. Without a monitor, it's like trying to drive a car without a fuel gauge or a speedometer. You might get where you're going, but you're constantly guessing, and eventually, you're bound to run out of gas or cause damage. A good battery monitor changes all of that, offering critical insights that extend the life of your expensive batteries and optimize your energy usage.
Understanding Your Power Habits
One of the biggest advantages of installing a battery monitor is gaining a deep understanding of your actual power consumption. Before, you might have just had a vague idea – "the fridge uses a lot," or "the lights aren't so bad." But a shunt-based battery monitor gives you real-time data on exactly how many amp-hours are flowing in and out of your battery bank. This isn't just a number to stare at; it's a powerful tool. For instance, you might discover that your "efficient" LED lights actually draw more than you thought when they're all on, or that your laptop charger has a surprisingly low draw. This precise information allows you to fine-tune your energy habits, making conscious decisions about when to run certain appliances, or even identifying power hogs you can replace with more efficient alternatives. This leads to a more sustainable off-grid lifestyle and significantly reduces the stress of unexpected power outages. For anyone looking to understand their daily energy usage, a battery monitor is indispensable.
Protecting Your Battery Bank
Your off-grid batteries represent a significant investment, often being the most expensive component in your solar setup. The longevity and performance of these batteries are directly tied to how well you manage their charge and discharge cycles. Deeply discharging lead-acid batteries too often will drastically shorten their lifespan, while overcharging any battery type can lead to damage and safety concerns. Lithium (LiFePO4) batteries are more forgiving but still benefit greatly from accurate monitoring to prevent them from dropping below their safe voltage thresholds. A battery monitor acts as an early warning system, showing you your precise State of Charge (SoC). This allows you to know exactly when your batteries need charging or when you need to conserve power, preventing costly damage from over-discharging. It’s a vital layer of protection that ensures you get the most out of your battery bank and avoids the expense of needing to Cost to Replace Off-Grid Solar Batteries prematurely.
Types of Battery Monitors and How They Work
When you start looking into battery monitors, you'll quickly realize there's a range of options, from simple voltmeters to sophisticated smart systems. Each has its place, but for serious off-grid living, understanding the difference is key to choosing the right tool for the job. You want something that provides accurate, comprehensive data, not just a vague idea of your power situation.
Shunt-Based Monitors: The Gold Standard
If you're serious about your off-grid power system, a shunt-based battery monitor is the way to go. These are considered the gold standard because they offer the most accurate and complete picture of your battery's health and activity. How do they work? The core component is a "shunt," which is a very low-resistance resistor installed on the negative cable of your battery bank. All current flowing into or out of your batteries must pass through this shunt. The monitor then measures the minuscule voltage drop across this shunt, and using Ohm's Law (V=IR), it accurately calculates the current (Amps) flowing through it. By continuously tracking this current over time, the monitor can precisely determine the Net Amp-Hours (Ah) remaining in your battery bank, giving you a highly accurate State of Charge (SoC).
Unlike simpler monitors, shunt-based systems like the Victron SmartShunt or the Renogy ONE provide a wealth of information beyond just voltage. You'll see:
- State of Charge (SoC): The percentage of battery capacity remaining, just like your phone's battery icon.
- Voltage: The current voltage of your battery bank.
- Current (Amps): The real-time rate of charge or discharge. Are your solar panels pumping in 20 Amps, or is your fridge pulling 5 Amps? You'll know instantly.
- Power (Watts): Current multiplied by voltage, giving you an idea of overall power flow.
- Time to Go: An estimate of how long your batteries will last at the current discharge rate, or how long until they're full.
- Historical Data: Many smart monitors record peak discharge, total amp-hours consumed, and average discharge. This data is invaluable for figuring out How to Calculate Daily Energy Usage and optimizing your system.
This level of detail is crucial for properly managing your battery bank, diagnosing issues, and truly understanding your energy economy. It's an investment that pays off by extending battery life and giving you true confidence in your power supply.
Simpler Voltage-Based Gauges
On the other end of the spectrum, you'll find simpler voltage-based gauges. These are often inexpensive, easy to install, and provide a quick snapshot of your battery voltage. They typically consist of a small digital display that connects directly to your battery terminals. While they are useful for a very basic understanding of your battery's general charge level, they come with significant limitations.
The main issue is that battery voltage isn't always a direct, accurate indicator of your battery's true State of Charge (SoC), especially under load. When you draw power from a battery, its voltage temporarily dips. Once the load is removed, the voltage can rebound. This makes it difficult to know if your batteries are genuinely low or just experiencing a temporary voltage sag. For example, a 12V lead-acid battery might read 12.0V under a heavy load, suggesting it's almost dead, but then rebound to 12.5V after the load is removed, indicating it still has a decent charge. This phenomenon is even more pronounced with lithium batteries, which hold a very stable voltage across most of their discharge curve until they are nearly empty, making voltage an even less reliable indicator. These simple gauges are fine for very small, intermittent setups like a basic camping light system where precise monitoring isn't critical, or as a secondary quick-check alongside a more accurate shunt-based system. However, for a reliable off-grid homestead or full-time RV, relying solely on a voltage-based gauge can lead to inaccurate power assessments and potentially damage your batteries.
Essential Tools and Materials for Installation
Before you dive into installing your new battery monitor, it's really important to gather all the necessary tools and materials. Rushing into a job without everything you need can lead to frustration, delays, and potentially even safety hazards. A little preparation goes a long way in making the installation process smooth and successful.
Basic Hand Tools and Safety Gear
You'll need a handful of common hand tools, many of which you likely already have around your workshop or garage. These aren't specialized solar tools, but they are absolutely essential for making secure connections and ensuring a safe installation.
Here’s a breakdown:
- Wrenches or Socket Set: You'll need these to loosen and tighten the nuts on your battery terminals and potentially on the shunt itself. Make sure you have the right sizes for your specific battery terminals (often 1/2 inch or 13mm) and the shunt's connection points.
- Screwdrivers (Phillips and Flathead): For mounting the monitor display, securing wiring terminals, and opening any enclosures.
- Wire Strippers: Critical for cleanly stripping the insulation off your wires, ensuring good electrical contact. Don't use pliers or a knife, as they can damage the wire strands.
- Crimpers: If you're using ring terminals or other connectors, you'll need a good set of crimpers to attach them securely to your wires. A poor crimp is a common cause of resistance and connection issues.
- Multimeter: This is your best friend for verifying voltage, checking for continuity, and ensuring everything is wired correctly before you power up. It's a non-negotiable safety and troubleshooting tool for any electrical work.
- Drill and Drill Bits: For mounting the shunt and the display unit in your chosen locations.
- Pencil or Marker: For marking drill points.
- Zip Ties or Cable Management Clips: To keep your wiring neat, organized, and out of the way, preventing accidental snags or damage.
Beyond the tools, safety gear is paramount. Always wear safety glasses to protect your eyes from stray wire clippings or sparks. Insulated gloves are also highly recommended when working with battery banks, especially high-amperage systems, to prevent accidental shorts. Remember, batteries can deliver massive amounts of current, and a short circuit can be extremely dangerous, causing burns, fires, or explosions. Never work on live circuits if you can avoid it, and always double-check your connections.
Wiring and Connections
The quality of your wiring and connections directly impacts the accuracy and reliability of your battery monitor. You can't just grab any old wire; you need to ensure it's properly sized and robust enough for the job.
- Shunt: Your shunt will typically come with the necessary large bolts or studs for connecting the main negative battery cable and the main negative load/charger cable. These connections are critical as all your DC negative current will flow through the shunt.
- Sense Wire: Most shunt-based monitors require a small gauge "sense" wire (usually 18-22 AWG) that runs from the monitor or shunt to the positive terminal of your battery bank. This wire is what allows the monitor to read the battery's voltage. Ensure this wire is protected and properly routed. Some kits, like those from Renogy found on Amazon, will include this wiring.
- Ring Terminals: You'll likely need various sizes of ring terminals to connect your wires to battery posts, the shunt, and any fuse blocks. Ensure they are sized correctly for both the wire gauge and the bolt/stud size.
- Fuses and Fuse Holders: Depending on your monitor's design, you may need an inline fuse for the sense wire or the power supply to the display unit. This is a vital safety component that protects the monitor and wiring from overcurrent, preventing potential fires. Always use a fuse rated appropriately for the wire gauge and the device it's protecting. Your monitor's manual will specify fuse requirements.
- Busbar (Optional but Recommended): For larger systems, a DC negative busbar can greatly simplify wiring. Instead of connecting multiple negative wires directly to the battery or the shunt, you can connect them all to a single busbar, and then run one main cable from the busbar to the "load" side of your shunt. This creates a much cleaner and more organized wiring setup, reducing clutter around the battery terminals. When designing your system, consider How to Wire a Battery Bank efficiently.
Ensuring all connections are clean, tight, and protected is not just good practice; it’s essential for safety and optimal performance. Loose connections can cause resistance, leading to heat buildup and inaccurate readings from your monitor.
Step-by-Step Installation of a Shunt-Based Battery Monitor
Installing a shunt-based battery monitor might seem daunting at first, but if you take it one step at a time, it's a very manageable DIY project. The key is to be methodical, prioritize safety, and follow the instructions specific to your chosen monitor. Remember, the goal is to make sure all negative current flows through the shunt for accurate readings.
Pre-Installation Planning and Safety First
Before you even pick up a tool, proper planning and rigorous safety measures are non-negotiable. Working with battery banks means dealing with significant electrical power, and mistakes can be dangerous.
- Read the Manual: Seriously, this is step number one. Every battery monitor is slightly different, and the manufacturer's instructions are your best guide. Pay close attention to wiring diagrams, specifications, and safety warnings.
- Gather Your Tools and Materials: Double-check that you have everything listed above. There's nothing worse than being halfway through a project and realizing you're missing a crucial component.
- Choose Your Shunt Location: The shunt needs to be installed on the main negative cable coming from your battery bank, before it connects to any loads or chargers. This means the shunt should be the only thing between your battery bank's negative terminal and the rest of your DC system's negative connections.
- Proximity to Batteries: Keep the shunt reasonably close to your batteries to minimize long cable runs, but ensure there's enough space for proper air circulation and easy access for wiring.
- Secure Mounting: The shunt needs to be mounted securely to a non-conductive surface. Some shunts are designed to be wall-mounted, while others might fit into an existing electrical enclosure. Ensure it's in a dry, protected location.
- Disconnect All Power: This is the most critical safety step.
- Turn off all DC and AC breakers.
- Disconnect solar panels: Cover them or disconnect them at the charge controller. You don't want them actively charging the system while you're working.
- Disconnect any other charging sources: Shore power, generator, etc.
- Disconnect the main negative battery cable: Loosen the nut on the negative terminal of your battery bank and carefully remove the cable. Tuck it away so it cannot accidentally make contact.
- Disconnect the main positive battery cable: Do the same for the positive cable. Now your battery bank is isolated.
Take a deep breath. Double-check that all power sources are disconnected. Your safety is paramount.
Mounting the Shunt and Wiring DC Negative
This is where the shunt becomes the gatekeeper for all your battery's negative current. Getting this right is crucial for accurate readings.
- Mount the Shunt: Using your drill and screws, securely mount the shunt in your chosen location. Ensure it's firm and won't vibrate loose.
- Connect Battery Bank Negative to Shunt's "Battery" Terminal: Take the main negative cable that was previously connected directly to your battery bank's negative terminal. This cable now needs to connect to the "Battery" side of your shunt (it's usually clearly labeled).
- If the cable isn't long enough, you'll need to create a new, appropriately sized cable to go from the battery negative terminal to the shunt's "Battery" terminal. Remember to size your wire appropriately for your system's maximum amperage.
- Ensure the connection is tight and secure.
- Connect Load/Charger Negative to Shunt's "Load" Terminal: Now, all the negative wires that would normally go to your DC negative busbar or directly to your inverter/charge controller will connect to the "Load" side of the shunt.
- If you have a dedicated DC negative busbar, simply connect one main negative cable from the "Load" side of the shunt to your DC negative busbar. All other negative loads and chargers then connect to this busbar. This ensures all current passes through the shunt.
- If you don't have a busbar, all negative returns from your inverter, charge controller, DC loads, and any other negative connections must go to the "Load" side of the shunt. This can get messy, which is why a busbar is highly recommended for proper Off-Grid Solar Wiring Diagram Explained.
- Again, make sure all connections are tight and secure.
Visually inspect your work: All negative current from your battery bank must now pass through the shunt before going to any loads or coming from any charging sources. Any negative connection that bypasses the shunt will result in inaccurate readings.
Connecting the Sense Wire and Display
With the main current-carrying negative cables connected, it's time to hook up the monitor's brain and its eyes.
- Connect the Sense Wire to Battery Positive: Your battery monitor kit will include a thin sense wire (or sometimes a small harness) that typically connects from the monitor/shunt to the positive terminal of your battery bank. This wire allows the monitor to read the actual battery voltage.
- Find the positive terminal of your battery bank.
- Connect one end of the sense wire (or the appropriate wire from the harness) to this positive terminal.
- Route the sense wire cleanly and safely to the input on your shunt or monitor unit. It's often fused, either with a small inline fuse or a fuse directly on the circuit board, protecting the monitor in case of a short.
- Ensure this connection at the battery positive is secure.
- Powering the Display Unit: Most shunt-based monitors have a separate display unit that shows you all the data. This display needs power, which it typically draws from the battery bank itself.
- Many monitors will draw power directly from the shunt via a small cable, which then gets its power from the positive sense wire connected to the battery.
- Others might have a separate small gauge positive and negative wire that needs to be connected to a fused DC power source (like a small fuse block) or directly to the battery terminals. Refer to your specific monitor's manual for this connection.
- Mount the Display: Choose a convenient location where you can easily view the display. Drill appropriate holes and secure the display unit. Then, connect the communication cable from the shunt to the display unit. For wireless units like the Victron SmartShunt, there's no physical display, just a Bluetooth connection to your phone, which simplifies this step considerably. If you have multiple batteries, remember to consult guides like How to Connect Batteries, Inverter, and Panels for proper system integration.
Final Checks, Configuration, and First Readings
You're almost there! This final stage is about double-checking your work and getting your monitor ready to provide accurate data.
- Double-Check All Connections: Before reapplying power, meticulously go over every connection.
- Are the main battery positive and negative cables secured?
- Are the shunt's "Battery" and "Load" terminals correctly wired and tight?
- Is the positive sense wire correctly connected and fused?
- Are all other small wires secure?
- Are there any loose tools or bare wires that could cause a short?
- Reconnect Power:
- Connect the main positive battery cable to its terminal.
- Connect the main negative battery cable to its terminal.
- Reactivate your solar panels or other charging sources.
- Turn on your main DC and AC breakers.
- Initial Power-Up and Configuration: Your battery monitor display should now light up.
- Battery Capacity: The very first thing you need to do is tell the monitor the total Amp-hour (Ah) capacity of your battery bank. This is crucial for it to accurately calculate your State of Charge. If you have a 400Ah LiFePO4 battery, input 400Ah. If you have four 100Ah batteries in parallel, input 400Ah. This is where knowing How Many Batteries for an Off-Grid System comes in handy.
- Voltage Range: Some monitors allow you to set the voltage range (e.g., 12V, 24V, 48V).
- Peukert Exponent (for lead-acid): If you have lead-acid batteries, some advanced monitors let you input a Peukert exponent, which accounts for the fact that lead-acid batteries deliver less usable capacity at higher discharge rates. For LiFePO4, this setting is typically not needed or set to 1.0.
- Charge Efficiency (for lead-acid): Similarly, for lead-acid, you might set a charge efficiency factor (e.g., 85-95%) to reflect that not all charging current makes it into usable battery capacity. LiFePO4 is much more efficient (near 100%).
- Synchronization: Many monitors need an initial "synchronization" or "sync" point to establish 100% State of Charge. This usually happens automatically when the battery voltage reaches a specific "charged" threshold for a certain period, or you can manually sync it after a full charge cycle. Follow your manual's instructions for this.
- Verify Readings: Once configured, observe the readings.
- Does the voltage match what your multimeter reads at the battery terminals?
- Is the current reading showing positive (charging) when solar is active and negative (discharging) when loads are on?
- Is the State of Charge (SoC) looking reasonable?
It might take a few charge/discharge cycles for the monitor to "learn" your battery's characteristics and become fully accurate, but with proper installation and configuration, you'll quickly gain invaluable insights into your off-grid power.
Common Installation Challenges and Troubleshooting Tips
Even with the best planning, sometimes things don't go exactly as expected. Installing electrical components can present a few hurdles, but most common issues with battery monitors are usually straightforward to troubleshoot. Don't get discouraged if your monitor isn't immediately displaying perfect data.
Inaccurate Readings and Connection Issues
This is probably the most common headache for new battery monitor owners. You've hooked everything up, but the numbers just don't seem right. The State of Charge is jumping around, or the current readings are off.
- Bypassed Shunt: The absolute number one reason for inaccurate readings is a negative connection that bypasses the shunt. Remember, all negative current must flow through the shunt.
- Symptom: Your monitor shows current flowing out, but not enough flowing in, or vice-versa. Or, the SoC drops much faster than expected and doesn't fully recover.
- Troubleshooting: Go back to your battery bank. Trace every single negative wire connected to your batteries or your main negative busbar. If any negative wire goes directly to the battery and bypasses the "load" side of your shunt, you've found the problem. All loads and charge sources must connect to the "load" side of the shunt. Even a small parasitic draw on the battery side of the shunt will throw off readings over time.
- Loose Connections: A surprisingly common culprit. Loose wires create resistance, which can lead to voltage drops and skewed current readings.
- Symptom: Readings are intermittent, jumpy, or consistently low/high compared to what you expect. Connections might feel warm to the touch (a major red flag!).
- Troubleshooting: Power down your system completely (disconnect batteries!). Then, physically check every single connection point – battery terminals, shunt terminals, sense wire connections, display unit connections. Tighten everything securely, but don't overtighten and strip threads.
- Incorrect Battery Capacity Input: If you tell the monitor you have a 200Ah battery bank when you actually have 400Ah, all your SoC percentages will be wrong.
- Symptom: SoC drops too quickly or too slowly, or "time to go" estimates are way off.
- Troubleshooting: Access the monitor's settings and verify that the total Amp-hour capacity of your battery bank is correctly entered. This is where How to Size an Off-Grid Battery Bank becomes critical, as knowing your actual capacity is paramount.
- Sense Wire Issues: The thin sense wire is vital for voltage readings. If it's faulty or poorly connected, it affects accuracy.
- Symptom: Voltage readings are incorrect, or the monitor won't power up properly.
- Troubleshooting: Check the continuity of the sense wire with your multimeter. Ensure its connections at both the battery positive and the shunt/monitor are secure. If there's an inline fuse on the sense wire, check if it's blown.
Display Not Powering On or Communication Errors
You've done all the wiring, reconnected power, but the display remains stubbornly blank, or it shows an error message.
- No Power to Display Unit:
- Symptom: Screen is completely dark, no lights, no response.
- Troubleshooting:
- Check Fuses: Many display units, or their associated wiring harnesses, have small inline fuses. Use your multimeter to check for continuity across these fuses. If blown, replace them with the correct rating.
- Verify Power Source: Ensure the positive and negative power wires for the display unit (if separate from the sense wire) are correctly connected to a live DC source (e.g., a fused terminal on your busbar or directly to the battery, as per the manual). Use your multimeter to confirm you have correct voltage at the display's power input.
- Main Battery Disconnect: Double-check that your main battery disconnect switch (if you have one) is in the "on" position, and the main battery cables are securely connected.
- Communication Errors (e.g., Bluetooth not connecting for smart shunts):
- Symptom: The display powers on but shows "no data" or "communication error," or your phone app can't find a Bluetooth device.
- Troubleshooting:
- Bluetooth On: Ensure Bluetooth is enabled on your phone or device.
- Proximity: Be close to the shunt/monitor unit.
- Power Cycle: Sometimes simply powering down the monitor (by disconnecting its power briefly) and restarting it can resolve temporary communication glitches.
- App Updates: Ensure your monitoring app is up to date.
- Interference: While rare, other strong radio signals nearby could potentially cause interference. Try moving your phone closer or temporarily disabling other Bluetooth devices.
- Shunt Power: Ensure the shunt itself is powered (it often draws power from the sense wire, so check that connection again). Without power, it can't transmit data.
Troubleshooting often involves systematically going back through each connection and verifying continuity and voltage with your multimeter. Patience is key, and referring back to your monitor's specific manual will usually guide you to the solution. Addressing Common Off-Grid Wiring Mistakes proactively can prevent many of these issues.
Getting the Most Out of Your Battery Monitor
Installing your battery monitor is just the first step. The real magic happens when you start actively using the data it provides to make informed decisions about your off-grid power consumption and generation. It's not just a fancy gadget; it's a vital tool for maximizing efficiency, extending the life of your equipment, and truly becoming a master of your off-grid domain.
Interpreting the Data
Your shunt-based battery monitor provides a wealth of real-time information. Understanding what each reading means and how it relates to your system is paramount.
- State of Charge (SoC): This is perhaps the most-watched number. It tells you the percentage of energy remaining in your battery bank, just like the fuel gauge in your car. A fully charged battery will show 100%. As you use power, this number will decrease. It's crucial to know your battery chemistry's recommended discharge limits. For lead-acid, consistently staying above 50% SoC significantly extends their life. For LiFePO4, while they can be discharged deeper (often to 20% or even 0% by their internal BMS), it's generally good practice to keep them above 10-20% for optimal longevity.
- Voltage: While SoC is primary, voltage still gives you valuable context. You'll notice voltage fluctuations based on current flow. When charging, voltage rises; when discharging, it drops. Knowing the typical voltage range for your battery type at different SoC levels helps you quickly spot anomalies. For example, a 12V LiFePO4 battery holding at 13.0V while under load is a good sign, whereas one dropping to 11.5V under the same load would indicate a problem or very low SoC.
- Current (Amps): This shows you the real-time flow of electricity. A positive number indicates current flowing into the battery (charging), and a negative number indicates current flowing out (discharging). This is incredibly useful for:
- Monitoring Solar Production: How many amps are your panels actually sending to your batteries right now?
- Identifying Power Hogs: Turn an appliance on and watch the current draw spike. This helps you figure out How to Do an Off-Grid Load Analysis and understand which devices consume the most power.
- Checking Charge Controller/Inverter Function: Is your charge controller putting out the expected amps? Is your inverter drawing too much quiescent current?
- Power (Watts): This is current multiplied by voltage (Watts = Amps x Volts). It gives you an instantaneous reading of the total power being generated or consumed. Watching this number change as you switch appliances on and off provides a clearer picture of your overall power budget.
- Time to Go / Time to Full: Many advanced monitors calculate an estimate of how much longer your batteries will last at the current discharge rate, or how long until they reach full charge. This is a dynamic estimate, so it will change as your loads or charging sources fluctuate. It's a great planning tool for managing your power through the night or during cloudy spells.
By paying attention to these readings, you'll develop an intuitive understanding of your system's performance and health, catching issues before they become major problems.
Optimizing Your Off-Grid Lifestyle
The data from your battery monitor isn't just for diagnosing problems; it's for actively optimizing your entire off-grid lifestyle. It empowers you to make smarter choices that save energy, extend battery life, and ensure consistent power.
- Adjusting Usage Patterns: Once you know exactly what each appliance draws in amps or watts, you can strategically adjust your usage.
- Time-shifting Loads: Run high-draw appliances like washing machines or power tools only when your solar panels are producing abundantly, typically midday. Your monitor will show you a strong positive current while these are running, indicating they're powered directly by solar rather than depleting your batteries.
- Prioritizing Essentials: During cloudy periods or at night, your monitor will clearly show your SoC dropping. This is your cue to reduce non-essential loads, extending the life of your stored energy. Maybe postpone that movie night or switch to reading a book with a low-wattage LED lamp.
- Identifying Inefficiencies: If you see a constant, unexplained current draw, your monitor can help you track down phantom loads or inefficient appliances that are silently draining your batteries. For example, if your "Cost to Run A Refrigerator on Off-Grid Solar" seems higher than expected, your monitor can confirm its actual draw.
- Understanding Charge Cycles and Battery Health: Your monitor gives you direct feedback on how effectively your solar array and charge controller are doing their job.
- Full Charges: Is your battery bank consistently reaching 100% SoC and staying there for the absorption phase? If not, you might need to adjust your charge controller settings or evaluate if you have How Many Watts of Solar You Need to meet your demands.
- Discharge Depth: By watching the SoC, you can ensure you're not routinely discharging your batteries too deeply, which is critical for their long-term health, especially for lead-acid chemistries.
- Planning for Variable Weather: Off-grid living often means adapting to the elements. Your battery monitor is your crystal ball for energy forecasting.
- Cloudy Days: If you know a multi-day cloudy spell is coming, your monitor will show a reduced (or absent) charging current and a steady discharge. This immediate feedback helps you conserve energy proactively, perhaps starting your generator earlier or being extra frugal with power until the sun returns.
- Seasonal Adjustments: In winter, with shorter days and lower sun angles, your solar production will be less. Your monitor will highlight this by showing fewer amps flowing in. This reminds you to adjust your consumption downwards or consider supplementary charging options, as discussed in How Winter Affects Off-Grid Sizing.
By integrating the data from your battery monitor into your daily routine, you're not just using solar power; you're mastering it. This leads to less stress, more reliability, and a much more satisfying off-grid experience.
Disclaimer
The information provided in this guide is for general informational and educational purposes only. While we strive to provide accurate and helpful advice, off-grid solar installations involve working with electricity, which can be dangerous if not handled properly. Always prioritize safety, disconnect all power sources before working on your system, and consult with a qualified electrician or solar professional if you are unsure about any steps or aspects of your installation. We are not responsible for any damage or injury resulting from the use or misuse of this information.