How to Connect Batteries, Inverter, and Panels
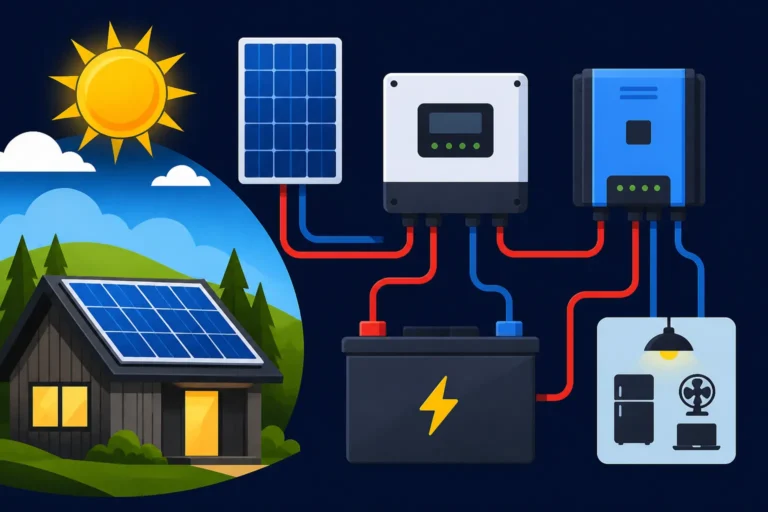
Stepping into the world of off-grid solar can feel a bit like trying to solve a complicated puzzle with a million pieces scattered everywhere. You've got your beautiful solar panels, your robust battery bank, and your sleek inverter, but how on earth do they all sing together in harmony? It’s completely normal to feel overwhelmed when faced with the task of connecting these vital components. This comprehensive guide is here to walk you through the process, demystifying the connections between your solar panels, batteries, and inverter so you can confidently build your independent power system.
Understanding the Core Components of Your Off-Grid System
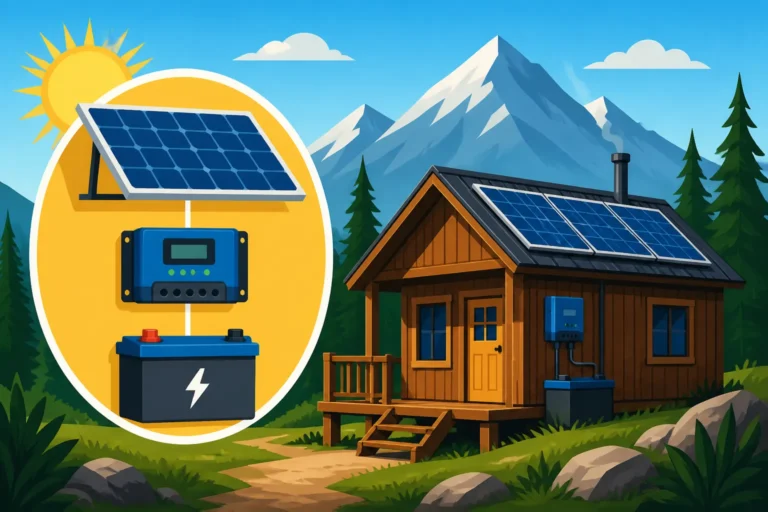
Before we dive into the nitty-gritty of connecting wires, it's absolutely crucial to have a solid understanding of what each major component in your off-grid solar system actually does. Think of it like learning the personalities of your team members before you assign them tasks. Each piece plays a unique and indispensable role in generating, storing, and delivering power to your off-grid lifestyle.
The Role of Solar Panels
Solar panels are often the first thing people picture when they think of solar power, and for good reason—they’re your primary energy gatherers! These diligent rectangular arrays are designed to convert sunlight directly into usable electricity, specifically Direct Current (DC) power. Without them, your off-grid dream wouldn't even get off the ground.
There are a few main types of solar panels out there, with monocrystalline and polycrystalline being the most common for off-grid applications. Monocrystalline panels, often dark black, are typically more efficient and take up less space, making them a popular choice for RVs or cabins where real estate is at a premium. Polycrystalline panels, usually blue, are a bit less efficient but can be more budget-friendly. When you're looking at panels, you'll see ratings for wattage and voltage. The wattage (like 100W, 200W, 400W) tells you how much power the panel can produce under ideal conditions, while the voltage (e.g., 18V, 30V) is crucial for matching it correctly with your charge controller and battery bank. Choosing the right panels is a foundational step; if you're curious about what options are available, checking out a guide on the Best Off-Grid Solar Panels can be incredibly helpful. These panels are the very beginning of your electrical journey, turning sunlight into the raw energy that fuels your independent life.
The Heart of the System: Your Battery Bank
If solar panels are the muscles generating power, your battery bank is undeniably the heart of your off-grid system. The sun doesn't shine 24/7, and that's where batteries come in – they store all that glorious DC power generated by your panels so you have electricity available when the sun goes down, on cloudy days, or during periods of high demand. Without a robust battery bank, you’d only have power when the sun is actively hitting your panels, which isn’t exactly practical for modern living.
The world of off-grid batteries can seem like a labyrinth, with various chemistries each having their own pros and cons. You'll commonly encounter flooded lead-acid, Absorbed Glass Mat (AGM), and the increasingly popular Lithium Iron Phosphate (LiFePO4) batteries. Flooded lead-acid batteries are often the most affordable upfront but require regular maintenance and have a shorter lifespan. AGM batteries are sealed, maintenance-free, and more resilient to vibrations, making them great for mobile applications like RVs. LiFePO4 batteries, while having a higher initial cost, boast incredible longevity, deeper discharge capabilities, and lighter weight, offering a fantastic return on investment over time. The capacity of your battery bank, measured in Amp-hours (Ah) or kilowatt-hours (kWh), dictates how much power you can store, and its voltage (12V, 24V, 48V) needs to align with the rest of your system. A well-chosen battery bank ensures energy independence, so diving into options like the Best Off-Grid Solar Batteries will give you a good head start. This component truly acts as your energy reservoir, ensuring a consistent flow of power whenever you need it.
The Brain of the System: The Inverter and Charge Controller
If panels are the power source and batteries are the storage, then the charge controller and inverter are the intelligent control center, the brain and nervous system that manage and convert that power. You wouldn't want raw, unregulated power flowing into your expensive batteries or trying to run your coffee maker directly from DC. These two devices ensure everything works safely and efficiently.
The charge controller is your battery's best friend. Its primary job is to regulate the voltage and current coming from your solar panels before it reaches your battery bank. This is absolutely critical because overcharging batteries can severely damage them, reduce their lifespan, or even create dangerous conditions. There are two main types: PWM (Pulse Width Modulation) and MPPT (Maximum Power Point Tracking). PWM controllers are simpler and more affordable, best suited for smaller systems where the panel voltage closely matches the battery voltage. MPPT controllers, on the other hand, are highly efficient, especially in larger systems or when panel voltage is significantly higher than battery voltage, extracting more power from your panels. For optimal performance and battery longevity, understanding the Best MPPT Charge Controllers is often a good place to start your research.
Next up is the inverter. This is the wizard that transforms the DC (Direct Current) power stored in your batteries into AC (Alternating Current) power, which is what almost all your household appliances use. From your refrigerator to your laptop charger, they all crave AC power. Just like charge controllers, inverters come in different flavors: modified sine wave and pure sine wave. Modified sine wave inverters are more economical but produce a "choppy" power wave that can damage sensitive electronics (like modern TVs, medical devices, or anything with a motor). Pure sine wave inverters produce clean, grid-quality power, making them the gold standard for off-grid living where you want your electronics to run smoothly and last long. Matching your inverter's capacity (wattage) to your expected peak load is vital to avoid overloads. You can explore options like the Best Off-Grid Solar Inverters to ensure you pick a reliable unit. Together, these two components orchestrate the safe and efficient flow of power from generation to consumption, making your off-grid system truly functional.
Planning Your System Wiring Layout and Safety First
Connecting off-grid solar components isn't just about plugging things in; it's about thoughtful design and rigorous safety. Before you even think about stripping a wire, you need a clear plan, much like a builder needs blueprints before laying a foundation. This planning phase is where you prevent headaches, ensure efficiency, and, most importantly, protect yourself and your investment.
Mapping Out Your System Components
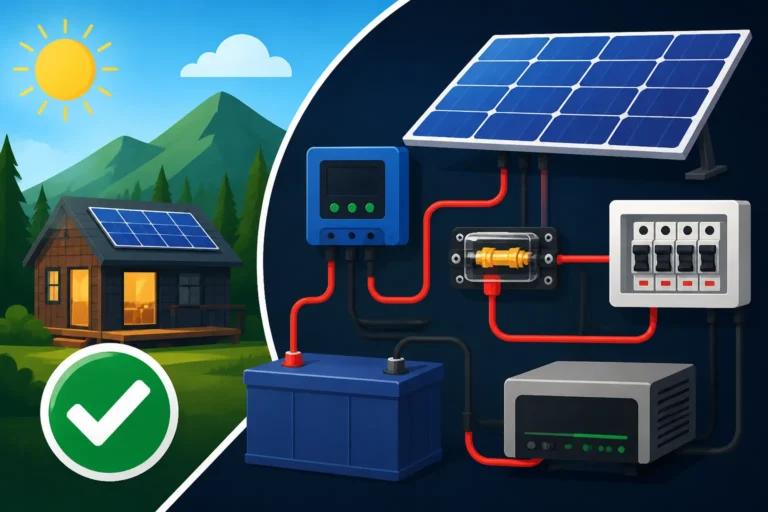
The first step in any successful off-grid solar installation is to create a detailed wiring diagram and component layout. Seriously, grab a notebook, a pen, or even some advanced software, and draw it all out. This isn't just for pros; it's a vital step for DIYers too. Visualize where each component will live: your solar panels on the roof or a ground mount, the charge controller and inverter typically indoors in a protected area, and your battery bank in a well-ventilated, temperature-controlled space.
Consider the physical placement carefully. Panels need optimal sun exposure and minimal shading throughout the day, as even a small shadow can drastically reduce output. Your charge controller and inverter should be close to your battery bank to minimize cable length and voltage drop, but also in a spot where they can dissipate heat efficiently. Batteries, especially lead-acid types, require ventilation, and all components need to be accessible for future maintenance or troubleshooting. Thinking about cable runs now will save you a lot of grief later. For instance, planning to run your main power cables through existing conduits or new, properly sized conduit can prevent damage and create a much cleaner look. Don't rush this step; a well-thought-out layout makes the rest of the installation smooth sailing.
Essential Safety Gear and Practices
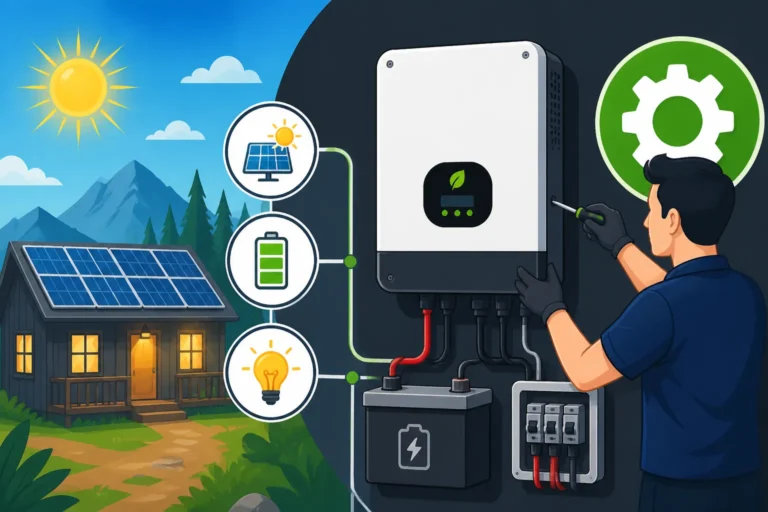
I cannot stress this enough: safety is paramount. You are dealing with electricity, sometimes high voltage and high current, which can be incredibly dangerous if not handled properly. This isn't the time to cut corners or skip steps. Always assume wires are live, even if you’ve disconnected things.
Before you start any work, gather your Personal Protective Equipment (PPE):
- Insulated gloves: Essential for handling electrical wires.
- Safety glasses/goggles: Protect your eyes from sparks or debris.
- Appropriate clothing: Long sleeves and pants to protect skin.
- Insulated tools: Pliers, screwdrivers, and wrenches designed for electrical work.
Beyond PPE, the system itself needs built-in safety mechanisms. This includes DC disconnect switches between your solar array and charge controller, and between your battery bank and inverter. These allow you to safely shut down sections of your system for maintenance or in an emergency. Fuses and breakers are also non-negotiable; they protect your components and wiring from overcurrents, acting as sacrificial links that blow before major damage occurs. Proper Off-Grid Solar Safety and Grounding is another critical aspect. All metal enclosures of your components (inverter, charge controller, panel frames) must be properly grounded to a common grounding point to prevent electrical shock hazards. Familiarize yourself with local electrical codes, even if you’re off-grid; many principles are still important for safety. Never work alone if possible, and always have a fire extinguisher rated for electrical fires nearby.
Understanding Electrical Current and Voltage
To connect your components successfully, you need a basic grasp of electrical principles: Direct Current (DC) and Alternating Current (AC), and the relationship between voltage, amperage, and wattage.
- DC (Direct Current): This is the type of electricity produced by your solar panels and stored in your batteries. It flows in one direction, from positive to negative. Your charge controller works with DC, and your inverter takes DC in and converts it. Most smaller, simple off-grid devices (like some LED lights or USB chargers) can run directly on DC.
- AC (Alternating Current): This is the standard power found in homes and supplied by the utility grid. It's what your inverter produces, and it's what runs virtually all your major appliances. The current periodically reverses direction.
Your system will operate at a specific system voltage, typically 12V, 24V, or 48V DC. Solar panels often produce voltages higher than the battery bank, which is fine if you have an MPPT charge controller that can efficiently convert it. The choice of system voltage (e.g., 12V vs 24V vs 48V: Which to Choose) depends on your power needs. Higher voltage systems are generally more efficient for larger loads because they require less current (amperage) to deliver the same amount of power (wattage), which means you can use smaller, less expensive wires, reducing voltage drop over long runs. Voltage drop is a significant concern in off-grid systems; it's the reduction in voltage as electricity travels through a wire. Too much voltage drop means less power reaching your devices and inefficient charging. You'll need to calculate appropriate wire gauges based on current, cable length, and acceptable voltage drop, which is usually no more than 3% for critical circuits. Understanding these basics is the foundation for making sound wiring decisions and ensuring your system operates effectively and safely.
Connecting Your Solar Panels to the Charge Controller
Now that you understand the components and have a safety plan, it's time to start making connections. The first major link in your off-grid solar chain is getting the power from your panels into your charge controller. This is where the sun's energy begins its journey into your home or cabin.
Wiring Panels in Series or Parallel
One of the most common questions when setting up solar panels is whether to wire them in series, parallel, or a combination of both. The choice significantly impacts the voltage and current delivered to your charge controller, and it needs to match your system design.
-
Series Wiring: When you wire panels in series, you connect the positive terminal of one panel to the negative terminal of the next. Think of it like a string of Christmas lights. This configuration adds up the voltage of each panel while keeping the current (amperage) the same. For example, two 12V panels wired in series will output 24V at the same amperage as a single panel. This is often preferred for MPPT charge controllers, especially in larger systems, because higher voltage arrays require thinner wiring, reducing voltage drop over longer distances between the array and the charge controller. It's also beneficial in colder climates where panels produce higher voltage, helping activate MPPT controllers. However, a major downside is that if one panel in a series string is shaded or underperforming, it can significantly reduce the output of the entire string, as the weakest link affects them all. You can learn more in-depth about this method in articles like How to Wire Solar Panels in Series.
-
Parallel Wiring: In parallel wiring, you connect all positive terminals together and all negative terminals together, often using "Y" branch connectors or a combiner box. This configuration adds up the current (amperage) of each panel while keeping the voltage the same as a single panel. For instance, two 12V panels wired in parallel will still output 12V, but at double the amperage of a single panel. Parallel wiring is often used for smaller 12V systems, or when panels are prone to partial shading, as the performance of one panel doesn't drastically impact the others. The downside is that higher amperage requires thicker, more expensive wiring to prevent voltage drop, especially over longer distances. It's also common to use parallel wiring when the overall array voltage matches the battery bank voltage and you're using a PWM charge controller. For a deeper dive, check out How to Wire Solar Panels in Parallel.
For larger systems, it’s common to use a series-parallel combination. This involves wiring several panels in series to create a higher voltage string, and then wiring multiple such strings in parallel to increase total current. This gives you the benefits of higher voltage (thinner wires) and higher current (more power), while mitigating some of the shading issues of pure series arrays. Always refer to your charge controller's specifications for maximum input voltage and current before finalizing your panel wiring configuration.
Connecting to the Charge Controller
Once your solar array is wired, the next step is to physically connect it to your charge controller. This is a critical connection, and doing it correctly ensures the safety and efficiency of your system.
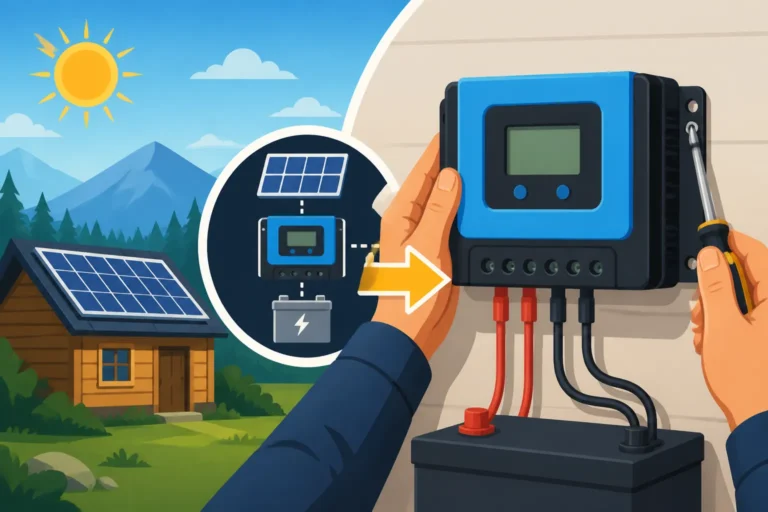
First, ensure your PV (photovoltaic) disconnect switch (if you have one) is in the "off" position, and your battery bank is NOT yet connected to the charge controller. We always connect batteries to the charge controller first, then panels. Most solar panels come with MC4 connectors, which are weatherproof and easy to use. You'll need appropriate length solar cables, ideally rated for outdoor use and UV resistant, running from your panel array to your charge controller. These cables should be sized correctly for the current and distance to minimize voltage drop.
At the charge controller, you'll find clearly labeled terminals for "PV Input" or "Solar Input," often marked with a sun icon. You will have a positive (+) and a negative (-) terminal. Carefully connect the positive wire from your solar array to the positive PV input terminal on the charge controller, and the negative wire from your solar array to the negative PV input terminal. It is absolutely crucial to maintain correct polarity. Reversing polarity can cause serious damage to your charge controller and potentially your panels. Double-check all connections to ensure they are tight and secure. If you have a PV disconnect switch, the cables from the array will first go into the disconnect, and then from the disconnect to the charge controller. This switch provides an easy way to fully de-energize your solar array for maintenance or emergencies.
Verifying Panel Output
After connecting your panels to the charge controller, but before connecting your batteries (if you haven't already), it's a good practice to verify that your panels are actually producing power as expected. This helps catch any wiring mistakes in the array itself or faulty panels early on.
With the sun shining on your panels and the solar input connected to the charge controller (but with the charge controller currently disconnected from the battery bank), you can use a multimeter. Set your multimeter to measure DC voltage. Touch the positive probe to the positive PV input terminal on the charge controller and the negative probe to the negative PV input terminal. You should see a voltage reading that corresponds to your array's open-circuit voltage (Voc) or close to it, depending on the sunlight conditions. If you wired your panels in series, this voltage should be the sum of each panel's voltage. If wired in parallel, it should be roughly the voltage of a single panel. If you're seeing zero or a significantly lower voltage, re-check your panel wiring and connections, looking for loose wires, incorrect polarity, or potential shading issues.
You can also test the current if you have an appropriate multimeter (one with an amperage clamp or inline current measurement capability, ensuring it can handle the expected amperage). However, voltage measurement is usually sufficient for a basic functional check at this stage. This quick verification step gives you peace of mind that your energy collectors are indeed collecting energy, setting the stage for the next crucial connection.
Linking the Charge Controller to Your Battery Bank
This is arguably the most critical connection in your off-grid solar system. The charge controller is designed to protect your battery bank, and establishing this link correctly is paramount for the longevity and safety of your batteries. Improper connection here can lead to severely damaged batteries or even dangerous situations.
Preparing Your Battery Bank
Before connecting your batteries to anything, they need to be properly prepared and configured for your system. This involves both physical setup and electrical wiring.
First, ensure your battery bank is located in a safe, well-ventilated area, protected from extreme temperatures. Batteries, especially lead-acid types, can off-gas hydrogen, which is flammable, so good airflow is essential. Secure your batteries so they won't tip over. Install appropriate battery boxes if needed to protect the terminals and contain any spills. For How to Wire a Battery Bank, the most important aspect is to match the total voltage of your battery bank to your system voltage (e.g., 12V, 24V, or 48V). If you have multiple 12V batteries and want a 24V system, you'll wire two 12V batteries in series. If you want more capacity at 12V, you'll wire multiple 12V batteries in parallel.
- Series Wiring for Batteries: Connect the positive terminal of one battery to the negative terminal of the next battery. This increases the overall voltage of the bank while keeping the Amp-hour (Ah) capacity the same as a single battery. For example, two 100Ah, 12V batteries in series create a 24V, 100Ah bank.
- Parallel Wiring for Batteries: Connect all positive terminals together and all negative terminals together. This increases the total Amp-hour capacity of the bank while keeping the voltage the same as a single battery. For example, two 100Ah, 12V batteries in parallel create a 12V, 200Ah bank.
Always use thick, appropriately sized battery cables for these connections, as the current involved can be very high. Ensure all terminal connections are clean, tight, and corrosion-free. It's a good practice to use terminal covers to prevent accidental short circuits. For optimal performance and safety, make sure all batteries in your bank are of the same type, age, and capacity. Mixing and matching can lead to imbalance and reduced lifespan for the entire bank.
Connecting to the Charge Controller
This is the golden rule of off-grid solar wiring: always connect the batteries to the charge controller FIRST, before connecting the solar panels. Why? Because the charge controller needs to sense the battery voltage to properly regulate the incoming power from the panels. If you connect the panels first, the charge controller might not know what voltage to output, potentially sending unregulated power that could damage both the controller and the batteries.
From your prepared battery bank, run your appropriately sized battery cables to the "Battery Input" or "Battery" terminals on your charge controller. These terminals will also be clearly marked with positive (+) and negative (-) indicators, often with a battery icon.
- Positive Connection: Connect the positive cable from your battery bank's main positive terminal (or battery disconnect positive output) to the positive battery input terminal on the charge controller.
- Negative Connection: Connect the negative cable from your battery bank's main negative terminal (or battery disconnect negative output) to the negative battery input terminal on the charge controller.
Just like with the panels, absolute correct polarity is vital. Double-check your connections. Many off-grid systems incorporate a battery disconnect switch or a fuse block directly at the battery bank. If so, your cables will run from the main battery terminals to this disconnect/fuse, and then from the output of the disconnect/fuse to the charge controller. This allows you to safely isolate the battery bank from the rest of the system for maintenance. Once these connections are secure, you can then proceed to connect your solar panels to the charge controller, as we discussed in the previous section. When you make the solar panel connection now, you should see your charge controller light up, recognizing the battery bank and beginning to regulate power.
Setting Charge Controller Parameters
Connecting the wires is only half the battle; the other half is telling your charge controller how to correctly manage your specific type of battery. This step is often overlooked by beginners but is absolutely critical for battery health, performance, and longevity. Different battery chemistries have different charging requirements, and misconfiguring these settings can severely shorten your battery's life or even pose a safety risk.
Most modern MPPT charge controllers, like those from Renogy or Victron, will have programmable settings accessible via a screen on the unit itself, a remote display, or a Bluetooth app. The key parameters you'll need to set include:
- Battery Type: This is usually a general setting like "Flooded," "AGM," "Gel," or "Lithium (LiFePO4)." Selecting the correct type will automatically apply default voltage settings.
- Bulk Charge Voltage: This is the highest voltage at which your batteries will accept a charge. During the bulk stage, the charge controller delivers as much current as the batteries can handle until they reach this voltage.
- Absorption Voltage: Once the bulk charge voltage is reached, the controller switches to the absorption stage, holding the voltage constant for a set period (the absorption time) to allow the batteries to fully top off and equalize the charge across cells.
- Float Voltage: After the absorption stage, the controller drops to a lower "float" voltage. This maintains the battery at full charge without overcharging, compensating for self-discharge.
- Equalization Voltage (for flooded lead-acid only): This is a higher, controlled overcharge that helps to remove sulfation from the battery plates and balances cell voltages. It should never be applied to sealed lead-acid (AGM/Gel) or lithium batteries.
- Low Voltage Disconnect (LVD): This setting determines at what battery voltage the charge controller will cut off power to your loads (or stop charging) to prevent over-discharging the batteries, which can cause irreversible damage, especially to lead-acid types.
- Temperature Compensation: Many charge controllers have a battery temperature sensor. Connecting and enabling this allows the controller to adjust charging voltages based on battery temperature, which is crucial for lead-acid batteries, as their charging requirements change with temperature. Lithium batteries are less sensitive but often have their own internal Battery Management System (BMS) that handles thermal protection.
Always refer to your specific battery manufacturer's data sheet for their recommended charging parameters. Don't guess! For instance, a quality LiFePO4 battery might have very specific bulk and float voltages that differ from what an AGM battery requires. Correctly setting these parameters ensures your batteries receive the precise care they need, maximizing their performance and lifespan for years of reliable off-grid power.
Integrating the Inverter with Your Battery Bank
With your panels charging your batteries through the charge controller, the next crucial step is getting that stored DC power converted into usable AC power for your appliances. This is where your inverter comes into play, acting as the bridge between your DC storage and your AC loads.
Choosing the Right Inverter Connection Point
Connecting your inverter to your battery bank requires careful consideration of cable sizing and safety. The inverter will draw significant current from your batteries, especially when running high-wattage appliances, so having robust connections is non-negotiable.
For most off-grid systems, the inverter connects directly to the main terminals of your battery bank or to a robust DC busbar that is directly connected to the battery bank. This direct connection ensures the shortest possible cable run between the battery and the inverter, which is critical to minimize voltage drop. Even a small voltage drop on the DC side can lead to significant power loss and affect inverter performance, especially under heavy loads. Thicker, shorter cables are always preferred here.
If your system includes a main battery disconnect switch or a DC distribution panel that can handle the inverter's maximum current draw, you can connect the inverter to the load side of that component. This provides an additional layer of safety, allowing you to easily isolate the inverter from the batteries when needed. However, ensure that any fuses, circuit breakers, or disconnects in this path are rated sufficiently for the inverter's surge capacity, not just its continuous rating. An inverter's starting or "surge" wattage can be several times its continuous wattage, especially when starting motors in appliances like refrigerators or power tools.
Step-by-Step Inverter Connection
Connecting the inverter is a straightforward but high-stakes operation. Incorrect wiring can cause serious damage or safety hazards, so proceed with extreme caution and double-check every step.
- Safety First (Again!): Before you touch anything, ensure your battery bank's main disconnect is open (OFF), and your charge controller is disconnected from the solar panels. We want absolutely no power flowing when making these high-current connections.
- Cable Sizing: This is critical. The cables connecting your inverter to your batteries must be extremely thick to handle the high amperage. Consult your inverter's manual for recommended cable gauge based on its wattage and the length of your cable run. Using undersized cables will lead to excessive voltage drop, overheating, and fire risk.
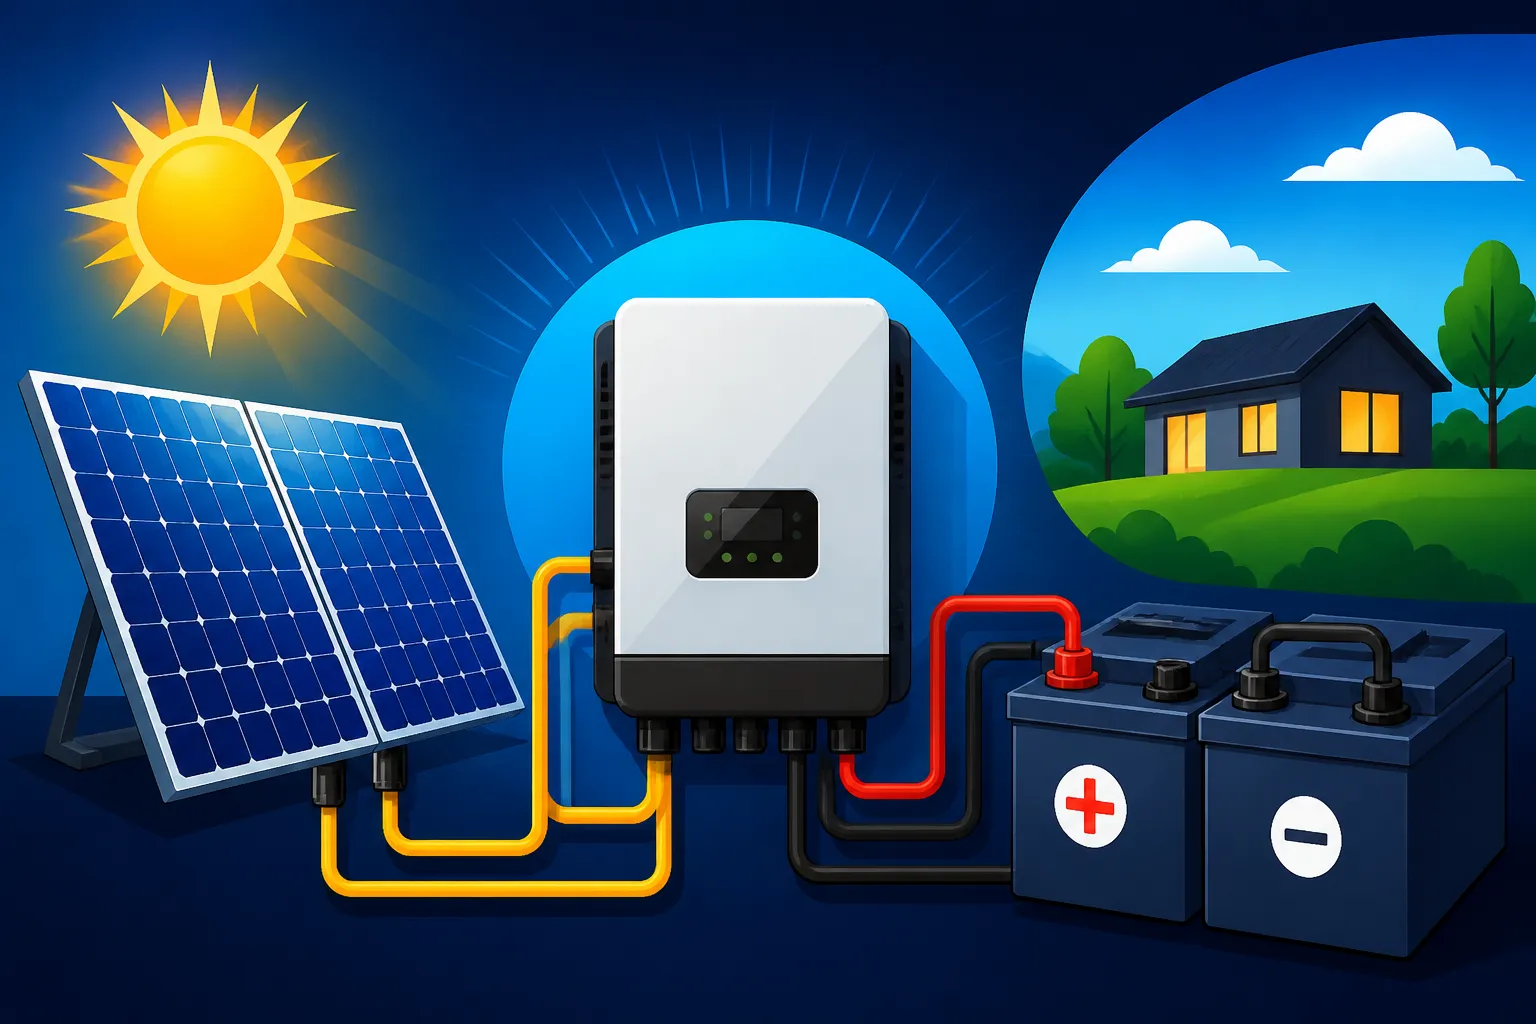
- Positive Connection: Locate the positive (+) terminal on your inverter. Connect one end of your positive battery cable to this terminal. The other end will go to the main positive terminal of your battery bank (or the positive output of your main DC disconnect/busbar).
- Negative Connection: Similarly, locate the negative (-) terminal on your inverter. Connect one end of your negative battery cable to this terminal. The other end will go to the main negative terminal of your battery bank (or the negative output of your main DC disconnect/busbar).
- Fusing: Install a properly sized DC fuse or circuit breaker on the positive cable, as close to the battery bank as possible. This fuse is a sacrificial component designed to blow if there's an overcurrent, protecting your expensive inverter and preventing battery fires. Your inverter's manual will specify the required fuse size, which is typically based on the inverter's maximum continuous current draw. Many brands like Renogy offer all-in-one inverter-chargers that simplify the connection by integrating multiple functions, but even these units require proper external fusing to the battery bank.
- Secure Connections: Ensure all cable lugs are properly crimped onto the cables and that all terminal connections are incredibly tight. Loose connections can create resistance, generate heat, and lead to system failure or fire.
Once these DC connections are made and fused, you are ready to move on to grounding and setting up the AC output.
Grounding the Inverter and AC Output
Proper grounding of your inverter is not just a recommendation; it's a critical safety requirement that protects you from electrical shock. The inverter chassis, along with all other metallic electrical enclosures in your system, must be bonded to a common ground point.
-
Inverter Chassis Grounding: Your inverter will have a dedicated grounding lug, usually a green screw terminal or a clearly marked connection point. Use a green-insulated copper wire (sized appropriately, often specified in the manual) to connect this lug to your system's main grounding busbar or earth ground rod. This ensures that if an internal fault occurs within the inverter, any stray current is safely diverted to the earth, rather than passing through you.
-
AC Output Wiring: After grounding the inverter chassis, you'll need to wire its AC output. Most off-grid inverters provide standard AC terminals for line (hot), neutral, and ground. For smaller systems powering just a few dedicated outlets, you might wire directly from the inverter's AC output to those outlets (after ensuring proper fusing/breakers at the inverter output). For larger systems powering a whole house, the inverter's AC output will typically connect to a main AC breaker panel.
- Line/Hot: Connect the "Line" or "Hot" terminal from the inverter to a main breaker in your AC panel.
- Neutral: Connect the "Neutral" terminal from the inverter to the neutral busbar in your AC panel.
- Ground: Connect the "Ground" terminal from the inverter to the ground busbar in your AC panel, which should also be connected to your main system ground.
It's important to understand split-phase vs. single-phase AC. Most smaller inverters are single-phase (120V AC). If you need 240V AC for appliances like a well pump or dryer, you'll typically need two inverters (or a specialized 240V inverter) configured to provide split-phase power. Always use properly rated AC wiring and circuit breakers in your AC distribution panel to protect your loads. Consulting a qualified electrician for the AC side of your system, especially if connecting to a main breaker panel, is highly recommended to ensure compliance with electrical codes and maximize safety. After all these connections are made, your inverter is now ready to transform stored battery power into the usable electricity your off-grid life depends on. You're getting closer to flipping that switch and seeing the lights come on! For more detailed steps, consider reading How to Connect an Inverter to Batteries.
Bringing it All Together: System Commissioning and Testing
You've done the hard work of connecting everything, but the journey isn't over yet. The commissioning and testing phase is where you safely bring your system online, verify its functionality, and make sure everything is running as intended. This isn't a step to rush; a methodical approach here ensures long-term reliability and safety.
The Power-Up Sequence
Bringing an off-grid solar system to life for the first time should always follow a specific, cautious sequence. This prevents damage to components and ensures your safety. Think of it as a carefully choreographed dance.
- Verify All Connections (OFF): Before applying any power, do a thorough visual inspection. Double-check every single connection you've made: panel wiring, battery terminals, inverter cables, and all ground connections. Make sure all fuses are in place but all disconnects (PV disconnect, battery disconnect, AC output breakers) are in the OFF position. Confirm correct polarity on all DC connections.
- Activate the Battery Bank: This is the first step in the power-up. Close your main battery disconnect switch or connect the final battery cables (if you left them disconnected for safety). Your battery bank is now live.
- Power Up the Charge Controller: At this point, your charge controller should already be connected to the battery bank (remember, batteries first!). It should power on and display the battery voltage. Verify this voltage reading matches what you expect from your battery bank.
- Connect the Solar Panels: Now, and only now, close your PV disconnect switch (or connect your solar panel cables to the charge controller if you removed them). The charge controller should detect the solar input and, if the sun is shining, begin the charging process, indicated by status lights or a display showing charging current.
- Activate the Inverter: With the batteries and charge controller happily working, you can now power up your inverter. Flip its DC input breaker/disconnect to the ON position, then press the power button on the inverter itself (if it has one). Listen for any abnormal sounds. The inverter should initialize and, once stable, indicate that it’s ready to provide AC power.
- Activate AC Loads: Finally, with the inverter running, you can close the AC breakers or plug in your first AC loads. Start with a small, non-critical load (like a lamp) to verify AC output before connecting heavier appliances.
Following this sequence meticulously helps ensure a smooth startup and protects your components from unexpected surges or misconfigurations. This careful approach to How to Commission an Off-Grid System pays dividends in system reliability.
Initial System Testing and Monitoring
After the initial power-up, it’s crucial to perform a series of tests and establish a routine for monitoring your system’s performance. This confirms that everything is operating efficiently and gives you baseline data for future troubleshooting.
- Battery Voltage and Charge Current: Use your charge controller's display or a dedicated battery monitor (like a Victron BMV-712 or a Renogy shunt-based monitor) to check the battery voltage. Observe the charge current coming from the solar panels. Does it align with the expected output given the current sunlight conditions? Watch for the charge controller transitioning through its charge stages (bulk, absorption, float) as your batteries fill up.
- Inverter Output: With a multimeter, test the AC voltage at your inverter's output terminals or at the first AC outlet connected to the inverter. It should read around 120V (or 240V for split-phase systems). If your inverter has a display, it will show AC output wattage, frequency (60Hz), and voltage. Test a variety of appliances, starting small and gradually moving to larger loads like a microwave or power tools, to ensure the inverter can handle the surge and continuous demands.
- Load Testing: It's a good idea to put a decent load on your system. Run a few lights, maybe your refrigerator, and track how the battery voltage responds. Is the inverter working smoothly? Is the charge controller keeping up?
- Grounding Check: Perform a quick visual check of all grounding wires. Use a multimeter to verify continuity between the chassis of all major components and your main ground point.
- System Monitoring: If your charge controller or inverter has smart features and a companion app, get it set up! These apps provide invaluable real-time data on power production, consumption, battery state of charge, and historical trends. This data is incredibly useful for understanding your system's performance and optimizing your energy usage. Regular checks and monitoring are key elements of How to Test an Off-Grid Solar System.
Common Troubleshooting and What to Watch For
Even with meticulous planning, issues can arise. Knowing common problems and how to approach them can save you a lot of frustration.
- No Power/Low Power:
- Check DC disconnects: Are all battery and PV disconnects ON?
- Check Fuses/Breakers: A blown fuse or tripped breaker is a common culprit. Replace/reset and investigate why it tripped (overload, short circuit).
- Battery State of Charge: Is your battery bank severely discharged? The inverter might have shut off to protect them.
- Panel Connection: Is the solar array getting sufficient sun? Are all panel connections secure?
- Inverter Error Codes: Most modern inverters have diagnostic displays that show error codes. Look these up in your inverter's manual; they often point directly to the problem (e.g., low battery voltage, overload, over-temperature).
- Battery Not Charging:
- Charge Controller Settings: Recheck your battery type and charge parameters. Are they correct for your batteries?
- PV Input: Is there voltage from your solar panels reaching the charge controller? Use a multimeter to verify.
- Battery Connection: Is the charge controller correctly sensing battery voltage? Loose battery connections are a common cause.
- System Overload: If the inverter shuts down when a large appliance is turned on, it’s likely an overload. This could mean your inverter is undersized for that particular surge load, or you have too many appliances running simultaneously. You might need to adjust your usage habits or consider upgrading your inverter.
- Intermittent Power: Check all cable connections again. Loose connections can cause intermittent power delivery and generate dangerous heat.
Always start troubleshooting with the simplest checks and work your way through the system logically. Consult the manuals for each of your components, as they often contain detailed troubleshooting guides. Online forums and manufacturer support can also be excellent resources. Learning How to Troubleshoot Off-Grid Solar is an essential skill for any off-grid homesteader, helping you maintain a reliable power supply.
Advanced Considerations for a Robust Off-Grid System
Once you have your basic off-grid solar system up and running, there are always ways to enhance its reliability, extend its life, and prepare for future needs. Thinking ahead can save you significant time and money down the road.
Integrating a Backup Generator
While solar power is fantastic, the reality of off-grid living often means you'll face periods when the sun simply isn't enough. Extended cloudy weather, heavy loads, or unforeseen system issues can deplete your batteries faster than your panels can recharge them. This is where a backup generator becomes your reliable friend.
A generator, typically fueled by gasoline, propane, or diesel, provides an alternative source of power to recharge your batteries or directly power your AC loads when your solar array can't keep up. For a truly robust system, you’ll typically connect the generator to an inverter-charger. An inverter-charger is a powerful device that not only converts DC to AC but also contains a sophisticated battery charger. When the generator runs, the inverter-charger uses its AC output to charge your battery bank, bringing them back up to a healthy state. Many advanced inverter-chargers, especially models from Victron or Sol-Ark, can even automatically start a compatible generator when battery voltage drops to a certain level, providing seamless backup power without you having to lift a finger. This level of automation is a huge convenience for remote homesteads or busy families.
Furthermore, a critical component when integrating a generator is a properly installed transfer switch. This switch ensures that your generator's power supply and your inverter's power supply are never connected to your home's electrical panel simultaneously, which would create a dangerous backfeed situation. Some inverter-chargers have built-in transfer switches for this purpose, simplifying the setup. Deciding How to Add a Generator to Your Design means peace of mind, knowing you have a reliable energy fallback when solar production is low.
Monitoring and Maintenance for Longevity
Installing your system is a big accomplishment, but maintaining it is key to ensuring it lasts for decades. Think of it like owning a car: you wouldn't just drive it without ever checking the oil, right? Your off-grid solar system needs similar attention.
Regular monitoring is your first line of defense. Keep an eye on your battery's state of charge, the voltage from your panels, and the current being drawn by your loads. Most modern charge controllers and inverters offer data logging and remote monitoring through apps (many from brands you find on Amazon like Renogy or more specialized ones like Victron come with great monitoring capabilities), allowing you to spot anomalies before they become major problems. For instance, if you notice your daily solar production dipping consistently, it might be time to check for shading or dirty panels.
Maintenance tasks vary depending on your components:
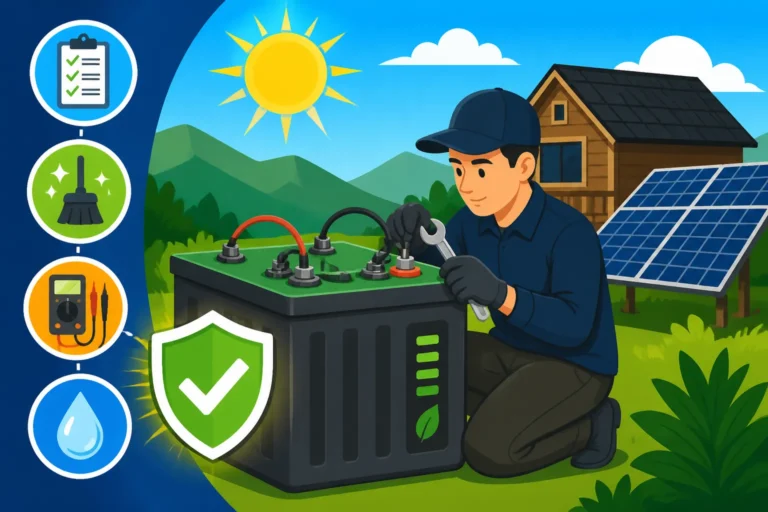
- Solar Panels: Periodically clean your solar panels, especially if you live in a dusty area or one with frequent bird activity. Dust, dirt, leaves, and bird droppings can significantly reduce their efficiency.
- Batteries:
- Flooded Lead-Acid: These require the most maintenance. Regularly check electrolyte levels and top up with distilled water as needed. Perform equalization charges periodically to balance cells and prevent sulfation. Keep terminals clean and free of corrosion.
- AGM/Gel/LiFePO4: These are largely maintenance-free regarding water levels, but still benefit from periodic terminal checks for tightness and cleanliness. For LiFePO4, ensure your Battery Management System (BMS) is functioning correctly.
- Wiring and Connections: At least once a year, do a thorough visual inspection of all wiring. Look for signs of wear, fraying, or discoloration from heat. Gently pull on connections to ensure they're still tight. Loose connections are a major cause of problems and fire hazards.
- Inverter/Charge Controller: Keep the areas around these components clear to allow for proper ventilation and cooling. Check for any error codes or unusual noises. Some units might require occasional firmware updates for optimal performance.
Adhering to a good Off-Grid Solar Maintenance Guide can significantly extend the lifespan of your expensive components, ensuring reliable power for many years to come and protecting your investment.
Planning for Future Expansion
The beauty of many off-grid solar systems is their modularity and ability to expand. What starts as a small system for a cabin or RV might grow into a larger setup for a full-time homestead as your power needs evolve. Planning for future expansion from the very beginning can save you a lot of hassle and expense.
When designing your initial system, consider these aspects:
- Oversize Conduits and Wiring: If you're running conduit for your solar panel wiring, install a larger diameter than you initially need. This allows for additional wiring in the future if you decide to add more panels without having to dig up or replace existing conduit. Similarly, when running main DC cables from your charge controller to your battery bank, consider going up one gauge thicker than strictly necessary. While a bit more expensive upfront, this provides headroom for increased current draw if you expand your battery bank or add more charging sources.
- Choose Modular Components: Opt for components that are designed for expansion. For example, many battery manufacturers, particularly for LiFePO4 batteries, offer units that can be easily paralleled to increase capacity. Some charge controllers can be run in parallel, and many inverters can be stacked (connected together) to double AC output or create split-phase power. Look for brands known for their scalability.
- Dedicated Space: Designate sufficient space in your power shed or battery box for additional components. Even if you're not installing them now, having the physical space reserved will make future upgrades much simpler.
- Flexible Wiring Paths: Try to keep your wiring as organized and accessible as possible. Use cable trays or clips, and label everything clearly. This makes it easier to add new circuits or components without untangling a spaghetti mess.
By thinking about How to Design an Expandable System from day one, you build a foundation that can grow with your needs, making your off-grid journey more adaptable and less prone to costly overhauls when you inevitably decide you need more power for that new electric vehicle charger or a larger workshop.
Series vs. Parallel Wiring for Solar Panels
Understanding the differences between series and parallel wiring for your solar panels is crucial for optimizing your system's performance and ensuring compatibility with your charge controller. Here's a quick comparison:
| Feature | Series Wiring | Parallel Wiring |
|---|---|---|
| Voltage | Increases (adds individual panel voltages) | Stays the same (equal to one panel's voltage) |
| Current (Amps) | Stays the same (equal to one panel's current) | Increases (adds individual panel currents) |
| Cable Sizing | Can use thinner wires (lower amperage) | Requires thicker wires (higher amperage) |
| Shading Impact | High impact (one shaded panel affects whole string) | Lower impact (individual panel affected) |
| Best For | MPPT charge controllers, long cable runs, cold climates | PWM charge controllers, short cable runs, partial shading |
| Example | Two 12V, 10A panels = 24V, 10A output | Two 12V, 10A panels = 12V, 20A output |
This table provides a quick reference, but always consult your specific component manuals and perform proper calculations for your unique system.
Disclaimer
The information provided in this guide is for general informational and educational purposes only and is not intended as professional electrical advice. Working with electricity, especially high-voltage DC and AC, can be dangerous and potentially lead to serious injury or property damage if not handled correctly. Always consult with a qualified, licensed electrician or solar professional before installing or modifying any electrical system. Follow all local and national electrical codes, and adhere strictly to the safety guidelines and installation instructions provided by the manufacturers of your specific solar components. The author and publisher are not liable for any loss, damage, or injury resulting from the use of this information.