How to Configure a Growatt Inverter
Setting up an off-grid solar system can feel like learning a whole new language, and when it comes to the heart of that system – your inverter – the initial configuration can be a real head-scratcher. Many folks, myself included, have stared at those blinking lights and cryptic menu options on a Growatt inverter, wondering if they're about to fry their expensive batteries or accidentally disconnect their entire power supply. This guide is here to walk you through the process, demystifying how to configure a Growatt inverter so you can get your off-grid power running smoothly and reliably, without the stress.
Understanding Your Growatt Inverter Before Configuration
Before we dive deep into the button-pressing and menu-scrolling, it's absolutely crucial to have a foundational understanding of your Growatt inverter. Think of it like learning the layout of your kitchen before you start cooking a gourmet meal; you need to know where the stove is, where the ingredients are, and which tools do what. Rushing this step often leads to frustration and potential system issues down the line.
Familiarizing Yourself with Growatt Models
Growatt offers a range of inverters, each designed with specific applications in mind, though many share similar core configuration principles. You might have a Growatt SPF series inverter, like the SPF 3000-5000 ES, which is a popular all-in-one choice for many off-grid homeowners and cabin dwellers because it integrates the inverter, solar charger, and AC charger into one tidy box. Then there are other models, some perhaps designed more for grid-tied systems with battery backup, but many also have robust off-grid capabilities.
The key takeaway here is to know your specific model. The menu structure, available parameters, and even the physical buttons can vary slightly. Always have your user manual handy – seriously, it’s not just for collecting dust! It will be your best friend, clarifying any specific technical terms or parameter ranges unique to your exact Growatt unit. Understanding your model will help you avoid looking for settings that simply don't exist on your particular inverter, saving you a lot of wasted time and aggravation. If you're looking into buying one, doing your homework on Best Off-Grid Solar Inverters can help you pick the right model for your needs.
Essential Components and Connections
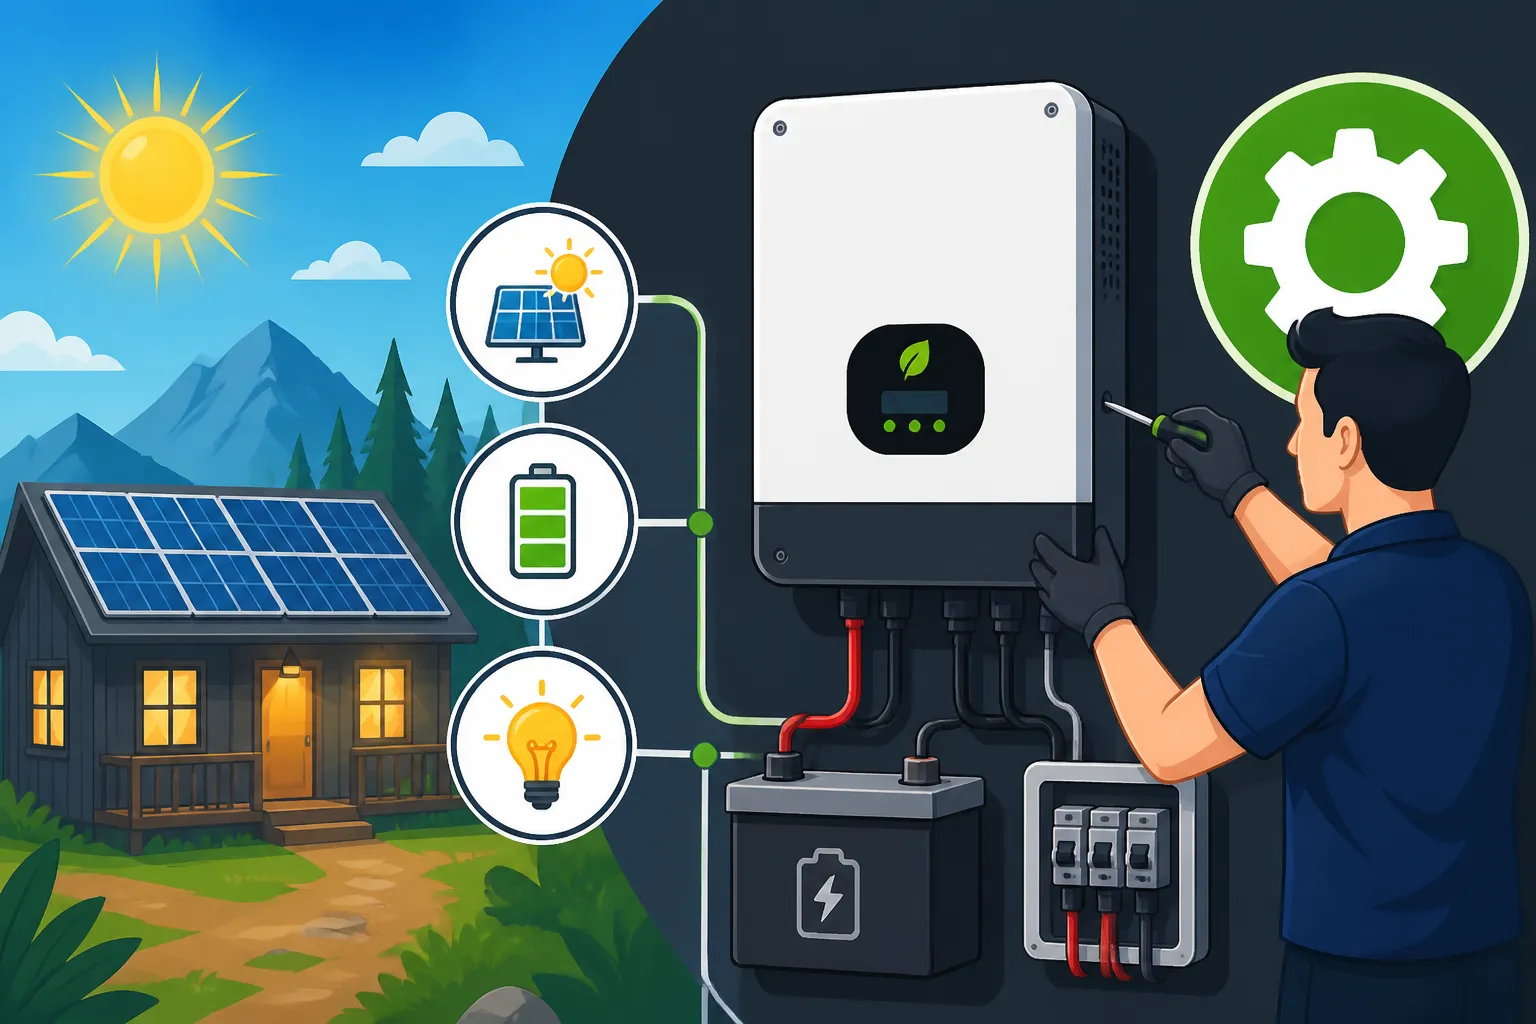
Your inverter isn't a standalone magical box; it's the central hub that connects your solar panels, batteries, and your household appliances. Before you even think about configuration, ensure all physical connections are correct and secure.
- Battery Connections: These are paramount. Your batteries are the fuel tank for your off-grid system. Incorrect polarity or loose connections can be dangerous and damage your inverter or batteries. Most Growatt off-grid inverters require a specific battery voltage (e.g., 24V or 48V), and your battery bank needs to match this. You can learn more about this in How to Wire a Battery Bank.
- Solar Input (PV): This is where your solar panels connect. Ensure your panel array's voltage and current are within the inverter's specifications, especially for its MPPT (Maximum Power Point Tracking) charge controller. Too high voltage can damage the unit, too low won't charge efficiently.
- AC Output (Load): This is where you connect your home's breaker panel or specific AC loads. This side of the inverter converts the DC power from your batteries into usable AC power for your appliances.
- AC Input (Utility/Generator): Many Growatt hybrid inverters also have an AC input. For off-grid setups, this is typically used for a backup generator, allowing the inverter to charge your batteries or even pass power directly to your loads from the generator when solar isn't sufficient.
- Communication Ports: These are often overlooked but are vital for advanced monitoring and configuration. Many Growatt inverters come with a USB or RS232 port, and sometimes even a dry contact for generator auto-start. These allow you to connect to a computer or external monitoring device for more detailed control and data logging.
Double-check every single wire. A quick visual inspection, and then a tug test on each connection point, can prevent headaches later.
Why Proper Configuration Matters
You might be thinking, "Can't I just plug it in and go?" While some basic functionality might work right out of the box, proper configuration is the difference between a system that barely limps along and one that provides reliable, efficient power for years. Here’s why it’s non-negotiable:
- Battery Health and Longevity: This is perhaps the most critical aspect. Incorrect charging voltages or low-voltage cut-off settings can severely shorten the lifespan of your expensive batteries. For instance, setting too high a float voltage can overcharge lithium batteries, reducing their capacity over time, while too low a cut-off can deeply discharge lead-acid batteries, which is detrimental. This is especially important for maximizing your Off-Grid Solar Battery Replacement Cost Over Time.
- System Efficiency: Optimal settings ensure your solar panels are generating as much power as possible and that power is being efficiently transferred to your batteries and loads. Suboptimal settings can lead to wasted solar energy or unnecessary cycling of your batteries.
- Reliability and Autonomy: Imagine a cloudy week, and your inverter isn't set to prioritize solar charging when it is available, or your low-voltage cut-off is too aggressive, leaving you in the dark prematurely. Correct settings allow your system to adapt to varying conditions and provide the autonomy you need.
- Safety: While less common, extreme misconfiguration can lead to safety hazards, especially concerning overcharging or improper load handling. Your inverter is designed with safety protocols, but they work best when settings align with your system's components.
In essence, configuring your Growatt inverter correctly ensures you get the most out of your investment, prolongs the life of your components, and provides the consistent, worry-free power that off-grid living promises.
Step-by-Step Growatt Inverter Configuration for Off-Grid Systems
Alright, let's get into the nitty-gritty! This section will walk you through the general steps for configuring your Growatt inverter using its onboard display and buttons, and touch upon using software for a more granular approach. Remember, the exact menu numbers and labels might differ slightly based on your model, so keep that manual close!
Initial Power-Up and Display Navigation
The first time you power up your Growatt inverter, you'll typically be greeted by its LCD screen. This is your primary interface for basic settings.
-
Connect Batteries First: Always, always, always connect your batteries to the inverter first. The inverter needs a stable DC power source to initialize correctly and provide power to its control circuitry. Ensure the correct polarity (+ to +, – to -).
-
Power On: Locate the main power switch on your inverter. Flip it to the "ON" position. You should hear a beep, and the LCD screen will light up, displaying information like battery voltage, current status, and perhaps a default setting or error message if something is amiss.
-
Navigate the Menu: Most Growatt inverters have four primary buttons:
- "Up" / "Down" Arrows: Used to scroll through menu options or increase/decrease values.
- "Enter" / "Confirm": Used to select a menu option or confirm a setting change.
- "ESC" / "Back": Used to go back to the previous menu or exit a setting without saving.
Get comfortable pressing these buttons to explore the different information screens (input voltage, output voltage, charging current, etc.) and then to access the program settings menu. Typically, you'll long-press the "Enter" button for a few seconds to enter the settings menu.
Key Settings for Battery Management
This is the most critical part of off-grid inverter configuration. Your battery bank is the heart of your system, and protecting it is paramount. The options below are usually found under program numbers like "05" (Battery Type), "26" (Bulk Charging Voltage), "27" (Float Charging Voltage), "29" (Low DC Cut-off Voltage), etc.
-
Battery Type (Program 05): This is foundational. You must select the correct battery type. Common options include:
- User-Defined (USE): This is usually the best option for lithium iron phosphate (LiFePO4) batteries or if you have specific recommendations from your battery manufacturer. It allows you to manually input all other charging parameters.
- AGM/SLA: For Sealed Lead Acid or Absorbent Glass Mat batteries.
- FLD: For Flooded Lead Acid batteries.
If you're using LiFePO4 batteries, selecting "User-Defined" is almost always the way to go. Otherwise, the inverter's default settings for AGM or flooded might not be ideal for your specific battery brand and could lead to reduced battery life. For example, a quality 48V LiFePO4 battery like those from Battle Born or EG4 requires precise charging parameters to ensure longevity.
-
Max Charging Current (Program 02): This setting limits how much current your inverter will push into your batteries from the solar array. It's crucial not to exceed your battery manufacturer's recommended maximum charge current. For instance, if you have a 100Ah LiFePO4 battery rated for a 1C charge, the max current would be 100 Amps. For a 48V system with 200Ah batteries, you'd calculate this carefully. Learn more in How to Calculate Battery Amp-Hours Needed.
-
Bulk/Absorption Charging Voltage (Program 26): This is the voltage at which the inverter will actively charge your batteries until they reach near-full capacity.
- For a 48V LiFePO4 system, a common setting might be around 54.0V – 54.4V.
- For 48V AGM, it might be 57.6V – 58.4V.
- Refer to your battery datasheet.
-
Float Charging Voltage (Program 27): Once your batteries are full, the inverter will drop to this lower "float" voltage to maintain them without overcharging.
- For 48V LiFePO4, a float is often set slightly lower, perhaps 53.0V – 53.6V, or some manufacturers even recommend no float and simply disconnecting.
- For 48V AGM, it might be 54.0V – 55.2V.
-
Low DC Cut-off Voltage (Program 29): This is a critical protection setting. When your battery voltage drops to this level, the inverter will shut off its AC output to prevent deep discharge, which can permanently damage your batteries.
- For 48V LiFePO4, typical settings are around 46V – 48V. Lithium batteries handle lower voltages better than lead-acid, but still have limits.
- For 48V AGM, it might be higher, around 49V – 50V.
Getting this wrong is a common mistake that can significantly reduce battery lifespan, especially with lead-acid batteries.
Optimizing Solar Charging Parameters
Beyond battery voltages, there are settings that dictate how your inverter uses solar power.
-
Output Source Priority (Program 01): This determines where your loads get their power from first. For off-grid, a common setting is "Solar First" (SBU – Solar-Battery-Utility/Generator). This means:
- Solar powers loads directly.
- If solar isn't enough, batteries supplement.
- If batteries get low (or solar is absent), the inverter switches to a generator (if connected to AC input).
- Other options like "Utility First" (UTI) or "SFO" (Solar-First-Utility-then-Battery) are usually for hybrid or grid-tied systems.
-
Input Voltage Range for AC (Program 12): This defines the acceptable voltage range for the AC input if you're using a generator. For sensitive electronics, you might choose a narrower range ("Appliance Mode"), while for less sensitive loads, a wider range ("UPS Mode") might be acceptable. This helps protect your equipment from unstable generator output.
-
Auto Restart (Programs 13 & 14): These settings determine if the inverter automatically restarts after an overload or an over-temperature fault. For reliability in off-grid systems, you generally want these enabled so the system can recover without manual intervention, but always consider the root cause of repeated faults.
AC Output and Load Management
These settings control the quality and availability of the power you draw for your appliances.
- Output Voltage Setting (Program 20): This sets the nominal AC output voltage of your inverter, typically 120V (for North America) or 230V (for other regions). Ensure this matches your locale and appliances.
- Output Frequency (Program 21): Sets the AC output frequency, typically 60Hz or 50Hz. Again, match this to your region and appliances.
- Power Saving Mode (Program 22): Some Growatt inverters offer a power-saving or "eco" mode. When enabled, the inverter might shut down or go into a low-power state if no significant load is detected, periodically "waking up" to check for loads. This can save quiescent power (the power the inverter consumes just by being on), but if set too aggressively, it can cause issues with very low-power devices like certain LED lights or smart home hubs that draw minimal current. You might find a similar setting in Best Off-Grid Solar Kits for Beginners.
Connecting to a PC for Advanced Settings
While the onboard display is great for quick adjustments, for a truly comprehensive setup and long-term monitoring, connecting your Growatt inverter to a PC is highly recommended.
- Software Installation: Growatt provides software like "WatchPower" or "ShineTools" for their inverters. You'll download and install this on your Windows PC.
- USB/RS232 Connection: You'll typically connect your inverter to your computer using a USB cable (often a USB Type-B, similar to older printer cables) or an RS232 serial cable. If your computer doesn't have an RS232 port, you'll need a USB-to-RS232 adapter, which you can easily find on
Amazon. - Monitoring and Configuration: Once connected and the software recognizes your inverter, you'll have access to:
- Real-time Data: Monitor battery voltage, solar input, AC output, charging currents, and more, often with graphs and historical data.
- Advanced Settings: Many parameters that are difficult or impossible to set via the LCD can be adjusted here. This includes more granular control over battery charging curves, inverter behavior under fault conditions, and scheduling generator runs.
- Firmware Updates: Occasionally, Growatt releases firmware updates that can improve performance or add new features. These are usually applied via the PC software.
Using the software gives you a much clearer picture of what's happening with your system and allows for fine-tuning that can greatly enhance its performance and your peace of mind. For those serious about data and optimization, this step is invaluable.
Common Configuration Challenges and Troubleshooting Tips
Even with the best instructions, you might run into bumps along the road. It's totally normal. Most off-grid solar enthusiasts have faced moments of head-scratching and mild panic. Here are some common issues you might encounter with your Growatt inverter and how to address them.
Battery Undervoltage/Overvoltage Errors
These are probably the most common errors you'll see, often indicated by specific error codes on the Growatt display.
- Undervoltage Errors (e.g., Error 03): This means your battery voltage has dropped below the low DC cut-off voltage (Program 29). The inverter has shut down to protect your batteries from deep discharge.
- Solution: Reduce your loads immediately. Check your battery charge level with a reliable battery monitor. If sunny, allow solar to recharge. If not, start your backup generator to bring the batteries back up. Re-evaluate your energy consumption and How Many Batteries for an Off-Grid System to ensure you have enough capacity for your needs and enough How Much Solar to Charge Your Batteries Daily.
- Overvoltage Errors (e.g., Error 04): Your battery voltage has exceeded the maximum safe charging voltage, usually the absorption voltage (Program 26) or a very high float.
- Solution: This is less common with well-configured MPPT charge controllers but can happen if settings are wrong or if a battery management system (BMS) in a lithium battery bank trips. Double-check your Program 26 and 27 settings against your battery manufacturer's specifications. If using lead-acid batteries, ensure temperature compensation is correctly configured if available.
Inverter Overload or Short Circuit Protection
Your inverter is a powerful piece of equipment, but it has limits.
- Overload Warnings/Errors (e.g., Error 01): This occurs when the total wattage of your running appliances exceeds the inverter's continuous output capacity or its surge capacity for too long.
- Solution: Immediately unplug or turn off high-power appliances. Identify which devices pushed it over the edge. You might need to adjust your usage habits or consider upgrading to a larger inverter if consistent overloads are a problem. Remember that appliances like microwaves, well pumps, and power tools have a high "starting wattage" (surge) that's much higher than their running wattage. Your inverter must be sized to handle these surges. A What Size Inverter to Run A Refrigerator guide can help you understand these demands.
- Short Circuit Errors: This is a safety shutdown when a direct short circuit is detected on the AC output.
- Solution: Turn off all loads, then carefully inspect your AC wiring for any faults, frayed wires, or incorrectly wired outlets. This is a serious issue that needs immediate attention.
No Solar Charging or Low Output
You've got panels in the sun, but your batteries aren't charging, or the power input is surprisingly low.
- Check Physical Connections: Re-verify that all solar panel strings are correctly connected to the inverter's PV input terminals, and that polarity is correct. Loose connections are a primary culprit.
- Verify PV Voltage: Use the inverter's display or monitoring software to check the incoming PV voltage. Is it within the inverter's MPPT operating range? If it's too low (e.g., due to heavy shading on a series string or too few panels in series), the MPPT won't engage. If it's too high, the inverter may shut down or enter an error state.
- Charge Controller Settings: Double-check your Program 02 (Max Charging Current) to ensure it's not limiting the input excessively. Also, ensure your battery type (Program 05) and charging voltages (Programs 26, 27) are correctly set, as the inverter won't charge if it thinks the batteries are full or if parameters are out of range. If you're using a separate charge controller, you'll need to make sure you know How to Program a Charge Controller.
- Shading: Even partial shading on one panel in a series string can drastically reduce the output of the entire string. If possible, try to eliminate shading or re-evaluate your Best Tilt Angle for Off-Grid Panels.
Using Monitoring Software Effectively
While Growatt inverters have their own dedicated software, many off-grid users also integrate their systems with broader monitoring solutions. Brands like Renogy offer comprehensive monitoring apps for their charge controllers and battery monitors, which can provide an alternative view of your system's performance.
- Regular Data Review: Make it a habit to check your inverter's monitoring data (either via the LCD or PC software) regularly. Look for trends in solar production, battery charge cycles, and load consumption. This helps you understand your system's health and allows you to proactively identify potential issues before they become major problems.
- Export and Analyze Logs: The PC software often allows you to export historical data logs. Analyzing these can help you pinpoint when issues occurred, how your system reacted, and whether specific appliance usage patterns are causing problems. This data is invaluable for Off-Grid Solar Maintenance Costs and knowing when to make adjustments or schedule maintenance.
Configuring a Growatt inverter, or any off-grid inverter for that matter, is a journey of learning and adjustment. Don't be discouraged by initial challenges. Each error message or unexpected shutdown is an opportunity to learn more about your system and become a more capable off-grid power user.
| Setting Number (Example) | Description | Common LiFePO4 (48V) Value | Common AGM (48V) Value |
|---|---|---|---|
| 01 | Output Source Priority | SBU (Solar-Battery-Utility) | SBU |
| 02 | Max Charging Current | Based on Battery C-rating | Based on Battery C-rating |
| 05 | Battery Type | USE (User-Defined) | AGM |
| 20 | Output Voltage | 120V / 230V | 120V / 230V |
| 21 | Output Frequency | 60Hz / 50Hz | 60Hz / 50Hz |
| 26 | Bulk/Absorption Voltage | 54.0V – 54.4V | 57.6V – 58.4V |
| 27 | Float Charging Voltage | 53.0V – 53.6V (or disabled) | 54.0V – 55.2V |
| 29 | Low DC Cut-off Voltage | 46.0V – 48.0V | 49.0V – 50.0V |
| 30 | Back to Grid Voltage | N/A (Off-grid) | N/A |
| 31 | Back to Battery Voltage | N/A (Off-grid) | N/A |
Note: These values are general guidelines. ALWAYS consult your specific battery manufacturer's data sheet for precise charging and discharge parameters.
Disclaimer
The information provided in this guide is for general informational purposes only and does not constitute professional electrical advice. Working with electricity and solar power systems can be dangerous. Always consult with a qualified electrician or solar professional before installing or modifying any electrical system. Follow all local codes, regulations, and manufacturer instructions. The author and publisher are not responsible for any damage, injury, or loss resulting from the use or misuse of this information.