How to Install Off-Grid Solar on a Cabin
Dreaming of escaping the grid and powering your rustic cabin with the clean, quiet energy of the sun is a beautiful vision, but the reality of actually setting it up can feel incredibly daunting. You're probably picturing tangled wires, complex calculations, and a hefty price tag, wondering if it's truly a DIY project or if you'll need an army of electricians. This comprehensive guide is here to walk you through the entire process of installing an off-grid solar system on your cabin, breaking down each step to make your off-grid dreams a tangible, achievable reality.
Assessing Your Cabin's Energy Needs
Before you even think about buying a single solar panel or battery, the absolute first step is to understand what you're trying to power. This isn't just about throwing some panels on the roof; it's a careful calculation that ensures you have enough juice to keep your lights on, your coffee hot, and your essentials running, even when the sun isn't shining its brightest. Skipping this step is like building a house without a blueprint – you're just asking for trouble (and a system that either falls short or costs way more than it needs to).
Calculating Daily Watt-Hours
The heart of designing any off-grid system lies in a thorough load analysis. This simply means figuring out every single appliance and device you plan to use in your cabin, how much power each one consumes (its wattage), and for how long you'll use it each day. Don't forget anything, from the big hitters like a refrigerator or well pump, down to your phone charger and the small LED reading lamp by your bed. It’s often surprising how quickly these seemingly small loads add up!
To do this, grab a pen and paper or a spreadsheet. List every item, find its wattage (usually on a label or in the manual, or you can use a kill-a-watt meter for actual readings), and then estimate its daily run time in hours. Multiply the wattage by the hours to get daily watt-hours for that item. For example, a 100-watt light bulb used for 4 hours a day consumes 400 watt-hours. A small energy-efficient refrigerator might run for 8-10 hours a day, even if it's plugged in 24/7, cycling on and off. Be realistic with your estimates; it's better to slightly overestimate than underestimate and run out of power. This detailed breakdown is crucial, and you can dive deeper into How to Calculate Daily Energy Usage if you need more guidance.
Once you have the daily watt-hours for each appliance, sum them all up. This total is your daily energy consumption in watt-hours. This number is the foundation of your entire solar system. If you plan to use your cabin only on weekends, calculate for a typical weekend day. If it's your full-time residence, consider an average day, accounting for seasonal variations in usage (e.g., more heating in winter, more fan use in summer).
Determining Days of Autonomy
Beyond your daily consumption, you need to consider how many days you want your system to run purely on stored battery power without any new solar input. This is what we call "days of autonomy," and for a cabin, it's often more critical than for a grid-tied home. Imagine a week of heavy snow, relentless rain, or dense fog where your solar panels might produce very little energy. You don't want to be left in the dark, literally.
For most off-grid cabins, aiming for 3 to 5 days of autonomy is a sensible goal. This provides a good buffer against extended periods of bad weather or unexpected high usage. If your cabin is in a particularly cloudy or snowy region, or if losing power for a few days would be a major inconvenience or safety concern, you might even consider 5-7 days. However, remember that each additional day of autonomy significantly increases the size and cost of your battery bank, so it's a balance between preparedness and budget. Learn more about How to Account for Cloudy Days when planning your system.
Your chosen days of autonomy will directly influence the size of your battery bank. If your cabin consumes 2000 watt-hours per day and you want 3 days of autonomy, your battery bank needs to supply at least 6000 watt-hours (and usually more, to account for inverter inefficiencies and battery depth-of-discharge limits). This buffer is your safety net, ensuring comfort and continuity when nature doesn't cooperate with your solar generation.
Gathering Your Off-Grid Solar System Components
Once you have a solid understanding of your cabin's energy needs, it's time for the exciting part: selecting the actual components that will make up your off-grid solar system. This is where you bring your energy calculations to life by choosing the right panels, batteries, inverter, and charge controller. Each component plays a vital role, and making informed choices here will ensure your system is robust, efficient, and tailored to your cabin's unique demands.
Selecting Solar Panels
Your solar panels are the workhorses of your system, converting sunlight into electricity. For a cabin, you'll generally be looking at rigid monocrystalline or polycrystalline panels. Monocrystalline panels are typically more efficient, meaning they can produce more power from a smaller footprint, which can be advantageous if roof space is limited. Polycrystalline panels are usually a bit more affordable and still very reliable.
When choosing panels, consider their wattage, physical size, and durability. Will they withstand heavy snow loads or high winds common in your cabin's location? Most reputable brands, like Renogy, offer robust panels designed for outdoor use. Think about how many panels you’ll need to generate enough power to meet your daily watt-hour needs, plus a little extra to recharge your battery bank adequately, especially during shorter winter days. The orientation and tilt angle of your panels are also critical for maximizing sunlight capture throughout the year. For an in-depth look, check out our guide on Best Off-Grid Solar Panels.
Remember to factor in your "peak sun hours" – the average number of hours per day your location receives intense enough sunlight for your panels to produce their rated power. A cabin in sunny Arizona will have different panel requirements than one nestled in the misty forests of the Pacific Northwest. Using an online solar calculator that considers your cabin's latitude and longitude can help immensely in estimating realistic power production.
Choosing the Right Battery Bank
The battery bank is the heart of your off-grid system, storing the solar energy for use when the sun isn't shining. This is often the most expensive component, so a careful choice is vital for both performance and long-term cost. The two main types you'll encounter are lead-acid (often AGM or Gel) and lithium iron phosphate (LiFePO4) batteries.
Lead-acid batteries are the traditional choice and are generally more budget-friendly upfront. However, they are heavier, have a shorter lifespan (typically 3-7 years), require more maintenance (especially flooded lead-acid), and should not be discharged below 50% to maximize their life. LiFePO4 batteries, while more expensive initially, offer significant advantages: they are lighter, last much longer (10-15+ years), can be safely discharged deeper (up to 80-100%), and are virtually maintenance-free. This deeper discharge capability means you need less overall capacity in LiFePO4 to get the same usable power as a larger lead-acid bank. For cold cabin environments, LiFePO4 batteries often need internal heating mechanisms or must be kept in a temperature-controlled space, as charging them below freezing temperatures can damage them. Our article on Best Off-Grid Solar Batteries provides more details on making this crucial decision.
Your battery bank needs to be sized to provide your calculated daily watt-hours for your desired days of autonomy. If your cabin needs 2 kWh per day and you want 3 days of autonomy, you'll need a battery bank that can deliver 6 kWh of usable energy. For lead-acid, this means buying roughly 12 kWh of capacity (since you can only use half). For LiFePO4, you'd buy closer to 6-7 kWh. This significant difference in usable capacity often makes LiFePO4 more cost-effective over the long run, despite the higher initial investment.
Inverter and Charge Controller Selection
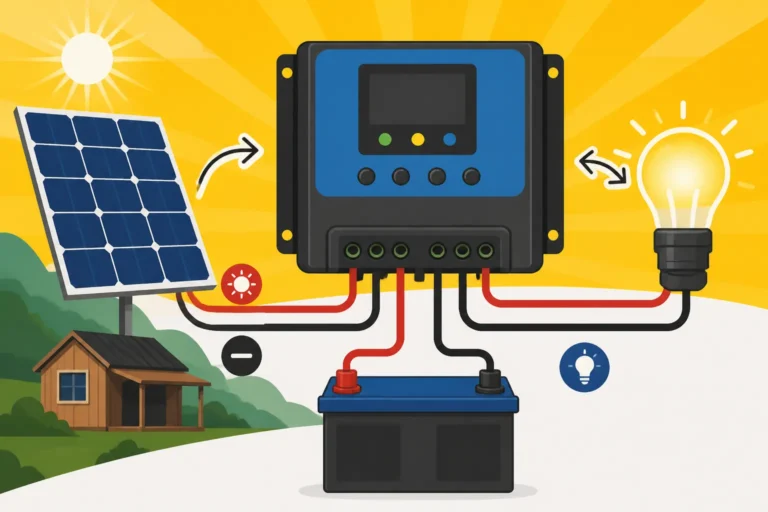
These two components are the brains and brawn that manage the flow of electricity in your system. The charge controller sits between your solar panels and your battery bank. Its job is to regulate the voltage and current coming from the panels, ensuring your batteries are charged safely and efficiently without overcharging. There are two main types: PWM (Pulse Width Modulation) and MPPT (Maximum Power Point Tracking). MPPT controllers are more expensive but significantly more efficient, especially in varying light conditions and when your panel voltage is much higher than your battery voltage (e.g., 48V panels charging a 24V battery bank). For any reasonably sized cabin system, an MPPT controller is almost always the better choice for maximizing your solar harvest. For detailed advice, see How to Choose an Off-Grid Charge Controller.
The inverter takes the DC (direct current) power stored in your batteries and converts it into AC (alternating current) power, which is what most standard cabin appliances use. When choosing an inverter, you need to consider two main ratings: continuous wattage and surge wattage. Continuous wattage is the maximum power it can supply constantly. Surge wattage is the higher, short burst of power it can provide for appliances with motors (like refrigerators, well pumps, or power tools) when they first start up. Always ensure your inverter's continuous rating is higher than your cabin's maximum expected simultaneous load, and its surge rating can handle the highest surge load you might experience. You can find out more about How to Choose an Off-Grid Inverter in our detailed guide.
For a cabin, a pure sine wave inverter is essential. Modified sine wave inverters are cheaper but can damage sensitive electronics and cause motors to run inefficiently or noisily. Don't skimp here; a good quality pure sine wave inverter from a reputable brand will ensure all your appliances run smoothly and last longer. You might also consider an inverter-charger, which combines the functions of an inverter and a battery charger, allowing you to charge your batteries from a generator if needed – a common and wise backup for off-grid cabins.
Step-by-Step Cabin Solar Installation Process
Alright, you've done the homework, you've selected your gear – now it's time to get your hands dirty and bring that off-grid vision to life! Installing solar on a cabin can be a truly rewarding DIY project, but it requires careful planning, attention to detail, and a strong emphasis on safety. Remember, while this guide provides comprehensive steps, if you're ever unsure or uncomfortable with electrical work, it's always best to consult or hire a qualified electrician.
Mounting Solar Panels
The first physical step is getting your solar panels securely mounted where they can soak up the sun. For cabins, you typically have two main options: roof mounts or ground mounts.
Roof Mounting: This is popular because it keeps panels out of the way and can offer good sun exposure. First, you'll need to assess your cabin's roof. Is it strong enough to support the weight of the panels and the racking, especially with potential snow loads? What's the best orientation (south-facing in the Northern Hemisphere, north-facing in the Southern) and tilt angle for year-round sun exposure? Often, a fixed tilt optimized for winter sun (when the sun is lower) is best for off-grid systems, as winter production is typically the most challenging. You'll need to secure racking systems directly into the roof rafters, not just the sheathing. This involves drilling pilot holes, sealing them meticulously with a high-quality sealant (like Dicor Self-Leveling Lap Sealant if it's an RV-style roof, or proper flashing kits for shingled roofs) to prevent leaks, and then attaching the mounting feet. The panels then attach to this racking. Pay close attention to cable management, ensuring wires are neatly tucked away, secured, and protected from UV exposure and critters. Dive into How to Mount Off-Grid Solar Panels for detailed techniques.
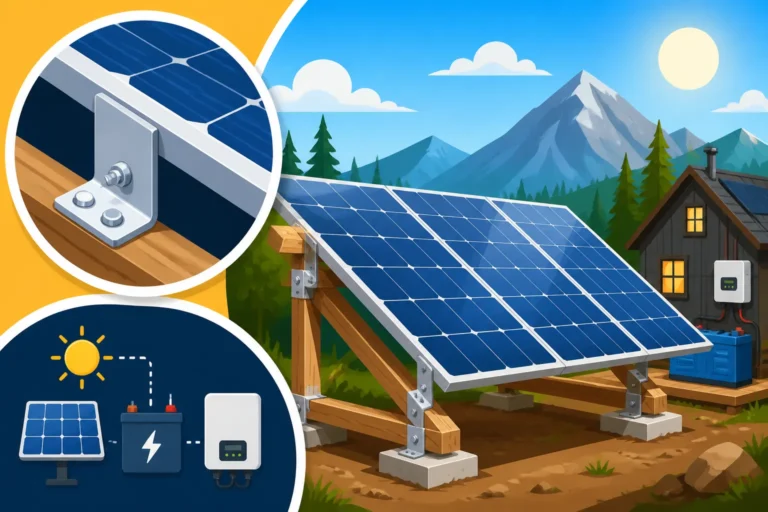
Ground Mounting: If your cabin roof isn't ideal due to shade from trees, poor orientation, or structural concerns, a ground mount is a fantastic alternative. This allows you to place your panels in an optimal, unshaded location, often with adjustable tilt options to maximize seasonal performance. Ground mounts require digging footings and setting posts (often galvanized steel or treated wood) into concrete. The racking system then attaches to these posts. While it might involve more initial earthwork, ground mounts can offer easier access for cleaning and maintenance, and better optimization for sun capture. Whichever method you choose, ensure the mounting is incredibly sturdy to withstand local weather conditions and comply with any local building codes, if applicable.
Wiring the System Together
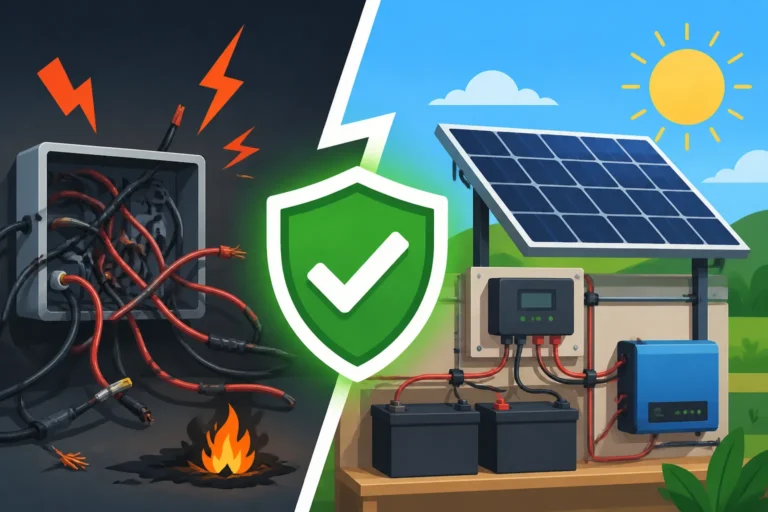
Now for the electrical connections – this is where everything comes to life! It's critical to use the correct wire gauges for all connections, as undersized wires can lead to voltage drop, efficiency losses, and even fire hazards. You can often find suitable wiring kits or bulk cable on platforms like Amazon or specialized solar suppliers.
-
Panels to Charge Controller: Your solar panels will connect to a combiner box (if you have multiple strings of panels) or directly to your charge controller. Use MC4 connectors for weather-tight, secure connections for your PV wires. Ensure your panels are wired in series or parallel (or a combination) to match the voltage input requirements of your MPPT charge controller. Always install a DC disconnect switch between your solar array and the charge controller, preferably close to the panels, so you can safely shut off power from the panels during installation, maintenance, or emergencies.
-
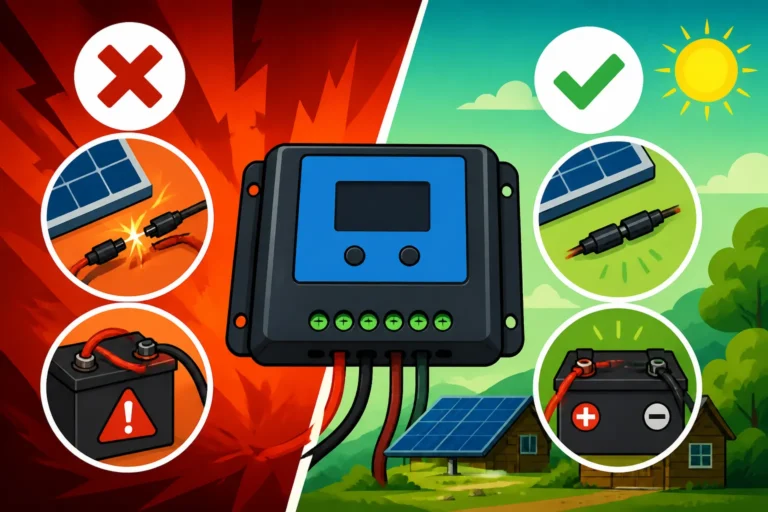
Charge Controller to Battery Bank: The output of your charge controller connects directly to your battery bank. Again, ensure you use appropriately sized cables (often thicker than your PV wires) and install a DC breaker or fuse on the positive line, as close to the battery bank as possible, to protect against overcurrent. Pay very close attention to polarity – positive to positive, negative to negative. Reversing polarity can cause serious damage to your equipment.
-
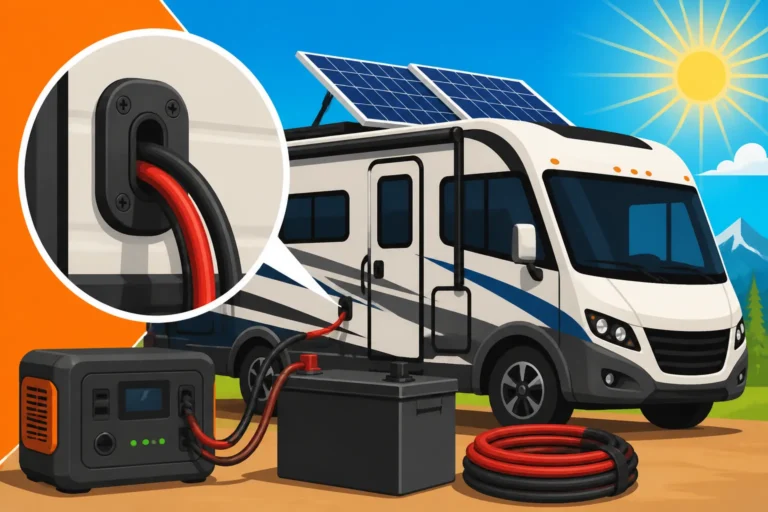
Battery Bank to Inverter: Your inverter connects directly to your battery bank. Once more, use very thick, high-gauge battery cables, and install a large DC fuse or breaker on the positive line, again as close to the battery as possible. This fuse is incredibly important; it's your primary protection against a short circuit in the inverter or its wiring. The size of this fuse will depend on your inverter's maximum DC input current. For a complete visual guide, refer to an Off-Grid Solar Wiring Diagram Explained, and follow the step-by-step instructions in How to Wire an Off-Grid Solar System.
When making all these connections, ensure they are tight and secure. Loose connections can generate heat, leading to power loss or fire. Double-check every connection with a multimeter before introducing power.
Connecting to Cabin Loads and Safety Checks
With your main solar components wired, the next step is to integrate the inverter's AC output into your cabin's electrical system.
-
Inverter to Cabin AC Loads: The AC output of your pure sine wave inverter will connect to a dedicated subpanel in your cabin. This subpanel will then distribute power to your cabin's outlets and lights, just like a grid-tied system. You'll install AC breakers in this subpanel, sized appropriately for each circuit (e.g., 15A for general outlets, 20A for kitchen appliances). Alternatively, for very small, simple cabins, you might run extension cords directly from the inverter to a power strip, but a dedicated subpanel is much safer and more robust for a permanent setup.
-
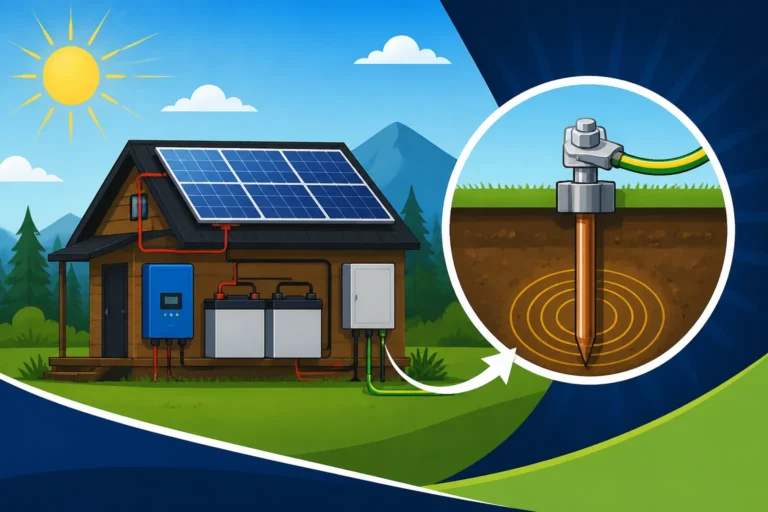
Grounding and Bonding: This is a crucial safety step that cannot be overlooked. Your entire off-grid solar system – panels, racking, charge controller, inverter, and battery bank – must be properly grounded to prevent electrical shock and equipment damage in case of a fault or lightning strike. This typically involves running a heavy gauge copper wire from a common grounding bus bar (or directly from major components) to a grounding rod driven deep into the earth. All metal components that could become energized must be bonded together. This aspect is complex and absolutely critical for safety, so review Off-Grid Solar Safety and Grounding thoroughly or consult with an electrician for proper implementation.
-
Final Checks and Commissioning: Before flipping any switches, perform a thorough visual inspection of all wiring. Ensure all connections are tight, cables are supported, and fuses/breakers are correctly installed and sized. Use your multimeter to verify voltages at various points. Once confident, follow your inverter and charge controller manufacturer's specific commissioning procedures. This usually involves powering on the batteries first, then the charge controller, and finally the inverter. Monitor your battery voltage and solar production as the system comes online. Listen for unusual noises and feel for excessive heat. Congratulations, you're officially producing your own power!
Post-Installation Care and Optimization
Getting your off-grid cabin solar system up and running is a huge accomplishment, but the journey doesn't end there. To ensure your system provides reliable power for years to come, ongoing monitoring, maintenance, and a little troubleshooting know-how are essential. Think of it like owning a car: regular oil changes and attention to warning lights prevent major breakdowns down the road.
Monitoring and Maintenance
Once your system is operational, you'll want to keep a close eye on its performance. Many modern charge controllers and inverters, especially those from brands like Victron or Renogy, come with integrated displays or even Bluetooth connectivity, allowing you to monitor real-time data on your phone or computer. Key metrics to watch include battery state of charge (SOC), incoming solar wattage, and AC load output. Consistently low battery SOC, despite adequate sunlight, might indicate an imbalance in your energy consumption versus production.
Regular maintenance is straightforward but vital. Keep your solar panels clean. Dust, pollen, leaves, and bird droppings can significantly reduce their efficiency. A gentle wash with water and a soft brush a few times a year, or after significant accumulation, is usually sufficient. Inspect all wiring connections periodically for corrosion or looseness. Check your battery terminals and ensure they are clean and tight. If you have lead-acid batteries, you'll need to check water levels (if they are flooded) and perform equalization charges as recommended by the manufacturer. LiFePO4 batteries require less hands-on maintenance but still benefit from occasional checks of connections and ensuring their environment is within specified temperature ranges, especially if they lack internal heating in cold climates. Our detailed guide on Off-Grid Solar Maintenance Guide can walk you through the specifics for various components.
Consider the surrounding environment of your cabin. Are there trees that are growing and beginning to shade your panels? Is there debris accumulating around your ground mount? Proactive adjustments and cleaning will pay dividends in consistent power generation and system longevity.
Troubleshooting Common Issues
Even with the best planning and maintenance, off-grid systems can sometimes throw a curveball. Knowing how to identify and address common issues can save you a lot of headache and potentially expensive service calls.
One of the most frequent problems is low or no power from the solar panels. First, check for physical obstructions like heavy snow, leaves, or dirt on the panels. Next, verify that all DC disconnects are on. Use a multimeter to check the voltage coming directly from the panels to ensure they are producing power. If the panels are fine, check the input voltage at the charge controller. A discrepancy might point to a wiring issue or a faulty fuse.
Batteries not charging adequately is another common concern. This could be due to insufficient solar input (cloudy weather, short winter days, oversized loads), a malfunctioning charge controller, or unhealthy batteries. Check the charge controller's display for any error codes. Verify the battery voltage with a multimeter. If individual batteries in a bank are significantly lower than others, you might have an unbalanced or failing battery.
If your inverter isn't providing AC power, check its display for error codes. It might have shut down due to a low battery voltage (common if your battery bank is too small or overworked), an overload (too many AC appliances running at once), or an internal fault. Try resetting the inverter (often by disconnecting it from the batteries for a few minutes). Ensure the AC output breaker from the inverter to your subpanel is in the "on" position. If you're frequently running into issues, our guide on How to Troubleshoot Off-Grid Solar provides a more exhaustive list of diagnostics and solutions.
Always approach troubleshooting methodically, checking the simplest potential issues first. Remember that electrical systems can be dangerous, so always ensure power is disconnected before inspecting or working on components.
Typical Cabin Appliance Power Consumption
To help you get started with your load analysis, here's a table with typical power consumption and estimated daily run times for common cabin appliances. These are averages and actual numbers for your specific appliances may vary, so always check the labels!
| Appliance | Typical Wattage (W) | Est. Daily Run Time (Hours) | Est. Daily Watt-Hours (Wh) |
|---|---|---|---|
| LED Light Bulb (10W) | 10 | 4 | 40 |
| Small Refrigerator (Energy-Star) | 50-100 | 8-10 (cycling) | 400-1000 |
| Water Pump (small pressure pump) | 300-600 | 0.5-1 | 150-600 |
| Laptop Charging | 40-70 | 2 | 80-140 |
| Cell Phone Charging | 5-10 | 1 | 5-10 |
| Microwave (brief use) | 800-1500 | 0.1-0.2 (minutes) | 80-300 |
| Flat Screen TV (32") | 50-80 | 3 | 150-240 |
| Small Fan (oscillating) | 20-50 | 4 | 80-200 |
| Coffee Maker (per brew) | 800-1000 | 0.1 (once daily) | 80-100 |
| Starlink Satellite Internet | 50-75 | 24 | 1200-1800 |
Note: For items like refrigerators, the run time is how long the compressor actively runs, not how long it's plugged in. For heating elements like coffee makers or microwaves, the wattage is high but the run time is very short.
Disclaimer
The information provided in this guide is for general informational purposes only and does not constitute professional advice. Off-grid solar system installation involves working with electricity, which can be dangerous if not handled properly. Always prioritize safety, follow all manufacturer instructions, and adhere to local electrical codes and permitting requirements. If you are unsure about any aspect of the installation process, consult with a qualified electrician or solar professional. The author and publisher are not liable for any personal injury, property damage, or other loss that may result from the use of this information.