Off-Grid Pwm Controller Installation Mistakes to Avoid
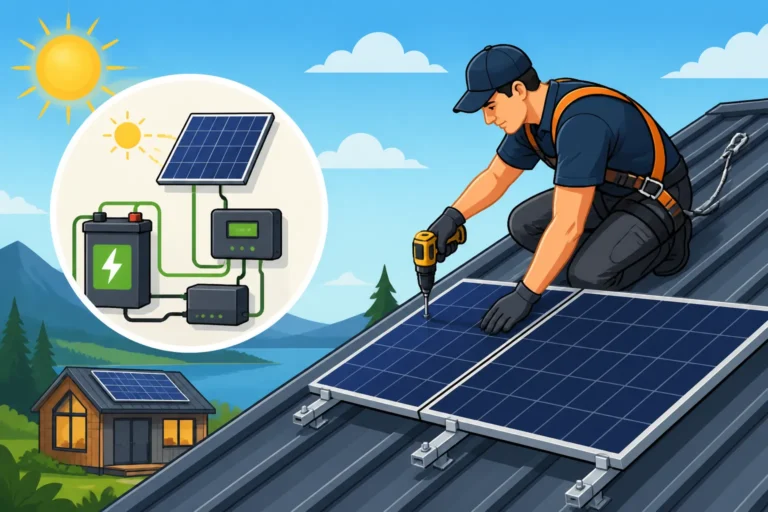
So you're dipping your toes into the world of off-grid solar, perhaps starting with a smaller system for your RV, shed, or a remote cabin. That's fantastic! It's an exciting journey toward energy independence. However, it's easy to get overwhelmed by all the components, and sometimes, the simplest-looking ones, like the PWM (Pulse Width Modulation) charge controller, can lead to frustrating mistakes if not handled correctly. Many people assume they're foolproof because they're less complex than MPPTs, but overlooking key installation steps can lead to poor performance, damaged batteries, or even safety hazards. This guide is here to walk you through the most common PWM controller installation blunders and show you exactly how to avoid them, ensuring your off-grid adventure starts off on the right foot.
The Allure and Pitfalls of PWM Charge Controllers
When you're first building an off-grid solar setup, the thought of grappling with complex electronics can be daunting. That's often why PWM charge controllers catch the eye – they promise simplicity and a lower entry cost, especially for smaller projects. But let's be realistic: "simple" doesn't mean "skip the instructions."
Why PWMs Are Appealing and Often Misunderstood
PWM charge controllers are a favorite among beginners and those with modest power needs because they are, in essence, straightforward devices. They work by connecting your solar array to your battery bank for short, controlled pulses, maintaining the battery voltage within an optimal charging range. This pulsing action effectively "tapers off" the charge as the battery fills up, preventing overcharging. Their appeal lies in their affordability and their effectiveness for 12V or 24V systems where the solar panel voltage closely matches the battery bank voltage. Many small solar kits, like those you might find on Amazon or from brands like Renogy, often include a basic PWM controller, making them accessible to a wide audience.
However, this simplicity often leads to misunderstandings. People sometimes treat them as a "plug-and-play" device without fully grasping their limitations or the precise installation sequence. They might assume that because it’s not an advanced MPPT controller, there’s less to worry about, which can be a costly assumption. For instance, while a PWM works fine for smaller arrays, trying to run a large, multi-panel setup with one can drastically reduce your system's efficiency, leaving you scratching your head wondering why your batteries aren't getting a full charge. Understanding How to Choose an Off-Grid Pwm Controller is paramount.
The Critical Role of a Charge Controller
Before we dive into the mistakes, let’s quickly reiterate why a charge controller, PWM or otherwise, is so vital. Think of it as the brain of your solar charging system. Its primary job is to regulate the voltage and current coming from your solar panels to your battery bank. Without it, your solar panels would constantly pump electricity into your batteries at whatever voltage they produce, leading to severe overcharging, overheating, and ultimately, permanent damage to your expensive battery bank.
Beyond preventing overcharging, a good charge controller also protects your batteries from over-discharge, usually by disconnecting loads when the battery voltage drops too low. This feature is crucial for extending battery lifespan, especially with lead-acid batteries, which are highly sensitive to deep discharges. It's truly the guardian of your power storage, ensuring longevity and safe operation for your entire off-grid setup. You can read more about What Drives Off-Grid Solar Costs and how a charge controller plays a part in the overall investment.
Common Wiring Blunders and How to Avoid Them
Wiring is where most DIYers run into trouble. It's not just about connecting the right wire to the right terminal; the order of those connections can be critical, and ignoring proper wire sizing and fusing is an express ticket to headaches or, worse, hazards.
Incorrect Connection Order
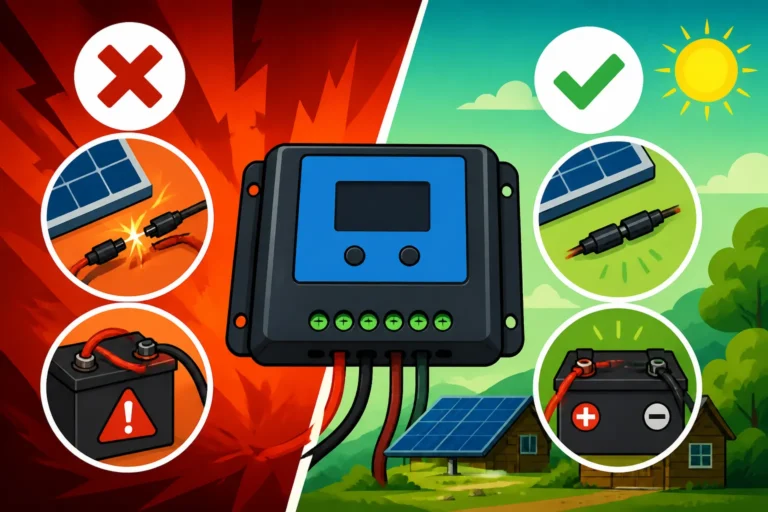
This is probably the most common and easily avoidable mistake, yet it causes so much frustration. Many PWM controllers, particularly the more basic models, have a very specific connection sequence:
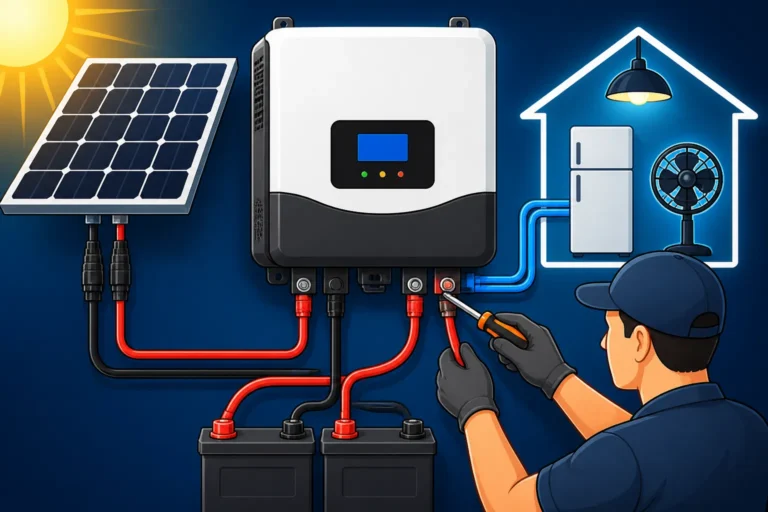
- Connect the battery first.
- Connect the solar panels second.
- Connect the DC loads (if applicable) last.
Why is this order so important? When you connect the battery first, the charge controller can auto-detect the system voltage (12V or 24V) and initialize properly. It gets a stable power source to start its internal diagnostics and configure itself for the correct battery type and voltage. If you connect the solar panels first, the controller might not have a stable reference voltage, leading to misconfiguration, error codes, or even damage to the controller itself, especially if the panels are producing a high voltage. Imagine turning on a computer without its operating system fully loaded – it just won't work right.
For example, if you have a 12V battery bank and connect your solar panels first, the controller might receive a higher voltage spike from the panels (say, 18-20V in bright sun) and misinterpret it, leading to faulty readings or preventing it from initiating charging correctly once the battery is connected. Always, always, always connect your batteries to the controller before your solar panels. Then, once both are connected and the system is initialized, you can hook up your DC loads. If you ever need to disconnect, reverse the order: loads first, then solar, then battery.
Using Undersized Wires and Fuses
Alright, let's talk wires. It's tempting to use whatever wire you have lying around, or to skimp on cost by choosing thinner gauges. Don't do it! Using undersized wires for your solar panels, battery bank, or loads is a recipe for disaster. Thin wires have higher electrical resistance, which means:
- Voltage Drop: More power is lost as heat in the wire itself, meaning less power actually reaches your batteries or appliances. Your 12V system might only be getting 11V at the battery, leading to inefficient charging and underperforming devices.
- Overheating and Fire Risk: When too much current flows through a wire that's too small for it, the wire will heat up significantly. This isn't just inefficient; it's a serious fire hazard. Imagine a wire getting so hot it melts its insulation or ignites nearby flammable materials in your cabin or RV.
- Reduced Performance: Your system will simply not perform to its potential. Batteries will take longer to charge, and appliances might not receive adequate power.
Proper wire sizing is determined by the current (amps) flowing through it and the distance it needs to travel. Generally, thicker wires (lower gauge numbers like 10 AWG or 8 AWG) are needed for higher currents or longer runs. You can find many online wire gauge calculators to help with this. Similarly, fuses and breakers are your system's last line of defense against overcurrent. An improperly sized or absent fuse won't protect your system or prevent a fire in case of a short circuit or surge. Always size your fuses slightly above your maximum expected operating current but below the wire's ampacity rating. Place them as close as possible to the power source, especially on the positive battery cable. For instance, Renogy often provides clear guidelines on wire and fuse sizing for their kits, which is a great starting point. Understanding How to Size Wire and Cables and How to Size Fuses and Breakers is crucial for safe operation.
Skipping Fuses or Breakers Entirely
This is a critical safety oversight. Some DIYers, in their rush to get power flowing, might skip fuses or breakers altogether, thinking they're unnecessary or just add complexity. This is an extremely dangerous mistake. Fuses and circuit breakers are essential safety devices designed to protect your equipment and prevent electrical fires.
Consider this: A short circuit in your solar panel wiring, or a faulty appliance connected to your load terminals, can draw an enormous amount of current from your battery bank in an instant. Without a fuse to interrupt that circuit, the current will continue to flow unchecked. This can rapidly overheat wires, potentially melting insulation, igniting components, and causing a full-blown electrical fire. Your battery bank, especially if it's a large one, can deliver a massive amount of power, making a short circuit incredibly destructive.
You should always have fuses on:
- The positive line between your solar array and the charge controller. This protects the controller and wiring from overcurrent coming from the panels.
- The positive line between your battery bank and the charge controller. This is arguably the most important fuse, protecting the battery, controller, and wiring from short circuits.
- The positive line between your charge controller's load terminals and your DC loads. This protects the loads and their wiring.
Fuses are cheap insurance compared to replacing damaged equipment or, worse, dealing with a fire. Don't ever skip them. They are a non-negotiable part of any safe off-grid solar system.
Configuration and Sizing Slip-ups
Beyond the physical wiring, how you configure and size your PWM controller relative to your system components can make or break your off-grid experience.
Mismatching Battery Type and Charge Settings
Modern PWM charge controllers, even the basic ones, often have settings for different battery types. You might see options for "Sealed," "Gel," "Flooded" (for lead-acid varieties), or even "Lithium" (LiFePO4). This isn't just a suggestion; it's a critical setting! Each battery chemistry has specific charging voltage requirements to achieve a full charge and maintain health.
For example, a LiFePO4 battery needs a higher absorption voltage than a traditional flooded lead-acid battery, and typically does not require a "float" charge in the same way. If you set your PWM controller to "Flooded" for a lithium battery, it will likely undercharge it, leading to diminished capacity and performance over time. Conversely, if you apply lithium charging profiles to lead-acid batteries, you risk overcharging them, boiling off electrolyte, and significantly shortening their lifespan.
Always consult your battery manufacturer's specifications for recommended charging voltages (bulk, absorption, float) and compare them with your PWM controller's available settings. Adjust the controller accordingly. If your PWM controller doesn't have the exact settings for your specific battery type, especially for LiFePO4 batteries, you might need to consider an upgrade or choose a battery type that's compatible with your controller's capabilities. This mismatch is a leading cause of premature battery failure in DIY off-grid systems. For more on this, check out How Battery Choice Affects Off-Grid Cost and LiFePO4 vs Lead-Acid Battery Cost.
Oversizing the Solar Array for the PWM Controller
PWM controllers are simple and cost-effective, but they have a crucial limitation: they are most efficient when the solar panel voltage (Vmp) is very close to the battery bank voltage. If your solar panels produce a much higher voltage than your battery bank, a PWM controller will essentially "clip" that excess voltage, wasting a significant amount of potential power as heat.
Imagine you have a 12V battery bank and a solar panel with a Vmp of 18V. A PWM controller will only allow 12-14V to pass through to the battery, essentially discarding the extra 4-6V. This means you're not getting all the watts your panel is capable of producing. If you have several panels wired in series, pushing the voltage even higher, a PWM becomes even less efficient.
This doesn't necessarily mean you can't use a PWM with slightly higher voltage panels, but you won't get optimal performance. The real mistake here is thinking you can connect a massive solar array with high open-circuit voltage (Voc) to a small, basic PWM controller and expect peak performance. Not only will you lose efficiency, but you could also exceed the controller's maximum input voltage or current ratings, damaging the unit. Always check your controller's specifications for maximum PV input voltage and current. For larger arrays, especially those with panels wired in series, an MPPT charge controller is almost always the better, more efficient choice, as it can convert higher voltage, lower amperage power from the panels into lower voltage, higher amperage power for the batteries with minimal loss. This is key to understanding How to Size a Charge Controller.
Ignoring Environmental Factors
Your charge controller, like all electronic components, isn't immune to its environment. Installing it without considering temperature and protection can lead to issues.
First, temperature compensation: Many higher-quality PWM controllers include a temperature sensor (either built-in or external) that adjusts charging voltages based on the ambient temperature. Batteries are sensitive to temperature; they require a slightly higher charging voltage in cold weather and a lower one in hot weather to charge properly and prevent damage. If your controller doesn't have temperature compensation, or if the sensor isn't correctly installed or exposed to the actual battery temperature, your batteries could be chronically under or overcharged, drastically reducing their lifespan. This is particularly important for lead-acid batteries in climates with significant temperature swings.
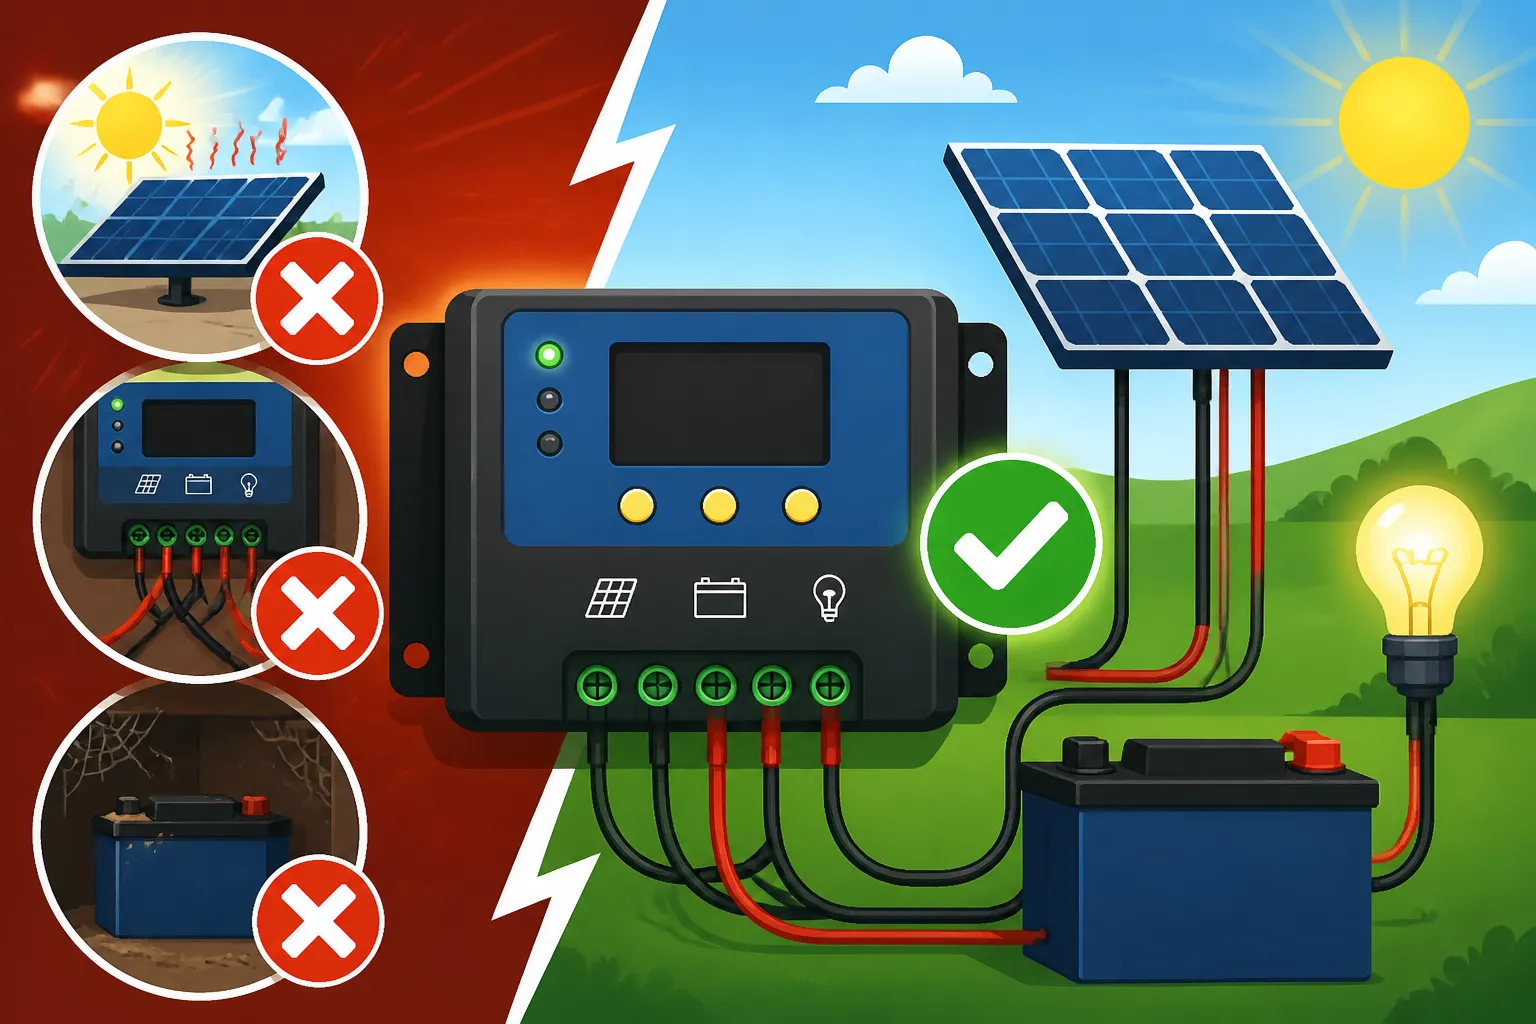
Second, physical protection: While many controllers are designed for outdoor use, they still need protection from direct sunlight, rain, snow, and excessive dust. Mounting your controller in an unventilated, scorching hot enclosure or directly exposed to the elements on a rainy exterior wall is an invitation for premature failure. Ensure it's in a well-ventilated area, protected from moisture and direct sun, and accessible for inspection and maintenance. You can find robust enclosures and mounting solutions for your Renogy or other brand components on platforms like Amazon.
Overlooked System Integration Mistakes
An off-grid solar system is more than just a collection of parts; it's an integrated system. Overlooking how these parts interact can lead to inefficiency or even danger.
Neglecting Proper Grounding
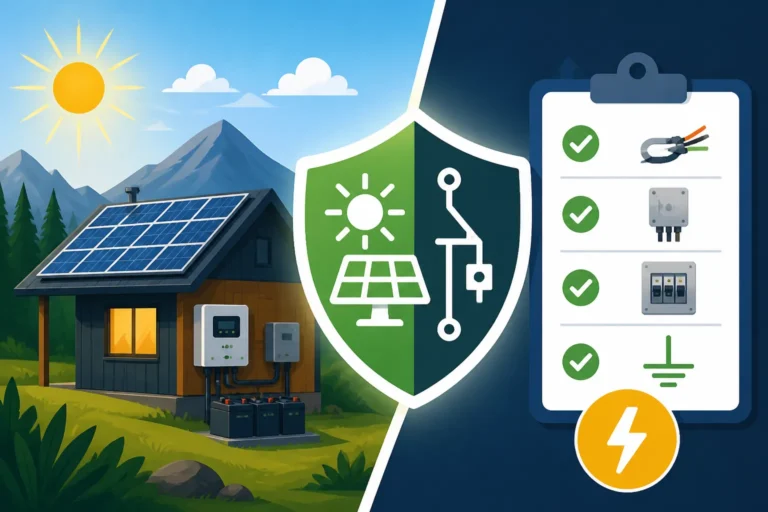
Grounding is one of those aspects that often gets overlooked in DIY setups because it might seem less critical than positive and negative connections. However, proper grounding is absolutely essential for safety. It provides a safe path for electrical current to flow to the earth in the event of a fault, preventing dangerous voltage buildup that could shock someone or damage equipment.
Imagine a scenario where a wiring insulation breaks down inside a metal-cased inverter or charge controller, and a live wire touches the metal casing. If the casing isn't properly grounded, it becomes energized. Anyone touching it could receive a severe electrical shock. A proper ground wire, connected from the component's chassis to a common ground point (like a ground rod driven into the earth), ensures that in such a fault condition, the current will immediately flow to the ground, tripping a breaker or blowing a fuse, thereby making the system safe.
Most charge controllers, especially those from reputable brands, will have a grounding terminal. Make sure this is properly connected to your system's main ground bus, which in turn should be connected to a reliable earth ground. Don't cut corners here; your safety and the safety of anyone interacting with your system depend on it. For more detailed information, look into Off-Grid Solar Safety and Grounding.
Ignoring System Voltage Compatibility
When you're building an off-grid system, all your primary electrical components need to be compatible in terms of voltage. This typically means designing for either a 12V, 24V, or 48V system. The most common mistake is mixing these voltages without proper conversion.
For example, if you have a 12V battery bank, you need a 12V PWM charge controller, and your DC loads should also be 12V. Trying to connect 24V solar panels in series directly to a 12V PWM controller, or running 24V appliances off a 12V battery bank (without a step-down converter), will lead to damage or simply not work. A 24V panel, when connected to a 12V battery via a PWM, will waste a significant portion of its voltage.
If your battery bank is 24V, then your PWM controller must also be rated for 24V, and your panels should be configured (likely in series) to produce a voltage compatible with 24V charging. While some advanced controllers can handle multiple voltages, most basic PWMs are designed for a specific system voltage or can auto-detect one. Always ensure that your solar panels, charge controller, battery bank, and DC loads are all compatible with your chosen system voltage. If you need to power appliances of a different voltage, use appropriate DC-DC converters. For a deeper dive, consider 12V vs 24V vs 48V: Which to Choose.
Not Monitoring System Performance
You've installed your PWM controller, hooked everything up, and you've got power! Great. But the journey doesn't end there. A common mistake is to "set it and forget it" without any monitoring. How do you know if your batteries are truly getting a full charge? How do you know if there's a problem developing?
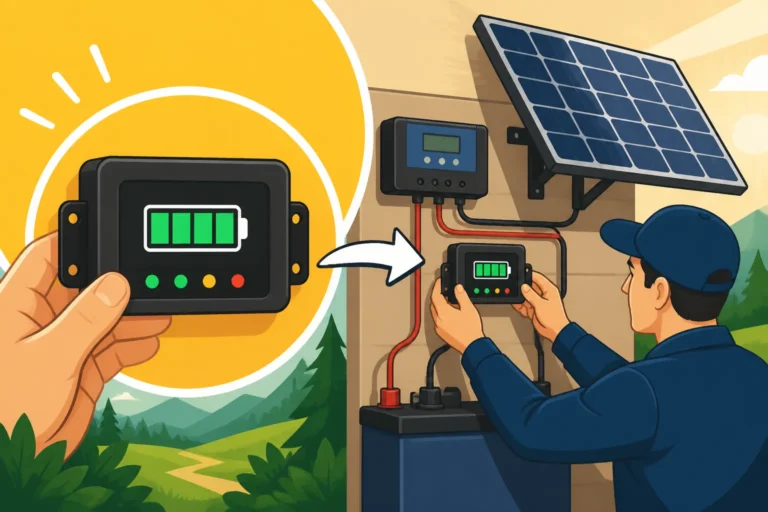
Even with a basic PWM system, investing in a simple battery monitor is incredibly valuable. At a minimum, this could be a voltmeter showing your battery voltage. A more comprehensive battery monitor will show you:
- State of Charge (SOC): How full your battery is, usually as a percentage.
- Voltage: The current voltage of your battery bank.
- Current (Amps): How much current is flowing into or out of your battery.
- Watt-hours (Wh) or Amp-hours (Ah) consumed/produced: A more accurate measure of energy usage.
Without monitoring, you're essentially driving blind. You might be slowly damaging your batteries through consistent undercharging or overdischarging without realizing it until it's too late. A good monitor can alert you to issues like panels not producing enough power, a faulty controller, or excessive load draw. Early detection of these issues can save you from costly replacements down the line. Many charge controllers from brands like Victron or even Renogy offer built-in displays or app connectivity for monitoring, but a dedicated shunt-based battery monitor provides the most accurate data for your overall battery health. Learning How to Install a Battery Monitor is a wise investment in your system's longevity.
PWM Controller Installation Mistakes and Their Solutions
Here's a quick rundown of the common mistakes and how to fix them, or better yet, avoid them in the first place!
Mistake Category Common Mistake Consequence Solution/Prevention Sunsation!
Welcome to the ultimate guide to avoiding PWM charge controller installation mistakes. As someone who's navigated the sometimes-tricky waters of off-grid living for years, I know firsthand how a small oversight can ripple through your entire system, turning excitement into frustration. Many folks gravitate towards PWM controllers for their affordability and straightforward nature, especially for powering a cozy cabin, a weekend RV adventure, or a simple shed workshop. But let's be real: "simple" doesn't mean "bulletproof." I've seen countless brilliant ideas fizzle out because of a few crucial missteps during the installation of this unassuming but vital component. This guide will help you sidestep those common pitfalls, ensuring your power system performs reliably and safely, so you can truly enjoy the freedom that off-grid living offers.
The Foundations of Your System: Wiring It Right from the Start
Wiring seems basic, right? Positive to positive, negative to negative. But in the world of off-grid solar, there's a specific dance to the connections, and if you miss a step, your entire system can suffer, or worse, become a hazard. It’s like baking a cake; you can have all the right ingredients, but if you don't add them in the correct order, you're not getting a delicious cake.
The Sacred Order of Connections
I can't stress this enough: the sequence in which you connect your components to a PWM charge controller is absolutely critical. Think of it as a golden rule etched into the solar bible. It goes like this: Batteries first, then solar panels, then your DC loads.
Why this specific order? When you connect your battery bank to the PWM controller first, the controller can accurately detect the system voltage – whether you're running a 12V or 24V setup. This initial connection provides the stable voltage reference the controller needs to initialize its internal software, calibrate itself, and correctly identify the battery type you've selected in its settings. If you bypass this and connect your solar panels before your batteries, the controller might receive a fluctuating or higher-than-expected voltage directly from the panels, which can confuse it, leading to incorrect voltage readings, error codes, or even causing irreversible damage to the unit itself. It's like trying to start a sophisticated piece of electronics by just randomly plugging in various power sources; it needs to "wake up" in a predictable, stable environment.
After your batteries are securely connected and the controller has booted up, then you can connect your solar array. This ensures the controller is ready to properly manage the incoming power. Finally, with both power source (solar) and storage (batteries) in place, you can connect your DC loads (like your lights or fan) to the appropriate terminals on the controller. Should you ever need to disconnect your system for maintenance or troubleshooting, reverse the order: disconnect loads first, then solar panels, then the battery bank. This simple yet vital procedure protects your controller and your valuable batteries from potential harm. If you're looking for more guidance on the full setup, our guide on How to Install an Off-Grid Solar System has comprehensive details.
Don't Skimp on Wires and Fuses
I've seen so many enthusiastic DIYers make this mistake: grabbing whatever wire they have handy, or trying to save a few bucks by opting for thinner, cheaper cables. Trust me, this is a false economy that can lead to headaches, inefficiency, and even serious fire risks. Your wires are the highways for electricity, and just like real highways, they need to be appropriately sized for the traffic (current) they carry.
Using wires that are too thin for the current passing through them is a problem for a few reasons:
- Voltage Drop: Thinner wires have higher electrical resistance. This means that as electricity flows through them, some of that precious energy is lost as heat. For your off-grid system, this translates directly to less power reaching your batteries or appliances. Your 12V battery might only receive 11V, leading to slower charging and potentially never reaching a full charge, which significantly reduces battery lifespan. Your connected devices might also underperform.
- Overheating and Fire Danger: This is the big one. If too much current tries to force its way through an undersized wire, that wire will heat up dramatically. I’m not talking warm to the touch; I’m talking scorching hot, melting insulation, and potentially igniting nearby flammable materials in your RV, cabin, or van. Imagine the smell of burning plastic and the panic that sets in. This is a very real danger!
- Reduced System Longevity: Constant stress on your wiring can degrade it faster, leading to intermittent connections, increased resistance over time, and a generally unreliable system.
To avoid this, always calculate the appropriate wire gauge based on the maximum current (amps) that will flow through it and the distance of the wire run. The longer the run and the higher the current, the thicker the wire needs to be (meaning a smaller AWG number, like 8 AWG instead of 14 AWG). Online calculators and charts are readily available to help you size your wires correctly. Brands like Renogy and others often provide wire sizing recommendations for their components. And don't forget the fuses! Fuses are the ultimate safety valves. They're designed to break the circuit if the current becomes dangerously high, preventing overheating and fires. You need appropriately rated fuses on the positive lines between your solar panels and controller, between your batteries and controller, and between your controller's load terminals and your DC appliances. This ensures that any short circuit or unexpected surge will blow a fuse, not your equipment or your property. Proper fuse placement and sizing are non-negotiable for a safe system.
Unseen Traps: Configuration and Sizing Slip-ups
Beyond the physical connections, a PWM controller also needs to be set up correctly for your specific system. Overlooking these details can lead to inefficient charging and prematurely worn-out batteries.
The Peril of Mismatched Battery Settings
This is a mistake that I've seen cause endless frustration and lead to many people prematurely replacing their expensive battery banks. It's easy to assume that all batteries charge the same way, but nothing could be further from the truth. Your PWM charge controller, even a basic one, will likely have settings for different battery types: "Sealed," "Gel," "Flooded" (for various lead-acid chemistries), and increasingly, "Lithium" (specifically LiFePO4). Choosing the wrong setting is a recipe for disaster.
Each battery chemistry has a unique "personality" when it comes to charging. They require specific voltages for their bulk, absorption, and float stages to ensure a full charge without damage.
- Lead-Acid Batteries: These are highly sensitive to both undercharging and overcharging. If you use a "Gel" setting for a "Flooded" battery, for example, the charging voltages might be slightly off, leading to sulfation (a common cause of lead-acid battery degradation) over time. If you overcharge a flooded battery, it can "boil off" its electrolyte, requiring constant topping up with distilled water and significantly shortening its life.
- LiFePO4 Batteries: These are fantastic for off-grid use due to their efficiency and longevity, but they have very specific charging requirements. They need a higher absorption voltage than lead-acid, and generally don't require a float charge. If you use a lead-acid setting for a LiFePO4 battery, it will almost certainly be undercharged, meaning you won't get its full advertised capacity and its internal Battery Management System (BMS) might never properly balance the cells. Conversely, attempting to charge a lead-acid battery with a lithium profile could severely overcharge it, potentially causing dangerous gassing and damage.
Always, and I mean always, consult the specifications provided by your battery manufacturer. Match these recommended charging parameters as closely as possible to the settings on your PWM charge controller. If your controller doesn't offer the precise settings your battery requires, especially for LiFePO4, it's a strong indicator that you might need to upgrade your charge controller or reconsider your battery choice to ensure compatibility. This single configuration step can literally double or halve the lifespan of your most expensive component – your battery bank. If you’re not sure about the best battery for your system, check out our guide on Best Off-Grid Solar Batteries.
Don't Overwhelm Your PWM with Too Much Solar
PWM charge controllers are fantastic for smaller, simpler systems. They’re cost-effective and get the job done. However, they have a fundamental limitation: they are most efficient when the voltage from your solar panels (known as Vmp, or maximum power voltage) closely matches your battery bank voltage. Trying to push too much solar power, especially with a significantly higher voltage, into a PWM controller is like trying to pour a gallon of water into a pint glass – you’re going to lose a lot.
Here’s why: A PWM controller essentially connects and disconnects the solar panel directly to the battery in rapid pulses. When it’s connected, the panel's voltage drops to near the battery's voltage. Any "excess" voltage from the panel is effectively wasted as heat, not converted into useful power for charging. For example, if you have a 12V battery bank and you connect a solar panel with a Vmp of 18V, the PWM controller will only allow about 12-14V to reach the battery. The extra 4-6V from the panel is just gone, lost. This means you’re not getting all the wattage your panel is capable of producing.
This becomes an even bigger issue if you start wiring multiple panels in series, which increases the overall voltage of your solar array significantly. While this is great for MPPT controllers (which excel at converting high-voltage, low-current power to low-voltage, high-current power efficiently), it’s a huge inefficiency for a PWM. Not only do you lose significant power, but you can also exceed the PWM controller’s maximum input voltage or current ratings, which will damage it. Always check the specifications of your PWM controller for its maximum PV input voltage and current. If your solar array’s total open-circuit voltage (Voc) or short-circuit current (Isc) exceeds these limits, you risk frying your controller. For larger arrays, or if you plan to expand, investing in an MPPT charge controller is almost always the more efficient and ultimately cost-effective solution, even if the upfront cost is higher. Our guide on MPPT vs PWM Charge Controllers delves into this comparison in detail.
Overlooking Environmental Impact
It's easy to mount your charge controller and forget about it, but its operating environment plays a huge role in its performance and longevity, especially for your batteries.
First, temperature compensation: Batteries are incredibly sensitive to temperature fluctuations. They need a slightly higher charging voltage in cold conditions and a slightly lower one when it’s hot. Many quality PWM controllers come with a built-in temperature sensor or an external one that you can attach to your battery bank. This sensor tells the controller the ambient temperature, allowing it to adjust the charging voltage accordingly. If your controller lacks this feature, or if the sensor isn't properly placed (e.g., inside a hot control box while your batteries are outside in the cold), your batteries will be chronically undercharged in winter and potentially overcharged in summer. This continuous thermal stress dramatically shortens their lifespan. Make sure your sensor is either measuring battery temperature directly or is located in the same ambient temperature as your battery bank.
Second, physical protection and ventilation: While some PWM controllers are designed for outdoor use, none are invincible. Mounting your controller directly exposed to harsh sunlight, rain, snow, or excessive dust is asking for trouble. Extreme heat from direct sun can degrade internal components, and moisture can lead to corrosion and short circuits. Always install your controller in a well-ventilated area, protected from direct elements. If it’s in an enclosure, ensure there’s adequate airflow to dissipate heat, especially during peak charging periods. A cool, dry, and protected environment will ensure your controller operates efficiently and lasts for years.
The Bigger Picture: System Integration Mistakes
An off-grid solar system is a delicate ecosystem of components. Every part needs to work harmoniously, and overlooking how they interact can lead to inefficiencies, hazards, or even total system failure.
The Non-Negotiable Necessity of Proper Grounding
Alright, let's talk about grounding. For many DIYers, grounding feels like an afterthought, or an overly complicated step that can be skipped for the sake of simplicity. This is a critical and potentially dangerous mistake. Proper grounding isn't just a recommendation; it's a fundamental safety requirement for any electrical system, especially one generating its own power.
Think of grounding as your system's emergency escape route for electricity. If there's an electrical fault – say, a loose wire touches the metal casing of your charge controller or inverter, or a surge from a lightning strike hits your panels – that stray electricity needs a safe path to dissipate. Without a proper ground, that metal casing could become energized, posing a severe electrocution risk to anyone who touches it. And trust me, getting zapped by a 12V or 24V system, while not always fatal, is incredibly unpleasant and can lead to serious injury.
Every major component in your off-grid solar system, including your PWM charge controller, inverter, and solar panel frames, should be bonded together and connected to a common ground point, typically a heavy-gauge copper wire leading to a ground rod driven deep into the earth. This creates a low-resistance path for fault currents to safely flow away from your equipment and into the earth, tripping a breaker or blowing a fuse in the process. This immediately de-energizes the faulty component, making it safe. Don't ever skip this step. It's the cheapest life insurance you'll ever buy for your off-grid system and yourself. For detailed guidance, consult our article on How to Ground an Off-Grid Solar System.
Ignoring System Voltage Compatibility
This might seem obvious, but it’s a surprisingly common oversight, especially for those new to off-grid solar. Your entire system – solar panels, charge controller, battery bank, and DC loads – needs to operate at a consistent voltage. Typically, this will be 12V, 24V, or 48V. Mixing and matching components with different nominal voltages without appropriate converters is a recipe for disaster.
Here’s a common scenario: someone decides to upgrade their small 12V RV system and buys new 24V solar panels, but keeps their old 12V PWM controller and battery bank. If they simply connect the 24V panels (wired in parallel) to the 12V PWM controller, the controller will essentially chop off half the voltage from the panels, wasting a huge amount of potential power. It’s even worse if the 24V panels are wired in series, creating an even higher voltage that could exceed the PWM's input limits and damage it. Similarly, trying to power a 24V appliance directly from a 12V battery bank won't work, and trying to power a 12V appliance from a 24V battery bank will likely fry the appliance (unless you use a step-down converter, which adds complexity and cost).
Always ensure that all your core components are compatible with your chosen system voltage. If you decide on a 12V battery bank, then your PWM controller should be 12V compatible, and your panels should be wired to produce an appropriate charging voltage for 12V. If you're building a larger system, say 24V or 48V, ensure all components reflect that. System voltage choice also impacts things like wire sizing (higher voltage means lower current for the same power, allowing for thinner wires). Consider checking out How to Choose System Voltage for more insights on this decision.
Neglecting Ongoing System Monitoring
You’ve wired everything up, the sun is shining, and you have power! It’s a wonderful feeling. But too often, new off-gridders make the mistake of adopting a "set it and forget it" mentality. Your off-grid solar system, even with a simple PWM controller, isn't a magical black box. It needs monitoring to ensure it's performing optimally and, critically, to protect your most expensive component: your batteries.
Without any form of monitoring, you are operating blind. How will you know if your solar panels aren't producing as much power as they should due to dirt or shading? How will you know if your batteries are consistently being undercharged, slowly leading to sulfation and reduced capacity? Or if a connected load is drawing more power than expected, leading to deeper discharges than your batteries can handle?
Even a basic voltmeter that shows your battery voltage is a start. But for real peace of mind and proactive maintenance, I highly recommend investing in a good quality battery monitor, even if it's external to your PWM controller. These typically measure Amp-hours in and out of your battery, giving you an accurate "state of charge" (SOC) percentage. They also display voltage, current flow, and sometimes even temperature. This data is invaluable for:
- Preventing Battery Damage: You’ll know precisely when your batteries are getting low and need to be conserved, or if they're not fully charging. This prevents chronic undercharging or over-discharging, which are prime battery killers.
- Optimizing Usage: You can adjust your power consumption habits based on real-time data, ensuring you always have enough power.
- Troubleshooting: If something goes wrong, a monitor provides crucial diagnostic information, helping you pinpoint problems quickly.
Many modern PWM controllers, including those from brands like Renogy, now come with decent built-in displays or even Bluetooth connectivity to smartphone apps for monitoring. Utilize these features! It's an investment in the longevity and reliability of your entire off-grid power system. Monitoring helps you understand Off-Grid Solar Maintenance Costs by preventing major issues.
Disclaimer
The information provided in this guide is for general informational purposes only and does not constitute professional electrical advice. Working with electricity, especially in off-grid solar systems, carries inherent risks, including electric shock, fire, and damage to equipment. Always consult with a qualified electrician or solar professional before installing or modifying any electrical system. Follow all local codes, regulations, and manufacturer instructions for all components. The author and publisher are not responsible for any loss, damage, or injury resulting from the use of this information.