How to Rack-Mount Off-Grid Batteries
The often-overlooked challenge of managing a growing off-grid battery bank can quickly turn your dream of energy independence into a tangled, disorganized, and potentially unsafe mess. Whether you're running a remote cabin, an RV, or a full-time off-grid homestead, keeping your batteries secure, accessible, and performing optimally is crucial. This comprehensive guide will walk you through the process of how to rack-mount off-grid batteries, transforming your power storage from a chaotic pile into a streamlined, professional, and much safer setup.
Why Rack-Mount Your Off-Grid Batteries?
Before we dive into the nuts and bolts, let's talk about why rack-mounting is such a game-changer for off-grid battery systems. It’s not just about aesthetics; it's about safety, efficiency, and ultimately, the longevity of your investment. Many folks start with a battery or two tucked away, but as their power needs grow, so does the physical footprint and complexity of their battery bank. This is where a structured approach becomes invaluable.
Enhancing Safety and Organization
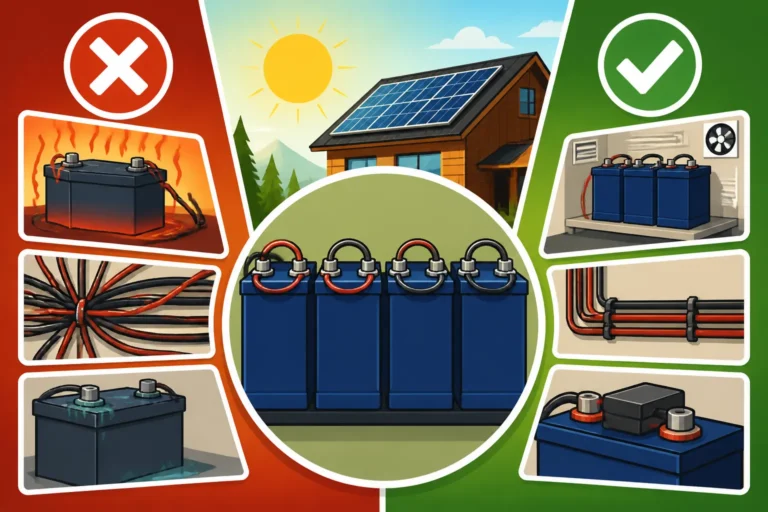
Picture this: multiple heavy batteries sitting on the floor, cables running every which way, some perhaps even crossing. This scenario, while common, is a recipe for disaster. Loose connections can lead to dangerous arcs, accidental contact with terminals can cause short circuits, and a cluttered space increases the risk of tripping or damaging a battery. It's not just about fire risk, which is a serious concern, but also about protecting yourself and your equipment from electrical hazards.
Rack-mounting your batteries dramatically improves safety by creating a dedicated, contained environment. The batteries are held securely in place, preventing them from shifting or being accidentally knocked over. The structure of the rack itself helps to keep all the wiring neat and organized, often providing channels or tie-down points for cables. This reduces the chance of accidental disconnections or short circuits and makes it immediately apparent if something is amiss. When everything is neatly arranged, you can quickly identify any potential issues, like a frayed cable or a corroded terminal, before they escalate into something more serious.
Beyond the immediate safety benefits, a well-organized battery rack simplifies troubleshooting immensely. Imagine trying to diagnose a problem in a spaghetti junction of wires versus a system where every connection is clearly visible and labeled. It's night and day. This organized approach reduces stress and saves valuable time when you're trying to figure out why your power isn't flowing as it should, preventing the common frustration of trying to trace a wire through a jumble of components.
Optimizing Space and Accessibility
One of the biggest headaches for off-gridders, especially those with limited square footage like in an RV or a tiny home, is finding enough space for their energy storage. Batteries, particularly the higher-capacity ones, can be quite bulky and take up significant floor space. This can be a real issue when you're trying to maximize every square inch for living or working. Just trying to stack them haphazardly isn't safe and can damage the battery cases or terminals.
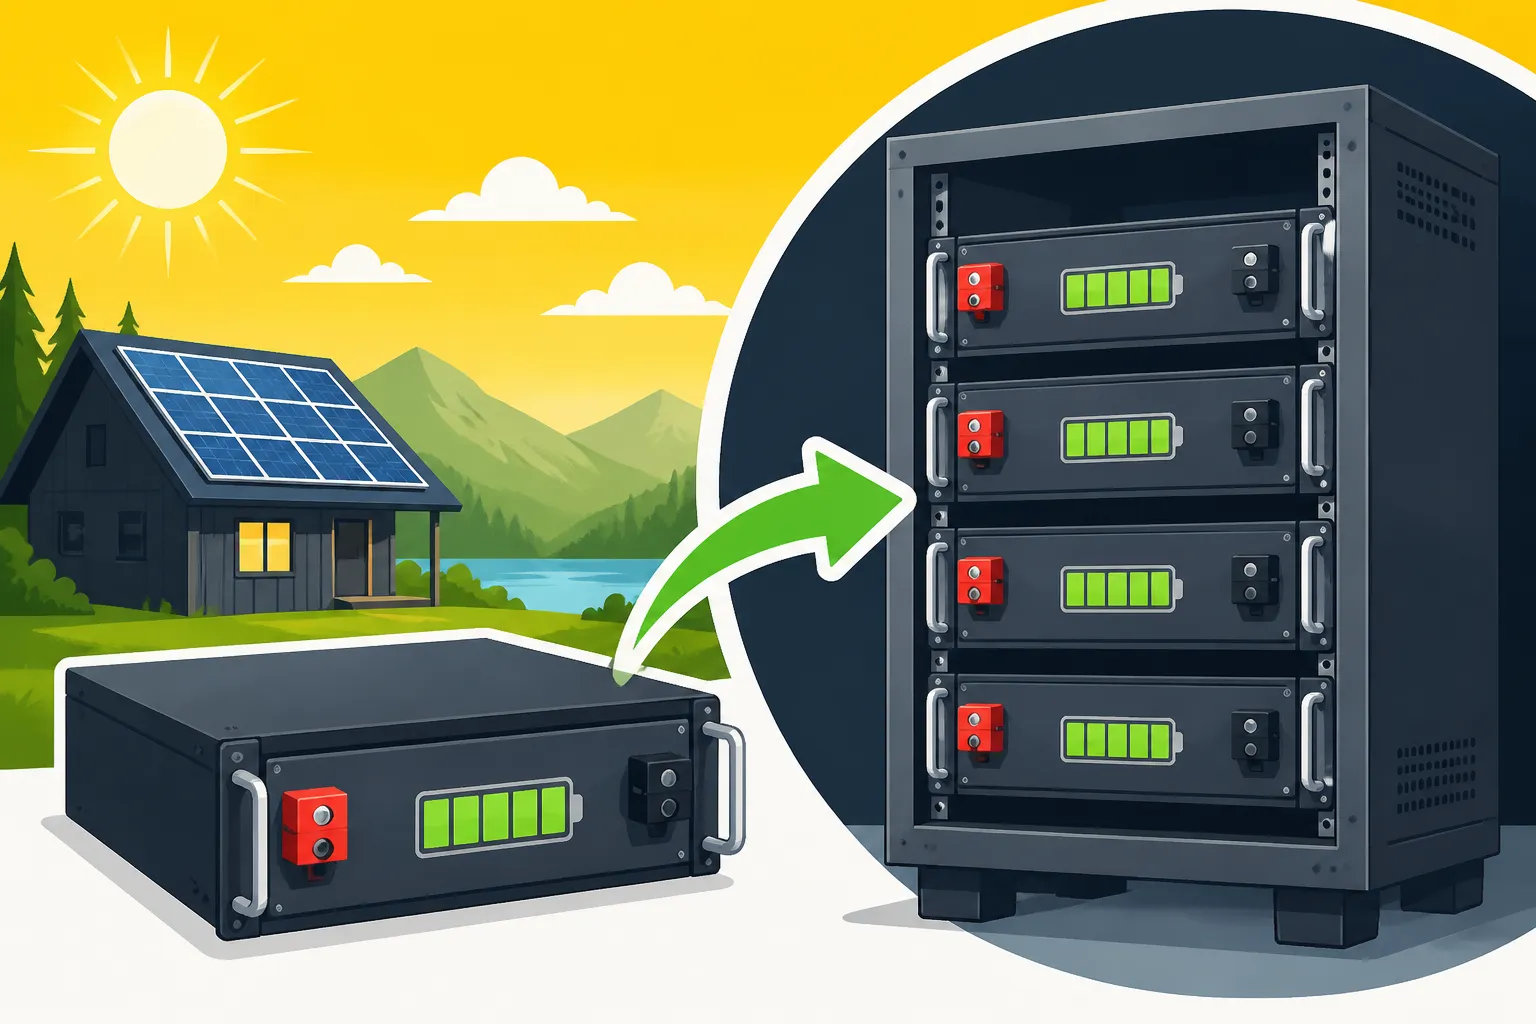
Battery racks solve this problem by allowing vertical stacking. Instead of spreading your batteries across the floor, you can utilize vertical space, effectively consolidating your power storage into a much smaller footprint. This frees up precious floor area for other equipment, storage, or just simply more room to move around. For example, a common server rack, which many off-gridders adapt for their batteries, can hold multiple large LiFePO4 units in a vertical configuration that would otherwise consume a huge chunk of your utility room.
Furthermore, a well-designed rack ensures that each battery is easily accessible. This might sound minor, but try lifting a 100-pound battery out of a tight corner for maintenance or replacement, and you'll quickly appreciate proper accessibility. With rack-mounted batteries, individual units can often be slid in and out (especially with purpose-built server rack batteries), or at the very least, are positioned at a manageable height for inspection and cleaning. This ease of access simplifies routine maintenance, such as checking terminal connections or monitoring individual battery voltages, which ultimately contributes to a healthier, longer-lasting system. For anyone planning to eventually expand their off-grid system, the ability to easily add or swap out batteries in a rack is a massive advantage compared to completely reconfiguring a floor-based setup.
Improving Thermal Management and Longevity
Batteries, especially when charging or discharging heavily, generate heat. This is particularly true for larger banks or when multiple devices are drawing power. Excessive heat is a silent killer for batteries, degrading their performance and significantly shortening their lifespan. Lead-acid batteries are notorious for being sensitive to temperature fluctuations, but even advanced lithium batteries, while more resilient, can suffer under sustained high temperatures. When batteries are crammed together on the floor or in a poorly ventilated enclosure, heat can build up rapidly, creating "hot spots" that accelerate wear and tear on individual cells.
Rack-mounting directly addresses this thermal challenge by promoting better airflow. The inherent design of most racks provides space between individual batteries, allowing ambient air to circulate freely around each unit. This natural convection helps to dissipate heat more effectively, preventing those damaging hot spots from forming. In larger or more intensively used systems, you can even integrate cooling fans into the rack design to actively move air and maintain optimal operating temperatures. For instance, if you have several high-capacity Best Lithium Batteries for Off-Grid, ensuring adequate spacing within a robust rack structure is critical for them to perform as advertised over their long lifespan.
By keeping your batteries within their ideal operating temperature range, you're directly contributing to their longevity and consistent performance. This means your battery bank will maintain its capacity for longer, hold its charge better, and provide more reliable power throughout its service life. This simple act of proper spacing and ventilation within a rack can save you significant money and hassle in the long run by delaying the need for costly battery replacements, especially when considering the Cost to Replace Off-Grid Solar Batteries. Proper thermal management is not just a nice-to-have; it's a fundamental aspect of a durable and efficient off-grid power system.
Types of Battery Racks and What to Look For
Choosing the right rack for your off-grid batteries is a crucial decision that impacts safety, space utilization, and future expandability. Not all racks are created equal, and understanding the different types and what to look for will ensure your system is well-supported and efficient. It's like choosing the right foundation for your home – you want something sturdy and appropriate for the load it will bear.
Open Frame vs. Enclosed Racks
When it comes to battery racks, you'll generally find two main categories: open-frame and enclosed. Each has its own set of advantages and disadvantages, making one more suitable than the other depending on your specific installation environment and needs.
Open-frame racks, as the name suggests, consist of a frame structure with exposed sides, front, and back. They are often lighter, more affordable, and offer superior ventilation because there's nothing obstructing airflow around the batteries. This can be a huge benefit for battery chemistries that generate a fair amount of heat, such as some lead-acid types, or even for high-power LiFePO4 batteries under heavy load. The open design also means unparalleled accessibility for installation, wiring, and maintenance. You can easily get to any battery or connection without having to remove panels or doors. However, this openness also means less physical protection for your batteries from dust, accidental bumps, or curious hands (or paws!). If your battery bank is located in a protected utility room or garage where physical security isn't a primary concern, an open-frame rack from a brand like Renogy might be a cost-effective and practical solution. They're excellent for environments where maximizing airflow and ease of access are top priorities.
Enclosed racks, on the other hand, look more like traditional server cabinets, featuring solid or perforated doors and side panels. These racks offer a higher degree of physical protection for your batteries, safeguarding them from dust, debris, and accidental damage. They can also provide a more aesthetically pleasing and secure setup, which might be important if your battery bank is in a visible area or if you need to prevent unauthorized access. Many enclosed racks also come with built-in cooling solutions, such as fans, which can be crucial for maintaining optimal temperatures, especially in warmer climates or with densely packed battery banks. The downside is that they are generally more expensive, heavier, and can make installation and maintenance a bit more cumbersome due to limited access points. They might also require more active ventilation if airflow is restricted. Despite these drawbacks, for installations in dusty workshops, shared spaces, or where maximum security and a clean appearance are desired, an enclosed rack is often the better choice.
Material and Weight Capacity Considerations
The material from which your battery rack is constructed is critical for both its durability and its ability to safely support the weight of your batteries. You'll typically find racks made from steel or aluminum, each with its own characteristics.
Steel racks are robust, incredibly strong, and highly durable. They are excellent for supporting heavy battery banks and can withstand significant wear and tear. However, steel is also heavier than aluminum and can be susceptible to rust if not properly coated or if exposed to moisture over time, which is a consideration in damp environments. If you’re going for a permanent, heavy-duty setup with a large number of Best Off-Grid Solar Batteries, a powder-coated steel rack is often the most reliable choice. Ensure it's treated for corrosion resistance if it's not in a perfectly dry environment.
Aluminum racks are lighter than steel, making them easier to maneuver and install, which can be a significant advantage in mobile applications like RVs or for DIYers working alone. While still strong, they generally have a lower weight capacity compared to steel racks of similar dimensions. Aluminum is naturally corrosion-resistant, which is a plus for humid climates or marine environments. For smaller to medium-sized battery banks where weight is a concern and the total load isn't extreme, an aluminum rack might be an ideal solution.
Regardless of the material, the weight capacity of the rack is paramount. You absolutely must calculate the total weight of your battery bank, including all individual batteries, and ensure that the chosen rack can safely support that load with a comfortable buffer. For example, a single 100Ah LiFePO4 battery can weigh anywhere from 25 to 35 pounds, while a large lead-acid battery might easily exceed 100 pounds. If you plan to install six 100Ah LiFePO4 batteries, that's already 150-210 pounds of weight. A rack designed for lightweight network equipment simply won't cut it. Always check the manufacturer's specifications for maximum load capacity, often measured in pounds or kilograms. Overloading a rack isn't just a risk to the rack itself; it can damage your expensive batteries or even cause a catastrophic failure. Many reputable suppliers found on platforms like Amazon will clearly list the load capacity for their products, so be diligent in your selection.
Compatibility and Expandability
When investing in a battery rack, thinking about current compatibility and future expandability will save you headaches and money down the line. It's rare that an off-grid system remains static; most tend to grow over time as needs change or more efficient components become available.
Compatibility primarily refers to the physical dimensions and mounting style of your batteries relative to the rack. Many modern lithium batteries, especially larger capacity units designed for stationary power, come in a "server rack" form factor. These are specifically designed to slide into standard 19-inch wide server racks, often designated by "rack units" (RU). If you're using these types of batteries, choosing a rack that adheres to these industry standards will ensure a perfect fit. For cylindrical or non-standard battery shapes, you might need shelves or custom mounting solutions within the rack. Always measure your batteries meticulously – length, width, and height – and compare those dimensions against the internal usable space of any potential rack. Don't forget to account for terminal clearances and cable routing space.
Expandability is where a good rack truly shines. Many off-grid setups start small and expand gradually. You might begin with enough power for basic essentials and then decide to add more capacity to run an air conditioner or a well pump, requiring more solar panels and, crucially, more batteries. A rack that allows for easy addition of more battery modules without having to completely dismantle your existing setup is invaluable. Look for racks that have extra vertical space (more RUs than you initially need) or are designed to be modular. Some racks even allow for "side-by-side" expansion, where you can connect another rack unit as your system grows. This modular approach makes it much easier to increase your storage capacity. Consider, for instance, how you might integrate additional units as your power demands increase, perhaps leading you to consider a larger system, which directly impacts the Off-Grid Solar Cost by System Size. By planning for a little extra space now, you can avoid the costly and time-consuming process of replacing your entire racking system when your power needs inevitably expand.
| Feature | Open-Frame Racks | Enclosed Racks |
|---|---|---|
| Ventilation | Excellent (unrestricted airflow) | Good to Poor (requires active cooling) |
| Accessibility | Excellent (easy access to all components) | Moderate (doors/panels may need to be opened/removed) |
| Physical Protection | Minimal (exposed to dust, bumps) | High (protected from dust, damage, unauthorized access) |
| Security | Low (easy to tamper with) | High (lockable doors available) |
| Aesthetics | Industrial, functional | Clean, professional, discreet |
| Cost | Generally lower | Generally higher |
| Weight | Lighter | Heavier |
| Ideal Use | Utility rooms, garages, dedicated battery sheds, mobile setups where space is constrained and ventilation is key | Visible areas, dusty environments, shared spaces, anywhere security is a concern |
Step-by-Step Guide to Rack-Mounting Your Batteries
Rack-mounting your batteries isn't just about throwing them onto a shelf; it's a careful process that requires planning, precision, and adherence to safety guidelines. By following these steps, you can ensure your battery bank is installed securely and functions optimally for years to come.
Planning Your Battery Bank Layout
The foundation of any successful off-grid solar installation, including battery racking, is thorough planning. Skipping this step often leads to frustrating rework, wasted materials, and potentially unsafe conditions. Before you even unbox your rack, you need to conduct a thorough inventory and assessment.
First and foremost, you need a clear understanding of your energy needs. If you haven't already, perform a detailed How to Calculate Daily Energy Usage for all your appliances and devices. This will confirm the total capacity of your battery bank, which in turn dictates the number and size of batteries you’ll need to rack. Once you know your battery count and type, measure each battery precisely: length, width, and height. Don't rely solely on online specs; a slight variance can throw off your entire layout. Consider the terminals – do they add to the height? How much clearance do you need for cabling?
Next, select the ideal location for your rack. This isn't just about where it fits. Batteries perform best within specific temperature ranges, and ventilation is paramount, especially for lead-acid types which can off-gas. Avoid direct sunlight, extreme cold (unless using batteries designed for it, or employing active heating), and damp areas. Ensure the chosen spot has a level, stable floor capable of supporting the immense weight. Remember, batteries are heavy! A small bank of four 100Ah LiFePO4 batteries could easily weigh over 100 pounds, and larger banks can be many hundreds of pounds. If you're building a Cost to Power a Cabin with Solar for year-round living, you'll need a much more robust setup than for a weekend hunting cabin.
Finally, visualize your cable routing. This includes the distance from your batteries to your inverter and charge controller. Shorter cable runs mean less voltage drop and more efficient power transfer. Sketch out your battery configuration within the rack (series, parallel, or series-parallel) and determine the exact cable lengths and gauges needed. You'll want to size your wires and cables appropriately, as explained in How to Size Wire and Cables, to prevent overheating and ensure efficient power delivery. Planning this out now will save you from scrambling for extra cable or realizing your runs are too long later.
Assembling and Securing the Rack
Start by carefully unboxing all components and laying them out. Familiarize yourself with the assembly instructions provided by the manufacturer. It's often helpful to have a second person assist, especially with larger or heavier racks. Begin by assembling the base frame, ensuring all bolts are tightened securely. Then, attach the vertical uprights, followed by the top frame. As you assemble, consistently check that everything is level and square. Using a spirit level throughout the process will prevent a wobbly or uneven rack, which could be problematic when loading heavy batteries.
Once the rack structure is assembled, position it in its planned location. This is where securing the rack becomes critical. For permanent installations, especially those with heavy battery banks, you should anchor the rack to the floor or a wall. Most racks come with pre-drilled holes in their base for this purpose. Use appropriate heavy-duty anchor bolts for concrete floors or lag bolts into wall studs if anchoring to a wall. This step prevents the rack from tipping over due to accidental bumps, vibrations (especially important in an RV or van setup), or even seismic activity in certain regions. Imagine the damage if several hundred pounds of batteries came crashing down!
Before you start loading any batteries, do a final safety check. Double-check all bolts for tightness. Give the rack a good shake to ensure it's stable. Verify that the location is free of anything that could obstruct ventilation or pose a fire hazard. Ensure there's adequate space around the rack for future maintenance access. This meticulous approach during assembly and securing will provide a rock-solid foundation for your valuable energy storage.
Installing Batteries and Wiring Considerations
Now comes the moment of truth: populating your rack with batteries and making the electrical connections. This stage requires careful attention to detail and strict adherence to electrical safety.
Start by safely lifting and placing each battery onto its designated shelf or slot within the rack. Remember, batteries are heavy, so use proper lifting techniques or get help to avoid injury. For server-rack style batteries, they often slide in on rails, much like server equipment. For other battery types, ensure they are stable and not prone to shifting. Distribute the weight evenly within the rack to maintain balance. As you load them, keep an eye on the spacing you planned for ventilation. Don't push them too close together, even if it means sacrificing an extra spot.
With the batteries in place, it's time for wiring. This is arguably the most critical part of the installation. If you’re wiring multiple batteries, you’ll need to decide on a series, parallel, or series-parallel configuration based on your system voltage (e.g., 12V, 24V, 48V). Our guide on How to Wire Batteries in Series and Parallel offers a deep dive into these configurations. Use high-quality battery cables of the correct gauge, as determined in your planning phase, and ensure all connections are clean, tight, and secure. Loose connections are a major cause of resistance, heat, and potential fire hazards. A good trick is to use a torque wrench to ensure all terminal bolts are tightened to the manufacturer's specified torque.
As you connect the batteries, organize your cables using zip ties, cable clamps, or even flexible conduit. Route them away from sharp edges, potential pinch points, and any moving parts. Clearly label each cable if your system is complex. Once the battery bank is wired, connect it to your charge controller and then to your inverter. Remember to install appropriate fuses and breakers, as detailed in How to Install Fuses and Breakers, between your battery bank and your other components. These are essential safety devices that protect your system from overcurrents. Always double-check all your wiring against your diagram before making the final connection and powering up the system. It's a good practice to test voltages at various points with a multimeter to ensure everything is connected correctly before energizing your entire off-grid setup.
Best Practices for Rack-Mounted Battery Systems
Even after your off-grid batteries are neatly rack-mounted, the job isn't quite done. To ensure your system runs smoothly, safely, and efficiently for its full lifespan, ongoing best practices are essential. Think of it as caring for a high-performance vehicle; regular checks and proper treatment keep it on the road.
Monitoring and Maintenance for Longevity
A well-installed battery bank, even one that's rack-mounted, still requires regular attention to perform optimally and last for years. Neglecting routine monitoring and maintenance is one of the quickest ways to shorten the lifespan of your expensive off-grid batteries.
Regular visual inspections are your first line of defense. Make it a habit to periodically open up your battery compartment (if enclosed) or simply walk around your open-frame rack. Look for any signs of wear and tear: frayed cables, loose connections, corrosion on terminals, or bulging battery cases (a serious sign of trouble, especially with lithium batteries). Check for any dust buildup that could impede airflow or create a conductive path. Ensure all cable management (zip ties, clamps) is still intact and that cables haven't shifted. Listen for any unusual sounds coming from the batteries or the rack itself, though modern LiFePO4 batteries are generally silent.
Beyond visual checks, monitoring battery health with appropriate tools is crucial. A good battery monitor (often with a shunt, like those reviewed in Best Battery Monitor Shunts) can provide real-time data on voltage, current, power, and state of charge (SoC). Pay attention to any significant discrepancies between individual batteries in a bank, which could indicate a balancing issue. Regularly checking the ambient temperature around your batteries is also important to ensure they are operating within their manufacturer-specified range. For lead-acid batteries, regular checks of electrolyte levels (if flooded) and specific gravity are essential. Keeping your terminals clean and corrosion-free is another simple but impactful task; a mixture of baking soda and water can neutralize acid if present, and a wire brush can clean away residue. By being proactive with these checks, you can catch minor issues before they escalate into major, costly problems, extending the working life of your entire battery bank.
Ensuring Proper Ventilation and Temperature Control
As we discussed earlier, temperature is a critical factor for battery performance and longevity. Even with a well-spaced rack, you still need to actively manage the environment around your battery bank to ensure optimal thermal conditions. Different battery chemistries have different sweet spots for operation, and understanding these is key.
For most LiFePO4 batteries, ideal operating temperatures are typically between 32°F and 113°F (0°C and 45°C) for charging, and often a wider range for discharging. While they handle heat better than lead-acid, sustained operation at the upper end of their temperature range will still degrade them faster. If your rack is in an area that gets hot, like a southern garage in summer, you might need to integrate active cooling. This could involve small exhaust fans to pull hot air out of an enclosed rack or strategically placed fans to circulate air around an open-frame system. If you're building a system in a Off-Grid Solar Cost in Cold Climates, you'll also need to consider maintaining minimum temperatures, as charging LiFePO4 batteries below freezing can cause permanent damage. In such cases, a battery heating pad or a small, thermostatically controlled heater within the battery enclosure might be necessary to keep them warm enough.
Lead-acid batteries (including flooded, AGM, and Gel) are particularly sensitive to high temperatures. For every 18°F (10°C) rise above their ideal operating temperature (typically 77°F or 25°C), their lifespan can be cut in half. This makes robust ventilation absolutely non-negotiable for lead-acid banks. Ensure there's ample space around each battery in the rack, and that the area itself has good airflow. Never operate lead-acid batteries in a sealed, unventilated space, as they can produce hydrogen gas, which is highly flammable. By carefully managing the ambient temperature and ensuring proper airflow through and around your rack-mounted batteries, you are directly investing in their longevity and reliability, maximizing the return on your initial investment.
Expandability and Future-Proofing Your Setup
One of the most appealing aspects of off-grid living is the ability to adapt and grow your energy system as your needs evolve. A smartly chosen and rack-mounted battery system makes this process far simpler and more cost-effective. Building in expandability from the outset is a forward-thinking strategy that will save you considerable time and money in the long run.
When you initially design your system and select your rack, consider leaving some empty space. If you're buying a rack that supports a certain number of rack units (RUs), and your current battery bank only fills half of them, that extra space is your future expansion room. This approach is particularly effective with modular batteries, such as the popular server-rack style LiFePO4 batteries from companies like EG4 or Growatt. These units are designed to slide right into an available slot, making adding capacity as straightforward as plugging in a new component. This forethought eliminates the need to completely dismantle and rebuild your entire battery storage system when you decide you need more power.
An expandable rack also simplifies the process when you decide to boost your overall system capacity, perhaps by adding more solar panels (see How to Add Panels to an Existing System) or integrating more power-hungry appliances. If your energy demands increase – maybe you add a mini-split AC unit or a larger well pump – having pre-allocated space for more batteries means you don't have to start from scratch. You simply acquire the additional battery modules, slide them into the available slots in your existing rack, and make the necessary wiring adjustments (which are typically minor with a well-designed modular system). This structured approach to expansion, facilitated by rack-mounting, ensures that your off-grid journey can evolve seamlessly without major logistical or financial roadblocks. It’s about building a system that can grow with you, rather than one that forces you into a complete overhaul every time your power needs change.
Disclaimer
This guide provides general information for rack-mounting off-grid batteries. While we strive for accuracy, individual setups can vary greatly. Always consult specific product manuals, adhere to all local electrical codes, and consider consulting with a certified electrician or solar professional for complex installations or if you are unsure about any steps. Working with electricity can be dangerous if not handled properly.