How to Install Fuses and Breakers
Venturing into the world of off-grid solar is incredibly empowering, but let's be honest, the electrical side can feel like a minefield. Many folks, myself included when I first started, get a little overwhelmed by all the talk of volts, amps, and watts, not to mention the crucial need for safety devices. You want your system to work, yes, but more importantly, you want it to be safe for you, your family, and your property. This guide is here to demystify the process of installing fuses and breakers in your off-grid solar system, ensuring you have reliable power without the nagging worry of electrical hazards.
Understanding the “Why” Behind Fuses and Breakers
It's easy to look at a fuse or a breaker as just another component you have to buy, another step in the wiring process. But trust me, understanding their fundamental purpose isn't just about ticking a box; it's about protecting your investment and, more importantly, your safety. These small devices are the unsung heroes of any electrical setup, especially in an off-grid environment where you're often your own electrician.
The Silent Dangers of Unprotected Circuits
Imagine plugging in an appliance, perhaps a trusty old microwave in your off-grid cabin, and suddenly, something goes wrong. Maybe there's an internal fault, or a wire frays and touches the metal casing. Without proper protection, that faulty microwave could draw an immense amount of current, far more than the wiring in your walls or the components in your inverter are designed to handle. This scenario is a silent threat because you might not see the problem immediately. The wires carrying that excessive current would start to heat up, potentially melting their insulation and, in the worst-case scenario, sparking a fire.
Even less dramatic events, like running too many high-draw appliances simultaneously, can put undue stress on your system. This sustained overload can degrade wiring over time, reduce the lifespan of expensive components like your inverter or batteries, and gradually build up to a critical failure point. It's not just about catastrophic short circuits; it's also about the slow, insidious damage caused by chronic overcurrent. We've all heard stories, or maybe even experienced the smell of hot plastic from an overloaded extension cord – that's your warning sign that something is drawing too much power, and without a fuse or breaker, that warning could escalate rapidly.
How Fuses and Breakers Safeguard Your System
This is where fuses and breakers step in as your system's personal bodyguards. Their job is simple: if the electrical current flowing through a circuit exceeds a safe limit, they interrupt that current, effectively shutting down the power to prevent damage or fire. Think of them as intentional weak links in your electrical chain, designed to break before something more critical (and expensive, or dangerous) does.
Fuses do this by having a small wire or strip of metal that literally melts and breaks when too much current passes through it. Once a fuse blows, it's a one-and-done deal; you have to replace it. This is why it's always smart to have a few spare fuses on hand, especially for critical circuits. Breakers, on the other hand, are resettable switches. When an overcurrent occurs, an internal mechanism trips, opening the circuit. Once the fault is cleared, you can usually just flip the switch back to restore power. Both achieve the same goal of interrupting current, but the resettable nature of breakers makes them very convenient for circuits that might experience occasional, minor overloads that can be easily resolved. They protect everything from your delicate charge controller, your robust inverter, and especially your battery bank, which can deliver massive amounts of current if short-circuited. Understanding these basic roles is fundamental to designing a safe and reliable off-grid system, a core part of any good Off-Grid Solar System Design Basics plan.
Types of Fuses and Breakers for Off-Grid Solar
Just like you wouldn't use a wrench to hammer a nail, you can't use just any fuse or breaker in your off-grid system. The world of electrical protection has specific components designed for specific tasks, especially when you're dealing with both direct current (DC) and alternating current (AC). Mixing them up can lead to inefficient protection, or worse, catastrophic failure.
DC Fuses and Breakers
Direct current, or DC, is what flows directly from your solar panels to your charge controller, and from your charge controller to your battery bank. It's also the current your battery bank supplies to your inverter. DC current behaves differently than AC, particularly when it comes to breaking the circuit. When you open a DC circuit under load, it has a strong tendency to create an electrical arc that can persist, causing heat and damage, which is why DC protection devices are engineered differently.
For DC applications, you'll encounter several common types:
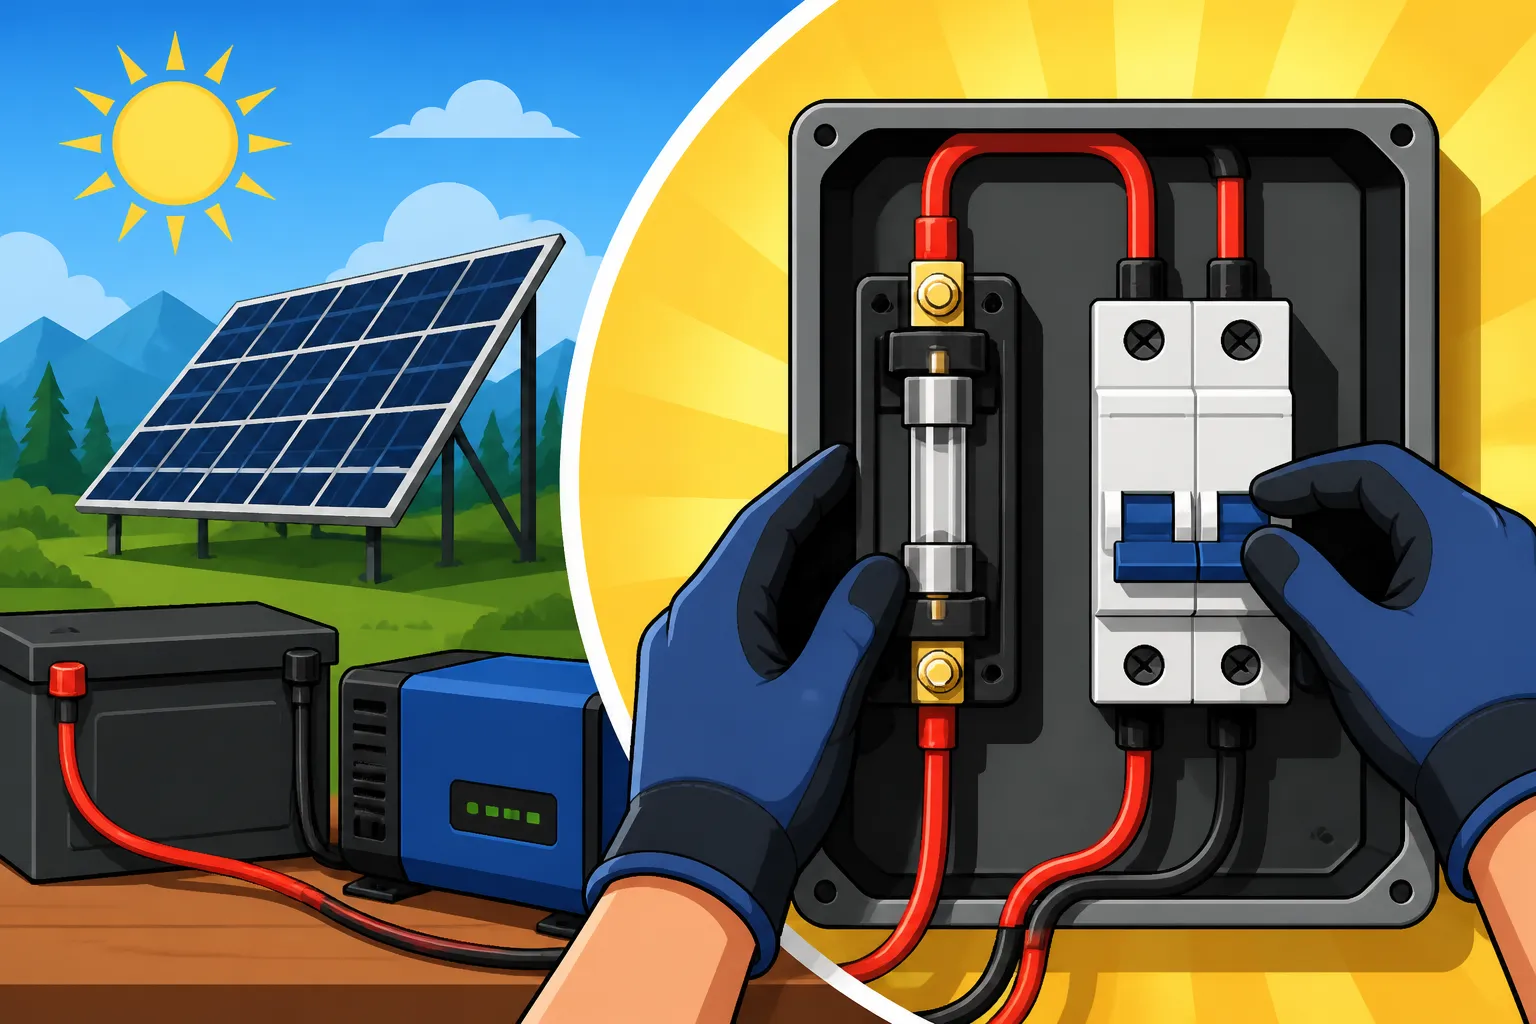
- ANL (Automotive Normal Link) Fuses: These are high-current, bolt-down fuses, typically used for main battery bank protection, especially between the battery and a large inverter. They can handle significant amperage and are designed for severe overcurrent conditions. Many off-grid enthusiasts source these easily through retailers like Renogy or find a wide selection on Amazon.
- MIDI/Maxi Fuses: These are smaller than ANL fuses but still designed for high-current applications, often found in battery boxes or for protecting individual string inputs from larger solar arrays.
- DC Circuit Breakers: These look a bit like miniature versions of your household breakers, but they are specifically rated for DC voltage and current. They come in various amperage ratings and are excellent for protecting the lines between your solar panels and charge controller, or between the charge controller and the battery bank. Their resettable nature is a huge plus for troubleshooting or temporarily disconnecting power to certain parts of your system, which can be super handy when you're doing maintenance or expanding your setup. If you're wondering How to Connect Batteries, Inverter, and Panels, these are key components in that connection.
It's absolutely critical to use DC-rated fuses and breakers for DC circuits. Using an AC breaker in a DC circuit, even if the amperage rating seems right, is a serious safety risk because it might not effectively interrupt the persistent DC arc, leading to potential fire.
AC Fuses and Breakers
Once your off-grid inverter converts the DC power from your batteries into usable alternating current (AC), you're essentially dealing with a mini-version of a standard household electrical system. This means you'll use familiar AC fuses and breakers for protection, but they'll be integrated into your off-grid specific AC distribution.
Common AC protection devices include:
- Standard Thermal-Magnetic Circuit Breakers: These are the standard breakers you find in any home's electrical panel. They protect against both overcurrent (thermal trip) and short circuits (magnetic trip). After your inverter, you'll typically have a main AC breaker, and then individual breakers for each AC circuit in your off-grid living space – just like a conventional house.
- GFCI (Ground Fault Circuit Interrupter) Breakers/Outlets: Essential for protecting against ground faults, which can be deadly. These are mandatory in wet locations like bathrooms, kitchens, and outdoor outlets, even in off-grid setups. They detect imbalances in current flow, indicating electricity is escaping the circuit (e.g., through someone's body to ground), and trip quickly to prevent electrocution.
- AFCI (Arc Fault Circuit Interrupter) Breakers: These are designed to detect dangerous electrical arcs (often caused by damaged wiring or loose connections) that can lead to fires. While not always strictly mandated for off-grid systems, they offer an extra layer of safety, especially in older structures or where wiring might be exposed to wear and tear.
When installing AC breakers, they'll typically be housed in a small AC subpanel connected directly to your inverter's AC output. The sizing of these breakers depends on the loads you plan to run and the wire gauge you've used for those circuits, following standard electrical codes. Remember, a good inverter, regardless of its features, relies on proper external protection. You can learn more about picking the right components in an Off-Grid Solar Equipment Explained guide.
Sizing and Placement: Where to Put Them and How Big
This is arguably the most crucial part of installing fuses and breakers. It's not enough to just have them; they need to be the right size and in the right place to do their job effectively. Get this wrong, and you might as well not have them at all. This is where safety truly meets functionality in your off-grid solar system.
The Golden Rule of Sizing: Protecting the Wire
Here's the absolute cornerstone of electrical protection: fuses and breakers are there to protect the wire, not the appliance. While they do protect appliances by limiting current, their primary role is to prevent the wires themselves from overheating and becoming a fire hazard. Every wire gauge has a maximum current capacity (ampacity) it can safely handle. If you put a fuse or breaker that allows more current than the wire can handle, that wire will heat up and potentially melt or cause a fire before the fuse or breaker ever trips.
Think of it this way: if your wire is rated for 30 amps, you must use a fuse or breaker rated at 30 amps or less. Never more. A common practice, especially for continuous loads (like an inverter running for hours), is to size your fuse or breaker to about 80% of the wire's ampacity. This gives you a safety margin. For instance, if a wire is rated for 100 amps, you might use an 80-amp breaker. This principle is deeply rooted in the National Electrical Code (NEC), which, even if not legally enforced in your specific off-grid location, provides invaluable best practices for safety. Calculating wire size correctly is vital, and you can find comprehensive guides on How to Size Wire and Cables to ensure you get this step right.
Let's illustrate with an example: you have a main cable running from your battery bank to your inverter. Let's say your inverter can draw up to 200 amps at peak, and you've selected a 4/0 AWG copper cable, which might be rated for around 300-400 amps depending on insulation and installation method. Applying the 80% rule for the wire would suggest a breaker around 240-320 amps. However, you also need to consider the inverter's maximum input current rating. You'd choose a fuse or breaker that is at or below the wire's ampacity and at or above the maximum continuous operating current of the inverter. Often, the inverter manufacturer will specify the maximum recommended fuse size. It's a careful balancing act, and when in doubt, consult the component manuals or an experienced solar electrician.
Critical Locations for Protection Devices
Proper placement of fuses and breakers is just as important as proper sizing. Every major current path in your off-grid system needs protection. Here are the crucial locations:
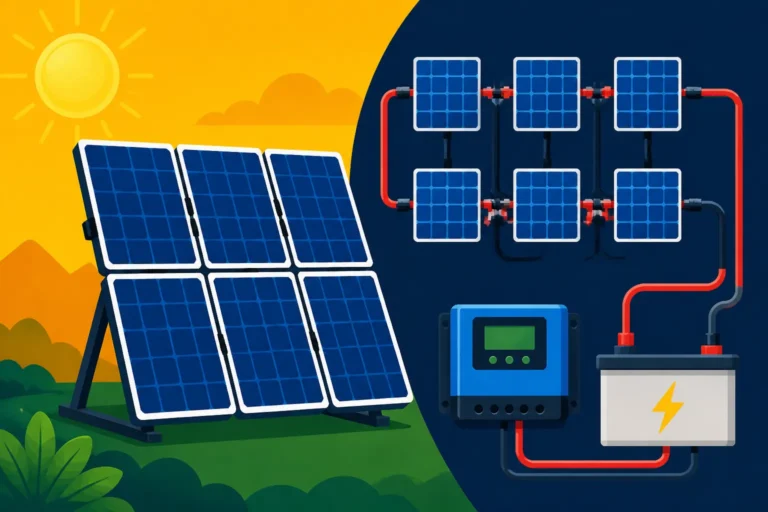
- Between Solar Array and Charge Controller (DC Input): You need overcurrent protection for the wires running from your solar panels to your charge controller. This protects the wire itself and the charge controller from faults originating in the array, like a short circuit from damaged panel wiring. Small DC circuit breakers or inline fuses are common here. This is also covered in detail in any guide on How to Wire an Off-Grid Solar System.
- Between Charge Controller and Battery Bank (DC Output): This fuse or breaker protects the battery bank from faults in the charge controller, and also protects the wiring if the battery were to back-feed a fault into the charge controller. Most charge controllers, especially reputable brands like Victron or Renogy, will specify the maximum fuse size for their battery connection.
- Between Battery Bank and Inverter (Main DC Protection): This is one of the most critical fuses or breakers in your entire system. Your battery bank can deliver immense amounts of current, and if a short circuit occurs at the inverter or in the main DC wiring, this protection device is the last line of defense against a battery meltdown or fire. ANL fuses or large DC circuit breakers are typically used here, sized to protect the main battery cables and the inverter.
- After the Inverter (Main AC Protection): Once your inverter produces AC power, you need a main AC breaker. This protects the inverter itself from overloads or short circuits in your home's AC wiring. This main breaker feeds into your AC distribution panel.
- Individual AC and DC Loads/Circuits: Within your AC distribution panel, each individual circuit (e.g., for lights, outlets, refrigerator) will have its own appropriately sized AC breaker. Similarly, if you have any direct DC loads (like 12V lights, USB chargers), they should also have individual fuses or small DC breakers to protect their wiring.
For optimal safety, these protection devices should be located as close as possible to the power source they are protecting. For instance, the main DC fuse for the inverter should be very close to the battery bank, usually within 12-18 inches, to protect the maximum length of wire. Accessibility is also key; you need to be able to easily reach and reset breakers or replace fuses.
| Fuse Type | Typical Application | Voltage Rating | Common Amperage Range | Notes |
|---|---|---|---|---|
| ANL | Main battery-to-inverter, large DC loads | 32V – 80V DC | 35A – 750A | Bolt-down style, high-rupture capacity. Critical for main system protection. Requires a fuse holder. |
| MIDI | Smaller battery banks, charge controller | 32V – 58V DC | 30A – 200A | Compact, bolt-down. Often used for branch DC circuits or between charge controller and battery. Requires a fuse holder. |
| Maxi | Auxiliary DC loads, panel inputs | 32V – 58V DC | 20A – 100A | Blade-style, plug-in. More common in automotive/RV DC distribution. Smaller current applications than ANL/MIDI. |
| DC Breaker | Solar array, charge controller, branch DC | 12V – 250V DC | 5A – 300A | Resettable, combines disconnect and overcurrent protection. Panel mount or surface mount. Extremely versatile for various points in the DC circuit. Look for proper DC voltage rating. |
| AC Breaker | After inverter, AC distribution panel | 120V / 240V AC | 15A – 100A | Standard household breakers. Protects AC wiring and appliances. GFCI/AFCI variants provide enhanced safety. Installed in AC subpanels. |
Step-by-Step Installation of Common Off-Grid Protection Devices
Alright, now that we know why and where to use fuses and breakers, let's get down to the nitty-gritty of actually putting them into your system. Don't worry, it's not as intimidating as it might seem, especially if you take it one step at a time and prioritize safety above all else. Remember, a well-planned DIY Off-Grid Solar Installation Step by Step guide will always emphasize safety.
Installing DC Fuses and Breakers
When working with DC components, especially around your battery bank, safety is paramount. High-voltage DC can deliver a nasty shock, and a short-circuited battery can generate enough heat to cause a fire or explosion. Always disconnect the battery bank entirely before starting any wiring work, wear appropriate personal protective equipment (PPE) like safety glasses and insulated gloves, and use insulated tools whenever possible.
Let's walk through installing a typical ANL fuse block for your main battery-to-inverter connection:
- Mount the Fuse Holder: Choose a sturdy, dry, and easily accessible location near your battery bank, within 12-18 inches. Mount the ANL fuse holder securely to a non-conductive surface (wood, plastic, or a dedicated electrical panel board) using appropriate screws.
- Prepare the Cables: You'll have a positive cable running from your battery's positive terminal to the fuse holder, and another positive cable from the fuse holder to your inverter. Measure the required lengths, ensuring they're as short as safely possible to minimize voltage drop. Cut the cables and strip about ¾ inch of insulation from each end.
- Crimp Lugs: For high-current connections like these, you must use appropriately sized copper crimp lugs. Slide a lug onto the stripped wire end and use a heavy-duty hydraulic or hammer crimper to secure it firmly. A good crimp is essential for minimizing resistance and heat. Double-check your crimps – a loose connection is a major fire hazard.
- Connect to Fuse Holder: Attach the crimped cable ends to the terminals of the ANL fuse holder. One cable comes from the battery positive, the other goes to the inverter's positive input.
- Insert the Fuse: Place the correctly sized ANL fuse (e.g., 250A) into the holder, ensuring it's seated properly. Secure any covers or fasteners.
- Final Connections and Torque: Connect the battery cable to the positive terminal of your battery bank. Connect the inverter cable to the positive input of your inverter. Use a torque wrench to tighten all connections (battery terminals, fuse holder, inverter terminals) to the manufacturer's specified torque. Loose connections are a common cause of overheating and failure in off-grid systems.
- Negative Cable: Remember, while fuses are usually placed on the positive side, the negative cable also needs to be securely connected and properly sized. In some systems, a shunt for a battery monitor will be integrated into the negative cable path, but it does not replace overcurrent protection. All electrical connections should be tight, clean, and free of corrosion.
- Installing DC Circuit Breakers: For DC circuit breakers, the process is similar. Mount the breaker, connect the incoming positive wire to one terminal and the outgoing positive wire to the other. Ensure the breaker is rated for the correct DC voltage and current for the circuit it's protecting.
Wiring AC Breakers into a Subpanel
Once your inverter is doing its job and converting DC to AC, you'll manage your household loads through an AC distribution panel, often called a subpanel. This is where your individual AC breakers live. Again, safety first! Ensure your inverter is completely off and disconnected from the batteries before beginning this work.
- Mount the AC Subpanel: Choose a suitable, dry indoor location. Mount the subpanel securely to a wall stud or a sturdy surface. Make sure it’s easily accessible and has enough space around it for wiring.
- Run Wires from Inverter: You'll run the main AC output wires from your inverter to the main lugs in the subpanel. This usually involves two "hot" wires (L1 and L2 for 240V systems, or just L1 for 120V systems), a neutral wire, and a ground wire. Use appropriate conduit or cable clamps to protect the wires as they enter the subpanel.
- Connect Main Lugs: Connect the main hot wires from the inverter to the main hot lugs in the subpanel. Connect the neutral wire from the inverter to the neutral bus bar in the subpanel. Connect the ground wire from the inverter to the ground bus bar. In a subpanel, the neutral and ground bus bars must not be bonded together; they should be separate, with the ground bar bonded to the panel enclosure. This is critical for proper Off-Grid Solar Safety and Grounding.
- Install Individual Breakers: For each AC circuit you plan to run (e.g., kitchen outlets, bedroom lights, well pump), you’ll need an appropriately sized AC breaker. Snap the breakers into the panel's bus bar.
- Wire Circuits to Breakers: Run your individual circuit wires (hot, neutral, ground) from your outlets, lights, and appliances into the subpanel. Connect the circuit’s hot wire to the terminal on its respective breaker. Connect the circuit’s neutral wire to the neutral bus bar. Connect the circuit’s ground wire to the ground bus bar.
- Label Everything: Once all wires are connected, clearly label each breaker with the circuit it controls (e.g., "Kitchen Outlets," "Bedroom Lights"). This is invaluable for troubleshooting and safety.
- Close Up and Test: Install the dead-front cover and the outer cover of the subpanel. Before re-energizing your inverter, double-check all connections. Once confident, re-connect your battery, power up the inverter, and then, one by one, flip on your AC breakers, testing each circuit as you go.
This process ensures that your AC loads are safely distributed and protected, just like in a grid-tied home. If you're using an inverter charger, the wiring might be slightly more complex as it integrates grid or generator input, but the principles of protection remain the same. More specialized information can be found in a guide on How to Wire an Inverter Charger.
Common Mistakes and Best Practices
Even with the best intentions, it's easy to fall into some common traps when wiring up fuses and breakers. Learning from these potential missteps and adopting solid best practices can save you a lot of headaches, money, and most importantly, keep your off-grid sanctuary safe.
Avoiding Pitfalls in Off-Grid Electrical Protection
It's a common rookie error to overlook the nuances of electrical protection. Here are some of the most frequent mistakes I've seen or personally wrestled with in the early days:
- Using Incorrect Ratings: This is probably the biggest offender. Putting a 100-amp fuse on a wire rated for 60 amps is a recipe for disaster. The wire will melt long before the fuse ever blows. Conversely, putting a fuse that's too small for a circuit's normal operating current (especially for motor start-up surges) can lead to nuisance trips and frustration. Always refer to wire ampacity charts and component specifications.
- Not Protecting All Conductors (Especially DC): While AC circuits often use a single breaker to interrupt both hot legs (in 240V systems) or just the hot (in 120V), DC circuits sometimes see people only fusing the positive line. While the positive is typically where the fuse goes, in some cases, especially in more complex systems or where code demands, both positive and negative DC lines need to be interruptible, particularly for disconnects. Always ensure your design fully protects the current path.
- Poor Connections: Loose terminals, improperly crimped lugs, or corroded connections are silent killers. They introduce resistance, which generates heat, and that heat can be enough to melt insulation, cause arcs, or start fires, regardless of whether you have a fuse in place. Always use proper tools (like a quality crimper and torque wrench) and ensure connections are clean and tight. This includes battery terminals, fuse block connections, and inverter terminals.
- Ignoring Environmental Factors: Dust, moisture, and extreme temperatures can all degrade electrical components. Fuses and breakers should be housed in appropriate enclosures (e.g., sealed boxes for outdoor use) to protect them from the elements. Overheating can cause components to fail prematurely or trip unnecessarily.
- Forgetting About Future Expansion: Many off-grid systems start small and grow. If you design your main battery cables and protection for your initial 2000W inverter, but later upgrade to a 5000W inverter, those old wires and fuse might no longer be adequate. Always consider potential future upgrades when sizing your initial system components, a concept explored in articles like How to Design an Expandable System.
- Using Automotive Fuses for High-Voltage DC: While some 12V RV systems might get away with automotive blade fuses for very small loads, never use standard automotive blade fuses for high-voltage (24V, 48V) or high-current DC applications in a residential-style off-grid system. They are not rated for the sustained DC voltage and can cause dangerous arcing. Stick to ANL, MIDI, or dedicated DC circuit breakers.
Ensuring Long-Term Reliability and Safety
Building a safe system isn't just about the initial installation; it's about maintaining that safety over the long haul. A few best practices can make a world of difference:
- Label Everything Clearly: This might seem minor, but clear, durable labels on every fuse, breaker, and wire are invaluable. When troubleshooting a tripped breaker at 2 AM or showing a visitor how to operate something, you'll be immensely grateful for good labels.
- Regular Inspection: Periodically, at least once or twice a year, perform a visual inspection of all your protection devices and wiring. Look for signs of heat (discoloration, melted insulation), corrosion, loose connections, or physical damage. Pay particular attention to high-current areas like the main battery cables and inverter connections.
- Proper Ventilation: Ensure any enclosures housing batteries, inverters, and fuse blocks have adequate ventilation, especially for lead-acid batteries that off-gas. Even LiFePO4 batteries and inverters generate heat, and proper airflow prevents overheating, which can cause component failure or nuisance trips.
- Use Quality Components: Don't skimp on fuses and breakers. Cheap, generic components may not perform as advertised, especially when it comes to critical interrupting capacities. Stick to reputable brands for electrical components. You can find quality components and systems from companies like Renogy or browse reliable options on Amazon, but always ensure they meet appropriate electrical standards. Investing in reliable equipment reduces the risk of failure and increases the overall safety of your system. This often means paying a little more upfront, but it’s worth it for peace of mind and longevity.
- Keep Spares: Fuses blow. It's their job. Always keep a supply of correctly sized spare fuses for all the different types in your system. There's nothing worse than a blown fuse shutting down a critical appliance when you're far from the nearest hardware store.
- Consider a Professional Review: If you're building a larger or more complex off-grid system, even if you're doing the DIY work, consider having a qualified solar electrician or licensed electrical inspector review your plans or conduct a final inspection. Their experienced eye can often spot potential issues that a DIYer might miss, helping you achieve 100% off-grid reliability. This can be especially important for areas requiring permits, even if you're not strictly connected to the grid.
By diligently applying these practices, you'll not only install fuses and breakers correctly but also ensure your off-grid solar system operates safely and efficiently for years to come.
Disclaimer
The information provided in this article is for educational and informational purposes only and is not intended as professional electrical advice. Working with electricity, especially high-voltage DC and AC systems, can be dangerous and may result in serious injury or death if not handled properly. Always consult with a qualified and licensed electrician or solar professional before designing, installing, or modifying any electrical system. Adhere to all local and national electrical codes, including the National Electrical Code (NEC), and manufacturer instructions for all components. The author and publisher are not liable for any losses, injuries, or damages resulting from the use or misuse of the information presented herein.