How to Run Solar Cables Safely
Getting your off-grid solar system up and running can feel like a monumental achievement, but the often-overlooked and critically important step of properly running your solar cables can quickly turn excitement into frustration, or worse, a dangerous situation. Frayed wires, tripped breakers, or even system failures due to improper wiring are real concerns that many DIYers and even experienced folks face. This comprehensive guide will walk you through everything you need to know about safely and effectively running your solar cables, ensuring your system is reliable, efficient, and, most importantly, safe for years to come.
Understanding Your Solar Cables
Before you even think about pulling a single wire, it's crucial to understand the different types of cables you'll be dealing with in an off-grid solar setup and why each one serves a specific purpose. Thinking of all wires as "just wires" is a recipe for trouble down the road. Each part of your system, from the panels to the batteries and then to your appliances, requires specific cabling designed to handle the unique electrical demands and environmental conditions.
Types of Cables for Off-Grid Systems
In an off-grid solar system, you'll encounter a few primary types of cables, each with its own characteristics and recommended usage. Knowing these differences is the first step to a successful and safe installation. It’s not just about what they look like, but what they’re rated for in terms of voltage, amperage, and environmental exposure.
First up, we have photovoltaic (PV) wire. This is specifically designed for solar panel applications and is typically found connecting your solar panels to each other and then to your charge controller. PV wire is unique because it's single-conductor, direct current (DC) rated, and incredibly durable, often featuring a thick, cross-linked polyethylene (XLPE) insulation that is highly resistant to UV radiation, moisture, and extreme temperatures. This robust construction is essential because these cables live outdoors, constantly exposed to the elements. You wouldn't want to use standard indoor electrical wire for this, as it would degrade rapidly in the sun, leading to potential shorts and fire hazards.
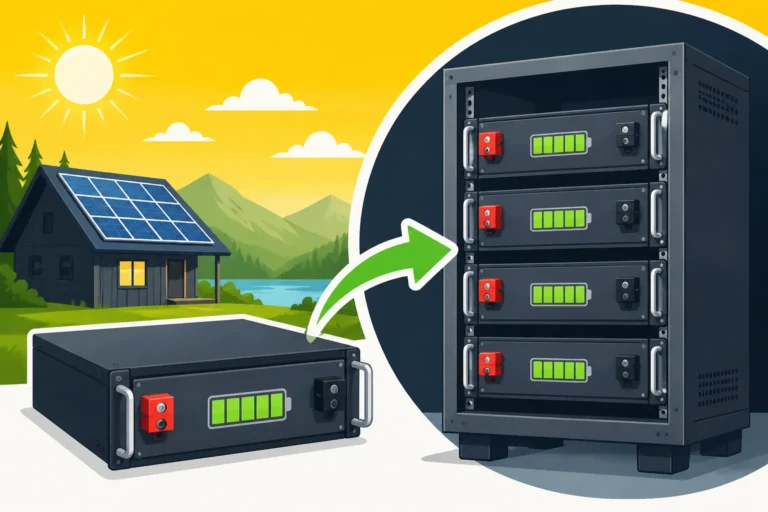
Next, you'll deal with battery cables. These are often thicker, stranded copper cables, much like welding cable, designed to carry high currents over relatively short distances from your charge controller to your battery bank, and then from your battery bank to your inverter. Their flexibility is a huge advantage when connecting multiple batteries in series or parallel within a confined space like a battery box. The thick gauge minimizes voltage drop and resistance, which is absolutely critical for battery banks that operate at lower voltages (like 12V or 24V) but push out massive amounts of current. Incorrectly sized battery cables can lead to significant energy loss, reduced system efficiency, and even dangerous overheating, especially when your inverter is drawing heavy loads.
Finally, there's your AC wiring. Once your inverter converts the DC power from your batteries into alternating current (AC) for your household appliances, you'll be using standard electrical wiring, often referred to as Romex (NM-B) for indoor applications or THHN/THWN in conduit, depending on your setup. This is the same type of wiring you'd find in a traditional grid-tied home. It's used for connecting your inverter to your AC distribution panel (breaker box) and then out to your lights, outlets, and appliances. While this might be familiar territory for some, ensuring proper grounding and sizing according to the National Electrical Code (NEC) is still paramount for safety.
Key Cable Specifications
Understanding the numbers and letters stamped on your cables isn't just for electricians; it's vital for anyone setting up an off-grid solar system. These specifications tell you what the cable is designed to do and, more importantly, what it can safely handle. Ignoring them is like driving a car without checking the oil – you might get away with it for a while, but eventually, you're asking for trouble.
The most critical specification you'll encounter is wire gauge, often measured using the American Wire Gauge (AWG) system. Counter-intuitively, the smaller the AWG number, the larger the wire's diameter and its capacity to carry current. For instance, a 10 AWG wire is much thinner than a 2/0 AWG (pronounced "two aught") cable. Solar panels typically use 10 AWG or 12 AWG PV wire, while battery banks and high-current inverter connections might require anything from 4 AWG down to 4/0 AWG, depending on the current draw and cable length. Undersizing your cables for the current they need to carry is one of the most common and dangerous mistakes, leading to excessive heat generation, potential fires, and significant power loss.
Next, pay close attention to the insulation rating. This tells you the maximum voltage the cable can safely carry and its resistance to environmental factors. For PV wire, you'll often see ratings like 600V or 1000V DC, along with UV and moisture resistance. Battery cables will have insulation suitable for their voltage (e.g., 60V DC) and good abrasion resistance. AC wiring will specify its voltage rating (e.g., 600V AC) and often its temperature rating (e.g., 90°C). The temperature rating indicates the maximum continuous operating temperature the insulation can withstand without degrading. Always choose cables with insulation ratings that meet or exceed your system's maximum voltage and environmental conditions.
Lastly, and directly related to gauge, is the amperage rating or ampacity. This specifies the maximum current (in amps) a cable can safely carry continuously without overheating. This rating is influenced by wire gauge, insulation type, ambient temperature, and how the cable is installed (e.g., in conduit with other cables). Always consult ampacity tables, often found in the National Electrical Code (NEC) or manufacturer specifications, to select the appropriate cable for your expected maximum current. For example, if you're running a 2000-watt inverter off a 12-volt battery bank, the inverter could be drawing over 160 amps DC, requiring very thick cables to handle that current safely. This is why properly sizing wire and cables is so important for an off-grid system.
The Importance of Correct Sizing
Getting your cable sizing right is not just a recommendation; it's a non-negotiable requirement for an efficient and safe off-grid solar system. Skimping on cable gauge to save a few dollars can cost you much more in the long run, both in terms of lost power and potential hazards. Many folks, especially those new to off-grid living, underestimate the impact of thin wires on a DC system.
The primary reason for correct sizing is to minimize voltage drop. In any electrical circuit, as current flows through a wire, there's a natural reduction in voltage over the length of that wire due to its inherent resistance. The thinner the wire and the longer the run, the greater this voltage drop. In a 12-volt or 24-volt DC system, even a seemingly small voltage drop of 1-2 volts can represent a significant percentage of your total available power. For example, a 1-volt drop on a 12-volt system is over 8% loss, directly impacting the performance of your charge controller, the efficiency of your battery charging, and the power delivered to your inverter. This means your batteries might not get fully charged, or your appliances might not receive adequate power, causing them to run inefficiently or not at all. You can learn more about this by checking out our guide on how to prevent voltage drop in off-grid wiring.
Beyond efficiency losses, incorrect cable sizing poses serious overheating risks. When a wire is too thin for the amount of current flowing through it, its electrical resistance causes it to heat up. If this heat cannot dissipate quickly enough, the cable can overheat to dangerous levels. This isn't just a hypothetical problem; overheated cables can melt their insulation, leading to short circuits, system damage, and, worst of all, electrical fires. Imagine trying to run a high-draw appliance like a microwave or a well pump through undersized wires – the heat generated could easily become a fire hazard, especially in enclosed spaces or near flammable materials like wood framing in a cabin or an RV. This is why understanding your load calculation and system size is so crucial when determining cable size.
The consequences of improper sizing extend to your components as well. Your charge controller, inverter, and batteries are designed to operate within specific voltage and current parameters. Consistent voltage drop can stress these components, leading to premature failure. For instance, an inverter constantly trying to compensate for low input voltage might draw even more current, exacerbating the overheating problem and reducing its lifespan. Therefore, always err on the side of caution: if you're between two gauges, choose the thicker one. While thicker cables might have a slightly higher upfront cost, they offer greater efficiency, longevity, and, most importantly, peace of mind for your entire system.
Planning Your Cable Runs for Safety and Efficiency
Thinking ahead about where your cables will go and how they will be routed is just as important as choosing the right cable types. Haphazardly running wires can lead to a messy, inefficient, and dangerous system. A well-planned cable run ensures optimal performance, protects your valuable equipment, and makes future maintenance or expansion much simpler. It's about creating a logical, safe pathway for your power, not just a tangled spaghetti monster.
Mapping Out the Path
Before you cut a single foot of wire or drill any holes, take the time to map out the entire path your solar cables will travel. This isn't just about aesthetics; it's a critical step for efficiency, safety, and compliance. Picture it like designing a plumbing system; you wouldn't just randomly run pipes without a plan, would you? The same deliberate approach is needed for your electrical arteries.
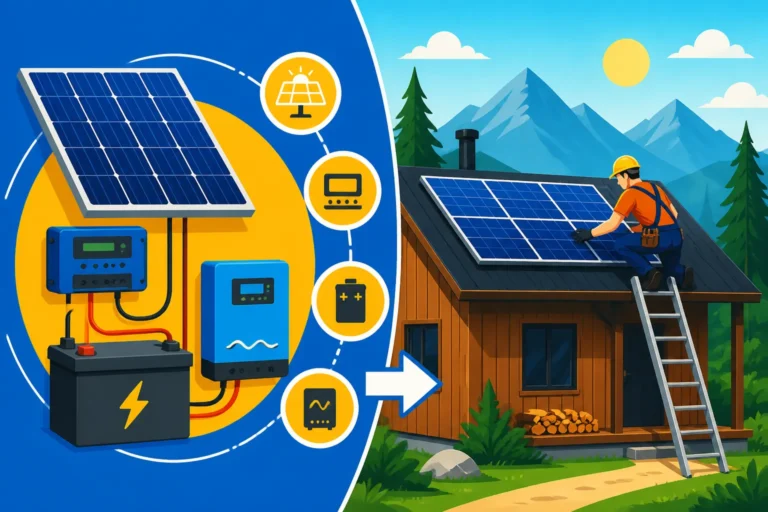
Start by identifying the major components: your solar panels, charge controller, battery bank, and inverter. Now, visualize the most direct, yet safest, route between each of these. For example, your solar panels on the roof of your cabin need to connect to the charge controller, which might be inside a utility room. Your charge controller then connects to your battery bank, often located nearby in a protective enclosure. Finally, your battery bank connects to your inverter, which then feeds your AC loads through a breaker panel. Sketching this out on paper or even doing a walk-through with a marker on your walls (if it's a permanent structure) can reveal potential issues before they become real problems. This helps with creating an overall wiring diagram.
Consider the environment each segment of the cable run will encounter. Cables running across a roof or exposed to direct sunlight will require different protection than those safely tucked away inside a wall. Will they be exposed to foot traffic, vehicles, or curious animals? Will they cross sharp edges or metal framing? Will they be near sources of extreme heat or cold? For instance, if you're installing on an RV, you'll want to carefully plan how to waterproof roof penetrations. Each environmental factor dictates the type of conduit, mounting hardware, and sealing you'll need. Don't forget to account for access points for inspection and maintenance later on. A tangled mess of inaccessible wires will be a nightmare if you ever need to troubleshoot a fault or expand your system.
Minimizing Lengths and Bends
When it comes to DC electrical systems, especially off-grid solar, length is the enemy of efficiency. Every foot of cable adds resistance, and resistance causes voltage drop and heat. Therefore, one of your primary planning goals should be to minimize the total length of your cable runs as much as possible, particularly the high-current DC runs between your charge controller, batteries, and inverter.
Shorter cable runs directly translate to less voltage drop and less energy loss. Imagine you're trying to push water through a very long, narrow hose; you lose pressure the further it has to travel. Electricity behaves similarly. In a 12-volt system, where every fraction of a volt counts, shaving off even a few feet from your main battery cables can make a noticeable difference in system performance. This often means strategically placing your major components – charge controller, battery bank, and inverter – as close to each other as safely possible. For instance, many off-gridders build a dedicated power shed or utility closet to house these components centrally.
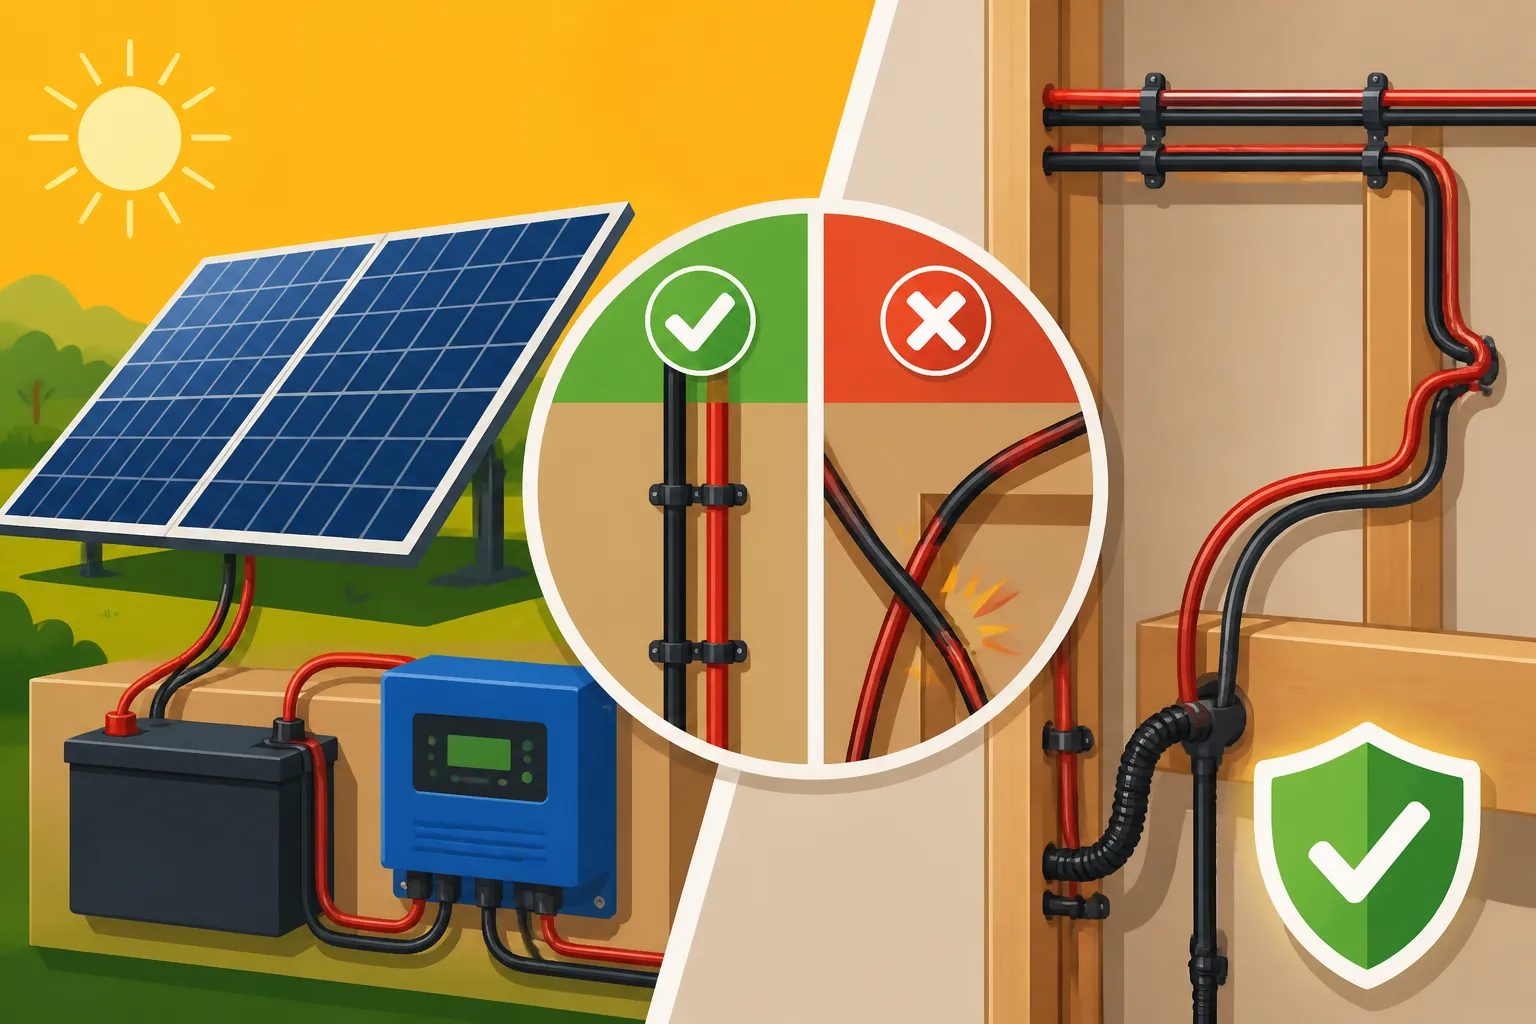
In addition to minimizing length, try to reduce the number of sharp bends in your cable runs. While cables are flexible, excessive bending, especially at sharp angles, can put strain on the conductors and insulation over time. This stress can lead to micro-fractures in the copper wires, increasing resistance, or even damage the insulation, creating weak points that are susceptible to shorts or environmental ingress. When bends are necessary, make them as gradual as possible. Use proper conduit fittings like sweep elbows rather than sharp 90-degree elbows, which can also make it incredibly difficult to pull wires through later. Planning straight, unobstructed paths wherever feasible will make installation easier and ensure the longevity of your cables.
Avoiding Hazards and Interference
Safety is paramount in any electrical installation, and running solar cables is no exception. A well-designed system actively mitigates potential hazards and prevents electromagnetic interference (EMI) that could affect other electronics. Overlooking these aspects during the planning phase can lead to frustrating operational issues or, more critically, dangerous conditions.
One of the biggest hazards to avoid is physical damage to your cables. This means routing them away from areas where they could be pinched, stepped on, abraded by sharp edges, or chewed by rodents. If cables must cross through an area prone to such risks, they absolutely need to be protected by sturdy conduit, such as EMT (electrical metallic tubing) or rigid PVC. For outdoor applications or where constant exposure to sunlight and weather is expected, ensuring cables are rated for outdoor use (like UV-resistant PV wire) and properly secured within weather-resistant conduit is critical. This is especially true for panels or cables from brands like Renogy, which are designed for outdoor resilience. Imagine a scenario where a branch falls on an exposed cable run to your remote hunting cabin – proper conduit could be the difference between a quick power outage and a much more extensive and costly repair.
Another significant hazard is heat. Cables generate heat when current flows through them, and this heat needs to dissipate. Running cables near other heat sources – like exhaust pipes, engine compartments (in an RV or boat), or even inside unventilated, direct-sun enclosures – can cause their internal temperature to rise beyond their rated limits. This accelerates insulation degradation, increases resistance, and dramatically elevates fire risk. Always maintain adequate separation from heat-generating components and ensure any enclosures housing cables (like a battery box) are properly ventilated. For example, if you're running cables from a hot engine bay into a cabin, ensure they pass through fire-rated grommets and are shielded from direct heat.
Finally, consider electromagnetic interference (EMI). High-current DC cables, especially those between your batteries and inverter, can generate significant electromagnetic fields. While usually not dangerous to humans, these fields can interfere with sensitive electronic equipment, such as radios, Wi-Fi routers, communication systems, or even some medical devices. Route these high-current cables away from such sensitive electronics whenever possible. If proximity is unavoidable, using shielded cables or running cables in metal conduit can help to mitigate EMI. This is a common issue in smaller spaces like a van or a tiny home where all components are in close quarters, so careful planning is essential.
Best Practices for Protecting Your Cables
Once you've carefully planned your cable runs, the next crucial step is to protect those cables from the harsh realities of their environment. Whether they're outdoors, indoors, or somewhere in between, cables are vulnerable to physical damage, UV degradation, moisture, and strain. Proactive protection not only extends the life of your system but, more importantly, prevents dangerous electrical faults. Think of it as putting armor on the arteries of your solar power system.
Conduit and Cable Management Solutions
Running bare wires, even if they're properly insulated, is almost never a good idea, especially in an off-grid setup where cables might be exposed to the elements, moving parts, or human interaction. This is where conduit and smart cable management solutions become your best friends. They provide a vital layer of protection against physical damage and environmental factors.
Conduit comes in various forms, each suited for different applications. For exposed outdoor runs, especially on roofs or along walls, Rigid Metal Conduit (RMC) or Intermediate Metal Conduit (IMC) offers excellent protection against physical impact and UV degradation. It's tough, durable, and provides a grounding path. However, it's heavier and harder to work with, requiring specialized bending tools. A more common and often easier-to-install option for outdoor and wet locations is PVC conduit. It's lightweight, non-corrosive, and relatively inexpensive, but it can become brittle in extreme cold and offers less physical protection than metal. For interior runs, especially where flexibility is needed or for short transitions, Electrical Metallic Tubing (EMT) or Flexible Metallic Conduit (FMC) can be used. PVC is also common for underground runs to protect from moisture and excavation damage. The key is to select conduit that is appropriately sized for your cables (don't overfill it!) and rated for the environment it will be in. You can find a wide range of conduit types and accessories on platforms like Amazon.
Beyond rigid conduit, effective cable management is about securing and organizing your wires to prevent strain, abrasion, and tangles. Cable ties (zip ties) are simple but effective for bundling cables neatly and securing them to mounting surfaces or within conduit. Always use UV-resistant cable ties for outdoor applications, as standard ones will quickly degrade in sunlight. Cable clips or clamps are fantastic for securing individual or bundled cables to studs, joists, or panel frames, preventing them from sagging or moving excessively. For larger bundles or where aesthetics are important, cable trays or raceways can provide a structured pathway, allowing for easy access and future expansion. Remember that even with conduit, proper cable support within the conduit is crucial to prevent stress on connectors and terminals.
UV Protection and Weatherproofing
The sun, while providing the energy for your solar system, can also be its greatest enemy when it comes to cable longevity. Ultraviolet (UV) radiation breaks down standard plastics and rubber over time, turning flexible insulation into brittle, cracked coverings that expose live wires. Similarly, moisture intrusion can lead to corrosion, short circuits, and ground faults, especially in DC systems where water can facilitate unintended current paths.
For any cables exposed to direct sunlight, UV protection is non-negotiable. This is why dedicated PV wire is crucial for your solar array; its robust XLPE insulation is specifically designed to resist UV degradation. If you're using other cable types outdoors, or if you want an extra layer of protection, ensure they are run inside UV-resistant conduit (like grey PVC conduit) or encased in specialized UV-resistant cable sleeves. Simply wrapping standard electrical tape around outdoor wires is a temporary fix at best; it will break down quickly and become ineffective. Over time, exposed, degraded insulation is a serious fire and shock hazard.
Weatherproofing is equally vital, especially at points where cables enter or exit enclosures, buildings, or vehicles. Any penetration point is an invitation for water, dust, and insects. Use high-quality cable glands or sealant-filled electrical boxes to create a watertight seal where cables pass through surfaces. For example, when running cables from your solar panels on a roof into your cabin, use a purpose-built solar cable entry gland that allows cables to pass through while maintaining a weather-tight seal against rain and snow. These usually involve a rubber gasket that compresses around the cables, effectively blocking water ingress. For RVs or vans, flexible roof cable entry glands are popular. Always ensure that any outdoor electrical boxes are NEMA-rated for outdoor use (e.g., NEMA 3R or 4X) to keep moisture out. You can find these specialized weatherproofing components easily on platforms like Amazon or at electrical supply stores.
Strain Relief and Support
Even with the correct cable type and proper conduit, neglecting strain relief and support can lead to premature cable failure and dangerous situations. Cables under constant tension or unsupported over long distances will eventually succumb to gravity, vibration, or physical stress. Preventing this wear and tear is a key part of ensuring a reliable, long-lasting system.
Strain relief refers to methods used to prevent tension from being directly applied to electrical connections. Imagine a heavy cable dangling from a terminal lug – over time, the weight of the cable, combined with vibrations or movement (especially in mobile setups like RVs), can loosen the connection, damage the terminal, or even break the wire strands at the connection point. This can lead to intermittent power, increased resistance, and arc flashes – a serious fire hazard. To prevent this, use strain relief connectors or glands where cables enter electrical boxes, inverters, or charge controllers. These components grip the cable firmly, transferring any pulling force to the device's housing rather than the internal electrical connection. For instance, when terminating battery cables to an inverter, ensure the cables are supported and secured before they reach the inverter's terminals, so no weight or tension pulls on the actual connection.
Proper support means securing your cable runs at regular intervals to prevent sagging and minimize movement. Long, unsupported cable spans are prone to damage from wind, snow, ice, or even just their own weight over time. Use cable clamps, clips, or straps to secure cables to structural elements like roof racking, walls, or posts. The spacing of these supports depends on the cable type, its weight, and the environment. For instance, outdoor PV wire might need support every few feet to prevent wind damage. When cables are run in conduit, the conduit itself needs to be properly supported according to electrical code guidelines to prevent sagging or separation. For example, PVC conduit typically requires support every 3 to 5 feet, depending on its size. This structured approach, outlined in guides like Off-Grid Solar Installation Guide, helps maintain the integrity of your wiring over decades of operation.
Proper Termination and Connections
Even the most robust cables are only as good as their weakest link, and often, that weakest link is a poorly made connection. Proper termination – how you attach your cables to components – is absolutely critical for both the efficiency and safety of your off-grid solar system. Bad connections can lead to high resistance, heat buildup, power loss, and even arc faults. It’s not a step to rush or cut corners on.
MC4 Connectors for Solar Panels
MC4 connectors are the industry standard for connecting solar panels. They're designed to be waterproof, UV-resistant, and provide a secure, low-resistance connection for DC circuits. If your solar panels didn't come with factory-installed MC4s, or if you're making your own custom length PV wires, learning how to properly terminate them is essential.
First, you'll need the right tools: a dedicated MC4 crimping tool, an MC4 wrench (for tightening the caps), and a wire stripper specifically for PV wire. Generic crimpers or pliers simply won't cut it for a reliable connection. Start by stripping the PV wire insulation to the exact length specified by the MC4 connector manufacturer, usually around 5-7mm. The goal is to expose just enough copper for the metal terminal to crimp onto, without any stray strands or exposed insulation within the crimp.
Next, carefully insert the stripped wire into the correct metal pin (male or female, depending on the connector housing). Using the MC4 crimping tool, firmly crimp the pin onto the wire. A proper crimp should be mechanically secure and electrically sound – it shouldn't pull off easily, and the wire strands should be tightly compressed into the pin. Once crimped, gently pull on the wire to test the connection. Finally, insert the crimped pin into its corresponding MC4 connector housing, ensuring it clicks securely into place. Then, thread and tighten the cable gland (the rear cap) until it's snug, creating a waterproof seal around the cable's insulation. The MC4 wrench helps achieve proper torque without damaging the connector. A poorly crimped or loose MC4 connector is a major source of system inefficiency and can lead to dangerous arcing, so take your time and do it right. Many brands like Renogy offer their panels with pre-attached MC4 connectors, which can simplify this step considerably.
Lugs and Terminals for Battery Connections
The connections to your battery bank and inverter are arguably the most critical and often carry the highest currents in your system. This makes proper termination with lugs and terminals paramount. A loose or corroded battery terminal can quickly become a dangerous hotspot, leading to significant power loss or even a battery fire.
When connecting large gauge battery cables, you'll typically use copper compression lugs. These are heavy-duty terminals designed to provide a secure and low-resistance connection to battery posts or inverter terminals. The process involves stripping the cable insulation to the correct length, inserting the bare copper strands fully into the lug barrel, and then using a specialized hydraulic crimping tool to compress the lug onto the wire. Hand-held crimpers might work for smaller gauges (like 6 or 4 AWG), but for anything larger (like 2/0 or 4/0 AWG), a hydraulic crimper is essential to achieve a tight, permanent, and electrically sound connection. A bad crimp will have high resistance, heat up under load, and can melt the cable insulation.
After crimping, it's highly recommended to use heat shrink tubing over the crimped lug and cable insulation. This provides an additional layer of mechanical protection, prevents corrosion by sealing out moisture and air, and helps insulate the connection. Choose marine-grade, adhesive-lined heat shrink for the best results, especially in humid or dusty environments. When connecting these lugs to battery posts, always use appropriately sized washers and nuts, and tighten them to the manufacturer's recommended torque specifications. Over-tightening can damage battery posts, while under-tightening leads to loose, high-resistance connections. Regularly inspect these connections for signs of corrosion or looseness, particularly if you have a lead-acid battery bank that can off-gas corrosive fumes.
Fuses, Breakers, and Disconnects
Proper cable termination isn't just about making good physical connections; it's also about integrating essential safety devices: fuses, breakers, and disconnects. These components are non-negotiable for protecting your system, your property, and yourself. They are the guardians that prevent catastrophic failures by interrupting current flow when things go wrong.
Fuses and circuit breakers serve a similar purpose: overcurrent protection. They are designed to "trip" or "blow" when the current flowing through them exceeds a safe limit, typically due to a short circuit or an overloaded component. Fuses are single-use devices that must be replaced after they blow, while circuit breakers can be reset. You'll need fuses or breakers at various points in your system: between your solar array and charge controller (DC side), between your charge controller and battery bank (DC side), between your battery bank and inverter (DC side), and at the output of your inverter to your AC distribution panel. The size (amp rating) of each fuse or breaker must be carefully chosen to protect the weakest link in that particular circuit, usually the cable itself or the connected component. For example, a fuse between your battery and inverter should be sized to protect the inverter and the battery cables, but not so small that it trips during normal, high-power inverter operation. Our guide on How to Install Fuses and Breakers can provide more detailed insights.
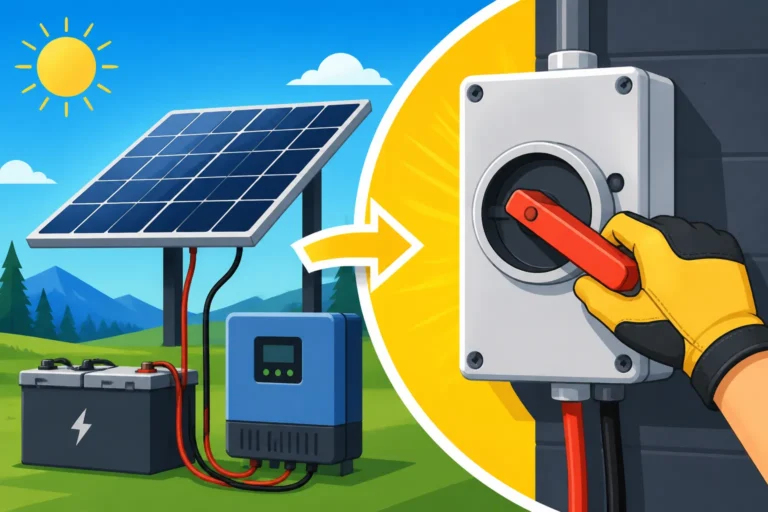
Disconnects are manually operated switches that allow you to completely isolate a section of your electrical system for safety, maintenance, or troubleshooting. They are absolutely critical for working on your system without the risk of electric shock. A common setup includes a DC disconnect between your solar array and charge controller, and another large DC disconnect between your battery bank and inverter. These allow you to safely shut down the power sources before making any adjustments or repairs. For AC circuits, your main breaker in the distribution panel acts as a disconnect. The ability to quickly and safely de-energize your system is a fundamental safety practice that should never be overlooked, especially when dealing with the high voltages and currents often present in off-grid solar setups.
Common Cable Running Mistakes to Avoid
Even with the best intentions, it's easy to fall into common traps when running solar cables. These mistakes can range from minor inefficiencies to serious safety hazards, compromising the very independence you sought by going off-grid. Learning from others' missteps can save you a lot of headache, heartache, and even money.
Undersized Cables and Overheating Risks
One of the most frequent and dangerous mistakes, as we touched on earlier, is using cables that are too thin for the current they need to carry. It's a tempting shortcut, often driven by the desire to save a few dollars on more expensive, thicker wire or simply by underestimating the power demands of DC systems. However, the consequences can be dire.
When cables are undersized, their electrical resistance becomes proportionally higher for the current flowing through them. This resistance converts electrical energy into heat. Imagine a tiny straw trying to suck up a gallon of water very quickly – the straw gets stressed, and the effort required is immense. Similarly, too much current through too small a wire means the wire heats up rapidly. This isn't just a slight warming; it can lead to cables becoming dangerously hot to the touch, melting their insulation, and exposing the live conductors. In a worst-case scenario, this can ignite surrounding flammable materials like wood, insulation, or fabric, leading to a catastrophic electrical fire. Many a mobile off-grid setup, like an RV or van, has suffered damage due to undersized battery cables overheating in tight, enclosed spaces.
Beyond the immediate fire risk, undersized cables cause significant voltage drop, which means your components don't receive the power they need to operate efficiently. Your batteries won't charge as effectively, your inverter will work harder (and hotter) to produce AC power, and your appliances might run sluggishly or not at all. This inefficiency translates directly into wasted solar energy and reduced battery lifespan. Always perform a thorough load analysis to determine your maximum current draws for each circuit and use a reliable wire sizing calculator (many are available online, or consult the NEC tables) to select the appropriate gauge. When in doubt, always go up a size – thicker cables are always safer and more efficient.
Exposed Wiring and Environmental Damage
Another common mistake is leaving cables exposed to the elements or unprotected in vulnerable areas. While some cables, like PV wire, are designed for outdoor exposure, even they benefit from additional physical protection and proper routing. Standard electrical wires, absolutely not.
Outdoor exposure, especially to direct sunlight, is brutal on most cable insulation. Non-UV rated cables will quickly become brittle, cracked, and degraded, exposing the copper conductors. This creates a direct pathway for moisture, which can lead to corrosion, ground faults, and short circuits. Rain, snow, ice, and even humidity can penetrate compromised insulation, causing unreliable system operation or dangerous electrical faults. For cables running along a roof, consider the added stress of wind, hail, and extreme temperature fluctuations. You can check out our article on Off-Grid Solar Panels Installation Mistakes to Avoid for more tips on external wiring.
Physical damage from foot traffic, falling objects, or curious animals (rodents love to chew on wires) is also a significant risk. An unprotected cable run in a shed, under an RV, or along a ground mount array is an open invitation for trouble. A simple scrape can compromise insulation, leading to shorts or shock hazards. For instance, a gardener accidentally cutting through an exposed underground solar cable could face a serious electric shock. The solution is always proper conduit for all exposed runs and judicious use of cable glands and sealing at all entry points. Don't rely on the cable's insulation as its sole protector; treat it as a critical but vulnerable component that needs an extra layer of defense against the world.
Loose Connections and Arc Flashes
Perhaps the most insidious and dangerous mistake is the loose electrical connection. These often go unnoticed until a problem arises, and by then, the consequences can be severe. Whether it's a poorly crimped lug, a terminal not tightened to specification, or a connector that wasn't fully seated, a loose connection is a hotspot waiting to happen.
When a connection is loose, there isn't enough surface area contact between the conductors, which increases electrical resistance at that specific point. Just like an undersized cable, this increased resistance generates heat. This heat can be intense enough to melt the connection itself, degrade the cable insulation nearby, or even ignite surrounding materials. Furthermore, a loose connection, especially in DC circuits, can lead to arcing. An electrical arc occurs when current jumps across a small air gap between two conductors. This is essentially a continuous electrical spark, and it generates incredibly high temperatures (thousands of degrees Fahrenheit) that can easily ignite fires. Arc faults are notoriously difficult to detect with standard circuit breakers and are a primary cause of electrical fires in both grid-tied and off-grid systems.
The solution is meticulous attention to detail during installation. Always use the correct tools for crimping and tightening, such as dedicated crimpers for MC4s and hydraulic crimpers for battery lugs. Always use a torque wrench to tighten battery and inverter terminals to the manufacturer's specified values. After installation, perform a thorough inspection, gently tugging on connections to ensure they are secure. Consider using a thermal camera if you have access to one, to scan for hotspots under load – this can reveal loose connections you might not otherwise see. Regularly inspect your connections during maintenance checks, especially after the system has been in operation for some time, as vibrations or temperature cycling can sometimes loosen connections. Taking the time to make solid, reliable connections is one of the most important steps in ensuring a safe and reliable off-grid system.
Safety First: Working with Electrical Systems
Working with electricity, especially high-current DC and AC systems found in off-grid solar setups, demands respect and caution. Safety should always be your top priority, not an afterthought. A momentary lapse in judgment or skipping a safety step can lead to severe injury, electrocution, or fire. You're dealing with powerful forces, and being prepared and following strict protocols is non-negotiable.
Essential Personal Protective Equipment (PPE)
Just like wearing a helmet when cycling or safety glasses in a workshop, using the right Personal Protective Equipment (PPE) when working with electrical systems is crucial. It creates a barrier between you and potential hazards, significantly reducing the risk of injury. Don't ever think "it won't happen to me" – static electricity or accidental contact with a live wire can cause serious harm.
First and foremost, invest in electrical safety gloves. These aren't your typical work gloves; they are specifically insulated to protect against electrical shocks. They come in different voltage ratings, so choose ones appropriate for the maximum voltage of your system (e.g., 1000V rated gloves for typical solar systems). Always inspect them for holes or damage before use. Beneath the rubber insulating gloves, wear a pair of cotton glove liners to absorb sweat and improve comfort, preventing the rubber from sticking to your skin.
Next, safety glasses or goggles are indispensable. Arc flashes, sparks from loose connections, or even flying debris during drilling or cutting can cause serious eye injuries. Look for glasses that meet ANSI Z87.1 standards for impact protection. Beyond that, sturdy, non-conductive work boots with rubber soles can provide an additional layer of insulation from ground faults. Wearing long-sleeved, non-synthetic clothing is also a good practice, as natural fibers like cotton are less likely to melt onto your skin if an arc flash occurs. Finally, ensure you have a properly insulated multimeter to test for voltage before touching any wires – this is not technically PPE, but it's your primary safety tool for verifying circuits are dead. Always keep a fire extinguisher (Class C) nearby, especially when working on battery banks.
Disconnecting Power Before Work
This might sound like common sense, but it’s the single most overlooked and most critical safety step: always, always disconnect all power sources before performing any work on your off-grid solar system. This means completely de-energizing the circuits you'll be working on. Failing to do so can result in severe electrical shock, arc flash incidents, or damage to your equipment.
Think of your off-grid system as having multiple power "taps." You have the solar panels generating power, your battery bank storing it, and possibly a backup generator contributing as well. To truly isolate a section, you need to turn off all these taps. This typically involves:
- Shutting down your inverter: Most inverters have a power button or a built-in disconnect.
- Disconnecting the AC output: If your inverter feeds an AC breaker panel, turn off the main AC breaker.
- Opening the DC disconnect between the battery and inverter: This isolates your inverter from your battery bank.
- Opening the DC disconnect between the solar array and charge controller: This stops power from your panels from reaching the charge controller and batteries.
- Opening the DC disconnect between the charge controller and batteries: This completely isolates your battery bank from the rest of the system, if possible.
After you've performed these steps, verify with your multimeter that the circuits you intend to work on are indeed dead. Do not just assume they are. Test for voltage between the positive and negative terminals, and between each terminal and ground. Repeat this process every time you re-engage with the system, even if you just stepped away for a few minutes. This process, often referred to as "Lockout/Tagout" in industrial settings, is your best defense against accidental re-energization. For more in-depth guidance, refer to our comprehensive Off-Grid Solar Safety and Grounding article.
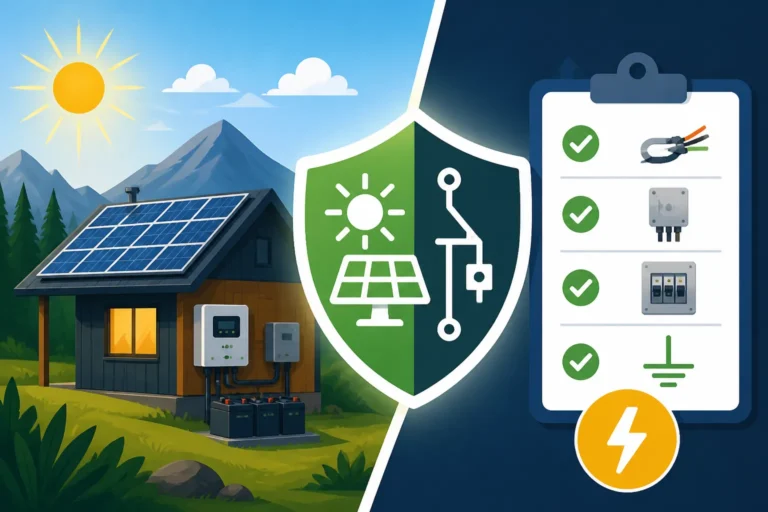
Grounding and Bonding Your System
Proper grounding and bonding are fundamental safety principles that protect both people and equipment from electrical faults. In an off-grid solar system, where you don't have a utility grid connection to rely on for grounding, you must establish your own robust grounding electrode system. Neglecting this step leaves your system vulnerable to surges, lightning strikes, and creates a shock hazard.
Grounding provides a safe path for fault currents to return to the earth, protecting against electrocution and equipment damage. In essence, it connects all non-current-carrying metal parts of your electrical system (like solar panel frames, conduit, inverter chassis, and electrical boxes) to a common grounding electrode. This electrode is typically a copper rod driven deep into the earth. If a live wire accidentally touches a metal enclosure, instead of that enclosure becoming energized and a shock hazard, the fault current flows safely to ground, tripping a breaker or blowing a fuse. For solar panels, all module frames should be connected to an equipment grounding conductor, which then runs back to your main grounding point. This connection protects against shock if an internal panel fault energizes the frame.
Bonding ensures that all metal parts that could potentially become energized are connected to each other, creating a low-impedance path to the grounding electrode. This includes metal conduit, junction boxes, and appliance enclosures. The goal is to ensure that there are no significant voltage differences between any two accessible metal parts, even during a fault condition. For example, if your solar panels are mounted on a metal racking system, that racking system must be bonded to the main grounding electrode. All metal conduit runs, such as EMT or RMC, must also be properly bonded. This creates an equipotential plane, meaning everything is at the same electrical potential, effectively preventing electric shock. Always consult local electrical codes, such as the National Electrical Code (NEC), for specific requirements regarding grounding electrode systems, conductor sizes, and proper bonding techniques for your off-grid installation.
Comparing Off-Grid Solar Cable Types
To help visualize the differences between the various cable types you'll encounter in an off-grid solar setup, here's a handy comparison table. This isn't exhaustive, but it covers the main contenders and their typical applications.
| Cable Type | Primary Application | Key Characteristics | Typical Environment | Gauge Range (AWG) | Notes |
|---|---|---|---|---|---|
| PV Wire | Panel-to-panel, panel-to-controller | Single conductor, UV/moisture/temp resistant XLPE insulation, high voltage DC rated | Outdoor, direct sunlight | 12 – 10 | Specifically designed for solar. Essential for array safety. |
| Battery Cable | Battery-to-controller, battery-to-inverter | Stranded copper, flexible, thick insulation, high current DC rated | Indoor, battery box, short runs | 4/0 – 4 | Minimizes voltage drop on high current, low voltage runs. |
| THHN/THWN-2 (AC) | Inverter to AC panel/loads | Single conductor, various colors, heat/moisture resistant PVC/Nylon insulation | Indoor, in conduit | 14 – 1/0 | Common for interior AC wiring in conduit. |
| NM-B (Romex) (AC) | Inverter to AC panel/loads (fixed) | Multi-conductor (with ground), PVC sheathed | Indoor, dry locations (behind walls) | 14 – 6 | Standard residential indoor AC wiring. Not for outdoor or conduit use. |
| Flexible Conduit | Transitions, vibration isolation | Flexible, protective sheathing (metal/liquid-tight) | Various (e.g., engine bays, RVs) | N/A (housing for wires) | Useful where rigid conduit is impractical or for movement. |
| Rigid Conduit | Main runs, high protection | Sturdy metal (RMC, IMC) or PVC pipes | Outdoor, underground, exposed | N/A (housing for wires) | Excellent physical and environmental protection. |
Disclaimer
The information provided in this guide is for general informational and educational purposes only and is not intended as professional electrical advice. Off-grid solar system installations involve high voltages and currents that can be dangerous. Always consult with a qualified electrician or solar professional and ensure compliance with all local electrical codes and regulations before installing or working on an off-grid solar system. Working with electricity can be hazardous, and improper installation or maintenance can lead to serious injury, death, or property damage.