How to Install Off-Grid Solar on a Workshop
Trying to power a workshop that's nowhere near the grid, or just tired of those sky-high electricity bills for your hobby space? It's a common frustration, especially if you've got power tools or lighting needs that your current setup just can't handle efficiently. This guide is all about demystifying the process of installing an off-grid solar system specifically for your workshop, giving you the freedom and reliable power you need without the utility company.
Planning Your Workshop Off-Grid Solar System
Before you start ordering panels and batteries, the absolute first step for any successful off-grid solar project, especially for a working space like a workshop, is meticulous planning. Skipping this stage is like trying to build a house without blueprints – you might get something up, but it won't be efficient, safe, or reliable in the long run. We need to figure out exactly what your workshop demands in terms of power, how much sunshine you actually get, and where everything will fit.
Assessing Your Workshop's Energy Needs
This is perhaps the most critical part of the entire process. You need to identify every single electrical item you plan to use in your workshop, from your power drill and air compressor to your lights, radio, and even a small heater or fan. For each item, you'll need to know its wattage (how much power it consumes) and how many hours per day you expect to run it. Don't just guess; grab the labels off your tools or look up their specifications online. Remember, some tools have a much higher "surge" wattage when they first start up compared to their continuous running wattage. An air compressor, for example, might pull 1500 watts while running but need 4500 watts for a split second to kick on.
Start a spreadsheet or a simple list. Jot down the appliance, its running wattage, its surge wattage, and the estimated daily run time. For items like a refrigerator (if you keep one in your workshop), consider its cycling nature. This detailed analysis will give you your daily watt-hour (Wh) consumption, which is the baseline for everything else. Understanding your How to Calculate Daily Energy Usage is paramount for a functional system.
Sizing Your Solar Array and Battery Bank
Once you have your total daily energy consumption in watt-hours, you can begin to size your system components. Your solar array (the panels) needs to generate enough electricity to meet your daily needs and fully recharge your batteries, accounting for less-than-ideal sun conditions. To accurately calculate this, you’ll also need to know your peak sun hours – that's the equivalent number of hours per day your panels receive direct, unobstructed sunlight. This varies greatly by location and season. A common mistake is to underestimate this, leading to insufficient power, especially during winter months or extended cloudy periods.
For the battery bank, you need enough capacity to store the energy collected by your panels and supply power when the sun isn't shining (e.g., at night, on cloudy days, or during heavy tool use). This involves calculating your desired "days of autonomy" – how many days your system can power your workshop without any solar input. For a workshop, especially if it's used frequently, you might want 2-3 days of autonomy, meaning if the sun doesn't shine for two or three days straight, you still have power. To delve deeper into this, check out our guide on How Many Batteries for an Off-Grid System. The choice of battery chemistry, like LiFePO4 vs. lead-acid, will also significantly impact capacity and longevity, as well as the Cost of an Off-Grid Solar Battery Bank.
Choosing the Right Location for Panels
The placement of your solar panels can make or break your system's efficiency. Ideally, panels should face true south (in the Northern Hemisphere) or true north (in the Southern Hemisphere) and be tilted at an angle that maximizes sun exposure throughout the year. For a workshop, this might mean mounting them on the roof, on a dedicated ground mount nearby, or even on a sturdy side wall. Consider any potential shading from trees, other buildings, or even your own workshop chimney. Even partial shading on one panel can drastically reduce the output of your entire array.
It's also important to consider accessibility for cleaning and maintenance. A ground mount might be easier to access than a steep roof. Factor in the distance from your panels to your charge controller and battery bank, as longer wire runs can lead to voltage drop and energy loss, requiring thicker, more expensive cabling.
Gathering Your Components and Tools
With your planning complete, it's time to gather all the necessary pieces of your off-grid puzzle. This phase can be exciting, seeing your system come together, but also daunting with the sheer number of options available. Don't worry, we'll walk through the essentials.
Essential Solar System Components
Every off-grid solar system, including one for your workshop, relies on a core set of components working together harmoniously. You'll need:
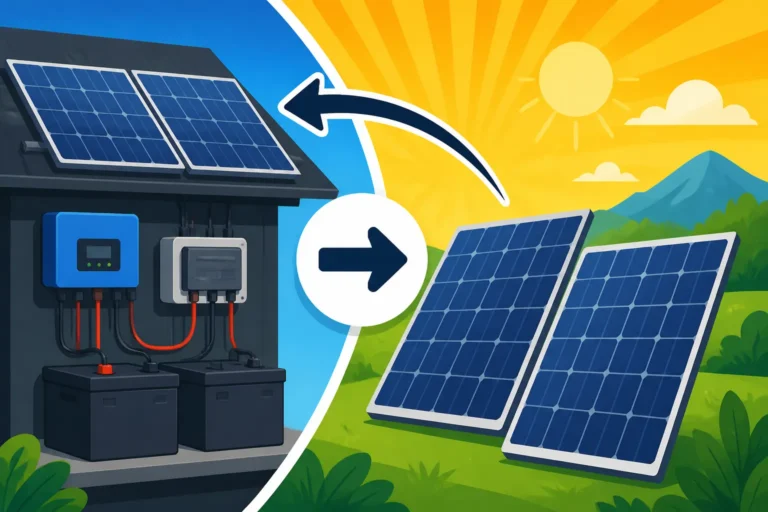
- Solar Panels: These convert sunlight into electricity. Consider reputable brands like Renogy, known for their quality and popularity among DIY enthusiasts. The type of panel (monocrystalline vs. polycrystalline) and their wattage will depend on your energy needs and available space. For more information, explore our article on the Best Off-Grid Solar Panels.
- Charge Controller: This vital device regulates the voltage and current coming from your solar panels, ensuring your batteries are charged safely and efficiently. There are two main types: PWM (Pulse Width Modulation) and MPPT (Maximum Power Point Tracking). MPPT controllers are generally more efficient, especially in fluctuating light conditions, and are highly recommended for larger systems.
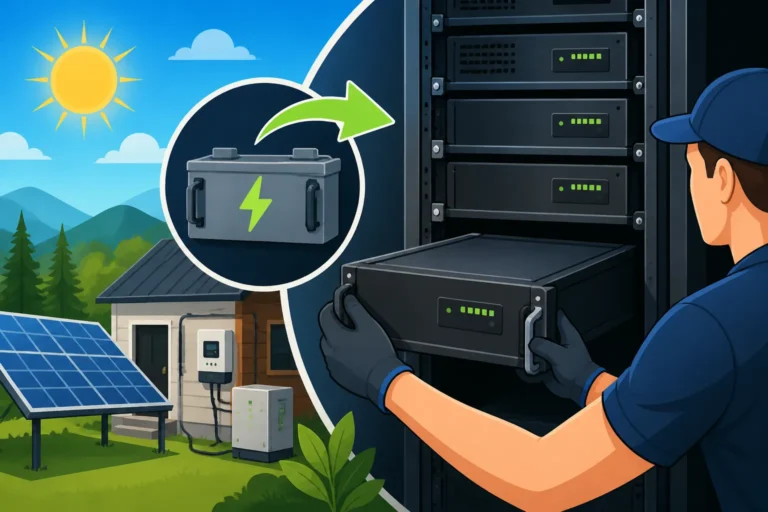
- Battery Bank: This is your energy storage. As discussed, LiFePO4 (lithium iron phosphate) batteries are increasingly popular for their long lifespan, high efficiency, and deep discharge capabilities, though they have a higher upfront cost than traditional lead-acid batteries.
- Inverter: Since most workshop tools and appliances run on AC (alternating current) power, you'll need an inverter to convert the DC (direct current) electricity stored in your batteries into usable AC power. Always opt for a pure sine wave inverter to protect your sensitive electronics and power tools. Our guide on Best Off-Grid Solar Inverters offers excellent insights.
- Wiring and Fuses/Breakers: Appropriate gauge wiring, fuses, and circuit breakers are essential for safety and efficient power transfer. Sizing these correctly is paramount to prevent overheating and potential fires.
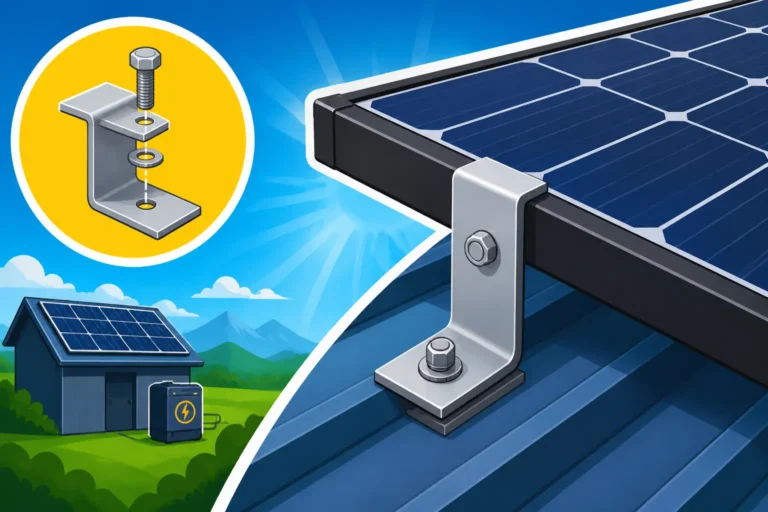
- Mounting Hardware: Whether it's roof mounts, ground mounts, or pole mounts, you'll need the right hardware to securely fasten your panels.
Many popular brands offer complete kits, which can be a great starting point for beginners, as they often include panels, charge controllers, inverters, and basic wiring, simplifying the component matching process.
Tools for a Smooth Installation
Having the right tools on hand will make your installation go much smoother and safer. You don't necessarily need a professional electrician's toolkit, but some specialized items are highly recommended.
Here's a list of tools you'll likely need:
- Multimeter: Absolutely essential for testing voltage, current, and continuity at various stages of your installation. This helps ensure connections are correct and components are functioning as expected.
- Wire Strippers and Crimpers: For preparing and connecting your wires. Using proper crimpers for MC4 connectors (for solar panels) and battery terminals is critical for secure, low-resistance connections.
- Screwdrivers and Wrenches: For assembling mounting hardware and securing electrical components.
- Drill and Drill Bits: For mounting brackets, running conduit, and securing components to walls or mounting surfaces.
- Conduit Bender (if using rigid conduit): For creating clean, protective pathways for your wiring.
- Personal Protective Equipment (PPE): Safety glasses, gloves, and appropriate footwear are a must. Working with electricity and heavy panels always carries risks.
- Cable Ties and Management Tools: To keep your wiring neat, organized, and out of the way, preventing accidental damage and making future troubleshooting easier.
- Stud Finder (for roof/wall mounts): To locate structural supports if mounting to the workshop structure.
You can find many of these tools, and even specialized solar-specific tools like MC4 crimpers, readily available on platforms like Amazon. Investing in quality tools will not only make the job easier but also contribute to a safer and more professional-looking installation. Remember, a well-equipped workshop starts with a well-equipped installer!
Step-by-Step Installation Process
Alright, you've planned everything out, got your components, and your tools are ready. Now comes the exciting part: putting it all together! While every workshop setup will have unique quirks, the fundamental sequence of connecting your off-grid solar system remains consistent. Always remember to work safely, and when in doubt, consult a qualified electrician.
Mounting the Solar Panels
This is where your chosen location and mounting hardware come into play. Whether you're securing panels to your workshop roof, building a ground mount structure, or even using a pole mount, ensure the mounting system is robust enough to withstand local wind and snow loads.
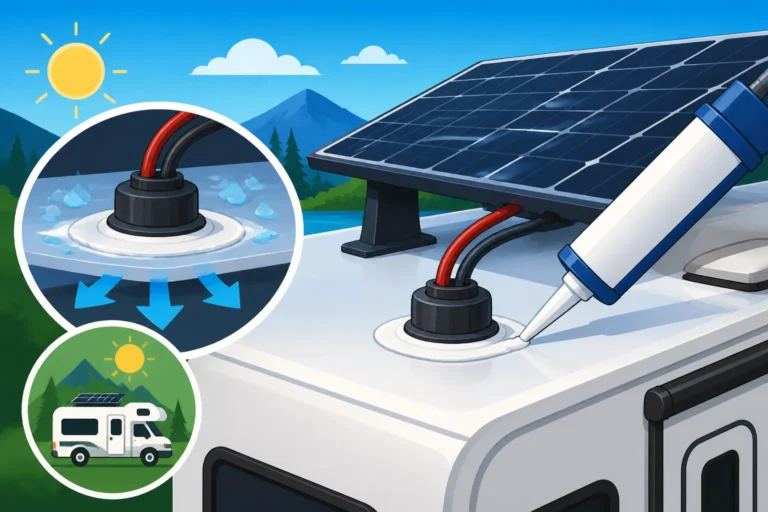
- Assemble Racking: Follow the manufacturer's instructions to assemble your chosen racking system. If mounting on a roof, ensure proper flashing and sealing around any penetrations to prevent leaks.
- Position Panels: Carefully lift and position each solar panel onto the rails. It’s always a good idea to have a helper for this, especially with larger, heavier panels.
- Secure Panels: Use the specified clamps or hardware to firmly secure the panels to the racking. Double-check all bolts and connections.
- Initial Wiring (Series/Parallel): Before connecting to the charge controller, you'll likely need to wire your panels together in series, parallel, or a combination of both to achieve the desired voltage and current for your system. Use MC4 connectors and ensure all connections are tight and waterproof. Refer to our guide on How to Wire Solar Panels in Series or How to Wire Solar Panels in Parallel for detailed instructions.
Wiring the Solar Array to the Charge Controller
With your panels securely mounted and wired together, the next step is to run the main PV (photovoltaic) cables from your solar array to your charge controller.
- Route PV Cables: Run the positive and negative PV cables from your panel array to the location of your charge controller. Use UV-resistant conduit for protection, especially if running cables outdoors or through areas where they could be damaged. Keep cable runs as short as practically possible to minimize voltage drop.
- Install Disconnects (Optional but Recommended): Consider installing a PV disconnect switch near the array and/or near the charge controller. This allows you to safely shut off power from the panels during installation, maintenance, or emergencies.
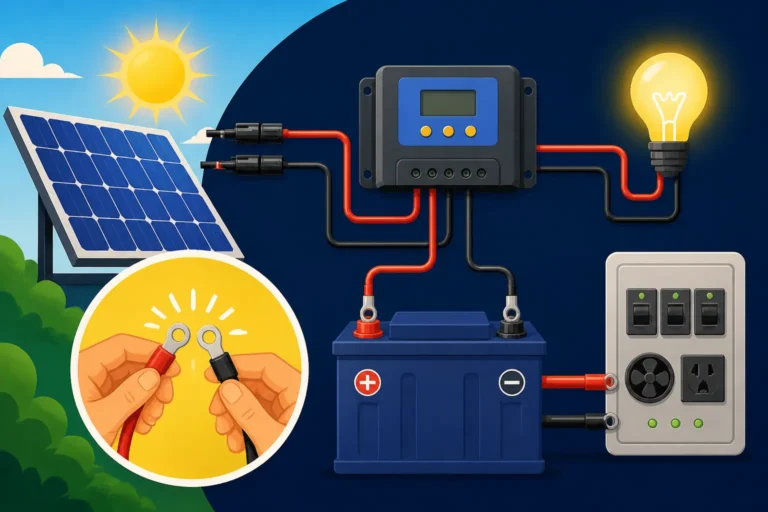
- Connect to Charge Controller: Crucially, connect the battery bank to the charge controller first, before connecting the solar panels. This allows the charge controller to sense the battery voltage and configure itself properly. Once the batteries are connected, then connect the positive and negative PV cables from your solar array to the designated "PV Input" terminals on the charge controller. Ensure polarity is correct (positive to positive, negative to negative).
Connecting the Charge Controller to the Battery Bank
The charge controller is the brain of your DC system, managing the flow of power to protect your valuable battery bank.
- Route Battery Cables: Run appropriately sized battery cables from the charge controller to your battery bank. Again, shorter runs are better.
- Install Fuses/Breakers: Install an appropriately sized DC rated fuse or circuit breaker on the positive battery cable as close to the battery bank as possible. This is critical overcurrent protection.
- Connect to Battery Bank: Connect the positive and negative battery cables from the charge controller's "Battery Output" terminals to your battery bank. If you have multiple batteries, ensure they are wired correctly in series, parallel, or series-parallel to achieve your desired system voltage (12V, 24V, 48V). Our article on How to Wire a Battery Bank provides clear diagrams and instructions for various configurations. Once connected, your charge controller should power up and display battery voltage.
Installing the Inverter and AC Wiring
Now it's time to bring AC power to your workshop. The inverter converts the DC power from your batteries into standard household AC power.
- Mount Inverter: Mount your inverter in a dry, well-ventilated area, preferably near your battery bank but with adequate clearance for cooling.
- Route Inverter Cables: Run thick, appropriately sized DC cables from your battery bank to the inverter's DC input terminals. These cables will carry very high current, so proper sizing is critical.
- Install Inverter Disconnect/Fuse: Install a high-current, DC-rated fuse or breaker on the positive inverter cable, close to the battery bank. This is essential overcurrent protection for the inverter.
- Connect Inverter to Batteries: Connect the positive and negative DC cables from the battery bank to the corresponding DC input terminals on the inverter.
- AC Output Wiring: From the AC output of the inverter, you will wire to a subpanel or directly to AC outlets in your workshop. This typically involves standard AC wiring practices (hot, neutral, ground). If you're not comfortable with AC wiring, this is definitely a point where hiring a licensed electrician is highly recommended to ensure safety and compliance with local codes. For more detailed instructions, consider reviewing an Off-Grid Solar Wiring Diagram Explained.
Grounding and Safety Checks
Proper grounding is not just a recommendation; it's a critical safety measure that protects your equipment and, more importantly, you from electrical shock and lightning strikes.
- Grounding Rods: Drive one or more grounding rods into the earth near your system components.
- Bonding: Connect all metallic components of your solar system (panel frames, mounting racks, inverter chassis, charge controller enclosure, combiner box, etc.) to a common grounding bus bar, which is then connected to your grounding rods. Use appropriately sized bare copper wire for all grounding connections.
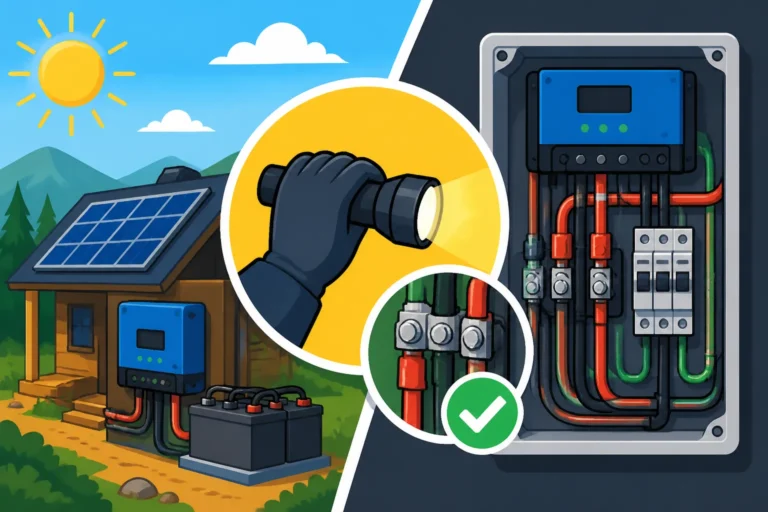
- Continuity Checks: Before applying full power, use your multimeter to perform continuity checks on all wiring to ensure there are no short circuits and that all connections are solid.
- Polarity Checks: Double-check the polarity of all DC connections to ensure positive goes to positive and negative to negative throughout the system. Reversed polarity can severely damage components.
- Secure All Connections: Go back and ensure every single screw terminal, crimped connector, and bolt is tight and secure. Loose connections are a common cause of system failure and fire hazards.
Following these steps meticulously and adhering to best practices outlined in resources like Off-Grid Solar Safety and Grounding will help you build a safe and reliable system.
Testing and Optimizing Your System
You've done the hard work of installation, and now it's time for the moment of truth: powering up your off-grid workshop! This stage involves not just flipping a switch, but carefully bringing the system online, monitoring its performance, and understanding how to maintain it for years of reliable service.
Initial System Startup and Monitoring
Bringing your system to life needs to be a controlled process. Don't just plug everything in and hope for the best.
- Verify All Connections (Again!): Seriously, do one last visual inspection. Check all your wire connections, fuses, and breakers one more time. Make sure panels are securely mounted and all components are properly grounded.
- Connect Battery Bank: If not already connected, connect your battery bank to the charge controller first. Ensure the battery voltage is present at the charge controller's battery terminals.
- Connect Solar Panels: With batteries connected, now connect the solar panel array to the charge controller. You should see the charge controller light up and indicate that it's receiving power from the panels and charging the batteries. Most modern charge controllers, like those from Renogy, have clear display screens or indicator lights.
- Activate Inverter: Once the batteries are being charged and you have a stable voltage, you can turn on your inverter. You should hear a soft hum or fan, and it will likely display its current status. Check for AC output at your outlets with a voltmeter or by plugging in a small, non-critical appliance like a lamp.
- Monitor Performance: For the first few days, diligently monitor your system. Note how much power your panels are producing, how quickly your batteries are charging, and how much power your workshop draws. Many charge controllers and inverters come with monitoring features or can be integrated with external battery monitors (like a Victron Energy SmartShunt) that provide real-time data on state of charge, voltage, current, and more. This early monitoring will help you confirm that your sizing calculations were accurate and that all components are working together as expected.
Troubleshooting Common Issues
Even with careful planning and installation, you might encounter a few bumps in the road. It's totally normal, especially with a DIY project. Here are some common issues and how to approach them:
- No Power from Panels: First, check for shading. Even a small shadow can significantly reduce output. Ensure all MC4 connectors are properly seated and watertight. Use a multimeter to check the voltage at the panel array output; if voltage is low or absent, re-check individual panel wiring.
- Batteries Not Charging: Verify the charge controller settings match your battery type (e.g., LiFePO4, AGM). Ensure the battery cables are securely connected to both the charge controller and the battery bank. Check the fuse or breaker on the battery line. Sometimes, a deeply discharged battery might not be recognized by the charge controller, requiring a "boost" charge from an external charger or a smaller panel.
- Inverter Not Producing AC Power: Check the DC input voltage to the inverter; if it's too low (due to discharged batteries), the inverter will shut down to protect itself. Ensure the DC input fuse/breaker is not tripped. Check the AC output breaker on the inverter. Many inverters have error codes displayed, which can point you to the specific problem.
- High Voltage Drop: If your lights seem dim or tools run weakly, measure voltage at different points in your system (e.g., at the battery, at the inverter input, at the outlet). Significant voltage drop usually indicates undersized wiring or loose connections. This is why proper wire sizing is so important from the start, as detailed in guides like How to Size Wire and Cables.
Patience is key during troubleshooting. Go through your system logically, component by component, using your multimeter to trace the flow of electricity.
Maintenance for Long-Term Performance
An off-grid solar system isn't a "set it and forget it" solution, especially in a workshop environment where dust and debris can accumulate. Regular maintenance will ensure your system operates efficiently and extends its lifespan.
- Panel Cleaning: Periodically clean your solar panels. Dust, dirt, pollen, bird droppings, and leaves can significantly reduce their output. A gentle wash with water and a soft brush (or even just rain, if you're lucky) is usually sufficient. Avoid abrasive cleaners or harsh scrubbing. Learn more about How to Maintain Off-Grid Solar Panels.
- Battery Inspection: For lead-acid batteries, regularly check electrolyte levels and top up with distilled water if needed. Keep battery terminals clean and free of corrosion. For LiFePO4 batteries, maintenance is minimal, but regularly checking connections and ensuring the battery management system (BMS) is balanced is still good practice. Make sure your battery compartment is well-ventilated.
- Wiring and Connections: Annually, inspect all wiring for signs of wear, fraying, or rodent damage. Check all connections for tightness. Loose connections can lead to resistance, heat buildup, and energy loss.
- Component Check: Listen for unusual noises from your inverter (beyond normal fan operation). Check charge controller displays for any error codes. Ensure cooling vents on all components are clear of obstructions.
- Seasonal Adjustments: If your panels are on adjustable mounts, consider changing their tilt angle seasonally to optimize sun exposure. A steeper angle in winter helps catch lower sun, while a shallower angle in summer maximizes overhead sun. This can greatly impact your system's efficiency, particularly in areas with significant seasonal sun variation.
By staying on top of these maintenance tasks, you can expect your workshop's off-grid solar system to provide reliable, clean power for many years to come, truly making your space independent.
Disclaimer
The information provided in this guide is for general educational purposes only and should not be considered professional advice. Working with electricity can be dangerous. Always consult with a qualified electrician or solar professional and adhere to all local electrical codes and regulations. Proceed with caution and at your own risk.