How to Inspect Off-Grid Wiring
Few things are more frustrating in an off-grid setup than mysterious power glitches, intermittent system failures, or worse, the terrifying smell of burning plastic. Often, the culprit isn't a faulty panel or a dying battery, but something much more fundamental and easily overlooked: your system's wiring. Neglecting to inspect these crucial lifelines can lead to dangerous situations and costly repairs. This guide will walk you through everything you need to know about inspecting your off-grid wiring, ensuring safety, efficiency, and peace of mind.
Why Regular Wiring Inspections are Critical for Off-Grid Systems
When you're living off the grid, your solar power system isn't just a convenience; it's your lifeline. And at the heart of that system, connecting every component from the panels to your appliances, is a complex network of wires and cables. Just like the veins and arteries in your body, if these pathways aren't healthy, the entire system suffers. Regular inspections aren't just a good idea; they're absolutely essential for the safety and longevity of your off-grid lifestyle.
Identifying Potential Hazards Early
Let's face it, nobody wants a fire in their remote cabin or RV, especially when help might be hours away. A significant number of off-grid system failures and even tragic incidents can be traced back to neglected wiring. Think about it: a loose terminal connection might seem minor, but over time, it creates resistance, generates heat, and can eventually melt insulation, sparking a fire. Similarly, a frayed cable exposed to the elements could short circuit, causing a massive surge that damages expensive equipment like your inverter or even presents a serious shock hazard. Catching these issues early—before they escalate into something catastrophic—is the primary reason to regularly check your wiring. It's about proactive prevention, not reactive damage control.
Moreover, identifying potential hazards isn't just about preventing dramatic failures. It's also about avoiding those annoying, chronic problems that slowly chip away at your system's reliability. Have you ever experienced a sudden, unexplained power drop, or an appliance that just won't run consistently? Sometimes, these aren't signs of a failing battery but rather a partially severed wire or a connection that's constantly vibrating loose from road travel in an RV or persistent winds at a remote homestead. Regular visual and electrical checks help pinpoint these subtle issues before they become major headaches, saving you countless hours of troubleshooting and frustration.
Maintaining System Efficiency and Longevity
Beyond safety, the health of your wiring directly impacts how well your off-grid system performs day in and day out. Every connection point, every foot of cable, is a potential point of resistance. If those connections are corroded, dirty, or undersized, they act like tiny dams in a river, impeding the flow of electricity. This means your solar panels might be producing plenty of power, but it's not all making it to your batteries, or your batteries aren't efficiently delivering power to your inverter. You're losing valuable watts that you worked hard to generate.
Consider the lifespan of your expensive components. A high-quality inverter or a robust battery bank is built to last for years, but only if it's operating within its optimal parameters. Constant voltage drops due to poor wiring can put undue stress on your inverter, forcing it to work harder and generate more heat, ultimately shortening its life. Similarly, inefficient charging due to resistive wiring means your batteries aren't getting the full charge they need, leading to deeper discharges and accelerated degradation. By keeping your wiring in pristine condition, you ensure that every component in your system is performing at its best, maximizing efficiency, and helping you get the most out of your significant investment in off-grid power. This isn't just about preventing failures; it's about optimizing your entire system for the long haul.
Essential Tools and Safety Gear for Wiring Inspection
Before you even think about touching a single wire in your off-grid system, it's absolutely crucial to gather the right tools and, more importantly, put on the necessary safety gear. This isn't a task where you can skimp on protection or rely on guesswork. Working with electrical systems, especially DC power from solar panels and batteries, carries inherent risks. Being prepared means you can perform your inspection confidently and safely.
Must-Have Inspection Tools
Having the right tools makes all the difference, allowing you to thoroughly check your wiring without guessing. You don't need a professional electrician's kit, but a few key items are non-negotiable.
First up, a digital multimeter is your best friend. This versatile device allows you to measure voltage (DC and AC), current (amps), and resistance (ohms). It's invaluable for verifying that circuits are de-energized before you work on them, checking for continuity in cables, and measuring voltage drops across connections. You can find reliable multimeters on platforms like Amazon from brands like Fluke or Klein Tools, which are known for their accuracy and durability. For instance, if you suspect a weak connection, you can use your multimeter to measure the voltage at the battery terminals and then again at the input of your inverter. Any significant drop indicates a problem with the connecting cables or terminals.
Next, a clamp meter is incredibly useful, especially for measuring current without breaking the circuit. This tool clamps around a wire and senses the electromagnetic field created by the current flowing through it, giving you an amp reading. This is fantastic for seeing how much current your panels are producing, what your charge controller is sending to the batteries, or how much an appliance is drawing from your inverter, all without having to disconnect anything. This non-invasive method is safer and quicker for routine checks.
A thermal imager or infrared thermometer, while a bit more of an investment, can be a game-changer. These devices allow you to scan your wiring and connections, revealing "hot spots" that indicate excessive resistance or loose connections. Heat is often the first sign of an impending electrical failure, and a thermal imager can literally show you problems invisible to the naked eye. Imagine scanning your battery bank or inverter terminals and seeing a bright red or orange area – that's a clear warning sign that something needs immediate attention. Even a simple infrared thermometer can detect these temperature anomalies.
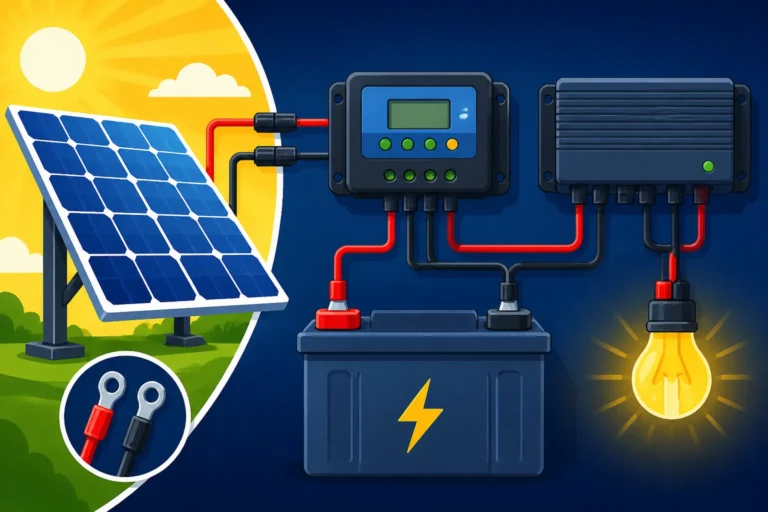
Finally, while not strictly "inspection" tools, having a good wire brush for cleaning corroded terminals, a set of wrenches/sockets for tightening connections, and perhaps a crimping tool with appropriate connectors (like MC4 connectors for solar panels, or ring terminals for batteries) on hand can turn an inspection into an immediate repair job, saving you time down the line. A bright LED flashlight or headlamp is also essential for peering into those dark corners of your system.
Non-Negotiable Safety Equipment
No matter how experienced you are, safety should always be your top priority. Electricity is unforgiving, and off-grid systems, with their large battery banks, can deliver significant current.
The absolute first rule of off-grid wiring inspection is to always shut down your system before working on it. This means disconnecting your solar array from the charge controller, then disconnecting your battery bank from the inverter and charge controller. Don't assume anything is off; verify it with your multimeter.
For personal protection, insulated gloves are a must. These are specifically designed to protect you from electrical shock and are rated for various voltage levels. Don't just grab any old work gloves; ensure they are electrically rated. Along with gloves, safety glasses will protect your eyes from accidental sparks, flying debris, or even battery acid, should you be working near lead-acid batteries.
A fire extinguisher (specifically a Class C extinguisher suitable for electrical fires) should always be within arm's reach when working on your system. Accidents can happen, and being prepared to quickly extinguish an electrical fire is paramount.
Finally, consider a lockout/tagout kit. This is a set of devices and procedures used to ensure that equipment is shut down, rendered inoperable, and cannot be accidentally re-energized while maintenance or inspection work is being performed. For instance, you can use a padlock on your battery disconnect switch or solar array breaker to prevent someone from inadvertently turning the system back on while you're working. This layer of protection is vital, especially if others might be in the vicinity of your system. Remember, a careful approach, combined with the right safety gear, is the best way to ensure your inspection goes smoothly and safely.
Step-by-Step Guide to Inspecting Your Off-Grid Wiring
Alright, with your tools and safety gear ready, let's get down to the actual inspection. This process should be methodical and thorough, ensuring no critical component or connection is overlooked. Remember, patience and attention to detail are your best allies here.
Pre-Inspection Power Down and Lockout Procedures
This is the most critical step, and I can't stress its importance enough. Before you touch a single wire, you absolutely must safely de-energize your entire off-grid system. Rushing this step is asking for trouble.
Here’s the breakdown:
- Disconnect the Solar Array: Start by stopping the power coming into your system. Locate your solar disconnect switch (or breaker) between your solar panels and your charge controller. Flip it to the "OFF" position. If you don't have a dedicated disconnect, you might need to cover your panels or disconnect the MC4 connectors directly at the combiner box or panels (though a disconnect is highly recommended for safety and ease of maintenance).
- Disconnect the Battery Bank: Next, cut power from your energy storage. Find your battery disconnect switch (or breaker) that sits between your battery bank and your charge controller/inverter. Turn it "OFF." If your system has multiple battery strings, ensure each string's fuse or breaker is pulled/tripped. When you're dealing with substantial battery banks, especially high-capacity lithium-ion batteries, disconnecting them is not just a suggestion, it's an imperative safety measure. Learn more about How to Wire a Battery Bank.
- Shut Down the Inverter/Charge Controller: Many inverters have their own on/off switch. Power down your inverter. If your charge controller has a disconnect, turn that off too. This ensures no residual power is floating around.
- Verify No Power: This step is often overlooked but it's crucial. Take your digital multimeter and verify that there is no voltage at key points where you'll be working. Check the DC input terminals of your charge controller, the DC input terminals of your inverter, and the main AC output terminals of your inverter. Your multimeter should read 0V or close to it. If you still detect voltage, retrace your steps and ensure all disconnects are open.
- Lockout/Tagout (if applicable): If you're working on a larger system, or if there's any chance someone else might try to re-energize the system, use your lockout/tagout kit. Place a lock on all disconnect switches and attach a "DO NOT OPERATE" tag with your name and the date. This physically prevents accidental re-energization.
Only once you've completed these steps and verified the system is truly dead, can you begin the physical inspection.
Visual Inspection: What to Look For
With the power safely off, it's time to put your eyes and hands to work. This is where you'll find the most common and often easiest-to-fix issues.
Start at your solar array and work your way down. Check the wiring coming from each panel. Are there any visible signs of damage to the insulation? Look for:
- Fraying, cuts, or cracks: These can expose the conductor to moisture, leading to shorts or corrosion. Rodents often chew on cables, especially in ground-mounted arrays, so look for chew marks.
- Discoloration or melting: This is a clear indicator of overheating, often caused by an undersized wire or a loose connection. Blackened or brittle insulation needs immediate attention.
- Proper routing and support: Are cables neatly routed and secured? Wires dangling or rubbing against sharp edges can chafe over time, leading to exposed conductors. Use UV-resistant cable ties and conduit where appropriate.
- MC4 connectors: These ubiquitous solar connectors can sometimes come loose or degrade over time due to UV exposure. Wiggle each connector gently to ensure it's tight. Look for cracks in the plastic.
Next, move to your combiner box (if you have one) and charge controller.
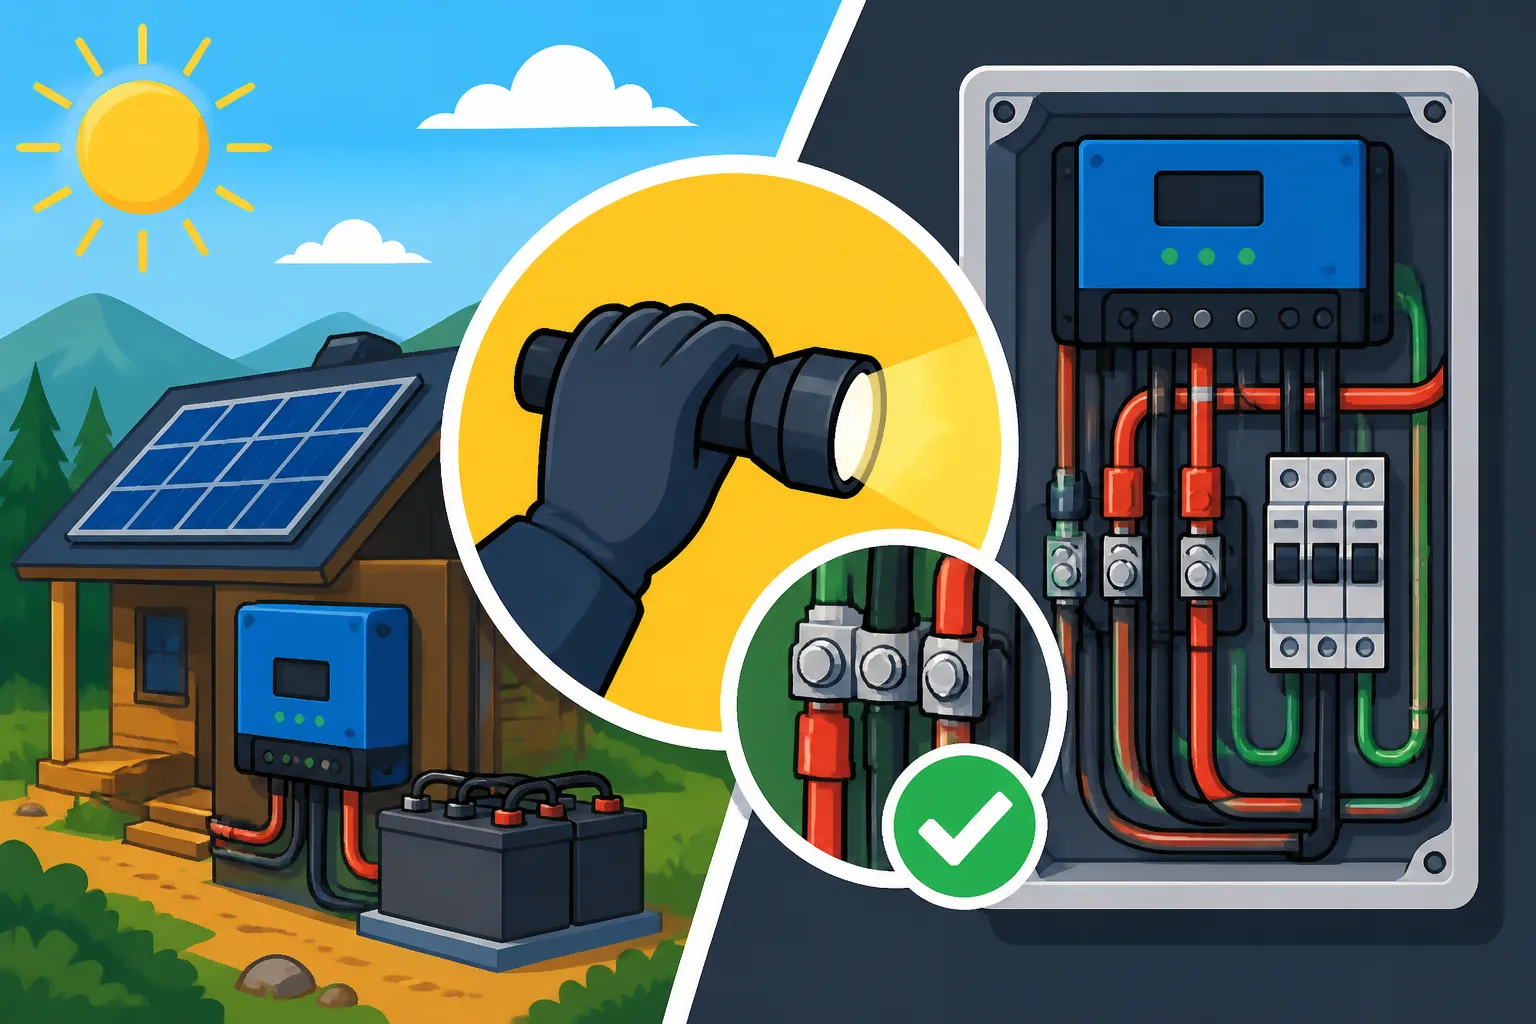
- Terminal connections: Open up your combiner box and check the terminals where the solar strings come in and the main PV wire leaves. At the charge controller, inspect both the solar input terminals and the battery output terminals. Are all wires securely seated? Give them a gentle tug. Are there any signs of corrosion (greenish or whitish powder)? Tighten any loose connections with the appropriate screwdriver or wrench. Corrosion can severely impede current flow.
- Wire gauge: Does the wire gauge look appropriate for the current it's carrying? Undersized wires will get hot. If you're unsure, you might need to consult resources on How to Size Wire and Cables.
Now, inspect your battery bank. This is often the heart of an off-grid system and a common source of wiring issues.
- Battery terminals: These are prime locations for corrosion. Clean any corrosion with a wire brush and a baking soda/water solution (for lead-acid batteries), then rinse and dry thoroughly. Ensure all cable lugs are tightly bolted to the battery posts. Apply a thin layer of dielectric grease to clean terminals to prevent future corrosion.
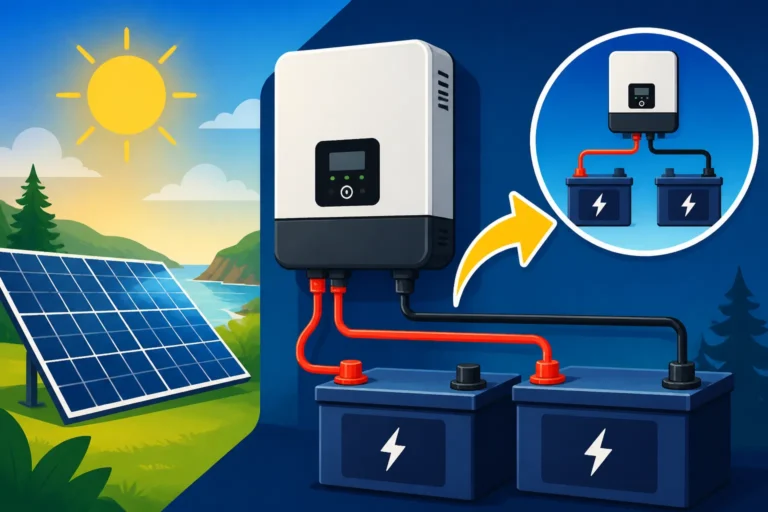
- Battery interconnect cables: These short, thick cables between batteries in a series or parallel bank carry very high currents. Check them for any signs of damage, fraying, or overheating. Ensure they are correctly sized.
- Main battery cables: Follow the main cables from your battery bank to your inverter and charge controller. Check for any damage, proper routing, and secure connections at both ends. Large gauge cables from brands like Renogy are designed to handle significant current without undue resistance.
Finally, inspect your inverter and any AC/DC distribution panels.
- Inverter terminals: Check the DC input terminals (from the batteries) and the AC output terminals (to your home's loads). Ensure all wires are firmly clamped down and show no signs of overheating or corrosion.
- Breakers and fuses: Inspect your DC and AC breakers and fuses. Are they seated properly? Are the wires securely connected to them? Look for any signs of arcing or burning around the breaker handles. A guide on How to Install Fuses and Breakers can help you understand correct installation.
As you perform this visual inspection, make a note of anything that looks suspicious, even if it seems minor. It’s better to be overly thorough.
Electrical Testing: Verifying Connections and Performance
Visual inspections are great, but they don't tell the whole story. To truly understand the health of your wiring, you need to conduct some electrical tests. Remember, for these tests, you'll need to re-energize parts of your system carefully and temporarily.
-
Voltage Drop Testing: This is a fantastic way to identify resistive connections.
- Procedure: With your system running (solar charging batteries, or batteries powering an inverter), use your multimeter to measure the voltage across a connection point, rather than to ground. For example, place one probe directly on the positive battery terminal and the other probe on the positive terminal of the cable lug that attaches to that battery. The ideal reading is 0V or very close to it (a few millivolts is acceptable). Any significant voltage reading (e.g., 0.1V or more) indicates a high resistance point at that connection. Repeat this for all major connections: battery terminals, charge controller terminals, inverter terminals, and even between MC4 connectors in your solar array.
- Interpretation: A measurable voltage drop means energy is being wasted as heat at that point, indicating a loose, corroded, or damaged connection. Address these immediately by cleaning and tightening. Learn more about How to Prevent Voltage Drop in Off-Grid Wiring.
-
Current Measurement with a Clamp Meter:
- Procedure: With your system operating normally, use your clamp meter to measure the current flowing through various critical wires. Clamp it around the main positive and negative cables from your solar array to the charge controller, then from the charge controller to the battery bank, and finally from the battery bank to the inverter.
- Interpretation: Compare these readings to your system's specifications. Are your panels producing the expected current? Is your charge controller efficiently delivering current to the batteries? Is your inverter drawing the expected current for the loads it's powering? Significant discrepancies could indicate issues within the wires themselves, or with connected components. For example, if your panels should be generating 20 amps but your clamp meter only shows 10 amps, you might have shading, a faulty panel, or a high-resistance wiring issue in the array.
-
Thermal Imaging Scan (with power on):
- Procedure: If you have a thermal imager, perform a full system scan while your system is operating under a load (ideally, a significant load). Scan all connections, terminals, fuses, breakers, and wire runs.
- Interpretation: Look for any areas that appear significantly hotter than their surroundings. These "hot spots" are almost always indicative of high resistance due to a loose connection, corrosion, or an undersized wire trying to carry too much current. This non-contact method is incredibly effective at finding invisible problems.
Remember to exercise extreme caution when conducting electrical tests with the system energized. Always follow manufacturer guidelines for your testing equipment and adhere to all safety protocols. Regularly checking your system's wiring is a crucial part of Off-Grid Solar Maintenance Guide and will save you from potential hazards and costly repairs down the road.
Common Off-Grid Wiring Issues and How to Address Them
Even with the best initial installation, off-grid wiring faces unique challenges from the elements, vibration, and continuous use. Knowing the most common issues can help you pinpoint problems faster and keep your system running smoothly.
Loose Connections and Corrosion
This is hands down one of the most prevalent and insidious issues in off-grid solar wiring. It's often the root cause of many "mystery" problems.
- Why they happen: Loose connections often occur due to vibration (especially in mobile setups like RVs or cabins on busy roads), improper initial tightening, or even temperature cycling which causes materials to expand and contract. Corrosion, on the other hand, is a chemical reaction that often happens when dissimilar metals are in contact in the presence of moisture, or when battery acid fumes from lead-acid batteries get into the air. When you have a loose connection, it creates a small gap where electrons have to "jump," generating heat. This heat accelerates corrosion and further loosens the connection over time, creating a vicious cycle of degradation.
- Signs: Visually, you might see discoloration around the terminal, melted insulation, or a greenish/whitish powdery buildup (corrosion). Electrically, you'll detect a significant voltage drop across the connection point when current is flowing, or the connection will simply feel warm to the touch (a major red flag!). Intermittent power issues or components unexpectedly shutting down are also strong indicators.
- How to fix:
- Safety First: As always, power down and lockout the system completely.
- Clean: If corrosion is present, gently remove the wire from the terminal. Use a wire brush or fine-grit sandpaper to thoroughly clean both the wire lug and the terminal post until shiny metal is exposed. For heavy corrosion, especially on lead-acid batteries, a solution of baking soda and water can neutralize the acid. Rinse thoroughly with clean water and dry completely.
- Inspect: Check the wire lug itself. If it's heavily corroded or damaged, it's best to cut the wire back and crimp on a new, high-quality lug. Ensure proper crimping for a secure, low-resistance connection.
- Tighten: Reattach the clean wire to the terminal. Use the correct size wrench or socket and tighten it firmly. Do not overtighten, as this can strip threads or damage terminals, but ensure it's snug enough that you can't wiggle the wire.
- Protect: For lead-acid battery terminals, apply a thin layer of dielectric grease or a purpose-made anti-corrosion spray. For other terminals, ensuring a sealed enclosure or using marine-grade heat shrink tubing can help prevent future environmental exposure.
Inadequate Wire Sizing and Overheating
Using wires that are too thin for the amount of current they are expected to carry is a recipe for disaster, and sadly, it's a mistake that happens more often than you'd think, particularly in DIY setups trying to cut costs.
- Why it's a problem: Electrical wires have resistance, and the thinner the wire, the higher its resistance per foot. When current flows through resistance, it generates heat. If a wire is undersized, it simply can't dissipate the heat fast enough, leading to overheating. This not only wastes energy (a voltage drop), but it can melt insulation, damage the wire itself, and create a significant fire hazard. It also puts undue strain on your components, reducing their lifespan.
- Signs: The most obvious sign is a wire that feels hot to the touch when the system is operating under load. You might also notice discolored or brittle insulation, a burnt plastic smell, or frequent tripping of breakers for no apparent reason (the wire is heating up, increasing resistance, and drawing more current than the breaker is rated for in a cascade effect). You might also observe lower-than-expected power output or dimming lights when heavy loads are on, which indicates a significant voltage drop.
- How to fix:
- Safety First: Power down and lockout the system.
- Identify: Pinpoint the undersized wire. This usually involves understanding the maximum current that section of the circuit is expected to carry and comparing it to the wire's gauge. Remember, longer runs also require thicker wire to minimize voltage drop.
- Recalculate: You'll need to re-evaluate your wire sizing based on the current, voltage, and length of the run. There are many online calculators and charts available to help with this. For example, a 12V system carrying 50 amps over 20 feet will require a much thicker wire than a 48V system carrying the same power. This is where a detailed understanding of How to Size Wire and Cables becomes invaluable.
- Replace: The only real solution is to replace the undersized wire with a properly sized one. This isn't a place to patch; it's a critical safety upgrade. Ensure the new wire is rated for outdoor use (UV resistant) if exposed, especially for solar panel runs. Brands like Renogy offer high-quality solar cables and battery cables that are appropriately rated.
Environmental Damage and Critter Infestations
Off-grid systems are often in exposed environments, making them susceptible to damage from Mother Nature and curious wildlife.
- Environmental Damage: Sunlight's UV rays can degrade cable insulation over time, making it brittle and prone to cracking. Extreme temperatures can also accelerate this degradation. Moisture, especially direct rain or snow, can seep into cracks or poorly sealed connections, leading to shorts or corrosion. Wind can cause cables to rub against surfaces, leading to chafing.
- Critter Infestations: Mice, rats, squirrels, and even insects love to chew on wires. They might be looking for nesting material, or simply find the insulation an appealing texture. This can lead to exposed conductors, short circuits, and system failures.
- Signs: For environmental damage, look for cracked, discolored, or brittle insulation, particularly on exposed cables. You might see water ingress around cable glands or conduit entries. For critters, obvious chew marks, shredded insulation, or even nesting materials around wires are clear giveaways. You might also notice intermittent issues or total power loss if a critter has completely severed a critical wire.
- How to address:
- Safety First: Power down and lockout the system.
- Protection from UV and Physical Abrasion: All outdoor DC wiring, particularly from solar panels, should be UV-resistant. Using conduit (either flexible or rigid, PVC or metallic) for all exposed cable runs is a highly effective way to protect against UV degradation, physical damage, and animal chewing. When routing cables, ensure they are secured and not rubbing against sharp edges.
- Moisture Sealing: Ensure all cable entries into combiner boxes, charge controllers, and inverters are properly sealed with appropriate cable glands. Use weatherproof junction boxes where necessary. When installing solar panels, make sure any roof penetrations are properly sealed and waterproofed, a key step often highlighted in guides like How to Install Off-Grid Solar Panels.
- Pest Deterrents:
- Physical Barriers: Conduit is your best friend here. Also, seal any openings or gaps into enclosures where critters might gain access.
- Repellents: Consider using animal repellents (though their effectiveness varies).
- Regular Checks: Regular visual checks (as outlined in this guide) are the best defense. Catching critter damage early can prevent minor chewing from becoming a complete system failure.
- Repair/Replace: If cables are damaged, they must be repaired using appropriate splicing techniques and waterproof connectors, or ideally, replaced entirely if the damage is extensive.
By proactively addressing these common wiring issues, you'll ensure your off-grid solar system remains reliable, efficient, and, most importantly, safe for years to come. Investing time in these inspections is far less costly and stressful than dealing with a catastrophic failure.
| Wiring Issue | Common Signs | Recommended Solution | Potential Hazard |
|---|---|---|---|
| Loose Connections | Warm terminals, discoloration, voltage drop, intermittent power | Clean terminals, re-tighten, apply dielectric grease | Fire, Equipment Damage, Shock |
| Corrosion | Green/white powder, increased resistance, voltage drop | Clean with wire brush/baking soda, secure connection, protect | Inefficiency, Fire, Equipment Damage |
| Undersized Wires | Hot wires, melted insulation, frequent breaker trips, voltage drop | Recalculate wire gauge, replace with appropriate size | Fire, Equipment Damage, Inefficiency |
| Environmental Damage | Cracked/brittle insulation, frayed wires (UV, wind) | Use UV-resistant cables, conduit, proper routing | Short Circuits, Shock, Fire |
| Critter Damage | Chew marks, exposed conductors, nesting material | Use conduit, seal entry points, pest deterrents | Short Circuits, Fire, Equipment Damage |
| Improper Routing | Wires rubbing/chafing, kinks | Re-route neatly, use cable ties, conduit, protective sleeving | Insulation failure, Short Circuits |
Disclaimer
The information provided in this guide is for general informational and educational purposes only. While we strive for accuracy, off-grid solar systems involve high voltages and currents that can be dangerous. Always prioritize safety. If you are not confident in your ability to safely inspect or maintain your off-grid solar wiring, please consult with a qualified electrician or solar professional. Improper installation or maintenance can lead to serious injury, death, or property damage. We are not responsible for any actions taken based on the information in this guide.