How to Mount Panels with Z-Brackets
Many off-grid adventurers and cabin owners dream of harnessing solar power, but then they hit a snag: how do you actually get those panels securely attached to your RV, shed, or tiny home without them flying off in the first windstorm or creating a leaky mess? It's a real concern, and fumbling with complex mounting systems can quickly turn excitement into frustration. This guide is here to demystify the process, walking you through exactly how to mount solar panels using Z-brackets, a simple, effective, and widely favored solution for a variety of off-grid setups.
Understanding Z-Brackets and Why They're Popular for Off-Grid Solar
When you're looking at solar panel mounting options for your off-grid project, Z-brackets often come up as a go-to solution for their straightforward design and reliability. They might seem simple, but their effectiveness in securing panels in many scenarios is undeniable.
What Exactly Are Z-Brackets?
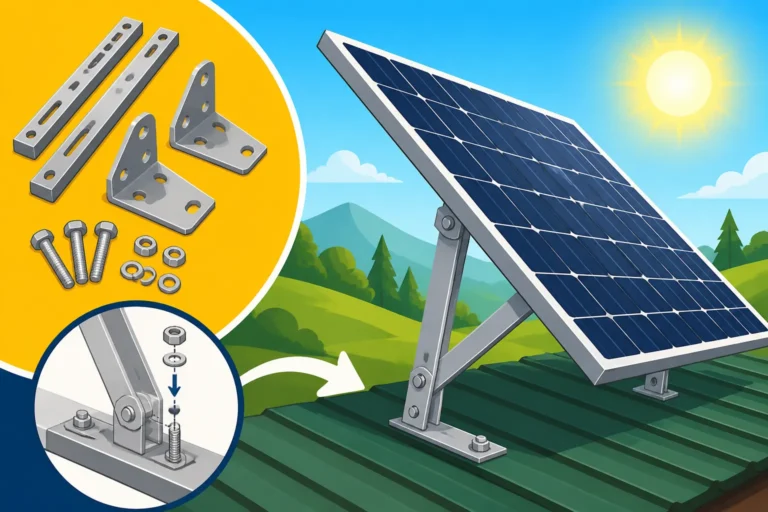
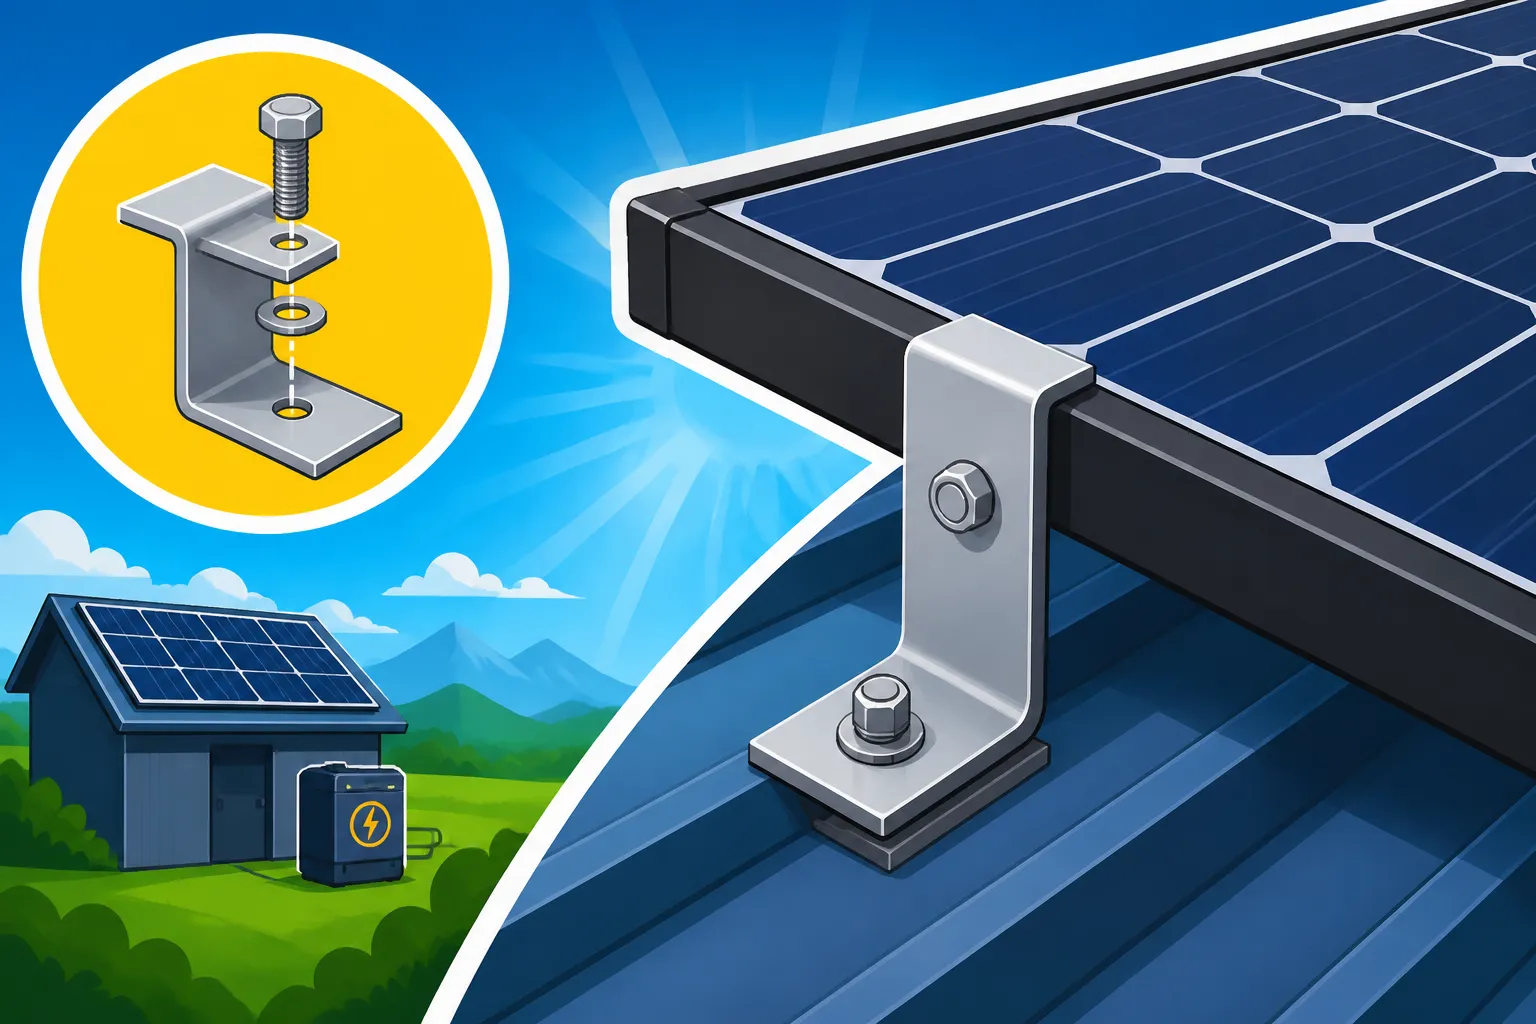
Imagine the letter "Z" lying on its side, and you've got the basic shape of a Z-bracket. These small, sturdy pieces of hardware are typically made from corrosion-resistant materials like aluminum or stainless steel, built to withstand the elements. Their unique shape allows them to lift the solar panel a small distance off the mounting surface. One flange bolts directly to the solar panel frame, while the other bolts to your chosen surface – be it an RV roof, the side of a shed, or even a small cabin.
The primary purpose of a Z-bracket isn't just to hold the panel down; it's also designed to create an air gap between the panel's back and the roof. This might seem like a minor detail, but it's actually incredibly important. Solar panels operate more efficiently when they're cooler, and that air circulation helps prevent heat buildup. You'll find them most useful for smaller to medium-sized panels, often installed as a fixed, non-tilted solution on flat or slightly curved surfaces like the roof of an RV, a camper van, or a utility shed next to your off-grid cabin. They're a stark contrast to more elaborate tilt mounts or heavy-duty ground mounts, which serve different purposes entirely.
Advantages of Z-Bracket Mounting
The popularity of Z-brackets among the off-grid community isn't by accident. They offer a host of benefits that make them incredibly appealing, especially for those who are tackling their solar installation themselves.
Firstly, their simplicity of installation is a huge win. Compared to a complex racking system that might require multiple specialized tools and intricate assembly, Z-brackets typically involve fewer parts and a much more intuitive setup. This makes them incredibly DIY friendly, even for those new to solar installations. You don't need to be a seasoned contractor to figure out how to attach these.
Secondly, they are wonderfully cost-effective. When you're budgeting for your entire off-grid system, every dollar counts. Z-brackets are generally inexpensive, helping to keep your overall How Much Does an Off-Grid Solar System Cost down. You can often find sets of four or eight brackets for a very reasonable price, sometimes even bundled with the necessary stainless steel hardware.
Their durability is another key advantage. Constructed from robust aluminum, they're built to last, shrugging off rust, UV exposure, and general wear and tear from weather. This means you can count on them to keep your panels secure for years to come, which is exactly what you want when you're relying on your solar setup for power.
As mentioned, the improved airflow for panel cooling is a critical, often overlooked benefit. A hot solar panel is a less efficient solar panel. By lifting the panel slightly off the surface, Z-brackets allow air to circulate underneath, helping to dissipate heat and maintain optimal operating temperatures. This translates directly to better power production, especially during hot summer days.
Finally, for mobile applications like RVs and vans, the low-profile aesthetic is a big plus. They don't add a lot of height to your vehicle, which can be crucial for clearing low bridges, fitting into garages, or simply maintaining a sleeker look. If you're looking at Off-Grid Solar Cost for an RV, considering low-profile mounts like these can make a big difference in both cost and convenience.
Limitations and Considerations
While Z-brackets are fantastic for many scenarios, it's important to be realistic about their limitations. They aren't a one-size-fits-all solution, and understanding where they fall short will help you make the best choice for your specific off-grid needs.
One of the most significant drawbacks is their fixed tilt angle. Once installed, your solar panels are essentially flat against your mounting surface (or slightly angled if the surface itself has a pitch). This means you can't optimize the panel's tilt for seasonal sun angles, which can impact efficiency, especially in winter when the sun is lower in the sky. If you're building a Off-Grid Solar Cost for a Cabin and year-round energy production is paramount, you might consider tilt mounts or ground mounts that allow for seasonal adjustments.
They are generally not suitable for large, heavy arrays. Z-brackets are best for individual panels or small clusters, not for powering a whole house with multiple heavy panels. For larger systems, a dedicated racking system designed to distribute weight and handle higher wind loads is typically more appropriate.
A practical concern is that they require drilling into the mounting surface. This means creating holes in your RV roof, shed, or cabin, which always carries the risk of leaks if not sealed properly. This is where meticulous attention to detail during installation becomes absolutely paramount. We'll delve into proper sealing techniques later, but it's a frustration many face when first contemplating this step.
Lastly, while sturdy, Z-brackets might offer less wind resistance than some other, more robust mounting types, especially for very large panels in extremely windy areas. The number of brackets used and the specific design of the panel frame can mitigate this, but it's a factor to consider in high-wind zones. Always ensure you're using enough brackets to adequately secure your panels for your local conditions.
Gathering Your Tools and Materials for Z-Bracket Installation
Before you start drilling and bolting, the secret to a smooth, frustration-free installation lies in preparation. Gathering all your components and tools beforehand will save you countless trips to the hardware store and prevent delays.
Essential Components Beyond the Brackets
You've got your Z-brackets, which is a great start, but they're just one piece of the puzzle. Here’s a rundown of other crucial items you’ll need:
First and foremost, you'll need your solar panels. Make sure they are the right size and wattage for your power needs. Z-brackets usually come in sets, typically four per panel, though for larger panels, you might want to consider six or eight for added stability.
Next, focus on mounting hardware. Most Z-bracket kits will include stainless steel bolts, nuts, and washers designed to secure the brackets to the panel frames. However, you'll also need hardware to attach the brackets to your specific mounting surface. This might include self-tapping screws for metal roofs, lag screws for wooden structures, or specific roofing screws. Always opt for stainless steel hardware to resist rust and ensure longevity, especially in outdoor environments.
Sealant is your best friend when drilling into any surface you want to keep watertight. For RVs, a high-quality Dicor lap sealant is often recommended, as it's designed for roofing materials and remains flexible. For other applications like metal or wood roofs, a strong, outdoor-rated silicone sealant or butyl tape can work wonders. Don't skimp on sealant; this is where most mistakes happen!
Finally, cable glands or entry points are essential for routing your solar panel wiring safely and weatherproofly into your RV, cabin, or battery box. These small devices ensure that where your wires pass through a surface, the hole remains sealed against water and pests. It's a critical component for protecting your investment from the elements. To get a broader understanding of all the parts that make up a solar system, check out our guide on Off-Grid Solar Equipment Explained.
Tools You'll Need for a Smooth Installation
Having the right tools at hand is like having a superpower when you're working on a DIY project. It makes all the difference in ease and quality.
You'll definitely need a good drill and a set of drill bits. You'll use these to create pilot holes for your screws and to drill the holes for any bolts that pass through your mounting surface. Make sure you have bits appropriate for metal (for panel frames) and wood or fiberglass (for your mounting surface).
A wrench and/or socket set will be invaluable for tightening the nuts and bolts that secure your Z-brackets to the panel frames and potentially to the mounting surface itself. Having both options means you'll be prepared for various fastener types. A screwdriver, particularly a cordless impact driver, can also be a huge time-saver for driving self-tapping screws.
For precise placement and alignment, a measuring tape and a marker are indispensable. You want your panels evenly spaced and straight, both for aesthetic appeal and for optimal light exposure.
Your sealant won't apply itself, so a caulking gun is necessary for dispensing tubes of sealant smoothly and evenly. If your sealant comes in a tub, you'll need a plastic putty knife or spreader.
Last but certainly not least, safety gear is non-negotiable. Always wear gloves to protect your hands and eye protection to safeguard against flying debris. It’s always better to be safe than sorry when working with tools and on roofs. You can find more details on all the necessary gear in our article about Off-Grid Solar Installation Tools Needed.
Step-by-Step Guide to Mounting Panels with Z-Brackets
Now that you've got all your gear, let's get down to the actual work. Breaking it down into manageable steps makes the process much less daunting.
Planning and Panel Placement
The most crucial phase of any installation happens before a single screw is driven: planning. A little foresight here can save you a lot of headache later.
Start by assessing the surface where your panels will be mounted. Is it an RV roof made of fiberglass or rubber? A shed roof with corrugated metal or asphalt shingles? Or a wooden deck on your cabin? Understanding the material will dictate your fastening and sealing methods. Also, consider the structural integrity. Can the surface support the weight of the panels, especially during high winds or heavy snow? For RVs, try to align panels over existing roof studs or crossbeams if possible.
Next, it's time for measuring and marking. Lay your solar panels out on the ground in the configuration you plan to use. This helps visualize spacing. Then, carefully transfer those measurements to your mounting surface. Ensure there’s even spacing between panels and that they’re oriented correctly to maximize sun exposure. For most of the Northern Hemisphere, facing due south is ideal. However, for fixed mounts like Z-brackets, you might accept a slightly off-south orientation if it fits the roofline better. Remember to leave enough space around the panels for future cleaning and maintenance. If you're wondering How to Mount Off-Grid Solar Panels effectively, this planning stage is critical.
Finally, consider your wire routing early. Where will the cables from your panels enter your vehicle or structure? Plan the shortest, most direct, and safest path, accounting for any obstructions or potential pinch points. This forethought will ensure you have a clean and secure entry point, preventing ugly, exposed wiring or future damage.
Attaching Brackets to the Panels
With your plan in place, it's time to start physically assembling. This step focuses on securing the Z-brackets to your solar panels.
Solar panel frames typically come with pre-drilled holes specifically designed for mounting hardware. You'll want to identify these holes along the frame. Most Z-brackets are designed to align perfectly with these existing holes.
Using the stainless steel bolts, nuts, and washers provided with your Z-bracket kit (or purchased separately), secure each Z-bracket to the panel frame. Typically, you'll attach one bracket to each of the four corners of the panel. For larger panels, or if you anticipate significant vibration (like on a constantly moving RV), you might consider adding an extra set of brackets in the middle of the long sides for enhanced stability. Ensure the nuts are snug, but don't over-tighten them to the point of deforming the aluminum frame. A firm, secure fit is what you're aiming for. It's often helpful to keep them slightly loose until all brackets are in place, then tighten them all down evenly.
Securing Panels to the Mounting Surface and Sealing
This is arguably the most critical step, especially when working on a roof, as it directly impacts both the security of your panels and the integrity of your structure against leaks.
Carefully lift your solar panel assembly (with the attached Z-brackets) and position it precisely onto the marked areas of your roof or mounting surface. Double-check your measurements and alignment. Once you're happy with the placement, use a marker to trace the outline of the Z-bracket feet onto the roof.
Next, you'll need to drill pilot holes through the mounting holes on the Z-bracket feet and into your mounting surface. Using a drill bit slightly smaller than your chosen fasteners will create a good channel without splitting wood or causing unnecessary damage to other materials.
Now for the fastening: using the appropriate screws for your surface (e.g., self-tapping screws for metal, or lag screws for wood), drive them through the Z-bracket feet and into the pilot holes. Tighten them down firmly, ensuring the panel is securely held to the surface. Do not over-tighten to avoid stripping screws or damaging the roof material.
This is where the crucial sealing step comes in. After all fasteners are in place, apply generous amounts of your chosen sealant around and over each screw head and the base of every Z-bracket. For an RV roof, this means a good dollop of Dicor lap sealant that completely encapsulates the fastener and the bracket base, creating a watertight barrier. For other materials, a bead of high-quality silicone or even an appropriate flashing material can work. Don't be shy with the sealant; this is your primary defense against water intrusion. Many people run into trouble later because they didn't seal thoroughly enough. If you're looking for more guidance on keeping your system watertight, read our post on How to Waterproof Roof Penetrations.
Finally, double-check the stability of each panel. Give them a gentle wiggle to ensure they are firmly attached and show no signs of movement.
Wiring and Final Checks
The physical mounting is done, but your system isn't live yet! Now it's time to connect everything up.
First, route your cables. This involves bringing the positive and negative wires from your solar panels into your vehicle or cabin. Use those pre-planned cable glands to create a clean, sealed entry point. Apply sealant around the cable gland as well to prevent any leaks. Ensure cables are routed safely, away from sharp edges, and secured to prevent snagging or flapping in the wind.
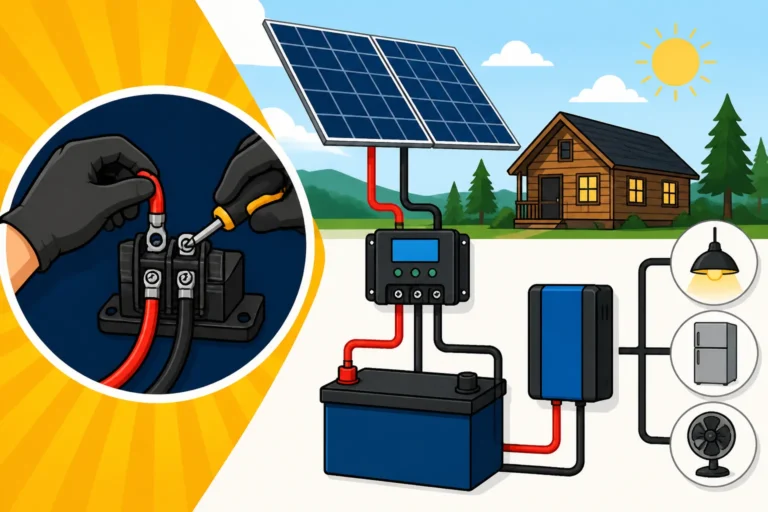
Next, connect your panels. Depending on your system voltage and the specifications of your charge controller, you'll need to wire your panels in series, parallel, or a combination of both. For example, if you have multiple 12V panels and a 24V or 48V system, you'll likely wire them in series. If you need more current, you'll wire them in parallel. Understanding the difference is key; you can learn more about How to Wire Solar Panels in Series or How to Wire Solar Panels in Parallel for your system. These connections typically happen at the solar panel's junction box or in a dedicated combiner box.
Once your panels are wired together and connected to your charge controller, and the charge controller is connected to your battery bank, it's time for testing. Use a multimeter to verify voltage and current readings. Confirm that your charge controller is recognizing the solar input and charging your batteries as expected. This final check ensures everything is working correctly before you rely on your off-grid power. If you want a full rundown on getting your system up and running, check out our guide on How to Commission an Off-Grid System.
Best Practices and Troubleshooting Tips
Even with a detailed guide, real-world installations can throw curveballs. Here are some extra tips to ensure your Z-bracket mounting stands the test of time and avoids common pitfalls.
Enhancing Security and Longevity
Making your solar panel installation robust and long-lasting is all about attention to detail and a few smart choices.
For mobile applications like RVs or camper vans, consider using anti-vibration washers (often called lock washers or fender washers with rubber backing) under your fasteners. These can help prevent nuts and bolts from loosening due to constant road vibrations, adding an extra layer of security.
While mechanical fasteners do the heavy lifting, adding a bead of adhesive sealant under the entire Z-bracket foot before screwing it down can provide extra grip. This creates a stronger bond between the bracket and the roof, acting as a secondary defense against uplift and movement, especially in windy conditions. Just be mindful that this will make future removal more challenging if needed.
Regular inspection is vital for any off-grid system. Periodically check all your mounting points. Look for any loose fasteners, cracks in the sealant, or signs of corrosion. Sunlight and weather can degrade even the best sealants over time, so re-applying sealant as needed can prevent leaks before they start. A quick visual check a few times a year can save you major headaches down the road. When you're sourcing these components, you can often find durable Z-bracket kits and robust mounting hardware from trusted brands like Renogy, or explore a wide variety of options and competitive pricing through sellers on Amazon.
Common Mistakes to Avoid
Many frustrations in DIY off-grid solar come from a few common, easily preventable mistakes. Knowing them ahead of time can save you a lot of grief.
The number one culprit for future headaches is insufficient sealing. I can't stress this enough: if you drill a hole in your roof and don't seal it completely and thoroughly, it will leak. Don't just dab a bit of caulk; create a generous, completely enclosed seal around every fastener and the base of every Z-bracket. This includes around your cable glands where wires enter the vehicle.
Another common issue is using inadequate fasteners. Don't grab the cheapest screws from your toolbox. Ensure your screws are stainless steel, long enough to get a secure bite into the underlying material, and appropriate for the specific surface. Using too few fasteners for the size of your panel or the expected wind loads is also a recipe for disaster. More is often better here, within reason.
Ignoring airflow beneath the panels is a subtle mistake that impacts performance. Mounting panels directly flush with the roof traps heat, causing the panels to operate at higher temperatures and consequently produce less power. The Z-bracket design inherently helps with this, but it's something to be aware of if considering other mounting methods or if your panels are very close to an adjacent surface.
Over-tightening fasteners can also cause problems. You might strip screw threads, crack fiberglass, or even warp the aluminum frame of your solar panel. Aim for firm and secure, not wrench-bending tight.
Finally, rushing the prep work almost always leads to mistakes. Skipping proper cleaning of the mounting surface (which can prevent sealants from adhering correctly), neglecting accurate measurements, or not planning wire runs ahead of time creates more work and potential issues later on. Take your time, measure twice, cut once, and you'll be much happier with the end result. For a more comprehensive list of things to watch out for, check out our guide on Off-Grid Solar Panels Installation Mistakes to Avoid.
| Mounting Surface Type | Recommended Fasteners | Recommended Sealant | Key Considerations |
|---|---|---|---|
| RV Rubber/TPO Roof | Self-tapping screws | Dicor Lap Sealant | Clean surface thoroughly, ensure sealant compatibility with roof material. |
| RV Fiberglass Roof | Stainless steel screws/bolts | Marine-grade Silicone or Dicor | Pre-drill pilot holes carefully to avoid cracking. |
| Metal Roof (Shed/Cabin) | Self-tapping metal screws | Butyl Tape + Silicone Sealant | Locate purlins/framing. Use washers for better grip. |
| Wood Roof (Shed/Cabin) | Lag screws / Wood screws | Exterior-grade Silicone Sealant | Ensure screws are long enough for structural integrity. |
| Vehicle Body (Van/Truck) | Rivnuts or Bolts with backing plates | Automotive-grade Sealant | Reinforce thin sheet metal, prevent rust on drilled holes. |
Disclaimer
Please be aware that while this guide provides comprehensive information, installing solar panels involves working with electricity and potentially at heights. Always prioritize safety, follow local electrical codes, and consult with a qualified electrician or solar professional if you are unsure about any steps or aspects of your installation. Your safety and the integrity of your off-grid system are paramount.