Off-Grid Solar System Design Basics
Jumping into the world of off-grid solar can feel like diving into a deep ocean without a map. There's so much jargon, so many components, and a constant fear of getting it wrong and ending up in the dark. It’s a common frustration to feel overwhelmed by the sheer volume of information out there, often presented in a way that assumes you already know the basics. This guide is here to untangle that complexity, walking you through the fundamental principles of designing a reliable off-grid solar system step by step, so you can confidently plan your energy independence.
Understanding Your Energy Needs: The First Crucial Step
Before you even think about panels or batteries, the absolute first thing you need to do is understand your own energy consumption. It’s like planning a road trip without knowing how far you need to go or what kind of terrain you’ll encounter – you’re bound to run out of gas or get stuck. Many folks jump straight to buying a kit, only to find it doesn't meet their needs, leading to frustration and wasted money. Take the time to do this right, and the rest of the design process will fall into place much more smoothly.
Conducting a Thorough Load Analysis
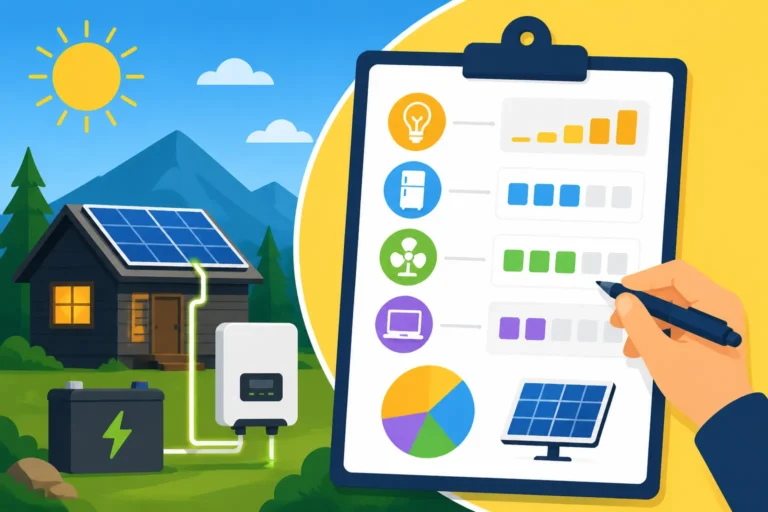
A load analysis is simply a detailed inventory of every single electrical device you plan to power, along with how much power it consumes and for how long. This isn't just about big items like your refrigerator; it's about everything from your phone charger to your coffee maker. Skipping this step or underestimating your usage is one of the most common reasons off-grid systems fall short. You might think, "Oh, I'll just be careful," but life happens, and suddenly you're running the microwave, the water pump, and charging your laptop all at once.
To start, walk through your space (whether it's a cabin, RV, or tiny home) and list every appliance and light. Don't forget those intermittent items like power tools you might use in a workshop, or a hair dryer. For each item, you'll need to find its wattage rating. This is usually printed on a label on the appliance itself, in the owner's manual, or easily found with a quick online search. Remember that some appliances, especially those with motors like refrigerators, well pumps, or microwaves, have a much higher "starting" or "surge" wattage for a brief moment than their continuous "running" wattage. This surge needs to be accounted for, or your inverter will simply shut down when these appliances kick on.
Imagine you're outfitting a remote cabin. You might list LED lights (10W each, 4 hours/day), a small refrigerator (60W running, but 600W surge, 8 hours/day compressor active), a laptop (50W, 4 hours/day), and a water pump (200W running, 1000W surge, 0.5 hours/day). You need to be meticulous, even if it feels tedious. A simple spreadsheet can be your best friend here. It's truly the foundation of knowing How to Calculate Daily Energy Usage.
Calculating Daily Watt-Hours and Peak Loads
Once you have your list and wattage for each item, the next step is to calculate its daily energy consumption in watt-hours (Wh). This is straightforward: multiply the appliance's running wattage by the number of hours you expect to use it per day. For instance, a 60W light used for 4 hours consumes 240 Wh per day (60W x 4h). Sum up all these daily watt-hour figures, and you'll have your total estimated daily energy consumption. This number is absolutely vital, as it dictates how large your solar array and battery bank need to be.
Beyond total daily consumption, you also need to identify your "peak load." This is the maximum wattage you anticipate drawing at any single moment, which often occurs when several high-draw appliances (especially those with surge requirements) turn on simultaneously. For example, if your refrigerator's compressor kicks on (600W surge) while you're microwaving something (1500W) and running a few lights (50W), your peak load could briefly hit over 2150W. This peak load is critical for appropriately How to Size an Off-Grid Inverter and prevents frustrating overloads that can leave you scrambling for a reset button. Tools like a Kill-A-Watt meter, which you can often find on platforms like Amazon, can be incredibly helpful for measuring actual appliance consumption, giving you real-world data rather than just relying on nameplate ratings. This detailed process is essentially an Off-Grid Solar Load Calculation Explained.
| Appliance | Running Watts | Surge Watts (approx.) | Hours/Day Used | Daily Watt-Hours |
|---|---|---|---|---|
| LED Lights (total) | 50 W | N/A | 5 hr | 250 Wh |
| Refrigerator | 60 W | 600 W | 8 hr | 480 Wh |
| Laptop Charging | 50 W | N/A | 4 hr | 200 Wh |
| Water Pump | 200 W | 1000 W | 0.5 hr | 100 Wh |
| Microwave | 1500 W | 2500 W | 0.1 hr | 150 Wh |
| Total Daily | 1180 Wh | |||
| Peak Load | ~2700 W |
Note: Peak Load assumes microwave and water pump surge simultaneously with lights, fridge running, and laptop charging.
Sizing Your Solar Array: Catching the Sun's Power
Once you know how much power you need, it's time to figure out how many solar panels it will take to generate that electricity. This isn't just about buying the biggest panels you can find; it's a careful calculation that balances your daily energy needs with the amount of sunlight your location receives. It's often where people get tripped up, either oversizing and overspending, or undersizing and constantly running low on power.
Determining Required Panel Wattage
The goal here is to collect enough energy from the sun to replenish your battery bank daily, ideally with some excess for cloudy days or seasonal variations. The primary factor, beyond your total daily watt-hour consumption, is your location's "peak sun hours." This isn't the total number of daylight hours, but rather the equivalent number of hours per day when the intensity of sunlight averages 1,000 watts per square meter (kW/m²). This value varies significantly by geographic location and, crucially, by season. For example, a location in Arizona might get 6-7 peak sun hours in summer but only 4 in winter, while a spot in the Pacific Northwest might see 3-4 in summer and a meager 1-2 in winter. When designing an off-grid system, you always design for the worst-case scenario, which is usually the winter months when days are shorter and the sun is lower in the sky.
A common formula to estimate the total wattage of your solar array is: (Total Daily Watt-Hours / Average Peak Sun Hours) / System Efficiency Factor. The system efficiency factor accounts for losses in your wiring, charge controller, and inverter, usually ranging from 0.7 to 0.85 (meaning 70-85% efficiency). So, if your daily consumption is 3000 Wh and your winter peak sun hours are 3, and you assume 75% system efficiency, you'd need an array of at least (3000 Wh / 3 hours) / 0.75 = 1333 watts. It's often wise to add a buffer, perhaps 10-20%, especially if you anticipate periods of heavy usage or persistent cloud cover. Understanding your Peak Sun Hours Explained is truly fundamental to getting this right.
Choosing Panel Type and Placement
The market offers several types of solar panels, each with its own characteristics. Monocrystalline panels are generally the most efficient, meaning they produce more power per square foot, making them ideal for spaces with limited area, like an RV roof or a small cabin. They tend to perform better in lower light conditions than their older polycrystalline counterparts. Polycrystalline panels are a bit less efficient and typically cost less, making them a good budget option if you have plenty of space. Then there are flexible panels, like some from Renogy, which are fantastic for curved surfaces or situations where weight is a major concern, though they often have lower efficiency and lifespan compared to rigid panels. For a fixed installation, rigid monocrystalline panels are usually the go-to for their durability and performance.
Panel placement and orientation are just as important as panel type. In the Northern Hemisphere, panels should ideally face true south (not magnetic south) to capture the most sunlight throughout the day. The tilt angle is also crucial. For year-round power, you might opt for a fixed tilt that's optimized for winter sun (latitude plus 15 degrees, roughly), or better yet, adjustable tilt mounts if you're able to change them seasonally. Shading, even partial shading from a tree branch or chimney, can drastically reduce the output of an entire string of panels if they're wired in series. It's vital to assess your site for any potential shading issues throughout the day and year, perhaps using a sun path calculator app. For ground-mounted systems, you have more flexibility to choose an optimal, shade-free location and adjust tilt, but they require more space and conduit for wiring. Knowing How Many Solar Panels for Off-Grid Living requires careful consideration of all these factors.
Designing Your Battery Bank: Storing the Sunshine
Solar panels only produce power when the sun shines, but you need electricity 24/7. That's where your battery bank comes in – it's the heart of your off-grid system, storing the energy generated during the day for use at night or when the sun isn't cooperating. This is often the most expensive component, and choosing the right batteries and sizing them correctly is paramount to the reliability and longevity of your system.
Selecting Battery Chemistry and Voltage
For off-grid applications, you'll primarily be looking at two main battery chemistries: lead-acid and lithium-ion, specifically Lithium Iron Phosphate (LiFePO4). Lead-acid batteries (like flooded, AGM, or Gel) are the traditional, more budget-friendly option. However, they have limitations: they can only be discharged to about 50% of their capacity without significantly shortening their lifespan, require more maintenance (especially flooded versions), and have a much shorter cycle life (how many times they can be charged and discharged) compared to lithium.
LiFePO4 batteries, on the other hand, are the modern workhorses of off-grid living. While they have a higher upfront cost, their advantages are substantial: they can be discharged almost completely (80-100% depth of discharge), have a lifespan of thousands of cycles, are virtually maintenance-free, and are much lighter and more compact. Brands like Battle Born or EG4 are popular choices for their reliability and performance. For serious, long-term off-grid living, the long-term value of LiFePO4 often outweighs the initial investment. You can learn more about the financial aspects in LiFePO4 vs Lead-Acid Battery Cost.
System voltage (12V, 24V, or 48V) is another critical decision. Smaller systems, like those for an RV or small shed, often use 12V. As your energy needs grow, however, moving to 24V or ideally 48V becomes more efficient. Higher voltage systems require smaller wire gauges for the same amount of power, reducing voltage drop and material costs, and they generally handle larger power loads more effectively. For a whole-house off-grid system, 48V is almost always recommended for its efficiency and scalability.
Calculating Battery Bank Capacity and Days of Autonomy
Your battery bank's capacity needs to be large enough to store your daily energy consumption and then some, to cover periods without solar input. This "then some" is what we call "days of autonomy" – how many days your system can power your loads solely from battery storage without any additional charging. Most off-gridders aim for 2-5 days of autonomy, depending on their location's weather patterns and their backup generation strategy (e.g., a generator). If you live in a sunny area like Southern California, 2-3 days might be sufficient. If you're in the Pacific Northwest with frequent overcast days, 4-5 days would be a safer bet.
To calculate your required battery capacity, use this formula: (Total Daily Watt-Hours x Desired Days of Autonomy) / (Battery Voltage x Maximum Depth of Discharge). Remember to convert watt-hours to amp-hours (Ah) if your batteries are rated in Ah (Wh / V = Ah). For example, if you need 5000 Wh per day, want 3 days of autonomy, have a 48V system, and are using LiFePO4 batteries with an 80% depth of discharge: (5000 Wh/day * 3 days) / (48V * 0.80) = 390.6 Ah. This means you'd need a battery bank capable of providing roughly 391 amp-hours at 48V. This detailed calculation is key to understanding How Many Batteries for an Off-Grid System and specifically How to Calculate Days of Autonomy.
| Battery Type | Pros | Cons | Depth of Discharge | Cycle Life (approx.) | Maintenance |
|---|---|---|---|---|---|
| LiFePO4 | High efficiency, long life, no maint. | Higher upfront cost, can struggle in cold | 80-100% | 3,000-6,000+ | Low |
| Sealed Lead-Acid (AGM/Gel) | Lower upfront cost, no watering | Shorter life, sensitive to deep discharge | 50% | 400-1,200 | Low |
| Flooded Lead-Acid | Lowest upfront cost, robust | Shorter life, requires watering, emits gas | 50% | 500-1,500 | High |
Selecting the Right Inverter: Converting Power for Your Home
The inverter is the unsung hero of your off-grid system, taking the direct current (DC) stored in your batteries and transforming it into the alternating current (AC) that powers most of your standard household appliances. Without a properly sized and high-quality inverter, all the solar panels and batteries in the world won't be able to run your coffee maker or charge your phone. Choosing the wrong one can lead to constant trips, appliance damage, or simply not having enough power when you need it most.
Sizing for Continuous and Surge Loads
When selecting an inverter, you need to consider two main power ratings: continuous wattage and surge wattage. The continuous wattage is the maximum amount of power the inverter can supply constantly, day in and day out, without overheating or failing. This rating should be equal to or greater than your calculated continuous peak load – that is, the total wattage of all AC appliances you might run simultaneously. If you plan to run a 1500W microwave, a 600W refrigerator, and 200W of other lights and electronics at the same time, you'd need an inverter with at least a 2300W continuous rating.
However, many appliances, particularly those with motors (refrigerators, freezers, air conditioners, well pumps, power tools), require a significantly higher burst of power, or "surge," for a few milliseconds when they first start up. This surge wattage can be 2-7 times their running wattage. For example, a refrigerator that runs at 150W might momentarily draw 1000W to kickstart its compressor. If your inverter can't handle this brief surge, it will simply shut down, often frustratingly resetting itself. Your inverter's surge rating needs to accommodate the highest surge load of any single appliance you plan to run. It's not about adding up all potential surges, but rather identifying the largest one. Many seasoned off-gridders choose an inverter that's comfortably larger than their calculated peak load to handle unexpected scenarios or future additions.
Pure Sine Wave vs. Modified Sine Wave Inverters
This is a critical distinction that can seriously impact your appliances. There are two main types of inverters: pure sine wave and modified sine wave.
-
Modified Sine Wave Inverters: These are typically less expensive and were common in older or budget-focused systems. They produce a "stepped" waveform that roughly approximates a sine wave. While they can power basic resistive loads like incandescent lights or simple heating elements, they are generally not recommended for sensitive electronics (laptops, TVs, medical devices like CPAP machines), appliances with motors (refrigerators, microwaves, pumps), or anything with a dimmer or variable speed setting. Using them can cause appliances to run inefficiently, overheat, buzz, or even be permanently damaged. For example, a microwave might take longer to heat food, and some modern fridges might not even start.
-
Pure Sine Wave Inverters: These inverters produce a smooth, consistent waveform that precisely mimics the power coming from the utility grid. This is the gold standard for off-grid living. They are compatible with virtually all AC appliances, from sensitive medical equipment to power tools and modern refrigerators. While they have a higher upfront cost, a pure sine wave inverter is an absolute must for reliability, appliance longevity, and peace of mind in any serious off-grid setup. Many modern integrated inverter-chargers, like those from Victron Energy or Sol-Ark, offer robust pure sine wave output. For more detail, check out Pure Sine Wave vs Modified Sine Wave Inverters.
Choosing a Charge Controller: Protecting Your Investment
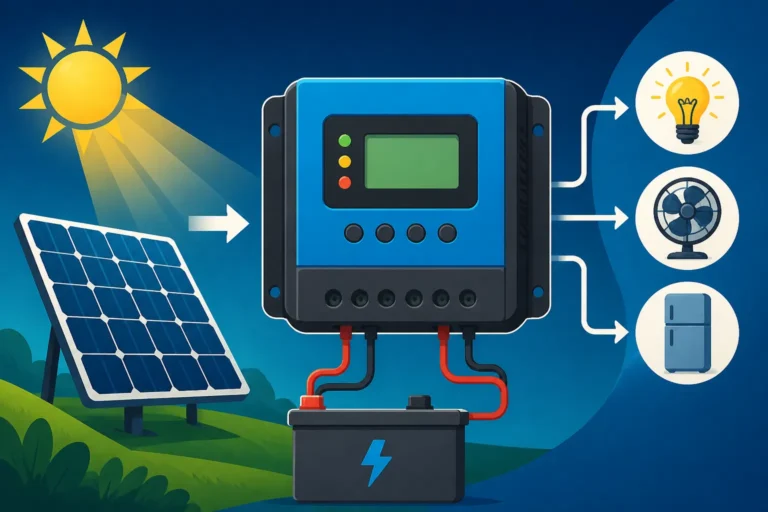
Think of the charge controller as the brain between your solar panels and your battery bank. Its crucial job is to regulate the voltage and current coming from your panels to ensure your batteries are charged safely and efficiently. Without it, your panels could overcharge your batteries, leading to damage, reduced lifespan, or even dangerous conditions. A good charge controller maximizes energy harvest and safeguards your expensive battery investment.
MPPT vs. PWM: Understanding the Differences
There are two primary types of charge controllers you'll encounter: PWM (Pulse Width Modulation) and MPPT (Maximum Power Point Tracking).
-
PWM Charge Controllers: These are simpler, more affordable, and have been around longer. They work by essentially matching the voltage of the solar array to the voltage of the battery bank. When the battery is full, it reduces or pulses the charge. While effective for smaller systems, particularly those where the panel voltage is close to the battery voltage (e.g., a 12V panel charging a 12V battery), they are less efficient. Energy can be lost as heat when the panel voltage is higher than the battery voltage, as they effectively "clip" the excess. They’re often seen in very basic setups, like charging a single battery for occasional use.
-
MPPT Charge Controllers: These are the superior choice for almost any modern off-grid system, especially larger ones. MPPT controllers are much more sophisticated; they can track the "maximum power point" of the solar array, converting the excess voltage from the panels into additional amperage. This means they can take a higher voltage input from your panels (e.g., 60V panels) and efficiently convert it down to the appropriate charging voltage for your battery bank (e.g., 12V, 24V, or 48V). This efficiency gain can be anywhere from 10% to 30% compared to a PWM controller, especially in cooler weather or when panels are wired in series. This extra power translates directly into faster battery charging and more usable energy, making the higher upfront cost of an MPPT controller a worthwhile investment in the long run. Learn more about the comparison in MPPT vs PWM Charge Controllers.
Sizing and Features to Consider
Sizing your charge controller correctly is vital. It needs to be rated to handle the maximum current that your solar array can produce. A common way to calculate this is to take your total panel wattage and divide it by your battery bank's voltage, then add a 25% safety factor to account for cold weather panel over-performance. For example, a 1000-watt solar array charging a 48V battery bank would need a charge controller rated for at least (1000W / 48V) * 1.25 = ~26 amps. However, it's always best to check the manufacturer's specifications for both your panels (specifically their Vmp and Imp) and the charge controller. Renogy and Victron Energy are examples of brands that offer a range of reliable MPPT charge controllers. For more precise sizing, refer to How to Size a Charge Controller.
Beyond just current rating, modern charge controllers come with a host of useful features. Look for models with a clear display that shows real-time data on battery voltage, charging current, and historical energy production. Programming options are incredibly important for battery health; you'll want to be able to set specific charging parameters (bulk, absorption, float voltages, equalization settings for flooded lead-acid) that match your battery manufacturer's recommendations. Temperature compensation, which adjusts charging voltages based on battery temperature, is another essential feature, especially in climates with significant temperature swings. Bluetooth connectivity, allowing you to monitor and adjust settings from your smartphone, can be a huge convenience for remote systems.
Wiring and Safety Considerations: The Backbone of Your System
Even with the best components, a poorly wired system is not only inefficient but also dangerous. Think of your wiring as the veins and arteries of your off-grid system; they carry the lifeblood of electricity. Getting this right means safe, reliable power; getting it wrong can lead to voltage drops, component damage, or even fire hazards. This is one area where cutting corners is never advisable.
Proper Wire Sizing and Voltage Drop
Choosing the correct wire gauge is not just about making connections; it's about minimizing resistance and preventing "voltage drop." Voltage drop occurs when the electrical current travels through a wire, and some of the voltage is lost due to the wire's resistance. In DC systems, especially at lower voltages (like 12V or 24V), voltage drop can be a significant issue, leading to less power reaching your batteries or appliances, and causing components to work harder and potentially fail prematurely.
Several factors influence wire sizing: the amount of current (amps) flowing through the wire, the total length of the wire run (round trip), and the acceptable voltage drop percentage (typically 2-3% for critical circuits, up to 5% for less critical ones). Thicker wires (lower AWG number) have less resistance and are needed for longer runs or higher current loads. Using a DC wire sizing calculator or referring to specialized charts is essential. For instance, a 10-foot run (20 feet round trip) carrying 50 amps at 12V would require much thicker cable than the same current at 48V. Always err on the side of slightly oversized wire if you're unsure. This level of detail ensures your system is both safe and efficient. Don't forget to review guides on How to Size Wire and Cables for best practices.
Fuses, Breakers, and Grounding for Safety
Overcurrent protection is non-negotiable in an off-grid solar system. Fuses and circuit breakers are your system's guardians, designed to interrupt the flow of electricity in the event of an overload or a short circuit, preventing damage to components and, more importantly, mitigating fire risks. Every major circuit needs protection.
Key locations for overcurrent protection include:
- Between the solar panels and the charge controller: Protects the wiring and controller from overcurrent from the panels.
- Between the charge controller and the battery bank: Protects the controller and battery from overcurrent.
- Between the battery bank and the inverter: This is typically the largest fuse or breaker in the system, protecting the inverter and the main DC wiring from the battery bank.
- On the AC output of the inverter: Standard AC breakers to protect your household AC circuits.
Proper grounding (or earthing) is another critical safety measure. This involves creating a safe path for fault currents to dissipate into the earth, preventing dangerous voltage buildup on metallic components in the event of a fault or lightning strike. All metallic components, including solar panel frames, mounting racks, inverter chassis, and battery enclosures, should be bonded together and connected to a robust grounding electrode (like a ground rod driven into the earth). Adhering to relevant electrical codes, such as the National Electrical Code (NEC) in the U.S., is crucial. While DIY is empowering, consulting a licensed electrician for final wiring inspections or complex parts of the grounding system is highly recommended to ensure safety and compliance. This deep dive into safety measures is covered in articles like Off-Grid Solar Safety and Grounding and How to Size Fuses and Breakers.
Putting It All Together: System Architecture and Expansion
Once you understand the individual components, the next challenge is to visualize how they all connect and function as a cohesive system. It’s like building a house – you have all the materials, but how do they fit together to form a stable structure? A well-planned system architecture is the difference between a reliable power source and a constant headache.
Component Integration and System Voltage
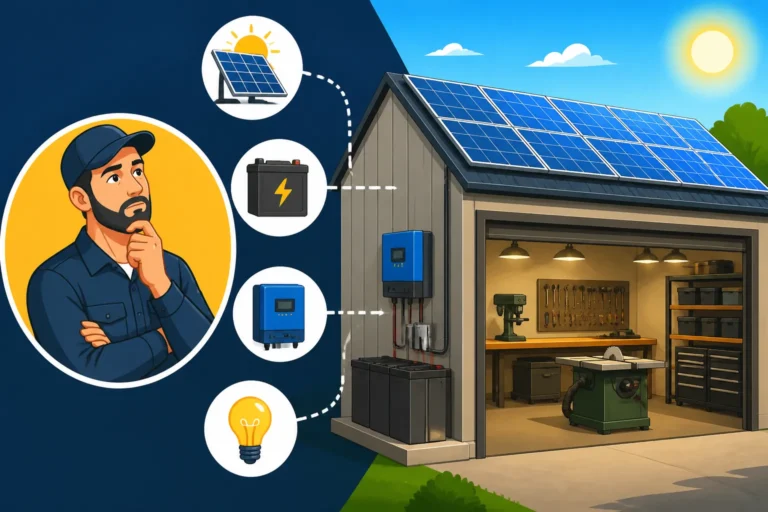
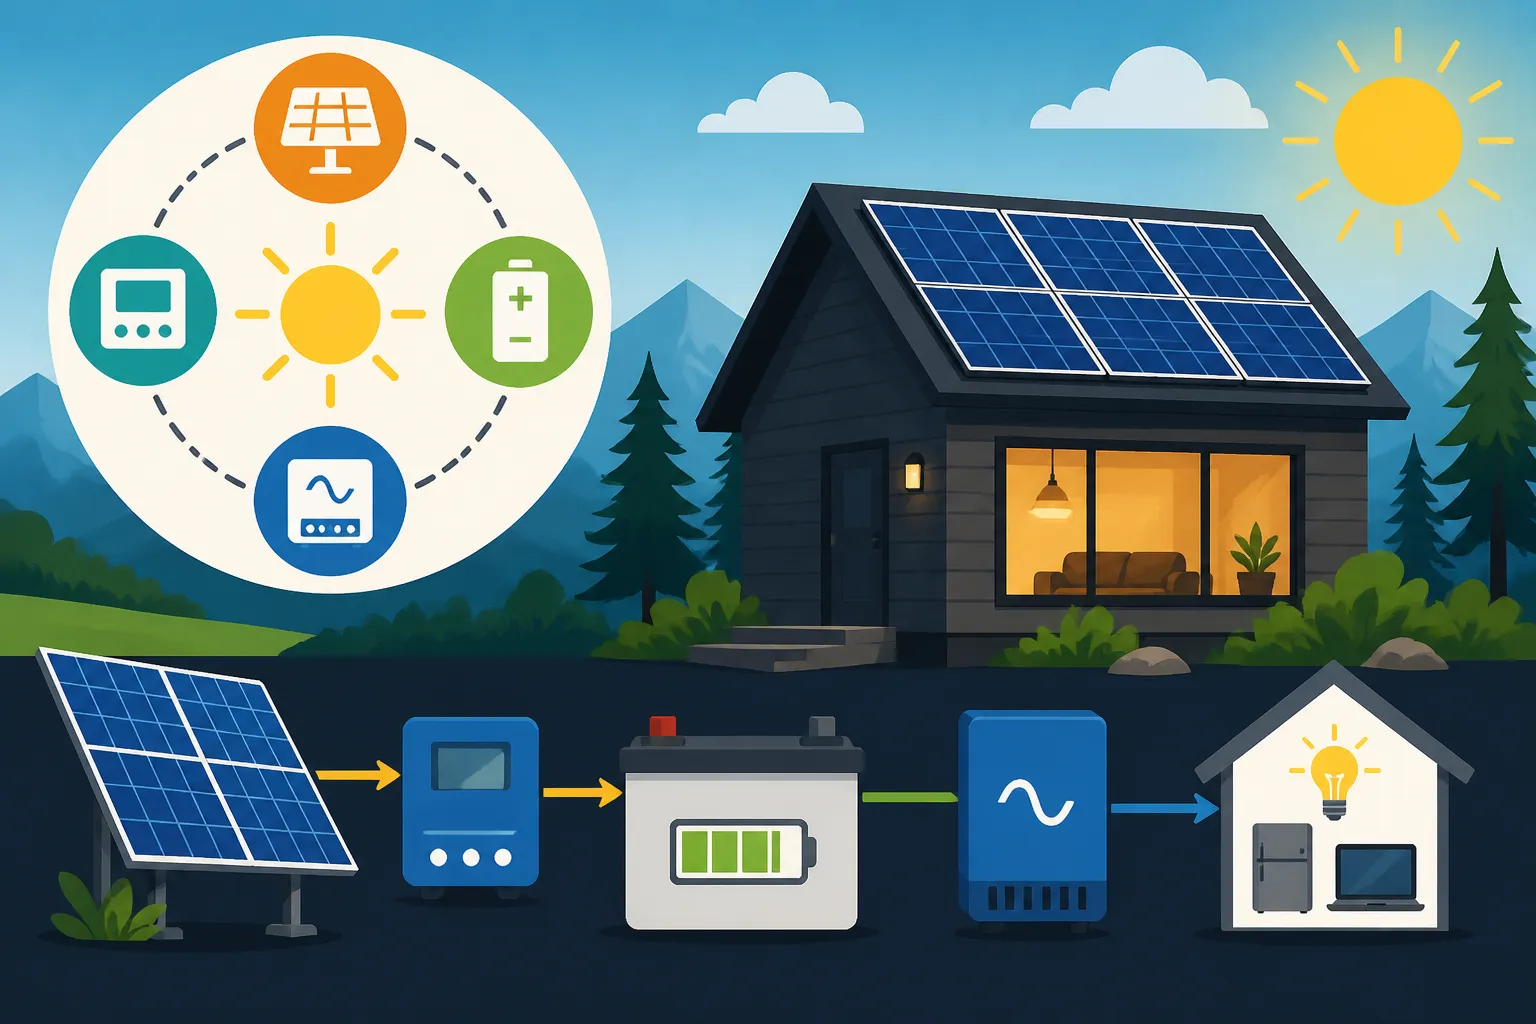
At its core, an off-grid solar system consists of your solar array, a charge controller, a battery bank, and an inverter. The solar panels generate DC power, which flows through the charge controller to charge the batteries. The batteries store this DC power. The inverter then draws DC power from the batteries and converts it into AC power to run your AC appliances. You might also have a DC load center to power 12V or 24V DC appliances directly from the battery, which is often more efficient as it bypasses the inverter's conversion losses.
The most crucial aspect of integration is maintaining consistent system voltage. If you decide on a 48V battery bank, your inverter should be a 48V inverter, and your charge controller should be capable of charging a 48V bank from your solar array. Mismatched voltages are a recipe for disaster. For instance, you could wire multiple 12V batteries in series to achieve 48V, or choose a single 48V server-rack style battery bank. Platforms like Amazon offer a wide array of connectors, cables, and busbars needed to make these connections safely and cleanly. Many integrated inverter-chargers, which combine the functions of an inverter, charge controller, and often a transfer switch, can simplify the wiring and management of the system, especially for larger setups. Understanding Off-Grid Solar System Design Basics is about seeing the whole picture.
Planning for Future Expansion and Redundancy
It’s rare that someone's energy needs stay exactly the same over the years. You might start with a small cabin and later want to add a freezer, a mini-split AC unit, or a workshop. Designing your system with future expansion in mind can save you significant time and money down the road. This might involve choosing a slightly oversized charge controller or inverter from the start, or ensuring your battery bank can easily accept additional batteries. For example, if you initially plan for a 3000W inverter, but suspect you might eventually need 5000W, getting a 5000W unit initially might be more cost-effective than replacing the whole thing later.
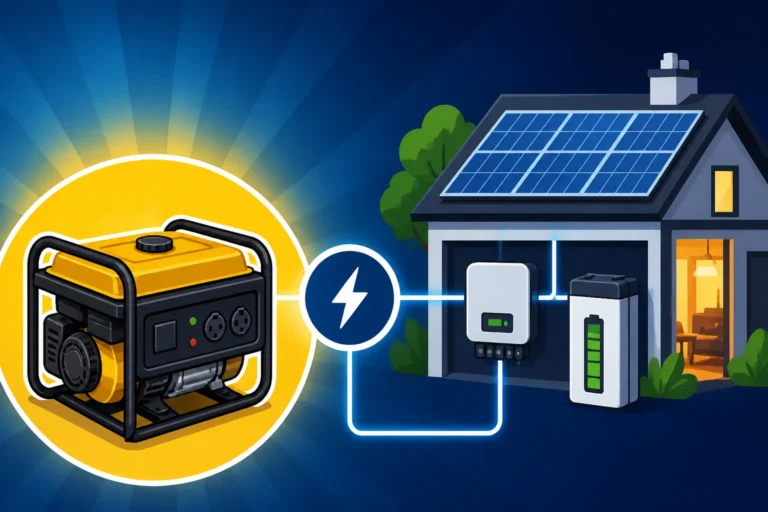
Redundancy is also a smart strategy for ultimate reliability in an off-grid scenario. A common form of redundancy is incorporating a backup generator. This can be manually started during extended cloudy periods or when unusually heavy loads are needed. Many modern inverter-chargers have built-in generator start/stop features, allowing the inverter to automatically fire up the generator when battery voltage drops below a certain threshold. This provides peace of mind, knowing you won't be left without power even in prolonged bad weather. Planning for this from the outset can simplify future installation of the generator. You can explore how to integrate this in How to Add a Generator to Your Design and How to Design an Expandable System.
Real-World Design Challenges and Solutions
Designing an off-grid solar system isn't just about math; it's about anticipating and mitigating real-world challenges. Mother Nature doesn't always cooperate, and budgets are often tight. Addressing these potential pitfalls upfront will ensure your system performs reliably and doesn't become a source of stress rather than liberation.
Addressing Seasonal Variations and Shading
One of the most significant real-world challenges for off-grid solar is the variability of sunlight throughout the year. Winter brings shorter days, lower sun angles, and often more cloud cover, drastically reducing solar production. If your system is designed only for summer loads, you'll find yourself running short on power come winter. The general rule is to design for your worst-case month (typically December for the Northern Hemisphere) or to factor in enough battery capacity and/or a generator to bridge those low-production periods. This often means oversizing your solar array significantly compared to what your average daily needs might suggest, sometimes by 50% or more, depending on your winter sun availability.
Shading is another insidious problem. Even a small shadow from a tree branch, chimney, or antenna across a single panel can reduce the output of an entire string of series-connected panels to zero. Strategic panel placement, considering sun paths at different times of the year, is critical. If shading is unavoidable, solutions like micro-inverters or power optimizers (though more common in grid-tied systems) or splitting your array into multiple strings with separate MPPT inputs on your charge controller can help mitigate losses. Regularly trimming trees is a year-round task for many off-gridders.
Budgeting and Phased System Development
Let’s be honest: a robust, reliable off-grid solar system isn't cheap upfront. The initial Off-Grid Solar Cost: Complete Breakdown can be substantial, especially for a whole-house setup. Batteries, especially LiFePO4, are often the single most expensive component. This can be a major hurdle for many aspiring off-gridders, leading to compromises that ultimately affect system performance or lifespan.
One effective strategy to manage costs is to embrace a phased development approach. Instead of trying to build the entire dream system at once, start with the essentials. For example, you might begin with enough solar and battery capacity to power your lights, refrigerator, and essential electronics. As your budget allows, you can then expand the system, adding more panels, increasing battery capacity, or upgrading your inverter to handle heavier loads like a washing machine or air conditioning. Many components, especially LiFePO4 batteries and MPPT charge controllers, are designed to be easily scalable. This allows you to gain energy independence incrementally without breaking the bank upfront.
Another way to save is by considering a DIY approach versus professional installation. While a DIY build can significantly reduce Cost of a DIY Off-Grid Solar Build, it requires careful research, attention to detail, and a commitment to safety. You can also look for off-grid solar kits on platforms like Renogy or through specialty solar retailers, which bundle compatible components and simplify the purchasing process, though they may not be perfectly tailored to every unique situation. Remember to thoroughly research and How to Budget for an Off-Grid Solar System before committing to any purchase. The long-term savings on utility bills and the profound sense of independence often make the investment well worth it.
Disclaimer
The information provided in this guide is for general informational purposes only and does not constitute professional advice. Off-grid solar system design and installation can be complex and potentially dangerous. Always consult with qualified professionals, adhere to local building and electrical codes, and follow manufacturer instructions for all components. Improper installation can result in property damage, injury, or death.