How to Connect a Backup Generator
Living off-grid is a dream for so many of us, offering unparalleled freedom and resilience. But let's be honest, the thought of losing power when the sun refuses to shine for days, or when your battery bank unexpectedly dips low, can cause real anxiety. That feeling of vulnerability, even with your solar setup, is perfectly normal. This comprehensive guide is here to empower you, walking you through the practical, step-by-step process of seamlessly connecting a reliable backup generator to your off-grid solar system, ensuring you maintain a consistent and comfortable power supply, no matter what.
Understanding Why You Need a Backup Generator for Off-Grid Solar
Embracing off-grid solar means taking charge of your energy, but it doesn't mean you're immune to Mother Nature's whims or your own fluctuating energy demands. While solar is incredibly powerful, there are very real scenarios where it just can't keep up. A backup generator isn't a sign of solar system weakness; it's a smart, pragmatic addition that elevates your energy independence to true reliability.
The Inevitable Gaps in Solar Production
No matter how meticulously you plan your system, there will always be times when your solar panels simply aren't generating enough power. Imagine a week of heavy, dark rain clouds descending over your property in the Pacific Northwest, or the notoriously short, low-angle days of winter in the northern states. These prolonged periods of low solar irradiance can quickly deplete even a generously sized battery bank. You might have sized your array for average conditions, but "average" doesn't account for every single gloomy day. Without a backup, you're left rationing power, turning off essential appliances, or worse, completely running out of electricity, which is exactly what you went off-grid to avoid in the first place.
Then there are those unexpected high-demand moments. Maybe you have guests over, or you decide to run a power-hungry tool in your workshop for longer than anticipated, or a cold snap hits, requiring more heating or an emergency well pump run. Your system might handle daily loads just fine, but peak demands can be challenging. A generator acts as your trusty sidekick, ready to jump in and supplement your solar when it's just not enough, ensuring you never have to choose between comfort and power. This significantly bolsters your overall energy security, making sure your system can handle the unexpected. For tips on incorporating a generator from the outset, you might find guidance in How to Add a Generator to Your Design.
Ensuring System Reliability and Longevity
Beyond simply providing power when solar falls short, a backup generator plays a crucial role in extending the life of your expensive battery bank. Batteries, especially lithium-ion ones, have a finite number of charge and discharge cycles. Deep cycling them repeatedly, day in and day out, or allowing them to drop to very low states of charge, can significantly shorten their lifespan. By using a generator to top up your batteries during extended low-solar periods or high-demand events, you reduce the strain on your battery bank, allowing it to operate within optimal parameters.
Think of it this way: instead of forcing your batteries to carry the entire load through every lean solar period, the generator provides a much-needed assist. This means fewer deep discharges and more consistent charging, directly translating to years, sometimes even a decade or more, of extended battery life. This not only saves you money on premature battery replacement but also ensures that critical loads – like medical equipment, a refrigerator full of food, or a vital well pump – always have the power they need, providing invaluable peace of mind for your off-grid lifestyle. Understanding the full financial picture, including ongoing costs, is covered in Off-Grid Solar Maintenance Costs.
Choosing the Right Generator for Your Off-Grid System
Selecting the ideal backup generator isn't a one-size-fits-all decision. It requires careful consideration of fuel type, power output, and start-up mechanisms to ensure it integrates seamlessly with your existing or planned off-grid solar system and truly meets your specific needs.
Fuel Types and Considerations
Generators typically run on gasoline, propane, or diesel, and each has its own set of advantages and disadvantages for off-grid applications.
- Gasoline Generators: These are often the most common and least expensive upfront. Gasoline is readily available at almost any gas station. However, it has a relatively short shelf life – typically 3-6 months, even with stabilizers – making long-term storage challenging for emergency preparedness. It's also highly flammable and produces more emissions than propane. For remote off-grid sites, transporting and storing large quantities of gasoline can be impractical and risky.
- Propane Generators: Many off-gridders gravitate towards propane generators. Propane has an indefinite shelf life, stores safely in tanks (like the ones used for grills or home heating), and burns cleaner, producing fewer harmful emissions and less carbon buildup in the engine. This means less maintenance and longer engine life. While propane might be slightly more expensive per gallon than gasoline, its storage stability and clean burn often make it a superior choice for backup power. It's also less prone to "gumming up" fuel lines after long periods of inactivity, a common issue with gasoline.
- Diesel Generators: Diesel generators are known for their robustness, efficiency, and long lifespan, often seen in industrial or commercial backup applications. Diesel fuel is also less volatile than gasoline, making it safer to store. They are typically more expensive to purchase initially, but their durability and fuel efficiency can make them cost-effective over the long run, especially for larger, more demanding systems or continuous duty. However, diesel fuel can gel in extremely cold temperatures, requiring special additives or heated storage, and exhaust fumes are potent. Considering how a generator's fuel choice impacts overall expenses is part of a larger discussion, like in Off-Grid Solar vs Generator Fuel Cost.
| Fuel Type | Pros | Cons | Storage | Cold Weather | Typical Cost |
|---|---|---|---|---|---|
| Gasoline | Widely available, low upfront cost | Short shelf life, higher emissions, flammable | Requires fuel stabilizers, safe containers | Can be hard to start, fuel lines clog | Lowest upfront |
| Propane | Indefinite shelf life, clean burn, lower emissions | Slightly higher fuel consumption, tank storage | Safe, convenient large tanks | Excellent, doesn't gel | Moderate |
| Diesel | Durable, fuel-efficient, long lifespan, safe storage | Higher upfront cost, potent exhaust | Large tanks, less volatile | Can gel in extreme cold | Highest upfront |
Generator Sizing and Output Types
Properly sizing your backup generator is paramount. You need a generator that can not only handle your maximum surge loads but also provide sufficient continuous power to efficiently charge your battery bank and run essential AC appliances simultaneously.
- Continuous vs. Surge Wattage: Generators list both running watts and starting (surge) watts. The running watts indicate the power it can continuously produce, while starting watts account for the brief, higher power draw of motors (like those in refrigerators or well pumps) when they first kick on. Your generator's continuous rating should ideally match or exceed the charging capability of your inverter charger, plus any direct AC loads you plan to run while the generator is active. For a deeper dive into figuring out how much power you truly need, explore How to Size a Backup Generator.
- Inverter Generators vs. Conventional Generators: Traditional generators produce raw AC power directly from the engine's RPMs, leading to less stable voltage and frequency, which can be harsh on sensitive electronics. Inverter generators, on the other hand, produce DC power, then convert it to clean, stable AC power via an inverter. This "pure sine wave" output is much safer for all your electronics, like laptops, TVs, and sensitive off-grid equipment. They are also significantly more fuel-efficient as they can vary engine speed based on load, running quieter and using less fuel when only partially loaded. While they cost more initially, the benefits for an off-grid system are often worth the investment.
- Matching to Inverter Charge Capacity: Most off-grid inverter chargers have a maximum AC input current or wattage they can accept from a generator for charging. Your generator's continuous output needs to meet this requirement. For example, if your inverter charger can handle a 60A charge current at 48V, that's roughly 2880 watts of DC charging power. Add inverter inefficiencies and any AC loads you're running, and you'll likely need a generator capable of 5,000 to 7,000 watts to keep up efficiently. Always check your inverter charger's specifications for its maximum AC input and recommended generator size.
Manual vs. Automatic Start Generators
The choice between a manual or automatic start generator largely comes down to convenience, budget, and how critical continuous power is for your setup.
- Manual Start Generators: These are generally more affordable and simpler. You manually start the generator, typically with a pull cord or an electric starter button, whenever you need backup power. This approach is perfectly fine for many off-grid scenarios, especially if you're regularly on-site and don't mind the manual intervention. It's often the choice for cabins or small systems where budget is a primary concern. The downside is that you have to be there to start it, and if your batteries unexpectedly drain while you're away, you could return to a powerless situation.
- Automatic Start Generators: For ultimate convenience and peace of mind, an automatic start (auto-start) generator is the way to go. These generators are designed to integrate directly with your inverter charger, which acts as the "brain." When the inverter charger detects that your battery bank has dropped below a pre-set voltage threshold, or if certain AC loads exceed solar capacity, it sends a signal to the generator to start up automatically. Once the batteries are sufficiently recharged or the load subsides, the inverter charger signals the generator to shut down. This seamless, hands-off operation ensures uninterrupted power, even when you're not around. Many popular inverter chargers, like those from Renogy, offer robust auto-start features that are highly configurable. While auto-start generators and the necessary integration components are more expensive, the added reliability and convenience, especially for full-time off-grid living or remote properties, are often invaluable.
Essential Components and Safety Considerations
Connecting a backup generator to your off-grid solar system isn't just about plugging it in; it's about creating a safe, efficient, and harmonious power ecosystem. This requires understanding the key components that orchestrate this integration and strictly adhering to electrical safety protocols.
The Inverter Charger: Your System's Brain
In an off-grid solar system with a generator backup, the inverter charger is arguably the most critical piece of equipment. It's the multi-talented component that seamlessly transitions between various power sources and manages energy flow.
- More Than Just an Inverter: Unlike a standard inverter that only converts DC battery power to AC power for your appliances, an inverter charger does much more. When your solar panels are producing enough power, it takes the DC from your batteries and converts it to AC. But when the sun isn't shining and your batteries are low, this intelligent device can automatically switch to accept an external AC source – like a generator or even a shore power connection – and use that AC power for two critical functions:
- Direct AC Passthrough: It "passes through" the generator's AC power directly to your household loads, meaning your appliances run straight from the generator.
- Battery Charging: Simultaneously, it takes any surplus AC power from the generator and converts it back into DC to recharge your battery bank. This dual functionality is what makes it indispensable.
- Managing Generator Operations: A well-configured inverter charger can be programmed to automatically start your generator when battery voltage drops below a certain threshold. It can also be set to stop the generator once batteries reach a target state of charge, or even based on specific times of day to minimize noise during quiet hours. This automation protects your batteries from deep discharge, optimizes fuel consumption, and saves you the hassle of manual intervention. For more details on wiring this central component, check out How to Connect an Inverter to Batteries.
Transfer Switches and Electrical Safety
A transfer switch is a non-negotiable safety device when integrating a generator with any electrical system, even a fully off-grid one. It prevents dangerous backfeeding and ensures proper power isolation.
- Preventing Backfeeding: Even if you're completely off the grid, good electrical practice dictates the use of a transfer switch. While it might seem less critical without a utility grid connection, a transfer switch ensures that only one power source (either your inverter or your generator) is supplying power to your home's main electrical panel at any given time. This prevents potential damage to your inverter or generator and, more importantly, eliminates the risk of accidentally energizing a circuit that someone else might be working on, if for instance, you ever decided to bring utility power to your property in the future.
- Manual vs. Automatic Transfer Switches:
- Manual Transfer Switch (MTS): This requires you to physically flip switches to disconnect your solar/inverter output from your load panel and connect the generator's output. It's a simple, reliable, and cost-effective option, common in smaller off-grid setups or for those who prefer manual control.
- Automatic Transfer Switch (ATS): An ATS automatically senses when your primary power source (solar/inverter) fails or falls below acceptable parameters and seamlessly switches to the generator, starting it if necessary. Once primary power is restored, it switches back and shuts down the generator. While more complex and expensive, an ATS provides true hands-off operation, perfect for maintaining continuous power for critical applications.
- Grounding and Bonding: Proper grounding and bonding are absolutely paramount for electrical safety. Your generator, like your solar system, must be properly grounded to earth to provide a safe path for fault currents and protect against electrocution. This typically involves connecting the generator's frame to a grounding rod driven into the earth. Additionally, all components of your off-grid system, including the generator, inverter, and main electrical panel, must be properly bonded to create an equipotential plane, ensuring that all metal parts are at the same electrical potential. Adhering to these safety standards is critical and is often detailed in guides like Off-Grid Solar Safety and Grounding.
Wiring and Overcurrent Protection
The cables and protective devices you use are just as important as the main components themselves. Incorrect wiring can lead to inefficiency, fire hazards, or equipment damage.
- Sizing Appropriate Gauge Wire: The wire connecting your generator to your inverter charger must be correctly sized to handle the generator's maximum output current without excessive voltage drop or overheating. This depends on the generator's wattage, voltage (e.g., 120V or 240V), and the distance between the generator and the inverter charger. Always consult wire sizing charts and err on the side of slightly thicker wire if in doubt. For example, a 5000-watt, 240V generator producing 20.8 amps would require different wire gauge than a 120V generator producing 41.6 amps.
- Fuses and Breakers for Generator Circuits: Just like your solar array and battery bank, your generator's electrical circuit needs robust overcurrent protection. This comes in the form of fuses or circuit breakers installed between the generator and your inverter charger (and/or transfer switch). These devices are designed to trip and interrupt the circuit if there's an overload or a short circuit, preventing damage to your equipment and, most importantly, mitigating fire risks. The size of these protective devices must be carefully matched to your wire gauge and the generator's output.
- Importance of Proper Conduit and Outdoor-Rated Components: If any of your generator wiring runs outdoors, it must be protected by appropriate conduit (e.g., rigid metal conduit, PVC conduit) and use outdoor-rated wiring (like UF-B cable) and connectors. Exposed wiring is vulnerable to physical damage, UV degradation, and moisture ingress, all of which can lead to hazardous electrical faults. Investing in robust, weather-resistant materials ensures the long-term safety and reliability of your generator connection. For a broader look at all the components involved in an off-grid setup, see Off-Grid Solar System Components Explained.
Step-by-Step Guide to Connecting Your Generator
Connecting a backup generator to your off-grid solar system requires careful planning and execution. This section will guide you through the process, from initial setup to configuring your inverter charger for optimal generator operation.
Pre-Installation Checklist and Site Preparation
Before you even think about connecting wires, some foundational steps need to be addressed to ensure safety and efficiency.
- Location for Generator: Choose a generator location that is well-ventilated, preferably outdoors, and away from windows or doors to prevent carbon monoxide poisoning. The exhaust fumes are deadly. Consider noise levels and distance from your living space. The ground should be level and stable, and ideally, provide some protection from the elements, like a small generator shed or cover, but always ensure adequate airflow to prevent overheating. Avoid placing it directly next to fuel storage.
- Fuel Storage Safety: Store fuel in approved, clearly labeled containers, away from ignition sources and out of direct sunlight. For gasoline, remember its limited shelf life. For propane, ensure tanks are secured and upright. Always follow local regulations for fuel storage, which might dictate distances from dwellings or quantities.
- Gathering Tools and Materials: Before you begin, gather all necessary tools and materials:
- Tools: Wire strippers, crimpers, multimeter, screwdrivers, wrenches, conduit bender (if using conduit), safety glasses, gloves.
- Materials: Appropriately sized AC wiring (e.g., Romex for indoor, UF-B for outdoor runs), conduit and fittings, circuit breakers or fuses, junction boxes, weather-rated inlet box, grounding wire, grounding rod, cable ties. Purchasing high-quality cables and connectors, perhaps from a reputable supplier on Amazon, can make a big difference in reliability. You can find a comprehensive list of items in Off-Grid Solar Installation Tools Needed.
Wiring the Generator to Your Inverter Charger
This is where the rubber meets the road. Proper wiring is crucial for safe and functional operation. Always refer to your generator and inverter charger manuals for specific instructions and diagrams.
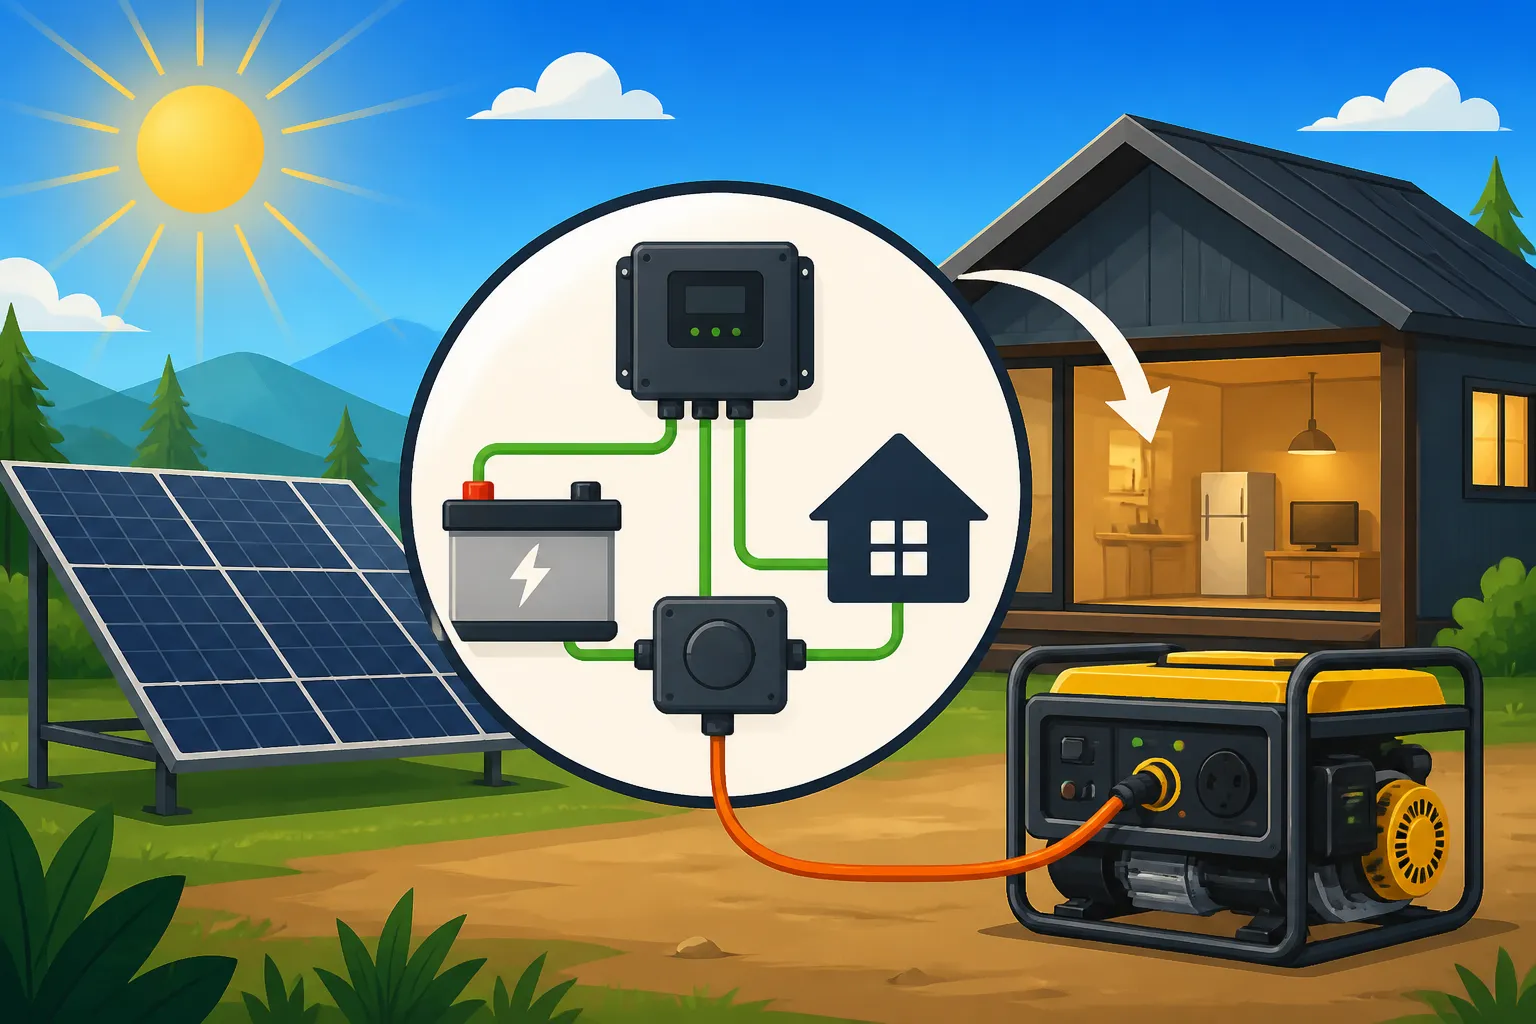
- Install the Generator Inlet Box: On the exterior wall of your cabin or RV, near where your inverter charger is located, install a weather-rated generator inlet box. This box typically has a single male receptacle that your generator's power cord will plug into. Ensure it's rated for your generator's maximum output (e.g., 30A or 50A, 120V or 240V).
- Run Wiring from Inlet Box to Inverter Charger:
- For 120V Generators: Run appropriate gauge AC wire (e.g., 10/2 with ground for a 30A circuit) from the generator inlet box to a dedicated circuit breaker in a small sub-panel, and then to the AC input of your inverter charger.
- For 240V Generators: Run appropriate gauge AC wire (e.g., 10/3 with ground for a 30A 240V circuit) from the inlet box through a double-pole breaker (e.g., 30A) in your sub-panel, and then to the 240V AC input of your inverter charger.
- Conduit Protection: If running wiring externally, use appropriate electrical conduit to protect it from environmental elements and physical damage.
- Connect to Inverter Charger: Carefully connect the wires to the designated AC input terminals on your inverter charger. Ensure correct polarity (line, neutral, ground). Many inverter chargers, including those from Renogy, have clear labeling for AC input terminals. Make sure the AC input breaker on your inverter charger (if present) is off during wiring.
- Grounding: Run a continuous grounding conductor from the generator's frame (if it's not a floating neutral type, consult the manual) to a dedicated grounding rod driven into the earth, separate from your main electrical system's ground if required by local code, or bond it to your main system ground. The generator inlet box should also be grounded. Always ensure all metal enclosures are properly bonded.
- Install Overcurrent Protection: Install the appropriately sized circuit breaker(s) in your sub-panel. This breaker protects the wiring and your inverter from overcurrent conditions originating from the generator. For example, if your inlet box and wiring are rated for 30A, use a 30A breaker.
- Double-Check Connections: Before powering anything on, meticulously double-check every wire connection for tightness, correct polarity, and proper insulation. Use a multimeter to verify continuity and check for any short circuits.
Configuring Your Inverter Charger for Generator Use
Once the physical wiring is complete, the next crucial step is to program your inverter charger to work intelligently with your generator. This is where you tell your system when and how to use the generator. If you need more general information on configuring components, check out How to Set Up an Inverter for Off-Grid.
- Setting Charge Parameters: This is vital for battery health. Access your inverter charger's settings (usually via an LCD screen or a remote monitoring app) and configure the following:
- Maximum AC Input Current/Power: Set this to match your generator's continuous output capacity and the rating of your generator inlet circuit breaker. This prevents the inverter charger from drawing too much power from the generator, potentially overloading it or tripping its internal breaker.
- Battery Charge Voltage: Program the appropriate bulk, absorption, and float voltages for your specific battery chemistry (e.g., LiFePO4, AGM). This ensures your batteries are charged correctly and prevents overcharging. Many modern inverter chargers have pre-set profiles for common battery types, but always verify.
- Maximum Charge Current: Set the maximum current the inverter charger will use from the generator to charge your batteries. This protects your batteries from excessive charging rates.
- Low Battery Voltage Auto-Start Settings: If you have an auto-start generator, this is where you enable its intelligent operation.
- Start Voltage: Set the battery voltage threshold at which the inverter charger will send a signal to start the generator. This should be a comfortable "buffer" voltage, well above the point where your batteries would be dangerously depleted. For example, you might set it to 49V for a 48V LiFePO4 bank.
- Stop Voltage or Time: Configure the conditions for the generator to shut off. This could be when the batteries reach a specific higher voltage (e.g., 55V for a 48V LiFePO4 bank, indicating full charge), or after a certain run time, or a combination of both.
- Start Delay/Stop Delay: Add short delays to prevent the generator from cycling on and off too frequently due to momentary voltage fluctuations.
- Quiet Time Settings: Many inverter chargers allow you to program "quiet times" during which the generator will not automatically start, even if batteries are low. This is perfect for avoiding noisy generator operation late at night or early in the morning, ensuring peace for you and any neighbors. If batteries drop low during a quiet time, the system will conserve power until the quiet period ends, or you manually start the generator.
- Other Advanced Settings: Depending on your inverter charger model, you might have other settings to optimize performance, such as load-sensing (generator starts if AC loads exceed a certain threshold), or periodic "exercise" cycles for the generator to keep it primed. Remember, precise charge parameters are covered in How to Set Charge Controller Parameters, and many of these principles apply to the inverter charger's charging function.
Advanced Integration and Smart Control
Once you've mastered the basics of connecting your backup generator, there are advanced techniques and technologies that can further optimize its performance, enhance convenience, and provide invaluable peace of mind. These integrations move beyond simple on/off operation to create a truly intelligent off-grid power ecosystem.
Integrating a Dedicated Battery Charger
While your inverter charger excels at using the generator's AC output to charge your batteries, there are specific scenarios where a separate, dedicated DC battery charger can be a beneficial addition.
- Smaller Generators and Inefficiencies: Some smaller, less powerful generators might struggle to meet the surge demands of both charging a large battery bank and simultaneously running AC loads through a large inverter charger. In such cases, the inverter charger might not be able to draw its full charging current from the generator, leading to slower, less efficient battery charging. A dedicated, high-efficiency DC battery charger (e.g., a Victron Blue Smart Charger) can sometimes extract more usable charging power from a smaller generator, especially if the generator is only providing 120V AC output and your inverter is a 240V model that runs less efficiently on a single leg.
- Specific Battery Chemistries or Charging Needs: While most modern inverter chargers are highly configurable, some niche battery chemistries or specific charging algorithms might be better handled by a dedicated charger designed for that purpose. For instance, if you have a mix of different battery types or are experimenting with unique charging profiles, a standalone charger offers more flexibility. Additionally, if your generator has a DC charging output (usually 12V), a dedicated DC-to-DC charger can convert that low-voltage power into the higher voltage needed for your main battery bank, allowing for even more versatile charging options directly from the generator. This kind of nuanced approach is part of understanding the lifetime cost of your system, which you can explore in Lifetime Cost of an Off-Grid Solar System.
Remote Monitoring and Control
The convenience of remote monitoring and control for your off-grid system, including your generator, cannot be overstated, especially for remote cabins, vacation homes, or properties where you're not always present.
- Beyond the Dashboard: Modern inverter chargers and charge controllers often come with built-in Wi-Fi or Bluetooth connectivity, allowing you to monitor your system's performance (battery state of charge, solar production, AC loads) from your smartphone or computer. However, integrating your generator into this monitoring system takes it to the next level.
- Smart Features for Comprehensive Oversight: Many advanced inverter chargers and external monitoring devices can track your generator's run time, fuel consumption, and even initiate remote starts/stops. Imagine being able to check your battery status from your city apartment and, if they're low due to prolonged cloudy weather at your mountain cabin, remotely start your propane generator to top them up before you arrive for the weekend. Some systems can even send you alerts for low fuel levels or maintenance reminders. Companies like Victron Energy offer comprehensive monitoring solutions (e.g., the Cerbo GX) that tie all components, including generator data, into one user-friendly interface. You can even find simpler remote start modules for generators on marketplaces like Amazon, providing basic functionality at a lower cost.
- Benefits for Remote Installations: For off-grid properties that are often unattended, remote monitoring provides immense peace of mind. You can quickly diagnose potential issues, ensure your critical systems remain powered, and manage your energy resources efficiently, preventing unexpected outages or costly repairs. It truly allows you to keep an eye on your energy independence from anywhere.
Generator Exercising and Maintenance Routines
A backup generator is only effective if it's reliable when you need it most. Regular exercising and preventative maintenance are key to ensuring it always starts and runs flawlessly.
- Automatic Exercising Schedules: Many auto-start generators and advanced inverter chargers can be programmed to automatically "exercise" the generator on a regular schedule (e.g., once a week or once a month) for a short period. This is incredibly important. Running the generator under a light load for 15-30 minutes helps lubricate internal components, keeps the carburetor (for gasoline models) from gumming up, and ensures that all systems are operational. It's like giving it a regular check-up to keep it ready for its crucial role.
- Preventative Maintenance Checklist: Don't wait for an emergency to discover your generator won't start. Implement a regular maintenance schedule:
- Oil Changes: Follow the manufacturer's recommendations, typically every 50-100 hours of operation or annually.
- Air Filter: Clean or replace the air filter regularly, especially in dusty environments.
- Spark Plug: Inspect and replace the spark plug as recommended.
- Fuel System: For gasoline generators, use fuel stabilizer. For all types, inspect fuel lines for cracks or leaks.
- Battery (if electric start): Check the starter battery's charge and terminals.
- General Inspection: Look for loose wires, damaged components, and signs of wear.
- Record Keeping: Keep a log of all generator run times, maintenance performed, and fuel added. This helps you track usage, predict maintenance needs, and understand the overall Off-Grid Solar Cost: Complete Breakdown including your generator. A well-maintained generator will serve you reliably for years, providing critical backup when your solar system needs a little help.
Troubleshooting and Maintenance Tips
Even the most robust off-grid solar and generator systems can encounter hiccups. Knowing how to troubleshoot common issues and establish a solid maintenance routine will save you headaches, time, and money.
Common Connection Issues and How to Resolve Them
When your generator isn't cooperating, it's easy to get frustrated. But many problems have straightforward solutions. Start with the simplest checks first.
- Generator Not Starting:
- No Fuel: This might sound obvious, but it's the number one cause. Check fuel levels. For propane, ensure the tank valve is open.
- No Oil: Most modern generators have a low-oil shutoff to prevent engine damage. Check the oil level and fill if necessary.
- Spark Plug Issues: A fouled or damaged spark plug can prevent ignition. Inspect and clean or replace it.
- Choke/Fuel Valve: Ensure the choke is set correctly for starting (if manual) and that the fuel valve is open.
- Circuit Breakers: Check the generator's main circuit breaker. It might have tripped due to an overload.
- Starter Battery (Electric Start): If it has an electric start, check the battery's charge.
- Generator Starts But Not Charging Batteries / Inverter Not Recognizing Input:
- Inverter AC Input Breaker: Ensure the AC input breaker on your inverter charger (if it has one) is ON.
- Generator Output Breaker: Verify the generator's own output breaker(s) are engaged.
- Wiring Connection: Double-check the physical wiring from the generator inlet to the inverter charger. Are all connections tight? Is the polarity correct? A loose neutral or ground can cause issues.
- Inverter Settings: Revisit your inverter charger's settings. Is the "AC Input Current Limit" set too low? Is it configured to accept a generator input? Is the "low battery voltage start" threshold too high or too low, preventing it from activating when needed, or causing it to shut off too soon?
- Generator Output Voltage/Frequency: Use a multimeter to check the actual AC voltage and frequency coming from the generator. If it's outside the acceptable range for your inverter charger (e.g., significant voltage drops under load or unstable frequency), the inverter might reject the input to protect itself. This is less common with modern inverter generators, but can happen with older conventional models.
- Generator Overloading/Tripping Breaker:
- Too Many Loads: You might be trying to run too many AC appliances directly from the generator while it's also trying to charge your batteries. Turn off non-essential loads.
- Inverter Charge Current Limit: Ensure your inverter charger's "Max AC Input Current" setting is properly configured for your generator's continuous output. If it's set too high, the inverter tries to draw more power than the generator can provide, leading to an overload.
- Surge Loads: Starting appliances with motors (refrigerators, well pumps, power tools) can cause a momentary surge. If your generator is too small for these surges, it will trip. Consider phasing your appliance usage.
Prolonging the Life of Your Generator and System
Preventative care is the best way to ensure your generator provides reliable service for years to come. Think of it as a vital part of your independent lifestyle, deserving of regular attention.
- Regular Preventative Maintenance: Stick to the manufacturer's maintenance schedule for oil changes, air filter replacement, and spark plug checks. Clean the generator regularly, especially cooling fins, to prevent overheating.
- Fuel Management:
- Gasoline: Always use fresh fuel. If storing for more than a month, use a fuel stabilizer like Sta-Bil to prevent ethanol separation and gumming.
- Propane: Propane doesn't degrade, so storage isn't an issue. Just ensure tanks are always secured.
- Diesel: Use winterized diesel in cold climates to prevent gelling, or add anti-gel additives. Keep the tank full to minimize condensation.
- Load Management: Avoid constantly running your generator at its absolute maximum capacity. Just like a car engine, constant heavy load can shorten its life. Try to manage your electricity consumption to allow the generator to run efficiently at a moderate load, only hitting peak capacity when absolutely necessary for short bursts. This not only extends generator life but also optimizes fuel usage.
- Proper Storage: When the generator isn't in use for extended periods, store it in a clean, dry, and protected environment. If it's a gasoline model, it's often best to run the carburetor dry or drain the fuel system after adding stabilizer to prevent issues.
- Battery Maintenance (Generator Starter): If your generator has an electric start, periodically check and charge its small starter battery. A trickle charger can keep it topped up and ready.
When to Call in the Professionals
While many off-grid tasks can be DIY projects, there are times when it's safer and smarter to bring in a qualified professional.
- Complex Electrical Issues: If you've gone through the troubleshooting steps and still can't identify the problem, or if you're dealing with intermittent faults, sparking, or unusual electrical behavior, it's time to call a licensed electrician or an off-grid solar specialist. Electrical work can be dangerous, and guessing can lead to serious injury or costly damage.
- Safety Concerns: Any situation involving smoke, burning smells, hot wires, or repeated tripping of main breakers indicates a serious problem. Do not try to diagnose these issues yourself. Immediately power down all affected components and seek professional help. Your safety and the safety of your property are paramount.
- Permitting Requirements and Code Compliance: Depending on your location, connecting a generator, especially if it's permanently wired into a structure, might require electrical permits and inspections to ensure it meets local building and electrical codes (like the National Electrical Code, or NEC). While going off-grid often means more autonomy, some jurisdictions still require permits for electrical installations, regardless of grid connection status. A professional can ensure your installation is fully compliant, avoiding potential fines, insurance issues, or safety hazards down the line. You can explore this further in Off-Grid Solar and Electrical Code. If you're undertaking a significant project, considering the DIY vs Professional Off-Grid Solar Cost might help you decide when to seek expert help.
Disclaimer
The information provided in this guide is for general informational purposes only and does not constitute professional electrical advice. Working with electricity can be dangerous and potentially life-threatening. Improper installation or wiring can result in personal injury, property damage, or fire. Always consult with a qualified, licensed electrician or solar professional before installing or modifying any electrical system. Follow all local codes, regulations, and manufacturer instructions for all equipment. The author and publisher assume no responsibility for any loss, damage, or injury that may result from relying on this information.