How to Mount Off-Grid Solar Panels
Mounting your off-grid solar panels can feel like a daunting puzzle, especially when you're staring at an empty roof or a vast piece of land, wondering where to even begin and how to ensure your investment is secure and efficient. It's not just about slapping panels up; it's about making sure they're positioned for optimal sun exposure, built to withstand the elements, and integrated seamlessly into your independent power system. This comprehensive guide will walk you through every step of the process, from choosing the right mount for your specific needs to the nitty-gritty of installation, so you can confidently secure your solar array and start harnessing that glorious sunshine.
Understanding Your Off-Grid Solar Panel Mounting Options
When you decide to go off-grid with solar, one of the first big decisions, after figuring out your power needs, is how and where you'll actually put those panels. It's not a one-size-fits-all situation, and what works beautifully for a cabin in the woods might be completely impractical for a van roaming the country. Understanding the different mounting options available is key to a successful, durable, and efficient off-grid solar setup. Each type has its own set of advantages and challenges, and weighing these against your property, climate, and lifestyle is crucial.
Roof Mounts for Stationary Structures
Roof mounting is probably what most people envision when they think of solar panels, and for good reason. It's incredibly common for homes, cabins, sheds, and garages, offering a discreet and often space-saving solution. By utilizing existing roof structures, you can keep your panels out of the way, protecting them from accidental damage and freeing up valuable ground space. However, it's not without its considerations, such as roof integrity, potential shading from trees or other structures, and the angle of your roof relative to the sun.
When installing on a roof, you’ll typically be dealing with either flush mounts or tilt mounts. Flush mounts sit parallel to the roof surface, often looking cleaner and being less susceptible to wind uplift. They're great for aesthetics and lower profile, but they rely entirely on your roof's existing angle for sun exposure. If your roof isn't optimally angled for your latitude, you might sacrifice a bit of efficiency. Tilt mounts, on the other hand, allow you to adjust the angle of your panels, which is fantastic for optimizing performance throughout the seasons or if your roof pitch isn't ideal. However, they're more visible and might have a slightly higher wind load.
Ground Mount Systems
For those with ample land or roofs that aren't suitable for solar – maybe they're too old, too shaded, or not properly oriented – ground mounts are an excellent alternative. These systems involve setting up a dedicated structure on the ground to hold your solar panels. This gives you incredible flexibility in terms of orientation and tilt angle, allowing you to perfectly position your panels for maximum sun exposure all year round. Imagine being able to fine-tune your array for winter's low sun or summer's high arc; that's the power of a good ground mount.
There are fixed ground mounts, which, once installed, maintain a consistent angle, and then there are tracking ground mounts. While more complex and expensive, tracking mounts automatically follow the sun's path across the sky, maximizing energy production. For a large off-grid system where every watt counts, especially if you're battling inconsistent weather or high energy demands, a single-axis or even dual-axis tracker can make a significant difference. You might invest more upfront, but the increased efficiency can mean fewer panels are needed or greater energy independence. Remember to factor in the labor and material costs for concrete footings or sturdy ground anchors, which are essential for stability. For a more detailed look at the setup, check out our guide on How to Install Ground-Mounted Solar Panels.
Specialized Mounts for Mobile and Off-Grid Applications
Beyond stationary structures, many off-gridders live life on the move in RVs, vans, or even boats. For these unique scenarios, specialized mounting systems are a must. The primary challenge here is combining durability with the ability to withstand constant motion, vibrations, and varying weather conditions. Aesthetics and aerodynamics also play a role, as you don't want your solar array creating too much drag or looking like an afterthought.
For RVs and vans, you'll often see sturdy, low-profile mounting feet that elevate the panels slightly above the roof to allow for airflow and prevent hot spots. Companies like Renogy offer excellent mounting kits specifically designed for RV roofs, which often involve drilling through the roof and sealing the penetrations meticulously to prevent leaks – a crucial step for any mobile setup. For boats, marine-grade mounts are essential, built from corrosion-resistant materials like anodized aluminum or stainless steel, capable of handling saltwater environments and robust enough to secure panels against strong winds and rocking motions. You might consider flexible panels for boats or vans, which can conform to curved surfaces and are much lighter, though typically less efficient per square foot than rigid panels. If you're pondering solar for your mobile home, our article on How to Mount Panels on an RV offers specific advice.
| Mounting Type | Best For | Key Advantages | Key Considerations |
|---|---|---|---|
| Flush Roof Mount | Homes, cabins, sheds with good roof angle | Discreet, low profile, less wind resistance | Fixed angle, roof integrity, potential for shading |
| Tilt Roof Mount | Homes, cabins, sheds with varied roof angle | Adjustable angle for seasonal optimization | More visible, higher wind load, roof penetrations |
| Fixed Ground Mount | Ample land, difficult roofs | Optimal orientation/tilt, easy access for cleaning | Takes up ground space, requires sturdy foundation |
| Tracking Ground Mount | Large systems, high energy demand | Maximized energy production throughout the day | Higher cost/complexity, more moving parts |
| RV/Van Mount | Mobile living, smaller systems | Designed for portability, durable for travel | Aerodynamics, roof waterproofing, vibration resistance |
| Marine Mount | Boats, docks, harsh environments | Corrosion-resistant, withstands water/motion | Specialized materials, robust securing, salt spray |
Tools and Materials You'll Need
Embarking on a solar panel mounting project requires more than just enthusiasm; you'll need the right tools and materials to ensure a safe, secure, and durable installation. Skimping on quality here can lead to headaches down the road, from loose panels to water leaks, so it's wise to invest in appropriate gear. Having everything laid out and ready before you start will make the process smoother and far less frustrating. Think of it like packing for a long trip – you don't want to realize you forgot your toothbrush halfway there!
Essential Tools for Installation
Before you even think about lifting a panel, gather your toolkit. At a minimum, you’ll need a good drill for making pilot holes and securing mounting hardware, along with a variety of drill bits suitable for wood, metal, and potentially masonry, depending on your mounting surface. A socket wrench set and combination wrenches will be indispensable for tightening bolts and nuts on your racking system. You'll also need a tape measure, level, and a chalk line to ensure your panels are aligned perfectly and mounted straight – nobody wants a crooked solar array!
Safety gear is non-negotiable. This includes work gloves to protect your hands, safety glasses to shield your eyes from debris, and a hard hat, especially if working on a roof or overhead. If you're working at heights, a sturdy ladder, fall protection harness, and ropes are absolutely critical. Don't be a hero; gravity always wins. Additionally, wire cutters, strippers, and crimpers will be necessary for any electrical connections, and a multimeter will help you test connections and ensure everything is functioning correctly before you power up your system. For comprehensive electrical safety, understanding Off-Grid Solar Safety and Grounding is paramount.
Mounting Hardware and Racking Components
The backbone of your solar panel installation is the mounting hardware and racking system. This is what physically holds your panels in place, so it needs to be robust and designed for the specific environment. Most systems consist of rails, which attach to your roof or ground structure, and clamps that secure the panels to these rails. Look for components made from durable, corrosion-resistant materials like anodized aluminum or stainless steel, especially if you're in a coastal area or dealing with harsh weather. Companies like Renogy often include complete hardware kits with their panels or mounting systems, which can simplify the process significantly.
When choosing your hardware, consider the type of roof or ground you're attaching to. For asphalt shingle roofs, flashing kits are used to create a watertight seal around the roof penetrations where the mounting feet are secured. For metal roofs, specialized clamps that attach to standing seams or fasteners that go into the purlins are needed. If you're going for a ground mount, you might need heavy-duty galvanized steel posts, concrete footings, and robust cross-beams to support the weight and withstand wind loads. Always ensure your chosen hardware is rated for the wind and snow loads in your specific geographical area. A quick search on Amazon can reveal a multitude of options, but always check reviews and specifications carefully.
Weatherproofing and Sealing Supplies
Protecting your investment from the elements, particularly water intrusion, is just as important as securing the panels themselves. Any penetration into a roof or vehicle body creates a potential leak point. You'll need high-quality sealants like exterior-grade silicone or specialized roofing sealants that are UV-resistant and flexible enough to accommodate temperature changes. Consider using butyl tape or self-leveling sealant around mounting feet, especially on RVs, to create an impenetrable barrier.
In addition to sealants, proper cable management is essential. UV-resistant cable ties, conduit clips, and weatherproof junction boxes will keep your wiring neat, protected from sun exposure, and prevent potential chafing or damage that could lead to electrical issues. When running cables through a roof or wall, use proper cable glands or conduit fittings designed to seal against moisture and pests. Taking the time to properly seal every entry point will save you countless headaches and costly repairs down the road, ensuring your off-grid system remains watertight for years to come. For more insights on this critical step, refer to our article on How to Waterproof Roof Penetrations.
Site Selection and Panel Orientation
Getting your panels mounted correctly is only half the battle; ensuring they're mounted in the right place and facing the right direction is paramount for optimal energy harvest. A well-designed array can make the difference between comfortably powering your off-grid life and constantly running short on juice. This involves carefully considering the environment around your installation site and understanding the sun's path throughout the day and year.
Identifying Optimal Sun Exposure
The absolute first step in mounting your off-grid solar panels is finding a spot that gets consistent, unobstructed sunlight. This sounds obvious, but it's often overlooked in its complexity. You need to observe the area over a full day, or even better, across different seasons, to identify any potential shading issues. Trees, chimneys, other buildings, or even utility poles can cast shadows that significantly reduce your panels' output. Even a small shadow on one cell of a panel can drastically reduce the output of the entire string of panels it's connected to.
Consider the sun's path from sunrise to sunset. In the Northern Hemisphere, south-facing is generally ideal, but a southwest or southeast orientation can still be highly effective, especially if you have higher energy demands in the morning or evening. For those in the Southern Hemisphere, north-facing is your best bet. Think about the entire year – while that tree might be bare in winter and not cast a shadow, its full foliage in summer could be a major problem. It’s also wise to consider future landscaping plans or potential new construction around your property that could eventually block your precious sunlight. You're looking for a clear line of sight to the sun's trajectory throughout the day, year-round.
Calculating the Best Tilt Angle
Once you've nailed down the orientation, the next crucial step is determining the optimal tilt angle for your solar panels. This angle dictates how directly the sun's rays strike the panel surface, which directly impacts efficiency. For year-round off-grid living, a good rule of thumb in many regions is to set your panel tilt angle roughly equal to your latitude. For example, if you live at 40 degrees North latitude, a 40-degree tilt would provide a good balance between summer and winter production.
However, if your off-grid system is primarily for seasonal use – say, a summer cabin or a winter hunting lodge – you might adjust this. For maximum summer production, you'd typically lower the tilt angle (closer to flat), while for winter, you'd increase it (more vertical) to catch the lower sun. Some advanced off-gridders even adjust their tilt angle seasonally or monthly. While more effort, this can dramatically boost output during critical periods. For ground mounts or tiltable roof mounts, this flexibility is a huge advantage. Remember that panels also produce less power when they're hot, so allowing airflow underneath them, even at an optimal tilt, can help with efficiency.
Avoiding Shading and Obstructions
Shading is the silent killer of solar efficiency. Even partial shading on just one panel can severely impact the performance of your entire solar array, especially with older string inverter systems. Modern MPPT charge controllers and micro-inverters or optimizers can mitigate this somewhat by allowing individual panels or sections of an array to perform independently, but shading will always reduce total output. Therefore, meticulous planning to eliminate or minimize shading is absolutely essential.
Walk around your proposed installation site multiple times a day, observing shadow patterns. Use a sun path calculator app on your phone or even just a compass and your own observations to anticipate seasonal shadow shifts. If you can't avoid some shading, consider splitting your array into multiple, smaller strings with separate charge controllers, or using panels equipped with bypass diodes and optimizers. Trimming trees or removing minor obstructions might be necessary. Remember, preventing shading is far more effective and less costly than trying to compensate for it after installation. A thorough understanding of How to Design Around Shading can save you a lot of grief.
Mounting Solar Panels on a Roof
Roof mounting is a popular choice for many off-grid homeowners because it utilizes existing space and keeps panels out of the way. However, it requires careful planning and execution to ensure both the safety of the installation and the integrity of your roof. Rushing this step can lead to leaks, structural damage, or even panels blowing off in high winds, so take your time and do it right.
Assessing Roof Structure and Integrity
Before you even think about drilling holes, you need to thoroughly inspect your roof. The first question is: can it handle the weight? While solar panels aren't incredibly heavy individually, an entire array, plus the mounting hardware, adds significant load. Most modern roofs are built to code and can easily support solar, but older roofs or those with existing damage might need reinforcement. You'll want to check the condition of your shingles, flashing, and most importantly, the underlying rafters. You'll be attaching your mounting feet directly to these structural members, so they need to be sound and free of rot or pest damage.
Take measurements of your roof area and calculate how many panels can realistically fit while leaving adequate space around the edges for maintenance and safety. Also, consider the age of your roof. If it's nearing the end of its lifespan, it might be more cost-effective to replace the roof before installing solar panels, as removing and reinstalling panels for a new roof can be an expensive endeavor. Addressing any roof repairs or replacements beforehand is a smart long-term strategy, ensuring your roof provides a stable and leak-free foundation for your off-grid solar system for decades to come.
Installing Mounting Rails and Flashing
Once your roof is deemed ready, the actual installation of the mounting system begins. The first step typically involves locating your roof rafters. You can do this by tapping, using a stud finder, or by going into your attic and measuring from known points. Mark the rafter locations carefully with a chalk line. These are the points where your mounting feet or standoffs will be securely attached. Each attachment point needs to be strong enough to support its share of the panel weight and resist wind uplift.
For asphalt shingle roofs, you'll generally install a flashing system. This involves lifting the shingles, drilling pilot holes into the rafters, and then installing special metal flashing plates that slide under the shingles and integrate with the mounting feet. These flashing pieces are designed to shed water around the mounting hardware, preventing leaks. After securing the mounting feet and flashing with lag bolts, you'll apply a high-quality sealant around the bolt heads and any exposed areas to create a truly watertight seal. Finally, the long aluminum rails are attached to these mounting feet, creating a sturdy framework for your panels. Remember, precise alignment of these rails is crucial for the panels to sit flat and look professional. Following a detailed Off-Grid Solar Installation Guide is highly recommended.
Securing Solar Panels to the Racking
With the rails firmly in place, it's time to hoist and secure your solar panels. This is often a two-person job, especially with larger, heavier panels, to prevent damage to the panels or injury to yourself. Carefully lift each panel onto the rails, aligning it with the preceding panel and ensuring it sits flush and level. Then, using mid-clamps and end-clamps, you'll secure the panels to the rails. Mid-clamps sit between two adjacent panels, holding both down, while end-clamps secure the panels at the ends of each row.
These clamps typically have a torque specification, so using a torque wrench is important to ensure they are tight enough to hold the panels securely, but not so tight that they damage the panel frames. Once all panels are clamped down, double-check every connection point, bolt, and clamp for tightness and security. You want to be absolutely sure your array can withstand the toughest winds, snow loads, and vibrations your environment throws at it. A properly secured system will not only protect your investment but also provide peace of mind during stormy weather.
Setting Up Ground Mount Systems
Ground mounts offer a fantastic alternative to roof installations, especially if you have an unsuitable roof, abundant land, or a desire for maximum adjustability. While they might require a bit more upfront labor in terms of site preparation, the flexibility and ease of access they provide can be a huge benefit for long-term off-grid living.
Preparing the Site and Foundation
The first and arguably most critical step for a ground mount is site preparation. You need a relatively level area that receives excellent, year-round sun exposure, free from shadows. Clear any vegetation, rocks, or debris that might interfere with the installation. Proper drainage is also key; you don't want your array sitting in standing water after a heavy rain, which could lead to corrosion or unstable ground over time. You might need to do some light grading or add a gravel base to ensure good drainage and a stable footing.
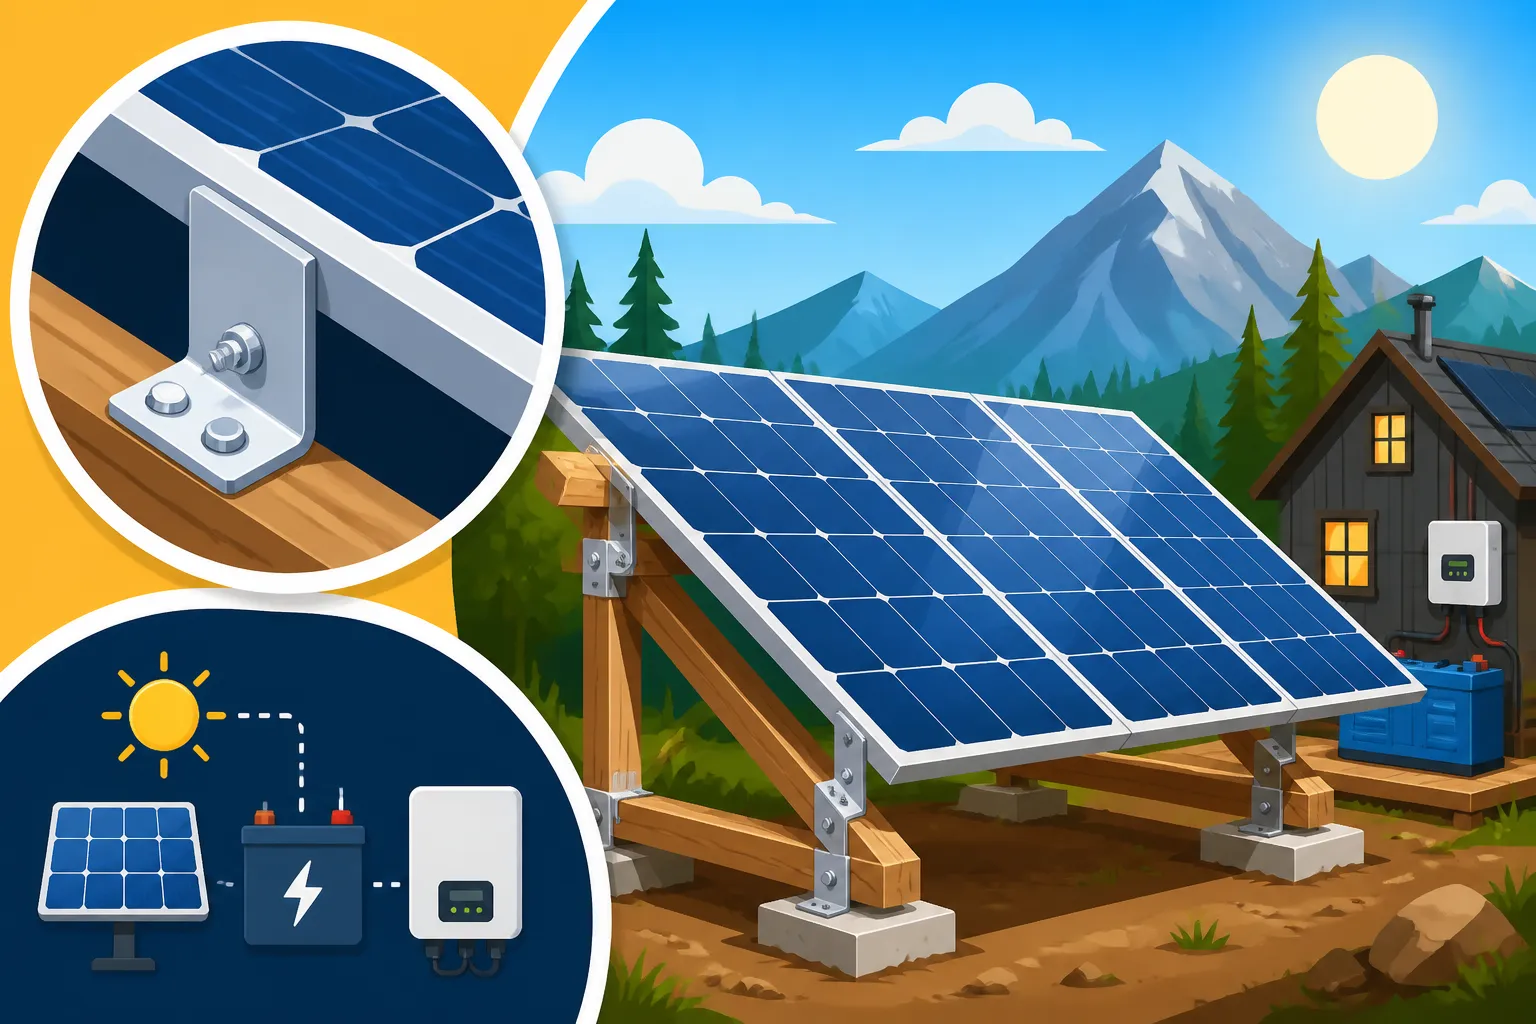
Next comes the foundation. Ground mounts need to be extremely stable to withstand wind and snow loads. The most common method involves sinking posts deep into the ground, often encased in concrete footings. The depth and size of these footings will depend on your local frost line, soil conditions, and the size of your solar array. For smaller systems or less permanent installations, ground screws or heavy-duty anchors might suffice. Whatever method you choose, ensure the foundation is plumb and perfectly aligned, as this will directly affect the straightness and stability of your entire array. Rushing this step will lead to a wobbly, inefficient, or even dangerous installation.
Assembling the Ground Mount Racking
With the foundation solid and secure, you can begin assembling the actual racking structure. This typically involves attaching vertical posts to your concrete footings or ground anchors, then securing horizontal cross-beams and rails to these posts. The goal is to create a rigid, sturdy framework that will hold your solar panels at the desired tilt angle and orientation. Most ground mount kits, such as those from Renogy, come with detailed instructions, but you'll still need to pay close attention to precision.
Measure twice, cut once, and double-check your angles and levels at every step. Ensure all bolts and fasteners are tightened to specification. This stage is where you truly lock in your optimal tilt angle, so make sure it's set correctly for your location and seasonal needs. The robust nature of ground mount racking often means it can handle larger and heavier panels than some roof mounts, offering more flexibility in panel choice. A well-built ground mount can be surprisingly resilient, often outlasting the panels themselves. For those considering a DIY approach, our guide on DIY Off-Grid Solar Installation Step by Step can provide more context.
Securing Panels and Managing Cables
The final stage of installing a ground mount is securing your solar panels to the racking and managing the associated wiring. Carefully lift each panel onto the assembled rails, ensuring proper alignment. Just like with roof mounts, you'll use mid-clamps and end-clamps to fasten the panels securely to the rails. Again, pay attention to torque specifications to avoid over-tightening. Once all panels are in place, give the entire structure a thorough inspection, checking every connection point for tightness and stability.
Cable management is particularly important for ground mounts, as wires are often more exposed to the elements and potential physical damage. Use UV-resistant cable ties and clips to neatly route all the DC wiring from the panels down the racking structure. Run cables through conduit where they might be exposed to animals, gardening equipment, or foot traffic to protect them from abrasion and UV degradation. Ensure all connections are weather-sealed, either by using MC4 connectors (which are designed to be weatherproof) or by placing junction boxes where splices occur. Proper cable management not only protects your investment but also makes troubleshooting and future maintenance much easier.
Mounting Panels on Vehicles and Marine
The world of off-grid living isn't just about stationary cabins; it's also about mobility and adventure! Mounting solar panels on RVs, vans, and boats presents a unique set of challenges compared to fixed installations, primarily due to movement, vibrations, and often, space constraints. Getting it right ensures reliable power no matter where your journey takes you.
RV and Van Roof Installations
For RVs and vans, the roof is typically the prime real estate for solar panels. The key considerations here are securely attaching the panels to withstand highway speeds, vibrations, and wind, while also ensuring the roof remains watertight. Standard RV mounting kits, often available on Amazon, usually consist of aluminum L-brackets or similar mounting feet that elevate the panels slightly. This elevation is critical for airflow, which helps keep the panels cool and more efficient, and also allows for cleaning underneath.
The process involves carefully measuring and marking the locations for your mounting feet, ensuring they are evenly spaced and positioned to avoid roof vents, skylights, and other obstructions. You'll then drill pilot holes through the RV roof into the underlying support structure (usually wood or aluminum framing). This is where meticulous waterproofing comes in: after securing the mounting feet with self-tapping screws or bolts, you must apply generous amounts of a high-quality, marine-grade, self-leveling sealant around each screw head and the base of the foot. Many experienced RVers use Dicor self-leveling sealant, known for its excellent adhesion and waterproofing properties. Once the mounting feet are sealed, the solar panels are bolted to them. Running wires usually involves drilling a single, carefully sealed entry point into the roof or side, often through a cable entry gland, and routing them to your charge controller and battery bank inside. Check out our guide on Off-Grid Solar Cost for an RV for budget considerations.
Boat and Marine Solar Mounting
Mounting solar panels on a boat requires an entirely different approach, primarily due to the harsh marine environment. Saltwater is incredibly corrosive, and panels need to withstand constant motion, strong winds, and occasional spray. Therefore, all mounting hardware must be marine-grade stainless steel or anodized aluminum to prevent rust and degradation. Flexible solar panels are a popular choice for boats, as they are lighter, can conform to curved surfaces, and are less prone to damage from impacts, though they often require more surface area for the same power output as rigid panels.
Common mounting locations include cabin roofs, dodgers, biminis, or even custom arches. Bimini-mounted panels can provide shade while generating power, but they need to be easily removable or collapsible. Custom arches offer a robust solution, often mounting rigid panels high and clear of deck clutter, but they are a significant structural addition. When attaching any mounts, ensure you're using through-bolting with backing plates wherever possible to distribute the load and prevent stress cracks on fiberglass or deck materials. All penetrations must be thoroughly sealed with marine-grade caulk, like 3M 4200 or 5200. Wiring needs to be run in marine-grade conduit or protected channels, secured every 18 inches, and all connections inside weatherproof junction boxes. Proper Off-Grid Solar Wiring Best Practices are especially crucial in marine environments to prevent shorts and corrosion.
Considerations for Portable and Flexible Panels
Sometimes, a permanent mount isn't the best solution, especially for casual camping, backup power, or if you need to chase the sun. This is where portable and flexible solar panels shine. Portable panels, like those from Goal Zero or Jackery, often come in a briefcase-style design, allowing you to unfold them and set them up anywhere you have sun. They're great for temporary setups, easy to store, and don't require any permanent installation. However, they do require manual positioning and are susceptible to theft or damage if left unattended.
Flexible solar panels, on the other hand, can be adhered directly to surfaces without heavy racking. They're ideal for slightly curved RV roofs, pop-top campers, or even boat decks where weight and profile are critical. Installation usually involves cleaning the surface thoroughly and using a strong adhesive (like VHB tape or specialized solar panel adhesive) around the edges, sometimes with additional screws for extra security. While convenient, flexible panels generally have a shorter lifespan than rigid panels, can be less efficient in hot weather due to lack of airflow, and are more prone to damage if walked on or improperly handled. Understanding these trade-offs is key when selecting the best solution for your mobile off-grid power needs.
Wiring and Connecting Your Mounted Panels
Once your solar panels are securely mounted, the next crucial step is connecting them electrically to your off-grid system. This stage involves careful wiring, ensuring proper polarity, managing voltage and current, and ultimately, directing that generated power to your charge controller, batteries, and inverter. This is where the magic really starts to happen, transforming sunlight into usable electricity for your off-grid lifestyle.
Connecting Panels in Series or Parallel
The way you connect your solar panels will directly impact the voltage and current delivered to your charge controller, and ultimately, your battery bank. There are two primary methods: series and parallel, or a combination of both (series-parallel).
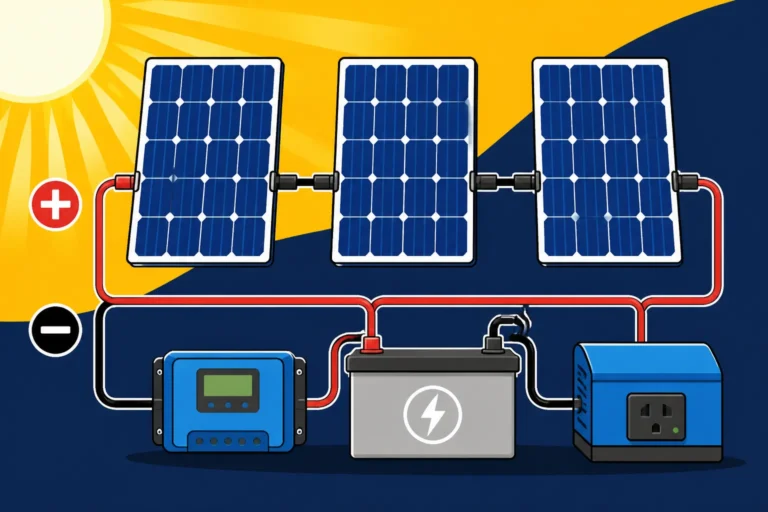
When you wire panels in series, you connect the positive terminal of one panel to the negative terminal of the next. This configuration adds up the voltage of each panel while the current (amperage) remains the same. For example, if you have two 12-volt panels, each producing 8 amps, wiring them in series would give you 24 volts at 8 amps. Series wiring is often preferred for larger systems and longer cable runs because higher voltage reduces current, which in turn minimizes voltage drop and allows for thinner, less expensive wiring. However, if one panel in a series string is shaded or malfunctions, it can significantly reduce the output of the entire string.
Parallel wiring, on the other hand, involves connecting all the positive terminals together and all the negative terminals together. This configuration adds up the current (amperage) of each panel while the voltage remains the same. Using our example of two 12-volt, 8-amp panels, wiring them in parallel would result in 12 volts at 16 amps. Parallel wiring is great for smaller systems or if you anticipate shading, as each panel operates more independently. However, higher amperage requires thicker cables to prevent excessive voltage drop, which can be more costly. Many off-grid systems use a series-parallel combination, where panels are first grouped in series strings, and then those strings are connected in parallel to achieve the desired voltage and current for the charge controller. It's important to select the right gauge for your solar cables; our guide on How to Size Wire and Cables offers essential calculations.
Routing Cables to the Charge Controller
With your panels connected, the next step is routing the DC output cables from your solar array to your charge controller. This needs to be done with care to protect the cables from physical damage, UV degradation, and moisture. Use UV-resistant, outdoor-rated solar cables (often marked with "PV Wire" or "USE-2"). These cables are specifically designed to withstand the harsh conditions they'll face outside.
Route the cables neatly along your mounting structure, securing them with UV-resistant cable ties or clips every foot or so to prevent sagging and chafing. If you're running cables across a roof or along the side of a vehicle, consider using wire loom or electrical conduit for added protection against rodents, branches, or accidental impacts. For ground mounts, running cables in underground conduit is often the best practice, especially if they cross areas of foot traffic or landscaping. Ensure any cable entry points into your building, RV, or marine vessel are properly sealed with a cable gland or a generous amount of marine-grade sealant to prevent water intrusion. This protects your interior from water damage and your electrical system from corrosion.
Final Connections and System Testing
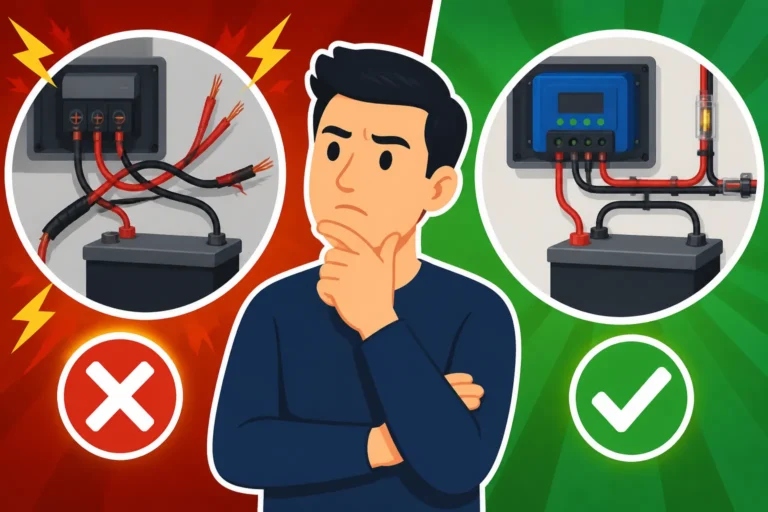
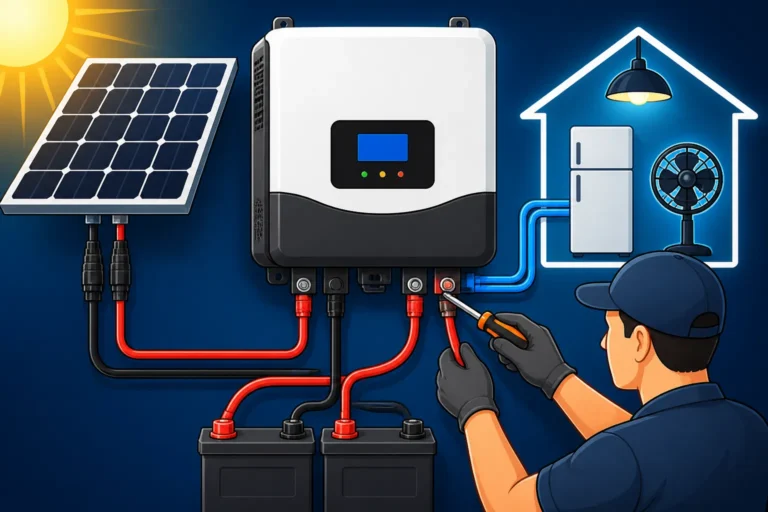
Before making the final connections to your charge controller and battery bank, it's crucial to double-check all your wiring. Verify polarity – positive to positive, negative to negative – at every junction. A multimeter is your best friend here; use it to measure the open-circuit voltage (Voc) and short-circuit current (Isc) of your array to ensure it matches your design specifications. This helps identify any wiring errors before they can cause damage to your expensive components.
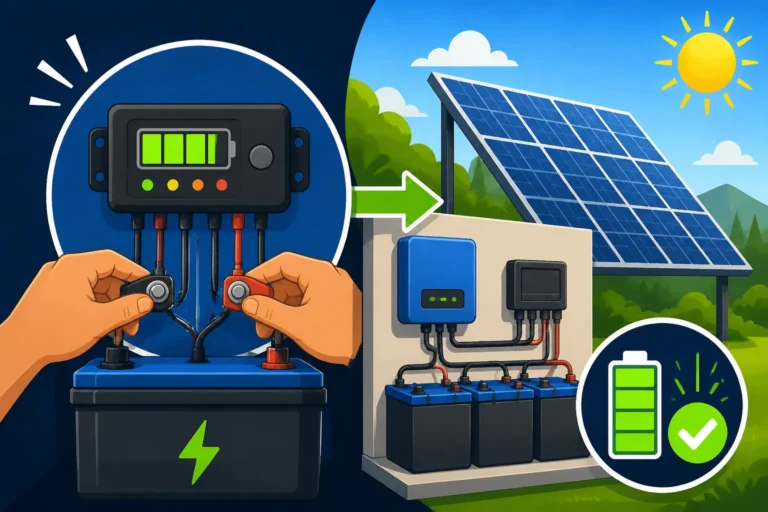
Once you're confident in your array's output and wiring integrity, you can proceed with connecting to the charge controller. Always follow the manufacturer's recommended connection order: typically, connect the battery to the charge controller first, then the solar array. This ensures the charge controller can properly sense the battery voltage before receiving power from the panels. Finally, connect your inverter to the battery bank (usually via a fuse or breaker) and then to your loads. After everything is connected, power up your system, monitor your charge controller's display, and use your battery monitor to verify that power is flowing correctly and your batteries are charging. This step-by-step approach ensures a safe and successful start-up for your off-grid system. For a complete overview, refer to our guide on How to Connect Batteries, Inverter, and Panels.
Safety Considerations and Best Practices
Installing an off-grid solar system, especially the panel mounting phase, involves working with heights, heavy objects, and electricity. Neglecting safety can lead to serious injury or damage to your property and equipment. Taking a meticulous approach to safety isn't just a recommendation; it's an absolute necessity. Remember, even experienced professionals adhere to strict safety protocols, and so should you.
Personal Protective Equipment and Fall Protection
Your personal safety should always be the top priority. Before you even touch a tool, make sure you have the right Personal Protective Equipment (PPE). This includes sturdy work gloves to protect your hands from sharp edges and splinters, safety glasses to shield your eyes from debris, and a hard hat, especially if you're working with panels overhead or in an area where tools could fall. Close-toed, slip-resistant footwear is also crucial, particularly if you're working on a roof or uneven ground.
If you're working on a roof, even a low-pitched one, fall protection is non-negotiable. A properly fitted fall protection harness anchored to a secure point on the roof, along with a lifeline, can literally be a lifesaver. Never work alone when at heights. Have a spotter or an assistant who can help with tools, panels, and, most importantly, provide immediate assistance in an emergency. Ladders should be rated for the job, set on stable ground, and extended at the correct angle. Inspect all your fall protection gear before each use for wear and tear. No off-grid power is worth a trip to the emergency room.
Electrical Safety and System Grounding
Working with solar panels means working with electricity, even before the system is fully energized. Solar panels produce electricity the moment they are exposed to light, so treating them as "live" sources from the start is a critical safety rule. Always cover panels with an opaque material (like a blanket or cardboard) if you are handling them or working with their wiring to de-energize them. Never work on wiring with wet hands or while standing in water.
Proper grounding is paramount for off-grid solar systems to protect against lightning strikes and electrical faults. All metallic components of your solar array – panel frames, mounting rails, and racking – must be bonded together and then connected to a grounding electrode, such as a copper ground rod driven into the earth. This creates a safe path for fault currents, preventing dangerous electrical shocks. Your inverter and charge controller should also be grounded according to manufacturer specifications and local electrical codes. If you're unsure about grounding requirements, consult with a licensed electrician or refer to detailed guidelines on Off-Grid Solar Safety and Grounding.
Weather Considerations and System Maintenance
The weather doesn't always cooperate, and it's essential to plan for it. Never attempt to install solar panels during high winds, heavy rain, snow, or thunderstorms. Not only is it incredibly dangerous due to slippery surfaces and lightning risk, but strong winds can turn large panels into dangerous sails. Check the forecast before you start a project and be prepared to stop if conditions deteriorate. Extreme heat can also make working on a roof exhausting and dangerous, increasing the risk of heatstroke. Hydrate regularly and take frequent breaks.
Once your system is installed, regular maintenance is key to its longevity and efficiency. Periodically inspect your panels for dirt, debris, or snow accumulation that can reduce output. Clean them gently with water and a soft brush as needed. Check all mounting hardware, bolts, and clamps annually for tightness. Vibrations and temperature changes can cause fasteners to loosen over time. Inspect all wiring for any signs of wear, fraying, or rodent damage. Ensure all seals around roof penetrations are still intact and not cracking. Proactive maintenance will catch small issues before they become expensive problems, ensuring your off-grid solar system continues to power your independent lifestyle reliably for many years to come. Our article on Off-Grid Solar Maintenance Costs highlights the importance of this ongoing care.
Local Regulations and Permitting
Navigating the local rules and regulations can often feel like the most frustrating part of any off-grid project. While the dream of complete independence is alluring, reality dictates that you still need to play by some rules, especially when it comes to structural and electrical installations. Ignoring these steps can lead to costly fines, forced removal of your system, or even safety hazards.
Understanding Off-Grid Solar Permit Requirements
The need for permits for off-grid solar systems varies significantly depending on your location, right down to the county or even municipal level. In some very rural areas, especially for small, temporary setups like an RV or a shed, you might find minimal or no permitting requirements. However, for permanent structures, particularly residential homes, cabins, or large ground mounts, you will almost certainly need to obtain building and electrical permits. These permits ensure that your installation meets minimum safety standards and adheres to local zoning laws.
Permits typically cover structural integrity (ensuring your roof or ground mount can handle the weight and wind loads) and electrical safety (ensuring all wiring, grounding, and connections comply with the National Electrical Code, or NEC). The permitting process usually involves submitting detailed plans of your solar system, including panel layout, wiring diagrams, and structural calculations. This might sound intimidating, but it's designed to protect you and future occupants. It's best to contact your local planning or building department early in your project to understand their specific requirements. For more general information, you might find our article on Off-Grid Solar Permit Requirements helpful.
Navigating Building and Electrical Codes
Building codes and electrical codes are essentially the rulebooks for safe construction and electrical work. For solar installations, the primary code is the National Electrical Code (NEC), which is adopted, sometimes with local amendments, across most of the United States. The NEC specifies everything from wire gauges and overcurrent protection (fuses and breakers) to grounding requirements and disconnect switches. Even if your off-grid system isn't connected to the utility grid, these codes are still crucial for safety and are what building inspectors will look for.
A common frustration for off-gridders is that inspectors might not be familiar with off-grid specific nuances, as much of the NEC is written with grid-tied systems in mind. This is why having comprehensive, well-documented plans is vital. If you're doing a DIY installation, take the time to study the relevant sections of the NEC (typically Article 690 for solar photovoltaic systems). If you're feeling overwhelmed, don't hesitate to hire a local electrician or a solar installer who is familiar with off-grid systems and local codes. They can help with the design, permitting, and inspection process, ensuring your system is both safe and compliant.
The Role of Professional Installers vs. DIY
The decision to go DIY or hire a professional installer for mounting your off-grid solar panels is a significant one, with implications for cost, complexity, and compliance. Many off-gridders are naturally inclined towards DIY for the sense of accomplishment and cost savings, and with proper research and careful planning, it's absolutely achievable. Doing it yourself can significantly reduce your Off-Grid Solar Installation Cost. There are countless online resources, forums, and even pre-packaged kits (often found on Amazon or from brands like Renogy) that make DIY more accessible.
However, a professional installer brings expertise, experience, and often, a deeper understanding of local codes and permitting processes. They can correctly size your system, ensure optimal panel placement, handle complex structural and electrical work, and often expedite the permitting and inspection process. For large, complex systems, or if you're uncomfortable with electrical work or heights, hiring a professional can be a wise investment for peace of mind and long-term reliability. Ultimately, whether you DIY or hire out, the goal is a safe, efficient, and code-compliant off-grid solar system that reliably powers your independent life.
Maximizing Off-Grid Solar Performance Post-Mounting
You've done the hard work of mounting your panels and connecting them – congratulations! But the journey to off-grid energy independence doesn't end there. To truly get the most out of your solar investment, you need to think about ongoing optimization, monitoring, and adapting to real-world conditions. A perfectly mounted system is only as good as its ability to continuously deliver power efficiently.
Regular Cleaning and Debris Removal
One of the simplest yet most effective ways to maintain your solar panel's efficiency is regular cleaning. Dust, pollen, bird droppings, leaves, and other environmental debris can accumulate on the panel surface, blocking sunlight and significantly reducing power output. While rain can wash away some of this, it's often not enough, especially if you live in a dusty area or near trees.
Aim to inspect your panels monthly and clean them as needed. For most off-grid setups, a gentle rinse with a hose and a soft brush or squeegee is usually sufficient. Avoid harsh detergents or abrasive materials, which can scratch the panel surface or damage anti-reflective coatings. If you have ground-mounted panels, this is typically an easy task. For roof-mounted panels, prioritize safety: use a long-handled brush or clean them while securely attached to fall protection. Keeping your panels sparkling clean ensures maximum sunlight penetration, translating directly into more power for your batteries and appliances.
Monitoring System Performance
Once your panels are mounted and connected, monitoring their performance is crucial for understanding your system's health and optimizing its output. Your charge controller, inverter, and dedicated battery monitors are your eyes and ears for your off-grid power system. Most modern charge controllers, especially MPPT ones, provide detailed data on panel voltage, current, power output, and charge status. Many even have Bluetooth connectivity or Wi-Fi modules, allowing you to monitor your system from your phone or computer.
Pay attention to trends. Is your system producing less power than usual on a sunny day? This could indicate a dirty panel, a loose connection, or even a shaded area you hadn't accounted for. Is your battery voltage dropping faster than expected? Perhaps your loads are higher than anticipated, or your battery bank isn't holding a charge as well. By actively monitoring, you can quickly identify and troubleshoot issues, making adjustments to your panel tilt, cleaning schedule, or even energy consumption habits to ensure you're always getting the most out of your solar array. Regular checks also help you understand how different weather conditions, like cloudy days or winter's low sun, impact your energy harvest, helping you prepare.
Seasonal Adjustments and Future Expansion
The sun's path across the sky changes with the seasons, impacting how directly its rays hit your stationary solar panels. If you have a ground mount system or tiltable roof mounts, making seasonal adjustments to your panel tilt angle can significantly boost your energy production, particularly in winter when the sun is low on the horizon. For example, if your optimal tilt is 40 degrees for year-round balance, you might increase it to 50-60 degrees in winter to catch more of that low sun, and decrease it to 20-30 degrees in summer. While not always necessary for smaller systems, these adjustments can provide a noticeable increase in power for larger, more demanding off-grid setups.
Thinking about future expansion is also a smart strategy during the initial mounting phase. Even if your current needs are modest, you might decide to add more appliances or increase your energy consumption down the road. Designing your initial mounting system with a bit of extra space and structural capacity can make adding more panels much easier and more cost-effective later on. Consider leaving extra room on your roof or for additional rows on a ground mount. Running extra conduit or leaving space in your combiner box can also simplify future upgrades. Planning for expandability in your mounting design gives you the flexibility to grow your off-grid system as your energy demands evolve, ensuring long-term energy independence. For more on this, consider reading How to Design an Expandable System.
Disclaimer
The information provided in this guide is for general informational purposes only and is not intended as professional advice. Off-grid solar system installation, especially electrical work and structural mounting, carries inherent risks. Always consult with qualified professionals, adhere to local building and electrical codes, and prioritize safety. The author and publisher are not liable for any loss, damage, or injury arising from the use of this information.