How to Mount Panels on an RV
Hitting the open road in your RV promises freedom, but nothing quite puts a damper on that adventure like realizing your batteries are dead and you're miles from the nearest hookup. You dream of running your appliances, charging your devices, and enjoying true independence, but the thought of drilling into your beloved RV or tackling complex electrical work can feel incredibly daunting. This guide is here to walk you through the entire process of mounting solar panels on your RV, empowering you to harness the sun's energy with confidence, ensure a safe installation, and enjoy reliable power wherever your journey takes you.
Understanding Your RV's Roof for Solar Panel Mounting
Before you even think about buying a single solar panel or drilling a hole, it's absolutely critical to get intimately familiar with the roof of your RV. This isn't just about finding a flat spot; it's about understanding its construction, limitations, and how it interacts with the forces of nature. Treating your RV roof like any other surface could lead to leaks, structural damage, or even panels flying off during transit, which is a nightmare no one wants.
Assessing Roof Type and Condition
Every RV roof is a bit different, and knowing what you're working with is the first step to a successful solar installation. The most common types you'll encounter are EPDM rubber, TPO (Thermoplastic Polyolefin), fiberglass, and sometimes aluminum. Each material has its own characteristics when it comes to adhesion, puncturing, and longevity. EPDM and TPO roofs are generally flexible and require specific types of sealants and mounting methods that won't degrade the material over time. Fiberglass roofs, often found on higher-end RVs, are more rigid and allow for more robust attachment points, but still demand careful sealing. Aluminum roofs are strong but can be prone to corrosion if dissimilar metals are used in fasteners.
Beyond the material, the current condition of your roof is paramount. Take a thorough walk-around, inspecting for any existing damage like cracks, tears, soft spots, or delamination. Soft spots usually indicate water damage to the underlying decking, and trying to mount heavy solar panels to a compromised roof is an absolute no-go. You'll need to address any existing repairs before proceeding. This assessment will inform your choice of mounting hardware, sealants, and ultimately, the viability of a DIY installation versus needing professional help for roof repairs. Remember, a leak originating from a poorly sealed solar mount is much harder to trace and fix than preventing it in the first place.
Considering Weight and Aerodynamics
Solar panels, especially larger ones, and their associated mounting hardware add significant weight to the roof of your RV. While most RVs are designed with some roof load capacity in mind (think AC units, vents, and storage), exceeding this limit can affect your RV's handling, fuel efficiency, and structural integrity. It's crucial to check your RV's specifications or consult your manufacturer for its maximum dynamic (while moving) and static (while parked) roof load capacity. Don't forget to factor in the weight of other roof-mounted accessories like antennas, air conditioners, and skylights.
Aerodynamics might not be the first thing that comes to mind, but it's vital for safe travel. Panels mounted too high or at an awkward angle can act like sails, creating enormous drag and wind uplift forces, especially at highway speeds. This isn't just about reducing your gas mileage; improper mounting can lead to severe stress on your roof, potential damage to the panels themselves, or worse, detachment. Low-profile, fixed mounts are often preferred for RVs that see a lot of highway travel, whereas tilt mounts, while offering greater energy harvest, require careful consideration of their deployed height and the wind forces they'll be exposed to. Ensuring your mounting system is robust enough to withstand these forces is just as important as the electrical connections, otherwise, you might find yourself needing a guide on how to install an off-grid solar system all over again.
Choosing the Right Mounting Hardware
Once you understand your RV's roof, the next big decision is what kind of hardware you'll use to secure your precious solar panels. This isn't a one-size-fits-all situation; your choice will depend on your RV usage, desired power output, and comfort level with different installation methods. The goal is always a secure, durable, and weather-tight attachment that maximizes solar exposure while minimizing risk.
Fixed Mounts Versus Tilt Mounts
This is arguably the biggest decision you'll make regarding your mounting hardware.
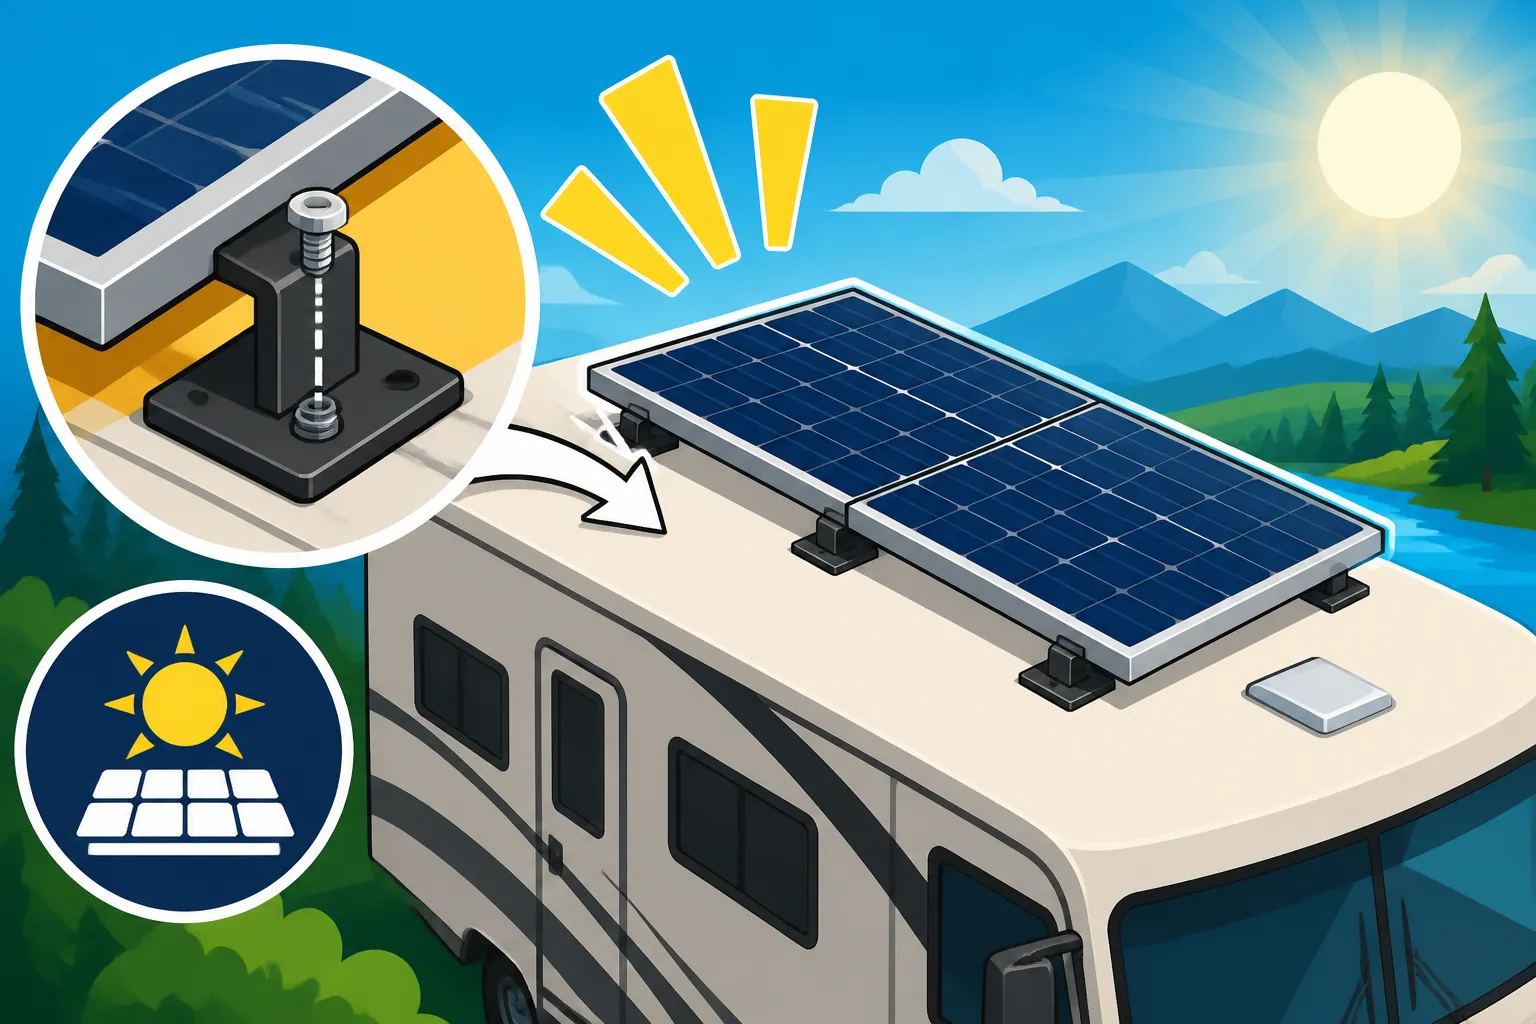
Fixed Mounts: These are the most common and often simplest choice for RV solar. Fixed mounts typically consist of L-shaped or Z-shaped aluminum brackets that bolt directly to the RV roof and then secure the solar panel frame. Their main advantage is their low profile, which significantly reduces aerodynamic drag and wind resistance while driving. They are generally robust and, once installed correctly, require minimal maintenance. Many RV owners opt for fixed mounts from reputable brands like Renogy, which often come in complete kits that make the process smoother. The downside is that fixed panels are, well, fixed. They can't be angled towards the sun, meaning their efficiency will vary throughout the day and seasonally. In the morning and late afternoon, or during winter months when the sun is lower in the sky, your panels won't be producing at their peak potential. However, for those who prioritize simplicity, durability, and less fuss on the road, fixed mounts are an excellent choice. They are particularly popular for smaller systems or when roof space is at a premium and you want to maximize the number of panels without worrying about moving parts.
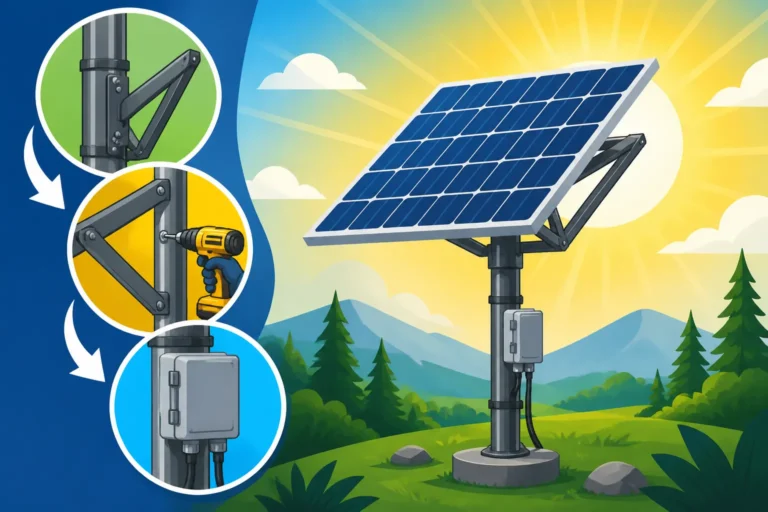
Tilt Mounts: If maximizing your solar harvest is a top priority, especially for stationary RV living or extended stays in one location, tilt mounts are worth considering. These systems allow you to manually adjust the angle of your solar panels to directly face the sun, significantly increasing their output compared to fixed panels. On a sunny day, adjusting your panels a few times can boost your energy production by 20-30% or even more, which can be crucial when you're trying to generate enough power for larger appliances like an air conditioner or a well pump. The trade-off, however, is increased complexity and potential for issues. Tilt mounts are generally more expensive, add more weight, and have more moving parts that can wear out or become loose over time. They also require more roof space when deployed and must be securely locked down before driving to prevent damage or detachment. You need to be mindful of obstructions when tilting, like other panels, vents, or air conditioning units. For more details on system components, you might want to check out information on Off-Grid Solar System Components Explained.
Adhesive Mounting Solutions
While most robust RV solar installations involve drilling and mechanical fasteners, adhesive mounting solutions do have their place, particularly for flexible panels or specific low-profile applications. These methods typically involve industrial-strength double-sided adhesive tapes, like VHB (Very High Bond) tape, often paired with specialized marine or RV-grade sealants.
Pros of Adhesive Mounting:
- No Drilling: This is the big one for many RV owners. Avoiding roof penetrations means eliminating the primary risk factor for leaks. This is especially appealing for those with new RVs or who are nervous about DIY drilling.
- Low Profile: Flexible solar panels, combined with adhesive mounting, create an incredibly low-profile setup that minimally impacts aerodynamics and aesthetics. They essentially become one with your roof.
- Lightweight: Flexible panels are much lighter than rigid panels, reducing the overall load on your roof.
Cons and Caveats:
- Reliability Concerns: While modern adhesives are incredibly strong, relying solely on them for heavier, rigid panels can be risky, especially given the vibrations, temperature extremes, and wind forces an RV experiences. Most experts recommend using a combination of adhesive and mechanical fasteners for rigid panels.
- Surface Preparation is Critical: For adhesives to work effectively, the RV roof surface must be meticulously cleaned, degreased, and primed according to the adhesive manufacturer's instructions. Skipping these steps will almost certainly lead to failure.
- Panel Type Limitation: Adhesive mounting is primarily suitable for flexible solar panels, which tend to be less efficient and more expensive per watt than rigid panels. They also have a shorter lifespan and can degrade faster in harsh sunlight due to heat buildup, as the heat can't dissipate as easily when adhered directly to the roof.
- Removal Challenges: Once adhered, these panels can be extremely difficult to remove without damaging the roof or the panel itself.
For instance, when purchasing materials, you might find flexible panels and specific adhesives on Amazon, but always ensure they are rated for outdoor, high-stress RV environments. For larger, more permanent installations, a hybrid approach of using strong VHB tape for initial positioning and then securing with a few well-sealed mechanical fasteners is often considered the safest bet. This provides both the broad surface adhesion and the shear strength of screws or bolts. Regardless of your choice, understanding the capabilities and limitations of each method is key to a secure and leak-free installation, which is a big part of any Off-Grid Solar Installation Guide.
Step-by-Step RV Solar Panel Installation Process
Alright, you've assessed your RV roof, chosen your mounting hardware, and you're ready to get your hands dirty! This section will walk you through the essential steps to get those panels securely attached and generating power. Remember, careful planning and attention to detail are your best friends here. Rushing through any step, especially when it comes to sealing, can lead to costly problems down the road.
Pre-Installation Planning and Layout
Before you drill a single hole, take a deep breath and plan everything out. This stage is critical and can save you a ton of headaches.
- Measure and Map Your Roof: Get accurate measurements of your entire usable roof space. Identify all existing obstructions like air conditioners, vents, skylights, antennas, and satellite dishes. These will cast shadows, which can severely impact the performance of your solar array, especially if panels are wired in series. Create a detailed drawing of your roof, marking all these elements.
- Determine Panel Placement: Lay out your solar panels on the roof (without permanently attaching them) to visualize the best configuration. Consider:
- Shading: Position panels to minimize shading from existing roof equipment throughout the day. If shading is unavoidable, consider using multiple smaller panels or micro-inverters/optimizers if your system supports them, to prevent one shaded panel from bringing down the output of the entire array.
- Cable Routing: Plan the shortest and most direct path for your cables to run from the panels to your charge controller inside the RV. This minimizes voltage drop and simplifies the penetration point.
- Accessibility: Ensure you can still access and clean your panels, and that they don't block access to other roof features you might need to maintain.
- Future Expansion: If you anticipate expanding your system later, leave room for additional panels.
- Mock-up and Mark: Once you're happy with the layout, use painter's tape or a washable marker to outline the exact placement of each panel and, more importantly, the locations where your mounting feet will attach to the roof. Double-check all measurements. This is also a good time to consider How to Size an Off-Grid System for a Rv if you haven't already, ensuring your panel array matches your energy needs.
Securing Panels to the Roof
This is where the rubber meets the road—literally. This step requires precision and a commitment to proper sealing.
- Prepare Mounting Feet: Attach your chosen mounting brackets (L-feet, Z-brackets, tilt mount bases) to the solar panel frames using the hardware provided with your panels. Make sure they are evenly spaced and securely fastened.
- Clean the Mounting Area: At each marked mounting foot location on the RV roof, thoroughly clean the surface. Use a degreaser or rubbing alcohol to remove any dirt, oil, or wax. The sealant needs a perfectly clean surface to adhere properly.
- Drill Pilot Holes: This is the moment of truth. Using a drill bit slightly smaller than your chosen stainless steel screws, carefully drill pilot holes through the roof at each marked mounting point. Go slowly and ensure you don't drill too deep, damaging interior components. For specific guidance on different RV roof types, you might consult resources on How to Install Roof-Mounted Solar Panels.
- Apply Sealant: This is the most crucial step for preventing leaks. Generously apply a high-quality, UV-resistant, self-leveling RV sealant (like Dicor Self-Leveling Lap Sealant for rubber/TPO roofs, or a marine-grade polyurethane sealant for fiberglass) into and around each pilot hole before inserting the screws. Create a dam of sealant around the hole.
- Fasten the Mounts: Place each mounting foot over its prepared hole, press down firmly, and then drive your stainless steel screws through the foot, sealant, and into the roof decking. Ensure they are snug but do not overtighten, which can strip the screws or damage the roof material.
- Cap with Sealant: Once all mounting feet are screwed down, apply another liberal bead of sealant over the top of each mounting foot, fully encapsulating the screw heads and the edges of the bracket. Create a "mushroom" cap of sealant to ensure a watertight seal. This meticulous sealing process is paramount for longevity and leak prevention.
Wiring and Sealing Penetrations
With your panels securely mounted, the final step in the physical installation is wiring them up and creating a watertight entry point for your cables into the RV.
- Connect Panels Electrically: Wire your solar panels according to your system design – typically in series, parallel, or a combination (series-parallel). Use MC4 connectors, which are weatherproof and designed for solar applications. Ensure all connections are tight and secure. For larger arrays, you might need a combiner box to bring multiple strings together before sending them to the charge controller. Always refer to your solar panel and charge controller manuals for specific wiring diagrams. If you're unsure, it's a good idea to research Off-Grid Solar Wiring Best Practices.
- Route Cables: Route your solar cables neatly across the roof to your chosen entry point. Use UV-resistant cable ties and adhesive cable clips to secure the cables to the roof, preventing them from flapping in the wind or becoming a tripping hazard. Leave a little slack for expansion and contraction due to temperature changes.
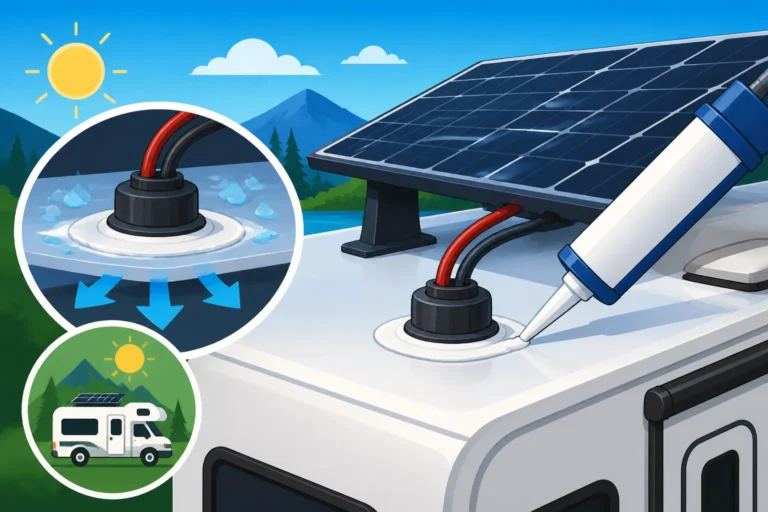
- Create a Cable Entry Point: The best practice is to use a dedicated cable entry gland or a solar cable pass-through box. These specialized components allow cables to enter the RV without exposing the penetration to the elements.
- Mark and Drill: Choose a location that's easy to access from the inside (e.g., near where your charge controller will be) and away from heavy foot traffic. Mark the drill points for the entry gland. Drill the necessary holes carefully, again, being mindful of interior components.
- Apply Sealant: Just like with the mounting feet, generously apply your chosen RV sealant around the edges of the cable entry gland's base before fastening it to the roof.
- Secure and Seal: Screw the entry gland down firmly. Once the cables are run through, apply more sealant around the cables where they exit/enter the gland, ensuring a complete, watertight seal. This step is critical, and you can find specific instructions on How to Waterproof Roof Penetrations.
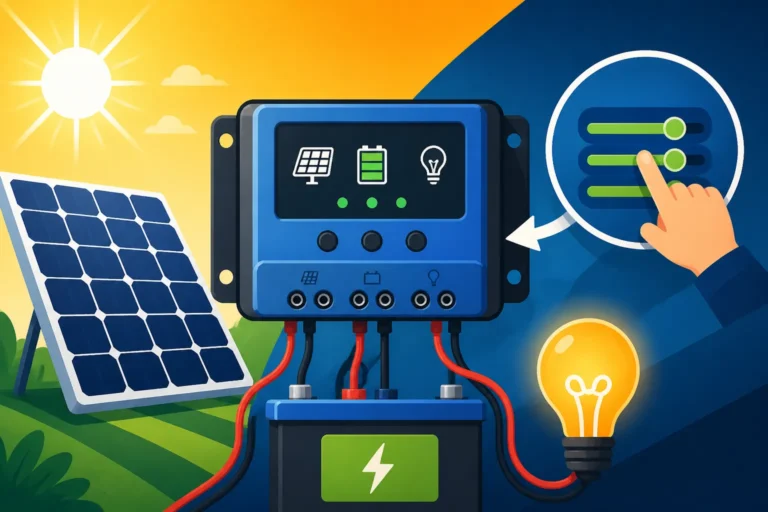
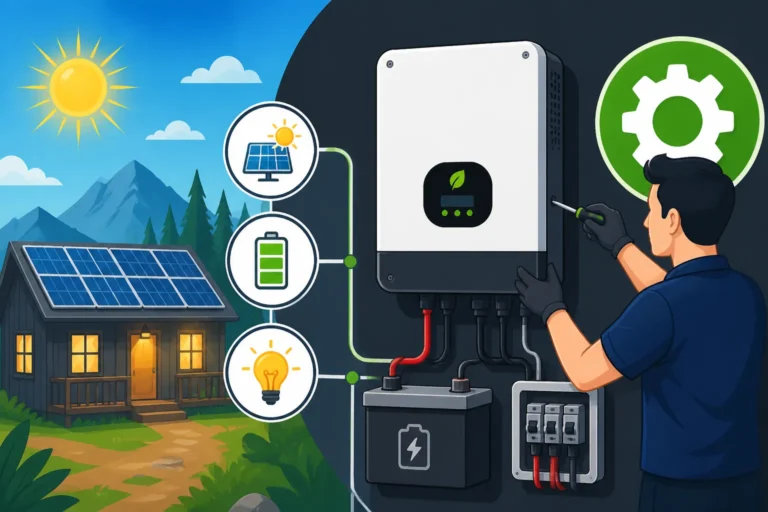
- Connect to Charge Controller: Once the cables are inside, run them to your charge controller, then from the charge controller to your battery bank. Ensure all connections are made in the correct order (battery to charge controller first, then panels to charge controller) to protect your system. Always use appropriate wire gauges, fuses, and breakers as detailed in your system design. Checking a guide like DIY Off-Grid Solar Installation Step by Step can provide additional context for the complete system.
Crucial Safety and Best Practices
Installing solar panels on your RV isn't just about getting power; it's about doing it safely and ensuring your investment lasts. Neglecting safety can lead to electrical hazards, damage to your RV, or serious injury. Likewise, ignoring best practices can shorten the life of your system and lead to frustrating performance issues.
Electrical Safety and Grounding
Working with electricity, even low-voltage DC, demands respect and adherence to safety protocols. A properly installed system is not only efficient but also safe for you and your RV.
- Always Disconnect Power: Before working on any electrical connections, always disconnect the power. For solar, this means covering your panels (to stop them from producing current), disconnecting the battery bank, and ensuring all breakers are off. Treat all wires as live until you've verified they are not.
- Use Proper Tools and PPE: Utilize insulated tools when working with electrical components. Wear appropriate personal protective equipment (PPE) such as safety glasses and electrical gloves.
- Proper Wire Sizing and Fusing: Voltage drop can be a real issue with longer cable runs, especially in 12V systems. Always use appropriately sized wire gauges for your current and run length to prevent overheating and ensure efficient power transfer. Install fuses or breakers on both the positive battery cable (close to the battery) and the positive wire coming from your solar array (before the charge controller). These are critical safety devices that protect your system from short circuits and overcurrents. Renogy, for example, often provides guidance on fuse sizing with their kits. For specific calculations, resources on How to Size Wire and Cables can be invaluable.
- System Grounding: Proper grounding is essential to protect against electrical shock and lightning strikes. The metal frames of your solar panels and the metal chassis of your RV should be bonded (connected) to a common grounding point. This creates a safe path for fault currents to dissipate. Consult the National Electrical Code (NEC) guidelines, even if not strictly enforced for RVs, as they offer excellent best practices for grounding. A dedicated grounding wire, typically green or bare copper, should run from the solar panel frames, through your charge controller, and eventually to the RV chassis ground.
Weatherproofing and Maintenance
A successful RV solar installation isn't just about getting it working; it's about ensuring it keeps working through all sorts of weather conditions and over many years of travel.
- Meticulous Sealing: We touched on this during installation, but it bears repeating: every single penetration point on your RV roof must be perfectly sealed. This includes mounting feet, cable entry glands, and any other modifications. Use UV-resistant, marine-grade, or RV-specific sealants designed for your roof type. Regularly inspect these seals, especially after harsh weather or extended travel, and reapply sealant as needed. Cracks in sealant are an open invitation for water damage.
- Cable Management: Secure all cables firmly to the roof using UV-resistant clips and ties. Loose cables can chafe, wear through their insulation, and become damaged by wind, road debris, or branches. Ensure no cables are pinched or stretched tightly.
- Regular Inspections and Cleaning:
- Visual Checks: Periodically inspect your entire solar system. Check the solar panels for any cracks, delamination, or discoloration. Look at the mounting hardware for loose screws, corrosion, or signs of stress. Inspect all wiring for fraying, exposed conductors, or damage from UV exposure or critters.
- Sealant Inspection: As mentioned, regularly check all sealant points. This is perhaps the most important maintenance task.
- Panel Cleaning: Dust, dirt, leaves, bird droppings, and even sap can significantly reduce your solar panel's efficiency. Clean your panels regularly with mild soap and water, using a soft brush or sponge. Avoid abrasive cleaners or harsh chemicals. For optimal performance, especially when you consider the Off-Grid Solar Return on Investment, clean panels are a must.
- Battery Maintenance: While not directly mounting, your battery bank is the heart of your off-grid system. Ensure it's properly maintained according to its type (e.g., checking water levels in lead-acid batteries, monitoring voltage for lithium). Protecting your batteries from extreme temperatures is also key, as discussed in How to Protect Batteries from Cold.
By adhering to these safety guidelines and maintenance practices, you'll ensure your RV solar system provides reliable, worry-free power for countless adventures.
Common Challenges and Solutions
Even with the best planning, you're bound to encounter a few curveballs when installing solar on an RV. It's the nature of DIY projects and mobile living! Knowing what to expect and having some strategies in your back pocket can turn potential headaches into minor detours.
Dealing with Shading and Obstructions
Shading is the archenemy of solar production, especially for panels wired in series. On an RV roof, obstructions are almost guaranteed. Your air conditioner, roof vents, satellite dish, and even nearby trees at a campsite can cast shadows that dramatically reduce your power output.
The Problem: When panels are wired in series, a single shaded cell on one panel can effectively shut down the entire string. Imagine a garden hose: if you crimp it anywhere, the flow stops everywhere. Solar panels behave similarly. Even a small shadow from an antenna can plummet the output of a 100-watt panel from 75 watts to just 5-10 watts, and if it's in a series string, it could impact all panels in that string.
Solutions:
- Strategic Placement: During your pre-installation layout, meticulously identify all potential shadow casters. Try to position panels in areas that receive the most uninterrupted sun exposure throughout the peak hours of the day. This might mean arranging panels in odd configurations rather than a neat rectangle.
- Parallel Wiring (or Series-Parallel): If significant shading is unavoidable, parallel wiring is often a better choice for RVs. In a parallel array, each panel operates more independently. If one panel is shaded, the others continue to produce at their full potential. Many RV systems utilize a series-parallel combination, where a few panels are in series, and then those strings are connected in parallel. This offers a good balance.
- MPPT Charge Controllers with Multiple Inputs: Advanced MPPT (Maximum Power Point Tracking) charge controllers are highly efficient and can sometimes extract more power from partially shaded arrays than older PWM (Pulse Width Modulation) controllers. Some high-end MPPT controllers even allow for multiple independent solar inputs, meaning you can have separate strings of panels that might experience different shading profiles.
- Micro-Inverters or Optimizers: While more common in grid-tied residential systems, these can be adapted for larger RV setups. They optimize the output of each individual panel, so shading on one panel doesn't affect the others. This is a more complex and costly solution, but it offers the ultimate in shading mitigation.
- Portable Panels: For those persistent shading issues, a great solution is to augment your roof-mounted system with a portable solar panel. These can be set up in a sunny spot on the ground, even if your RV is parked under a tree. They connect to your system via a separate input or a dedicated portable charge controller. Check out options from brands like Renogy, often available on Amazon.
- Tilt Mounts: As mentioned earlier, tilt mounts can help you chase the sun and avoid shadows by angling panels away from obstructions.
Dealing with Different RV Roof Materials
As we discussed, RV roofs come in various materials, and each presents unique considerations for mounting and sealing. Incorrectly addressing these differences is a primary cause of leaks.
- EPDM Rubber and TPO Roofs: These are the most common RV roof materials.
- Challenges: Both are relatively soft membranes. Standard self-leveling Dicor sealant works wonders, but you need to be careful not to overtighten screws, as this can compress and damage the membrane.
- Solutions: Use broad-based mounting feet that distribute the load over a wider area. Always use stainless steel hardware to prevent rust. Ensure your chosen sealant is compatible with EPDM or TPO (Dicor is specifically designed for these). When drilling pilot holes, be extra cautious to not go too deep and only penetrate the membrane and underlying decking. Consider using Well Nuts or other specialized fasteners that expand to create a watertight seal without crushing the membrane.
- Fiberglass Roofs: Often found on higher-end RVs, fiberglass is more rigid and durable.
- Challenges: Drilling into fiberglass requires care to prevent cracking. While sturdy, fiberglass can still allow water intrusion if not properly sealed.
- Solutions: Use a sharp drill bit designed for fiberglass to make clean holes. A marine-grade, high-strength polyurethane sealant (like 3M 5200 or SikaFlex 221) is often recommended, as it adheres exceptionally well to fiberglass and provides a strong, flexible, and watertight bond. Mechanical fasteners like bolts with large washers and lock nuts (if you can access the underside) offer the most secure attachment.
- Aluminum Roofs: Less common on modern RVs, but found on older models or some cargo trailers converted into RVs.
- Challenges: Corrosion can be a concern if dissimilar metals are in contact (galvanic corrosion).
- Solutions: Use only stainless steel fasteners to match the aluminum or ensure a protective barrier (like a non-conductive washer or sealant) separates dissimilar metals. A good quality silicone or polyurethane sealant is usually appropriate. Always ensure the mounting brackets themselves are aluminum to avoid galvanic corrosion.
No matter your RV's roof type, the golden rule remains: clean surfaces, appropriate fasteners, and liberal, compatible sealant are your best defense against leaks. Taking the time to understand these nuances will ensure your solar system remains securely attached and your RV stays dry for many years to come.
Disclaimer
The information provided in this guide is for educational and informational purposes only and is not intended as professional electrical, construction, or engineering advice. Off-grid solar installations can be complex and involve working with high currents and voltages. Improper installation can lead to property damage, fire, electrical shock, or serious injury. Always consult with qualified professionals (e.g., licensed electricians, RV technicians) before undertaking any significant modifications to your RV or electrical system. Ensure all work complies with local codes, regulations, and manufacturer warranties. Proceed at your own risk.