How to Pass an Off-Grid Solar Inspection
Stepping into the world of off-grid solar can feel incredibly liberating, full of dreams of energy independence and quiet homesteads. But then, the often-overlooked reality of local regulations and inspections can hit you like a cold splash of water, leaving you wondering if your DIY dream will ever get the official green light. It's frustrating to pour your heart and soul into a system, only to face a bureaucratic hurdle that seems designed to trip you up. This comprehensive guide is here to demystify the off-grid solar inspection process, helping you understand what inspectors look for, how to prepare, and ultimately, how to confidently pass your off-grid solar system inspection.
Understanding the Need for Off-Grid Solar Inspections
It’s easy to think that if you’re off the grid, you’re off the hook for inspections and permits. After all, you’re not connected to the utility company, so who cares, right? Well, unfortunately, that’s a common misconception that can lead to headaches, fines, and even safety hazards down the line. Local authorities do care, and for very good reasons centered around safety and property value.
Why Off-Grid Systems Are Subject to Code
Even if your property isn't tied into the local power grid, your solar system still involves high-voltage electricity, batteries that can store immense amounts of energy, and components that need to be safely housed and wired. Electrical codes, like the National Electrical Code (NEC), are developed to ensure the safety of people and property from electrical hazards. These codes don't distinguish between grid-tied and off-grid power generation when it comes to fundamental safety practices. Imagine a poorly installed battery bank overheating and causing a fire in your remote cabin – the fire department still has to respond, and neighbors, however distant, could still be at risk. This is why jurisdictions, from bustling counties in North Carolina to rural areas in Montana, typically require permits and inspections for any electrical installation, regardless of its grid connection status. They're looking out for future occupants, emergency responders, and the integrity of your investment.
Local Authority and Code Enforcement
The specifics of what's required for your off-grid system will largely depend on your local jurisdiction. This means your county building department, city planning office, or even specific rural development authorities. What flies in one state or county might be a strict no-go in another. For instance, some areas might have very stringent requirements for fire access and setback distances for ground-mounted arrays, while others might focus more on battery containment in residential structures. It’s crucial to initiate contact with your local permitting office early in your planning process. Don't wait until you've bought all your components to ask about permits and inspections. They can provide you with the exact codes they adhere to, any specific local amendments, and the application process. You might even find that they have specific worksheets or guidelines for off-grid systems, which can be a lifesaver for your planning. Getting a clear understanding of your local requirements is the very first step to ensuring your installation is up to par.
The Pre-Inspection Checklist and Documentation
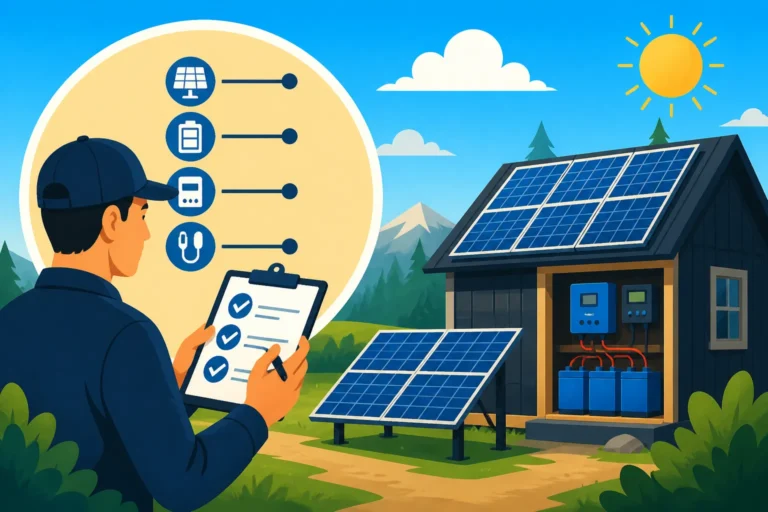
Before an inspector even sets foot on your property, a significant portion of passing your off-grid solar inspection hinges on meticulous preparation and having all your ducks in a row. Think of it as doing your homework – the better prepared you are, the smoother the process will be.
Gathering Required Permits and Plans
The journey to a successful inspection begins long before the wires are run. You'll need to secure the necessary electrical permits, and possibly structural permits if you're building substantial ground mounts or modifying your roof significantly. The application process usually requires detailed plans of your system. These aren't just rough sketches; they should be professional-looking, legible, and include specific details. This means clear diagrams showing your solar array layout, panel specifications (wattage, voltage, current), wiring diagrams (series/parallel connections), a complete list of your equipment (inverter, charge controller, batteries, disconnects, breakers), and a detailed load calculation showing your estimated daily energy usage. For those wondering how to best prepare these plans, our guide on Off-Grid Solar System Sizing Guide can offer some excellent starting points for your calculations.
Many seasoned off-gridders swear by using software or hiring a professional designer for complex systems to create these plans, especially if your local authority is particular. Having these documents ready and accessible for the inspector is paramount. They'll want to cross-reference your actual installation against what was approved on paper. If you've made any changes during the build, make sure those are reflected in updated plans, and ideally, approved by the permitting office before the inspection.
Ensuring System Components Meet Standards
One of the easiest ways to fail an inspection is by using components that aren't properly listed or rated for their intended use. Every major component in your off-grid solar system – from solar panels and batteries to inverters and charge controllers – should be UL-listed (Underwriters Laboratories) or certified by another Nationally Recognized Testing Laboratory (NRTL) like ETL. This certification indicates that the equipment has been tested and meets recognized safety and performance standards. When you're shopping for components, especially on platforms like Amazon or directly from manufacturers, always look for these certifications.
For example, a high-quality inverter from a reputable brand like Victron or Sol-Ark will clearly state its certifications. Similarly, battery manufacturers like Battle Born or EG4 will highlight their UL listings. While it might be tempting to save a few bucks on cheaper, uncertified equipment, it's a huge red flag for inspectors and can lead to immediate failure and the costly need to replace components. Make sure all your components are not only certified but also sized correctly for your system, a topic we delve into more deeply in our article on How to Choose an Off-Grid Inverter. Furthermore, ensure all labels, ratings, and instructions are still attached to the components; inspectors will often check these during their visit.
Preparing the Installation Site
A clean, organized, and accessible installation site speaks volumes to an inspector. Before they arrive, ensure all work areas are clear of debris, tools, and unnecessary clutter. This isn't just about aesthetics; it's about safety and clarity. The inspector needs to safely navigate around your solar array, battery bank, and electrical panels.
- Accessibility: Can the inspector easily reach all disconnects, fuses, and wiring connections? If your battery bank is in a tight closet, make sure there’s enough room for them to safely examine it.
- Labeling: All components should be clearly labeled. This includes warning labels, disconnect switches, circuit breakers, and conductor identification (e.g., "PV Array Disconnect," "Battery Bank," "Inverter Output"). The NEC has specific requirements for labeling, especially for safety shutoffs.
- Conduit and Wiring: All wiring should be neat, properly supported, and run in appropriate conduit where required. No loose, exposed wires! Check for proper wire sizing and color coding. Our guide on Off-Grid Solar Wiring Diagram Explained can offer detailed insights into proper wiring.
- Grounding: Ensure all grounding electrodes, conductors, and connections are properly installed and visible for inspection.
By taking the time to organize and label everything, you demonstrate a commitment to safety and professionalism, which can significantly influence the inspector's overall impression and the smoothness of the inspection.
Key Areas of Inspection Focus
When an inspector comes out to look at your off-grid solar setup, they're not just glancing around. They have a specific checklist derived from electrical and building codes. Understanding these critical areas can help you preemptively address potential issues.
Solar Panel Array Compliance
The solar panels are the heart of your system, converting sunlight into electricity. Inspectors will pay close attention to how they are installed and wired.
- Mounting and Structural Integrity: This is a big one. Whether you've chosen roof-mounted or ground-mounted panels, the inspector will verify that the mounting system is structurally sound and securely attached. Are the rails, clamps, and penetrations properly sealed and capable of withstanding local wind and snow loads? They'll check for proper flashing on roof mounts to prevent leaks and ensure ground mounts are set on robust foundations. Local codes often dictate specific requirements for racking and tilt angles.
- Wiring and Conductor Management: All wiring from your panels to the combiner box and then to your charge controller needs to be meticulously installed. This means using UV-resistant, outdoor-rated PV wire, properly secured and protected in conduit where exposed. They'll look for sag-free runs, appropriate strain relief, and correct polarity. Each string of panels should be properly connected, usually with MC4 connectors, and run neatly. For detailed advice, consult our article on How to Wire an Off-Grid Solar System.
- Rapid Shutdown and Disconnects: Many codes require a rapid shutdown mechanism for solar arrays, especially on residential buildings, to allow first responders to quickly de-energize the system in an emergency. This might involve module-level power electronics or specific disconnect switches at the array. The inspector will ensure these safety disconnects are easily accessible, clearly labeled, and function correctly.
Battery Bank Safety and Enclosure
The battery bank is often considered the most critical (and potentially hazardous) component in an off-grid system, making it a primary focus for inspectors.
- Battery Type and Chemistry: While not strictly a code violation in most cases, the inspector may inquire about your battery type (e.g., LiFePO4 vs. lead-acid). LiFePO4 batteries, like those from Battle Born, are becoming more common due to their safety features and lifespan, but they still require proper installation. Lead-acid batteries, on the other hand, produce hydrogen gas and require specific ventilation. Our guide on Best Off-Grid Solar Batteries offers a comprehensive comparison.
- Ventilation and Containment: For lead-acid batteries, proper ventilation is non-negotiable to disperse explosive hydrogen gas. This means an appropriately sized, dedicated battery box or room with active or passive ventilation to the outside. Lithium batteries typically don't off-gas but still require proper containment and protection from environmental factors and physical damage. The enclosure needs to protect the batteries from the elements, pests, and accidental contact.
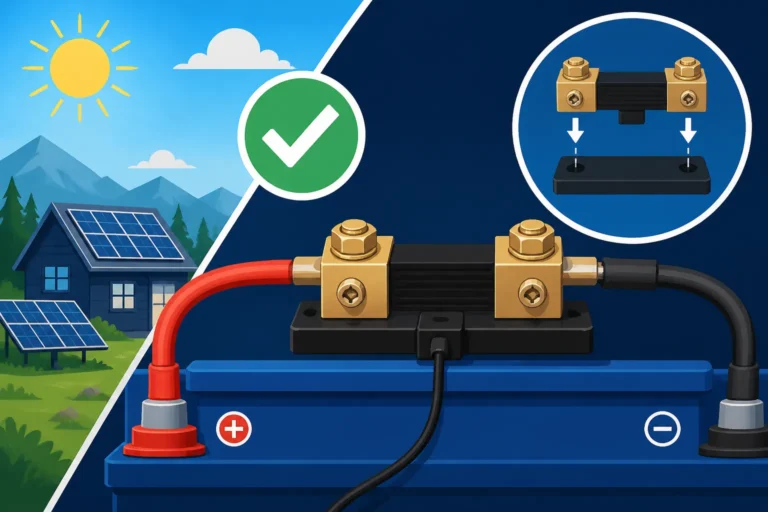
- Wiring, Fuses, and Disconnects: Battery wiring needs to be heavy-gauge, appropriately sized for the current, and kept as short as possible. All battery connections should be clean and tight. Crucially, a main battery disconnect and appropriate fusing are required close to the battery bank to protect against overcurrent and short circuits. The inspector will confirm these are installed correctly, accessible, and clearly labeled. They’ll be looking for signs of corrosion, loose terminals, or improperly insulated connections.
Inverter and Charge Controller Setup
These are the brains of your off-grid system, managing power flow and converting DC to AC power.
- Mounting and Location: The inverter and charge controller need to be securely mounted in a dry, well-ventilated location, protected from physical damage and extreme temperatures. They should not be installed in areas with flammable materials or corrosive fumes. The inspector will check for sufficient clearance around the units for cooling and maintenance access.
- Wiring and Overcurrent Protection: All DC wiring from the charge controller to the battery bank, and AC wiring from the inverter to your electrical panel, must be properly sized, routed in conduit (if required), and protected by circuit breakers or fuses. The inspector will ensure the correct gauge wire is used for the expected current and that all connections are secure. They will also verify that your charge controller is appropriately sized for your solar array, as detailed in our article How to Size a Charge Controller.
- Grounding: Both the inverter and charge controller need to be properly grounded according to NEC requirements to prevent electrical shock hazards and protect the equipment from surges. The grounding electrode conductor and connections will be scrutinized.
Grounding and Electrical Code Compliance
This is arguably the most critical safety aspect of any electrical installation, off-grid or otherwise. Proper grounding is essential to dissipate fault currents and prevent dangerous voltage buildups.
- Grounding Electrode System: The inspector will look for a properly installed grounding electrode system, which typically involves one or more grounding rods driven into the earth to a specific depth, bonded together and to your main electrical panel. All connections must be robust and corrosion-resistant. For those doing a DIY setup, remember you can often find suitable grounding rods and clamps on Amazon, but ensure they meet code.
- Equipment Grounding Conductors: All metallic components of your solar array, mounting system, inverter chassis, and battery enclosure must be bonded together and connected to the grounding electrode system. This includes the metal frames of your solar panels themselves. The inspector will check that all bonding jumpers are correctly installed and that there's continuity throughout the system. Our article on Off-Grid Solar Safety and Grounding provides a deep dive into these requirements.
- Conduit and Junction Boxes: All wiring within conduit needs to be continuous and protected. Junction boxes must be properly rated for the environment (e.g., weatherproof for outdoor use), securely mounted, and have proper strain relief for all cables entering and exiting. All unused knockout holes must be plugged. The inspector will open junction boxes to ensure proper wiring techniques, splices, and connections. They'll also check that any exposed wires are inside conduit or appropriate enclosures.
- Arc-Fault and Ground-Fault Protection: Depending on your specific code cycle and jurisdiction, you might be required to install Arc-Fault Circuit Interrupter (AFCI) and Ground-Fault Circuit Interrupter (GFCI) protection for certain circuits, even in an off-grid setup. These devices are designed to detect dangerous electrical conditions that standard breakers might miss. Inspectors will confirm their presence and proper installation if required.
Common Pitfalls and How to Avoid Them
It’s easy to get caught up in the excitement of building your off-grid sanctuary, but overlooking details can lead to failed inspections, delays, and costly rework. Many common mistakes are entirely avoidable with a bit of foresight and adherence to best practices.
Inadequate Wire Sizing and Protection
This is probably one of the most frequent reasons for failed electrical inspections, both on and off-grid. When you're dealing with DC power, especially at lower voltages like 12V or 24V, the current can be quite high, requiring much thicker wires than you might expect for AC circuits.
- Under-sizing: Using wire that is too thin (too high a gauge number) for the current it carries creates resistance, generates heat, and causes voltage drop. This not only makes your system less efficient but poses a serious fire risk. The inspector will meticulously check wire gauges against the calculated current draws and length of the runs. Remember that different wire types, like copper versus aluminum, have different current capacities, so always refer to current tables in the NEC.
- Lack of Protection: All wiring, especially when exposed to the elements, physical damage, or fire hazards, must be protected. This typically means running wires in appropriate conduit (e.g., EMT, PVC, or liquid-tight flexible conduit) and securing it with proper clamps and supports. Wires entering enclosures must have bushings or connectors to prevent chafing. Don't leave wires dangling or unprotected, even in seemingly out-of-the-way spots. Our detailed guide on How to Size Wire and Cables is a must-read for any DIYer.
- Improper Splices: All wire splices must be made in an approved junction box using appropriate connectors (wire nuts, crimp connectors). Open-air splices or tape-only connections are unacceptable and highly dangerous.
Insufficient Disconnects and Labeling
Safety disconnects are a critical line of defense for both your system and anyone working on it, including emergency personnel.
- Missing Disconnects: You need clearly identifiable manual disconnects for your solar array, battery bank, and inverter output. These allow you to completely de-energize different parts of the system for maintenance or emergencies. The inspector will verify that these are present, properly rated for the voltage and current, and easily accessible. A good rule of thumb is that if someone needs to troubleshoot your system, they should be able to quickly and safely shut down power at multiple points.
- Poor Labeling: Imagine an emergency responder trying to figure out how to shut down your system in a hurry. Confusing or missing labels can be a matter of life and death. Every disconnect, breaker, and major component should have a clear, durable label indicating its function (e.g., "PV Disconnect," "Battery Disconnect," "Main Inverter Breaker"). Warning labels for high voltage or stored energy are also crucial. Labels should be weather-resistant if outdoors.
Incomplete or Improper Grounding
This is another huge safety issue that inspectors take very seriously. An improperly grounded system is a severe shock hazard.
- Missing or Loose Connections: All metallic components, including solar panel frames, mounting rails, inverter chassis, and electrical boxes, need to be bonded together and connected to the grounding electrode system. Loose or corroded grounding connections render the entire system unsafe. The inspector will often use a continuity tester to ensure everything is properly bonded.
- Incorrect Grounding Electrode System: Simply sticking a rebar into the ground isn't sufficient. The grounding electrode system needs to conform to NEC requirements, which often specify the type, size, and depth of grounding rods, as well as the bonding conductor. Some areas might require multiple rods or even a ground ring. For a better understanding of what’s needed, review How to Ground an Off-Grid Solar System.
Neglecting Manufacturer Specifications
Every piece of equipment you buy, from a Renogy solar panel to a Victron inverter, comes with detailed installation instructions and specifications. These aren't just suggestions; they are often based on safety certifications and proper operating conditions.
- Ignoring Data Sheets: Your inspector will assume you've read and followed these. For instance, if a solar panel's data sheet specifies a maximum fuse rating or a specific mounting method, the inspector will expect your installation to adhere to it.
- Improper Environmental Conditions: Batteries often have temperature limits, and inverters require adequate airflow for cooling. Installing equipment in unapproved temperature ranges or without proper ventilation can lead to equipment failure and will be noted by an inspector. An enclosed battery box, for example, needs to be adequately sized and ventilated if it houses lead-acid batteries.
By paying close attention to these common pitfalls during your planning and installation phase, you can significantly increase your chances of sailing through your off-grid solar inspection.
The Inspection Day: What to Expect
The day of the inspection can feel a bit nerve-wracking, but by knowing what to expect, you can approach it with confidence and ensure a smooth process.
Inspector's Role and Approach
Your inspector is there to ensure your system meets safety standards and local codes, not necessarily to critique your craftsmanship or personal design choices (unless they impact safety). They are typically licensed electricians or building officials with expertise in electrical systems. Their approach will generally be methodical:
- Reviewing Documentation: They will usually start by reviewing your permits, approved plans, and component specifications. Make sure these are easily accessible and organized. This is where your detailed planning pays off.
- Visual Inspection: The bulk of the inspection will be a thorough visual check of your entire system, from the panels on your roof (or ground array) down to your main DC/AC load centers. They'll look at mounting, wiring, conduit, connections, labels, and safety devices.
- Functional Checks: They might ask you to operate disconnects, test specific breakers, or confirm that warning alarms are functional. They won't typically energize a brand new system, but they will ensure that all components are ready to be safely energized.
- Code Compliance: They will be cross-referencing everything against the adopted electrical code (often the NEC with local amendments) and any specific requirements from your permit.
It's helpful to be present during the inspection to answer any questions, but avoid hovering or trying to "help" too much. Let them do their job, and only offer information or access when asked.
What the Inspector Will Scrutinize
Beyond the general areas, inspectors often focus on specific details that are critical for safety and system integrity.
- Grounding and Bonding: They will pay very close attention to your grounding electrode system, ensuring proper rod installation, conductor size, and secure connections. They will also check that all metallic components are properly bonded to the system. This means looking inside electrical boxes, checking panel frames, and ensuring mounting rails are tied into the ground system. They might even use a multimeter to check for continuity across various grounded parts.
- Overcurrent Protection Devices: Every circuit and conductor needs protection from overcurrent. This means checking that circuit breakers and fuses are correctly sized for the wire gauge and the components they protect. For instance, the main breaker between your inverter and your AC load panel must be rated correctly for the inverter's output. Similarly, fuses in your combiner box or at the battery bank must match the array's short-circuit current and battery bank capacity.
- Accessibility and Clearances: All electrical panels, disconnects, and service equipment must have adequate working space in front of them, as mandated by code (typically 3 feet deep, 30 inches wide, and 6.5 feet high, free of obstructions). They'll also ensure that components are installed in accessible locations for maintenance and emergency shutdown.
- Signage and Labels: Beyond just "PV Disconnect," comprehensive labeling for maximum voltage, amperage, and warning signs (e.g., "DANGER: Dual Power Source") are often required. These inform anyone encountering the system about its electrical characteristics and potential hazards.
Conducting the Walk-Through
During the walk-through, the inspector will guide you through their observations. This might involve:
- Panel Array: Checking panel condition, mounting security, module-level grounding, and the integrity of wiring runs, ensuring conduit is properly sealed and UV-resistant. They'll confirm your rapid shutdown mechanism is correctly installed.
- Combiner Box/Junction Boxes: Opening these up to inspect wire connections, overcurrent devices, and surge protection devices. They'll check that all unused entry points are plugged.
- Charge Controller and Inverter: Verifying proper mounting, ventilation, wire sizing, and connections. They'll check for proper disconnects on both the DC and AC sides, along with correct grounding.
- Battery Bank: This is where they'll be very diligent. Expect them to check battery type, ventilation, protective enclosure, terminal connections, main battery disconnect, and fuse sizing. They might also check for battery monitoring systems or temperature sensors if your system includes them.
- Main Electrical Panel: If you're feeding an AC load panel from your inverter, they'll check the main breaker, bonding, grounding, and proper installation of all circuits.
Think of it as a comprehensive review of your entire system. If you've been careful and followed all the guidelines, this walk-through should mostly be a confirmation of your excellent work.
What Happens if You Fail the Inspection
It's an unpleasant thought, but sometimes, despite your best efforts, an off-grid solar inspection doesn't go as smoothly as planned. Don't panic! A failed inspection isn't the end of the world, but it does mean more work.
Receiving a Correction Notice
If your system doesn't pass, the inspector won't just pack up and leave you hanging. They will issue a written correction notice, sometimes called a "red tag" or "deficiency report." This document is incredibly important because it explicitly lists every item that failed to meet code or permit requirements.
- Specificity: The notice should be specific, citing the exact code section that was violated (e.g., "NEC 690.17: Improper overcurrent protection for PV array"). This specificity is your roadmap for corrections. If something is unclear, politely ask the inspector for clarification before they leave.
- Timeline: The notice might also include a timeline for making the corrections and scheduling a re-inspection. Make sure you understand any deadlines.
It's common for even experienced installers to get a few correction items, especially with complex systems or evolving code requirements. Don't take it personally; view it as an opportunity to ensure your system is as safe and robust as possible.
Making Corrections and Re-Inspection
Once you have your correction notice, the real work begins.
- Understand Each Deficiency: Go through each item on the notice. If a specific component like a charge controller is deemed inadequate, you'll need to research why. Perhaps it wasn't appropriately sized for your solar array. Our guide on How to Choose an Off-Grid Charge Controller might offer insight into alternative choices that meet code.
- Perform the Work: Carefully address each deficiency. This might involve re-wiring, replacing components, adding disconnects, improving grounding, or even simply adding labels. Document your changes, as this can be helpful during the re-inspection. If you're struggling with complex wiring, it might be time to consider bringing in a licensed electrician, even if you did most of the DIY work. Sometimes a fresh pair of eyes from an expert makes all the difference.
- Schedule Re-inspection: Once all corrections are made, contact the permitting office to schedule a re-inspection. There might be a fee for this, so try to get everything right the first time! During the re-inspection, the inspector will primarily focus on the items noted in the original correction notice, though they may do a quick check of other critical areas.
The Importance of Learning and Adapting
Every failed inspection is a learning experience. Use it to deepen your understanding of electrical codes and safe installation practices.
- Review Code Books: Take the time to look up the cited code sections in the National Electrical Code (NEC) or your local equivalent. Understanding the "why" behind the rules will make you a better installer.
- Consult Resources: Online forums, solar installation guides, and even manufacturer's technical support lines can be invaluable resources. For example, if you used a Renogy system and encountered an issue, their support documentation or community forums might offer specific troubleshooting advice.
- Future-Proofing: Think about how you can incorporate these lessons into future projects or system expansions. By understanding common issues, you can prevent them from recurring. For instance, knowing how to properly run conduit and seal roof penetrations from the start can save you a world of hurt.
Ultimately, passing your off-grid solar inspection is about more than just getting a stamp of approval. It’s about building a safe, reliable, and compliant system that will serve you well for years to come. The effort you put into understanding and adhering to the rules ensures peace of mind and protects your investment.
Disclaimer
The information provided in this guide is intended for informational purposes only and does not constitute professional advice. Off-grid solar installations involve high-voltage electricity and should be undertaken with extreme caution. Always consult with a licensed electrician or qualified solar professional and refer to your local building codes and regulations before designing or installing any off-grid solar system. Local codes can vary significantly, and this guide cannot cover all specific requirements. Failure to comply with applicable codes and safety practices can result in serious injury, death, fire, or property damage.