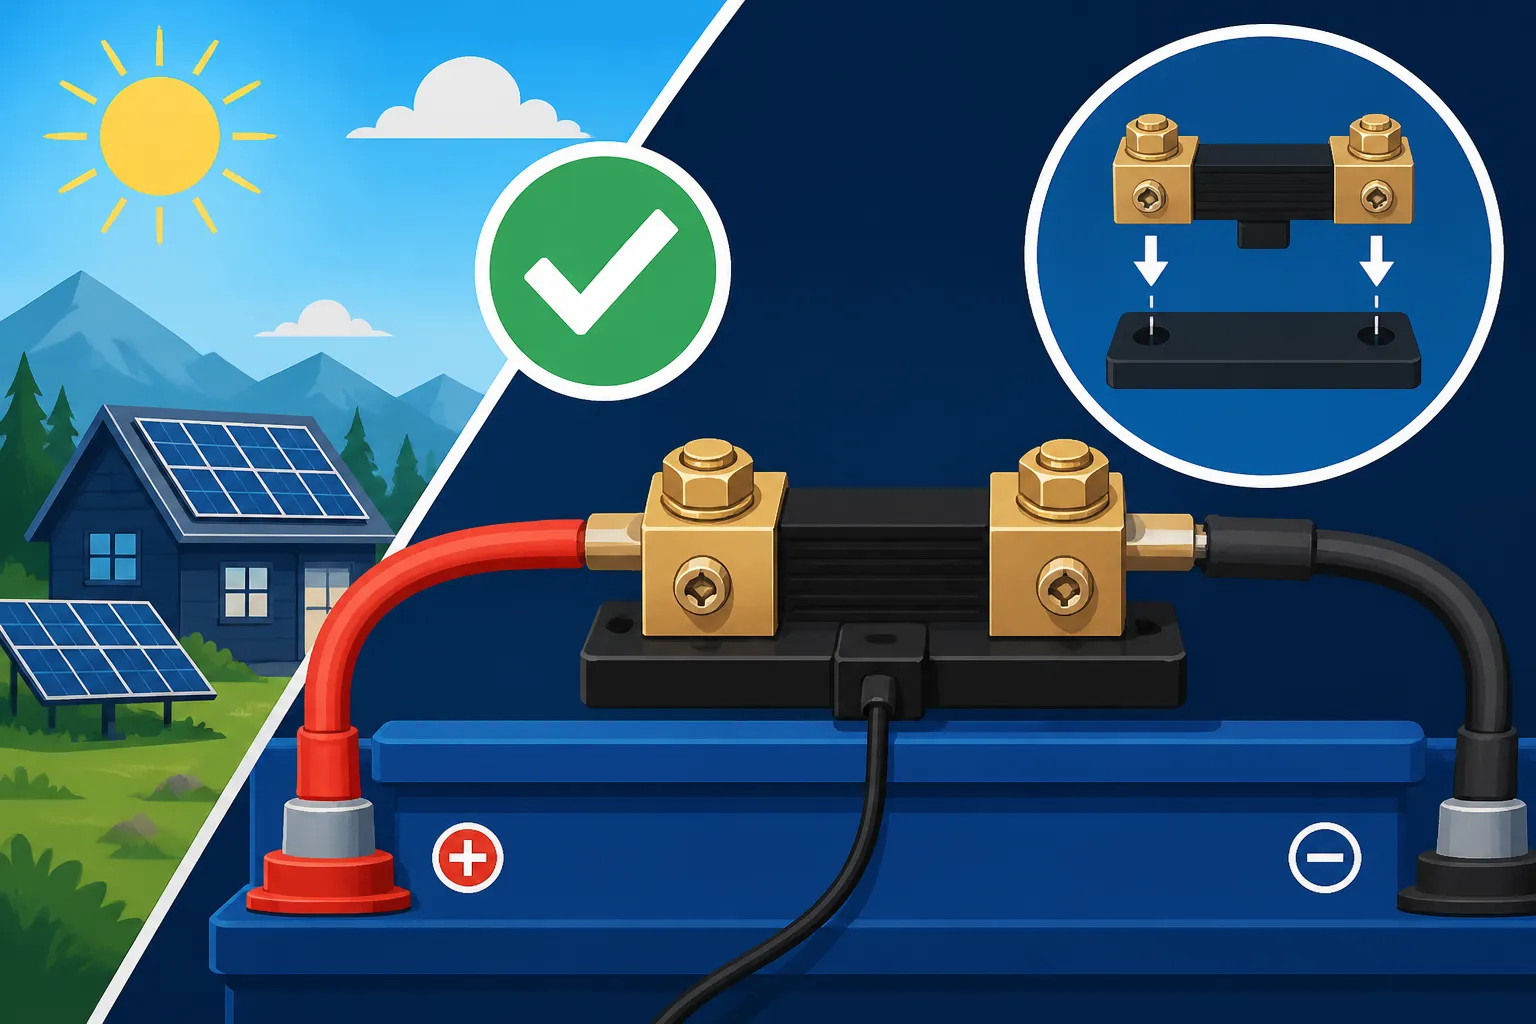
How to Install a Battery Shunt
Anyone who's lived off-grid knows the constant gnawing anxiety of not truly understanding your battery bank's health. You glance at the voltage, but it often feels like a guessing game – is it really full? How much longer can this last? That feeling of being in the dark about your most crucial power component is incredibly frustrating, and that's precisely why installing a battery shunt is one of the most vital upgrades you can make to your off-grid solar setup. This guide will walk you through everything you need to know to accurately monitor your power.
Understanding What a Battery Shunt Is and Why You Need One
When you're running on solar power, your battery bank is the heart of your system. It stores all that precious energy your panels collect, and without it, you'd be living minute-to-minute based on sunshine. But knowing exactly how much juice is left in that battery, and how much is going in and out, is where most people get tripped up. This is where a battery shunt comes into play – it's the unsung hero that brings clarity to your power consumption.
The Core Function of a Shunt
At its heart, a battery shunt is a very low resistance resistor designed to create a tiny, measurable voltage drop when current flows through it. Think of it like a highly sensitive toll booth on a busy highway. Every electron that passes through your battery system – whether it's flowing in from your solar panels or out to power your lights and appliances – has to go through this "toll booth." This minuscule voltage drop is then measured by a battery monitor, which translates it into a precise current reading (amperage).
Without a shunt, you're essentially flying blind. You might have a voltmeter, but that only tells you the battery's surface charge, not its true state of health or how quickly you're drawing power. This can lead to underestimating your consumption, over-discharging your batteries (which drastically shortens their lifespan), or simply living in a constant state of worry about whether your power will last through the night. A shunt eliminates that guesswork, giving you real-time data that is foundational for understanding and managing your off-grid energy. It's the first step in properly setting up any system that relies on accurate power tracking, especially when you're looking into something as complex as a How to Wire an Off-Grid Solar System.
Beyond Voltage: Why Amperage Matters
Many off-griders start by only monitoring their battery voltage, and it’s a perfectly natural instinct. After all, a higher voltage usually means more power, right? Well, yes and no. Voltage is like the pressure in your water tank – it gives you an idea, but it doesn't tell you how much water is actually in the tank, or how fast it's being used. When you put a load on a battery, the voltage can temporarily dip, making it look like you have less power than you do. Conversely, if you've just finished charging, the voltage might appear high, even if the battery isn't fully saturated. This phenomenon, known as "surface charge," can give you a false sense of security.
Amperage, on the other hand, tells you the flow of electricity. A shunt measures both the amps flowing into your battery from your solar panels or generator, and the amps flowing out to your appliances. By continuously tracking these ins and outs, a good battery monitor (paired with a shunt) can perform a highly accurate "coulomb count." This process meticulously counts every electron, allowing the monitor to deduce the true State of Charge (SoC) of your battery bank, typically displayed as a percentage. This is invaluable, because knowing your precise SoC helps you make informed decisions, like whether you can run that washing machine or if you need to conserve power until the sun comes up. It's a critical component for anyone trying to properly How to Calculate Daily Energy Usage in their off-grid home.
Choosing the Right Battery Shunt for Your Off-Grid System
Once you understand the fundamental importance of a battery shunt, the next step is to select the right one for your particular off-grid setup. It's not a one-size-fits-all situation, and choosing wisely can save you a lot of headaches (and potential system damage) down the line.
Shunt Rating and System Voltage Compatibility
The primary consideration when choosing a shunt is its current rating, typically expressed in Amperes (A). Shunts commonly come in sizes like 100A, 200A, 500A, and even 1000A. To determine the right size for you, you need to know the maximum current your entire system could potentially draw at any given moment. This means adding up the peak amperage of all your loads (inverter, lights, pumps, etc.) and also considering the maximum charging current from your solar charge controller and any backup generators. It’s always safer to slightly oversize your shunt than to undersize it. For example, a typical RV or small cabin setup might find a 500A shunt sufficient, as most inverters commonly used in these applications (say, a 3000W 12V inverter) would draw around 250A at full capacity, leaving a good margin. Trying to run more than the shunt is rated for can cause it to overheat and provide inaccurate readings.
While shunts themselves are typically voltage-agnostic (as they only measure current flow), the battery monitor they connect to does need to be compatible with your system's voltage (12V, 24V, 48V). Most modern monitors are designed to work across a range of common off-grid voltages, but it's always critical to double-check the specifications. This is especially important when you're planning out your How to Size an Off-Grid Battery Bank and deciding on the optimal system voltage.
Smart Shunts and Integrated Monitors
Gone are the days when a shunt was just a chunk of metal with a couple of terminals. Today, "smart shunts" and integrated battery monitors offer a wealth of information and convenience that can revolutionize how you interact with your off-grid power. These devices often combine the physical shunt with a sophisticated monitoring circuit, sometimes even built into the display unit itself.
Brands like Victron Energy are renowned for their smart shunts, such as the Victron BMV or SmartShunt series, which include Bluetooth connectivity. This allows you to monitor your battery's State of Charge, current draw, voltage, and even historical data right from your smartphone or tablet. Imagine checking your battery's health from the comfort of your couch or while planning your next day's activities! Renogy also offers excellent battery monitors that pair with their shunts, providing a comprehensive overview. These smart systems often track additional metrics like power (watts), energy consumed (watt-hours), time remaining until discharge, and even battery temperature, which is crucial for prolonging battery life, especially with sensitive lithium-ion batteries.
When you're considering the Best Off-Grid Solar Batteries, especially advanced LiFePO4 models, a smart shunt becomes almost a necessity. They often come with alarm functions that can alert you to low voltage or high current draws, helping prevent damage to your expensive battery bank. While you might find a basic shunt kit on Amazon that includes the shunt itself and a simple LCD display, for those looking for more advanced features, investing in a reputable smart shunt is highly recommended for complete peace of mind.
Step-by-Step Guide to Installing Your Battery Shunt
Installing a battery shunt might sound intimidating, but it's a straightforward process if you follow the steps carefully and prioritize safety. Remember, we're dealing with electricity, so caution is key!
Safety First Preparations
Before you touch any wires, the absolute priority is safety. Electricity can be dangerous, especially the high currents involved in off-grid systems.
- Disconnect All Power: This is non-negotiable. Turn off your inverter, disconnect your solar panels from the charge controller (cover them if possible to prevent accidental power generation), and disconnect any other charging sources like generators or shore power. Crucially, disconnect the positive cable from your battery bank as well to fully de-energize the system. Think of it as hitting the emergency stop button on your entire electrical setup.
- Gather Your Tools: You'll need some basic tools:
- Wrenches (for battery terminals and shunt bolts)
- Screwdrivers (for smaller terminal screws on the monitor)
- Multimeter (useful for verifying no voltage and checking connections)
- Wire cutters/crimpers (if you're making new cables)
- Heat shrink tubing and a heat gun (for professional-looking, secure connections)
- Safety glasses and gloves (always a good idea when working with batteries).
- Inspect Cables: Ensure your main battery cables are appropriately sized for your system. If you're upgrading or modifying, make sure the cables connecting to the shunt can handle the full current load. Using undersized cables can lead to resistance, heat, and inefficiency, which directly impacts your Off-Grid Solar Cost: Complete Breakdown over time due to energy loss.
- Choose a Location: Find a clean, dry, and easily accessible spot near your battery bank. The shunt needs to be installed on the main negative cable, so consider where that cable runs.
The Critical Negative Busbar Connection
This is the single most important rule of shunt installation: the shunt MUST be installed on the main negative cable between your battery bank and ALL your loads and charging sources. This means every single negative wire coming from your inverter, charge controller, DC fuse block, and any other appliance, must connect to one side of the shunt. The other side of the shunt connects directly to the negative terminal of your battery bank.
Here’s why this is so critical: if even one load or charging source bypasses the shunt, its current won't be measured. This will result in inaccurate State of Charge readings, rendering your battery monitor largely useless.
- Identify the Main Negative: Locate the thick negative cable that runs from your battery bank to your main distribution point (often a negative busbar) or directly to your inverter.
- Disconnect and Install: Disconnect this main negative cable. Connect the end coming from your battery's negative terminal to one side of the shunt (often labeled "Battery Side" or with a battery icon).
- Connect Loads/Chargers: Connect the other end of the main negative cable (the one that leads to all your system's loads and charge sources) to the other side of the shunt (often labeled "Load Side" or with a system icon). If you use a negative busbar, the main negative from the busbar connects to the "Load Side" of the shunt. All other negative wires from your system components should then connect to this busbar.
- Tighten Securely: Ensure all connections on the shunt are tight. Loose connections can cause resistance, heat, and inaccurate readings.
This setup ensures that every single amp-hour leaving or entering your battery bank passes through the shunt, allowing for precise coulomb counting. This principle is fundamental to setting up reliable How to Set Up Battery Monitoring for any off-grid system.
Wiring the Shunt and Monitor
Once the main power cables are connected to the shunt, it's time to wire the shunt to its accompanying monitor and provide power to the monitor itself.
- Connect the Sense Wire: Your battery shunt will have a small, usually thin, multi-conductor cable that connects to the battery monitor unit. This "sense wire" transmits the minuscule voltage drop across the shunt to the monitor, which then calculates the current. Plug or screw this cable into the designated ports on both the shunt and the monitor according to the manufacturer's instructions.
- Power the Monitor: The battery monitor unit itself needs a small amount of power to operate. This is usually supplied by a small positive wire that connects from your battery bank (often from the main positive terminal) to a dedicated positive input on the monitor. Be sure to include an appropriately sized in-line fuse on this positive wire to protect the monitor. This is generally a very low-amperage fuse, like a 1A or 2A fuse.
- Reconnect Power (Carefully): Double-check all your connections. Ensure no stray wire strands are touching, and all terminals are secure. Once you're confident, carefully reconnect the main positive battery cable you disconnected earlier. Then, turn your inverter back on, and uncover your solar panels. Your battery monitor should power up.
Initial Setup and Calibration
With everything wired, the final step is to set up and calibrate your battery monitor. This is where you tell the monitor about your battery bank's specific characteristics.
- Enter Battery Capacity: The most crucial piece of information your monitor needs is the total amp-hour (Ah) capacity of your battery bank. For example, if you have two 100Ah LiFePO4 batteries in parallel, your total capacity is 200Ah. This is how the monitor calculates your State of Charge percentage. You can typically find this setting in the monitor's menu, usually under "Battery Settings" or "Capacity."
- Synchronize State of Charge: For the monitor to be accurate from the start, you need to tell it when your battery is truly 100% full. The easiest way to do this is to fully charge your battery bank (let your solar panels or charger run until the batteries are completely topped off), and then manually trigger a "synchronize" or "sync to 100%" function on the monitor. Most smart shunts will also auto-synchronize to 100% after sensing a prolonged period of very low current draw once the battery voltage reaches a specific "full" threshold.
- Discharge/Charge Cycles: Over the first few discharge and charge cycles, your monitor will become even more accurate as it learns the nuances of your specific battery bank. Many users like to perform a full discharge (within safe limits, of course) and then a full charge to help the monitor get a precise baseline. For example, if you're trying to figure out How Many Batteries for an Off-Grid System and their true capacity, this step is essential.
Common Installation Mistakes and Troubleshooting
Even with the best intentions, it's easy to make a small error during installation, especially for those new to off-grid wiring. Recognizing common pitfalls and knowing how to troubleshoot can save you a lot of frustration.
Incorrect Wiring Location
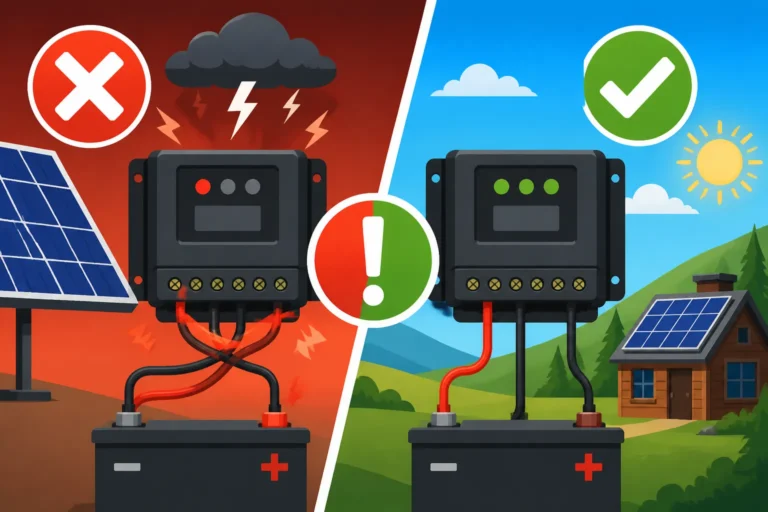
This is, by far, the most prevalent mistake and the one that causes the most head-scratching. We already hammered home the point: the shunt must be on the main negative path between the battery and all current-drawing or current-producing components. If you wire it incorrectly, your readings will be inaccurate, frustrating, and ultimately, useless.
Consider a scenario where you've installed the shunt only on the negative line from your inverter, but your solar charge controller's negative bypasses the shunt and goes directly to the battery's negative terminal. In this case, the shunt will accurately measure what your inverter is drawing, but it won't see the current coming in from your solar panels. This means your battery monitor will show an ever-decreasing State of Charge, even when the sun is shining and your batteries are actually charging! Another common error is connecting only some loads to the shunt, while smaller DC loads like lights or USB chargers have their negatives running straight to the battery. Again, these "parasitic loads" bypass the shunt, leading to an overestimation of your remaining battery capacity. Always remember that the shunt acts as the gatekeeper for all electrons entering or leaving the battery. If it's not the only gate, your data will be flawed. This is often listed among the Common Off-Grid Sizing Mistakes because inaccurate data leads to poor system management.
Loose Connections and Voltage Drop
Another common issue, often overlooked, is poor connections. Given the high currents that can flow through a shunt, loose or poorly crimped connections can lead to significant problems.
- Inaccurate Readings: A loose connection creates resistance. This resistance can cause a voltage drop that the shunt might register incorrectly, or it could simply impede proper current flow, leading to faulty readings on your monitor. This directly impacts the accuracy of your State of Charge.
- Heat Buildup: Resistance also generates heat. In a high-current circuit, a loose connection can become dangerously hot, posing a fire risk. This is particularly true if you are using a lower gauge for your How to Size Wire and Cables than is recommended for your system's peak loads.
- Intermittent Operation: Over time, a loose connection can corrode, vibrate loose, or simply fail, leading to intermittent power to your monitor or, worse, impacting your main battery connection.
Always ensure that all terminals, especially the large ones on the shunt itself, are clean, properly crimped, and tightened down to the manufacturer's specifications. A little dielectric grease can also help prevent corrosion in humid environments. When working with battery cables, investing in a good quality crimper for large gauge wire is essential for making secure, low-resistance connections.
What to Do When Readings are Off
So, you’ve installed your shunt, but the numbers just don't seem right. Don't panic! This is a common troubleshooting scenario.
- Re-check Wiring: First and foremost, go back to the "Critical Negative Busbar Connection" section. Visually trace every single negative wire in your system. Does every single negative path, whether from a load or a charger, pass through the shunt on the "load side" before returning to the battery? Are there any negatives that bypass it and go directly to the battery's negative terminal? Even a tiny wire for a small light can throw off the readings significantly over time.
- Recalibrate the Monitor: If you suspect the SoC percentage is off but the current readings seem plausible, try a full synchronization. Fully charge your battery bank until it's undeniably 100% full (you might need to confirm this with your charge controller or inverter's settings), then perform the "sync to 100%" action on your battery monitor. For lithium batteries, this means ensuring all cells are balanced and the Battery Management System (BMS) indicates a full charge.
- Look for Parasitic Loads: Sometimes, small devices draw power even when turned "off." If these loads bypass the shunt, they contribute to an unseen drain on your battery. Use a clamp meter to measure current on individual negative lines if you suspect a bypass.
- Check Shunt Integrity: In rare cases, the shunt itself could be faulty, or a small component in the monitor could be damaged. If you've exhausted all other options, use your multimeter to measure voltage drop across the shunt and compare it to its specifications (e.g., a 50mV drop at 500A). If it's far off, the shunt might need replacement.
Troubleshooting an off-grid system takes patience, but with a reliable shunt, you'll at least have accurate data to work with. For maintaining your whole system, you might find our Off-Grid Solar Maintenance Guide helpful in the long run.
Here's a quick comparison of basic vs. smart shunts to help you decide:
| Feature | Basic Shunt with Display | Smart Shunt with App |
|---|---|---|
| Core Function | Measures current for SoC calculation | Measures current for SoC, plus advanced data |
| Display | Small LCD/LED screen on a separate monitor | Dedicated monitor + Bluetooth app for phone/tablet |
| Connectivity | Hardwired display unit | Bluetooth (most common), sometimes USB |
| Data Provided | Voltage, Current (A), State of Charge (%), Ah used/remaining | Voltage, Current, SoC, Power (W), Ah, Time-to-go, Historical data, Battery temperature |
| Alerts/Alarms | Basic audible/visual alerts on monitor (if any) | Configurable alerts via app (low SoC, high current, etc.) |
| Setup/Configuration | Manual button presses on display | Via intuitive app interface |
| Ease of Monitoring | Requires looking at the display | Remote monitoring from phone, data logging |
| Typical Cost | Lower | Higher |
| Common Brands | Renogy, WindyNation, Amazon basics | Victron Energy, Renogy, SOK, EG4 |
If you're delving deeper into enhancing your battery monitoring or considering a complete system overhaul, check out resources like How to Choose an Off-Grid Battery Monitor for more detailed insights.
Disclaimer
The information provided in this guide is for general informational purposes only and does not constitute professional electrical advice. Working with electricity can be dangerous. Always consult with a qualified electrician or solar professional before undertaking any electrical work. Take all necessary safety precautions and comply with local electrical codes and regulations. The author and publisher are not liable for any injury or damage resulting from the use or misuse of this information.