How to Set Up Battery Monitoring
Living off-grid is an incredible journey towards self-sufficiency, but let's be honest, it comes with its own unique set of challenges. One of the biggest headaches people face is the mystery of their battery bank—you know, that feeling when your lights suddenly flicker or your fridge silently quits, leaving you wondering "What just happened to my power?" This guide is all about demystifying your power storage, walking you through how to set up robust battery monitoring so you can confidently track your energy usage, protect your valuable batteries, and avoid those frustrating, unexpected blackouts.
Why Battery Monitoring is Non-Negotiable for Off-Grid Living
Think of your off-grid battery bank as the beating heart of your entire power system. Without a way to consistently check its pulse, you're essentially flying blind. Many folks, especially when they're new to off-grid living, assume that if the lights are on, everything must be fine. But the truth is, what's happening inside those batteries is far more complex than a simple "on" or "off" indicator. Ignoring proper monitoring isn't just an inconvenience; it can lead to costly repairs, premature replacements, and a whole lot of stress.
Avoiding Unexpected Power Outages
There's nothing quite like the sudden, jarring realization that your power is out, especially when you're relying solely on your own system. Maybe you're in the middle of cooking dinner, running your well pump, or working on a project, and poof—everything goes dark. This isn't just annoying; it can be disruptive, impacting everything from food spoilage to safety. Without real-time information about your battery's state of charge, you're essentially playing a guessing game, pushing your system to its limits without even knowing it.
A good battery monitoring system acts like your system's crystal ball, providing precise information about how much energy you have left and how quickly you're using it. Imagine being able to see, minute by minute, how much power that coffee maker draws or what percentage your battery drops when you run the microwave. This foresight allows you to make informed decisions, like deciding to delay that laundry cycle until the sun is higher or conserving power on a cloudy day, completely sidestepping those frustrating, unforeseen outages. It takes the guesswork out of daily power management, giving you peace of mind instead of constant worry.
Extending Battery Lifespan and Protecting Your Investment
Let's talk about the cold, hard cash invested in your batteries. Whether you've opted for the traditional robustness of lead-acid batteries or the higher efficiency of LiFePO4 options, your battery bank is likely one of the most expensive components of your off-grid system. The lifespan of these batteries, which can be a decade or more for quality lithium batteries, is heavily dependent on how well you treat them. Improper charging and discharging practices are the number one killers of off-grid batteries, significantly shortening their useful life.
Over-discharging, which means consistently drawing too much power before recharging, can severely damage battery cells, especially in lead-acid batteries. On the flip side, overcharging can also cause irreversible damage. Even temperature extremes, if not accounted for, can degrade performance and longevity. A reliable battery monitor keeps a watchful eye on these critical parameters, alerting you before you push your batteries into dangerous territory. By ensuring your batteries operate within their optimal voltage and state-of-charge windows, you're directly contributing to their longevity, safeguarding your investment, and delaying the day you have to face the Cost to Replace Off-Grid Solar Batteries. This diligent care translates into substantial long-term savings and more reliable power.
Optimizing Energy Usage and System Performance
Beyond just preventing issues, battery monitoring empowers you to become a true energy efficiency expert. When you can see exactly how much power is flowing in and out, you gain an invaluable understanding of your energy consumption habits. You might discover that seemingly small appliances are actually significant phantom loads, quietly draining your power even when not in active use. This data is gold for identifying areas where you can trim your consumption or make smarter choices about when to use high-draw appliances.
For instance, if you notice your battery levels dipping drastically after running your well pump, it might prompt you to investigate more efficient pump options or plan your water usage during peak solar hours. Monitoring also helps you assess the overall performance of your solar array and charge controller. Are your panels generating as much power as they should be? Is your How to Choose an Off-Grid Charge Controller performing optimally? By tracking the energy input alongside the output, you can identify inefficiencies in your generation, pinpoint issues with panel shading, or even realize when it's time to consider expanding your solar array. It's about turning raw data into actionable insights to ensure your off-grid system runs as smoothly and efficiently as possible, maximizing every watt-hour you generate.
Essential Components for Effective Battery Monitoring
Okay, so you're convinced that battery monitoring is a must-have. But what exactly do you need to get started? It's not just about glancing at a vague light or guessing. A truly effective setup involves a few key components, each playing a vital role in giving you a complete picture of your battery health. Think of it as putting together a diagnostic toolbox for your power system.
The Heart of the System: Battery Monitors (Shunts)
At the core of comprehensive battery monitoring is the shunt-based battery monitor. Unlike simple voltage meters, which only tell you the current electrical pressure, a shunt-based monitor measures the actual current (amps) flowing both into and out of your battery bank. It achieves this by installing a small, precisely calibrated resistor (the shunt) in the negative electrical path of your battery bank. All current must flow through this resistor, creating a tiny voltage drop that the monitor measures and translates into accurate current readings.
These sophisticated devices then use this current data, combined with voltage readings and your battery's programmed capacity, to calculate a highly accurate "State of Charge" (SoC), often displayed as a percentage, much like your phone's battery indicator. Key features to look for in a good shunt-based monitor include real-time voltage, current, power (watts), consumed energy (watt-hours), and historical data. Many modern units, like the popular Victron SmartShunt or the offerings from Renogy, connect via Bluetooth to a smartphone app, making setup and data viewing incredibly convenient. If you're serious about truly understanding how many useful amp-hours you have left, this is the essential piece of equipment.
Voltage Meters and Multimeters: Your Basic Tools
While a shunt-based monitor is ideal, knowing how to read voltage is still fundamental. A basic voltage meter, often integrated into a charge controller or inverter display, provides an immediate snapshot of your battery's electrical pressure. For lead-acid batteries, voltage is a decent, though not perfect, indicator of state of charge when the battery is at rest (no charging or discharging). However, under load, voltage can sag significantly, giving a misleadingly low reading.
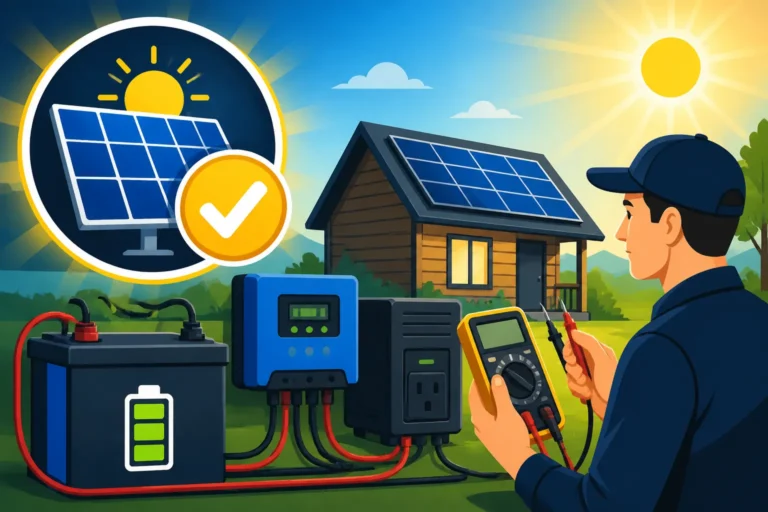
Even with an advanced monitor, a handheld digital multimeter is an invaluable tool for any off-grid resident. You can use it for quick, independent spot checks of individual battery terminals, ensuring connections are solid and verifying voltage readings. It's also critical for troubleshooting specific components, checking for continuity, or confirming the output of your solar panels directly. While not offering the continuous, dynamic data of a shunt, these simpler tools are crucial for verifying components and providing backup diagnostic capabilities.
Temperature Sensors: Protecting Your Batteries
Battery temperature often gets overlooked, but it's a critical factor, especially for lead-acid batteries and for ensuring the safety and performance of lithium batteries. Extreme heat can accelerate degradation, while freezing temperatures can cause irreversible damage, particularly if lead-acid batteries are discharged deeply while cold. Many modern LiFePO4 batteries have internal Battery Management Systems (BMS) that incorporate temperature protection, but external monitoring is still beneficial.
Some advanced charge controllers and battery monitors include dedicated temperature sensors that can be attached directly to your battery bank. These sensors feed data back to the monitor or charge controller, which can then adjust charging parameters or even cut off charging/discharging if temperatures move outside safe operating limits. For example, charging a lead-acid battery in cold weather requires higher voltages, while lithium batteries might require a complete cessation of charging below freezing temperatures to prevent permanent damage. Integrating a temperature sensor into your monitoring setup adds another crucial layer of protection, particularly important if your batteries are exposed to varying climates, like in a shed or an RV.
Advanced Monitoring: BMS (Battery Management Systems)
For those utilizing lithium iron phosphate (LiFePO4) batteries, a Battery Management System (BMS) isn't just a monitoring component; it's an absolute necessity. Most quality LiFePO4 batteries, such as those from Battle Born or EG4, come with an internal BMS. This sophisticated electronic brain performs a multitude of critical functions, far beyond what a simple external monitor can do.
The BMS actively monitors individual cell voltages within the battery pack, ensuring they remain balanced. This is crucial because even tiny differences in cell voltage can lead to one cell being overcharged or over-discharged, ultimately destroying the entire battery. The BMS also provides vital protection against over-voltage (charging too high), under-voltage (discharging too low), over-current (drawing too much power too fast), and over-temperature. Many advanced BMS units also communicate their data—like individual cell voltages, temperature, and cycle count—via Bluetooth or a dedicated communication port to an external display or app. When you're dealing with the higher upfront cost of lithium batteries, understanding the role of the BMS and its monitoring capabilities is paramount for their safety and longevity.
Step-by-Step Guide to Setting Up Your Battery Monitor
Alright, you've got your components, you understand why you need them, now let's get down to the practical side of things. Setting up a battery monitor, especially a shunt-based one, might seem a bit intimidating at first, but I promise it's totally manageable if you take it one step at a time. Safety first, always! Make sure you understand Off-Grid Solar Safety and Grounding before you begin any wiring.
Planning and Placement
Before you grab your tools, take a moment to plan. The proper placement of your shunt is critical for accurate readings. The most important rule for a shunt is that all current flowing to or from your battery bank (except for the battery's positive connection) must pass through it. This means the shunt should be installed on the negative side of your battery bank, typically between the battery's negative terminal (or negative busbar, if you have multiple batteries) and all your loads and charging sources. Nothing should bypass the shunt on the negative side.
Consider accessibility: you'll need to be able to connect wires to it and potentially access any diagnostic ports. Ensure the location is dry, well-ventilated, and protected from physical damage. For example, if you have a multi-battery setup, like what you might learn about in How Many Batteries for an Off-Grid System, ensure the shunt is placed on the main negative busbar, or the shared negative terminal, connecting all your batteries to your inverter, charge controller, and DC loads. Thinking this through prevents re-doing wiring later and ensures all current is accurately measured.
Wiring the Shunt and Power
Once you've chosen your spot, it's time for wiring. This usually involves two main connections for the shunt itself, plus power for the monitor's display unit (if separate).
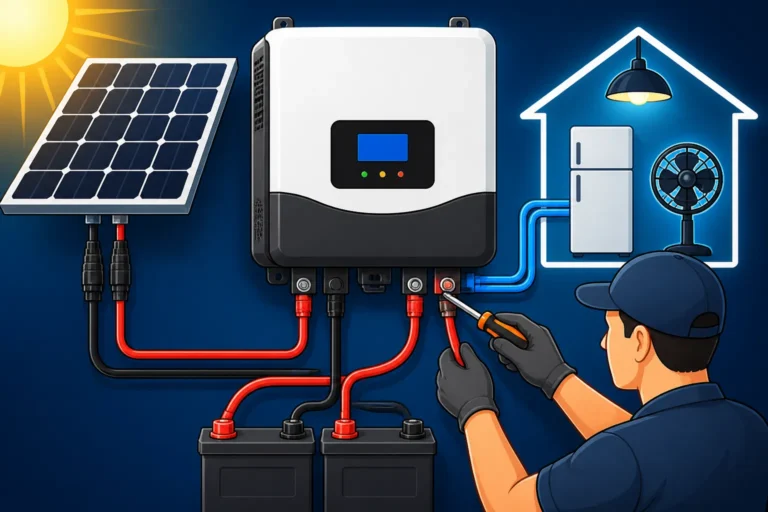
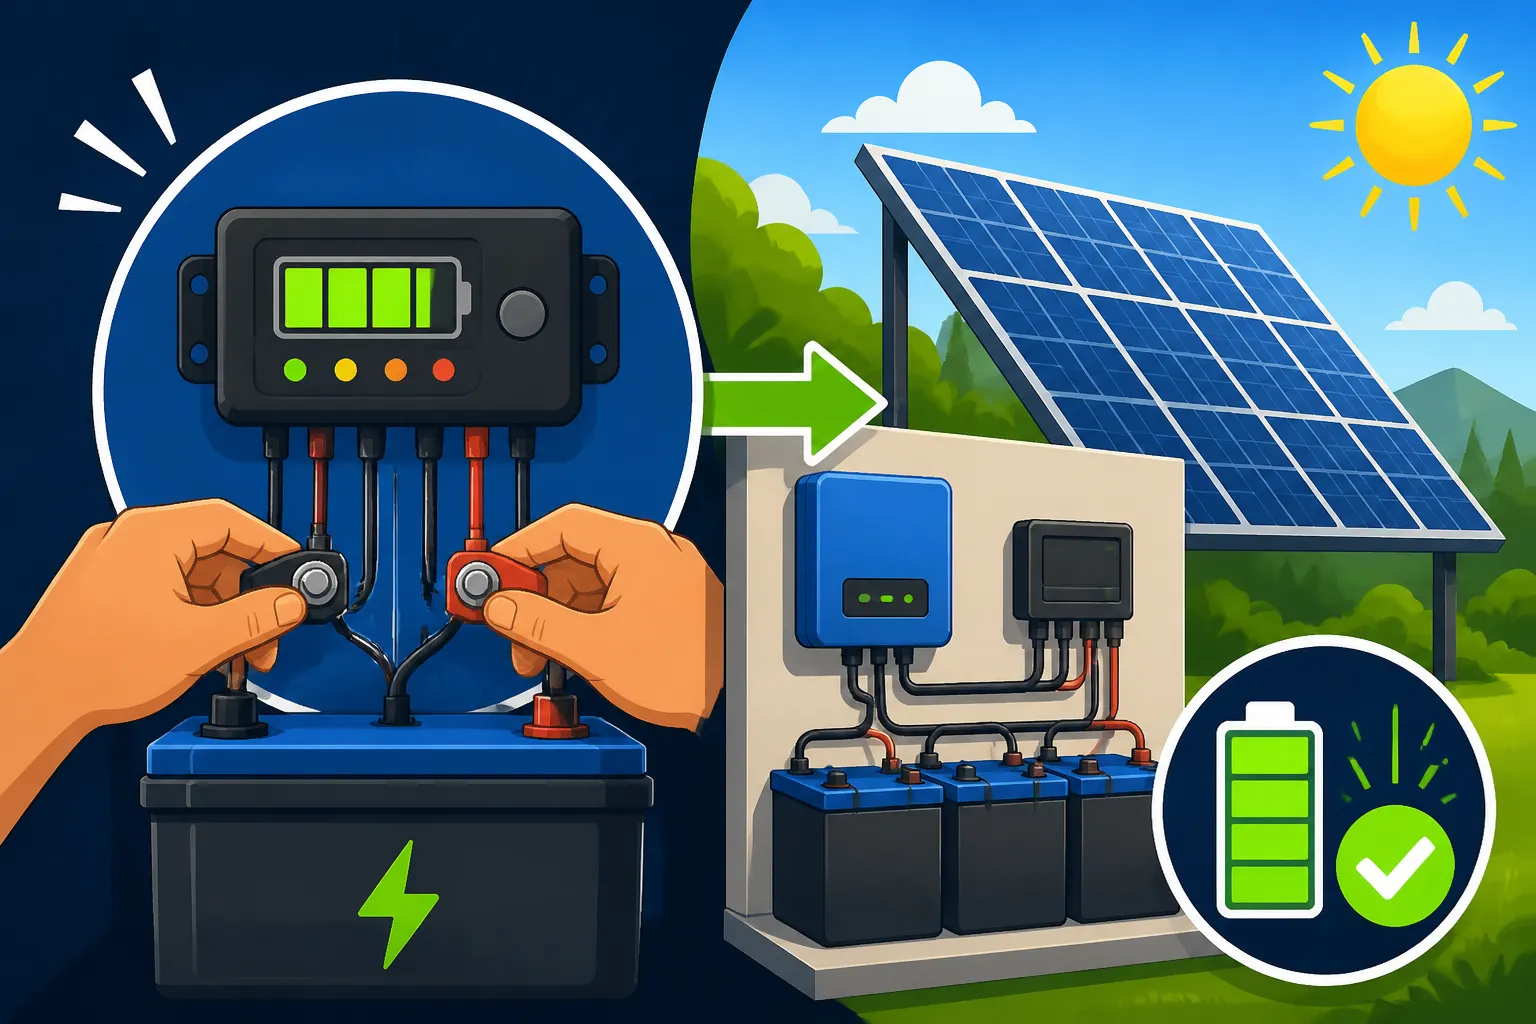
- Main Negative Cable: Disconnect all power sources (solar, generator, utility, etc.) and loads from your battery bank before starting. Connect the main negative cable coming from your inverter, charge controller, and DC load panel to one side of the shunt (often labeled "Load" or "System"). Then, connect a short, heavy-gauge cable (often supplied with the shunt) from the other side of the shunt (often labeled "Battery") directly to the negative terminal of your battery bank or your main negative busbar. This ensures all current goes through the shunt.
- Positive Sense Wire: The monitor unit itself needs power and a voltage reference. It will typically have a small-gauge positive wire that connects to the positive terminal of your battery bank. This wire is usually fused (often a small inline fuse is included) and provides the monitor with the exact voltage of your battery.
- Communication/Display Cable: If your monitor has a separate display unit or a communication port (like an RJ45 Ethernet cable for Victron products, or a dedicated cable for a Renogy monitor), connect this between the shunt and the display/smart dongle. Many modern shunts, like the Victron SmartShunt, use Bluetooth and don't require a physical display, making wiring even simpler as you just connect to its app.
Always double-check your connections for tightness and correct polarity. Loose connections can lead to inaccurate readings and potential fire hazards. Refer to your specific battery monitor's manual for precise wiring diagrams, as each model can have slight variations. Understanding the general principles of How to Wire a Battery Bank will definitely help here.
Configuration and Calibration
After the physical wiring is complete, the monitor needs to be configured with your battery bank's specific information. This is where you tell the monitor about the battery it's attached to, so it can make accurate calculations.
- Set Battery Capacity (Ah): This is the most crucial setting. You need to input the total usable amp-hour capacity of your entire battery bank. For example, if you have two 100Ah LiFePO4 batteries in parallel, your total capacity is 200Ah. This information is usually found on your battery's label or datasheet.
- Peukert's Exponent (if applicable): Some advanced monitors for lead-acid batteries allow you to input a Peukert's Exponent. This factor accounts for the fact that lead-acid batteries deliver less usable capacity at higher discharge rates. For LiFePO4 batteries, which have a relatively flat discharge curve, this setting is usually ignored or set to 1.00.
- Charge Efficiency: This setting (sometimes called "charge factor") tells the monitor how efficiently your batteries accept a charge. Lead-acid batteries are not 100% efficient (some energy is lost as heat during charging), so a setting of 85-95% might be appropriate. LiFePO4 batteries are much more efficient, often 98-99%, so this setting is less critical for them.
- Initial Synchronization: For accurate State of Charge (SoC) readings, your monitor needs to "synchronize" to 100% at least once. This means fully charging your battery bank until your charge controller shows it's complete, and then manually or automatically instructing the monitor to reset its SoC to 100%. Many monitors will automatically synchronize once a specific voltage and current threshold are met during charging.
Most monitors are configured via a dedicated display panel or, more commonly these days, through a smartphone app. For example, Victron's SmartShunt uses the VictronConnect app, which makes calibration and data viewing incredibly user-friendly. Always follow the manufacturer's instructions for your specific model.
Integrating with Other System Components
A truly powerful off-grid solar setup isn't just a collection of parts; it's a cohesive system where components communicate. Your battery monitor can be a central part of this communication hub, especially if you're using equipment from a single ecosystem or brand.
Consider linking your battery monitor's data with your charge controller and inverter. Many advanced models from brands like Victron Energy or Sol-Ark offer communication protocols (like VE.Direct, CAN bus, or proprietary links) that allow devices to share information. For instance, a Victron SmartShunt can send battery SoC data directly to a Victron MPPT charge controller, allowing the charge controller to have more accurate information for optimal charging algorithms. Some integrated systems, like the EcoFlow Power Kit for Off-Grid: Specs and Review, come with sophisticated central control units that combine monitoring data from all components, offering a unified dashboard.
Even without direct digital communication, simply having all your vital information—solar production from your charge controller, power draw from your inverter, and battery health from your monitor—readily accessible helps you paint a complete picture. This holistic view is invaluable when you're trying to figure out How to Calculate Off-Grid Solar Needs or diagnose subtle issues that might affect your power independence.
Interpreting Your Battery Monitoring Data for Off-Grid Success
Okay, so you've got your battery monitor all hooked up and humming along. Now what? The real magic happens when you start to understand what all those numbers and percentages actually mean for your daily off-grid life. It's like learning to speak the language of your power system, and it's essential for making smart decisions.
Understanding State of Charge SoC and Depth of Discharge DoD
These two acronyms are perhaps the most important metrics you'll get from your battery monitor.
- State of Charge (SoC): This is your battery's fuel gauge, usually expressed as a percentage (e.g., 85% SoC). It tells you how much energy is currently stored in your battery bank relative to its total usable capacity. A higher SoC means more available power.
- Depth of Discharge (DoD): This is the inverse of SoC. It indicates how much energy has been removed from your battery relative to its total capacity. For example, if your battery started at 100% and is now at 50% SoC, you've reached a 50% DoD.
The key to extending your battery life, especially for lead-acid types, is to avoid deep discharges. For traditional lead-acid batteries, regularly discharging below 50% DoD (meaning 50% SoC) can significantly shorten their lifespan. LiFePO4 batteries are far more tolerant and can handle deeper discharges, often down to 20% SoC (80% DoD) or even lower for short periods, without significant degradation. Your monitor will show you these percentages in real-time, allowing you to manage your usage effectively. Knowing your current SoC helps you determine if you have enough power to run that well pump or if you should hold off until your How Many Solar Panels for Off-Grid Living array has had more time to replenish the bank.
Recognizing Voltage Trends and Anomalies
While SoC is your fuel gauge, voltage is more like the "speed" or "pressure" of your system. It's a fundamental indicator of what's happening.
- Resting Voltage: This is the voltage of your battery when no significant current is flowing in or out (i.e., no charging or discharging). For lead-acid, this can give a rough estimate of SoC, but it's not precise. For lithium, resting voltage is less indicative of SoC but should always be within the safe operating range.
- Charging Voltage: When your solar panels or generator are charging, the voltage will rise. Your charge controller aims to keep this within specific parameters for optimal charging stages (bulk, absorption, float for lead-acid; bulk, absorption for lithium).
- Discharging Voltage (Voltage Sag): When you turn on an appliance, especially a high-draw one, you'll see a temporary dip in voltage, known as "voltage sag." This is normal, but excessive sag can indicate an undersized battery bank, loose connections, or a battery that is nearing the end of its life.
Your monitor will typically display real-time voltage. By observing these trends, you can learn a lot. For instance, if your battery voltage consistently drops very low under a moderate load, even with a decent SoC, it might indicate an issue with your battery's internal resistance or that you might need to reconsider your overall How to Size an Off-Grid Battery Bank. If you notice voltage spikes during charging, it could signal a problem with your charge controller's regulation.
Analyzing Current Flow Amps
The current reading, measured in Amps, tells you exactly how much electricity is moving at any given moment, and in which direction.
- Positive Amps: When current is positive, it means power is flowing into your batteries (charging). You'll see this when your solar panels are producing or your generator is running. The higher the positive amp reading, the faster your batteries are charging.
- Negative Amps: When current is negative, it means power is flowing out of your batteries (discharging). This happens when you turn on any DC or AC appliance. The higher the negative amp reading, the more power your loads are currently drawing.
Monitoring current flow helps you understand which appliances consume the most power. For example, if you turn on a microwave and see a sudden negative spike of 100+ amps, you know that appliance is a heavy hitter. This information is crucial for performing an effective How to Do an Off-Grid Load Analysis and adjusting your habits. If your panels are generating +20 amps but your loads are drawing -30 amps, you know your battery bank is actively being depleted, even with solar input. This insight is powerful for proactive energy management.
Leveraging Historical Data and Alarms
Many battery monitors, especially those with smartphone apps or data logging capabilities, provide access to historical data. This is where you can truly become a power detective!
- Tracking Daily Usage: Reviewing daily or weekly energy consumption patterns can reveal trends you might not notice in real-time. Perhaps you consistently draw more power on weekends, or your consumption spikes every evening. This data helps you fine-tune your How to Calculate Daily Energy Usage estimates and optimize your system.
- Identifying Seasonal Trends: Historical data helps you understand how your power needs and generation change with the seasons. You'll see how much less solar production you get in winter and how your heating or cooling needs vary, informing future adjustments to your system, as discussed in How Winter Affects Off-Grid Sizing.
- Setting Alarms: One of the most practical features of advanced monitors is the ability to set alarms. You can configure alerts for:
- Low SoC: Get a notification if your battery drops below a critical percentage (e.g., 25% for LiFePO4), giving you time to reduce loads or start a generator.
- Low/High Voltage: Be alerted if voltage falls outside safe operating ranges.
- Temperature Warnings: Receive an alert if battery temperature gets too hot or too cold.
These alarms are your system's way of telling you, "Hey, pay attention!" before a small issue becomes a big problem. They are a game-changer for preventing critical battery issues and ensuring uninterrupted power.
Common Mistakes and Troubleshooting Battery Monitoring
Even with the best intentions, things can go awry during setup or operation. It's part of the off-grid learning curve! Knowing the most common pitfalls can help you avoid frustration and troubleshoot more effectively when something doesn't seem quite right with your battery monitoring setup.
Incorrect Wiring and Connections
This is, hands down, the most frequent issue people encounter. A battery monitor is only as good as its connections.
- Shunt Bypass: The number one mistake is inadvertently creating a path for current to bypass the shunt on the negative side. Remember, all negative current (from loads and chargers) must flow through the shunt to be measured. If you have a small DC load connected directly to the battery's negative terminal instead of the "load" side of the shunt, that current won't be accounted for, leading to inaccurate SoC readings that drift over time. Double-check your Off-Grid Solar Wiring Diagram Explained to ensure everything is routed correctly through the shunt.
- Loose Terminals: Vibrations, temperature changes, or simply not tightening connections enough can lead to loose terminals. A loose connection can cause inaccurate readings, voltage drops, and even generate heat, posing a fire risk. Always use the correct tools and verify that all terminals are snug.
- Reversed Polarity: While less common with modern, well-labeled equipment, connecting a wire with reversed polarity can damage the monitor or other components. Always visually confirm positive to positive and negative to negative before energizing any part of your system.
If your SoC readings seem off, jump erratically, or the monitor isn't turning on, the very first thing to do is a thorough inspection of all your wiring, ensuring every connection is secure and correctly routed through the shunt.
Improper Calibration and Settings
Once wired, the monitor's brain needs the right information to do its job. Incorrect settings are another common source of frustration.
- Wrong Battery Capacity: If you tell your monitor you have a 400Ah battery bank when you actually only have 200Ah, all its SoC calculations will be wildly inaccurate. It will think it has twice as much power as it truly does, leading to unexpected shutdowns when the battery is actually empty, even if the monitor says 50% SoC. Always verify the total usable amp-hour capacity of your entire battery bank.
- Not Synchronizing at 100%: A new monitor, or one that has lost power, needs to be "synchronized" to 100% SoC after the battery bank is fully charged. If you skip this step, the monitor has no baseline, and its readings will "drift" over time, becoming less and less accurate. Ensure your system reaches a full charge, and then either manually synchronize or allow the monitor's automatic synchronization feature to kick in. This is often tied to your How to Program a Charge Controller settings and absorption voltage.
- Incorrect Charge Efficiency/Peukert's Exponent: While less critical for LiFePO4, if these settings are off for lead-acid batteries, the monitor won't accurately account for charging losses or discharge rate effects, again leading to SoC drift. Consult your battery and monitor manuals for recommended settings.
If your monitor's SoC consistently seems to be "off" compared to what your system is actually doing, revisit your configuration settings and perform a full charge cycle followed by a synchronization.
Ignoring Environmental Factors
Your battery bank doesn't live in a vacuum; its performance and your monitoring readings can be affected by the environment.
- Temperature Effects: As mentioned earlier, extreme temperatures significantly impact battery performance and capacity. A monitor might report 50% SoC, but if your lead-acid batteries are freezing cold, their usable capacity at that moment might be much lower due to increased internal resistance. Conversely, very hot batteries can also show unusual behavior. If you notice unusual performance and your monitor has a temperature sensor, check those readings. You might need to consider solutions for Off-Grid Solar Cost in Cold Climates or add insulation to your battery box.
- Panel Shading: Even partial shading on your solar panels can dramatically reduce their output, affecting how quickly your batteries recharge. If your monitor shows a low charge rate despite sunny conditions, it's worth checking your panels for shadows from trees, dirt, or even an accumulation of snow. This isn't a monitor error, but an external factor impacting your system that the monitor helps you diagnose.
- Parasitic Loads: Sometimes, tiny, continuous draws that you don't even think about (like a small LED indicator light, or an idle inverter) can slowly drain your battery bank. Your monitor, by showing a persistent low negative amp draw even when everything seems off, can help you identify these "phantom loads" and take steps to eliminate them, saving precious power.
By understanding how environmental factors can influence your readings, you can interpret your monitor's data more accurately and take appropriate action, ensuring the longevity and reliability of your off-grid power system.
Comparing Battery Monitoring Methods
To help you decide which monitoring method is right for your off-grid setup, here's a quick comparison of common approaches.
| Monitoring Method | Pros | Cons | Best For |
|---|---|---|---|
| Basic Voltage Meter | Simple, inexpensive, often built into charge controllers/inverters. Easy to read. | Only shows voltage, which is a poor indicator of true SoC, especially under load or for LiFePO4. No cumulative energy tracking. | Small, temporary systems (e.g., single-use camping), as a quick reference, or for verifying other systems. |
| Shunt-Based Monitor | Highly accurate State of Charge (SoC), tracks amp-hours in/out, voltage, current, power. Historical data. | Requires careful wiring (all current through shunt). Slightly more complex to install and configure initially. Higher cost than basic voltage meters. | Any serious off-grid system (RV, cabin, tiny home, full house) where precise power management and battery longevity are crucial. |
| Integrated BMS (for LiFePO4) | Essential for LiFePO4 safety (cell balancing, over/under protection). Often provides internal monitoring data. | Only available with LiFePO4 batteries. External shunt-based monitor still recommended for whole-system power tracking, as BMS only monitors the battery itself. | All LiFePO4 battery banks; provides critical safety and internal cell health monitoring. Pair with a shunt for overall system insights. |
Disclaimer
Please remember that while off-grid solar systems offer incredible independence, they involve electricity. Always exercise extreme caution when working with electrical components. If you are unsure about any installation or wiring step, it is strongly recommended to consult with a qualified electrician or solar professional. This guide is for informational purposes only and should not replace professional advice.