How to Install Roof-Mounted Solar Panels
Trying to figure out how to get those shiny new solar panels securely and safely onto your roof can feel like a monumental task, riddled with worries about leaks, structural integrity, and making all the right electrical connections. It's enough to make anyone feel a bit overwhelmed! But don't you worry, this comprehensive guide is going to walk you through every single step of installing roof-mounted solar panels for your off-grid system, ensuring you're confident and capable from start to finish.
Understanding Your Roof and Structural Considerations
Before you even unbox your first solar panel, it's absolutely crucial to get intimately familiar with the very foundation of your solar dreams: your roof. Skipping this step is like building a house on sand – it might look good for a while, but it's bound to cause problems down the line. We need to make sure your roof is up to the challenge of supporting an entire solar array, both for safety and long-term durability.
Assessing Your Roof Type and Condition
Different roofs have different personalities, and what works for one might be a nightmare for another. For instance, if you have a traditional asphalt shingle roof, you'll be dealing with specific flashing and sealing techniques to prevent water intrusion. These are generally easier to work with than, say, a delicate slate or clay tile roof, which might require specialized mounting hardware or even professionals experienced in working with those materials to avoid costly damage. Metal roofs, especially standing seam, can sometimes offer easier, non-penetrating mounting options, which is a huge plus for waterproofing, but not all metal roofs are created equal. Corrugated metal will still require penetrations but has distinct methods for sealing.
Beyond the type, the condition of your roof is paramount. Think of this as its pre-existing health. Is it nearing the end of its lifespan? Are there any visible signs of wear, soft spots, or water stains in your attic? Installing a solar array means those panels will be up there for 20-25 years, so you don't want to put them on a roof that needs to be replaced in five. Imagine having to uninstall and reinstall your entire solar setup just to put on a new roof – that's a headache and an expense you definitely want to avoid! Take the time now to visually inspect your roof, from the shingles themselves to the flashing around vents and chimneys. If anything looks suspect, address it before you even think about solar. This might involve patching, re-sealing, or even a full roof replacement, but it's a critical investment in your off-grid future.
A good visual inspection often means getting up close and personal, safely of course, to check for cracked shingles, loose nails, excessive moss or algae growth, or any areas where the granular surface of asphalt shingles has worn away, exposing the fiberglass mat underneath. These are all indicators that your roof might not be in prime condition for holding solar panels for decades. If you're not comfortable doing this yourself, a reputable roofing contractor can provide an assessment and perform any necessary repairs. It’s a small upfront cost that can save you a fortune and a lot of stress in the long run.
Structural Integrity and Load Bearing
Now, let's talk about weight. Solar panels aren't light, and neither are their mounting systems. A typical solar panel weighs around 40-50 pounds, and a small array can easily add hundreds of pounds to your roof. This weight needs to be distributed properly and supported by the underlying structure of your home. Your roof framing, typically rafters or trusses, is designed to support a certain "live load" (like snow or wind) and "dead load" (the weight of the roof materials themselves). Adding solar panels increases that dead load. For most modern homes, built to current codes, a standard solar array might not be an issue. However, if you have an older home, a cabin with a less robust structure, or if you live in an area with heavy snow loads, a structural assessment is non-negotiable.
Consulting a structural engineer might seem like an extra hassle or expense, but believe me, it’s worth every penny. They can assess your roof's current load-bearing capacity and tell you if it can handle the additional weight of your chosen solar system. They'll look at the size and spacing of your rafters, the type of wood, and the overall condition of the roof framing. In some cases, they might recommend reinforcement, such as adding sister joists or strengthening existing members, which is much easier to do before panels are installed. Ignoring this could lead to sagging roofs, cracked ceilings, or, in extreme cases, structural failure, which is a nightmare scenario for any off-grid homesteader.
Beyond the static weight of the panels, you also have to consider dynamic loads like wind and snow. If you live in a region prone to hurricanes or high winds, your mounting system needs to be incredibly robust. Similarly, heavy snowfall can add immense weight to your roof. Your solar panels themselves will contribute to the total snow load, and the mounting hardware must be able to withstand these forces without failing. A structural engineer will take these factors into account when advising on your roof's capacity, ensuring your system is built to last through all seasons. For instance, here in the foothills of the Rockies, ensuring proper snow load capacity is critical, as a foot of wet snow can weigh significantly more than dry, powdery snow, making the panels a substantial additional burden. Understanding these variables is key to designing a reliable off-grid system.
Essential Tools and Safety Gear for Installation
Alright, so you’ve assessed your roof and know it’s ready. Now, let’s talk about getting the job done right and, more importantly, safely. This isn't a task to be rushed or done without the proper equipment. Having the right tools makes the work easier and more accurate, while the right safety gear protects you from potential hazards. Trust me, a trip to the hardware store is much better than a trip to the emergency room!
Tools for Measuring, Marking, and Fastening
When you're working on a roof, precision is your best friend. A good, sturdy tape measure is indispensable for laying out your array dimensions and ensuring everything is square and evenly spaced. A chalk line will help you create perfectly straight lines for your rails, which is crucial for a clean, professional-looking installation and proper panel alignment. A reliable stud finder is also absolutely critical. You need to locate your roof rafters or trusses to ensure your mounting hardware is securely fastened into structural wood, not just plywood sheathing. This prevents future leaks and provides the necessary structural support.
For the actual fastening, a powerful drill (cordless is a lifesaver on a roof) is essential. You’ll need various drill bits: pilot bits for pre-drilling holes for lag screws, and potentially specialized bits if you have a metal or tile roof. A good quality socket wrench set will be invaluable for tightening all the nuts and bolts on your mounting hardware, rails, and panel clamps. Investing in quality tools, like those you might find on Amazon, will save you frustration and ensure secure connections. Don't skimp on these; cheap tools can strip fasteners, leading to headaches and potential compromises to your system's integrity. Having a durable, impact-rated driver can make a huge difference, especially when you're driving dozens of lag screws.
Beyond the basics, think about a level – a long one if you can manage it – to ensure your rails are perfectly level across the span. While panels don't need to be perfectly level for operation, a level array just looks better and is easier to install consistently. A caulk gun for applying sealant is also a must-have, and make sure it’s a good one that won’t seize up on you halfway through the job. Also, a utility knife is always handy for cutting sealants, flashing, or cable ties. These seemingly small details can greatly improve the efficiency and quality of your installation.
Prioritizing Personal Safety
I cannot stress this enough: safety on a roof is paramount. Falls are the leading cause of fatalities in construction, and even a small residential roof can be incredibly dangerous. Your personal safety gear is not optional; it’s a non-negotiable part of the job. First and foremost, you need fall protection. This includes a full-body harness, a robust lifeline, and an anchor point securely fastened to the roof structure. Many roofers use temporary anchor points that can be removed and sealed after the job, or you might be able to tie off to a sturdy chimney or other permanent structure. Whatever you do, never work on a roof, especially one with a significant pitch, without adequate fall protection. It's simply not worth the risk.
Beyond fall protection, electrical safety is incredibly important. Even a single solar panel, when exposed to sunlight, generates a DC voltage that can be dangerous. When panels are wired in series, those voltages add up quickly. Always wear insulated gloves when handling wires and panels, especially when connecting them. It's good practice to cover panels with a tarp or blanket if you’re working on the wiring during daylight hours to reduce their output and mitigate shock hazards. Additionally, implement lockout/tagout procedures for your DC disconnects if you're working on the electrical components of the system post-installation to ensure no one accidentally re-energizes the system.
Other essential personal protective equipment (PPE) includes sturdy work boots with good grip to prevent slips, durable work gloves to protect your hands from scrapes and cuts, and safety glasses to shield your eyes from debris, dust, or accidental splashes of sealant. Don't forget sun protection – a wide-brimmed hat, sunscreen, and plenty of water are vital, especially on a sunny roof. Take frequent breaks, stay hydrated, and if you’re working with a partner, always keep an eye out for each other. This is a big project, and rushing or cutting corners on safety is a recipe for disaster. Remember, the goal is to enjoy your off-grid power, not to become a cautionary tale!
Step-by-Step Guide to Mounting Your Solar Panels
With your roof assessed and your safety gear on, it’s time for the exciting part: getting those panels up there! This isn’t just about drilling holes; it’s a systematic process that ensures your array is securely anchored, weatherproofed, and optimized for maximum sun exposure. Taking your time with each step will prevent costly mistakes and ensure the longevity of your system.
Planning and Layout on the Roof
Before any drilling commences, the most critical step is a detailed plan and layout. You should have already done your system sizing and calculated How Many Solar Panels for Off-Grid Living you need. Now, visualize how those panels will fit on your specific roof. Consider factors like shading from trees, chimneys, or other roof structures. Even a small amount of shading on one panel can significantly reduce the output of an entire string of panels. Use a shading analysis tool or simply observe the sun's path throughout the day and across seasons. Aim for the south-facing slope of your roof if possible (in the Northern Hemisphere) for optimal year-round production, or southeast/southwest if south isn't an option.
Once you have your general area identified, measure and mark the exact dimensions of your planned array. This involves accounting for panel size, spacing between panels, and necessary clearances from roof edges, ridges, and valleys, often dictated by local building codes for fire safety and access. A common clearance requirement is usually 6 inches from the roof edge. Use your chalk line to snap clean, straight lines that represent the outer boundaries of your array and the lines where your mounting rails will run. This visual guide is invaluable. Don't just guess; mark everything out. You can even lay out the panels loosely on the roof (if safe to do so) to get a real-world feel for the spacing and ensure everything aligns as planned before you commit to drilling. This pre-visualization step, which is an integral part of Designing an Off-Grid Solar System Step by Step, really helps catch potential issues early.
Another crucial part of planning the layout is considering future expansion. If you anticipate needing more power down the line, can you easily add more panels to your current layout without having to completely rearrange everything? Think about access for maintenance and cleaning as well. While tightly packed arrays might maximize space, they can make it a nightmare to clean individual panels or troubleshoot wiring. Sometimes, leaving a little extra space or planning for an adjacent array section makes future life much simpler. Remember, this isn't just about putting panels on a roof; it's about creating a functional, maintainable, and expandable power source for your off-grid life.
Installing the Mounting Hardware
This is where the rubber meets the roof, literally. The primary goal here is to securely anchor your solar array while maintaining your roof’s waterproofing. Start by locating your roof rafters or trusses. This is where your stud finder becomes your best friend. Mark these structural members clearly on your roof surface. Your mounting hardware, such as L-feet, standoffs, or proprietary attachments, will fasten directly into these rafters. Do not, under any circumstances, attach mounting hardware only into the roof sheathing; it won't hold and will likely lead to leaks and structural failure.
For asphalt shingle roofs, the most common method involves installing flashing. This flashing, often a metal plate with a sleeve or raised section, is designed to be installed under the shingle above it and over the shingle below it, creating a waterproof barrier. You’ll drill a pilot hole through the shingle and into the rafter, apply a generous bead of industrial-grade sealant (like an approved roofing caulk or butyl tape) into and around the hole, then slide the flashing underneath the upper shingle, align the hole, and secure a lag bolt through the flashing and into the rafter. The L-foot or standoff then typically attaches to this flashing. It’s a multi-layer approach to ensure no water can penetrate. Brands like Renogy offer comprehensive mounting kits that include flashing specifically designed for shingle roofs, and you can find similar options readily available on Amazon.
For metal roofs, especially standing seam, many systems use clamps that grip the standing seams themselves, requiring no roof penetrations – a huge advantage for waterproofing. For corrugated metal or exposed fastener metal roofs, you’ll typically use standoffs or brackets that bolt directly through the metal, into the purlins or rafters below. Again, proper sealing with specialized washers and sealants is paramount. Tile roofs usually require specialized tile-replacement flashing or tile cutting to allow for the mounting hardware to penetrate the underlayment and attach to the rafters, carefully replacing or sealing around the tile to maintain the aesthetic and waterproof integrity. Whichever method you use, apply sealant liberally around all penetrations and ensure every lag bolt is torqued to the manufacturer’s specifications to prevent loosening over time. This step is a critical component of How to Install Off-Grid Solar Panels and really emphasizes How to Waterproof Roof Penetrations correctly.
Attaching Rails and Panels
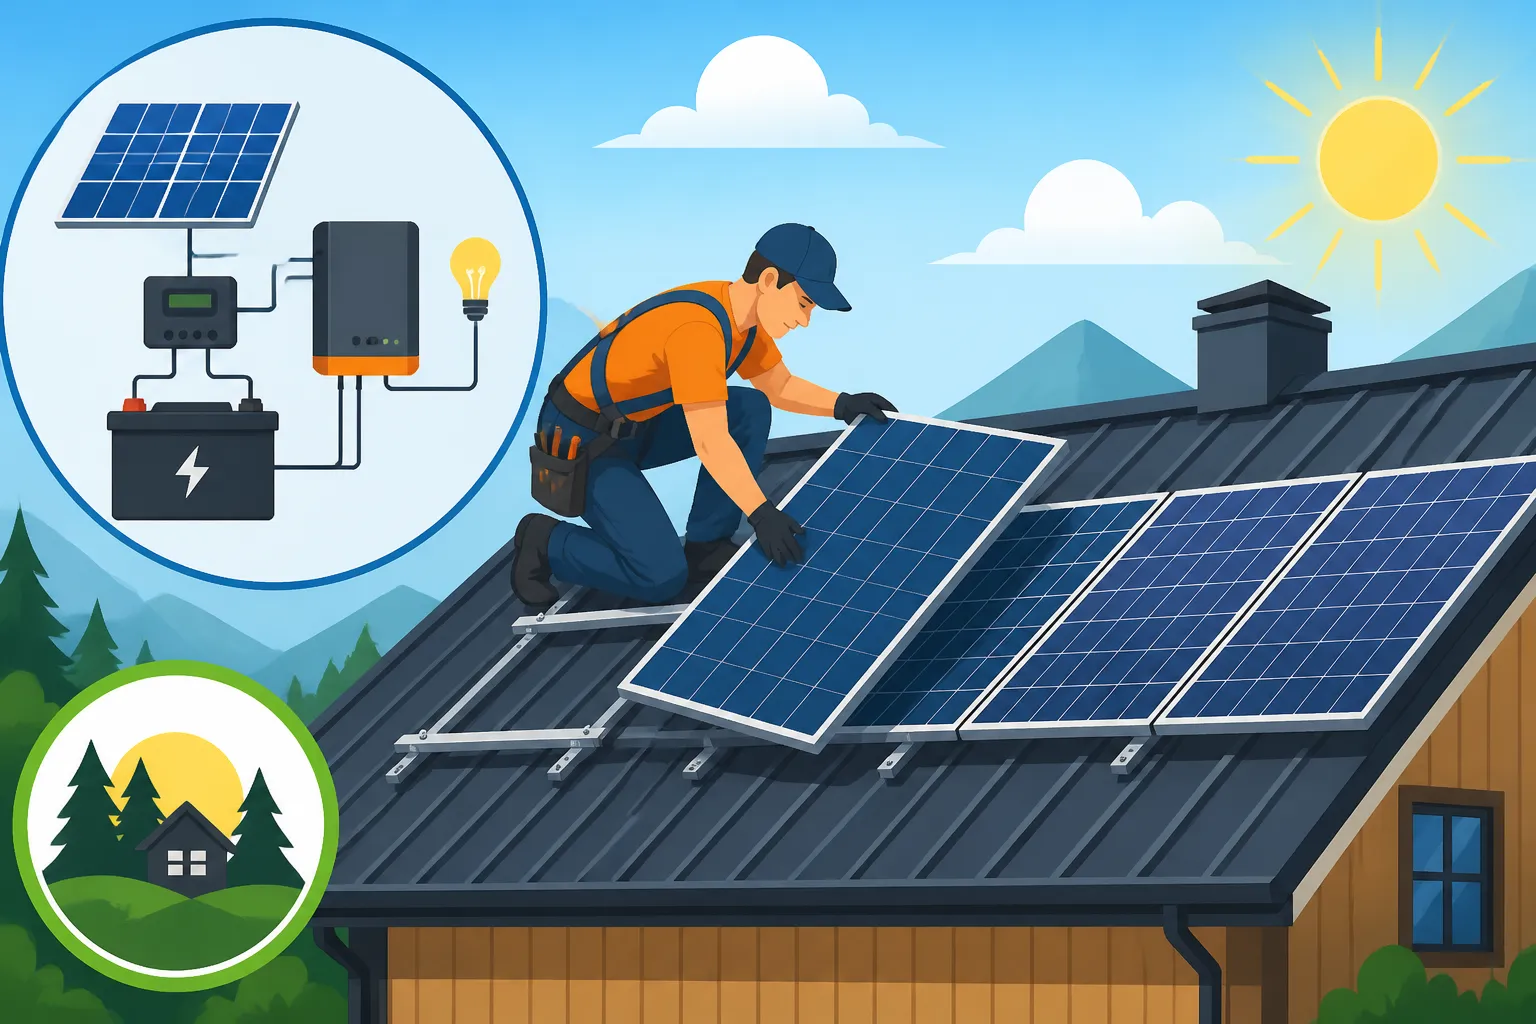
Once your L-feet, standoffs, or other mounting points are securely installed and sealed, it's time to connect the rails. These are the aluminum channels that your solar panels will rest upon. Mount the rails to the L-feet using the provided hardware, making sure they are perfectly parallel and level. Use your level frequently during this step. Imperfections here will become glaringly obvious when you try to align your panels, making the final stages much harder. Ensure the rails are spaced according to your panel manufacturer's recommendations, usually with at least two rails supporting each panel to prevent sagging or undue stress. Many rail systems allow for some adjustability to ensure everything lines up perfectly.
With the rails in place, you can now carefully lift and position your solar panels. This is often a two-person job, as panels can be bulky and awkward to handle on a roof. Start at one end of your array. The first panel will typically be secured with "end clamps" at its outer edge. Subsequent panels will use "mid-clamps" that clamp down on the edges of two adjacent panels, securing both simultaneously. The final panel in each row will also use end clamps. Ensure that each clamp is tightened to the manufacturer's specified torque. Overtightening can damage the panel frame, while undertightening can lead to panels shifting in high winds.
As you place each panel, double-check its alignment with its neighbors and the overall array. Take a step back and visually inspect the entire section to ensure everything looks straight and uniform. While a small misalignment might not affect performance, it can be an indicator of other issues and can detract from the professional look of your system. Remember, these panels will be sitting on your roof for decades, so a little extra time spent on precise installation now will pay dividends in aesthetics and peace of mind later.
Wiring and System Integration on the Roof
With your panels securely mounted, the next phase is connecting them electrically. This involves carefully running DC wiring from the panels, through proper weatherproofing, and down to your charge controller and inverter. This part requires careful attention to detail, as incorrect wiring can lead to poor performance, damage to components, or even fire hazards.
Running DC Wiring from Panels
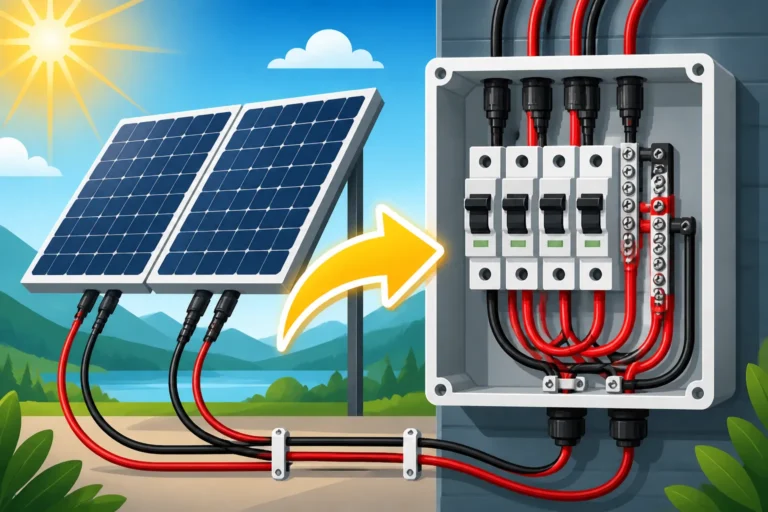
The first step in wiring is understanding how your panels will be connected: in series, parallel, or a combination of both (series-parallel). This decision is typically made during the How to Size an Off-Grid Solar System phase and depends on your system voltage (12V, 24V, or 48V) and your charge controller's specifications. Panels wired in series add their voltages together, while panels wired in parallel add their current (amperage). Most residential systems utilize some combination to achieve an optimal voltage and current for the MPPT charge controller. Each solar panel comes with two cables, typically ending in MC4 connectors – one positive and one negative. These connectors are designed for secure, weatherproof connections.
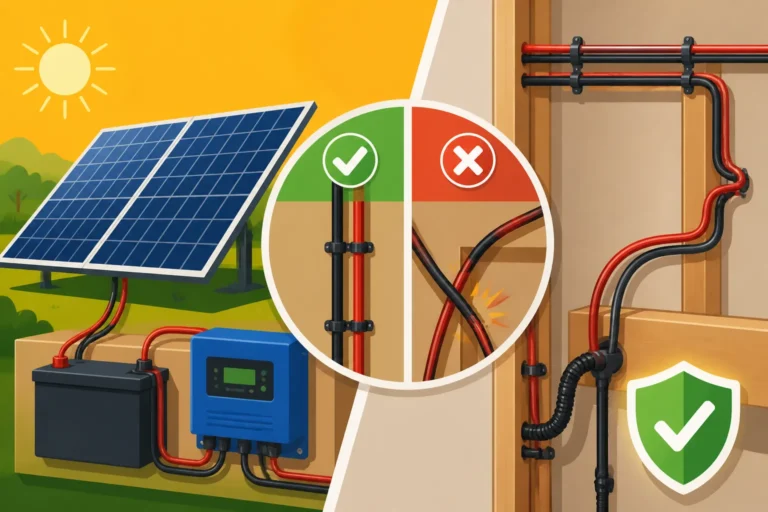
As you connect your panels, ensure all connections are tight and secure. You’ll be running these cables along the underside of your solar array rails. Use UV-resistant cable ties or specialized cable clips to neatly secure the wires to the rails. This prevents them from sagging, flapping in the wind, or getting abraded against sharp edges, which could lead to shorts or damage over time. Proper cable management also makes troubleshooting and future maintenance much easier. The cables should be routed to a central point, often a combiner box, which groups the strings of panels together before sending a single, higher current cable down to the charge controller.
From the combiner box (or directly from the array if it’s a small system), you’ll run thicker DC cables down into your home or utility shed where your charge controller, battery bank, and inverter are located. These cables need to be sized appropriately for the current they will carry and the distance they will travel to minimize voltage drop. Refer to the Off-Grid Solar Wiring Diagram Explained in your system’s manual. This is a crucial step to ensure efficient power transfer and is covered in more detail in articles like How to Wire Solar Panels in Series and How to Wire an Off-Grid Solar System.
Weatherproofing and Cable Penetrations
Just like with your mounting hardware, any point where cables penetrate your roof needs meticulous weatherproofing. This is often done using a dedicated roof gland or a specialized conduit entry point that is sealed with robust, UV-resistant sealant. Think of it like a miniature, dedicated chimney for your wires. The goal is to prevent any water from entering your home through these openings, which could lead to extensive damage to your structure and electrical components.
The best practice is to run your solar cables through conduit, whether flexible or rigid, from the array entry point all the way down to your electrical components. Conduit protects your cables from the elements (sun, rain, snow), physical damage (from animals or accidental impacts), and general wear and tear. It also adds a layer of safety by containing the wires and making them less accessible. Ensure any conduit runs have proper drip loops before they enter a junction box or building penetration. A drip loop is a section of cable that dips below the entry point, causing any water running along the cable to drip off before it reaches the penetration, rather than wicking into your home.
When sealing your roof penetrations, use a high-quality, long-lasting sealant specifically designed for outdoor, roofing applications. Products like self-leveling lap sealant (often used on RVs) or premium silicone sealants are good choices. Apply it generously, covering not just the opening but also overlapping onto the roof surface to create a wide, waterproof seal. Regularly inspect these seals during your Off-Grid Solar Maintenance Guide checks to ensure they haven't cracked or deteriorated over time, especially after harsh weather.
Connecting to the Charge Controller and Inverter
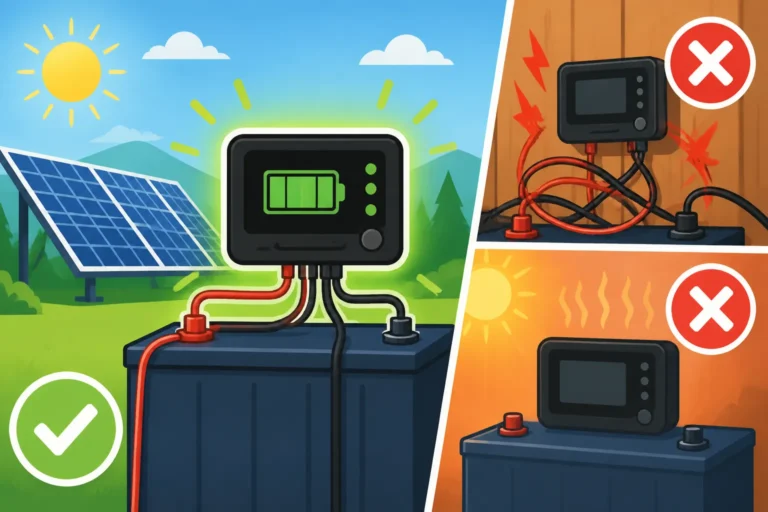
Once your DC cables are safely routed off the roof and into your equipment area, the final electrical connections begin. The typical path is: solar panels -> DC disconnect (optional but recommended for safety) -> charge controller -> battery bank -> inverter. The charge controller is a vital component; it regulates the voltage and current from your solar panels to efficiently and safely charge your batteries, preventing overcharging and prolonging battery life. Articles like How to Connect a Charge Controller delve deeper into this.
When making these connections, always confirm polarity (positive to positive, negative to negative) multiple times with a multimeter before connecting. Incorrect polarity can severely damage your charge controller or batteries. Ensure all terminals are clean and connections are tight. The voltage from your solar array should be within the operating range of your charge controller, and the current rating should not exceed its maximum input. If you have chosen a good MPPT charge controller, it will optimize the power extraction from your panels, even in fluctuating conditions.
Finally, connect your battery bank to your inverter. The inverter takes the DC power from your batteries and converts it into AC power, which is what most of your household appliances use. Ensure the inverter is properly sized for your maximum load (both continuous and surge loads) and that its input voltage matches your battery bank voltage. This entire sequence of connections is the heart of your off-grid system, and careful, methodical work here will ensure reliable power for years to come. Remember to always make your battery connections last and check for continuity before applying power from the solar array.
| Roof Type | Suitable Mounting Hardware | Key Considerations |
|---|---|---|
| Asphalt Shingle | L-feet with flashing | Requires roof penetrations, crucial to seal flashing correctly. |
| Metal (Standing Seam) | Non-penetrating clamps | Often easiest to install, preserves roof integrity, no holes needed. |
| Metal (Corrugated/Exposed Fastener) | Standoffs with specialized washers | Requires penetrations, critical sealing for each fastener point. |
| Tile (Clay/Concrete) | Tile replacement flashing, tile hooks | Fragile tiles, may require cutting or replacing tiles, specialized tools. |
| Flat Roof (e.g., Commercial, Shed) | Ballasted racking, penetrative mounts | Requires tilt angle consideration, wind load calculations for ballast. |
| Wood Shake/Cedar | Similar to asphalt, but more care | Can be delicate, prone to splitting, fire code compliance. |
Post-Installation Checks and Maintenance
You’ve done the hard work of installation, and now it’s time to flip the switch and see your system come to life! But the job isn't quite over. A few crucial post-installation checks ensure everything is operating as it should, and establishing a routine maintenance schedule will guarantee your off-grid solar system continues to perform optimally for decades.
Verifying System Performance
Once all the components are installed and wired, the initial system checks are vital. Before connecting your panels to the charge controller, use a multimeter to measure the open-circuit voltage (Voc) of your solar array (or each string if you have multiple). This reading should match what you expect from your panel specifications and wiring configuration. Then, you can connect the panels to the charge controller and observe the charging current. On a sunny day, you should see a substantial current flowing into your batteries, indicating that the panels are producing power. Your charge controller's display or monitoring app (if available) will provide real-time data on panel voltage, current, and battery charging status. Many modern controllers from brands like Renogy or Victron Energy have excellent diagnostic displays.
Beyond just seeing numbers, you'll want to verify continuity and check for any potential shorts. With the system disconnected from power, use your multimeter to check resistance between positive and negative terminals to ensure there are no unintended connections. It’s also wise to check for ground faults – ensure that none of your live conductors are inadvertently touching the grounding system. These initial tests confirm that your Off-Grid Solar System Design Basics were correctly implemented and that all connections are sound. Don't be afraid to double-check everything; it's far better to catch a small issue now than to face a major problem down the line.
Finally, allow the system to operate for a full day, or even a few days, monitoring its performance. Is the battery bank reaching full charge? Is the inverter providing stable AC power when you turn on appliances? Pay attention to any unusual noises from the inverter or charge controller, or excessive heat. Many charge controllers and inverters have built-in fault codes or warning lights. Familiarize yourself with these, as they are your system’s way of telling you if something isn't quite right. Observing your system in action under various loads will give you a good understanding of its capabilities and help you identify any areas that might need tweaking. This diligent verification process is key to a robust off-grid setup.
Ongoing Maintenance for Roof-Mounted Panels
While solar panels are generally low-maintenance, "low" doesn't mean "no." Establishing a routine for checking your roof-mounted panels will significantly contribute to their efficiency and lifespan. The most common maintenance task is cleaning. Dust, pollen, bird droppings, and leaves can accumulate on your panels, reducing their ability to absorb sunlight. Depending on your local environment, you might need to clean them a few times a year. In dry, dusty regions, it could be more frequent. A gentle rinse with a hose and a soft brush (or a squeegee with a long handle) is usually all that's needed. Avoid abrasive cleaners or harsh scrubbing, as these can scratch the glass.
Beyond cleaning, a periodic visual inspection of your entire array is crucial. Look for any signs of physical damage to the panels themselves, such as cracks in the glass, delamination, or discoloration. Check all your wiring: are any cables sagging or chafing? Are the cable ties still secure? Inspect all electrical connections at the combiner box and where cables enter the building; ensure they are tight and free from corrosion. Pay close attention to your mounting hardware – are all bolts tight? Are there any signs of rust or degradation? It’s also wise to check the sealant around all roof penetrations for cracking or deterioration. Even small gaps can eventually lead to leaks.
A good schedule might be quarterly visual inspections, with a more thorough inspection every year or two. During the annual check, you might want to re-torque all mounting bolts and electrical connections (after safely disconnecting power, of course). If you've got an inverter with monitoring capabilities, keep an eye on its performance data over time. A sudden drop in power production could indicate a problem with one of your panels or a string of panels, or it could simply mean it’s time for a good cleaning. Proactive maintenance, as outlined in guides like Off-Grid Solar Maintenance Costs, will prevent small issues from becoming expensive repairs and keep your power flowing smoothly.
Common Challenges and Troubleshooting Roof Installations
Even the most meticulous installation can sometimes present unexpected challenges. When you're dealing with the forces of nature, intricate electrical systems, and the structural dynamics of a building, things can crop up. Knowing how to anticipate and address common issues is part of the off-grid journey.
Dealing with Shading and Obstructions
One of the biggest silent killers of solar array performance is shading. You might have designed your system to avoid major shading, but small or unexpected obstructions can still wreak havoc. A single tree branch that grows a few feet, a new antenna installed on a neighbor's roof, or even accumulated dirt on the edge of one panel can significantly reduce the output of an entire string of panels if they are wired in series. This happens because the current flow in a series string is limited by the weakest link – the shaded panel. The frustrating part is that this often goes unnoticed until you see a consistent dip in your power production.
Strategies to mitigate shading include smart design and, if possible, removing the obstruction. If a tree branch is the culprit, a quick trim might solve the problem. If a permanent obstruction like a chimney is unavoidable, then consider technologies that work around shading. Micro-inverters or power optimizers, for example, can be installed on each individual panel. This means if one panel is shaded, it only affects that panel's output, not the entire string. While these add to the initial Cost of an Off-Grid Solar System, they can dramatically improve performance in less-than-ideal shading conditions.
For existing arrays, regular observation is key. If you notice a sudden drop in power output on an otherwise sunny day, it's time to investigate. Sometimes, it's as simple as cleaning a patch of bird droppings or removing leaves. If it's persistent, a more thorough shading analysis, perhaps at different times of the day and year, might be necessary. You might even consider adjusting the tilt angle of your panels if seasonal shading is a major issue, though this adds complexity to a roof-mounted system. The goal is always to maximize the amount of direct sunlight hitting your panels.
Preventing Leaks and Water Damage
The fear of roof leaks is perhaps the single biggest concern for homeowners considering roof-mounted solar, and for good reason. A leaky roof can cause extensive damage, from warped ceilings and ruined insulation to mold growth and compromised structural integrity. The good news is that with proper installation and attention to detail, leaks are largely preventable. The key, as we've discussed, lies in the flashing and sealing of every single roof penetration.
Common mistakes that lead to leaks include insufficient sealant application, using the wrong type of sealant (e.g., non-UV resistant or non-roofing specific), improperly layered flashing, or simply not fastening into structural members firmly enough. If a lag bolt isn't properly seated, water can find its way in. If the flashing isn't correctly slipped under the upper shingle, water can run behind it. Even tiny nail holes from temporary bracing can become leak points if not properly sealed. It's not just about the large penetrations; every single point of entry needs respect.
If, despite your best efforts, you suspect a leak after installation, act quickly. Don't wait for a huge water stain to appear. Check your attic or crawl space after heavy rain. Look for drips, damp spots, or discoloration. If you find a leak, the first step is to identify its source. It might be directly at a panel mount, or water could be traveling along a rafter from a higher point. Once identified, dry the area thoroughly, remove any old, compromised sealant, and reapply a fresh, generous layer of high-quality roofing sealant. Sometimes, adding an extra layer of flashing or a specialized roof patch over the suspected area can provide an additional safeguard. Remember, a stitch in time saves nine, especially when it comes to roof leaks and your off-grid sanctuary.
Disclaimer
The information provided in this guide is for general informational purposes only and is not intended as professional advice. Off-grid solar system installation involves working with electricity and at heights, which can be dangerous. Always consult with qualified professionals, such as licensed electricians and structural engineers, and adhere to all local building codes and regulations before undertaking any solar installation project. The author and publisher are not responsible for any damage, injury, or loss resulting from the use or misuse of the information contained herein.