How to Install an Off-Grid Solar System
Embarking on the journey to install an off-grid solar system can feel like deciphering an ancient, complex map. It’s a significant undertaking, filled with technical jargon and the fear of making a costly mistake, especially when your reliable power depends on it. This comprehensive guide is designed to demystify the entire process, walking you through every crucial step from understanding your components to flipping the switch on your very own independent power source.
Understanding Your Off-Grid Solar System Components
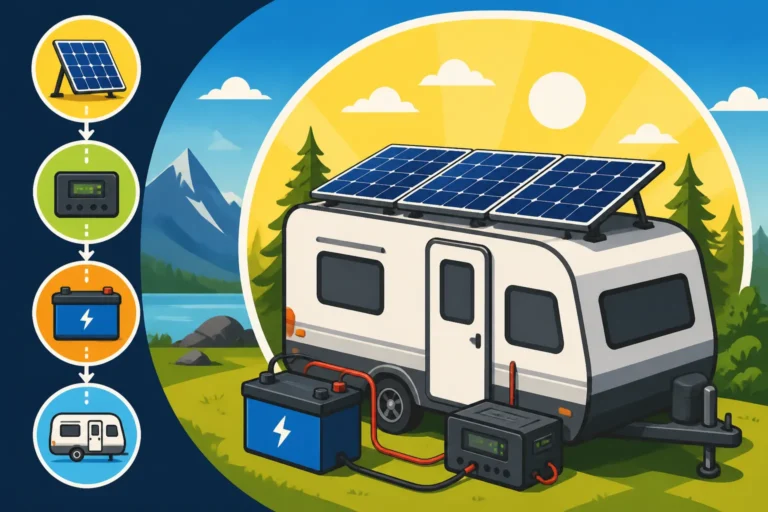
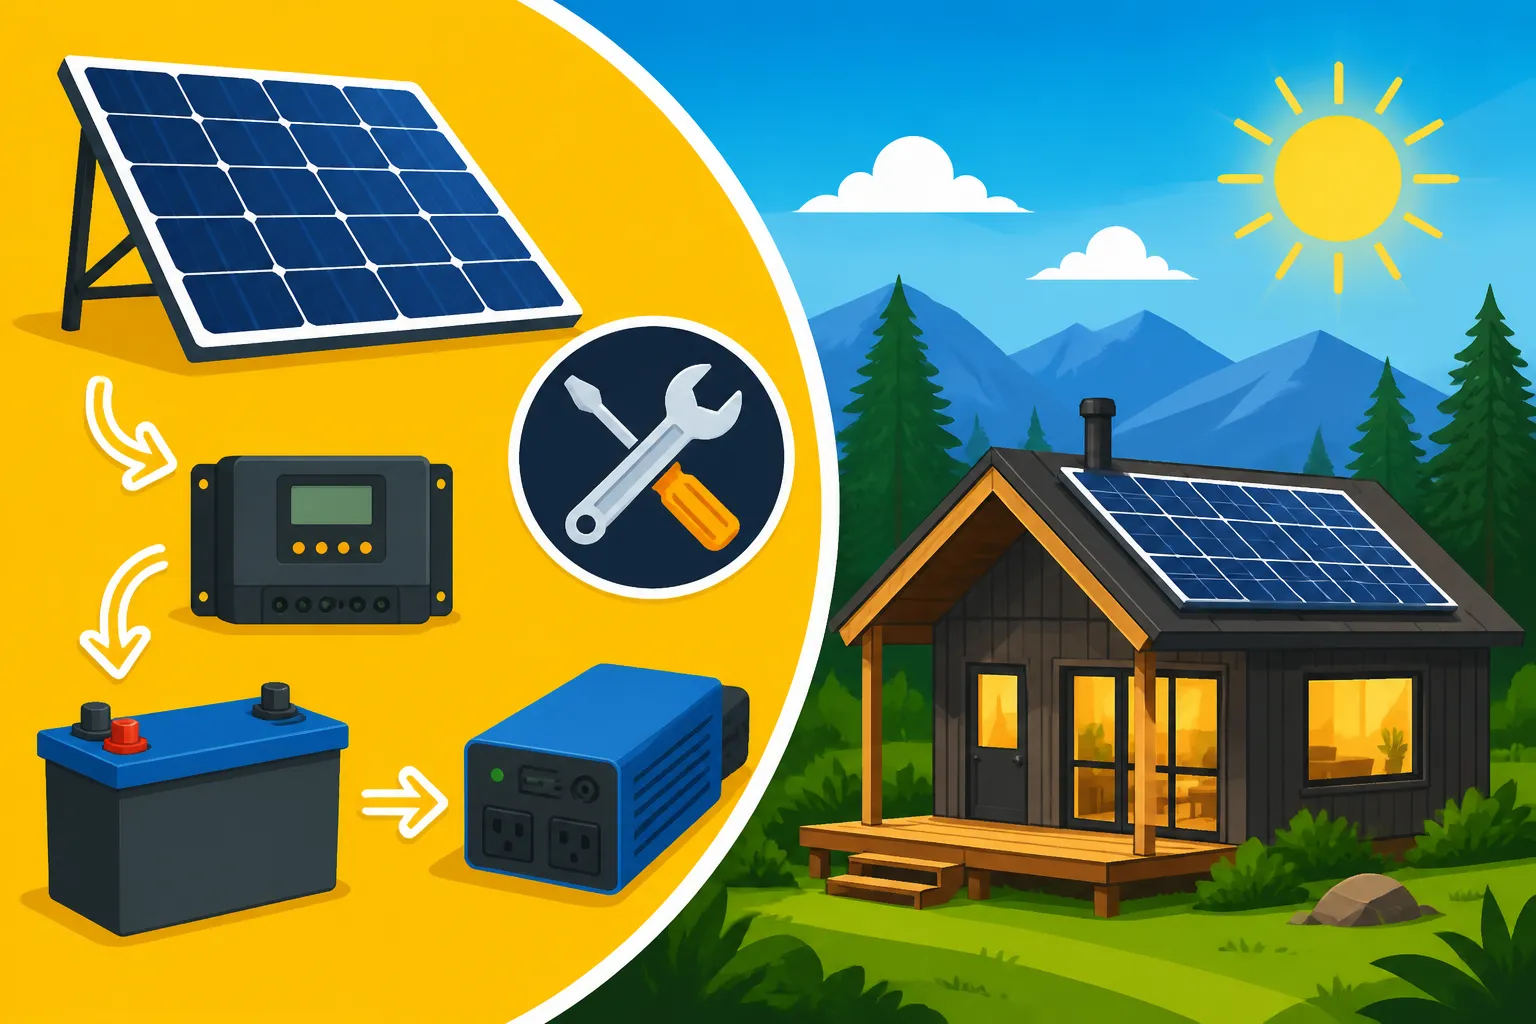
Before you can even think about installation, it’s absolutely vital to understand what each piece of the off-grid puzzle does. Many folks jump straight to buying panels, only to realize later they’ve overlooked a critical component or bought incompatible parts. Think of your off-grid system like a symphony orchestra; each instrument has a specific role, and they all have to work in harmony to produce beautiful music – or in our case, reliable electricity.
Solar Panels: The Energy Harvesters
These are often the first thing people visualize when they think about solar power, and for good reason! Solar panels are the frontline workers, the literal energy harvesters, transforming sunlight directly into usable electricity. Specifically, they convert solar energy into direct current (DC) electricity. There are different types, such as monocrystalline and polycrystalline, but for most off-grid applications, high-efficiency monocrystalline panels are the go-to. They take up less space for the same power output, which is a huge plus when you’re trying to maximize your array in a limited footprint, whether that’s on a cabin roof or a ground mount.
When choosing panels, consider not just the wattage, but also their physical dimensions and voltage output, as these factors will impact your wiring configuration and compatibility with your charge controller. You might be surprised how much variation there is. For instance, a quality 100-watt panel from a brand like Renogy might be a bit pricier than a generic one, but the efficiency and build quality often make it worth the investment in the long run.
Batteries: The Powerhouse of Your System
If your panels are the harvesters, your batteries are the silent, steadfast powerhouses. They store the DC electricity generated by your solar panels for use when the sun isn’t shining – at night, on cloudy days, or during peak demand. Without a robust battery bank, an off-grid system simply wouldn’t function reliably. This is where your energy independence truly comes into play.
There are primarily two main types of batteries used in off-grid setups: lead-acid (which include flooded, AGM, and gel varieties) and lithium-ion (specifically LiFePO4, or lithium iron phosphate). While lead-acid batteries are typically cheaper upfront, LiFePO4 batteries offer significantly longer lifespans, deeper discharge capabilities, and often come with built-in battery management systems (BMS) for safety and efficiency. Deciding on your battery bank is a crucial step, as it accounts for a significant portion of your overall system cost and performance. You can learn more about this by reading about the Cost of an Off-Grid Solar Battery Bank.
Charge Controllers: The Battery’s Gatekeeper
Imagine constantly filling a bucket with a firehose without a way to regulate the flow – eventually, it overflows and makes a mess. That’s essentially what would happen to your batteries if they were connected directly to solar panels without a charge controller. This device is the intelligent gatekeeper, regulating the voltage and current coming from your solar panels to your battery bank. It ensures your batteries are charged efficiently and, more importantly, prevents overcharging, which can severely damage and shorten the lifespan of your expensive batteries.
There are two main types: PWM (Pulse Width Modulation) and MPPT (Maximum Power Point Tracking). MPPT controllers are more advanced and significantly more efficient, especially in colder weather or when panel voltage is much higher than battery voltage. They can extract up to 30% more power from your panels compared to PWM controllers, making them the preferred choice for most serious off-grid systems, even if they come with a higher price tag. Understanding How to Choose an Off-Grid Charge Controller is essential.
Inverters: Converting DC to AC Power
Most of the appliances and electronics we use every day run on alternating current (AC) power – think refrigerators, microwaves, laptops, and lights. Your solar panels and batteries, however, produce and store direct current (DC). This is where the inverter steps in, acting as a crucial translator, converting the DC power from your batteries into usable AC power for your home or cabin.
Inverters come in various sizes and types, from small units for specific appliances to large, whole-house models. You'll typically encounter pure sine wave inverters, which produce clean, grid-quality power suitable for all electronics, and modified sine wave inverters, which are less expensive but can damage sensitive electronics. For any critical or sensitive loads, always opt for a pure sine wave inverter. Sizing your inverter correctly for your anticipated peak load is vital to prevent overloading and system shutdowns. Discover more about How to Size an Off-Grid Inverter to ensure you select the right unit.
Balance of System Components (BOS)
While panels, batteries, charge controllers, and inverters are the “big four,” a functioning off-grid system relies heavily on a range of “Balance of System” (BOS) components. These often overlooked items are critical for safety, efficiency, and longevity. They include all the wiring and cables, fuses and circuit breakers, disconnect switches, mounting hardware for your panels, and sometimes a battery monitor.
Think of it this way: you can have the best engine, tires, and chassis (panels, batteries, inverter), but without robust brake lines, a proper steering wheel, and reliable electrical connections, the car isn't going anywhere safely. High-quality copper wiring of appropriate gauge, correctly rated fuses, and accessible disconnects are not just good practice; they are essential for protecting your investment and, more importantly, ensuring your personal safety. Never skimp on these components; they are the unsung heroes that hold your entire system together securely.
Crucial Pre-Installation Planning and Design
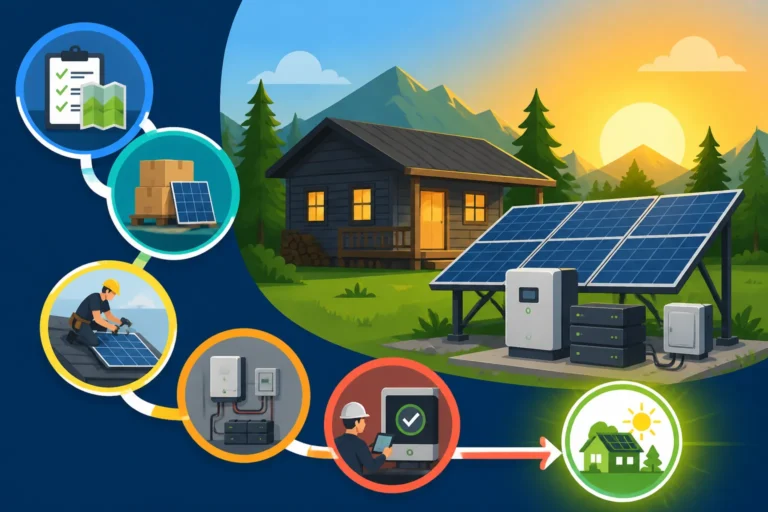
Before a single tool is picked up or a wire is cut, meticulous planning is the cornerstone of a successful off-grid solar installation. Skipping this phase is like trying to build a house without blueprints – you might get something standing, but it won’t be efficient, safe, or meet your long-term needs. This is where you calculate, strategize, and often, save yourself a lot of headaches and money down the road.
Assessing Your Energy Needs and Load Calculation
The absolute first step in any off-grid design is understanding your energy consumption. This isn’t just a rough guess; it’s a detailed audit of every electrical device you plan to power. Grab a pen and paper, or a spreadsheet, and list every appliance, light, and electronic gadget. For each item, note its wattage (power consumption) and how many hours per day you expect to use it. This will give you your daily watt-hour (Wh) consumption for each item.
For example, a mini-fridge that draws 100 watts and runs for 8 hours a day (intermittently, but averages out) consumes 800 Wh/day. A laptop drawing 60 watts used for 5 hours consumes 300 Wh/day. Summing these up gives you your total daily energy requirement. Don't forget occasional high-draw items like a well pump or power tools, and factor in their surge (starting) wattage. This comprehensive Off-Grid Solar Load Calculation Explained is the foundation upon which your entire system is built, determining the size of your solar array and battery bank.
Site Survey and Panel Placement
Once you know how much power you need, you need to figure out where that power will come from. This means a thorough site survey. Walk your property, observing the path of the sun throughout the day, in different seasons if possible. The ideal location for solar panels in the Northern Hemisphere is facing true south (not magnetic south), with an unshaded view of the sky from 9 AM to 3 PM. Shading, even from a single tree branch, can drastically reduce the output of an entire string of panels.
Consider factors like roof integrity if you're planning a roof mount, or ground stability and accessibility if you're opting for a ground mount. Is there enough space? Is the area prone to snow accumulation that might cover panels? How will you run cables from the panels to your battery bank and inverter location? The closer these components are, the better, to minimize voltage drop and cable costs. Thinking about your unique conditions, like Off-Grid Solar Cost in Cold Climates or How to Design for Low Sun Regions, is crucial for reliable performance.
System Sizing: Panels, Batteries, and Inverter
With your energy needs quantified and your site surveyed, you can now accurately size each major component. This is often the most challenging part of the design process, and getting it wrong can lead to either an underpowered system that leaves you in the dark or an oversized system that costs more than necessary.
Your solar panel array size is determined by your daily energy needs, divided by the average peak sun hours for your specific location. Don't forget to add a buffer for cloudy days or lower winter sun. Your battery bank capacity is based on your daily energy consumption and how many "days of autonomy" you want – meaning, how many days your system can run without any solar input. Lastly, your inverter must be sized to handle the maximum simultaneous wattage of all your AC appliances, plus any significant surge loads. Many find that learning How to Size an Off-Grid Solar System is the most important preparatory step. It's a complex equation that balances desired autonomy, peak sun hours, and component efficiency.
Permitting and Local Regulations
This is often the most overlooked and frustrating part of the off-grid journey. While you might be going “off-grid,” that doesn’t necessarily mean you’re off the hook for local building codes and electrical permits. Many jurisdictions, especially for residential structures, require permits for electrical work, structural modifications for roof mounts, and even for ground-mounted arrays. The rules can vary wildly from county to county, or even within different areas of the same state.
Before you buy any major equipment, check with your local planning or building department. Ask about requirements for solar installations, electrical permits, and any specific inspections. Failing to secure the necessary permits can lead to fines, forced system removal, or difficulties when you try to sell your property later. While the process can be tedious, getting it right avoids costly legal issues and ensures your system meets safety standards. This step is critical, and you can find specific information by researching Off-Grid Solar Permits and Codes for your area.
Mounting Your Solar Panels: Secure and Efficient Placement
Once your planning is solid and your components are chosen, it’s time to physically install your solar panels. This phase requires attention to detail, structural integrity, and a good understanding of electrical connections. Improper mounting can lead to damaged panels, leaks, or even dangerous situations in high winds.
Choosing Your Mounting Style: Roof, Ground, or Pole
The choice of mounting style largely depends on your specific property, local sun exposure, and personal preference. Each option has its own set of pros and cons.
- Roof Mounts: These are common for homes and cabins. They save yard space and often provide good sun exposure. However, they require careful consideration of roof angle, structural integrity, and waterproofing. Installing them yourself can be more challenging due to working at heights and potential roof penetrations. If you're tackling How to Install Off-Grid Solar Panels on a roof, safety is paramount.
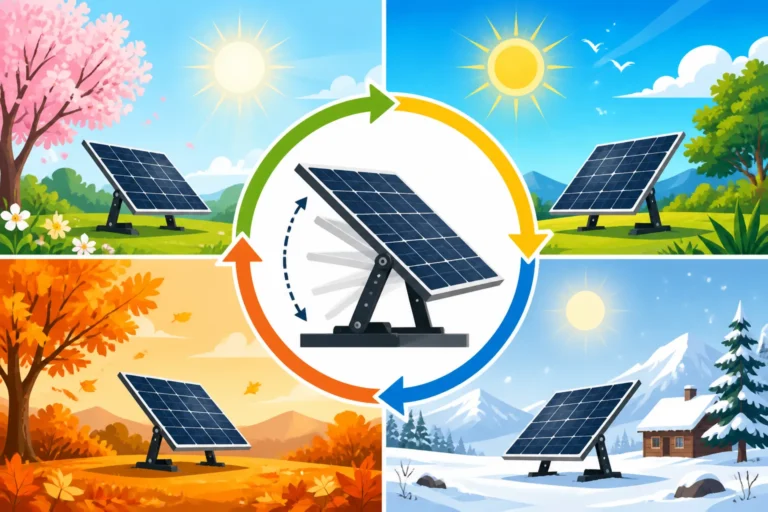
- Ground Mounts: Offering excellent flexibility, ground mounts allow you to choose the perfect orientation and tilt angle for optimal sun capture. They are easier to install and maintain than roof mounts, as you're working at ground level. They're also simpler to adjust seasonally for maximum efficiency. The downside is they take up yard space and may be subject to different zoning or aesthetic regulations.
- Pole Mounts: Ideal for smaller arrays or areas with limited ground space, pole mounts lift panels above snow lines and allow for easy seasonal adjustments. They can be more structurally complex to install, requiring a strong foundation and a sturdy pole capable of supporting the array's weight and resisting wind loads.
Step-by-Step Roof Mount Installation
If you’ve decided on a roof mount, the process typically follows these steps:
1. **Assess Roof Structure**: Confirm your roof can handle the additional weight and wind load of the panels and racking. Consult a structural engineer if unsure.
2. **Mark Layout**: Carefully plan the exact placement of your rails and panels, ensuring optimal spacing and alignment.
3. **Install Standoffs/Flashing**: Locate rafters, pre-drill holes, and secure flashing and standoffs to prevent leaks. These components provide a secure, waterproof anchor for your racking.
4. **Attach Rails**: Mount the solar rails to the standoffs. Ensure they are level and properly spaced according to your panel dimensions.
5. **Mount Panels**: Carefully lift and secure each solar panel to the rails using appropriate clamps. Work slowly and methodically, ensuring each panel is securely fastened.
6. **Wire Panels**: This is critical for connecting the panels correctly. Learn How to Wire Solar Panels in Series or parallel depending on your system voltage requirements.
Remember, working on a roof is dangerous. Always use proper fall protection, such as harnesses and safety lines, and work with a partner.
Ground Mount Installation Considerations
Ground mounts offer more flexibility and are generally safer for DIYers. Key considerations include:
1. **Foundation**: You’ll need a robust foundation. This could be concrete piers, ground screws, or ballasted footings depending on your soil type and local frost line. The foundation needs to withstand significant wind loads.
2. **Racking Structure**: Choose a racking system designed for ground mounts. These typically involve steel or aluminum posts and rails. Many pre-engineered kits are available, some from brands like IronRidge or EcoFasten, making installation simpler.
3. **Optimal Tilt and Azimuth**: Ground mounts allow you to easily adjust the tilt angle of your panels for optimal sun exposure throughout the year. In the Northern Hemisphere, facing true south is ideal, with tilt angles typically set between your latitude angle for year-round production, or steeper for winter performance.
4. **Accessibility**: Ensure the panels are accessible for cleaning and maintenance, but also secure from potential damage or theft. Fencing around the array might be a good idea, especially in remote areas.
Panel Wiring: Series, Parallel, and Combiner Boxes
Once your panels are physically mounted, the electrical connections are next. Understanding series and parallel wiring is crucial for matching your array’s voltage and current output to your charge controller and battery bank.
- Series Wiring: Connects the positive terminal of one panel to the negative terminal of the next. This increases the total voltage of the string, while the current remains the same as a single panel. This is often used for higher voltage systems (e.g., 24V or 48V) and can be more efficient over longer cable runs due to lower current and less voltage drop.
- Parallel Wiring: Connects all positive terminals together and all negative terminals together. This increases the total current, while the voltage remains the same as a single panel. This is common for smaller 12V systems or to provide higher current for charging.
Many larger systems use a combination of series and parallel wiring (series-parallel) to achieve the desired voltage and current. For multiple strings of panels, a combiner box is essential. This weatherproof enclosure houses fuses or breakers for each string, allowing you to safely combine the output of multiple series or parallel strings into a single output that runs to your charge controller. It also provides a convenient disconnect point for maintenance or emergencies. Ensure you use appropriately sized MC4 connectors and solar-rated cabling for all panel wiring.
Wiring Your System: Connecting the Components
This is where the magic happens – connecting all your carefully chosen components into a functional off-grid power system. This phase requires precision, adherence to electrical codes, and a strong emphasis on safety. Remember, we’re dealing with electricity, and mistakes can be dangerous and costly. If you’re unsure at any point, consider consulting with a licensed electrician.
Installing the Charge Controller
Your charge controller should be mounted in a dry, well-ventilated area, ideally close to your battery bank (within a few feet) to minimize voltage drop between the controller and batteries. This proximity ensures accurate voltage readings, which are critical for proper battery charging. Mount it securely to a wall or a dedicated panel, ensuring there’s enough clearance for airflow, especially if it’s an MPPT controller, as these can generate some heat during operation.
The wiring sequence is absolutely critical here to prevent damage to your controller and batteries. Always connect the battery cables to the charge controller first. This allows the controller to sense the battery voltage and configure itself accordingly. After the battery is connected, you can then connect the solar panel cables. Ensure all connections are tight and secure, and that you've used appropriately sized wire gauges, as specified by your controller's manual and the National Electrical Code (NEC). Refer to your specific model's manual for How to Connect a Charge Controller for detailed instructions.
Connecting the Battery Bank
Your battery bank is the heart of your off-grid system, and proper connection is paramount for performance and safety. As mentioned, connect the main battery cables to the charge controller before connecting the solar array. For larger systems, you’ll likely have multiple batteries wired together in series, parallel, or a combination of both to achieve the desired system voltage (12V, 24V, or 48V) and amp-hour capacity.
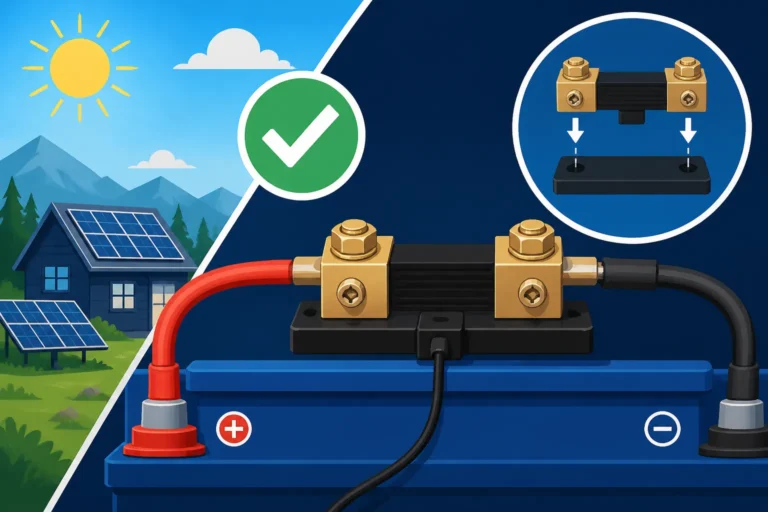
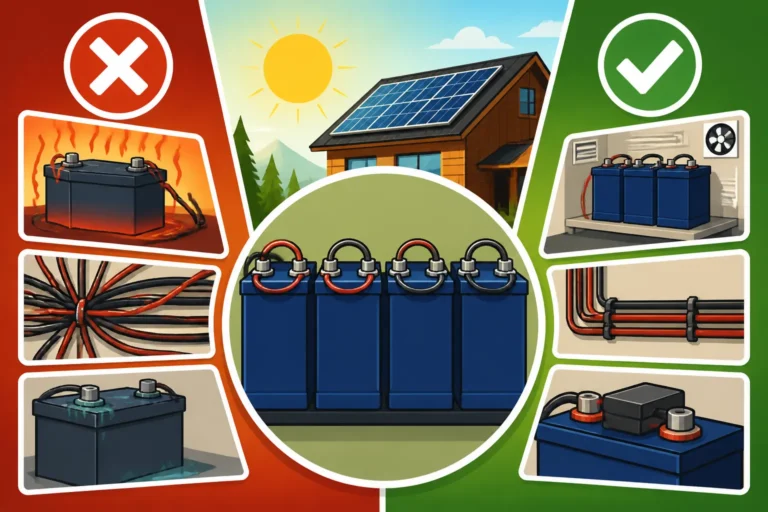
Use thick, flexible battery cables with crimped and sealed lugs, ensuring minimal resistance and maximum current flow. Always use appropriate battery disconnects and fuses for safety. These should be placed as close to the battery terminals as possible. For lead-acid batteries, ensure adequate ventilation as they can off-gas hydrogen. Lithium batteries (LiFePO4) are much safer in this regard, but still benefit from proper placement. If you're building a multi-battery setup, understanding How to Wire a Battery Bank correctly is essential for balanced charging and discharge. Brands like Battle Born and EG4 offer excellent LiFePO4 battery options, often with integrated BMS.
Wiring the Inverter
The inverter typically connects directly to your battery bank. Given that inverters handle significant power conversion and often have high surge capabilities, the cables connecting it to your batteries need to be extremely robust and short. Use the heaviest gauge cable recommended by the inverter manufacturer and keep the cable run as short as possible to minimize voltage drop and maximize efficiency.
Like your battery bank, the inverter connection should always include a properly rated DC circuit breaker or fuse on the positive battery line, located very close to the battery bank. This protects the inverter and wiring from overcurrent conditions. For larger whole-house inverters, you'll then connect the AC output of the inverter to a main AC breaker panel, similar to how grid power feeds a home. For smaller systems powering specific loads, you might simply plug appliances directly into the inverter's outlets or run a dedicated subpanel. Check your inverter's manual for specific wiring diagrams and always prioritize safety with proper overcurrent protection and grounding.
Essential Safety Devices: Fuses, Breakers, and Disconnects
No electrical system is complete, or safe, without adequate protection. Fuses, circuit breakers, and disconnect switches are your primary lines of defense against overcurrent, short circuits, and electrical fires.
- Fuses: These are single-use devices that melt and break a circuit when too much current flows through them. They are crucial for protecting sensitive components and wiring. Always use fuses rated for the specific circuit they are protecting.
- Circuit Breakers: Reusable alternatives to fuses, breakers automatically trip and open a circuit when an overcurrent condition occurs. They can be reset after the fault is cleared. They are found on both DC (between panels/charge controller and batteries) and AC (between inverter and loads) sides of the system.
- Disconnect Switches: These provide a manual way to completely de-energize a circuit. You should have disconnect switches for your solar array (PV disconnect), your battery bank (battery disconnect), and often for the AC output of your inverter. These are critical for safe maintenance, troubleshooting, and in emergency situations. For DIYers, sourcing these components from reliable platforms like Amazon or specialized solar suppliers is common.
Placing these devices correctly and sizing them appropriately for the connected loads and wire gauges is paramount. These aren't optional extras; they are non-negotiable safety requirements.
Proper Grounding Techniques
Grounding is perhaps the most misunderstood and yet critical aspect of electrical safety, especially in an off-grid setup. Proper grounding protects people from electrical shock and your equipment from lightning strikes and fault currents. It essentially provides a safe path for stray electrical current to dissipate into the earth.
Your solar panel frames, racking, inverter chassis, and the main electrical panel (if you have one) all need to be properly bonded and connected to an earth ground. This typically involves driving one or more copper-clad steel ground rods deep into the earth and connecting them to your system's main grounding bus with heavy gauge copper wire. All metal enclosures and exposed non-current-carrying metal parts of your system should be bonded together and then connected to this earth ground.
Consulting the National Electrical Code (NEC) article 690 (for solar photovoltaic systems) and article 250 (for grounding and bonding) is highly recommended. While the exact requirements can be complex, ensuring your entire system is robustly grounded offers peace of mind and significantly reduces risk. Many common off-grid solar installation mistakes involve improper or insufficient grounding.
Bringing Your System Online: Commissioning and Testing
After all the planning, mounting, and wiring, the moment of truth arrives: bringing your off-grid solar system to life. This commissioning phase involves a series of checks and tests to ensure everything is working as intended, safely and efficiently. Don’t rush this part; a systematic approach prevents future headaches.
Initial System Checks and First Power Up
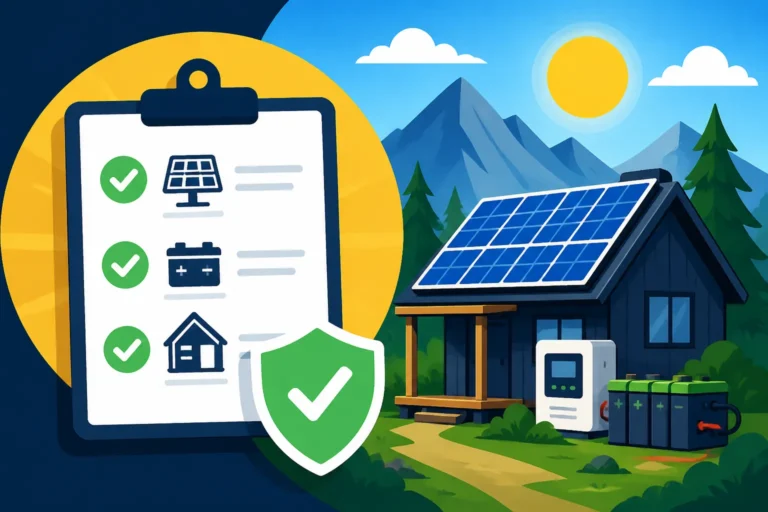
Before you energize anything, perform a thorough visual inspection of your entire system. Double-check every single wire connection: are they tight? Are polarities correct (positive to positive, negative to negative)? Are all fuses and breakers in place and correctly sized? Are all disconnect switches in the “off” position? Verify all grounding connections. This meticulous pre-power checklist can prevent serious damage or injury.
Once you’re confident in your visual inspection, follow the specific power-up sequence recommended by your component manufacturers, which usually involves:
- Connecting the battery bank: Turn on the battery disconnect, allowing the inverter and charge controller to sense the battery voltage.
- Energizing the inverter: Turn on the DC breaker/disconnect for the inverter. Listen for any unusual sounds.
- Connecting the solar array: Turn on the PV (photovoltaic) disconnect. Your charge controller should now recognize the incoming solar power and begin charging the batteries if the sun is out.
- Energizing AC loads: Finally, if you have an AC breaker panel, turn on the main breaker for your home or specific circuits.
Take voltage and current readings at various points (panel output, battery terminals, inverter output) to confirm they match your design specifications.
Monitoring Your System Performance
Once your system is online, continuous monitoring is key to understanding its health and efficiency. Most modern charge controllers and inverters come with built-in displays that show real-time data: battery voltage, charging current from panels, load consumption, and often historical data. Many also offer remote monitoring apps (e.g., from Victron Energy or MidNite Solar) that allow you to check your system from your phone or computer.
Beyond just checking the numbers, pay attention to how your system responds to different conditions. How does it perform on a sunny day? What about a cloudy day? Does your battery bank hold up through the night? Are any alarms or fault codes showing up on your equipment? Regularly reviewing this data helps you understand your power habits and identify any potential issues before they become major problems. A dedicated How to Install a Battery Monitor is also invaluable for precise battery state-of-charge tracking.
Troubleshooting Common Installation Issues
It’s rare for an off-grid system to come online without a hitch, especially for a DIY installation. Don’t get discouraged! Many issues are minor and easily fixable.
- No Power from Panels: Check all PV disconnects, ensure panels are clean and unshaded, and verify wiring polarity. Use a multimeter to test panel voltage.
- Batteries Not Charging: Check charge controller settings, ensure battery disconnects are on, and confirm charge controller is receiving power from panels and connected to batteries.
- Inverter Not Outputting AC: Check DC voltage at inverter input (is the battery charged enough?), check AC output breakers, and look for any fault codes on the inverter itself. An inverter might go into fault if the battery voltage is too low or if an AC load is causing an overload.
- Voltage Drop: If lights are dim or appliances aren't performing well, check cable lengths and gauges. Long runs or undersized wires can lead to significant voltage drop, reducing efficiency.
- Loose Connections: This is a classic culprit. Vibration and thermal expansion/contraction can loosen terminals. Periodically re-check all connections.
Always consult your component manuals for troubleshooting guides. Many issues are specific to certain brands or models. Remember, when in doubt, isolate the problematic component, disconnect power, and re-examine your work. Addressing Common Off-Grid Wiring Mistakes proactively can prevent many of these issues.
Safety First: Mitigating Risks in Off-Grid Installations
Safety should never be an afterthought when working with electricity, especially in a high-voltage, high-current off-grid solar system. Ignoring safety protocols not only puts your equipment at risk but, more importantly, can lead to severe injury or even death. Prioritizing safety is non-negotiable.
Electrical Hazards and Personal Protective Equipment
The most immediate danger in an off-grid solar installation is electrical shock. Solar panels produce electricity whenever there’s light, even on cloudy days. Battery banks store tremendous amounts of energy, and inverters transform DC into powerful AC. A direct contact with energized components can be fatal.
Always treat all wires and components as if they are live. Use appropriate Personal Protective Equipment (PPE):
- Insulated Gloves: Protect your hands from electrical contact.
- Safety Glasses: Shield your eyes from sparks or battery acid.
- Non-Conductive Footwear: Provide an additional layer of insulation.
- Arc-Flash Rated Clothing: Especially important for higher voltage systems, this protects against the extreme heat of an arc flash.
Before working on any part of the system, always disconnect all power sources – turn off PV disconnects, battery disconnects, and inverter breakers. Use a multimeter to confirm circuits are de-energized before touching any wires or terminals. Never work alone. Having a partner present can be critical in an emergency.
Proper Wire Sizing and Overcurrent Protection
Undersized wiring is a recipe for disaster. Wires that are too thin for the amount of current they carry will heat up, potentially melting insulation, causing fires, and leading to significant energy loss due to voltage drop. Always use wire gauges recommended by your component manufacturers and, critically, adhere to the National Electrical Code (NEC) for all wiring. The NEC provides clear guidelines for wire sizing based on current, length of run, and conductor temperature ratings.
Similarly, overcurrent protection (fuses and circuit breakers) must be correctly sized. A fuse or breaker that is too large won't trip when it should, allowing dangerous currents to flow. One that's too small will nuisance trip, causing constant frustration. Ensure that all fuses and breakers are rated not only for the correct current but also for the appropriate voltage (DC fuses for DC circuits, AC for AC). They should be placed strategically to protect each segment of your system, from the solar panels to the battery bank and the inverter's output. Following Off-Grid Solar Wiring Best Practices is crucial for fire prevention and system longevity.
Battery Safety and Ventilation
Batteries, particularly lead-acid types, pose unique safety challenges.
* **Explosion Risk**: Lead-acid batteries, especially when charging, can produce hydrogen gas, which is highly flammable and explosive when mixed with air. They must be installed in a well-ventilated area, away from ignition sources. Never smoke or create sparks near lead-acid batteries.
* **Acid Burns**: The electrolyte in lead-acid batteries is sulfuric acid, which can cause severe chemical burns. Always wear gloves and eye protection when working with these batteries. Have baking soda (to neutralize acid) and plenty of water readily available.
* **Short Circuits**: Shorting battery terminals with a metal tool can cause immediate, intense heat, sparks, and potentially an explosion. Use insulated tools and remove any metal jewelry when working around batteries.
While LiFePO4 batteries are much safer, they still require respect. They can still short circuit and, if damaged, can present a fire risk. Always ensure proper insulation of terminals and use appropriate disconnects. Regardless of battery chemistry, protecting your batteries from extreme temperatures (especially cold) is also vital for their lifespan and efficiency; you might need to research How to Protect Batteries from Cold if you live in a chilly climate. Proper installation within a secure, ventilated enclosure is key for all battery types.
Maintenance and Longevity of Your Off-Grid System
Installing an off-grid solar system is a significant investment, and like any valuable asset, it requires ongoing care to ensure its long-term performance and reliability. Neglecting maintenance can lead to reduced efficiency, premature component failure, and unexpected costs. A little attention goes a long way in maximizing the life of your power independence.
Routine Cleaning and Inspection
The most visible components of your system, the solar panels, are exposed to the elements constantly. Over time, dust, pollen, bird droppings, and leaves can accumulate on their surfaces, reducing their ability to capture sunlight. A simple routine cleaning, especially after dry spells or significant environmental events, can restore lost efficiency. Use soft cloths or brushes and plain water – avoid harsh chemicals or abrasive materials that could scratch the panel surface. For best results, clean panels on a cool, cloudy day or in the early morning to avoid thermal shock. For specific guidance, look into How to Clean Off-Grid Solar Panels.
Beyond cleaning, conduct regular visual inspections of your entire system. Check all wiring for signs of fraying, cracking, or rodent damage. Look for loose connections, corrosion on terminals, or any signs of overheating (discoloration or melted insulation). Inspect mounting hardware for rust or looseness, ensuring your panels remain securely fixed, especially after high winds or heavy snow.
Battery Care and Replacement
Your battery bank is often the most expensive component to replace and typically has the shortest lifespan of the major components. Regular care is crucial.
* **Lead-Acid Batteries**: If you have flooded lead-acid batteries, regularly check and top off electrolyte levels with distilled water. Maintain proper ventilation in the battery compartment. Periodically equalize charge them (if recommended by the manufacturer and your charge controller supports it) to prevent sulfation. Monitor specific gravity with a hydrometer.
* **LiFePO4 Batteries**: These are largely maintenance-free due to their robust chemistry and integrated Battery Management Systems (BMS). However, it’s still good practice to monitor their state of charge, ensure connections are tight, and keep them within their recommended operating temperature range.
Regardless of battery type, monitor your battery voltage and ensure they are not consistently discharged too deeply, as this significantly shortens their life. Understand the Off-Grid Solar Battery Replacement Cost Over Time to budget for future needs.
Monitoring System Health
Beyond individual component checks, get into the habit of monitoring your system’s overall health. Modern charge controllers and inverters often provide extensive data logging and diagnostic capabilities. Regularly review daily production (how much power your panels generate), consumption (how much power you use), and battery state of charge. Look for any trends or anomalies. Is production lower than expected for sunny days? Are your batteries draining faster than usual?
Many systems, particularly those using advanced inverters and charge controllers from brands like Victron Energy or Sol-Ark, offer sophisticated monitoring apps that can alert you to potential issues. Familiarize yourself with these tools and use them to catch problems early. A well-maintained system doesn't just last longer; it provides consistent, reliable power, which is the whole point of going off-grid.
DIY vs Professional Installation: Weighing Your Options
The question of whether to install your off-grid solar system yourself or hire professionals is one that many aspiring off-gridders grapple with. There are compelling arguments for both approaches, and the best choice often depends on your skill set, budget, and comfort level with electrical work.
Benefits and Challenges of DIY
**Benefits:**
* **Cost Savings**: This is often the biggest motivator. By doing the work yourself, you save significantly on labor costs, which can represent a substantial portion of a professional installation. How Much Cheaper Is DIY Off-Grid Solar can be considerable.
* **Learning Experience**: A DIY installation provides invaluable hands-on experience and a deep understanding of how your system works. This knowledge is priceless for troubleshooting, maintenance, and future expansions.
* **Customization**: You have complete control over component selection and system design, allowing you to tailor everything precisely to your unique needs and preferences.
Challenges:
- Complexity and Time: Off-grid solar systems involve high voltages and currents. The design and installation process is complex, requiring a good understanding of electrical principles, safety codes, and component compatibility. It’s also very time-consuming.
- Safety Risks: Without proper knowledge and precautions, there's a significant risk of electrical shock, fire, or damage to expensive equipment.
- Warranty Issues: Some component manufacturers may void warranties if equipment is not installed by certified professionals.
- Permitting Challenges: Navigating local permits and inspections can be more difficult for a DIYer, as inspectors may require more detailed plans or professional oversight.
Many robust kits, like those offered by Renogy, are designed with DIYers in mind, including clear instructions and bundled components, which can lower the barrier to entry for self-installation.
When to Call in the Experts
While the DIY route is appealing, there are several scenarios where hiring a professional is not just advisable, but essential:
* **Lack of Electrical Experience**: If you’re not comfortable with electrical wiring, high voltages, or complex diagrams, a professional installation is the safer choice. An experienced installer will ensure the system meets all safety standards.
* **Large, Complex Systems**: For whole-house systems with intricate load requirements, grid interaction (hybrid systems), or advanced battery management, the complexity quickly outweighs the benefits of DIY. Professionals have the expertise to optimize such systems.
* **Permitting Requirements**: If your local jurisdiction has strict permitting and inspection requirements that necessitate licensed electricians or certified solar installers, you may have no choice but to hire help.
* **Time Constraints**: If you don’t have the significant time required for research, planning, sourcing, and installation, a professional can complete the project much more quickly and efficiently.
* **Warranty and Insurance Needs**: Professionals typically offer warranties on their workmanship, and their installations are often more readily accepted by insurance companies.
Finding Reputable Off-Grid Installers
If you decide to go the professional route, choosing the right installer is crucial.
1. **Look for Experience**: Seek out companies that specialize in off-grid or remote power systems, not just grid-tied residential solar. Off-grid systems have unique design and operational considerations.
2. **Check Credentials and Licenses**: Ensure the installer is licensed and insured. Look for certifications from organizations like NABCEP (North American Board of Certified Energy Practitioners), which indicates a high level of expertise in solar installation.
3. **Ask for References and Portfolios**: Request to see examples of their previous off-grid work and speak with past clients. A reputable installer will be proud to share their successes.
4. **Get Multiple Quotes**: Obtain detailed quotes from at least three different companies. Compare not just the price, but also the proposed components, system design, warranty, and customer service.
5. **Understand the Scope of Work**: Ensure the quote clearly outlines everything included, from design and permitting to installation, commissioning, and post-installation support.
Ultimately, whether you tackle it yourself or bring in the pros, a well-installed off-grid solar system is a powerful step towards energy independence.
Disclaimer
_Please be advised that this guide provides general information and recommendations for installing an off-grid solar system. Electrical work can be dangerous and should only be undertaken by individuals with appropriate knowledge, skills, and safety equipment. Always consult local building codes, electrical regulations, and component manufacturer manuals. If you are uncertain about any aspect of installation, it is strongly recommended to consult a licensed electrician or certified solar installer to ensure safety and compliance._