How to Wire a 48V Battery Bank
Tackling the wiring of an off-grid solar battery bank can feel like staring down a complex puzzle, especially when you're aiming for a robust 48V system. Many folks get intimidated by the sheer number of batteries, the series and parallel connections, and the critical importance of getting it absolutely right for safety and performance. This guide is here to walk you through the process of wiring a 48V battery bank, demystifying each step so you can build a reliable power storage solution for your off-grid dreams.
Understanding the 48V Advantage for Off-Grid Systems
When you're diving into the world of off-grid living, you quickly realize that your battery bank isn't just a collection of batteries; it's the beating heart of your entire power system. A 48V system, in particular, has become a popular choice for many off-gridders, and for good reason. It’s not just about bigger numbers; it’s about efficiency, practicality, and often, long-term savings.
Why 48V is Often Preferred
For those looking to power more than just a few lights and charge a phone, a 48V system really starts to shine. Imagine trying to run a full-sized refrigerator, a well pump, or even an air conditioner on a 12V system. You'd need incredibly thick, expensive cables to carry the high amperage, and you'd still face significant power losses due to voltage drop over longer distances. This is where the 48V system steps in as a game-changer. By increasing the voltage, you drastically reduce the current (amps) needed to deliver the same amount of power (watts). Lower current means thinner, more affordable wiring can be used throughout your system, from your solar panels to your inverter. This doesn't just save you money on materials, but it also makes installation much easier, as thinner wires are more flexible and manageable.
Think about it like this: if you have a 2000-watt load, a 12V system would demand over 160 amps, while a 48V system would only pull about 40 amps. That's a massive difference in current, directly impacting the size and cost of your wiring, fuses, and breakers. For larger homes, cabins, or even substantial RV setups, a 48V system provides a much more robust and efficient foundation. It allows your inverter to operate more effectively, and often, high-power inverters are designed to work optimally with 48V battery banks. If you're pondering the best voltage for your setup, understanding 12V vs 24V vs 48V: Which to Choose is a crucial step in your design process.
Essential Components of a 48V Battery Bank
Before we get our hands dirty with wiring, let’s make sure we're all on the same page about what actually makes up a 48V battery bank. It’s not just the batteries themselves; it's a collection of vital components that ensure safety, efficiency, and longevity.
First and foremost, you'll need the batteries. Most off-grid battery banks are built using 12V or 6V batteries, which are then wired together in a specific configuration to achieve the desired 48V. Lithium Iron Phosphate (LiFePO4) batteries are increasingly popular due for their longevity and deep cycle capabilities, though robust lead-acid batteries (AGM or flooded) are also options. You'll need at least four 12V batteries wired in series, or eight 6V batteries also in series, to reach 48V. However, for most practical applications, you'll want more capacity, which means combining multiple series strings in parallel.
Beyond the batteries, you'll need high-quality battery cables. These aren't just any wires; they need to be appropriately gauged to handle the current, insulated to prevent shorts, and durable enough for the environment. You'll also need busbars, which are essentially large metal strips designed to provide a common connection point for multiple battery cables, simplifying wiring and reducing clutter. Fuses and breakers are absolutely non-negotiable safety devices. They protect your expensive batteries and other components from overcurrents that could lead to fires or permanent damage. A sturdy battery enclosure is also highly recommended, especially for lead-acid batteries that might vent gases, or to protect any battery type from environmental factors and accidental damage. Don't forget a reliable battery monitor, like those offered by brands such as Victron Energy, which provides essential information about your battery bank's state of charge, voltage, and current. This is incredibly helpful for maintaining your system and preventing premature battery degradation.
Step-by-Step Guide to Wiring Your 48V Battery Bank
Alright, let's get down to business. Wiring a 48V battery bank isn't as daunting as it might seem, but it absolutely requires careful attention to detail and a commitment to safety. We’ll break it down into manageable chunks, making sure you understand each step.
Safety First: Preparations Before You Start
Before you even think about touching a wrench to a battery terminal, safety must be your top priority. Batteries, especially large banks, store immense amounts of energy and can be incredibly dangerous if mishandled. First, make sure you have the right personal protective equipment (PPE): heavy-duty insulated gloves, safety glasses, and non-conductive tools. Remove any metal jewelry, watches, or rings, as these can cause severe burns if they accidentally bridge terminals.
Work in a well-ventilated area, particularly if you are working with lead-acid batteries, as they can produce hydrogen gas when charging, which is highly flammable. Have a fire extinguisher rated for electrical fires (Class C) readily available. Ensure all loads are disconnected from your inverter, and your solar charge controller and any other charging sources are turned off and disconnected from the battery bank. This means physically pulling fuses or flipping breakers if possible, to ensure no stray power is flowing. Finally, double-check your wiring diagram. A clear, accurate diagram for How to Wire a Battery Bank is your roadmap and will prevent costly mistakes. It's often helpful to lay out your batteries in their final configuration to visualize the connections before making any cuts or crimps to your cables.
Wiring Batteries in Series
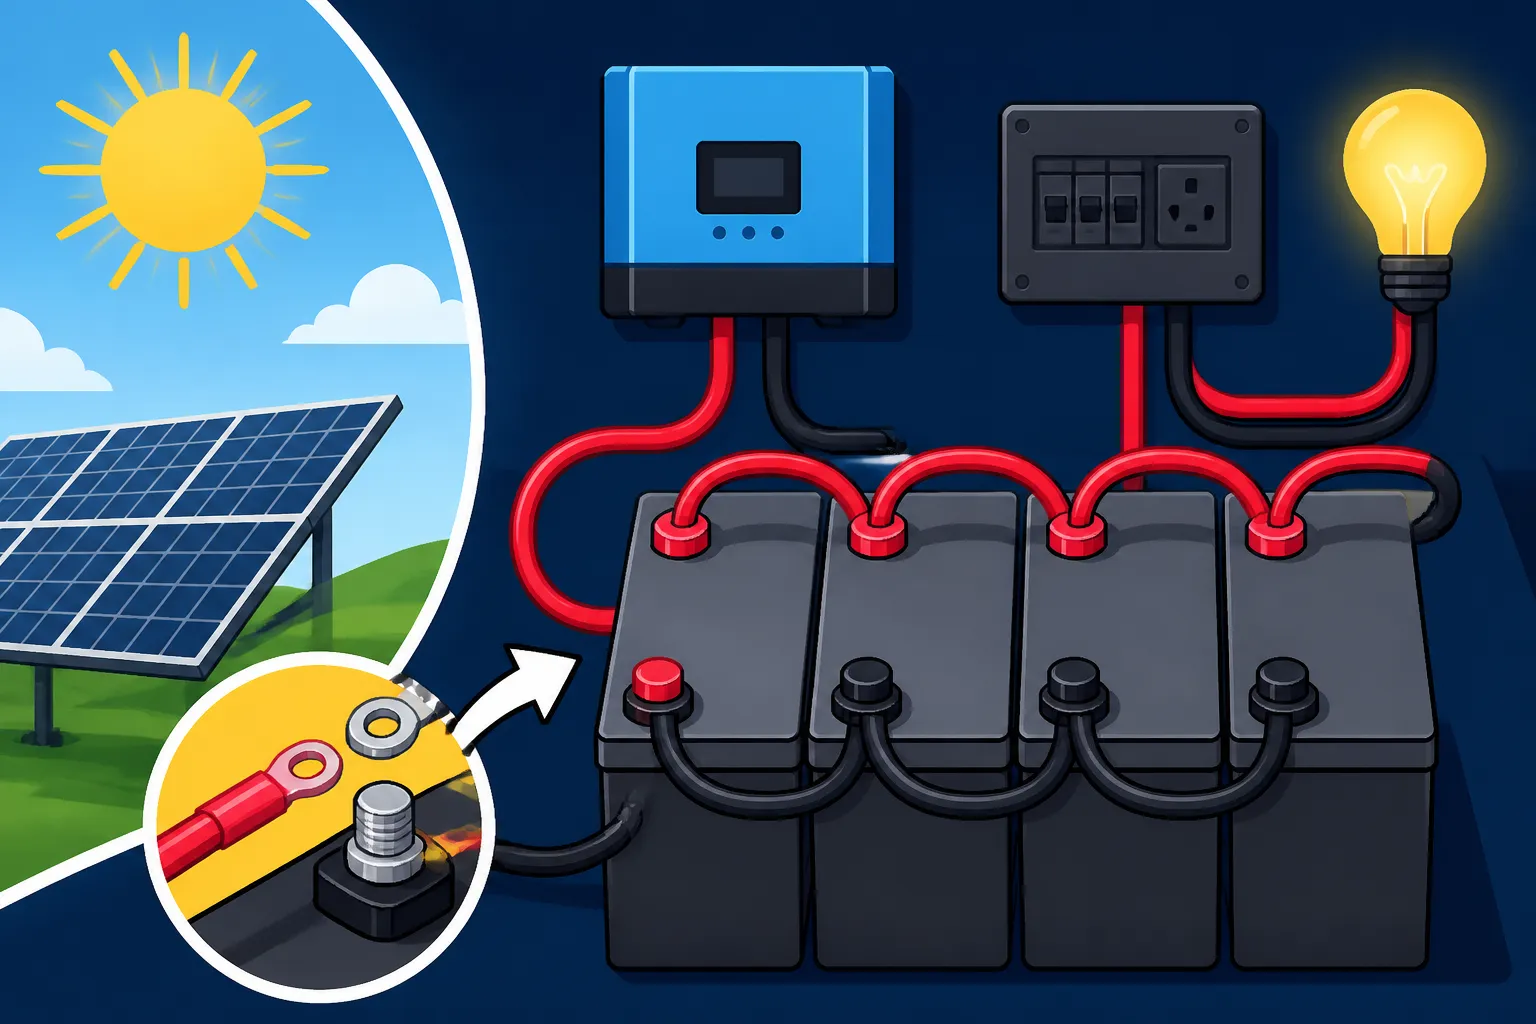
To achieve a 48V system, you'll primarily be wiring 12V batteries in series. This means connecting the positive terminal of one battery to the negative terminal of the next battery, and so on. Each series connection adds the voltage of the batteries together, while the amp-hour capacity remains the same as a single battery in that series string.
Let's say you have four 12V batteries, each with a 100Ah capacity.
- Placement: Arrange your four 12V batteries in a line or square, however they will best fit in your battery enclosure, ensuring easy access to terminals.
- First Connection: Take a battery cable and connect the positive terminal of battery #1 to the negative terminal of battery #2.
- Second Connection: Take another cable and connect the positive terminal of battery #2 to the negative terminal of battery #3.
- Third Connection: Use a third cable to connect the positive terminal of battery #3 to the negative terminal of battery #4.
At this point, you have successfully created a single 48V string. The remaining open terminals will be the negative terminal of battery #1 and the positive terminal of battery #4. These are your main 48V negative and positive terminals for that string. It’s crucial that all cables used for these series connections are of the same gauge and as short as possible to minimize resistance. If you’re using LiFePO4 batteries, ensure they have a built-in Battery Management System (BMS) that can handle the series configuration, or you'll need an external balancer to ensure cell voltage remains consistent, preventing issues during charging and discharging. For more specific guidance on How to Wire LiFePO4 Batteries in Series, consider exploring additional resources.
Wiring Batteries in Parallel
While wiring in series boosts your voltage, wiring in parallel increases your overall amp-hour capacity. This is critical for most off-grid setups, as a single 48V series string often won't provide enough stored energy for daily use. When you connect strings in parallel, the voltage stays the same (48V in this case), but the total amp-hour capacity becomes the sum of each parallel string's capacity.
Let's assume you've already created your first 48V string (four 12V 100Ah batteries in series). Now, you want to double your capacity by adding a second identical 48V string.
- Create a Second String: Follow the exact steps above to create another identical 48V string of four 12V 100Ah batteries. So now you have String A and String B, both providing 48V at 100Ah (if using 12V 100Ah batteries).
- Connect Positives to Positive Busbar: Take a main battery cable from the positive terminal of String A (the open positive terminal of the last battery in series) and connect it to a positive busbar. Do the same for String B, connecting its positive terminal to the same positive busbar.
- Connect Negatives to Negative Busbar: Similarly, take a main battery cable from the negative terminal of String A (the open negative terminal of the first battery in series) and connect it to a negative busbar. Connect the negative terminal of String B to the same negative busbar.
Now you have two 48V strings wired in parallel, giving you a combined capacity of 48V 200Ah (again, assuming 12V 100Ah batteries). You can repeat this process for as many parallel strings as you need to achieve your desired total capacity. The key is to ensure all cables connecting to the busbars are of the same length and gauge to promote even current flow and battery longevity. This method of How to Wire Batteries in Series and Parallel is fundamental for building larger, more capable off-grid systems. Brands like Renogy often provide kits with appropriately sized cables for common configurations, or you can find high-quality cables and busbars on Amazon.
Connecting to the Busbar and System Components
Once your battery strings are correctly wired in series (and parallel, if applicable), the final step is to connect them to the main system components. This typically involves connecting to a main system fuse/breaker, then to your charge controller and inverter.
- Main System Disconnect: From your positive busbar, run a heavy-gauge battery cable to a main DC disconnect switch or breaker. This acts as your primary safety cutoff for the entire battery bank. This is often rated for high amperage, like 250A or more, depending on your inverter size.
- To the Inverter: From the output side of your main DC disconnect, run a positive cable to the positive terminal of your inverter. From your negative busbar, run a negative cable directly to the negative terminal of your inverter. These cables must be sized appropriately for your inverter's maximum continuous current draw. Incorrectly sized cables can lead to dangerous overheating and power loss. Learning How to Size Battery Cables is crucial here.
- To the Charge Controller: Your charge controller is what regulates the power coming from your solar panels to charge your batteries. It must be connected directly to your battery bank, after the main disconnect, to get an accurate reading of battery voltage. Connect a positive cable from your positive busbar (or the battery side of your main disconnect) to the battery positive input on your charge controller. Connect a negative cable from your negative busbar to the battery negative input on your charge controller. Remember to install an appropriately sized fuse or breaker on the positive line between the battery bank and the charge controller. It's often recommended to wire the charge controller first, before the inverter, as the charge controller needs to sense battery voltage to operate safely.
It's vital to ensure all connections are tight and secure. Loose connections can create resistance, generate heat, and lead to system inefficiencies or even fires. Use lock washers and proper torque settings for all terminals.
Example 48V Battery Bank Wiring Table
| Component | Connection Type | Purpose | Notes |
|---|---|---|---|
| Individual 12V Batteries | Series | Increase voltage to 48V | Connect (+) to (-), 4 batteries per string. |
| 48V Battery Strings | Parallel | Increase amp-hour capacity | Connect (+) busbar to (+), (-) busbar to (-). |
| Positive Busbar | Collection Point | Consolidate positive connections | Central hub for all positive battery connections. |
| Negative Busbar | Collection Point | Consolidate negative connections | Central hub for all negative battery connections. |
| Main DC Disconnect/Breaker | Series (Positive) | Primary safety cutoff for battery bank | Located on the positive line between busbar and inverter. |
| Inverter | Parallel | Converts DC to AC power | Connects directly to positive and negative busbars (via disconnect). |
| Charge Controller | Parallel | Regulates solar charging | Connects directly to positive and negative busbars. |
| Battery Cables | Interconnect | Carry current between components | Correct gauge and length are critical for efficiency and safety. |
Common Mistakes and Troubleshooting for 48V Battery Banks
Even with the best intentions and careful planning, mistakes can happen. When dealing with high-voltage DC systems like a 48V battery bank, a small error can have significant consequences. Being aware of common pitfalls and having a basic troubleshooting strategy can save you a lot of headache, and potentially your equipment or even your safety.
Pitfalls to Avoid During Installation
One of the most frequent errors is incorrect wiring polarity. Accidentally reversing positive and negative connections can instantly fry sensitive electronics like charge controllers and inverters. Always triple-check your polarity with a multimeter before making final connections, and use clearly color-coded cables (red for positive, black for negative). This might sound basic, but in a multi-battery setup, it’s surprisingly easy to get wires crossed.
Another common mistake is undersizing battery cables. As mentioned before, while 48V systems reduce current compared to 12V for the same power, the main cables connecting your battery bank to the inverter will still carry substantial current, especially during peak loads. Using cables that are too thin will lead to excessive voltage drop, wasted energy in the form of heat, and can even pose a fire hazard. Always consult a wire gauge chart and err on the side of slightly thicker cables, especially for longer runs. Understanding How to Prevent Voltage Drop in Off-Grid Wiring is a must.
Loose connections are another silent killer. Over time, vibrations or temperature changes can loosen terminals, leading to increased resistance, heat, and inefficient power transfer. Always use proper tools to tighten connections to the manufacturer's recommended torque specifications. It's also easy to forget to install proper fuses and breakers. Every major circuit, especially the main battery disconnect, the solar input to the charge controller, and the battery output to the inverter, needs appropriate overcurrent protection. These devices are your insurance policy against short circuits and overloads.
Finally, mixing different battery types or ages within the same bank is a recipe for disaster. If you're building a 48V system with four 12V batteries, ensure all four are identical in brand, capacity, and age. Batteries with different internal resistances or capacities will charge and discharge unevenly, leading to premature failure of the weakest battery and reduced overall bank performance. This is particularly important when learning How to Balance Batteries Before Wiring.
What to Do When Things Go Wrong
So, you've flipped the switch, and nothing happens, or worse, you smell something burning. Don't panic. The first and most critical step is to immediately disconnect all power sources. Flip the main DC disconnect switch and unplug your solar panels from the charge controller. Safety first!
Once power is safely cut, start your investigation systematically:
- Check All Connections: Go back through every single terminal and connection. Are they tight? Is anything visibly melted or charred? Are the polarities correct? Even a single loose or reversed connection can shut down your entire system.
- Verify Voltage at Each Stage: With a multimeter, start at your individual batteries. Measure each 12V battery to ensure it's healthy. Then measure each series string to confirm it's 48V. Then measure at the busbars, then at the input to your main disconnect, and finally at the input to your inverter and charge controller. This methodical approach will help you pinpoint where the voltage is dropping or where the circuit is open.
- Inspect Fuses and Breakers: A blown fuse or tripped breaker is a good sign that it did its job. Check all fuses for continuity and reset any tripped breakers. If a fuse blows repeatedly, you have an underlying issue, likely a short circuit or an overloaded component, which needs to be identified before replacing the fuse.
- Consult Your Wiring Diagram: Go back to your diagram and trace every line. Does it match your physical installation? Sometimes, a simple misinterpretation of the diagram can lead to errors.
- Check Component Manuals: Your inverter, charge controller, and even the batteries themselves will have troubleshooting sections in their manuals. Error codes on digital displays can provide valuable clues. Brands like Victron Energy and Outback Power have excellent diagnostic tools and detailed manuals.
Remember, many troubleshooting guides are available online, and specific issues like "Off-Grid Battery Bank Installation Mistakes to Avoid" often highlight solutions to common problems. Don't hesitate to reach out to forums or experienced off-gridders if you're stumped.
Maintaining Your 48V Battery Bank for Longevity
Wiring your 48V battery bank correctly is a fantastic start, but true off-grid independence means nurturing your system for the long haul. A battery bank is a significant investment, and proper maintenance can dramatically extend its lifespan, saving you money and hassle in the long run.
Regular Checks and Best Practices
Routine checks are your best defense against unexpected failures. Make it a habit to visually inspect your battery bank at least once a month, or more frequently if it’s in a high-traffic area or subject to extreme conditions. Look for any signs of corrosion on the terminals, which can impede current flow and increase resistance. Clean terminals with a wire brush and a baking soda-water solution if you spot any buildup. Ensure all cable connections are still snug. Vibrations, especially in mobile applications like an RV or a tiny home on wheels, can gradually loosen terminals.
If you're using flooded lead-acid batteries, checking the electrolyte levels and topping them off with distilled water is a critical maintenance task, usually done monthly or quarterly depending on use. For LiFePO4 or sealed AGM/Gel batteries, this isn't necessary, which is one of their major benefits. However, even these maintenance-free batteries benefit from temperature monitoring. Extreme heat or cold can degrade battery performance and lifespan. Consider strategies for How to Protect Batteries from Cold if your system is in an unheated space during winter.
Keep the battery area clean and free of debris. Dust can accumulate and, in conjunction with humidity, can create conductive paths or short circuits. Ensure adequate ventilation, especially for lead-acid batteries, to dissipate any off-gassing. A well-designed battery box with proper airflow is essential for both safety and longevity.
Optimizing Performance and Lifespan
Beyond routine checks, there are several best practices to adopt to truly optimize the performance and lifespan of your 48V battery bank.
One of the most important factors is avoiding deep discharges. While LiFePO4 batteries can handle deeper cycles, regularly discharging any battery type below 50% state of charge (SoC) will significantly shorten its life. Aim to keep your discharge cycles shallower whenever possible. This means properly sizing your battery bank for your daily energy usage and having enough solar charging capacity to replenish it consistently. If you're interested in calculating your exact needs, resources like How Many Batteries for an Off-Grid System can be incredibly helpful.
Ensure your charge controller settings are precisely matched to your battery manufacturer’s recommendations. Different battery chemistries and even different brands (like Renogy or Battle Born) will have specific voltage set points for bulk, absorption, float, and equalization (for lead-acid). Incorrect charging parameters can lead to undercharging, overcharging, or sulfation (in lead-acid), all of which degrade battery health over time. A good battery monitor will give you the insight needed to confirm these settings are working correctly.
Finally, consider your daily energy habits. Minimizing phantom loads (appliances drawing power even when off) and optimizing your energy consumption, especially during periods of low solar production (like cloudy days or winter), will reduce the stress on your battery bank. If you find yourself consistently draining your batteries too low, it might be time to consider expanding your system or adjusting your usage. Learning How to Maintain an Off-Grid Battery Bank comprehensively can make a huge difference in the long-term reliability of your off-grid power.
Disclaimer
The information provided in this guide is for educational and informational purposes only. Working with electricity, especially high-voltage DC systems, can be dangerous and should only be undertaken by individuals with the appropriate knowledge, skills, and safety equipment. Improper installation or maintenance can result in serious injury, death, or property damage. Always consult with a qualified electrician or solar professional before installing or modifying any electrical system. Follow all local codes and regulations. The author and publisher are not liable for any losses, injuries, or damages resulting from the use or misuse of this information.