How to Size a Charge Controller
It's a familiar scenario: you're excitedly planning your off-grid solar setup, picturing endless free power, but then you hit a snag. The sheer number of components and their precise specifications can be overwhelming, and few are as critical, or as confusing to size, as the charge controller. Undersizing it can lead to damaged batteries or even melted wires, while oversizing can drain your budget unnecessarily. This guide is here to demystify the process, walking you through exactly how to size a charge controller so your off-grid system runs safely and efficiently.
Understanding the Role of a Charge Controller
Before we dive into the nitty-gritty of calculations, it’s really important to grasp what a charge controller actually does in your off-grid solar system. Think of it as the brain and brawn of your charging setup, working tirelessly behind the scenes to keep everything humming along. Without it, your batteries would be at serious risk, and your solar investment could literally go up in smoke.
What a Charge Controller Does and Why It's Critical
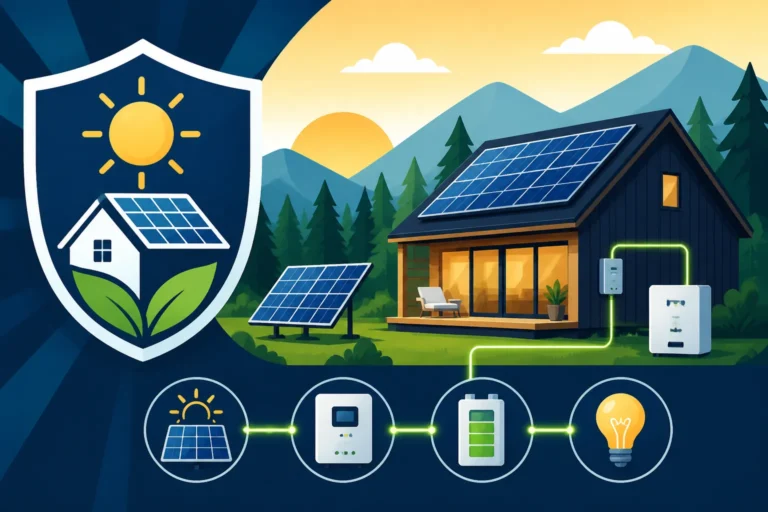
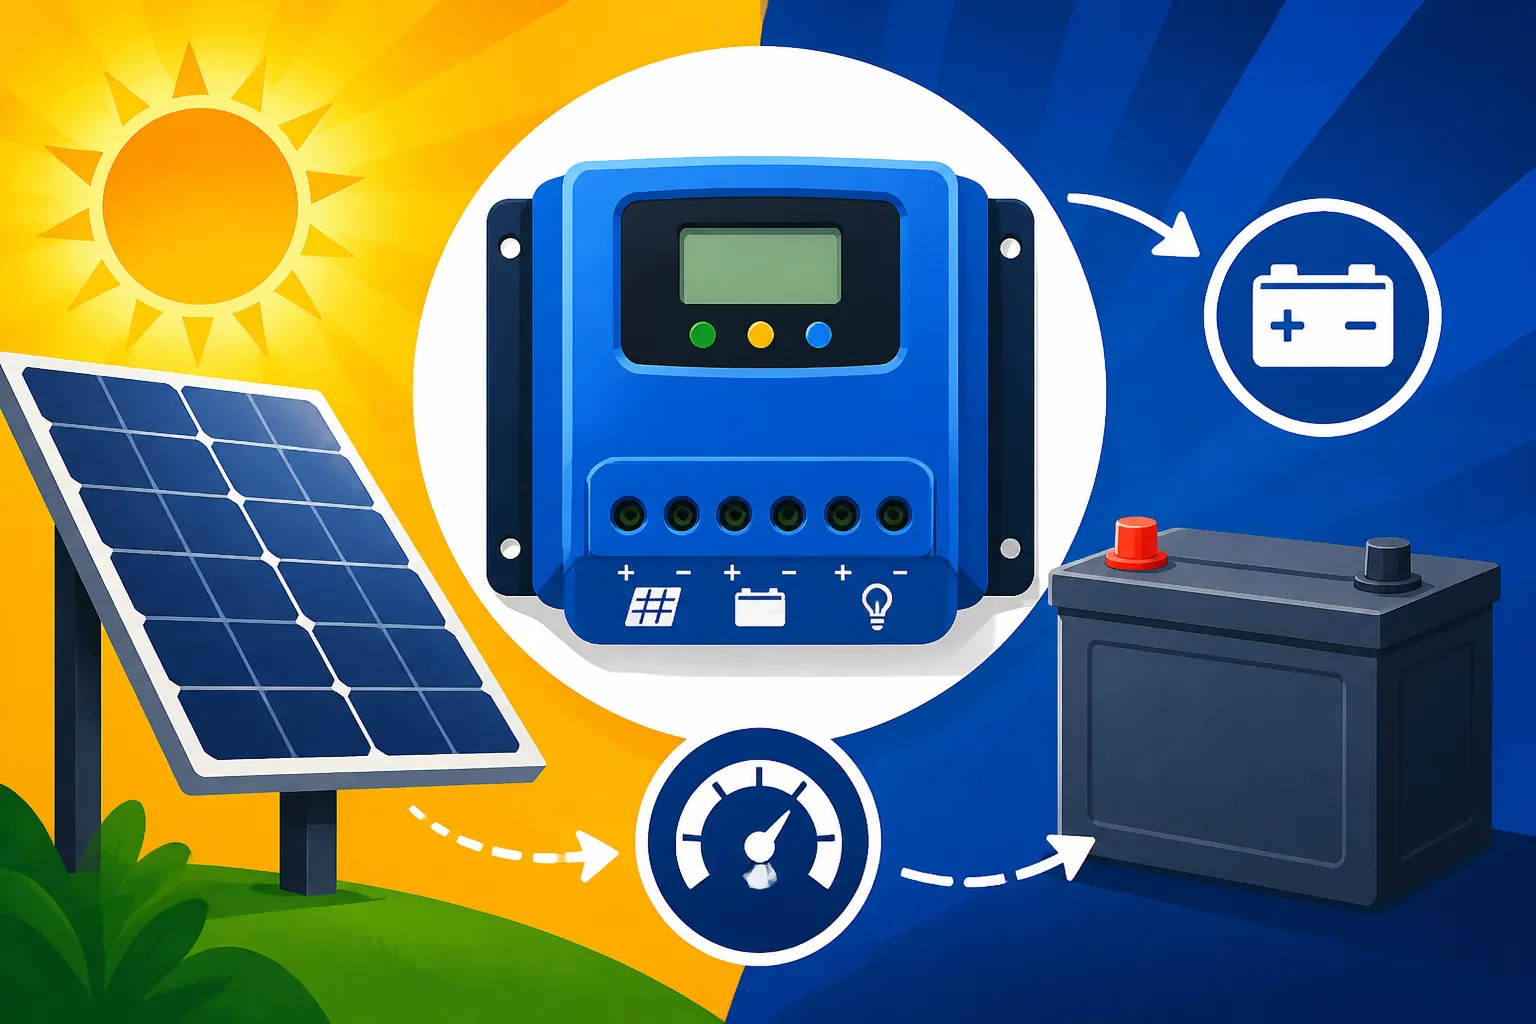
At its core, a charge controller has a few vital jobs. First and foremost, it regulates the voltage and current coming from your solar panels before it reaches your battery bank. Solar panels, bless their sunny hearts, produce varying amounts of power depending on sunlight intensity, temperature, and even the angle of the sun. If this unregulated power went straight into your batteries, it could quickly overcharge them, leading to damage, reduced lifespan, or, in extreme cases, a dangerous thermal runaway. It’s essentially a protective shield for your valuable batteries.
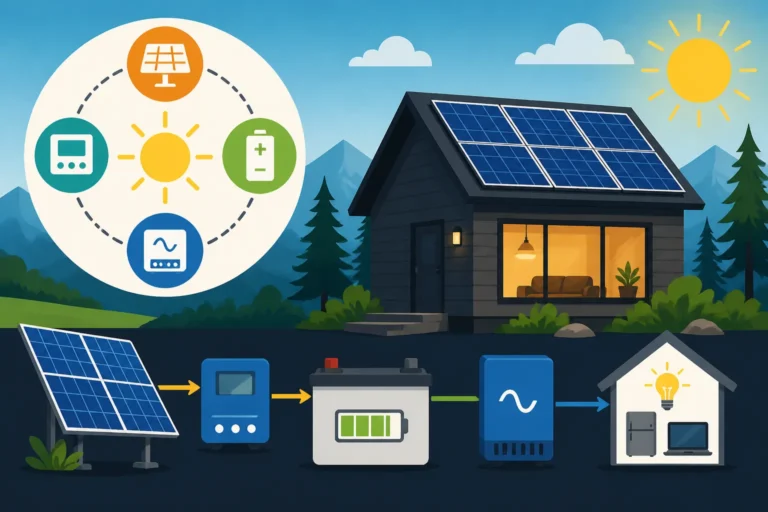
Beyond protection, a good charge controller also manages the various stages of battery charging. Batteries aren't happy with just a constant trickle; they need a specific charging profile that includes bulk charging (filling them up fast), absorption charging (topping them off carefully), and float charging (maintaining them once full). This multi-stage charging optimizes battery health and longevity, ensuring you get the most out of your power storage investment. It also typically includes features like reverse polarity protection, over-current protection, and sometimes even low-voltage disconnects to prevent deep discharge, which can permanently damage batteries. When you're considering the overall system, understanding Off-Grid Solar System Components Explained really highlights the charge controller's crucial place.
The Two Main Types: PWM vs MPPT
When you start shopping for charge controllers, you’ll quickly encounter two main technologies: Pulse Width Modulation (PWM) and Maximum Power Point Tracking (MPPT). While both do the essential job of regulating charge, they go about it in very different ways, and choosing between them heavily influences your sizing decisions and overall system efficiency.
PWM controllers are the simpler, more budget-friendly option. They essentially act like a fast switch, connecting and disconnecting your solar array to the battery bank. By rapidly cycling the connection, they "chop" the voltage from the solar panels down to match the battery voltage. While this works, it means that any excess voltage the panels could produce above the battery's current state of charge is simply wasted. For example, if your 12V battery is charging, and your panels are producing 18V, the PWM controller will effectively pull the panel's voltage down to around 12V, losing the potential power from that 6V difference. This is why PWM controllers are often recommended for smaller systems, where cost is a major factor, or for systems where the panel voltage is relatively close to the battery bank's voltage. You might find them in simple Off-Grid Solar Cost for a Shed setups or basic RV charging.
MPPT controllers, on the other hand, are the more advanced, and typically more expensive, option. These clever devices don't just chop the voltage; they actively track and optimize the output of your solar panels to extract the absolute maximum power available. They do this by converting any excess voltage from the panels into additional amperage for the battery. So, using our previous example, an MPPT controller could take that 18V from your panel and convert it into a higher charging current at 12V for your battery, significantly increasing charging efficiency, especially in colder temperatures or when panels are operating at a much higher voltage than the battery. This makes MPPT controllers ideal for larger systems, complex arrays, or situations where you want to maximize every bit of power you can harvest, like in a full-time Off-Grid Solar Cost for a Whole House scenario or when dealing with variable weather conditions. For a deeper dive into this, check out our guide on MPPT vs PWM Charge Controllers.
Essential Information You Need Before Sizing
Before you even think about numbers, you need to gather some crucial data about your solar panels and your battery bank. This isn't just guesswork; these are specific electrical ratings that will dictate the size of the charge controller you need. Getting this information right is the first, most important step.
Knowing Your Solar Array's Specifications Voc, Isc, Vmp, Imp
Every solar panel comes with a specification sheet, often found on the back of the panel itself or in its accompanying manual. You'll need to locate four key values, typically listed under "Electrical Characteristics at Standard Test Conditions (STC)":
- Open Circuit Voltage (Voc): This is the maximum voltage your solar panel can produce when it's not connected to a load, meaning no current is flowing. It's like measuring the voltage of a battery with nothing plugged into it. This value is critically important for MPPT controller sizing, especially in cold weather, as panel voltage increases in colder temperatures.
- Short Circuit Current (Isc): This is the maximum current your solar panel can produce when its positive and negative terminals are connected directly (short-circuited). Again, this is under STC, so actual current might vary. This value is essential for PWM controller sizing, as well as for selecting appropriate wiring and circuit breakers.
- Maximum Power Voltage (Vmp): This is the voltage at which the solar panel produces its maximum power under normal operating conditions. It's the "sweet spot" voltage for optimal performance.
- Maximum Power Current (Imp): This is the current produced by the solar panel when operating at its maximum power voltage (Vmp).
Why are these important? For PWM controllers, you'll primarily be concerned with Isc, as these controllers essentially operate at battery voltage. For MPPT controllers, both Voc and Isc (and thus Vmp and Imp indirectly) are vital because MPPTs can handle higher input voltages and convert them. Remember, these values are for one panel. If you have multiple panels, you'll need to understand How to Wire Solar Panels in Series or parallel to correctly calculate the total array Voc and Isc.
Understanding Your Battery Bank's Voltage
Your battery bank's nominal voltage is another non-negotiable piece of information. Off-grid systems commonly use 12V, 24V, or 48V battery banks. The charge controller must be compatible with your battery bank's voltage. A 12V charge controller simply won't work with a 48V battery bank, and vice versa. It sounds obvious, but it's a mistake people make more often than you'd think!
To determine your battery bank's voltage, look at the specifications of your individual batteries and how they are wired. If you have four 12V batteries wired in series, you have a 48V bank. If you have two 6V batteries wired in series, you have a 12V bank. Knowing How Many Batteries for an Off-Grid System and how they're connected is fundamental. Many charge controllers auto-detect the battery voltage, but it’s always best to confirm and set it manually if the option is available. This ensures safe and proper charging throughout the battery's lifespan.
Accounting for Environmental Factors and Future Expansion
Sizing isn't just about matching numbers on a spec sheet; it's about building a robust system that accounts for real-world conditions. Environmental factors play a huge role. For instance, solar panels produce higher voltage in colder temperatures. This is why you must use the Voc value for sizing, not just Vmp, and factor in a safety margin (often 1.25x or even 1.5x for Voc in very cold climates). Ignoring this could lead to your controller being over-voltaged and failing, especially during a crisp winter morning.
Consider where your system will be installed. Will it see extreme cold, like in Alaska, or blistering heat, like in Arizona? Temperature derating applies to components too; electronics perform differently under extreme heat.
Finally, think about future expansion. Many people start with a smaller system and want to add more panels later. If you undersize your charge controller now, you might have to buy a whole new one when you want to expand your array. It's often more cost-effective in the long run to slightly oversize your charge controller initially to accommodate potential additions. This foresight can save you money and hassle down the road, making the initial investment into Cost of an Off-Grid Solar System more worthwhile.
Step-by-Step Sizing for PWM Charge Controllers
PWM charge controllers are a fantastic choice for many smaller, simpler off-grid solar setups. They are generally more affordable and easier to understand, making them a popular option for DIY enthusiasts or those with modest power needs. However, their sizing method is specific and crucial to get right to avoid damaging your system.
Calculating Max Array Current
For a PWM charge controller, the most critical number to calculate is the maximum current that your solar array can produce. Unlike MPPT controllers, which are rated by their maximum input voltage and output current, PWM controllers are primarily rated by the maximum input current they can handle at the battery voltage.
Here’s how you calculate it:
- Find the Isc (Short Circuit Current) for a single panel: Look at your panel's spec sheet. Let's say it's 8 Amps.
- Determine your panel wiring:
- If panels are in parallel: The total Isc of your array is the sum of the Isc of all individual panels. For example, if you have three panels, each with an Isc of 8A, wired in parallel, your total array Isc would be 8A + 8A + 8A = 24A.
- If panels are in series: The total Isc for the array remains the same as a single panel's Isc. Series wiring increases voltage, not current.
- Apply a safety factor: The National Electrical Code (NEC) generally recommends multiplying your calculated array Isc by a factor of 1.25 for continuous operation. This accounts for conditions that might temporarily increase panel output, such as cold temperatures. So, if your calculated array Isc is 24A, you'd multiply 24A * 1.25 = 30A.
This final number (30A in our example) is the minimum amperage rating your PWM charge controller should have.
Matching to Battery Bank Voltage
Once you have your maximum array current, the next step is to ensure your chosen PWM charge controller is compatible with your battery bank's voltage. As mentioned earlier, PWM controllers operate by bringing the solar panel voltage down to essentially match the battery voltage. Therefore, a PWM controller will be specified as suitable for either 12V, 24V, or sometimes 12V/24V auto-sensing.
If your battery bank is 12V, you need a 12V PWM controller. If it's 24V, you need a 24V PWM controller. It's a straightforward match, but one that is absolutely non-negotiable. Connecting a 12V array and a 12V controller to a 24V battery bank, for instance, simply won't work effectively and could lead to system instability or even component failure. You want to make sure your How to Size a Charge Controller choice aligns perfectly with your battery setup.
Practical Examples and Considerations
Let's run through a quick example. Imagine you have four 100-watt solar panels, each with an Isc of 6 Amps and a Voc of 22V. You want to charge a 12V battery bank.
Scenario 1: Panels in Parallel
- Total array Isc = 4 panels * 6A/panel = 24A
- Apply safety factor: 24A * 1.25 = 30A
- You would need a 12V PWM charge controller rated for at least 30 Amps.
Scenario 2: Panels in Series (This is where PWM limitations show)
- Total array Isc = 6A (current remains the same)
- Total array Voc = 4 panels * 22V/panel = 88V
- Apply safety factor (for Voc): 88V * 1.25 = 110V (This high voltage is generally not suitable for typical PWM controllers, which often have a max input voltage of around 25-50V. This setup would likely require an MPPT controller.)
This example perfectly illustrates why PWM controllers are often better suited for smaller arrays where panel voltage isn't significantly higher than the battery voltage, or where panels are wired in parallel to keep the voltage low but increase current. For example, a single Renogy 100W solar panel with its low voltage is well-suited for a smaller PWM system, perhaps for a basic cabin or RV setup where you're not planning to expand much. You can often find decent PWM controllers on Amazon for very reasonable prices, making them accessible for entry-level projects. If you're pondering the details of your setup, our article on How to Choose an Off-Grid Charge Controller offers more insights.
Step-by-Step Sizing for MPPT Charge Controllers
MPPT charge controllers are the powerhouse of off-grid solar, offering superior efficiency, especially for larger systems or in challenging environmental conditions. While they are a bit more complex and typically carry a higher price tag, their ability to maximize power harvest makes them an incredibly worthwhile investment. Sizing an MPPT controller involves considering both voltage and current carefully.
Determining Max Array Voltage (Voc) and Current (Isc)
Sizing an MPPT controller starts with the same foundational data as a PWM controller, but with a greater emphasis on the array's maximum voltage. MPPT controllers have a maximum input voltage rating, which is crucial to respect for the longevity and safety of the device.
- Find Voc (Open Circuit Voltage) and Isc (Short Circuit Current) for a single panel: Let's say a single panel has a Voc of 40V and an Isc of 9A.
- Calculate total array Voc:
- If panels are in series: The total Voc of your array is the sum of the Voc of all individual panels. For example, if you have four panels, each with a Voc of 40V, wired in series, your total array Voc would be 40V * 4 = 160V.
- If panels are in parallel: The total Voc remains the same as a single panel's Voc (40V). Parallel wiring increases current, not voltage.
- Apply a cold temperature factor to Voc: This is critical! Solar panels produce higher voltage in colder temperatures. A common rule of thumb is to multiply your total array Voc by 1.25 (or check local temperature coefficients for a more precise factor, like 1.18 in very cold climates). So, 160V * 1.25 = 200V. This is your absolute maximum expected open-circuit voltage. Your MPPT charge controller's maximum input voltage rating must be higher than this value. Many MPPT controllers are rated for 150V or 200V maximum input, so this calculation is vital.
- Calculate total array Isc:
- If panels are in series: The total Isc of the array remains the same as a single panel's Isc (9A).
- If panels are in parallel: The total Isc is the sum of the Isc of all individual panels. For example, four panels in parallel would be 9A * 4 = 36A.
- Apply a safety factor to Isc: Just like with PWM, multiply your calculated array Isc by 1.25. If your total array Isc is 9A (series), then 9A * 1.25 = 11.25A. If it's 36A (parallel), then 36A * 1.25 = 45A.
These values (cold Voc and safety-factored Isc) are what your MPPT controller needs to safely handle on its input side.
Calculating Max Output Current to Batteries
The output current of an MPPT charge controller is the current that actually goes into your battery bank. This is what determines the amperage rating you need for the MPPT controller. Because MPPT controllers convert higher input voltage into higher output current, this calculation isn't as simple as just using the array's Isc.
Here’s a general method for estimating the required output current rating:
- Calculate your total array wattage (Pmax): Multiply your panel's Pmax (peak power wattage) by the number of panels. For example, if you have four 200-watt panels, your total array wattage is 4 * 200W = 800W.
- Factor in controller efficiency: MPPT controllers are highly efficient, typically 92-99%. Let's use a conservative 95% (0.95).
- Divide by your battery bank voltage:
- Maximum output current (Amps) = (Total Array Wattage * Controller Efficiency) / Battery Bank Voltage
- So, for an 800W array charging a 12V battery: (800W * 0.95) / 12V = 760W / 12V ≈ 63.3 Amps.
- For an 800W array charging a 24V battery: (800W * 0.95) / 24V = 760W / 24V ≈ 31.7 Amps.
- For an 800W array charging a 48V battery: (800W * 0.95) / 48V = 760W / 48V ≈ 15.8 Amps.
- Apply a safety factor to the output current: Again, add a 1.25 safety factor. For our 12V example: 63.3A * 1.25 = 79.1 Amps.
Therefore, for the 12V system, you would need an MPPT charge controller rated for at least 80 Amps (rounding up). You also need to ensure the MPPT controller's maximum input voltage rating (from the previous section's cold Voc calculation) is sufficient. Brands like Victron Energy or Renogy offer a range of MPPT controllers with different voltage and amperage ratings to suit various system sizes.
The Importance of Over-Paneling and Efficiency
One of the significant advantages of MPPT controllers is their ability to handle "over-paneling." This means installing more solar panel wattage than the nominal rating of your inverter or even your charge controller's output rating (within reason). For example, you might have a 1000W solar array feeding into an MPPT controller rated for 800W of output to your battery.
Why do this? Solar panels rarely, if ever, produce their full rated wattage. Factors like panel temperature, dirt, shading, angle, and time of day all reduce actual output. By over-paneling, you increase the chances of hitting closer to your desired output, especially during less-than-ideal conditions (like cloudy days or winter months). The MPPT controller will simply limit its output to its maximum rating, ensuring it's not overloaded, while still extracting the most power possible from the array. This strategy can significantly improve your How to Design for Year-Round Off-Grid Power.
This conversion efficiency is the core benefit of MPPT controllers. They can take a high-voltage, lower-current input from your panels and convert it into the correct voltage and a higher current to charge your batteries more effectively. This is particularly useful when you have long wire runs from your panels to your controller, as running higher voltage means less current, which in turn means less voltage drop and thinner, less expensive wiring for the PV array side. This is a key reason why MPPTs are recommended when you're trying to How Many Watts of Solar You Need for a substantial power demand.
Choosing the Right Controller for Your Specific Setup
Navigating the world of charge controllers can feel a bit like Goldilocks trying to find the just right porridge. Too small, and your system struggles or breaks; too big, and you've overspent. The "right" choice really boils down to the specifics of your system, your budget, and your long-term goals.
Small Systems vs Large Systems
The size and complexity of your off-grid solar system are probably the biggest determinants when choosing between a PWM and MPPT charge controller, and subsequently, how you size it.
For small systems, think a simple setup for a shed, a small RV, or a minimal cabin. These might involve just one or two solar panels and a single 12V battery. In these cases, a PWM controller often makes perfect sense. They are inexpensive, robust, and the slight loss in efficiency isn't a deal-breaker when your power needs are low. For example, if you have a couple of 100-watt panels directly charging a 12V battery, a 20-30 Amp PWM controller, which you can easily find on Amazon, would likely be more than sufficient and budget-friendly. The key here is that the panel's Vmp (around 18-20V) is not drastically higher than the 12-14V needed for charging, so the "waste" of voltage by the PWM isn't huge in terms of absolute watts. This is a common setup for basic Cost to Power a Cabin with Solar projects.
However, for large systems, such as a full-time off-grid home, a substantial RV, or a remote workshop, MPPT controllers become almost indispensable. These systems typically involve multiple panels, often wired in series to achieve higher voltages (24V, 48V, or even higher for the array) to reduce wire size and voltage drop over longer distances. The MPPT controller's ability to efficiently convert this higher voltage to the correct battery charging voltage means you're extracting far more usable power from your expensive solar panels. For example, powering a well pump or an air conditioner requires significant wattage, and an MPPT controller ensures that your Sizing Solar for a Well Pump or Sizing Solar for Air Conditioning system operates at peak efficiency. The upfront cost is higher, but the long-term gains in energy harvest and system robustness often quickly outweigh the initial expense.
Budget Considerations and Long-Term Value
Let's be real, budget is almost always a factor when building an off-grid system. PWM controllers are undeniably cheaper. You can often pick one up for under $50, sometimes even less. MPPT controllers, on the other hand, can range from $150 for smaller units to well over $1000 for high-capacity controllers from premium brands like Victron Energy or Sol-Ark.
When you're trying to How to Budget for an Off-Grid Solar System, it’s tempting to always go for the cheaper option. But consider the long-term value. If a PWM controller loses 10-30% of your potential solar harvest every day, those lost watts add up over years. If you're relying on solar for your primary power, that lost energy might mean more reliance on a backup generator, running it longer, and thus spending more on fuel. Or it could mean not having enough power for critical loads on cloudy days.
For a system where solar is a minor convenience, the PWM's lower cost and simplicity win. But for any system where maximizing solar harvest and battery longevity are priorities, the MPPT's higher efficiency often provides a better return on investment over the life of the system. It helps you get closer to your goal of Off-Grid Solar Return on Investment. Think of it as investing in an efficient appliance; it costs more upfront but saves you money and hassle in the long run.
Key Features to Look For and Why They Matter
Beyond just PWM vs. MPPT and the core voltage/current ratings, several other features can make a significant difference in your charge controller's performance, usability, and safety:
- Multi-Stage Charging: We touched on this, but truly, a controller with at least 3-stage charging (bulk, absorption, float) is non-negotiable for battery health. Some advanced MPPT controllers offer even more stages, like equalization (for flooded lead-acid) or desulfation, further extending battery life.
- Battery Type Compatibility: Ensure the controller supports your battery chemistry (e.g., flooded lead-acid, AGM, Gel, or LiFePO4). Different battery types require different charging voltages and profiles. Most modern controllers allow you to select the battery type, but always double-check. For example, Renogy often clearly labels its controllers for LiFePO4 compatibility, which is crucial for maximizing the lifespan of these popular batteries. Our article on How Battery Choice Affects Off-Grid Cost goes into this in detail.
- Temperature Compensation: This feature adjusts charging voltages based on battery temperature, which is vital for safe and efficient charging, especially in fluctuating climates. Most good controllers come with an external temperature sensor that you attach to your battery.
- LCD Display and Monitoring: A clear display that shows real-time data (PV voltage, PV current, battery voltage, charging current, daily yield) is incredibly useful for monitoring system performance and troubleshooting. Some controllers offer remote monitoring via Bluetooth or Wi-Fi, allowing you to check your system from your phone or computer.
- Programmable Settings: Advanced users appreciate the ability to fine-tune charging parameters, such as absorption voltage, float voltage, and low-voltage disconnects. This allows for optimal performance tailored to specific battery types and system needs.
- Load Control Output: Some charge controllers include a DC load output that can be programmed to disconnect non-essential loads if the battery voltage drops too low. This prevents deep discharge and protects your batteries.
- Safety Features: Look for built-in protections against over-voltage, over-current, reverse polarity, and short circuits. These are standard on reputable brands but always worth confirming.
By carefully considering these features alongside your sizing calculations, you can select a charge controller that not only meets your power demands but also enhances the safety, longevity, and convenience of your entire off-grid solar system.
Common Mistakes and Troubleshooting Tips
Even with all the calculations and careful planning, mistakes can happen. It's an inherent part of any DIY project, especially with something as intricate as an off-grid solar system. Knowing the common pitfalls can help you avoid them, and understanding basic troubleshooting can save you a lot of headache and potentially costly replacements.
The Dangers of Undersizing and Oversizing
When it comes to charge controllers, there's a delicate balance to strike. Both undersizing and oversizing can lead to problems, albeit different ones.
Undersizing your charge controller is perhaps the more dangerous mistake. If your solar array can produce more current or voltage than your charge controller is rated to handle, several things can go wrong:
- Overheating and Failure: Exceeding the current rating can cause the controller to overheat, leading to component failure, often irreversible. This might manifest as the controller simply shutting down or, in worse cases, emitting smoke or even catching fire.
- Damaged Batteries: If the controller fails or can't properly regulate the charge, your batteries could be subjected to excessive voltage or current. This can lead to overcharging, gassing (for lead-acid), swelling, reduced lifespan, or even thermal runaway with lithium batteries.
- Inefficient Charging: Even if it doesn't fail outright, an undersized controller might "throttle" the input from your panels, effectively wasting potential solar harvest. It simply can't process all the power your panels are trying to send.
Oversizing your charge controller, while not as immediately dangerous, can still be problematic:
- Wasted Money: Charge controllers are a significant investment, especially MPPT units. Buying one with a much higher amperage or voltage rating than your current (and future planned) array requires means you've spent money that could have gone towards more batteries, panels, or other essential components. For instance, buying a 100A MPPT controller for a small 400W array feeding a 12V battery (which might only need a 30A controller) is simply inefficient budgeting.
- Lower Efficiency (in some cases): While MPPT controllers generally work across a wide range, some controllers might have slightly lower efficiency at the very low end of their operational range compared to being utilized closer to their rated capacity.
- Physical Size: Larger controllers are physically bigger and heavier, requiring more space and potentially more robust mounting, which can be an issue in confined spaces like an RV or a tiny home.
The goal is to select a controller that's adequately sized for your maximum potential array output, including safety factors, but not excessively large that it becomes a financial burden or an installation headache. Our guide on How to Right-Size vs Oversize a System covers this balancing act in more detail.
What to Do When Your Controller Isn't Performing
It's frustrating when you've done all the work, hooked everything up, and your charge controller isn't doing what it's supposed to. Here are some troubleshooting steps and common issues:
- Check All Connections: This is the golden rule of electrical troubleshooting. Are all wires securely connected? Are they in the correct terminals (PV+, PV-, Batt+, Batt-)? Is the polarity correct? A single loose wire or reversed polarity (even if the controller has protection) can prevent operation. Look for obvious signs of corrosion or damage.
- Verify Voltage Readings: Use a multimeter to check voltages at various points:
- Panel Voltage (Voc): Disconnect panels from the controller and measure the open-circuit voltage directly from the panel array. Does it match your expected total Voc (with cold temperature factor)?
- Battery Voltage: Measure the voltage directly at the battery terminals. Is it within the normal operating range for your battery type? Is it matching what the controller's display (if any) shows?
- Controller Input (PV) Voltage: Measure at the PV input terminals on the controller. Does it match your array Voc?
- Controller Output (Battery) Voltage: Measure at the battery output terminals on the controller. Is it delivering voltage appropriate for charging?
- Check Fuses and Breakers: All systems should have fuses or breakers on both the PV array side and the battery side. A blown fuse or tripped breaker will stop power flow. Learn about How to Size Fuses and Breakers to ensure they are correct for your system.
- Confirm Battery Settings: If your controller allows battery type selection, ensure it's set correctly for your specific batteries (e.g., LiFePO4, AGM, Flooded). Incorrect settings can lead to improper charging or no charging at all.
- Sunlight Conditions: Is there enough sun? Is anything shading your panels? Solar output varies dramatically with light intensity. What might seem like a controller issue could just be a very cloudy day.
- Controller Fault Codes: Many modern charge controllers have diagnostic displays that show error codes. Consult your controller's manual to understand what these codes mean and how to address them. Brands like Renogy and Victron typically have extensive manuals and support resources for interpreting these codes.
If you've gone through these steps and still can't diagnose the issue, don't hesitate to consult the manufacturer's support or reach out to an experienced off-grid solar professional. Sometimes, a fresh pair of eyes can spot something you've overlooked.
PWM vs MPPT Charge Controller Sizing Quick Reference
To help consolidate the key differences and considerations when sizing a charge controller, here's a quick comparison table:
| Feature | PWM Charge Controller | MPPT Charge Controller |
|---|---|---|
| Primary Sizing Factor | Max Input Current (Isc) from Array | Max Input Voltage (Voc) and Max Output Current (Amps) |
| Efficiency | 70-85% (less efficient, especially with high Voc panels) | 92-99% (highly efficient, converts excess voltage to current) |
| Cost | Lower | Higher |
| Best For | Small systems, panel Vmp close to battery voltage, short wire runs, budget-conscious builds | Large systems, panels wired in series, long wire runs, maximizing solar harvest, variable weather |
| Input Voltage Range | Limited (often max 25-50V), typically matches battery voltage | Wide (often up to 150V or 200V+), can be much higher than battery voltage |
| Cold Temp Voc Impact | Less critical if array Voc is already low and matches battery, but still need to confirm max input voltage. | Critical! Must account for cold-weather Voc spike with safety factor. |
| Safety Factor for Current | 1.25 x array Isc | 1.25 x calculated output current to battery |
| Safety Factor for Voltage | Not usually a specific calculation for PWM, but max input voltage limit must be respected. | 1.25 x array Voc (cold weather) |
| Typical Brand Examples | Basic Renogy PWM, generic Amazon models | Victron Energy, Renogy Rover, Outback, EG4 |
This table should serve as a useful mental checklist as you work through your own system design and sizing decisions.
Disclaimer
The information provided in this guide is for general informational purposes only and does not constitute professional electrical engineering advice. Off-grid solar system design and installation can be complex and potentially dangerous if not executed correctly. Always consult with a qualified electrician or solar professional and adhere to all local electrical codes and regulations. Working with electricity carries inherent risks, including electric shock and fire. Proceed with caution and ensure all safety precautions are taken.