Best DIY Battery Kits for Off-Grid
Feeling the pinch of sky-high costs when looking at pre-built battery banks for your off-grid solar system? You're not alone. Many folks dream of energy independence but get hit with sticker shock when they see the price tag on a ready-to-go battery solution. It can feel like a huge barrier, but what if I told you there's a fantastic, often more affordable, and incredibly rewarding path to powering your off-grid dreams? This guide is all about diving deep into the world of DIY battery kits for off-grid living, helping you understand the components, choices, and steps to building your own power storage.
Why DIY Battery Kits? The Allure of Building Your Own
It’s completely understandable why the idea of building your own battery bank might seem daunting at first. Visions of complex wiring diagrams and specialized tools might dance in your head. But for many, the leap into DIY off-grid battery kits isn't just about saving money; it's about empowerment, education, and tailoring a solution that perfectly fits their unique energy needs. Let's unpack why so many people are choosing to roll up their sleeves and build their own battery powerhouses.
Cost Savings and Control
Let's be real, cost is often the biggest driver. Pre-assembled battery banks, especially high-capacity lithium-ion models from well-known brands, come with a premium. That price tag covers the manufacturer's R&D, assembly, branding, and warranty, which are all valuable, but they also significantly inflate the final cost. When you go the DIY route, you're cutting out a large chunk of that markup. You're buying the individual components directly, often at wholesale or near-wholesale prices, particularly the battery cells themselves. This direct sourcing allows you to allocate your budget more efficiently, perhaps investing in higher quality cells or a more robust Battery Management System (BMS) than you might otherwise afford in a pre-built unit. You can also explore different suppliers and compare prices, giving you an immense amount of financial control over your project. The savings can be substantial, making that initial off-grid solar investment feel a lot less overwhelming.
Customization for Unique Needs
One size rarely fits all, and that's especially true in the diverse world of off-grid living. Whether you're powering a tiny cabin in the mountains, a full-time RV, or a remote workshop, your energy demands are unique. A pre-built battery bank might offer a few standard configurations, but what if your space is oddly shaped? What if you need a very specific voltage or a non-standard capacity? With a DIY kit, you are the architect. You get to decide the exact capacity by choosing the number of cells, the voltage by how you wire them (in series or parallel), and even the physical footprint of your battery bank. This flexibility means you can optimize your battery storage for peak performance during cloudy days or extend your system's autonomy, unlike relying on a generic solution. You can truly build a battery bank that integrates seamlessly into your specific setup, rather than trying to force a square peg into a round hole. Want to know more about how much battery capacity you need? Check out our guide on How Many Batteries for an Off-Grid System.
Learning and Empowerment
Beyond the tangible savings and customization, there's an immense sense of satisfaction that comes with building something so fundamental to your off-grid lifestyle. Undertaking a DIY battery project is a fantastic learning experience. You'll gain a deep understanding of battery chemistry, electrical principles, and system design. You'll learn about voltage, current, capacity, and the critical role of a BMS. This knowledge isn't just theoretical; it's practical expertise that empowers you to troubleshoot issues, perform maintenance, and even expand your system down the road. It transforms you from a consumer into a capable system operator, fostering true independence. Plus, being intimately familiar with every component means you’re better equipped to maintain and repair your system, saving on technician fees and downtime in the long run. Many enthusiasts find that the journey of learning to Build a DIY Battery Bank is as rewarding as the finished product.
Key Components of a DIY Off-Grid Battery Kit
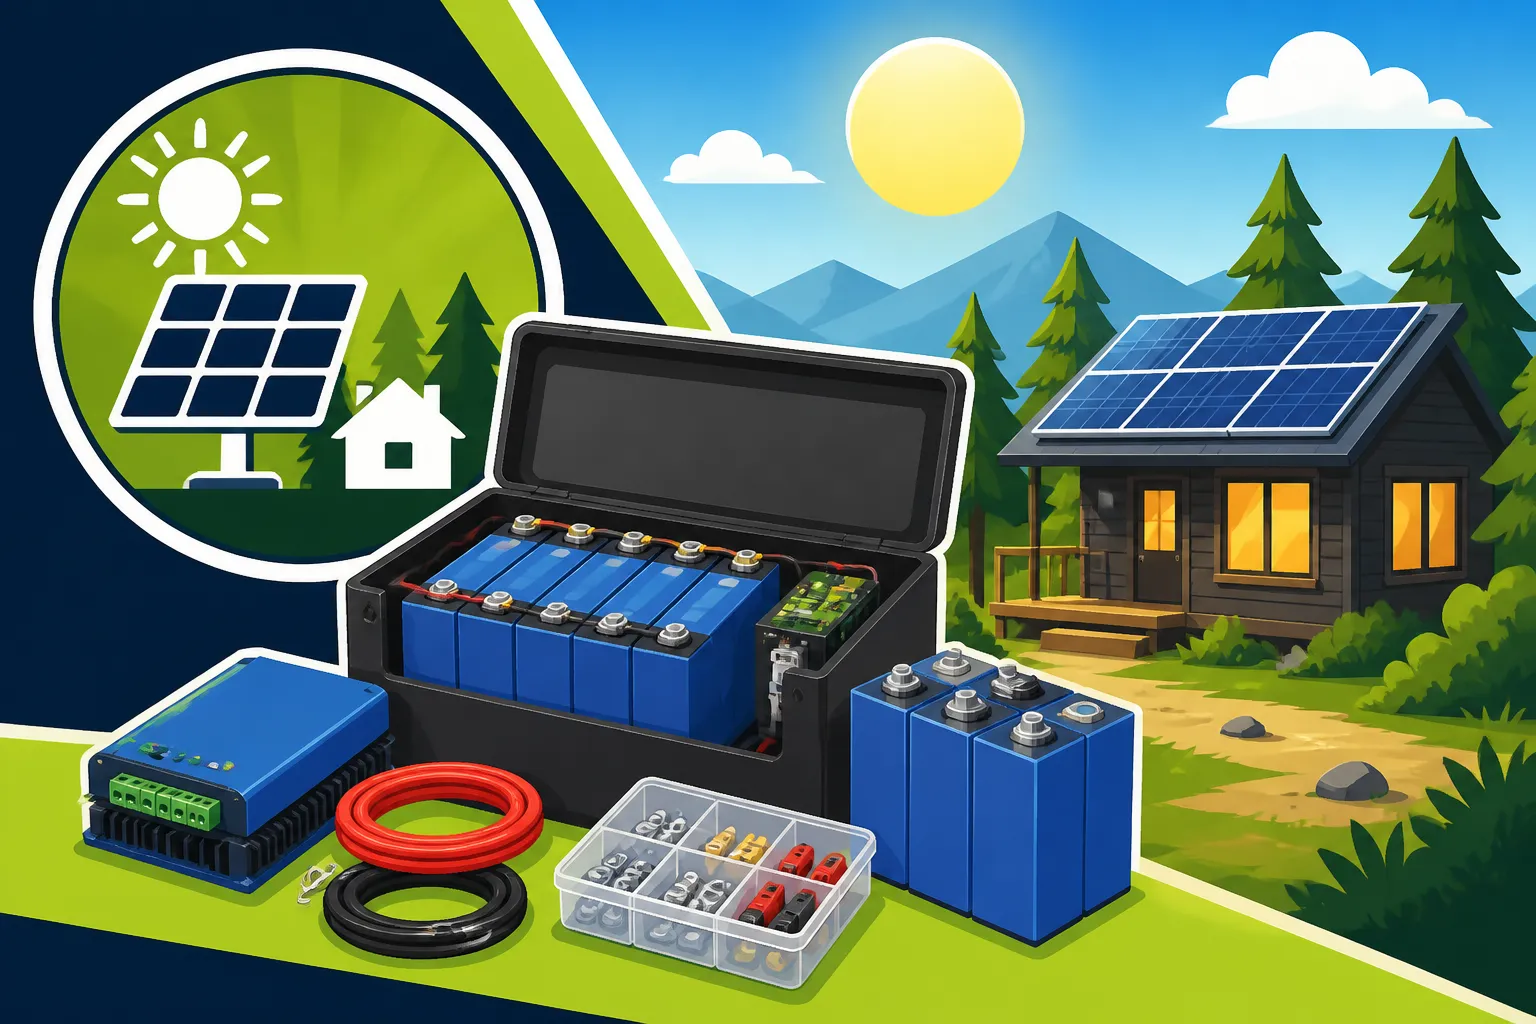
When you're looking at "DIY battery kits," it's not usually a single box with everything perfectly pre-packaged like an IKEA furniture set. Instead, it typically refers to sourcing the major individual components necessary to assemble a functional battery bank. Understanding each piece of the puzzle is crucial to making informed decisions and ensuring your system is safe and efficient.
The Battery Cells Themselves
This is, quite literally, the heart of your DIY battery kit. For off-grid applications, the overwhelming favorite for DIYers today is LiFePO4 (Lithium Iron Phosphate) cells. These are not your everyday AA batteries; they are typically large prismatic cells, often resembling small rectangular bricks. They come in various capacities, commonly 100Ah, 200Ah, or 280Ah, and usually operate at a nominal voltage of 3.2V. You connect these individual cells in series to achieve your desired system voltage (e.g., eight 3.2V cells in series make a 25.6V nominal battery, which is considered a 24V system, and sixteen make a 51.2V nominal battery for a 48V system).
What makes LiFePO4 so popular? They offer an incredible cycle life (meaning they can be charged and discharged thousands of times), a high depth of discharge (you can use almost all of their stored energy without damaging them), and are much safer and more stable than other lithium chemistries. Compared to traditional lead-acid batteries, LiFePO4 cells are lighter, more compact, and require virtually no maintenance. While the upfront cost for LiFePO4 might seem higher than lead-acid, their longevity and efficiency often result in a lower Lifetime Cost of an Off-Grid Solar System. You can learn more about this comparison in articles like LiFePO4 vs Lead-Acid Battery Cost.
Battery Management System (BMS)
If the cells are the heart, the Battery Management System (BMS) is the brain. You absolutely cannot skip this component when building a LiFePO4 battery bank. The BMS is an electronic circuit board that serves several critical functions:
- Cell Balancing: Ensures all individual cells in your series string maintain a similar voltage level. Without balancing, some cells might become overcharged or over-discharged, leading to premature battery degradation or even safety hazards.
- Overcharge Protection: Prevents cells from being charged beyond their safe voltage limit, which can cause heat buildup and damage.
- Over-discharge Protection: Stops the battery from discharging too deeply, which can permanently damage LiFePO4 cells and shorten their lifespan.
- Overcurrent Protection: Shuts down the battery if too much current is drawn, protecting both the battery and your appliances.
- Temperature Protection: Monitors the battery's temperature and disconnects it if it gets too hot or too cold, preventing damage or thermal runaway.
Choosing the right BMS is paramount. It needs to be rated for the correct voltage (e.g., 24V or 48V) and current (e.g., 100A, 200A) for your system. Many modern BMS units also offer Bluetooth connectivity, allowing you to monitor cell voltages, temperature, and overall battery health from your smartphone. Brands like Overkill Solar or Daly are popular choices among DIYers for their reliability and features.
Busbars, Terminals, and Wiring
Once you have your cells and BMS, you need to connect everything. This is where busbars, terminals, and wiring come in.
- Busbars: These are thick copper or aluminum bars that connect the positive terminal of one cell to the negative terminal of the next when wiring in series. They also connect cells of the same polarity when wiring in parallel. High-quality busbars are essential for minimizing resistance and ensuring efficient power transfer. Often, cells come with basic aluminum busbars, but many DIYers upgrade to thicker copper ones for better performance.
- Terminals: These are the connection points on your individual battery cells. They need to be robust and allow for secure attachment of your busbars and main battery cables.
- Wiring: You'll need appropriate gauge wire to connect your battery bank to your inverter and charge controller. Proper wire sizing is critical to prevent voltage drop and overheating. When calculating wire gauge, you'll need to consider the current, the length of the run, and the desired voltage drop. It's an area where cutting corners can lead to inefficiencies and safety risks. Our guide on How to Size Wire and Cables can provide more detailed information.
Enclosures and Safety
A collection of bare cells and exposed wiring isn't a safe or practical battery bank. An enclosure is necessary to protect your cells from environmental factors, physical damage, and accidental contact. This can range from a custom-built wooden box to a more industrial-grade plastic or metal battery box. The enclosure should be sturdy, well-ventilated (even LiFePO4 cells produce a tiny amount of heat during charging/discharging), and offer easy access for maintenance while keeping everything safely contained.
Beyond the enclosure, safety components like fuses and circuit breakers are non-negotiable. A main fuse between your battery bank and your inverter, and smaller fuses for individual cell strings (if your BMS doesn't handle this directly), are essential for protecting against short circuits and overcurrents. You should also consider a master disconnect switch to completely isolate the battery bank when needed for maintenance or emergencies. Proper grounding of your entire off-grid solar system, including your battery enclosure, is also a critical safety measure. You can find out more about this in our article on Off-Grid Solar Safety and Grounding.
Types of Cells for DIY Off-Grid Battery Kits
When embarking on a DIY battery build for your off-grid system, the choice of cell chemistry is arguably the most important decision you'll make. It impacts everything from cost and lifespan to safety and overall performance. While there are a few options out there, one has clearly risen to the top for off-grid DIY enthusiasts: Lithium Iron Phosphate.
LiFePO4 Lithium Iron Phosphate Cells
Let's just get it out there: LiFePO4 (Lithium Iron Phosphate) cells are the reigning champions of DIY off-grid battery builds, and for very good reason. If you're going to build your own, this is almost certainly the chemistry you'll be working with. Here’s a closer look at why they’ve become so incredibly popular:
- Exceptional Lifespan: We're talking thousands of charge/discharge cycles. While traditional lead-acid batteries might give you 300-500 cycles before significant degradation, quality LiFePO4 cells can often provide 3,000 to 6,000 cycles, or even more, before reaching 80% of their original capacity. This means a properly built LiFePO4 bank can last a decade or more, far outstripping the lifespan of its lead-acid counterparts. This longevity makes the higher upfront cost much more justifiable in the long run.
- High Depth of Discharge (DoD): This is a huge advantage for off-grid users. You can safely discharge LiFePO4 batteries down to 80-90% of their capacity without causing damage or significantly shortening their life. In contrast, lead-acid batteries are typically only safe to discharge to about 50% DoD to maintain a decent lifespan. This means a 100Ah LiFePO4 battery offers far more usable energy than a 100Ah lead-acid battery. Effectively, you need less raw capacity to meet the same energy needs, which can save space and weight.
- Consistent Power Output: LiFePO4 batteries maintain a very stable voltage throughout their discharge cycle. This means your appliances receive consistent power until the battery is nearly depleted, unlike lead-acid batteries which see a noticeable voltage sag as they discharge. This constant voltage is crucial for sensitive electronics and ensures optimal performance from your inverter.
- Faster Charging Capability: LiFePO4 batteries can accept a much higher charge current than lead-acid batteries, allowing them to recharge significantly faster. This is incredibly beneficial in off-grid scenarios where solar charging windows might be limited by weather or daylight hours. You can capture more energy from your solar panels in a shorter amount of time.
- Safety and Stability: While all lithium batteries require careful handling, LiFePO4 is one of the safest lithium chemistries available. They are less prone to thermal runaway, overheating, or explosion compared to other lithium-ion types (like those found in laptops or electric vehicles). This inherent stability, combined with a robust Battery Management System (BMS), makes them a relatively safe choice for home-based DIY projects.
- Lightweight and Compact: Compared to lead-acid batteries of equivalent usable energy, LiFePO4 cells are considerably lighter and take up much less space. This is a massive advantage for mobile off-grid setups like RVs or vans, and even for stationary cabins where space might be at a premium.
- Maintenance-Free: Once properly assembled and set up with a BMS, LiFePO4 batteries are essentially maintenance-free. There's no need to check water levels (as with flooded lead-acid) or worry about sulfation.
The majority of DIY LiFePO4 kits consist of individual 3.2V prismatic cells, often from manufacturers like EVE, CATL, or Lishen, which are then assembled into larger battery packs. When sourcing, pay close attention to the cell grade (A-grade cells are preferred) and consistency of internal resistance, as these factors impact the long-term performance and balance of your battery bank. If you want to delve deeper into the nuances of How to Choose Off-Grid Battery Chemistry, we have a comprehensive article on that very topic.
Exploring Other Options Briefly
While LiFePO4 is the go-to for DIY off-grid, it’s worth a quick mention of other chemistries, primarily to understand why they’re less suited for this specific application.
- Lead-Acid Batteries (Flooded, AGM, Gel): These are the traditional workhorses of off-grid power, and they are still viable, especially for budget-conscious projects. However, for DIY kits, they are less common in the "build-your-own-from-cells" sense, as they are usually purchased as complete, sealed units. They are cheaper upfront but suffer from shorter lifespans, lower usable capacity (due to shallower DoD), slower charging, heavier weight, and often require more maintenance. For many looking for longevity and performance, Best Off-Grid Solar Batteries will lean heavily towards lithium.
- Other Lithium-Ion Chemistries (NMC, LCO, etc.): These are fantastic for high energy density applications like electric vehicles or consumer electronics. However, they are typically more volatile, less stable, and have a higher risk of thermal runaway compared to LiFePO4. Their higher energy density isn't as critical for stationary off-grid power storage, and the increased safety concerns make them unsuitable for most DIY projects without specialized knowledge and equipment.
For most DIY off-grid power storage, the choice is clear: LiFePO4 offers the best balance of performance, longevity, safety, and cost-effectiveness when built correctly with a proper BMS.
Choosing the Best DIY Battery Kit for Your Needs
Navigating the world of DIY battery kits can feel a bit like being a kid in a candy store, but with high-voltage consequences. The "best" kit isn't a universal truth; it's entirely dependent on your specific situation, energy demands, and technical comfort level. Here's how to think through your options and make a choice that genuinely serves your off-grid lifestyle.
Assessing Your Energy Requirements
Before you even start looking at cells, you must know your energy needs. This isn't a step you can skip, fudge, or guess at. Your entire system's design, from the size of your solar array to your inverter, hinges on this calculation.
Start by listing every appliance and device you plan to power. For each item, identify its wattage (how much power it consumes at any given moment) and how many hours per day you'll use it.
For example:
- LED Lights: 10W x 5 hours = 50 Wh/day
- Refrigerator: 100W (running average) x 8 hours = 800 Wh/day (fridges cycle on and off, so this is an estimated run time)
- Laptop Charging: 60W x 2 hours = 120 Wh/day
- Water Pump: 500W x 0.5 hours = 250 Wh/day
Sum up all these daily watt-hours (Wh) to get your total daily energy consumption. For instance, if your sum is 3,000 Wh (or 3 kWh) per day. This is your foundation.
Next, consider your desired days of autonomy. This refers to how many days your battery bank can power your loads without any incoming solar charge (e.g., during prolonged cloudy weather). For most off-grid setups, 2-3 days of autonomy is a good starting point, but remote or critical systems might aim for more.
Let's say you need 3,000 Wh/day and want 3 days of autonomy.
Total energy needed = 3,000 Wh/day * 3 days = 9,000 Wh.
Now, remember that usable capacity for LiFePO4 is about 80-90% DoD. So, if you need 9,000 Wh usable capacity, your nominal battery capacity needs to be a bit higher.
Nominal battery capacity = 9,000 Wh / 0.85 (for 85% DoD) = approx. 10,588 Wh.
If you're building a 24V system, your battery's Amp-hour (Ah) capacity would be 10,588 Wh / 24V = 441 Ah. If it's a 48V system, it would be 10,588 Wh / 48V = 220 Ah. This calculation will directly tell you how many individual 100Ah or 280Ah cells you'll need. It's a fundamental step that you can learn more about in our detailed guide on How to Calculate Daily Energy Usage and How Many Watt-Hours You Use Per Day.
Understanding Cell Quality and Supplier Reputation
Not all battery cells are created equal, even if they share the same chemistry and nominal specifications. When buying individual cells for a DIY kit, quality and the reputation of your supplier are paramount.
- Cell Grading: Look for "Grade A" cells. These are new, fully tested cells that meet the manufacturer's specifications. Avoid "Grade B" or "used" cells for critical off-grid applications unless you are extremely knowledgeable in battery testing and willing to accept higher risks. Grade B cells often have minor cosmetic defects or slightly reduced capacity/lifespan.
- Consistency: When buying multiple cells, it's crucial that they are as consistent as possible in terms of internal resistance and voltage. Buying matched sets from a reputable supplier helps ensure better performance and easier balancing for your BMS.
- Supplier Reputation: Do your homework! Look for suppliers with transparent pricing, clear product descriptions, good customer reviews, and responsive support. Forums and YouTube channels dedicated to DIY power are excellent resources for finding trusted vendors. Be wary of deals that seem too good to be true, especially from unknown online sellers, as counterfeit or low-quality cells are a real concern. Reputable suppliers often offer pre-tested cells and even include suitable busbars.
Compatibility with Your Existing System
A DIY battery kit isn't an island; it's part of a larger off-grid ecosystem. You need to ensure your new battery bank will play nicely with your existing (or planned) charge controller and inverter.
- System Voltage: Most off-grid systems run at 12V, 24V, or 48V. Your DIY battery bank must be built to match this voltage. For example, if you have a 48V inverter, you'll need to build a 48V battery bank (typically using sixteen 3.2V LiFePO4 cells in series). Mismatching voltages can lead to severe damage to your components. Our article on How to Choose System Voltage is a great resource.
- Charge Controller Settings: Your charge controller (e.g., MPPT or PWM) needs to be programmable for LiFePO4 charging parameters. This includes specific bulk, absorption, and float voltages, as well as temperature compensation if applicable. Most modern MPPT charge controllers from brands like Victron, Outback, or Renogy offer these customizable settings.
- Inverter Capacity: Ensure your inverter's input voltage range is compatible with your battery bank's voltage, and its continuous and surge wattage ratings are sufficient for your loads. A well-sized inverter is crucial for running all your appliances smoothly. For example, if you plan to Run a Well Pump on Off-Grid Solar, you'll need an inverter with a significant surge capacity.
Taking the time to plan and match your components will prevent costly mistakes and ensure your DIY battery kit integrates seamlessly into a reliable and efficient off-grid power system.
Popular Brands and Where to Find DIY Components
When you decide to go the DIY route for your off-grid battery, you're essentially becoming the system integrator. This means sourcing components from various places, rather than buying a single "kit" from one brand. However, certain brands stand out for their quality components or as reputable marketplaces for DIYers.
Trusted Suppliers for Cells and BMS
For the core components – the LiFePO4 cells and the crucial Battery Management System (BMS) – it's vital to source from established and reliable suppliers. These aren't items you want to gamble on.
-
Online Battery Specialists: There are several reputable online retailers that specialize in LiFePO4 cells and related components. These companies often work directly with manufacturers like EVE, CATL, Lishen, or offer their own branded cells that meet high-quality standards.
- LiFePO4 Power: A well-known supplier that often provides tested and matched cells, simplifying the balancing process for DIYers. They often bundle cells with appropriate busbars and a BMS.
- Signature Solar (EG4): While known for their complete systems and inverters, Signature Solar also offers individual EG4 LiFePO4 cells and server rack batteries that are popular with DIYers looking for high-quality components. Their offerings are often accompanied by strong community support and educational resources.
- Other Reputable Sellers: Look for dedicated battery component stores that are active in the DIY solar community. Many smaller, niche businesses have popped up, focusing on providing quality cells, BMS units (like Daly, JK BMS, Overkill Solar), and accessories. Always check recent reviews and forum discussions for current recommendations.
-
Wholesale or Manufacturer Direct (with caution): Some DIYers with larger projects might look into buying directly from manufacturers or large wholesalers, often from overseas. While this can yield significant cost savings, it usually requires purchasing in larger quantities, navigating international shipping and customs, and having the expertise to thoroughly test the cells upon arrival. It's generally not recommended for beginners.
When shopping, especially for cells, confirm the cell grade (A-grade is best), the actual tested capacity (some sellers provide individual cell test reports), and that busbars are included or clearly specified for purchase. For BMS units, ensure it's adequately rated for your desired voltage and current, and that it offers the protective features you need.
The Role of Online Marketplaces like Amazon
Amazon can be a double-edged sword for DIY off-grid battery components. On one hand, it offers incredible convenience and a vast selection. You can easily find various accessories, lower-power LiFePO4 batteries (often in cases, not raw cells), and smaller components.
-
Pros of Amazon:
- Accessibility: Easy to find accessories like battery terminals, heat shrink tubing, wire lugs, safety fuses, and cable management solutions.
- Shipping: Fast and often free shipping for Prime members, which can be a huge plus when you need a small part quickly.
- Customer Reviews: You can often gauge the quality and reliability of a product by sifting through customer reviews, though it's important to differentiate between reviews for a complete product vs. individual components.
- Lower-Capacity Batteries: For small projects, such as a 100W Off-Grid Solar System, you might find complete 12V LiFePO4 batteries (often 50Ah or 100Ah) that are suitable for a simpler DIY setup, even if they aren't raw cells. Brands like Ampere Time or LiTime often offer these types of pre-assembled batteries with internal BMS.
-
Cons of Amazon:
- Quality Control: The biggest challenge is the variability in seller quality. It can be harder to verify the authenticity and true specifications of raw LiFePO4 cells or a critical BMS from unknown third-party sellers. There's a higher risk of receiving mislabeled, B-grade, or even counterfeit products.
- Limited High-Capacity Raw Cells: It's less common to find high-capacity (e.g., 280Ah+) raw prismatic LiFePO4 cells suitable for a large home system on Amazon from truly verified, high-volume sellers.
For core components like raw LiFePO4 cells and the main BMS, it's generally safer to stick to specialized battery suppliers. However, for supporting items, tools, and smaller 12V LiFePO4 batteries, Amazon can be a valuable resource.
Considering Renogy for Integrated Solutions
Renogy is a brand that occupies a unique space in the off-grid solar market. They are incredibly popular among RVers, van lifers, and cabin owners for their comprehensive range of solar panels, charge controllers, inverters, and batteries. While they don't typically sell individual raw LiFePO4 cells for pure DIY battery building, they offer robust, complete LiFePO4 batteries that come with an integrated BMS.
- Renogy's Role in DIY: If your idea of "DIY battery kit" leans more towards assembling a system from high-quality, pre-built components rather than soldering individual cells, Renogy offers excellent solutions. Their LiFePO4 batteries are designed to seamlessly integrate with their charge controllers and inverters, making system design and installation much simpler.
- Ease of Integration: Renogy's ecosystem approach means their products are often plug-and-play within their brand. This reduces complexity and guesswork, which can be appealing if you're comfortable with electrical work but prefer not to delve into the microscopic world of cell balancing and BMS programming.
- Product Range: Renogy offers various capacities of 12V, 24V, and 48V LiFePO4 batteries, often with features like low-temperature cutoff (critical for cold climates) and Bluetooth monitoring. They also offer flexible solar panels and a wide range of accessories that are commonly used in DIY setups.
So, while Renogy might not provide the raw cells for a ground-up battery build, they definitely cater to a segment of the DIY market that prefers to assemble a reliable system from well-engineered, complementary components. Many DIYers combine Renogy panels and charge controllers with their own self-built or purchased LiFePO4 batteries.
Installation Considerations and Safety Tips for DIY Battery Kits
You've meticulously researched, carefully sourced your components, and now you're ready to bring your DIY battery bank to life. This is where the rubber meets the road, and it's paramount to approach the installation with diligence and, most importantly, a strong commitment to safety. Rushing or cutting corners here can lead to inefficiencies, equipment damage, or even serious hazards.
Tools and Workspace Preparation
Before you even think about connecting wires, make sure you have the right tools and a safe, organized workspace. This isn't a job for rusty pliers and a dimly lit corner.
- Essential Tools:
- Multimeter: Absolutely non-negotiable for checking voltage, continuity, and diagnosing issues. Learn how to use it proficiently.
- Insulated Wrenches/Sockets: To tighten battery terminals safely, preventing accidental short circuits.
- Crimper: For attaching battery lugs to cables. Hydraulic crimpers are ideal for larger gauge cables to ensure solid, low-resistance connections.
- Wire Strippers: For cleanly stripping insulation from battery cables.
- Heat Gun/Torch: For shrinking heat-shrink tubing over connections, providing insulation and protection.
- Personal Protective Equipment (PPE): Safety glasses are a must. Heavy-duty insulated gloves are highly recommended when working with battery terminals, especially with higher voltage systems.
- Fire Extinguisher: Have a Class ABC or D (for lithium fires) extinguisher readily accessible.
- Workspace: Choose a dry, well-ventilated area away from combustible materials. Ensure it's clear of clutter, well-lit, and provides enough space to work comfortably and safely without bumping into things or tripping over cables. Consider laying down a non-conductive mat. If working on a mobile setup like an RV, ensure the vehicle is stable and the work area is clear.
Wiring and Connection Best Practices
Wiring your DIY battery kit correctly is critical for performance and safety. Every connection counts.
- Series vs. Parallel Wiring:
- Series: Connects the positive terminal of one cell to the negative terminal of the next to increase the overall voltage (e.g., four 3.2V cells in series make a 12.8V battery).
- Parallel: Connects positive to positive and negative to negative to increase the overall amperage/capacity (e.g., two 100Ah 12.8V batteries in parallel create a 200Ah 12.8V battery).
- Most DIY LiFePO4 builds involve wiring individual 3.2V cells in series to achieve the desired system voltage (e.g., 8 cells for 24V, 16 cells for 48V). Then, if more capacity is needed, multiple strings of series-wired cells can be connected in parallel. Refer to our guide on How to Wire a Battery Bank for detailed diagrams and explanations.
- Clean and Secure Connections: All connections (busbars to cells, cables to lugs, lugs to terminals) must be clean, tight, and secure. Loose connections create resistance, generate heat, and can lead to power loss or even fire. Use dielectric grease on terminals to prevent corrosion.
- Proper Cable Sizing: Always use appropriately sized cables (gauge) for the expected current draw and length of the run. Undersized cables can overheat, cause significant voltage drop, and reduce efficiency. If you need to Prevent Voltage Drop in Off-Grid Wiring, correctly sizing your cables is paramount.
- Insulation: After making connections, ensure all exposed metal is properly insulated using heat-shrink tubing, electrical tape (as a secondary measure), or terminal covers. This prevents accidental short circuits, especially crucial if working in confined spaces.
- Initial Cell Balancing: Before assembling your LiFePO4 cells into a bank, it's highly recommended to perform an initial top-balancing procedure. This involves charging each individual cell to its maximum voltage (e.g., 3.65V) and allowing them to sit for a while to ensure they are all at the same state of charge. This gives your BMS an easier job once the bank is assembled. You can read more about How to Balance Batteries Before Wiring.
Safety First: Fuses, Breakers, and Ventilation
Electrical systems, especially high-capacity battery banks, demand respect and robust safety measures.
- Fuses and Breakers: These are your system's guardians.
- Main DC Disconnect/Breaker: Install a properly rated DC breaker or fuse (e.g., ANL or T-fuse for larger systems) as close as possible to the positive terminal of your battery bank. This protects the entire system from catastrophic overcurrents or short circuits from your inverter or charge controller.
- BMS Protection: Your Battery Management System (BMS) provides internal overcurrent protection, but the main DC fuse acts as a vital last line of defense.
- Ventilation: Even though LiFePO4 batteries are sealed and don't off-gas like flooded lead-acid, they still generate some heat during heavy charging and discharging cycles. Your battery enclosure needs adequate ventilation to dissipate this heat and prevent premature degradation of the cells and BMS. Passive vents might suffice for smaller systems, but larger banks might benefit from a small, low-power exhaust fan.
- Battery Enclosure: As mentioned earlier, a robust, non-conductive enclosure is essential. It protects the cells from physical damage, accidental contact, and provides an organized space for wiring. If you're building a new enclosure, consider materials that are fire-resistant and ensure easy access for future maintenance. Take a look at How to Build a Battery Box for inspiration and practical steps.
- Grounding: Ensure your entire off-grid system, including your inverter chassis and potentially your battery enclosure (if metal), is properly grounded to a common ground point. This provides a safe path for fault currents and is a critical safety measure against electrical shock.
By meticulously planning your installation, using the correct tools, adhering to best wiring practices, and implementing robust safety measures, you'll ensure your DIY off-grid battery kit is a reliable, efficient, and safe power source for years to come.
Pros and Cons of DIY Off-Grid Battery Kits
Deciding to build your own off-grid battery bank from a DIY kit is a significant undertaking, and like any big project, it comes with a unique set of advantages and disadvantages. It’s important to look at both sides honestly before committing your time and resources.
Advantages: Savings, Knowledge, Flexibility
Let's start with the good stuff, the reasons why so many folks are drawn to the DIY path.
- Significant Cost Savings: This is often the primary motivator, and it's a huge one. When you purchase individual cells, a separate BMS, and assemble them yourself, you can often save 30% to 50% (or even more) compared to buying a fully assembled, branded battery bank of equivalent capacity. This is especially true for larger systems where the cost of a pre-built solution can be astronomical. By cutting out the labor, assembly, and branding markup, you put more money back in your pocket, or allow yourself to afford more capacity than otherwise possible. This directly impacts your Off-Grid Solar Cost: Complete Breakdown in a positive way.
- In-Depth Knowledge and Empowerment: Building your own battery bank is an incredible learning experience. You gain a deep, hands-on understanding of how your power system works, from cell chemistry and balancing to the intricacies of the BMS. This knowledge is invaluable for troubleshooting, maintenance, and future expansion. You're not just a user; you're an expert in your own system. This self-reliance is a cornerstone of off-grid living and can be incredibly empowering.
- Unparalleled Customization and Flexibility: Pre-built battery banks come in fixed sizes and form factors. With a DIY kit, you have complete control. Need a specific Amp-hour capacity? You can build it. Have an oddly shaped space for your battery bank? You can design an enclosure to fit. Want to use specific brands for your cells or BMS? You're free to choose. This flexibility allows you to perfectly tailor the battery bank to your unique energy needs and physical constraints, optimizing performance and integration into your overall system. You can even design it with future expansion in mind, knowing exactly How to Expand an Off-Grid System down the line.
- Component-Level Repairability: If a single cell or a component of your BMS fails in a pre-built bank, you often have to send the entire unit back for repair or replacement. With a DIY setup, you can often diagnose and replace individual faulty cells or a malfunctioning BMS, potentially saving significant time and money on repairs and reducing downtime.
Disadvantages: Time, Skill, Warranty, Potential Risks
While the benefits are compelling, it's crucial to be aware of the challenges and potential downsides of going the DIY route.
- Time Commitment: Building a battery bank is not a quick project. It requires significant time for research, sourcing components, potentially pre-balancing cells, assembly, wiring, and rigorous testing. If you're short on time or need a system up and running immediately, a DIY kit might not be the best choice. This isn't just a weekend project for a complex, high-capacity system.
- Technical Skill and Knowledge Required: This isn't for the faint of heart or those completely new to electrical work. You need a solid understanding of electrical principles, safety protocols, and the specific requirements of LiFePO4 chemistry. Mistakes in wiring, cell balancing, or BMS setup can lead to poor performance, premature battery failure, or, in worst-case scenarios, safety hazards like fire. While there are tons of resources available, including guides on Off-Grid Solar Wiring Best Practices, you still need to be confident in your abilities.
- No Single-Point Warranty: When you buy a pre-built battery, you typically get a single warranty from the manufacturer covering the entire unit. With a DIY kit, you have separate warranties (if any) for individual components (cells, BMS, etc.). This can complicate troubleshooting and warranty claims if an issue arises. You become responsible for the overall system's integrity, and there's no "kit manufacturer" to back you up if something goes wrong due to your assembly.
- Potential Safety Risks: Incorrect wiring, inadequate fusing, improper BMS setup, or using low-quality components can create serious safety hazards. LiFePO4 batteries are stable, but they still store a tremendous amount of energy. Short circuits can lead to extremely high currents, fire, and personal injury. This is why thorough research, adherence to safety standards, and careful work are non-negotiable.
- Initial Setup and Configuration: Even after assembly, programming your BMS, ensuring proper communication with your charge controller, and setting appropriate charging parameters can be complex. This might involve diving into software interfaces and understanding specific battery curves and voltage cutoffs.
- Resale Value and Documentation: A professionally assembled battery bank from a recognized brand might have better resale value and clearer documentation than a custom-built DIY solution, especially if you ever decide to sell your off-grid property or upgrade your system.
Ultimately, the decision comes down to your comfort level with electrical work, your budget, your timeline, and your desire for deep system understanding. For many, the rewards of building a high-performance, cost-effective, and perfectly customized off-grid battery bank far outweigh the challenges.
Disclaimer
Please be aware that working with electricity and high-capacity battery systems can be dangerous. This guide provides general information and best practices. Always consult with a qualified electrician or solar professional before undertaking any complex electrical work. Ensure you understand all local codes, regulations, and safety procedures. The author and publisher are not responsible for any injury, damage, or loss incurred as a result of following the information presented herein.