How to Size an Off-Grid Battery Bank
One of the trickiest parts about diving into the world of off-grid solar is getting your head around battery sizing. It’s easy to feel overwhelmed, wondering if you've bought too little capacity and will constantly be without power, or too much, draining your wallet unnecessarily. This guide is here to walk you through the entire process, breaking down how to accurately size an off-grid battery bank so you can enjoy reliable, consistent power without the guesswork and anxiety.
Understanding Your Energy Consumption for Battery Sizing
Before you even think about batteries, you need a crystal-clear picture of what you're actually powering. This might sound simple, but it's where most folks make their first mistake – either underestimating their needs or overestimating and ending up with an unnecessarily expensive system.
The Critical First Step: Performing a Load Analysis
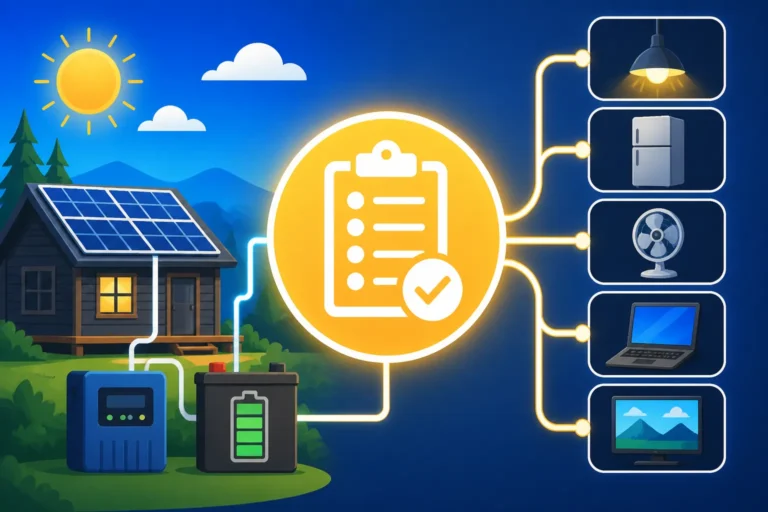
Think of a load analysis as taking inventory of every single electrical device you plan to run. This isn't just about the big energy hogs like a refrigerator or a well pump; it's also about the phone chargers, the LED lights, the laptop, and even the tiny clock radio you forget is always plugged in. Every watt-hour counts in an off-grid system.
To start, grab a pen and paper, or open up a spreadsheet. Go room by room, or if you're in an RV, appliance by appliance. For each item, you need to identify its wattage and how many hours per day you expect to use it. Many appliances have a label on the back or bottom that lists their wattage. If not, you can often find this information in the owner's manual or a quick online search. For example, a modern energy-efficient refrigerator might draw 100-200 watts, but it only cycles on for a fraction of the day. A laptop charger might be 60 watts, used for 4 hours. Don't forget seasonal items, like a fan in the summer or a small heater in the winter, and decide if these are critical loads you need to size your battery for. This detailed analysis is absolutely crucial to accurately How to Calculate Daily Energy Usage.
Calculating Daily Watt-Hours Wh and Amp-Hours Ah
Once you have your list of appliances and their estimated daily usage, it's time to crunch some numbers. For each appliance, multiply its wattage by the hours of daily use to get its daily watt-hours (Wh). For instance, a 100-watt television used for 3 hours a day consumes 300 Wh. Do this for every item on your list, then add up all the daily watt-hours to get your total estimated daily energy consumption. This total is the foundation of your battery bank sizing.
Now, why do we care about amp-hours (Ah)? While watt-hours give you the total energy, amp-hours relate directly to battery capacity, especially when you consider your system voltage (12V, 24V, or 48V). To convert your total daily watt-hours to amp-hours, divide the total Wh by your chosen system voltage. So, if you have 3000 Wh per day and you're planning a 12V system, you'd need roughly 250 Ah of usable capacity per day. This is a crucial distinction that often trips up beginners, but understanding Watts vs Watt-Hours vs Amp-Hours Explained will clear things right up.
Accounting for Phantom Loads and Infrequent Use Appliances
It's so easy to overlook those sneaky energy consumers that constantly draw a small amount of power, even when they appear "off." These are known as phantom loads or vampire loads. Think about your microwave's clock, the standby light on your TV, your phone charger that's always plugged in even without a phone, or even some modern smart devices that constantly maintain a network connection. These tiny draws add up over 24 hours. A good rule of thumb is to add an extra 10-15% to your total daily consumption to account for these hidden power vampires.
Then there are the appliances you don't use every day, but when you do, they draw a lot of power. Maybe it's a heavy-duty blender for a smoothie a few times a week, a vacuum cleaner, or power tools used on weekends. You don't necessarily need to size your daily battery capacity for these, but you need to ensure your inverter can handle their surge wattage, and that your overall solar array can replenish the energy they consume over a week. For instance, if you use a 1000-watt vacuum for 30 minutes once a week, that's an extra 500 Wh for that specific day, which needs to be considered in your weekly energy budget. Performing a thorough How to Do an Off-Grid Load Analysis covers these details.
Deciphering Battery Chemistry and Its Impact on Capacity
The type of battery you choose isn't just about cost; it profoundly impacts the usable capacity, lifespan, and overall efficiency of your off-grid system. There's no one-size-fits-all, and understanding the nuances is key.
Lithium Iron Phosphate LiFePO4 Batteries: The Modern Choice
LiFePO4, or Lithium Iron Phosphate, batteries have truly revolutionized off-grid power. They are lauded for their impressive depth of discharge (DoD), which means you can safely use almost all of their rated capacity without damaging the battery. Typically, you can discharge LiFePO4 batteries down to 80-100% DoD, providing significantly more usable energy than lead-acid batteries of the same nominal capacity. For example, a 100Ah LiFePO4 battery offers close to 100Ah of usable power.
Beyond their fantastic DoD, LiFePO4 batteries boast an incredibly long cycle life, often lasting 3,000 to 7,000 cycles, translating to 10-20 years of use in many off-grid scenarios. They're also much lighter and more compact than lead-acid, making them ideal for mobile applications like RVs or vans. While the upfront cost is higher, their longevity and superior performance often lead to a lower LiFePO4 vs Lead-Acid Battery Cost over the system's lifetime. Many off-gridders choose brands like Renogy or Battle Born for their reliability and integrated Battery Management Systems (BMS), which protect against overcharging, over-discharging, and temperature extremes.
Lead-Acid Batteries: Flooded, AGM, and Gel Options
Lead-acid batteries are the traditional workhorse of off-grid systems and are generally more affordable upfront. However, they come with a crucial limitation: a much shallower recommended depth of discharge.
- Flooded Lead-Acid (FLA) batteries, often seen in golf carts or forklifts, are the cheapest and can offer a decent cycle life if meticulously maintained. They typically allow for a 50% DoD, meaning a 100Ah FLA battery provides only about 50Ah of usable energy. They require regular watering (topping up with distilled water) and proper ventilation to dissipate hydrogen gas during charging.
- Absorbed Glass Mat (AGM) batteries are a sealed, maintenance-free version of lead-acid. They're spill-proof, can be mounted in various orientations, and handle vibration well, making them popular for RVs or marine applications. Their recommended DoD is also around 50%, and they have a shorter cycle life than FLAs.
- Gel batteries are similar to AGMs but use a silica gel to suspend the electrolyte. They are also sealed and maintenance-free, excel in hot climates, and have a very slow self-discharge rate. However, they are more sensitive to overcharging and generally have a lower maximum charge rate and slightly lower capacity compared to AGMs of the same size. Their DoD is usually capped at 50%.
When considering lead-acid, remember that you'll need to double the nominal capacity to get the same usable energy as a LiFePO4 battery, and factor in their shorter lifespan when evaluating the Cost of an Off-Grid Solar Battery Bank over many years.
Depth of Discharge DoD and Usable Capacity
This is perhaps the most critical concept when sizing your battery bank. Depth of Discharge (DoD) refers to the percentage of a battery's total capacity that has been discharged. For longevity, you want to avoid regularly discharging a battery too deeply.
As mentioned, LiFePO4 batteries are typically rated for 80-100% DoD without significant impact on their cycle life. This means if you have a 200Ah LiFePO4 battery, you can safely use 160-200Ah of power. On the other hand, traditional lead-acid batteries (FLA, AGM, Gel) are generally recommended to be discharged no more than 50% to maximize their lifespan. So, a 200Ah lead-acid battery only provides about 100Ah of usable capacity. If you push them deeper, you'll drastically shorten their life. This distinction fundamentally changes how many batteries you need to purchase for the same amount of usable energy. For practical purposes, when calculating total battery capacity, always factor in the usable capacity based on the recommended DoD for your chosen battery chemistry.
Determining Days of Autonomy DoA for Reliability
Designing an off-grid system isn't just about sunny days. It's about ensuring you have power even when the sun isn't cooperating. This is where the concept of "days of autonomy" comes into play.
Why You Need to Plan for Cloudy Days and Low Sun
Imagine a week of relentless rain, or a stretch of heavy snow in winter. If your solar panels aren't generating much power, your battery bank becomes your sole energy source. Days of autonomy (DoA) is the number of days your battery bank can sustain your energy needs without any input from your solar panels or a backup generator. For most full-time off-grid homes, aiming for 3-5 days of autonomy is a common recommendation, though this can vary wildly based on your location and risk tolerance. If you live in a notoriously cloudy region, or you simply prefer absolute peace of mind, you might want to aim for 7 days.
Considering DoA is vital because it directly impacts the overall size and How Many Batteries for an Off-Grid System you'll need. Failing to account for cloudy days is a common mistake that leads to frustration and reliance on backup generators, defeating some of the purpose of going off-grid. Think about your family's comfort and essential needs during an extended period of low solar production.
Balancing Autonomy with Budget and Space Constraints
While more autonomy sounds great, it comes with a cost. Each additional day of autonomy means a larger battery bank, which translates to significantly higher expenses for batteries, more space required for installation, and potentially a heavier footprint for mobile setups like an RV or van. You'll need to strike a balance between desired reliability, your budget, and the physical space you have available for your battery bank.
For a remote cabin that's only used on weekends, you might get away with 1-2 days of autonomy. For a full-time off-grid homestead in the Pacific Northwest, 5-7 days might be a bare minimum. It's a personal decision based on your specific situation, energy needs, and financial limits. Don't forget that larger battery banks also require more solar panels to recharge them efficiently, further increasing the overall system cost. It’s a delicate dance between ambition and reality, but understanding your priorities will guide your choices.
Seasonal Adjustments and Contingency Planning
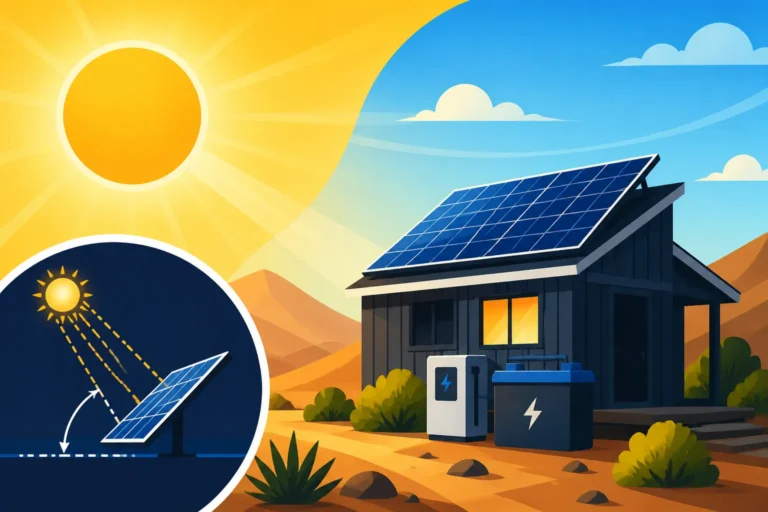
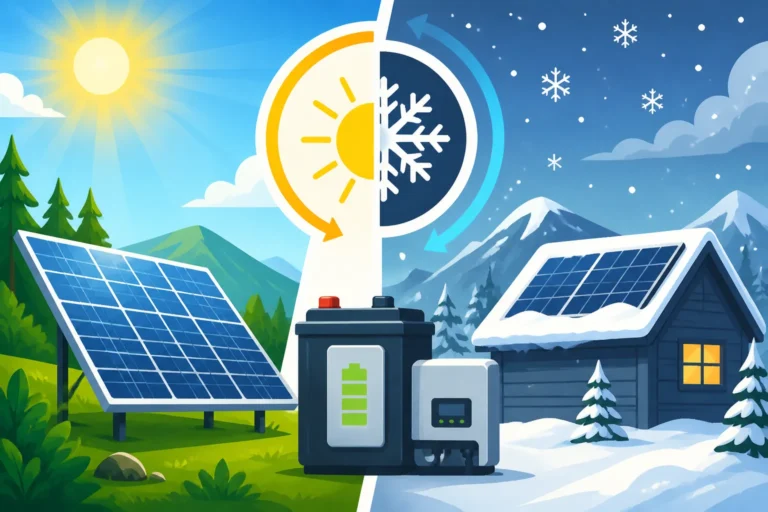
The amount of sunlight you receive varies significantly with the seasons. In winter, days are shorter, the sun is lower in the sky, and weather conditions are often cloudier. This means your solar panels will generate less power, but your energy needs for heating and lighting might increase. When determining your days of autonomy, it's prudent to plan for your lowest production period, which is typically winter. This might mean designing your system for a higher DoA during those darker months, or accepting that you'll need to supplement with a generator more frequently.
Contingency planning also involves thinking about emergencies or unexpected events. What if an appliance breaks and draws more power temporarily? What if you have guests and your energy consumption spikes? Having a bit of buffer in your battery bank, even if it's just one extra day of autonomy, can be a lifesaver. This proactive approach ensures your system can handle the unexpected, contributing to a more robust and reliable off-grid experience. Designing for How to Design for Year-Round Off-Grid Power is an important consideration.
Calculating Your Total Battery Bank Capacity
Now that we understand consumption, battery types, and desired autonomy, it's time to put it all together and calculate the actual size of your battery bank. This is where the rubber meets the road!
The Core Formula: Bringing Together Consumption and Autonomy
The fundamental formula for calculating your required battery bank capacity is quite straightforward:
Total Usable Battery Capacity (Wh) = Daily Energy Consumption (Wh) x Days of Autonomy (DoA)
Let's say your detailed load analysis (from the first section) showed you use 4,000 Wh per day, and you've decided you want 3 days of autonomy to cover those cloudy stretches.
So, your total usable battery capacity needed in watt-hours would be:
4,000 Wh/day * 3 days = 12,000 Wh.
This 12,000 Wh represents the total usable energy your battery bank needs to store. If you're using LiFePO4 batteries with an 80% DoD, you'd then divide this usable capacity by 0.8 to get the nominal capacity required. If you're using lead-acid with a 50% DoD, you'd divide by 0.5. This conversion is critical because batteries are usually rated by their nominal capacity.
Accounting for System Voltage 12V, 24V, 48V
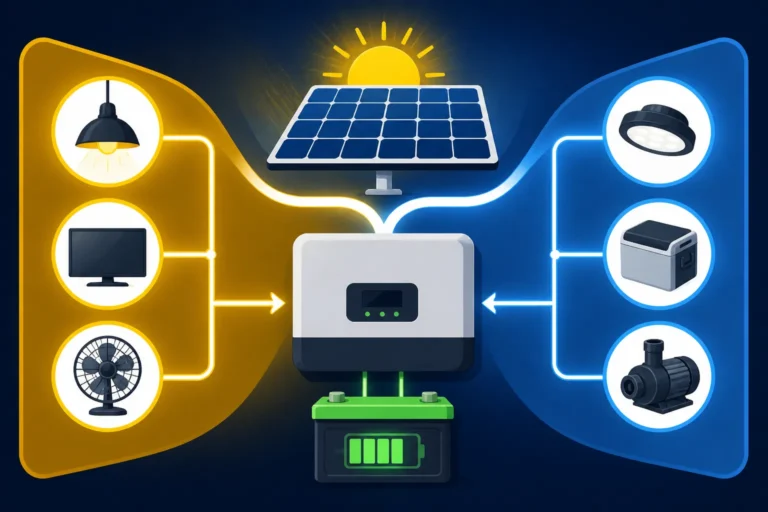
Once you have your total usable capacity in watt-hours, you need to translate that into amp-hours (Ah) based on your chosen system voltage. Your system voltage (12V, 24V, or 48V) refers to the voltage at which your battery bank operates, and it influences everything from wire sizing to inverter selection.
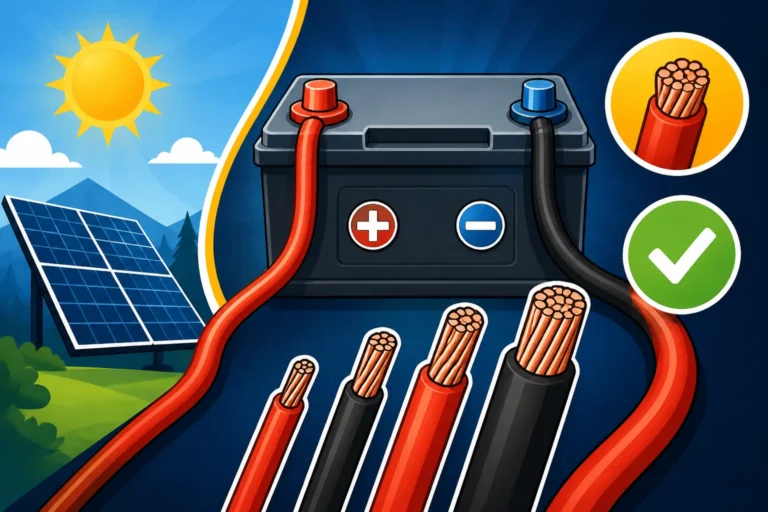
- 12V Systems: Common for smaller setups like RVs, vans, or tiny cabins with limited loads. They are simpler to wire but require thicker, more expensive cables for the same power delivery due to higher current.
- 24V Systems: A good middle-ground for medium-sized cabins or small homes. They are more efficient than 12V for higher power needs, allowing for thinner cables.
- 48V Systems: Standard for larger off-grid homes with significant energy demands. They are the most efficient, requiring the thinnest cables for the same power, reducing energy loss and cost in wiring. This is often the preferred choice for a whole-house system, and you can learn more about 12V vs 24V vs 48V: Which to Choose in a dedicated guide.
To find the nominal amp-hour capacity needed for your battery bank, you use this formula:
Nominal Battery Capacity (Ah) = (Total Usable Battery Capacity (Wh) / Chosen System Voltage (V)) / Usable DoD Percentage
Let's re-run our example from above. You need 12,000 Wh of usable capacity.
Example 1: Using LiFePO4 batteries (80% DoD) in a 48V system:
- Total Usable Wh: 12,000 Wh
- System Voltage: 48V
- Usable Capacity in Ah at 48V: 12,000 Wh / 48V = 250 Ah
- Nominal LiFePO4 Capacity needed: 250 Ah / 0.80 (for 80% DoD) = 312.5 Ah
So, you'd need roughly 313 Ah of nominal 48V LiFePO4 battery capacity. You'd then look for 48V batteries or combine 12V or 24V batteries in series to achieve this voltage and capacity. For instance, four 12V 100Ah LiFePO4 batteries wired in series would give you a 48V 100Ah bank, so you might need three of these 48V 100Ah setups in parallel to reach ~300Ah.
Example 2: Using Lead-Acid batteries (50% DoD) in a 24V system:
- Total Usable Wh: 12,000 Wh
- System Voltage: 24V
- Usable Capacity in Ah at 24V: 12,000 Wh / 24V = 500 Ah
- Nominal Lead-Acid Capacity needed: 500 Ah / 0.50 (for 50% DoD) = 1,000 Ah
Here, you'd need 1,000 Ah of nominal 24V lead-acid battery capacity. This demonstrates why lead-acid systems often appear much larger in nominal amp-hours for the same usable energy compared to LiFePO4.
Practical Examples and Step-by-Step Calculations
Let’s run through a real-world scenario. You're building an off-grid system for a small cabin that will be used year-round.
Step 1: Calculate Daily Energy Consumption (Wh)
| Appliance | Wattage (W) | Hours/Day | Daily Wh |
|---|---|---|---|
| LED Lights (total) | 50 | 4 | 200 |
| Mini-Fridge | 60 | 12 | 720 |
| Laptop Charging | 45 | 3 | 135 |
| Phone Charging | 10 | 2 | 20 |
| Water Pump (intermittent) | 300 | 0.5 | 150 |
| Fan (summer only) | 30 | 6 | 180 |
| Subtotal | 1405 Wh | ||
| Phantom Loads (15%) | 210.75 | ||
| Total Daily Wh | 1615.75 Wh |
Let's round up to 1620 Wh for simplicity.
Step 2: Determine Days of Autonomy (DoA)
Given it's a year-round cabin in an area with occasional cloudy periods, you decide on 4 days of autonomy. This will give you a good buffer.
Step 3: Calculate Total Usable Battery Capacity (Wh)
Total Usable Wh = 1620 Wh/day * 4 days = 6,480 Wh
Step 4: Choose Battery Chemistry and System Voltage
You decide to go with modern LiFePO4 batteries for their lifespan and efficiency, targeting a 24V system to minimize cable losses. LiFePO4 DoD = 80%.
Step 5: Calculate Nominal Battery Capacity (Ah)
Nominal Battery Capacity (Ah) = (6,480 Wh / 24V) / 0.80
Nominal Battery Capacity (Ah) = 270 Ah / 0.80
Nominal Battery Capacity (Ah) = 337.5 Ah
So, you would need approximately 340 Ah of nominal 24V LiFePO4 battery capacity. You might achieve this with three 12V 100Ah LiFePO4 batteries wired in series (total 24V 100Ah) with an additional 12V 100Ah battery in parallel (total 24V 200Ah), and another 12V 100Ah battery to get closer to your target. Or, more simply, purchase 24V batteries that sum up to 340Ah. For instance, a single 24V 300Ah battery would get you close, or perhaps two 24V 170Ah batteries in parallel. Remember that these batteries often come in standard sizes, so you might round up slightly to the nearest available capacity. Reputable brands like EG4 or Victron offer excellent solutions for larger battery banks.
Considering Future Expansion and Oversizing
When you're planning an off-grid system, it's easy to focus solely on current needs. But the truth is, life changes, and so do energy demands. Thinking ahead can save you a lot of headache and expense down the road.
Why It Pays to Plan for Growth
One of the most common regrets I hear from people who've set up their off-grid systems is, "I wish I'd gone bigger." As you settle into off-grid living, you might find yourself wanting to add more comforts – a small freezer, a larger TV, or perhaps you'll pick up a new hobby that requires more power tools. Or maybe your family grows, and with it, your overall consumption.
Planning for future expansion means designing your system with the capacity to add more solar panels and, crucially, more battery storage. This isn't about wildly oversizing initially, but rather about choosing components that can easily integrate additional modules. For example, if you opt for a 48V system from the start, adding more batteries in parallel later is much simpler than trying to upgrade a 12V system to 24V or 48V, which often requires replacing major components like your inverter and charge controller. It's often more cost-effective in the long run to pay a little extra now for a scalable foundation than to completely overhaul your system later.
The Benefits of a Slightly Oversized Bank
While nobody wants to waste money, a slightly oversized battery bank offers several distinct advantages beyond just future-proofing:
- Increased Reliability: That extra capacity acts as a buffer against unexpected surges in consumption or extended periods of bad weather. It means fewer instances of running low on power and less reliance on a backup generator.
- Extended Battery Lifespan: Batteries, especially lead-acid, benefit greatly from shallower discharge cycles. If your battery bank is large enough that you rarely hit its maximum recommended DoD, it will last significantly longer, postponing the costly Off-Grid Solar Battery Replacement Cost Over Time. Even LiFePO4 batteries, while more robust, will see their cycle life extended if they're not consistently pushed to their limits.
- Peace of Mind: Knowing you have ample power reserves can dramatically reduce the stress of off-grid living. No more anxiously watching your battery monitor during a cloudy week or having to ration power. It allows you to live more freely and comfortably.
Consider adding an extra 10-20% to your calculated nominal capacity, especially if your budget allows. This small initial investment can pay dividends in reliability and longevity.
Designing for Modularity and Easy Upgrades
When purchasing batteries, especially LiFePO4, think about modularity. Buying several smaller batteries that can be wired in parallel or series to achieve your desired capacity and voltage makes future upgrades or replacements much simpler. If one battery in a large bank fails, it's easier to replace a single module than to source an entirely new, massive battery. Many brands, including those you can find on Amazon, design their LiFePO4 batteries with robust terminals and communication ports that make connecting multiple units seamless.
Also, consider the physical layout. Leave space in your battery enclosure or designated area for additional batteries. Ensure your wiring, busbars, and fuses are sized appropriately for the eventual maximum capacity you foresee, not just your initial setup. This forward-thinking approach transforms your off-grid system from a static setup into a dynamic, adaptable power solution that can evolve with your needs.
Optimizing Battery Performance and Lifespan
Having a properly sized battery bank is only half the battle. To truly get the most out of your investment and ensure years of reliable service, you need to understand how to care for your batteries.
Best Practices for Charging and Discharging
The way you charge and discharge your batteries has a monumental impact on their health and longevity. For LiFePO4 batteries, it's generally best to keep them within their recommended voltage window and avoid prolonged states of full discharge or full charge at high temperatures. Most LiFePO4 batteries come with a Battery Management System (BMS) that handles these protections internally, but proper charge controller settings are still crucial. You'll want an MPPT charge controller that can be programmed for specific LiFePO4 charging profiles.
For lead-acid batteries, the rules are stricter. They prefer a slower, more controlled charge cycle. Overcharging or undercharging can lead to sulfation (a common killer of lead-acid batteries). Regularly bringing them to a full charge, including a "float" or "absorption" stage, is vital to prevent sulfation and ensure cell balancing. Also, avoid deep discharges below 50% DoD for lead-acid as much as possible. A good How to Choose an Off-Grid Charge Controller will allow you to set the precise parameters for your battery type.
Environmental Factors: Temperature and Ventilation
Batteries are sensitive to temperature extremes. Both very hot and very cold conditions can degrade performance and shorten lifespan.
- Heat: High temperatures accelerate chemical reactions within the battery, leading to faster degradation. If your batteries are in a hot climate or a poorly ventilated space, their lifespan will decrease. For lead-acid, excessive heat can also cause water loss. For LiFePO4, extreme heat can trigger the BMS to shut down the battery for safety. Ideally, batteries should be kept in a cool, consistent temperature range – typically between 50°F (10°C) and 77°F (25°C).
- Cold: Cold temperatures reduce a battery's usable capacity and can also make charging problematic, especially for LiFePO4 batteries. Charging LiFePO4 batteries below freezing (32°F / 0°C) can cause irreversible damage (lithium plating). If you live in a cold climate, you'll need to consider battery heating pads or keeping your battery bank in an insulated, heated space.
Proper ventilation is also key, particularly for flooded lead-acid batteries, which release hydrogen gas during charging. This gas is highly flammable and needs to be vented safely to the outside. Even sealed batteries like AGM and Gel, and especially LiFePO4, benefit from good airflow to prevent heat buildup. Always follow manufacturer guidelines for environmental conditions.
Monitoring Your Battery Bank: Essential Tools and Habits
A battery monitor is your best friend in an off-grid system. It provides real-time data on your battery's state of charge (SoC), voltage, current in/out, and sometimes even temperature. This information is invaluable for managing your power consumption and ensuring the health of your battery bank.
Good battery monitors, like those from Victron Energy, can connect to your smartphone, giving you detailed insights and historical data. Regularly checking your monitor allows you to:
- See how much power you're actually using versus generating.
- Avoid over-discharging your batteries.
- Spot potential issues before they become major problems.
- Adjust your energy usage habits to conserve power when needed.
Beyond monitoring, make it a habit to perform periodic visual inspections of your battery bank. Check for loose connections, corrosion on terminals (especially with lead-acid), bulging cases (a sign of serious trouble), or any unusual smells. Keeping your battery terminals clean and connections tight will prevent voltage drops and ensure efficient power transfer. These simple habits are crucial for How to Maintain an Off-Grid Battery Bank.
Common Battery Sizing Mistakes to Avoid
Even with the best intentions, it's easy to fall into traps when sizing your off-grid battery bank. Being aware of these common pitfalls can save you a ton of frustration, time, and money.
Underestimating Your True Energy Needs
This is arguably the most prevalent mistake off-gridders make. It's often due to an optimistic assessment of appliance usage or completely forgetting about certain items. People tend to think about the big loads, but neglect the cumulative effect of smaller, everyday electronics. Forgetting phantom loads or underestimating how long you'll actually use your lights or entertainment system can quickly lead to a system that struggles to keep up.
A common scenario: someone sizes their system based on a few hours of TV, but then they bring in a gaming console or decide to work from their off-grid cabin full-time, spending many more hours on their laptop. Suddenly, their "generous" battery bank feels woefully inadequate. That's why that initial, painstaking load analysis, including phantom loads and future potential additions, is non-negotiable. Don't just guess; verify. Consider using a Kill-A-Watt meter, easily found on Amazon or at hardware stores, to measure the actual power draw of your appliances over a period of time.
Neglecting Depth of Discharge Limitations
Another significant misstep is ignoring the specific DoD recommendations for your chosen battery chemistry. Many beginners look at a 100Ah battery and assume it will provide 100Ah of usable power, regardless of whether it's LiFePO4 or lead-acid. As we've discussed, this is a dangerous assumption for lead-acid batteries.
If you size a lead-acid bank for 80% DoD, you're not just risking premature failure; you're guaranteeing it. Your batteries will degrade rapidly, forcing expensive replacements much sooner than anticipated. This oversight not only costs more money in the long run but also causes reliability issues in the short term, as your battery bank rapidly loses its ability to hold a charge. Always, always factor in the usable capacity based on the manufacturer's recommended DoD, not just the nominal rating.
Ignoring System Voltage Compatibility
Choosing the wrong system voltage (12V, 24V, 48V) or failing to ensure compatibility across all your components can lead to inefficiencies, safety hazards, and incompatible equipment. For instance, if you have a large off-grid home with substantial power needs and you try to run everything on a 12V system, you'll face extremely high currents, requiring incredibly thick and expensive wiring, and causing significant voltage drop. Your inverter and charge controller must also match your battery bank's voltage.
A common error is buying a 12V inverter and then later realizing you need more power, so you try to configure your batteries to 24V or 48V, only to find your inverter isn't compatible. Plan your system voltage early in the design phase, matching it to your total power requirements. For larger systems, 48V is almost always the more efficient and cost-effective choice in the long run, allowing you to run more powerful appliances with less waste and safer wiring. This comprehensive approach is part of Off-Grid Solar System Design Basics.
Selecting the Right Battery Size for Specific Off-Grid Setups
Different off-grid applications have unique requirements, and what works for a weekend cabin might not cut it for full-time van life. Let's explore how battery sizing adapts to various setups.
Sizing for an RV or Van Life
RV and van life setups often prioritize space, weight, and portability. You're typically dealing with more compact living, so while you need power for essential comforts, massive battery banks might not be feasible or necessary. Many van lifers and RV enthusiasts opt for a 12V system, especially if they're relying heavily on 12V DC appliances. LiFePO4 batteries are an absolute game-changer here due to their light weight, small footprint, and high usable capacity.
A typical RV or van setup might range from 200Ah to 600Ah of 12V LiFePO4 capacity.
- Minimalist (200Ah): Enough for lights, phone charging, a small fan, and a 12V fridge for a couple of days.
- Comfortable (400Ah): Allows for more extended use of electronics, perhaps a small microwave, and longer fridge run times.
- High-Demand (600Ah+): Good for running AC appliances more frequently, such as a mini-split AC unit for a few hours, or power-hungry kitchen gadgets.
Always consider your driving habits too. If you drive daily, your alternator can help charge your batteries. If you plan to park for extended periods, you'll need more solar input and potentially more battery autonomy. Many companies, including Renogy, offer complete kits tailored for RV and van life that help simplify the selection process, but still require a careful load analysis. This helps simplify the Off-Grid Solar Cost for an RV.
Sizing for a Remote Cabin or Tiny Home
Remote cabins and tiny homes often bridge the gap between mobile setups and full-sized residences. They usually have more space for batteries than an RV, but still require careful energy management. Here, you're likely running more traditional household appliances, albeit often energy-efficient versions. System voltages of 24V or 48V become more practical and efficient, especially if you have a well pump, a larger refrigerator, or any heating/cooling elements.
Battery bank sizes can vary widely:
- Weekend Cabin (200Ah-400Ah 24V/48V LiFePO4): Enough for lights, small fridge, charging electronics for a few days, maybe a small water pump.
- Seasonal Cabin (400Ah-800Ah 24V/48V LiFePO4): Can handle more extended stays, perhaps a washing machine on occasion, more consistent lighting and entertainment.
- Full-Time Tiny Home (800Ah-1500Ah+ 48V LiFePO4): Designed to power most modern conveniences, including a full-sized fridge, frequent appliance use, and potentially modest heating/cooling.
For cabins, factors like heating are critical. If you rely on electric heating, even a mini-split, your battery and solar needs will skyrocket. It's often more efficient to use propane or wood for primary heating, reserving solar for lights, refrigeration, and electronics. When planning for these types of structures, understanding How to Size an Off-Grid System for a Cabin is essential.
Sizing for a Full-Time Off-Grid Residence
A full-time off-grid home demands the most robust and carefully sized battery bank. You're trying to replicate grid-like convenience, which means powering a wide array of appliances, often simultaneously, year-round. This will almost certainly require a 48V system due to efficiency and the sheer amount of power involved. LiFePO4 batteries are highly recommended for their long life and deep discharge capabilities, minimizing maintenance and maximizing usable energy.
Typical battery bank sizes for a full-time off-grid home:
- Modest Home (1000Ah-2000Ah 48V LiFePO4): Can support a family of 1-2 with careful energy management, running essential appliances like a refrigerator, washing machine, lights, and entertainment.
- Average Home (2000Ah-4000Ah 48V LiFePO4): Accommodates a family of 3-4 with a wider range of appliances, including a dryer or occasional well pump usage, and more comfortable power reserves.
- High-Consumption/Large Home (4000Ah+ 48V LiFePO4): For larger families, those with heavy-duty workshops, or reliance on electric heating/cooling. These systems are substantial and require significant planning and investment.
For a full-time residence, backup generator integration is almost always a necessity for extended cloudy periods or unexpected high loads. The goal is to maximize solar contribution, but having a generator to top off batteries when solar falls short is a critical part of a reliable system. When budgeting for your project, a detailed understanding of How to Budget for an Off-Grid Solar System for a full home is paramount.
Disclaimer
Please remember that the information provided in this guide is for general informational and educational purposes only. While we strive to offer accurate and up-to-date advice, off-grid solar system design and installation can be complex and involve significant electrical risks. Always consult with a qualified solar professional or licensed electrician when designing, installing, or modifying an off-grid solar system to ensure safety, compliance with local codes, and optimal performance. Your specific energy needs, local climate, and system components will dictate the exact sizing and configuration required for your unique situation.