How to Install a 12V RV Solar System
There's nothing quite like the freedom of the open road, parking your RV wherever your heart desires, and waking up to stunning views. But that freedom often comes with a nagging worry: how long will your power last? The constant search for shore power or the drone of a generator can really put a damper on your off-grid dreams. That's where a well-designed 12V RV solar system comes in, offering the independence to power your adventures without compromise. This guide will walk you through everything you need to know, from understanding the core components to a step-by-step installation process, ensuring you can confidently set up your own reliable solar power on wheels.
Understanding Your 12V RV Solar System Components
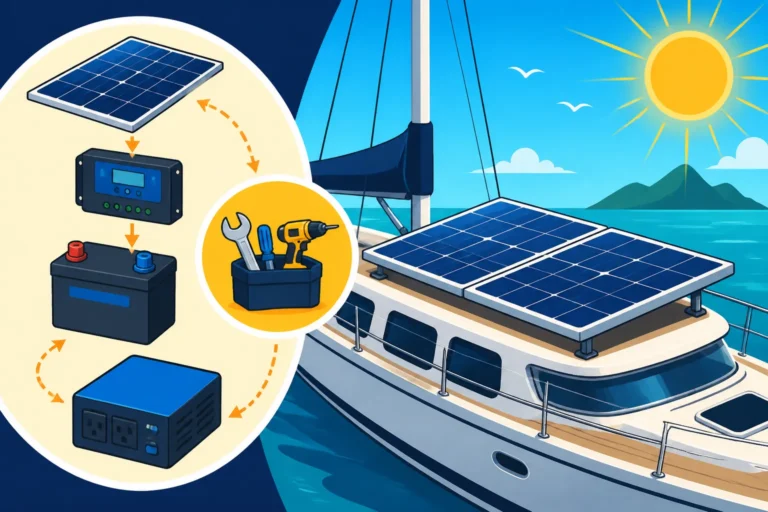
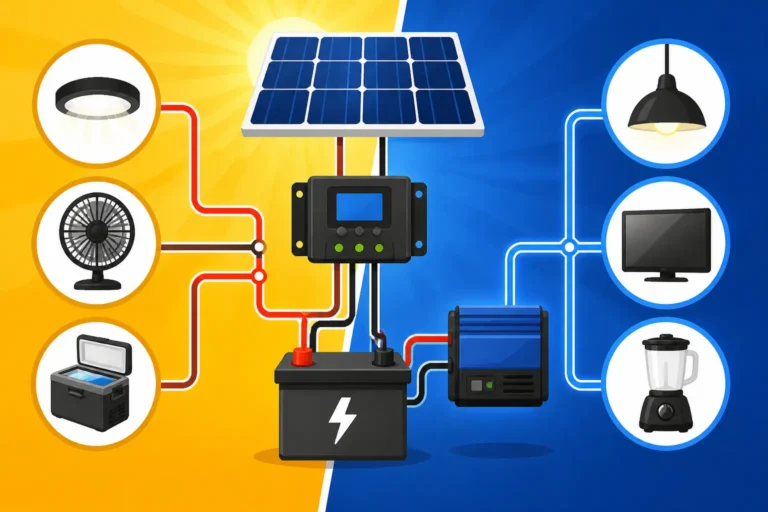
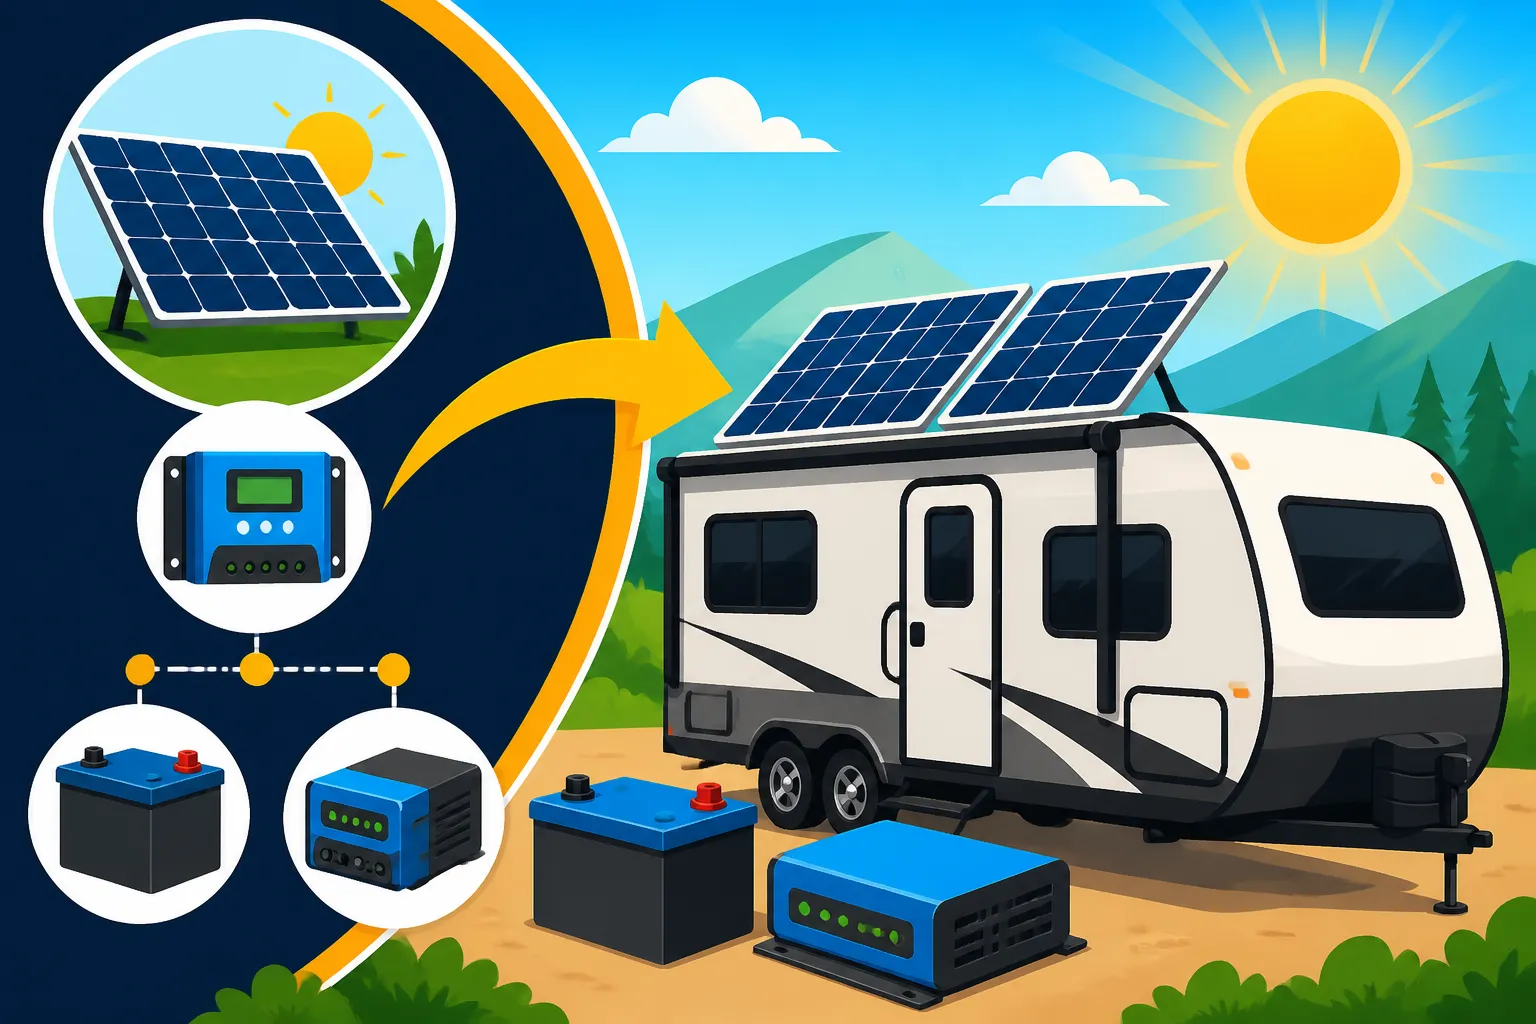
Before you even think about cutting wires or drilling holes, it’s crucial to wrap your head around the main players in any 12V RV solar system. Each component has a vital role, and understanding their functions will help you make informed decisions and troubleshoot any issues down the line. It's not just a collection of random parts; it's an interconnected ecosystem designed to capture, store, and deliver power efficiently.
The Solar Panels
Ah, the stars of the show! Solar panels are what capture the sun's energy and convert it into usable electricity. For RVs, you typically see a few main types, each with its own advantages. Rigid panels, often made with monocrystalline or polycrystalline cells, are the most common. They're durable and efficient, but they do require a secure mounting solution on your RV roof. Then there are flexible panels, which are lighter and can conform to curved surfaces, making them a great option if you have a less conventional roof shape or need to minimize weight. Many RVers start their solar journey with high-quality panels, perhaps from a reputable brand like Renogy, often found readily available on Amazon, due to their balance of efficiency and durability specifically designed for mobile applications.
The '12V' in our system title refers to the nominal voltage of most RV electrical systems. While individual solar panels can produce varying voltages depending on their design (often 18-22V at maximum power), they are designed to be compatible with 12V battery charging systems through the magic of a charge controller. Their role is straightforward: absorb sunlight, generate direct current (DC) electricity, and send it down to the next critical component in the chain. Think of them as your silent, sun-powered fuel pump, constantly topping up your energy reserves.
The Charge Controller
This is often called the "brain" of your solar charging system, and for good reason. The charge controller sits between your solar panels and your battery bank, performing a couple of absolutely essential tasks. First, it regulates the voltage and current coming from your solar panels, ensuring that your batteries are charged safely and efficiently. Without a charge controller, the fluctuating voltage from your panels could overcharge or undercharge your batteries, severely shortening their lifespan – a costly mistake you definitely want to avoid!
Second, charge controllers utilize different technologies to optimize power harvesting. The two main types you'll encounter are PWM (Pulse Width Modulation) and MPPT (Maximum Power Point Tracking). PWM controllers are simpler and more affordable, basically acting like a switch that turns the solar input on and off rapidly to match the battery voltage. They're fine for smaller, simpler systems, especially if your panel voltage is close to your battery voltage. However, MPPT controllers are far more efficient. They actively track the maximum power point of the solar array, converting excess voltage into additional amperage. This means they can take a higher voltage input from your panels and "step it down" to the battery's voltage while maintaining maximum power transfer. On a cloudy day or when your panels are less than perfectly angled, an MPPT controller will consistently outperform a PWM unit, potentially squeezing 15-30% more power out of your panels. For most RVers serious about off-grid living, especially if you're looking at larger panel arrays, an MPPT charge controller is almost always the recommended choice.
The Battery Bank
If solar panels are the fuel pump, your battery bank is the fuel tank. This is where all that glorious solar energy gets stored so you can use it whenever the sun isn't shining – at night, on cloudy days, or simply when you need a surge of power. For 12V RV solar systems, understanding your battery bank is paramount. It’s what allows you to truly go off-grid.
The most common types of 12V batteries you'll encounter for RV use are lead-acid (including flooded, AGM, and Gel) and lithium iron phosphate (LiFePO4). Flooded lead-acid batteries are the cheapest upfront but require regular maintenance and venting. AGM (Absorbed Glass Mat) batteries are sealed, maintenance-free, and perform better than flooded in many scenarios, making them a popular choice for RVers. However, LiFePO4 batteries are the real game-changers for serious off-grid enthusiasts. While they have a higher initial cost, their benefits are immense: they're significantly lighter, have a much longer cycle life (often 10 times that of lead-acid), can be discharged deeper without damage, and maintain a more consistent voltage output. For a detailed comparison on the financial aspects, you might want to look into the LiFePO4 vs Lead-Acid Battery Cost breakdown. Your battery bank capacity, usually measured in amp-hours (Ah) or kilowatt-hours (kWh), dictates how much energy you can store and, crucially, how long you can power your devices without drawing fresh power from the panels or another source.
The Inverter
While your solar panels and charge controller deal in direct current (DC) electricity, most of the appliances and electronics in your RV (like microwaves, coffee makers, hair dryers, or even charging laptops) run on alternating current (AC). That's where the inverter comes in. Its job is simple: convert the 12V DC power from your batteries into 120V AC power, just like you'd find in a standard household outlet.
Deciding whether you need an inverter and, if so, what size, depends entirely on your power consumption habits. If you only plan to charge phones and run 12V LED lights, you might get away with a DC-only setup. But if you want to run anything with a standard wall plug, an inverter is a must. There are two main types: modified sine wave and pure sine wave. Modified sine wave inverters are cheaper, but they produce a "choppy" power wave that can be detrimental to sensitive electronics and inefficient for motors (think microwave or refrigerator compressors). Pure sine wave inverters produce clean, smooth power identical to what you get from the grid, making them ideal for all electronics and appliances, even the most sensitive ones. While they cost more, the peace of mind and protection for your devices are often well worth it for an RV setup. To get a better idea of what size inverter you'd need for common appliances, checking out resources like What Size Inverter to Run A Refrigerator can be incredibly helpful.
Planning Your 12V RV Solar Installation
Jumping straight into installation without a solid plan is a recipe for frustration and potential failure. Just like planning a road trip, you need to map out your power journey. This planning stage is where you'll assess your actual needs, select the right components to meet those needs, and strategically decide where everything will go. Taking the time to do this groundwork will save you headaches, time, and money in the long run.
Assessing Your Power Needs
This is arguably the most critical step in designing any solar system, especially for an RV where space and weight are at a premium. You can't just guess how much power you need; you have to calculate it. This process is called a "load analysis" or "energy audit." It involves figuring out every electrical device you plan to use, how much power each one draws, and for how long you'll use it in a typical 24-hour period.
Start by making a comprehensive list of all your 12V DC appliances (lights, water pump, fan, phone chargers) and any 120V AC appliances you intend to run via an inverter (TV, laptop, coffee maker, microwave). For each item, find its wattage (W) or amperage (A). This information is usually on the appliance label or in its manual. If you only have amperage for a 12V DC device, multiply it by 12V to get watts (A x V = W). If you have AC watts, that's generally what the inverter will draw from the battery.
Next, estimate how many hours per day you'll use each item. Multiply the wattage by the hours of use to get daily Watt-hours (Wh). Sum up all the daily Watt-hours for your entire list. Add a buffer, maybe 15-20%, for unforeseen usage or cloudy days. This total daily Watt-hour number is your target. For a more detailed walkthrough, you can always refer to a guide like How to Calculate Daily Energy Usage. For example, if your RV fridge runs 24 hours a day at 60W, that's 1440 Wh/day. A laptop charged for 3 hours at 45W is 135 Wh/day. Add in lights, fans, and device charging, and you'll quickly see your daily energy footprint.
Choosing the Right Components for Your RV
Once you have a clear picture of your daily energy consumption, you can start selecting components that match. This isn't about buying the biggest or the cheapest; it's about buying what's right for your specific RV and lifestyle.
- Solar Panels: Based on your total daily Watt-hours, you'll need to figure out how many watts of solar panels are required to replenish that energy. You'll also need to consider your available roof space and typical sun exposure. As a rule of thumb, divide your total daily Watt-hours by your "peak sun hours" (average hours of direct sunlight per day, which varies greatly by location and season—often 3-5 hours in many areas). For instance, if you need 1500 Wh/day and have 4 peak sun hours, you need at least 375W of solar panels (1500 Wh / 4 hours = 375W). It's often smart to slightly oversize your array to account for cloudy weather or less-than-ideal panel angles.
- Charge Controller: With your panel wattage determined, you can size your charge controller. Its primary rating is maximum input current and voltage. An MPPT controller can handle higher voltage inputs from panels wired in series, converting it down efficiently. A simple calculation involves dividing your total panel watts by your battery voltage (e.g., 375W / 12V = 31.25 Amps). Always choose a controller with an amperage rating slightly higher than your calculated maximum current, adding a 25% safety margin is good practice. For more in-depth guidance on this, check out How to Size a Charge Controller.
- Battery Bank: Your battery bank capacity should ideally be able to store at least 2-3 days' worth of your calculated daily Watt-hours, especially for off-grid RVing, to cover periods of low sun. If you need 1500 Wh/day, aim for a battery bank that can provide 3000-4500 Wh. Convert this to Amp-hours (Ah) by dividing by your system voltage (e.g., 3000 Wh / 12V = 250 Ah). Remember to factor in the usable capacity of your battery type (e.g., LiFePO4 offers nearly 100% usable capacity, while lead-acid is typically 50%).
- Inverter: If you're using an inverter, its continuous wattage rating needs to be higher than the combined running wattage of all AC appliances you might run simultaneously. Also, consider the "surge" wattage of certain appliances (like microwaves or induction cooktops), which can be 2-3 times their running wattage for a few seconds when they start up.
Brands like Renogy offer complete 12V RV solar kits that can be a great starting point, often bundling panels, charge controllers, and necessary wiring. This can simplify the selection process, especially for beginners.
Selecting the Best Mounting Location
For RVs, the roof is almost always the primary location for solar panels. It offers the most direct exposure to the sun and keeps the panels out of the way. However, you need to consider a few things:
- Available Space: Measure your RV roof carefully, accounting for existing vents, AC units, skylights, and anything else that might cast shadows. Try to place panels where they will receive unobstructed sunlight for the longest duration possible throughout the day.
- Shading: Even a small amount of shading on one part of a panel can drastically reduce the output of the entire array. Be mindful of roof obstacles or even pop-up tent edges.
- Accessibility: While you want panels securely mounted, think about future maintenance. Can you easily clean them? Are the connections accessible?
- Fixed vs. Portable: Most RV systems feature fixed panels on the roof. However, many RVers supplement their roof array with portable panels that can be moved to chase the sun or avoid temporary shade, especially if they frequently park in shaded spots.
For wiring, think about the shortest, most direct route from your panels to your charge controller, and then to your battery bank. This minimizes voltage drop and reduces the amount of expensive heavy-gauge cable you'll need. Consider where you can safely run wires through the roof or sidewall, ensuring they are protected from weather and abrasion.
Step-by-Step Installation Process for Your 12V RV Solar System
Alright, you've done your homework, tallied your needs, and gathered your gear. Now it's time for the hands-on part! Installing a 12V RV solar system can feel daunting, but breaking it down into manageable steps makes it much less intimidating. Safety is paramount here, so always double-check your work and disconnect power sources when needed.
Mounting Your Solar Panels
This is usually the first physical step. How you mount your panels will depend on their type (rigid or flexible) and your RV's roof construction.
- Tools You'll Need: Drill, screwdriver, sealant (Dicor self-leveling sealant is a popular choice for RV roofs), mounting brackets (Z-brackets are common for rigid panels), rubbing alcohol or cleaner, and potentially a stud finder if mounting into roof rafters.
- Rigid Panel Mounting: For rigid panels, Z-brackets or similar mounting feet are typically used. Position your panels on the roof, ideally allowing for some airflow underneath to help with cooling (panels lose efficiency when they get too hot). Mark the drilling locations for your brackets. Before drilling, apply a generous amount of sealant to the holes to prevent water intrusion. Screw the brackets securely into the roof, and then attach your panels to the brackets. After securing everything, apply more sealant over all screw heads and bracket edges to ensure a watertight seal. If you want to dive deeper into bracket specifics, check out guides like How to Mount Panels with Z-Brackets.
- Flexible Panel Mounting: Flexible panels often use adhesive directly to the roof, sometimes with a few screws along the edges for extra security. Clean the roof surface thoroughly with rubbing alcohol where the panel will be placed. Apply a strong, RV-grade adhesive (like VHB tape or appropriate structural adhesive) to the back of the panel and press it firmly onto the roof, smoothing out any air bubbles. Seal the edges with a compatible sealant to prevent water from getting underneath.
- Roof Penetrations: Once your panels are mounted, you'll need to run the cables from the panels into your RV. This usually involves drilling a small hole in the roof. Use a cable entry gland (also called a roof entry gland or combiner box) to create a watertight seal around the cables where they pass through the roof. This is a crucial step to prevent leaks. Fill the gland and surround it with plenty of RV-appropriate sealant, like the kind from Dicor. Neglecting this step can lead to significant water damage down the road, so learning How to Waterproof Roof Penetrations is vital.
Wiring the Solar Panels to the Charge Controller
With the panels securely in place and the cables routed into the RV, it's time to connect them to your charge controller. For most 12V RV systems, especially smaller to medium-sized arrays, wiring panels in parallel is often the preferred method.
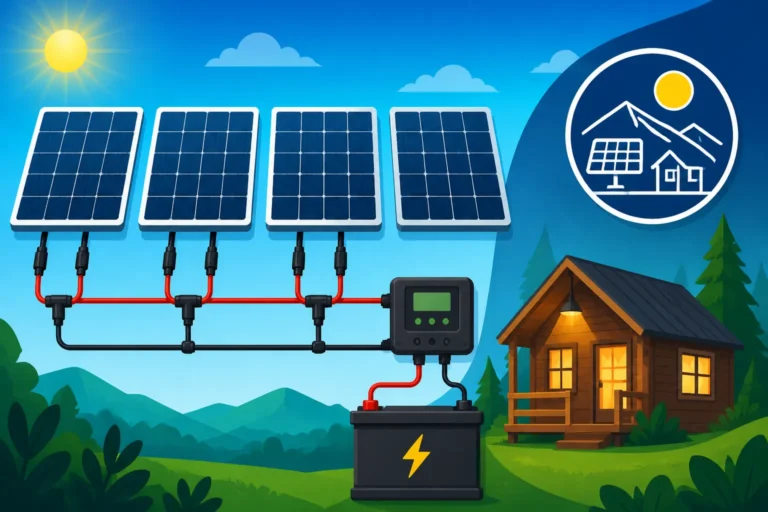
- Series vs. Parallel Wiring: When you wire panels in series, their voltages add up, but the current stays the same. When wired in parallel, their currents add up, but the voltage stays the same (keeping it around 12V or slightly higher for charging). For a 12V battery bank, you'll typically want your array's nominal voltage to remain close to 12V, so parallel wiring is common. This also helps mitigate the impact of partial shading; if one panel is shaded in a parallel array, the others continue to produce power. However, if you have an MPPT charge controller and want to run longer wires with less voltage drop, wiring panels in series (or series-parallel combinations) to get a higher voltage might be more efficient, as the MPPT controller can then step that higher voltage down to 12V while boosting the current.
- Using MC4 Connectors: Solar panels come with industry-standard MC4 connectors. These are designed for outdoor use, are waterproof, and snap together securely. You'll use MC4 branch connectors if you're wiring multiple panels in parallel. Ensure all connections are tight and clean.
- Cable Routing: Route the combined positive and negative cables from your solar array down to your charge controller. Make sure these cables are protected from abrasion, sharp edges, and excessive heat. Use appropriate cable clamps and conduit where necessary to keep them tidy and safe. You can get more specifics on how to manage these connections by looking at guides such as How to Wire Solar Panels in Parallel.
Connecting the Charge Controller to the Battery Bank
This is where the regulated power meets your storage system. This connection is fundamental for the health and longevity of your batteries.
- Wire Gauge Selection: Proper wire gauge is absolutely critical here. Undersized wires can lead to voltage drop (meaning less power reaches your batteries) and can overheat, posing a fire risk. The distance between your charge controller and battery bank, and the maximum current your system will draw, determine the required wire gauge. Consult a wire gauge chart, keeping in mind that the longer the run and the higher the amperage, the thicker the wire (lower gauge number) you'll need. For instance, a 30A charge controller might need 8 AWG wire for a short run, but 6 AWG or even 4 AWG for a longer run. Don't skimp on this! Resources like How to Size Wire and Cables can provide detailed charts.
- Fuses and Breakers: Before connecting to the battery, you MUST install appropriate fuses or breakers on both the positive solar panel line (between the panels and the charge controller) and the positive battery line (between the charge controller and the battery bank). These are essential safety devices that protect your system and your RV from short circuits or overcurrents. The fuse/breaker on the battery line should be rated to protect your wire from the maximum output of the charge controller.
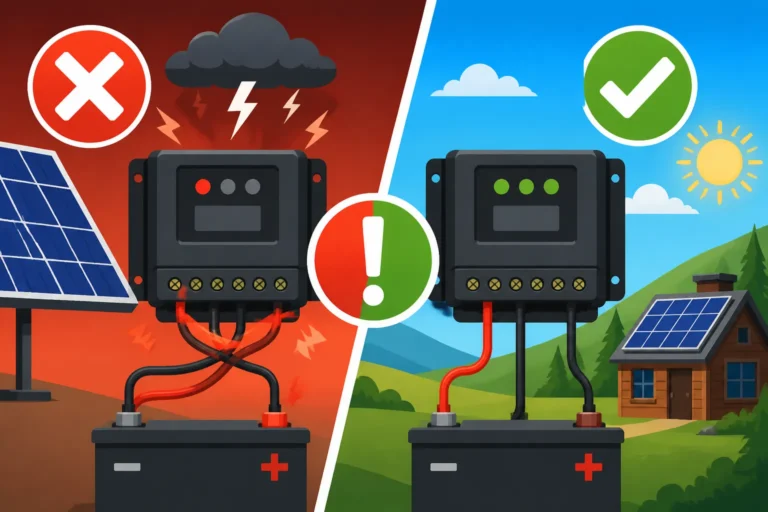
- Proper Battery Connections: Connect the positive (+) terminal of your charge controller to the positive (+) terminal of your battery bank, and the negative (-) terminal of your charge controller to the negative (-) terminal of your battery bank. Ensure these connections are clean, tight, and corrosion-free. Always connect the battery first to the charge controller to allow the controller to sense the battery voltage before connecting the solar panels. This prevents potential damage to the charge controller.
Installing the Inverter (If Applicable)
If your power needs include AC appliances, the inverter is your next stop.
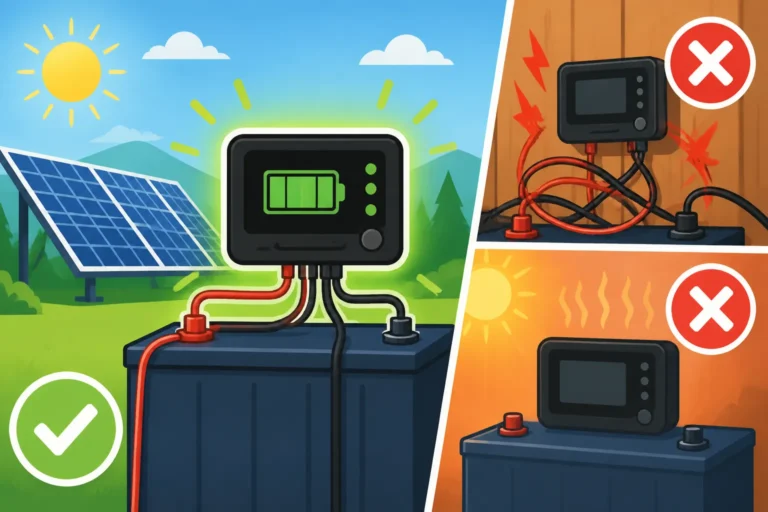
- Mounting Location: Choose a dry, well-ventilated location for your inverter, preferably as close to your battery bank as possible. This minimizes the length of the thick DC cables required, reducing voltage drop. Avoid mounting it in direct sunlight or in an unventilated battery compartment.
- Heavy Gauge Cables: Inverters draw significant current from your batteries. You will need very thick (low gauge, like 4/0 or 2/0 AWG for larger inverters) cables to connect the inverter directly to your battery bank. Again, proper wire sizing and fusing are paramount for safety and efficiency. Install a large DC fuse or breaker on the positive cable close to the battery to protect the inverter and wiring.
- Connecting to AC Loads: Once the inverter is connected to the battery bank, you'll connect its AC output to your RV's electrical system. For smaller inverters (say, up to 1000W), you might just plug an extension cord into an inverter outlet. For larger inverters designed to power your whole RV, you'll connect it to a dedicated subpanel or use an automatic transfer switch (ATS) to seamlessly switch between shore power and inverter power. This usually involves some 120V AC wiring, which if you're not comfortable with, is definitely a job for a qualified electrician to ensure safety and compliance with RV electrical codes.
Testing, Maintenance, and Maximizing Your RV Solar Power
You've put in the hard work, and your system is installed! But the journey doesn't end there. To ensure your RV solar system performs reliably for years to come, you need to properly test it, commit to a routine maintenance schedule, and learn how to optimize your power usage. This final stage is all about living comfortably and confidently with your newfound off-grid capability.
Initial System Testing and Commissioning
Once all components are connected and fuses are in place, it's time for the moment of truth: turning it on! This isn't just about flipping a switch; it's about systematically verifying that everything is working as intended.
- Step-by-Step Power-Up:
- Connect Battery to Charge Controller: With solar panels disconnected, connect the positive and negative leads from your battery bank to the corresponding battery terminals on the charge controller. The charge controller should power up and display your battery voltage.
- Connect Solar Panels to Charge Controller: Now, connect the positive and negative leads from your solar array to the solar input terminals on the charge controller. In good sunlight, you should see the charge controller indicate that it's receiving power from the panels and is now charging the batteries.
- Check Voltages and Currents: Use a multimeter to verify the voltage at your battery terminals and at the charge controller's battery output. They should be consistent. If your charge controller has a display, check the input voltage from the panels and the current flowing into the batteries.
- Inverter Test: If you have an inverter, switch it on. Plug a low-power AC appliance (like a phone charger or small lamp) into an inverter outlet and ensure it works. Monitor the inverter's display (if it has one) for voltage and power draw.
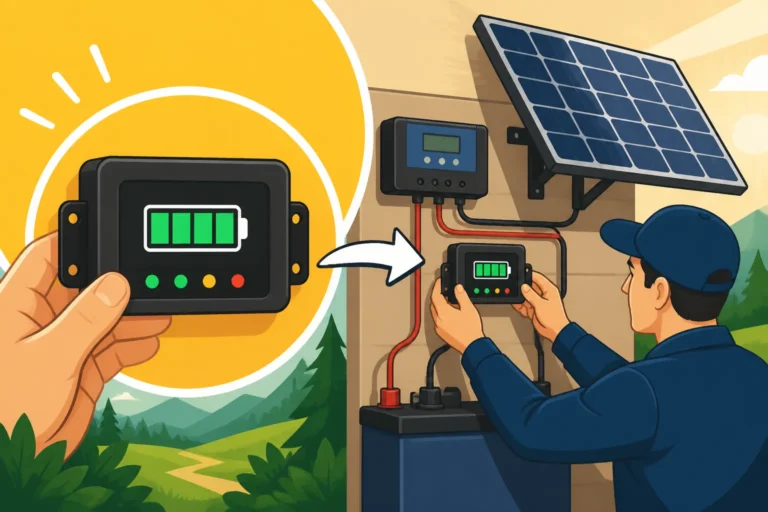
- Battery Monitor: If you've installed a shunt-based battery monitor (which is highly recommended for accurate battery state-of-charge), verify that it's correctly displaying current flow in and out of the battery, and that the state of charge is updating. Learning How to Install a Battery Monitor is a valuable addition to any comprehensive system.
- Troubleshooting Common Issues: Don't be discouraged if something doesn't work perfectly on the first try.
- No Power from Panels: Check MC4 connections, ensure panels are in direct sunlight, and verify wiring polarity.
- Charge Controller Not Charging: Ensure the battery is connected first and is above its minimum voltage. Check fuses between the panels and controller, and between the controller and batteries.
- Inverter Not Turning On: Check DC input voltage from batteries (must be within inverter's operating range), check fuses/breakers on the DC input line, and ensure the inverter's power button is engaged.
- For more detailed solutions to common glitches, a guide on How to Troubleshoot Off-Grid Solar can be an invaluable resource.
Regular Maintenance for Longevity
A solar system, even a robust RV setup, isn't a "set it and forget it" solution. A little proactive maintenance goes a long way in ensuring its long-term performance and efficiency.
- Cleaning Panels: This is probably the easiest and most impactful task. Dust, dirt, pollen, bird droppings, and even sap can significantly reduce your panels' efficiency. Clean them regularly with mild soap and water, using a soft brush or sponge. Rinse thoroughly. For a deeper dive, read How to Clean Off-Grid Solar Panels.
- Checking Connections: Periodically inspect all electrical connections – from the panels to the charge controller, and from the charge controller to the batteries and inverter. Look for any loose wires, signs of corrosion, or wear on insulation. Tighten any loose terminals.
- Battery Care:
- Lead-Acid Batteries: If you have flooded lead-acid batteries, check the electrolyte levels regularly and top up with distilled water as needed. Keep terminals clean.
- LiFePO4 Batteries: These are largely maintenance-free, but it's still good practice to inspect terminals for cleanliness and tightness. Most LiFePO4 batteries have an internal Battery Management System (BMS) that handles balancing and protection.
- Structural Integrity: Check the mounting hardware for your panels, especially after driving on rough roads. Ensure all screws and bolts are tight and that sealants around roof penetrations are still intact and not cracking. Reapply sealant as needed to prevent leaks.
Optimizing Your Power Usage on the Road
Having a solar system gives you power, but smart usage ensures you make the most of it. This means becoming conscious of your energy consumption and adapting to what your system can realistically provide.
- Energy-Efficient Appliances: If you're serious about off-grid living, consider swapping out power-hungry appliances for more efficient alternatives. LED lights are a no-brainer. Look for 12V DC refrigerators specifically designed for RVs, as they are far more efficient than residential AC fridges run through an inverter.
- Monitoring Your Consumption: Your battery monitor and charge controller displays are your best friends. Keep an eye on your battery's state of charge and how much power your panels are producing. This will give you a real-time understanding of your energy budget. If you see your battery dropping faster than expected, you'll know to cut back on usage or seek more sun.
- Seasonal Adjustments: Solar output varies significantly with the seasons. In winter, days are shorter, the sun is lower in the sky, and you might experience more cloudy days. Be prepared to adjust your power usage accordingly or consider supplementing with a generator if you plan to be off-grid year-round in less-than-ideal solar conditions. Understanding How to Design for Year-Round Off-Grid Power is a valuable consideration during the planning phase. In summer, you'll likely have an abundance of power, but also greater demand for things like AC. Learn to cycle power-hungry appliances and use them when solar production is highest.
By understanding your system, maintaining it diligently, and using your power wisely, your 12V RV solar system will unlock incredible freedom and independence, allowing you to truly embrace the off-grid lifestyle wherever your adventures take you. Happy travels!
Disclaimer
Please remember that working with electricity can be dangerous. This guide provides general information for educational purposes only. Always exercise extreme caution, follow all manufacturer instructions for your specific components, and adhere to local electrical codes. If you are unsure about any aspect of your installation, it is strongly recommended to consult with a qualified electrician or RV solar professional. We cannot be held responsible for any damage or injury that may result from following this guide.