How to Seal RV Roof Solar Penetrations
It’s a scenario many of us off-gridders have faced: you've finally got your shiny new solar panels installed on your RV roof, envisioning endless adventure and self-sufficiency, only to lie awake at night wondering if that one cable entry or mounting foot is going to invite an unwelcome trickle of water into your cozy space. The fear of leaks is very real, and it’s a critical concern when you’re cutting holes in your mobile home. This guide is all about giving you the peace of mind you deserve by showing you exactly how to properly seal those RV roof solar penetrations, ensuring your rig stays dry and your solar setup thrives.
Why Proper Sealing is Absolutely Critical for Your RV Solar Installation
Let’s be honest, putting holes in your RV roof feels a bit counterintuitive, doesn't it? But it's a necessary step for installing solar. The key isn't avoiding the holes, it's making sure those holes are absolutely, positively watertight. Skipping steps or using the wrong materials here can lead to headaches that are far more annoying and costly than the initial installation. Your RV isn't just a vehicle; it's your home on wheels, and protecting it from the elements, especially water, is paramount.
The Silent Threat of Water Damage
Water damage in an RV is insidious. It starts small, a tiny drip here, a bit of moisture there, often unseen until it's too late. That little trickle from an improperly sealed solar mount or cable entry can slowly but surely wreak havoc on your rig. We're talking about structural damage to your roof decking and interior walls, which are often made of plywood or luan that will quickly delaminate and rot when exposed to moisture. Imagine a spongy roof underfoot – not ideal for your adventures!
Beyond the structural integrity, water ingress invites mold and mildew, creating unhealthy living conditions and that unmistakable musty RV smell that no amount of air freshener can combat. Furthermore, when water finds its way into electrical components, it can cause shorts, damage sensitive solar equipment like inverters and charge controllers, or even pose fire hazards. Considering your RV is constantly flexing and vibrating as you travel down the road, those small gaps can widen over time, making a robust seal even more crucial.
Protecting Your Investment and Your Peace of Mind
Your off-grid solar system is a significant investment. From the panels themselves to the batteries and wiring, you've put time, money, and effort into achieving energy independence. An unexpected leak can compromise expensive components, potentially requiring costly repairs or replacements. Think about a high-end Best Off-Grid Solar Inverters getting drenched – that’s a repair bill you absolutely want to avoid. Proper sealing protects this investment by keeping water out of your electrical system and away from your precious equipment.
But it’s not just about the money. It's about your peace of mind. There’s nothing worse than being out in a beautiful remote location, enjoying your off-grid freedom, only to discover a drip during a rainstorm. Knowing that your solar installation is securely and professionally sealed allows you to fully relax and enjoy the benefits of your system without constantly worrying about potential leaks. It also helps maintain the overall value of your RV, as potential buyers will be wary of rigs with signs of past or present water damage. When considering Is Off-Grid Solar Worth the Cost, factors like proper installation and longevity directly impact its value.
Essential Tools and Materials for a Watertight Seal
Getting a truly watertight seal isn't about guesswork; it's about using the right materials and having the proper tools on hand. Don't cheap out here, because a few dollars saved on sealant can cost you thousands in repairs down the line. We want to create a durable, flexible, and long-lasting barrier against the elements that can withstand the rigors of RV life.
Choosing the Right Sealants
When it comes to RV roof sealing, not all sealants are created equal, and using the wrong type is a common Off-Grid Solar Panels Installation Mistakes to Avoid. The goal is to choose products specifically designed for RV roofs and outdoor exposure.
- Self-Leveling Lap Sealants: These are your absolute best friends for horizontal roof surfaces. Brands like Dicor Self-Leveling Lap Sealant are the industry standard for a reason. Once applied, this type of sealant flows into small gaps and self-levels, creating a smooth, watertight barrier that adheres incredibly well to various RV roofing materials like EPDM, TPO, and fiberglass. It remains flexible, which is crucial for an RV that’s constantly moving and vibrating. You can often find this on Amazon or at RV supply stores.
- Non-Sag Sealants: For vertical surfaces, such as the sides of a mounting foot or a cable entry gland that protrudes vertically, a non-sag sealant is essential. These don't run or drip, allowing you to build up a bead where needed. Many manufacturers, including Dicor, offer non-sag versions that are compatible with their self-leveling sealants.
- Butyl Tape: Often overlooked, butyl tape is a critical first line of defense. This sticky, pliable tape forms an excellent compressible gasket seal. You'll want to use it under any mounting feet or cable entry glands where they meet the roof surface. When compressed, it fills imperfections and creates a strong mechanical seal, preventing water from getting underneath the mounted component.
Here's a quick comparison of common sealant types for RV solar installations:
| Sealant Type | Best Use Case | Key Characteristics | Brands (Examples) | Notes |
|---|---|---|---|---|
| Self-Leveling Lap Sealant | Horizontal roof penetrations, panel feet | Flows to fill gaps, flexible, UV resistant | Dicor, Alpha Systems | Essential for main roof seals; typically white or almond. |
| Non-Sag Lap Sealant | Vertical edges of mounts, cable entries | Holds shape, flexible, UV resistant | Dicor, Alpha Systems | Prevents dripping on vertical surfaces. |
| Butyl Tape | Underneath mounting brackets, cable glands | Compressible, creates mechanical gasket seal, waterproof | Various generic brands | Crucial first layer for adhesion and sealing. |
| Silicone Sealant | Avoid for RV roofs | Does not adhere well to RV roofing, difficult to remove | GE, DAP | Can cause adhesion issues for future repairs, generally not recommended. |
Prepping Your Work Area
Before you even think about applying sealant, you need to ensure your work area is pristine and you're ready for the job. You'll be working on your roof, so safety is paramount. Make sure your ladder is stable, and consider a safety harness if you're uncomfortable with heights or working on a slippery roof.
For cleaning, gather mineral spirits or denatured alcohol, along with plenty of clean rags. These solvents are excellent for removing old sealant residue, grease, and dirt, providing a clean surface for your new sealant to adhere to. Always check the compatibility of your cleaning agent with your specific RV roof material, though mineral spirits and denatured alcohol are generally safe for common EPDM and TPO roofs.
You'll also need a sturdy caulk gun for applying tube sealants, and a putty knife or scraper for carefully removing any old, failing sealant. A wire brush can be helpful for really stubborn grime, but use it gently to avoid damaging your roof membrane. Don't forget personal protective equipment like gloves and eye protection, as sealants and solvents can be irritating. Having these Off-Grid Solar Installation Tools Needed ready will make the process much smoother.
Step-by-Step Guide to Sealing RV Roof Solar Penetrations
Alright, let’s get down to business. Sealing your RV roof penetrations isn't a race; it's a methodical process that demands patience and attention to detail. Every step contributes to a long-lasting, watertight seal that will protect your RV for years to come. Thinking about How to Install Off-Grid Solar Panels often involves this crucial last step.
Preparation is Key: Cleaning and Priming the Surface
This is arguably the most critical step, and where many DIYers make mistakes. If your surface isn't clean, your expensive sealant won't adhere properly, and you'll be right back to worrying about leaks. Start by thoroughly cleaning the entire roof area where you'll be working. Remove any loose debris, dirt, leaves, or dust. A soft-bristle brush and some mild soap and water can be a good starting point for general cleaning.
Once the area is generally clean, focus on the specific spots where your solar mounts and cable entries will be. Use a putty knife or scraper to gently remove any old, cracked, or loose sealant. Be very careful not to damage the underlying roof membrane. After removing the bulk of the old material, apply mineral spirits or denatured alcohol to a clean rag and meticulously wipe down the areas. This degreases the surface and removes any unseen residues that could compromise adhesion. Let the surface dry completely. This is non-negotiable; moisture trapped under sealant is a recipe for disaster. If you're pondering How to Plan Your Off-Grid Installation, factor in ample drying time.
Securing Your Mounts and Running Cables
Before you apply your final liquid sealant, your solar panel mounts and cable entries need to be physically secured and initially sealed. For your solar panel mounting feet, apply a generous amount of butyl tape to the underside of each foot before positioning it on the cleaned roof surface. The tape should cover the entire footprint of the mounting bracket. As you screw the mounting feet down, the butyl tape will compress and squeeze out slightly around the edges, forming an excellent, flexible gasket that fills any minor imperfections in the roof. This compression seal is vital for preventing water from getting under the mount.
For cable entry points, such as roof glands or a solar combiner box, the principle is similar. Many dedicated RV cable entry glands, like those offered by Renogy, come with their own rubber gaskets. Even with these, applying butyl tape to the underside of the gland where it meets the roof surface adds an extra layer of protection. Once the cable is routed through the gland and secured, ensure any internal seals within the gland itself are tightened according to manufacturer instructions. If you're working with a junction box, make sure it's designed for outdoor use and properly sealed at all seams. Remember, attention to detail here ensures your Off-Grid Solar Wiring Best Practices are upheld.
Applying the Sealant for Maximum Protection
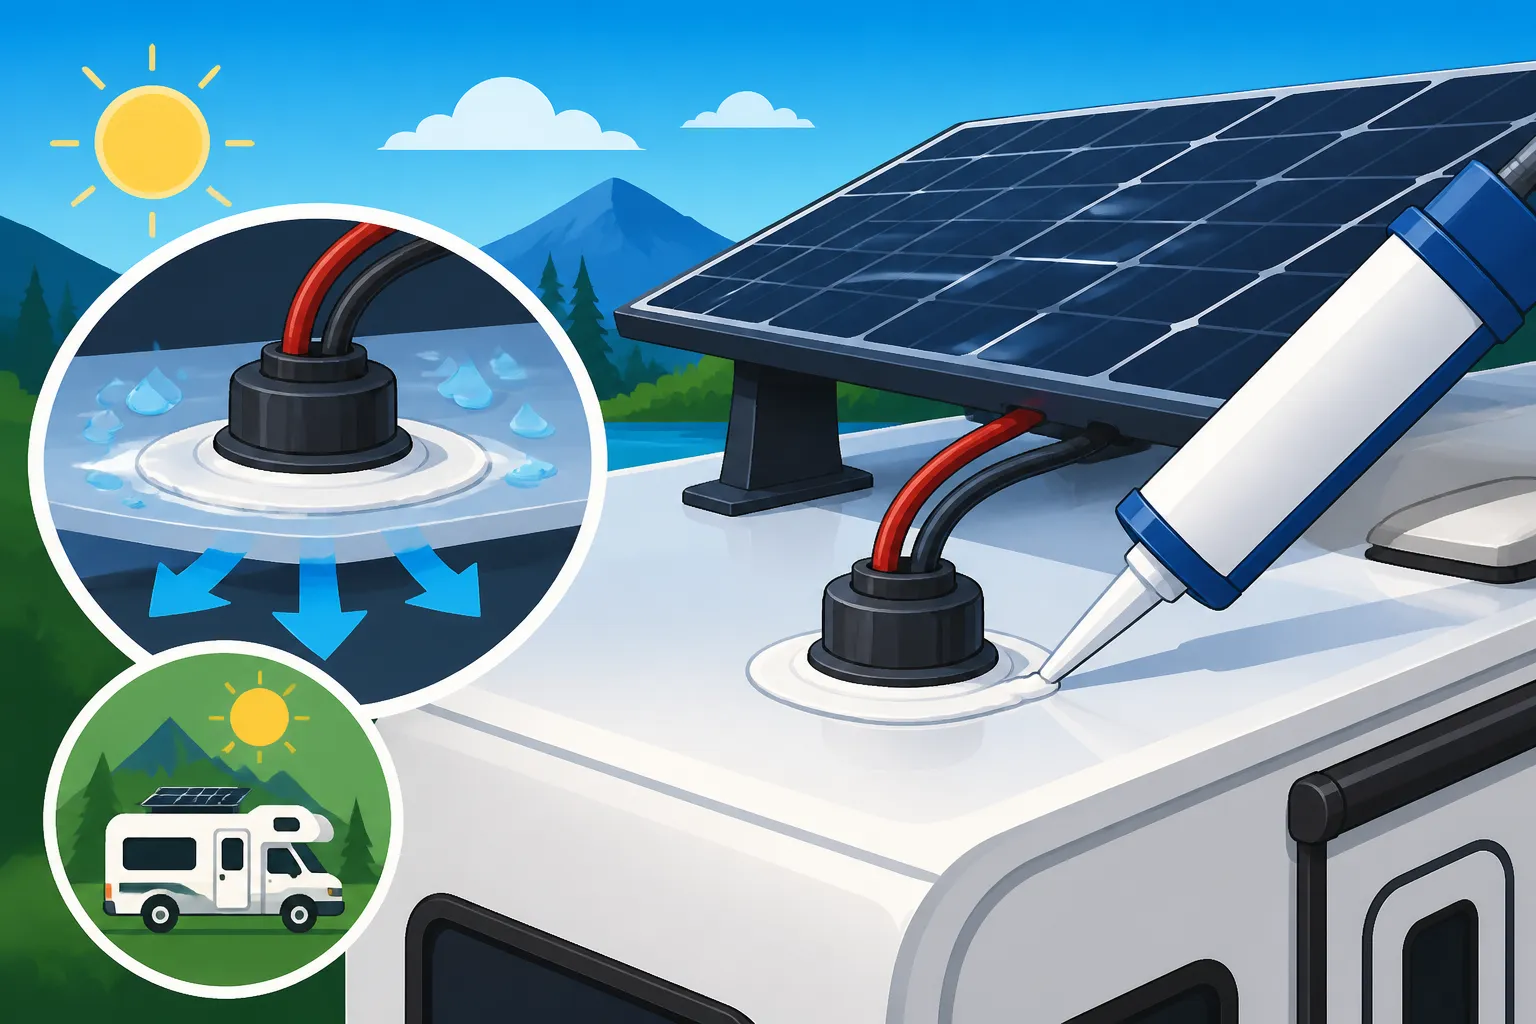
Now for the final, critical layer of protection. With your mounts and cable entries secured with butyl tape, it's time for the liquid sealant. Load your caulk gun with your chosen self-leveling lap sealant (like Dicor). For solar panel mounting feet, apply a continuous, generous bead of self-leveling sealant all around the base of each foot, extending slightly beyond the edges of the butyl tape. The sealant should encapsulate the screws and the edges of the mounting foot. Because it's self-leveling, it will flow to create a smooth, domed appearance.
For cable entry glands, apply a continuous bead around the base, again encapsulating the screws and the edges. If your cable gland has a higher profile, you might want to use a non-sag sealant initially on the vertical sides to build up the barrier, and then finish with self-leveling sealant around the base where it transitions to the roof. Don't be shy with the sealant, but avoid making it excessively thick, as this can lead to cracking over time. Aim for good coverage that seamlessly transitions from the mounted component to the roof surface. Allow the sealant to cure fully according to the manufacturer's instructions, which can take anywhere from a few hours to a few days, depending on temperature and humidity. Resist the urge to poke or touch it while it’s curing! Learning How to Wire an Off-Grid Solar System extends to these external protections.
Common Mistakes to Avoid and Maintenance Tips
Even with the best intentions, it's easy to make a few slip-ups during the sealing process or overlook ongoing care. A flawless installation today needs ongoing vigilance to stay watertight. Understanding Common Off-Grid Wiring Mistakes also often overlaps with installation sealing errors.
Pitfalls During Installation
We've talked about preparation being key, but let's highlight some common mistakes that can undermine your efforts:
- Insufficient Cleaning: This is probably the number one culprit for sealant failure. Any dirt, oil, or old residue left on the roof surface will prevent the new sealant from bonding properly, leading to premature lifting or cracking. Imagine trying to stick a band-aid to a greasy frying pan – it won't work.
- Using the Wrong Sealant: As mentioned, silicone is a no-go for most RV roofs. It doesn't adhere well to EPDM/TPO, and once applied, it’s notoriously difficult to remove completely, making future repairs a nightmare because nothing else will stick to the silicone residue. Always stick to purpose-built RV lap sealants.
- Not Using Butyl Tape: Relying solely on liquid sealant for a penetration is a risk. Butyl tape provides that crucial mechanical compression seal underneath the hardware, ensuring that water can't find its way under the mounting feet or cable entry points, even if the top liquid layer gets a small crack.
- Applying Sealant to a Wet Surface: Sealants need a completely dry surface to cure and bond correctly. Applying it in humid conditions or when the roof is even slightly damp will compromise its integrity and lifespan.
- Rushing the Cure Time: Curing takes time, and trying to move or inspect things too soon can disrupt the sealant's ability to form a strong bond. Follow the manufacturer's recommendations for curing, especially before exposing the RV to rain or travel.
Long-Term Care and Inspection
Your work isn't done once the sealant has cured. RV roofs, including your solar installation, require regular inspection and maintenance to ensure they remain watertight. Think of it as part of your overall Off-Grid Solar Maintenance Guide.
Make it a habit to visually inspect all your roof seals every three to six months, or before any major trip. Look for any signs of cracking, peeling, shrinking, or discoloration. Pay close attention to the edges where the sealant meets the mounting hardware and the roof surface. These are typically the first places to show wear. If you spot any small cracks or areas where the sealant appears to be lifting, address them promptly. You can often clean the area thoroughly with mineral spirits and apply a fresh bead of compatible self-leveling lap sealant directly over the old, compromised area, extending slightly onto the good sealant and the roof. For larger failures, you might need to carefully remove the old sealant and reapply.
Keeping your RV roof generally clean also helps preserve the longevity of your seals. Bird droppings, tree sap, and environmental grime can degrade sealants over time. A simple wash with RV-safe soap and water a few times a year will go a long way. By being proactive with your inspections and maintenance, you can catch potential problems early and keep your RV dry and your off-grid solar system performing optimally. Don't forget, understanding Cost to Replace Off-Grid Solar Batteries is part of long-term planning, and preventing water damage helps avoid unexpected expenses that impact that budget.
Disclaimer
Please remember that working on an RV roof and with electrical systems carries inherent risks. Always prioritize safety, wear appropriate personal protective equipment, and consult with a qualified professional if you are unsure about any part of the installation or sealing process. This guide provides general information and best practices, but individual circumstances may vary.