How to Install Off-Grid Solar on a Tiny Home
Setting up an off-grid solar system for your tiny home can feel like navigating a maze, especially when you're dreaming of energy independence but are intimidated by all the technical jargon and endless equipment options. Many aspiring tiny home dwellers get overwhelmed just thinking about where to start with wiring, sizing, and ensuring a reliable power supply. This comprehensive guide is here to demystify the process, walking you through every crucial step to successfully power your tiny home with solar, from initial planning to long-term maintenance.
Understanding Your Tiny Home's Energy Needs
Before you even think about buying a single solar panel, the absolute first step for any tiny home off-grid solar project is to get a crystal-clear picture of your energy consumption. It’s like trying to pack for a trip without knowing where you’re going or what the weather will be like – you’ll either overpack or, worse, leave essential items behind. Without a precise understanding of your power demands, you risk building a system that’s either too small and leaves you in the dark, or too large and unnecessarily expensive.
Calculating Daily Watt-Hours
This is where you become an energy detective. Grab a notepad, a spreadsheet, or even just a piece of paper, and list every single electrical appliance and device you plan to use in your tiny home. Think everything from your refrigerator and lights to your laptop, phone charger, and even that little electric kettle you can't live without. For each item, you need to find two key pieces of information: its wattage (how much power it uses when it's running) and how many hours per day you expect to use it.
You can usually find the wattage listed on the appliance's label, in its manual, or by doing a quick online search. If it only lists amps, multiply amps by voltage (e.g., 120V for most AC household items) to get watts. Once you have the wattage, multiply it by the daily hours of use. This gives you the daily watt-hours (Wh) for that specific appliance. For example, a 60-watt LED lightbulb used for 5 hours a day consumes 300 Wh (60W * 5h = 300 Wh). Do this for every item, and then sum them all up. That final number is your estimated total daily watt-hour consumption. Don't forget to consider seasonal variations; you might use more heating or cooling in different times of the year, which significantly impacts consumption. For a more detailed walkthrough, check out our guide on How to Calculate Off-Grid Solar Needs.
Accounting for Surge Loads and Peak Demand
Beyond the average daily usage, there's another crucial factor: surge loads. Many appliances, especially those with motors like refrigerators, well pumps, microwaves, or power tools, draw a much higher amount of power for a brief moment when they first start up. This "starting watts" or "surge power" can be 2-3 times higher than their "running watts." If your inverter isn't sized to handle these momentary surges, it will trip or fail to power the appliance, leaving you frustrated.
When you're doing your load analysis, pay special attention to these "heavy hitters." Your inverter needs to be able to supply the highest simultaneous surge demand that your tiny home might experience. For instance, if your refrigerator kicks on while you're microwaving a meal, those two surge loads add up. You'll need an inverter capable of handling that combined peak. Failing to account for surge loads is one of the most common mistakes tiny homeowners make, leading to underpowered systems and constant headaches.
Days of Autonomy and System Sizing for Reliability
"Days of autonomy" refers to how long your battery bank can power your tiny home without any additional charge from your solar panels, typically during cloudy weather or short winter days. This is a critical factor for off-grid living, especially in regions prone to extended periods of overcast skies or in seasons with limited sunlight. You don't want to run out of power just because it rained for a few days.
Most off-grid systems aim for 2-5 days of autonomy, depending on your location's weather patterns and your risk tolerance. To calculate this, you take your total daily watt-hour consumption and multiply it by your desired days of autonomy. This gives you the total usable energy storage your battery bank needs. Remember that not all battery types allow you to use 100% of their rated capacity; lead-acid batteries, for example, are typically only discharged to 50% to prolong their lifespan. This means you’d need twice the rated capacity for lead-acid compared to lithium batteries which often allow 80-100% discharge. Understanding these nuances is key to sizing your battery bank appropriately and ensuring uninterrupted power, even when the sun isn't shining.
Essential Components of a Tiny Home Off-Grid Solar System
Building an off-grid solar system for your tiny home is a bit like assembling a puzzle; each piece has a vital role, and they all have to fit together perfectly. Understanding each component is crucial for making informed decisions about your setup.
Solar Panels: Types, Placement, and Mounting Options
Solar panels are the workhorses of your system, capturing sunlight and converting it into electricity. For tiny homes, space is always a premium, so choosing the right type and figuring out optimal placement is paramount.
- Monocrystalline vs. Polycrystalline: Monocrystalline panels are generally more efficient, meaning they produce more power per square foot, which is a huge advantage for smaller spaces. They also tend to perform better in low-light conditions. Polycrystalline panels are typically less expensive but also less efficient. Given the limited roof real estate on most tiny homes, many people opt for monocrystalline panels to maximize power output. For more insights, delve into our guide on the Best Off-Grid Solar Panels.
- Placement and Mounting:
- Roof Mounts: This is the most common option for tiny homes, integrating the panels directly onto the roof structure. You'll want to aim for a south-facing orientation (in the Northern Hemisphere) and an optimal tilt angle to capture the most sunlight year-round. Consider the structural integrity of your tiny home's roof and how to seal any penetrations to prevent leaks. Many tiny home builders will factor solar mounting into their design from the get-go.
- Ground Mounts: If your tiny home is stationary and you have extra land, a ground mount offers flexibility. You can optimize the tilt and azimuth (direction) perfectly and adjust them seasonally. They're also easier to clean and maintain. However, they take up yard space and require trenching for wiring.
- Portable/Folding Panels: Great for supplementing a roof-mounted system or for mobile tiny homes that frequently change location. They can be angled directly at the sun throughout the day, maximizing capture, and then stowed away. Brands like Renogy offer excellent portable panel options that can be easily folded and stored in a tiny home's limited storage space.
- Flexible Panels: These lightweight panels can conform to curved surfaces, making them an option for certain tiny home designs or RVs where traditional rigid panels aren't feasible. However, they tend to be less efficient and can degrade faster due to heat buildup if not properly ventilated.
Batteries: The Heart of Your Off-Grid Power
Your battery bank is where all that solar energy is stored, ready for use when the sun goes down or decides to take a few days off. Without a robust battery bank, your off-grid dreams will quickly become a nightmare of power outages.
- LiFePO4 (Lithium Iron Phosphate): These batteries are the darlings of the off-grid world for good reason. They offer a much longer cycle life (how many times they can be charged and discharged) than lead-acid, can be discharged deeply (80-100%) without damage, are lighter, and often have a higher energy density. While their upfront cost is higher, their longevity and performance often make them more cost-effective in the long run. Many tiny home owners purchase these batteries directly from online retailers like Amazon for convenience.
- Lead-Acid (AGM, Gel, Flooded): More budget-friendly upfront, lead-acid batteries have been the traditional choice. However, they are heavier, have a shorter lifespan, require more careful charging and discharge cycles (typically only 50% depth of discharge for optimal life), and may require venting (flooded cells) or specific temperature controls. For detailed cost comparisons, read our article on LiFePO4 vs Lead-Acid Battery Cost.
For a tiny home, the space and weight savings of LiFePO4 batteries are often a deciding factor, making them a popular choice despite the initial sticker shock. You can also explore options for How to Size an Off-Grid Battery Bank to get a better idea of what capacity you'll need.
Charge Controllers and Inverters: The Brains and Brawn
These components manage the flow of power and transform it into usable electricity for your home.
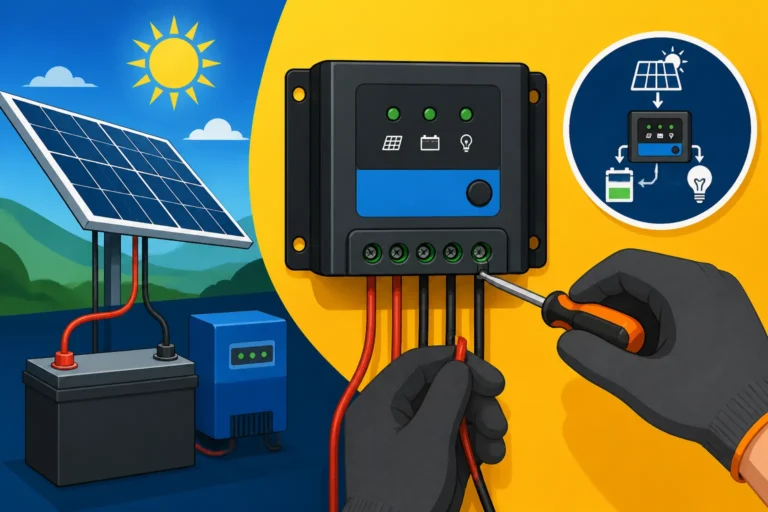
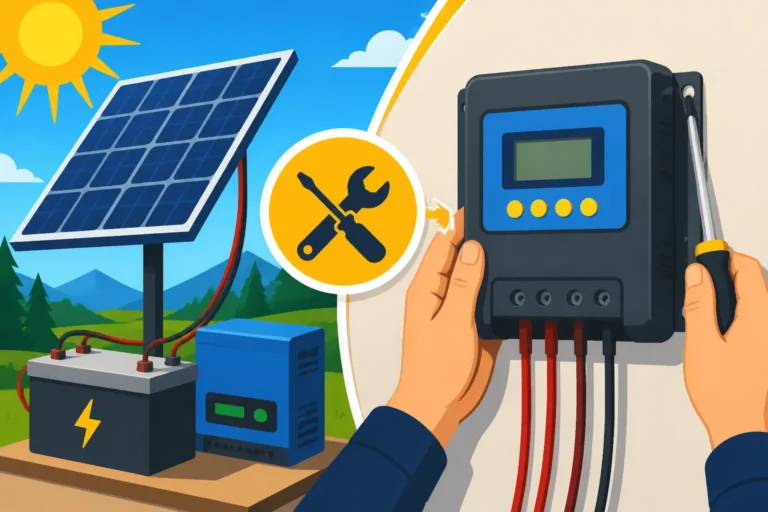
- Charge Controller: This intelligent device sits between your solar panels and your battery bank. Its job is to regulate the voltage and current coming from the panels to prevent overcharging and damage to your batteries. There are two main types:
- MPPT (Maximum Power Point Tracking): These are more efficient, especially in varying light conditions and when your panel voltage differs significantly from your battery voltage. They can extract up to 30% more power from your panels compared to PWM controllers, making them ideal for maximizing energy capture in tiny homes where every watt counts.
- PWM (Pulse Width Modulation): Simpler and less expensive, PWM controllers are best suited for smaller systems where the solar panel voltage closely matches the battery bank voltage. They essentially act like a switch, slowly tapering off the charge as the battery fills.
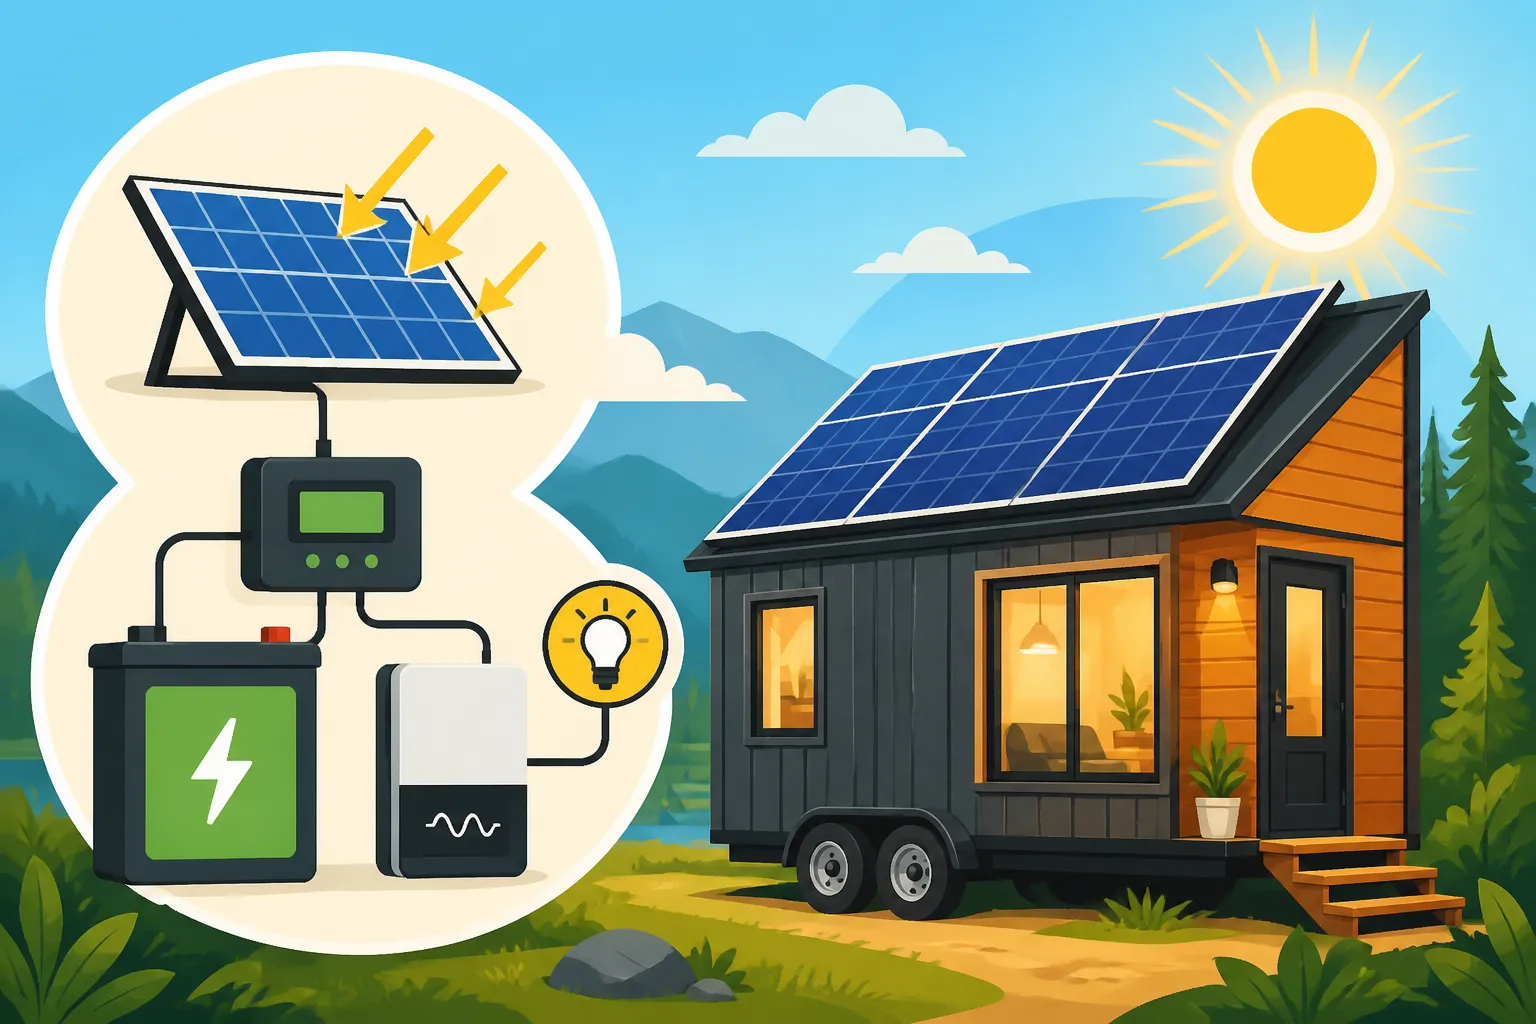
- Inverter: Your solar panels and batteries produce direct current (DC) electricity, but most standard home appliances run on alternating current (AC). The inverter's job is to convert that DC power into usable AC power.
- Pure Sine Wave Inverters: These produce a clean, high-quality AC waveform that is identical to (or even better than) what you get from the utility grid. This is crucial for sensitive electronics like laptops, televisions, and medical equipment. Always opt for a pure sine wave inverter for your tiny home to protect your appliances and ensure smooth operation.
- Inverter Chargers: Many modern off-grid systems use "inverter chargers" which combine the functions of an inverter and a battery charger into one unit. These are incredibly versatile, allowing you to charge your batteries from solar, but also from a generator or shore power (if your tiny home is occasionally hooked up). This makes them a fantastic backbone for a tiny home system, offering flexibility and backup options. To help you make the right choice, we have a detailed guide on How to Choose an Off-Grid Inverter.
Balance of System Components (BOS)
While panels, batteries, and inverters are the major players, several other components are absolutely essential for a safe, functional, and efficient off-grid solar system. These are often referred to as the "Balance of System" or BOS components.
- Wiring and Cables: You'll need appropriate gauge wiring to connect your panels, charge controller, batteries, and inverter. The sizing of these cables is critical to prevent voltage drop and overheating, which can lead to inefficiency or even fire hazards. Always use marine-grade or appropriately rated solar PV wire. Understanding How to Size Wire and Cables is a fundamental safety and performance requirement.
- Fuses and Breakers: These are non-negotiable safety devices. Fuses and breakers protect your system components and, more importantly, you, from overcurrents, short circuits, and potential fires. You'll need them at various points in your system: between panels and charge controller, between charge controller and batteries, and between batteries and inverter.
- Disconnect Switches: DC disconnect switches allow you to safely isolate parts of your system for maintenance or in an emergency. You'll typically have one between your solar array and the charge controller, and another between your battery bank and the inverter.
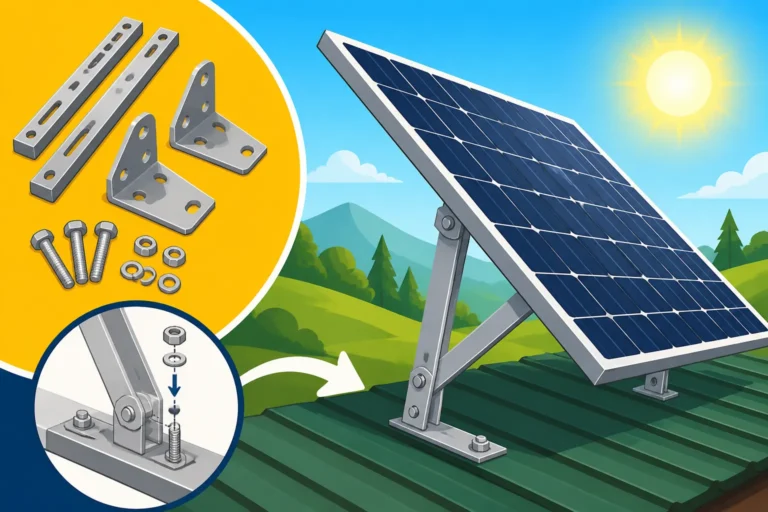
- Mounting Hardware: Sturdy racking and mounting hardware are crucial for securing your solar panels to your tiny home's roof or a ground mount structure. These need to be robust enough to withstand wind, snow, and other environmental factors in your specific location.
- Monitoring System: While not strictly essential for power generation, a good monitoring system (often integrated into the inverter or a separate battery monitor like a Victron SmartShunt) allows you to track your power production, consumption, and battery state of charge. This data is invaluable for understanding your system's health, optimizing usage, and troubleshooting.
- Combiner Boxes: For larger arrays with multiple strings of solar panels, a combiner box helps consolidate wiring, and often includes surge protection and individual string fusing for added safety and ease of troubleshooting.
- Grounding Equipment: Proper grounding is paramount for safety, protecting your system from lightning strikes and preventing electrical shock hazards. This involves grounding the panel frames, mounting structures, and inverter to an earth ground.
Choosing the right system voltage (12V, 24V, or 48V) will also impact the components you select and their wiring. Generally, larger systems benefit from higher voltages like 48V to reduce current and allow for thinner, less expensive wiring. Learn more about How to Choose System Voltage to make the best decision for your tiny home.
Step-by-Step Installation Process for Your Tiny Home
Once you have a solid understanding of your energy needs and the components involved, it's time to get your hands dirty! Installing an off-grid solar system on a tiny home involves several key stages, each requiring careful attention to detail.
Planning and Permitting Considerations
Even though it’s a tiny home and potentially off-grid, you can't just slap panels on the roof and call it a day, especially if your tiny home is on a foundation or in a community with building codes. Local regulations vary widely. Some jurisdictions consider tiny homes as traditional residences and require permits for any electrical work, including solar installations, to ensure safety and compliance with the National Electrical Code (NEC). Others might be more lenient, especially for mobile tiny homes or those in extremely rural areas.
- Research Local Codes: Before you start drilling, contact your local building department or planning office. Ask about specific requirements for solar PV systems on tiny homes, including electrical permits, structural permits for roof mounts, and any inspection processes. Ignoring permits can lead to fines, forced removal, or issues with insurance down the road. Our guide on Off-Grid Solar Permits and Codes provides an excellent overview of what to expect.
- Safety First: Beyond permits, safety is paramount. Ensure you have the right tools, personal protective equipment (PPE) like gloves and safety glasses, and a clear understanding of electrical safety. If you're not confident in your electrical skills, consider hiring a licensed electrician for the high-voltage connections or the final tie-in to your tiny home's electrical panel.
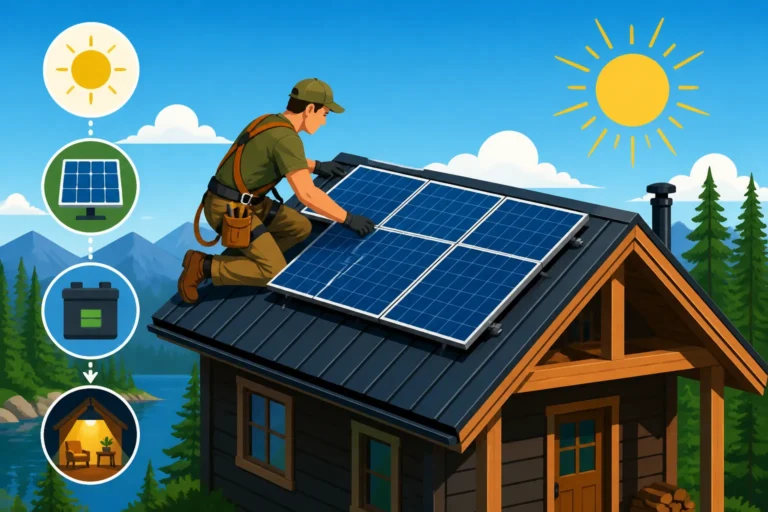
Mounting Solar Panels Securely
Mounting your solar panels securely is critical to their performance and longevity, especially given the potential for movement in mobile tiny homes or harsh weather.
- Determine Panel Layout: Based on your tiny home's roof space and optimal sun exposure, decide on the best layout for your panels. Measure carefully and ensure enough space for mounting hardware and cabling. For many tiny homes, securing the panels directly to the roof rafters is common practice.
- Install Mounting Feet/Stanchions: For a roof mount, you'll need to securely attach mounting feet (also called L-feet or stanchions) to your tiny home's roof structure. This usually involves locating rafters and drilling pilot holes. Apply generous amounts of sealant (like Dicor Self-Leveling Lap Sealant for RV roofs, or specialized flashing for residential roofs) around each screw penetration to prevent water intrusion.
- Attach Rails: Once the mounting feet are secure and sealed, attach aluminum rails to them. These rails will provide the framework for your solar panels. Ensure they are level and properly spaced according to your panel dimensions.
- Place and Clamp Panels: Carefully lift your solar panels onto the rails. This is often a two-person job, especially for larger panels. Use mid-clamps to secure panels in the middle of a row and end-clamps for the panels at the ends. Double-check that all clamps are tight and panels are firmly seated. If you purchased a system from a reputable brand like Renogy, their kits usually come with well-designed mounting hardware that simplifies this step.
For mobile tiny homes, consider flexible panels that can be adhered directly, or robust low-profile mounts that can handle vibrations and wind shear during travel.
Wiring the System: Panels to Charge Controller to Batteries to Inverter
This is where the magic happens, but it's also where safety and precision are most important. Follow the circuit from generation to consumption:
- Panel Wiring (DC Side):
- Series vs. Parallel: Decide whether to wire your panels in series, parallel, or a combination (series-parallel). Series wiring increases voltage, while parallel wiring increases current (amperage). Your choice will depend on your charge controller's input voltage limits and your overall system voltage (12V, 24V, or 48V). Higher voltage strings are generally more efficient over longer cable runs and perform better with MPPT charge controllers.
- Connect Panels to Combiner Box (Optional): If you have multiple strings of panels, wire them into a combiner box with fuses or breakers for each string. Then, a single set of positive and negative cables runs from the combiner box to the PV disconnect switch.
- PV Disconnect: Install a DC PV disconnect switch between your solar array and your charge controller. This allows you to safely shut off power from the panels for maintenance or emergencies.
- Cable Routing: Route appropriate gauge solar PV cables from your panels (or combiner box) through a sealed roof entry point (such as a cable entry gland box) down to your charge controller. Keep cable runs as short as possible to minimize voltage drop.
- Charge Controller to Batteries (DC Side):
- Connect Charge Controller: Connect the positive and negative cables from the PV disconnect to the "PV input" terminals on your charge controller.
- Battery Disconnect: Install a heavy-duty DC battery disconnect switch between your charge controller and your battery bank. This is a critical safety component.
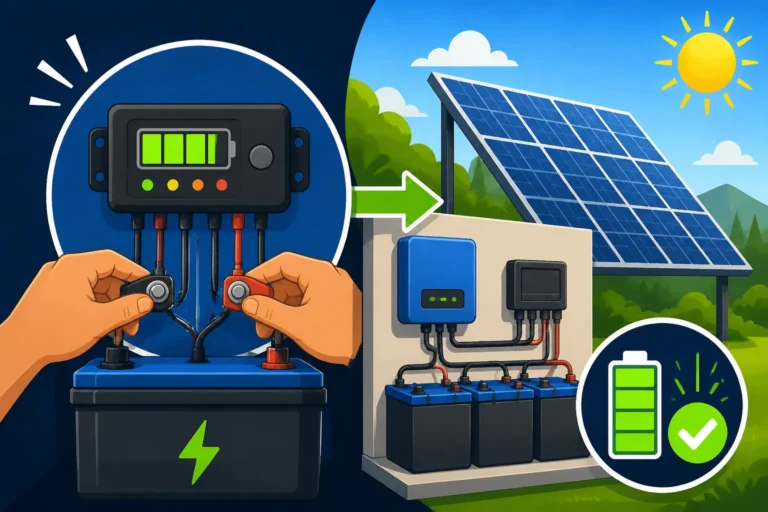
- Connect to Batteries: Run appropriately sized battery cables from the charge controller's "battery output" terminals to your battery disconnect, and then to your battery bank. Ensure correct polarity (positive to positive, negative to negative).
- Battery Bank Wiring: If you have multiple batteries, wire them together in series, parallel, or series-parallel to achieve your desired system voltage and capacity. Use thick, short battery interconnect cables. Make sure all connections are clean and tight. For more information, check out our guide on How to Wire an Off-Grid Solar System.
- Batteries to Inverter (DC Side):
- Inverter Disconnect: Install another heavy-duty DC disconnect switch between your battery bank and your inverter. This allows you to safely isolate the inverter.
- Connect Inverter: Connect heavy-gauge battery cables from your battery bank (via the inverter disconnect) to the DC input terminals on your inverter. Again, ensure correct polarity.
- Inverter to AC Loads/Panel (AC Side):
- AC Output: Your inverter will have AC output terminals. Run standard AC electrical wire from these terminals to an AC breaker panel in your tiny home.
- Breaker Panel: Within your tiny home's breaker panel, you'll distribute power to your various outlets, lights, and appliances, just like a traditional home. Each circuit should have its own appropriately sized breaker for protection. Our guide on How to Wire Off-Grid Solar to a Breaker Panel provides further details.
- Grounding: Properly ground all metallic components of your system (panel frames, mounting rails, inverter chassis) to a common grounding point and then to an earth ground rod. This is a crucial safety step to prevent electrical shock and protect against lightning.
When purchasing wiring and other electrical components, remember that Amazon is a good place to find a variety of gauges and lengths, often with competitive pricing and quick delivery, which can be a lifesaver when you're in the middle of an install.
Optimizing and Maintaining Your Tiny Home Off-Grid System
Once your off-grid solar system is installed and humming along, your journey isn't over. To ensure it runs reliably and efficiently for years to come, ongoing optimization and regular maintenance are absolutely essential. Think of it like owning a vehicle: you wouldn't just drive it without ever changing the oil, right? Your solar system needs the same kind of love and attention.
Monitoring Your System's Performance
An informed tiny home owner is a powerful tiny home owner. Having a clear understanding of how your system is performing daily is key to preventing issues and maximizing your energy independence.
- Battery Monitors: These are invaluable. A good battery monitor, often a shunt-based system like a Victron SmartShunt, gives you real-time information on your battery's state of charge (%), current draw, and power going in or out. This prevents accidental over-discharging (which can damage batteries) and helps you budget your power usage more effectively. Knowing you're at 60% capacity on a cloudy day might mean holding off on that extra load.
- Inverter Displays/Apps: Most modern inverters come with a display or can connect to a smartphone app. These often show you how much power your panels are currently generating, how much AC power you're consuming, and overall system status. Regularly checking these numbers helps you identify any anomalies quickly. If your solar production suddenly drops significantly on a clear day, it could signal a dirty panel, a loose connection, or a problem with your charge controller.
- Understanding Usage Patterns: By consistently monitoring, you'll start to recognize your tiny home's unique energy rhythms. You'll learn which appliances are the biggest energy hogs, what your average daily consumption looks like, and how your system copes with different weather conditions. This knowledge empowers you to make smarter choices, like running the washing machine only on sunny days or adjusting thermostat settings to conserve power during extended cloudy periods.
Routine Maintenance for Longevity
A little preventative maintenance goes a long way in ensuring your off-grid solar system has a long and productive life. Neglecting these simple tasks can lead to reduced efficiency, premature component failure, and costly repairs down the road.
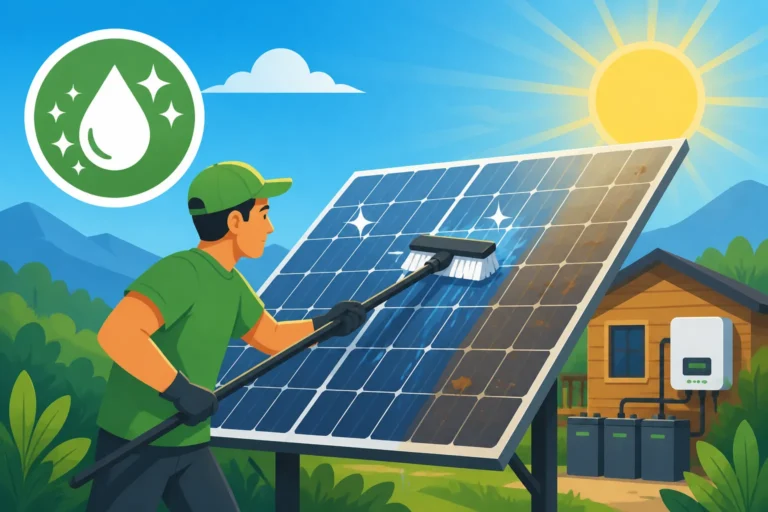
- Panel Cleaning: Dust, pollen, bird droppings, and leaves can accumulate on your solar panels, significantly reducing their efficiency. Depending on your environment, clean your panels every few weeks or months. Use a soft brush, a hose with plain water, or a specialized solar panel cleaning solution. Avoid abrasive cleaners or harsh scrubbing that could scratch the glass.
- Connection Checks: Annually, or more often if you experience issues, visually inspect all your electrical connections. Look for loose wires, corrosion, or signs of overheating (discolored insulation, melted plastic). Tighten any loose connections. This includes MC4 connectors on your panels, terminals on your charge controller, inverter, and battery bank. Remember to always disconnect power sources before working on connections!
- Battery Care:
- LiFePO4: These are relatively low-maintenance, but ensure they are not consistently over-discharged. If you have a battery management system (BMS) in place, it will handle most of the protective measures. Keep them in a temperature-controlled environment if possible, as extreme cold or heat can affect performance and lifespan.
- Lead-Acid (Flooded): These require the most attention. Regularly check the electrolyte levels and top them up with distilled water as needed. Keep the battery terminals clean and free of corrosion. Ensure adequate ventilation if your batteries are in an enclosed space, as they can off-gas hydrogen.
- Ventilation: Ensure that your charge controller, inverter, and battery bank (especially lead-acid) have adequate ventilation. Overheating can significantly reduce the lifespan and efficiency of electronics. Clear any dust or debris from vents.
- Shading Management: Periodically check for new sources of shade, such as growing trees, new structures, or seasonal sun path changes. Trim branches if necessary or adjust panel tilt if your mounts allow it.
Consistent maintenance ensures your system performs at its peak, saving you money on power and reducing the likelihood of unexpected outages. For more comprehensive tips on keeping your system in top shape, consult our guide on Off-Grid Solar Maintenance Costs.
Troubleshooting Common Issues
Even with the best planning and maintenance, sometimes things go wrong. Knowing how to diagnose basic problems can save you a lot of time and frustration.
- No Power/System Shutdown:
- Check Breakers/Fuses: Start with the simplest culprit. Have any breakers tripped? Have any fuses blown? Replace blown fuses or reset tripped breakers. Investigate why they tripped – was it an overloaded circuit?
- Battery State of Charge: Is your battery bank critically low? Your inverter might shut down to protect the batteries. Reduce loads and wait for solar charging.
- Inverter Error Codes: Most modern inverters have diagnostic displays. Look up any error codes in your inverter's manual. Common errors include low battery voltage, over-temperature, or overload.
- Low Solar Production:
- Shading: Is something casting a shadow on your panels? Even partial shading can drastically reduce output.
- Dirty Panels: Are your panels covered in dust, pollen, or debris? A quick cleaning can make a big difference.
- Cloudy Weather: Obvious, but worth noting. During extended cloudy periods or winter, production will naturally be lower. This is why "days of autonomy" is so crucial during the design phase.
- Loose Connections: Check wiring from panels to charge controller.
- Batteries Not Charging Properly:
- Charge Controller Settings: Are your charge controller's battery charging parameters correctly set for your battery chemistry (e.g., LiFePO4 vs. AGM)? Incorrect settings can lead to undercharging or overcharging.
- Panel Issues: Is your solar array producing power? Check panel output at the charge controller input terminals.
- Battery Health: If your batteries are old, they might not be holding a charge effectively. Consider a capacity test or, if they're lead-acid, check electrolyte levels.
- Appliance Not Working:
- Inverter Overload: Is the appliance drawing more power than your inverter can handle (especially surge loads)?
- AC Breaker Tripped: Check the breaker for that specific circuit in your tiny home's AC distribution panel.
- Appliance Fault: Is the appliance itself faulty? Try it on grid power if possible.
Many issues can be resolved with simple checks. However, if you're dealing with persistent problems, especially electrical ones, don't hesitate to consult an experienced solar technician or licensed electrician. Always prioritize safety. Our dedicated guide on How to Troubleshoot Off-Grid Solar offers a deeper dive into these diagnostic steps.
| Component | Purpose | Key Considerations for Tiny Homes |
|---|---|---|
| Solar Panels | Convert sunlight into electricity | High efficiency (monocrystalline) due to limited space; roof aesthetics; secure mounting for static or mobile units. |
| Batteries | Store energy for later use | LiFePO4 for better space/weight savings, longer life; adequate capacity for desired days of autonomy. |
| Charge Controller | Regulate power flow to batteries | MPPT for maximum efficiency, especially with varying light and higher voltage panels; correct voltage matching. |
| Inverter | Convert DC to AC power | Pure sine wave for sensitive electronics; adequate surge capacity for appliances like microwaves/pumps; all-in-one inverter/chargers. |
| Wiring & Fuses | Conduct electricity safely | Correct wire gauge to prevent voltage drop; proper fuses/breakers for overload protection; secure and sealed routing. |
| Mounting Hardware | Secure panels to structure | Robust, weatherproof, and aesthetically pleasing; proper sealing to prevent leaks; structural integrity of tiny home roof. |
| Monitoring System | Track system performance | Essential for optimizing usage and troubleshooting; real-time battery SoC and production data. |
Equipping your tiny home with an off-grid solar system is a fantastic step towards true independence and sustainable living. While the initial planning and installation may seem daunting, breaking it down into manageable steps, understanding each component, and prioritizing safety will make the process much smoother. With a well-designed and properly maintained system, you'll enjoy reliable, clean power for your tiny home for many years to come. Remember, you're not just installing solar; you're building a foundation for a self-sufficient lifestyle.
Disclaimer
The information provided in this guide is for general informational purposes only and does not constitute professional electrical or solar engineering advice. Off-grid solar installations involve high voltage DC and AC electricity, which can be dangerous. Always consult with a qualified and licensed electrician or solar professional before undertaking any electrical work or solar system installation to ensure compliance with local codes, safety standards, and optimal system design for your specific needs. The author and publisher are not responsible for any actions taken based on the information provided herein.