How to Install an Off-Grid Pwm Controller
Setting up an off-grid solar system can feel like navigating a maze, especially when you're trying to figure out each component's role and how it all connects. Many folks stumble when it comes to the charge controller, specifically understanding how to properly install a Pulse Width Modulation (PWM) type. This guide is here to untangle that process, offering a clear, step-by-step walkthrough to get your off-grid PWM controller installed correctly and safely, ensuring your batteries are charging efficiently.
Understanding PWM Charge Controllers and Their Role
Before we dive into installation, it's really important to get a grasp on what a PWM charge controller actually is and why you might choose one for your off-grid setup. Think of it as the brain between your solar panels and your batteries; its primary job is to regulate the power coming from your solar array to prevent your batteries from overcharging, which can severely shorten their lifespan or even damage them.
What is PWM Technology?
PWM, or Pulse Width Modulation, is a method of battery charging that essentially "pulses" the power from your solar panels to the battery. Unlike a simpler "on/off" controller, a PWM controller rapidly switches the connection between the solar panels and the battery. It essentially mimics a fully charged battery by reducing the voltage output from the solar array to match the battery's voltage as it approaches full. It carefully monitors the battery's state of charge and adjusts the width of these pulses. When the battery needs more charge, the pulses are longer, allowing more current to flow. As the battery gets fuller, the pulses become shorter, gradually tapering off the current to avoid overcharging. This "smart" charging helps maintain battery health and prolong its life by providing a more gentle and controlled charge cycle than basic controllers. It’s a bit like giving your battery sips of water rather than a continuous pour, ensuring it doesn't overflow.
When a PWM Controller Makes Sense
PWM controllers are often seen as the more budget-friendly option compared to their more advanced counterpart, MPPT (Maximum Power Point Tracking) controllers. They really shine in smaller, simpler off-grid systems where cost-effectiveness is a key concern. If you're powering something like a small shed, a camper, or a basic cabin with a relatively low power demand, a PWM controller can be a fantastic choice. For instance, if you're only looking to run some LED lights, charge a few phones, and maybe a small portable fridge, a PWM controller will likely do the job without breaking the bank.
They are most efficient when your solar panel's nominal voltage closely matches your battery bank's nominal voltage – think 12V panels charging a 12V battery bank. If your panels have a much higher voltage than your battery bank (e.g., a 24V panel trying to charge a 12V battery), a PWM controller will essentially "clip" the excess voltage, turning it into wasted heat rather than usable power. In these scenarios, an MPPT controller would convert that excess voltage into current, making it a more efficient choice. However, for straightforward, smaller systems, especially if you're aiming to understand how to save money on an off-grid solar build, a PWM controller offers a reliable and economical solution. Many reputable brands, including Renogy, offer excellent PWM models that are easy to install and very durable for these types of applications.
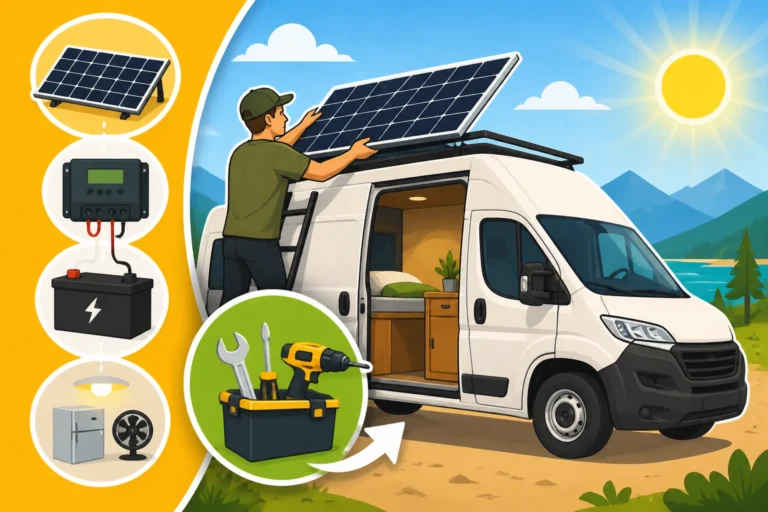
Essential Tools and Materials for Installation
Before you even think about connecting wires, getting all your ducks in a row with the right tools and materials is crucial. This isn't just about making the job easier; it's about making it safe and ensuring your system functions correctly for years to come.
Safety Gear and Basic Hand Tools
Your safety should always be your top priority. Seriously, don't skimp here. Before you touch anything electrical, make sure you have:
- Safety Glasses: Protect your eyes from stray wire clippings or sparks.
- Insulated Gloves: A must-have when working with electrical components.
- Multimeter: Absolutely essential for checking voltage, current, and continuity. You can't see electricity, so this is your eyes.
- Wire Strippers/Cutters: For preparing your cables.
- Crimpers: To properly attach lugs and connectors to your wires. This is far better than soldering for high-current DC applications.
- Screwdrivers (Phillips and Flathead): For terminal screws and mounting.
- Adjustable Wrench or Socket Set: For tightening larger connections, especially on battery terminals.
- Drill: For mounting the charge controller and any fuse blocks.
- Pen and Paper: To sketch out your wiring diagram and make notes. This is a simple but invaluable step, especially if you need to troubleshoot later or expand your system.
Specific Components
Beyond the basic tools, you'll need the right components to build a robust and safe system.
- PWM Charge Controller: Of course, this is the star of the show! Make sure its voltage and amperage ratings are suitable for your solar array and battery bank. If you're looking for recommendations, many people start with reliable options found on platforms like Amazon.
- Solar Panels: These will be connected to your charge controller. Ensure they are clean and free of physical damage before installation.
- Deep Cycle Batteries: The heart of your off-grid storage. Check out our guide on how to install an off-grid battery bank for more detailed information on battery types and connections.
- Appropriate Sized Wire/Cables: This is where many DIYers make mistakes. Undersized wires can lead to voltage drop, overheating, and fire hazards. You'll need wires to connect your panels to the controller, and the controller to your batteries. Refer to our article on how to size wire and cables to ensure you're using the correct gauge for your current and distance. For instance, a 10-gauge wire might be fine for a small 100W panel to a controller close by, but a larger system or longer run will demand thicker cables.
- Fuses and Circuit Breakers: These are non-negotiable safety devices. You need fuses between your solar panels and the controller, and crucially, between your battery bank and the charge controller. DC-rated circuit breakers are often preferred for easy disconnection. These protect your components from overcurrent and short circuits.
- Disconnect Switches: A DC disconnect switch between your solar panels and the charge controller, and another between the battery bank and the charge controller, allows you to safely shut down parts of your system for maintenance or emergencies.
- Mounting Hardware: Screws, bolts, and anchors to secure your charge controller to a wall or mounting board.
- Wire Lugs and Heat Shrink Tubing: For creating secure, professional-looking connections. Using heat shrink tubing over crimped lugs provides insulation and corrosion protection.
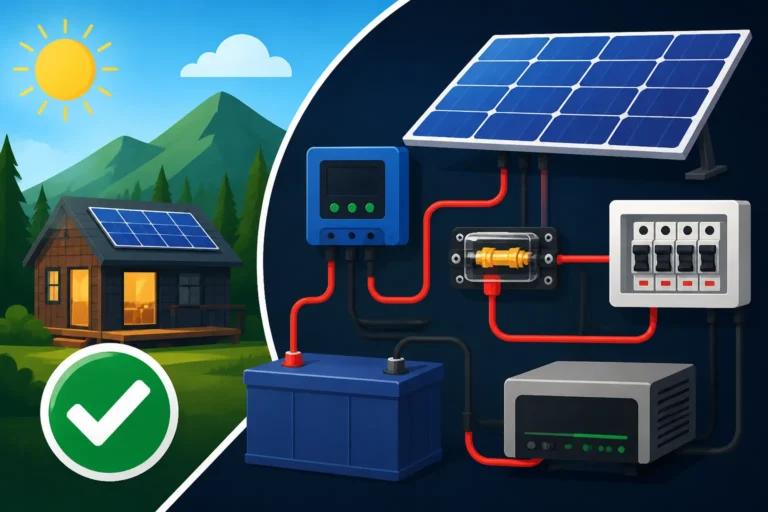
Having a clear understanding of all the components and their purpose, as outlined in an off-grid solar wiring diagram explained, will make your installation go much smoother.
Step-by-Step Installation Guide for a PWM Charge Controller
Alright, now that we've got our tools and components ready, let's get down to the actual installation process. Remember, the golden rule in DC solar wiring is always connect the battery first, then the panels. This ensures the charge controller properly senses the battery voltage before receiving power from the panels.
Pre-Installation Checks and Placement
Before you start running wires, a little planning goes a long way.
- Read the Manual: Seriously, every charge controller is a little different. Your specific Renogy or other brand PWM controller will have its own quirks, terminal labels, and recommended wiring sequences. Read that manual from cover to cover!
- Choose Your Location:
- Proximity to Batteries: Your charge controller should be mounted as close to your battery bank as practically possible. This minimizes voltage drop and allows for more accurate battery voltage sensing, which is crucial for efficient charging. If the cables between the controller and batteries are too long or too thin, the controller will read a lower voltage than the battery actually has, leading to inaccurate charging.
- Ventilation: PWM controllers can generate some heat, especially under heavy loads. Ensure your chosen location has adequate airflow and is not in an enclosed, unventilated space.
- Protection: Mount the controller in a dry, cool area, away from direct sunlight, extreme temperatures, or potential physical damage. If it's in a shed or cabin, consider a shaded wall.
- Accessibility: You'll need to be able to see the display, access the terminals for wiring, and potentially adjust settings.
- Mount the Controller: Use the appropriate mounting hardware to securely fasten your PWM charge controller to a solid surface, like a wall stud or a robust plywood mounting board. Don't fully tighten screws until all wires are connected, but ensure it's stable.
- Confirm Component Ratings: Double-check that your solar panel array's maximum current and voltage are within the operational limits of your chosen PWM controller. For example, if your controller is rated for 30 amps, ensure your panels won't produce more than 30 amps of charging current. Similarly, confirm your battery bank's voltage matches what the controller expects (e.g., 12V or 24V).
Connecting the Battery Bank
This is the most critical step, and doing it incorrectly can damage your controller or create a safety hazard.
- Ensure Batteries are Disconnected (Safety First!): Before doing anything, make sure all loads are disconnected from your battery bank, and if possible, place electrical tape over the battery terminals you aren't actively working on to prevent accidental short circuits.
- Measure and Cut Battery Cables: Measure the distance from your charge controller to your battery terminals. Cut two lengths of appropriately sized cable (positive and negative) to connect them. Remember to account for a little slack for routing and making connections.
- Attach Lugs: Crimp high-quality copper lugs onto both ends of your positive and negative battery cables. Use heat shrink tubing over the crimped connections for added durability and insulation.
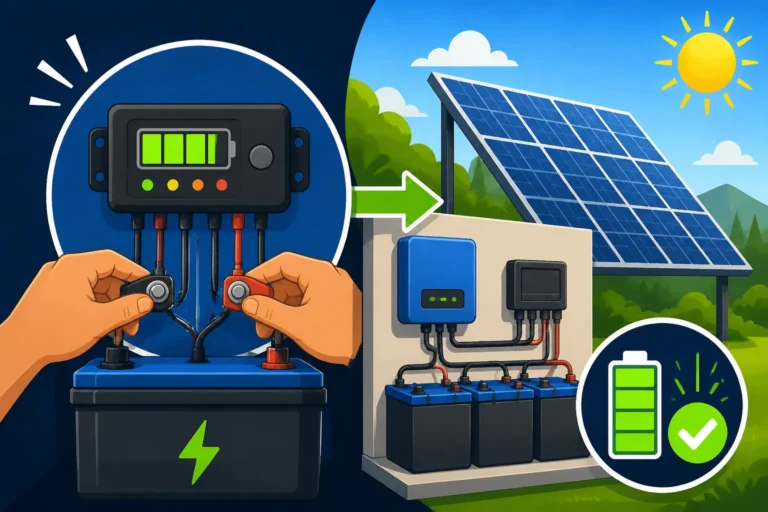
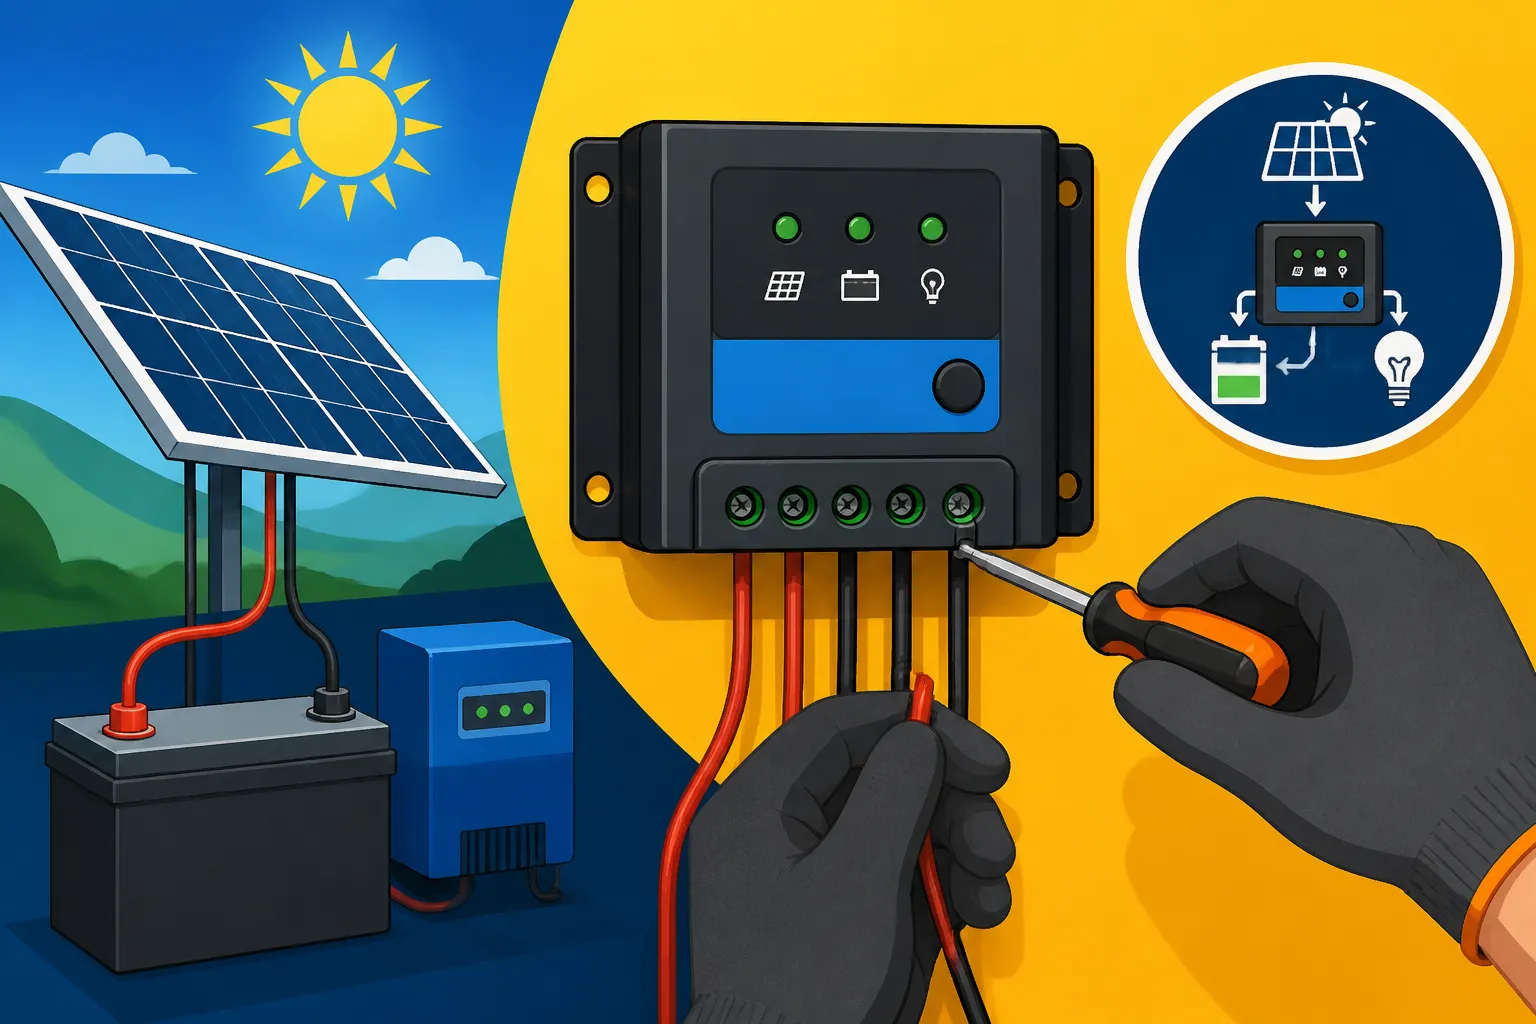
- Connect to Controller: Locate the battery terminals on your PWM charge controller. They will typically be clearly labeled with a battery icon, "+" for positive, and "-" for negative. Connect the negative battery cable to the negative battery terminal on the controller, and then the positive battery cable to the positive battery terminal. Do not connect to the battery yet.
- Install Battery Fuse/Breaker: This is where your safety device comes in. Install a DC-rated fuse or circuit breaker inline with the positive battery cable, as close to the battery's positive terminal as possible. This protects the entire circuit, including the charge controller, from overcurrents originating from the battery.
- Connect to Batteries: Finally, connect the negative battery cable to the negative terminal of your battery bank. Then, connect the positive battery cable (after the fuse/breaker) to the positive terminal of your battery bank. At this point, your charge controller should power on and display the battery voltage. If it doesn't, double-check your connections and the battery's state of charge with your multimeter.
Connecting the Solar Panels
With the battery safely connected and the controller powered up, you can now connect your solar panels. This is crucial for how to connect batteries, inverter, and panels in a cohesive system.
- Cover Panels (Safety First!): If your solar panels are already mounted and exposed to sunlight, it's highly recommended to cover them with a blanket, tarp, or cardboard to prevent them from generating power during connection. This eliminates the risk of sparks or damage to your controller.
- Measure and Cut Panel Cables: Measure the distance from your solar panel array (or combiner box, if you have one) to your charge controller. Cut two lengths of appropriately sized solar cable (often marked as PV wire) for positive and negative.
- Install Solar Disconnect and Fuse/Breaker: Install a DC-rated disconnect switch and an inline fuse or circuit breaker on the positive solar panel cable, as close to the panels as possible, before it reaches the charge controller. This provides another layer of protection and allows you to safely disconnect the panels from the system for maintenance.
- Connect to Controller: Locate the solar panel terminals on your PWM charge controller (usually marked with a solar panel icon, "+" and "-"). Connect the negative solar panel cable to the negative panel terminal, and the positive solar panel cable (after the disconnect and fuse/breaker) to the positive panel terminal. Ensure all connections are tight.
- Uncover Panels: Once all connections are secure, you can remove the covers from your solar panels. The charge controller should now begin to sense the incoming solar power and, if the battery voltage is below the charge setpoint, start charging your batteries. You might see an indicator light or a display showing charging activity.
Connecting DC Loads (Optional)
Many PWM charge controllers also feature dedicated terminals for DC loads, often with a light bulb icon. This allows the controller to manage power to your 12V DC devices directly, often with low-voltage disconnect features to protect your battery from being completely drained by your loads.
- Identify Load Terminals: Locate the load terminals on your PWM charge controller. They will be marked with a light bulb icon, "+" and "-".
- Measure and Cut Load Cables: Determine the appropriate wire gauge for your specific DC loads and cut lengths of positive and negative cable. Remember to install fuses for each individual DC load if connecting multiple devices to prevent any single device from impacting the entire load circuit.
- Connect to Controller: Connect your DC load's negative wire to the negative load terminal and the positive wire to the positive load terminal on the charge controller.
- Connect to Device: Connect the other ends of these cables to your DC appliance or a DC distribution panel.
- Test Loads: Once connected, you can usually activate the load output via the controller's settings or a dedicated button to test if your devices are receiving power. This setup can be very handy for smaller devices you want to run directly off your battery with built-in protection.
For larger AC loads, you would typically connect an inverter to your battery bank, not directly to the charge controller's load terminals. Our guide on how to wire an off-grid solar system provides a broader perspective on integrating all these components.
Initial Setup and Testing Your PWM System
You've got everything wired up – that's a huge step! But the journey isn't over yet. Now you need to configure your controller and make sure everything is humming along as it should be. This stage is crucial for ensuring efficiency and longevity of your setup.
Programming the Controller Settings
Most PWM charge controllers, even the simpler ones, will have a few basic settings you might need to adjust. This isn't usually complex, but it's important to get it right, especially for your battery's health.
-
Battery Type Selection: This is perhaps the most critical setting. Your charge controller needs to know what type of battery it's charging to apply the correct voltage setpoints. Common options include:
- Sealed Lead-Acid (SLA) / AGM: These are common choices for smaller off-grid setups and typically require a lower float voltage.
- Flooded Lead-Acid (FLA): Often found in larger, more traditional off-grid systems, these require higher charging voltages and sometimes a "equalization" charge.
- Lithium (LiFePO4): Becoming increasingly popular due to their efficiency and lifespan. These require very specific charging parameters, and if your controller doesn't have a dedicated lithium setting, it might not be suitable for them.
Consult your battery manufacturer's specifications to find the recommended charging voltages (bulk, absorption, float, and equalization, if applicable). Then, select the closest matching battery type on your PWM controller. If there's no exact match, try to choose a setting that won't overcharge your specific battery chemistry. For example, some Renogy controllers will have a simple button to cycle through these options.
-
Load Timer Settings (If Applicable): If you've connected DC loads to your charge controller, many models allow you to set timers for these loads. For example, you might want to program lights to come on at dusk and turn off after a few hours, or only operate certain devices during daylight hours. This can be a great way to manage power consumption and preserve battery life. Take some time to explore these options if your controller has them.
-
Low Voltage Disconnect (LVD) Setting: This setting determines at what battery voltage your controller will cut off power to the DC loads connected to its load terminals. This is a vital feature for protecting your battery from deep discharge, which can severely damage it. You want to set this high enough to prevent damage but low enough to allow for usable capacity. For lead-acid batteries, a typical LVD setting might be around 11.5V to 12V for a 12V system. Lithium batteries can handle deeper discharges, but you should still set an LVD based on manufacturer recommendations, perhaps around 10.5V per 12V battery.
Always double-check the values and unit of measurement (volts, hours, etc.) on your controller's display or through its interface.
Verifying System Functionality
Once your settings are configured, it's time to put your system to the test.
-
Observe Charging Indicators: Most PWM controllers have LED indicators or a digital display. Look for:
- Battery Status: Is it showing that the battery is charging, fully charged, or low?
- Solar Input: Is there an indicator that solar power is actively coming in?
- Load Output: If you have loads connected, is the indicator showing power delivery?
A healthy system will typically show solar input and battery charging during daylight hours, and the battery status should gradually increase throughout the day.
-
Use Your Multimeter: This is your best friend for verification.
- Battery Voltage: Measure the voltage directly at your battery terminals. Then, measure the voltage at the charge controller's battery terminals. These readings should be very close, ideally within 0.1-0.2V. If there's a significant difference, it could indicate undersized or loose wiring.
- Solar Panel Voltage: With the panels uncovered and in sunlight, measure the voltage coming from your solar array before it enters the charge controller. Then, measure the voltage at the charge controller's solar input terminals. Again, these should be very close.
- Charging Current: If your multimeter has an amperage clamp, you can measure the current flowing from the solar panels to the charge controller, and from the charge controller to the batteries. This gives you a real-time sense of how much power your system is generating and delivering.
- Load Voltage/Current: If you have DC loads, measure the voltage and current at the load terminals of the controller and at the load device itself.
-
Check for Heat: After an hour or so of operation, gently feel the wires and the charge controller itself. They might be slightly warm, but they should not be hot to the touch. Hot wires indicate excessive current for the wire gauge (undersizing) or a loose connection, both of which are serious fire hazards. If you notice excessive heat, immediately disconnect power (panels first, then battery) and investigate.
By carefully programming your settings and thoroughly testing your system, you're ensuring that your off-grid power solution is not only working but working optimally and safely. This step is as important as the physical wiring itself.
Common Mistakes to Avoid and Troubleshooting Tips
Even with the best intentions and careful planning, hiccups can happen. It's totally normal! Knowing what commonly goes wrong and how to fix it can save you a lot of frustration and potential damage.
Installation Pitfalls
Many issues with off-grid PWM controllers stem from common installation errors that are often overlooked in the excitement of getting power.
- Incorrect Wiring Order: This is, without a doubt, the most frequent and potentially damaging mistake. Always, always, always connect your battery to the charge controller first, and only then connect your solar panels. Connecting panels first to a controller without a battery connected can cause voltage surges that can literally fry the internal electronics of the controller. Most controllers are designed to sense battery voltage first to properly regulate incoming solar power. If you've been searching for an "off-grid charge controller installation mistakes to avoid" guide, this is usually at the top of the list.
- Reverse Polarity: Connecting positive to negative or vice versa, either on the battery or solar side, is a critical error. While many modern PWM controllers have reverse polarity protection, it's not foolproof, and you could still damage the controller, your batteries, or blow internal fuses. Always double-check your positive (red) and negative (black) connections before tightening them down. Use your multimeter to verify polarity if you're unsure.
- Undersized Wiring: Using wires that are too thin for the amount of current flowing through them is a silent killer. Undersized wires lead to significant voltage drop, meaning less power actually reaches your batteries, and they can overheat, posing a serious fire risk. This is especially true for the battery-to-controller connection, which carries the highest currents. Always refer to wire sizing charts based on your system's amperage and cable length. Our guide on how to size wire and cables goes into much more detail on this.
- No Fuses or Breakers: Skipping safety devices is like driving a car without brakes. Fuses and circuit breakers are there to protect your expensive components (and your property!) from overcurrents and short circuits. Always install them on both the battery positive line and the solar panel positive line.
- Improper Battery Type Setting: If your PWM controller doesn't know what type of battery it's charging, it will apply generic voltage setpoints that might not be suitable for your specific battery chemistry. For example, charging a LiFePO4 battery with settings meant for a flooded lead-acid battery could lead to undercharging (reducing usable capacity) or overcharging (damaging the battery). This adjustment is typically a simple button press or menu selection on models from brands like Renogy.
- Poor Connections: Loose or improperly crimped connections create resistance, which leads to heat, voltage drop, and potential arcing. Take your time to make sure all wire lugs are securely crimped and all terminal screws are tight. Give each wire a gentle tug to confirm it's seated properly.
Basic Troubleshooting Steps
When something isn't working right, don't panic! Most issues have relatively simple solutions.
- No Display or Power:
- Check Battery Connections: Is the battery properly connected to the controller? Are the battery terminals tight and free of corrosion?
- Check Battery Voltage: Use your multimeter to verify the battery has sufficient voltage. A very low battery might not be able to power the controller.
- Check Fuses/Breakers: Is the fuse between the battery and controller blown, or is the breaker tripped? Replace or reset as needed.
- No Solar Charging:
- Check Panel Connections: Are the solar panels connected properly to the controller?
- Check Solar Disconnect/Fuses: Is the solar disconnect switch in the "on" position? Is the solar fuse blown or breaker tripped?
- Check for Sunlight: Are the panels in direct sunlight and free of shading? Even a small amount of shade can drastically reduce output.
- Check Panel Voltage: With the panels uncovered, use your multimeter to check the voltage coming directly from your solar panels. If it's too low, there might be an issue with the panels themselves or their wiring.
- Battery Not Fully Charging:
- Battery Type Setting: Is the correct battery type selected on your controller? Incorrect settings can prevent a full charge.
- Sunlight Hours/Shading: Are your panels getting enough peak sun hours throughout the day? Cloudy days or shading will naturally reduce charging.
- Panel Sizing: Is your solar array large enough for your daily energy consumption? If you're using more power than your panels can generate, your batteries will always struggle to reach a full charge. This often leads people to consider How to Size an Off-Grid Solar System.
- Old/Failing Batteries: Older batteries, especially lead-acid types, lose capacity over time and may never reach a "full" charge according to the controller. You may need to assess your Cost to Replace Off-Grid Solar Batteries.
- Loads Not Working:
- Check Load Connections: Are the DC loads properly connected to the controller's load terminals?
- Load Settings/Timer: Are the load output settings enabled on the controller? Is there a timer preventing them from turning on?
- Low Voltage Disconnect (LVD): Has the battery voltage dropped below the LVD setting? If so, the controller will cut power to protect the battery. The loads will likely resume once the battery has recharged.
- Load Fuses: Is there a fuse on the load circuit (either at the controller or on the device itself) that might be blown?
By systematically checking these points, you can usually pinpoint and resolve most issues with your PWM charge controller installation and operation. Remember, patience and a multimeter are your best tools for troubleshooting.
Maintaining Your PWM Charge Controller
Once your PWM charge controller is installed and running smoothly, you might think your work is done. Not quite! While these devices are generally low-maintenance, a little bit of ongoing care can ensure they continue to perform optimally and extend the life of your entire off-grid system. After all, you've invested time and money, so protecting that investment makes perfect sense.
Regular Checks and Cleaning
Think of these checks like giving your car a regular oil change – small efforts that prevent big problems down the road.
- Visual Inspection (Monthly/Quarterly):
- Wiring: Periodically check all visible wiring connections. Are they still tight? Do you see any signs of corrosion, fraying, or wear? Loose connections can lead to resistance, heat, and inefficient power transfer. This is especially true for the high-current connections to your battery bank. If you notice any issues, carefully disconnect the system (panels first, then battery) and rectify the problem.
- Controller Housing: Look for any physical damage, cracks, or signs of overheating (discoloration of plastic). Ensure dust, dirt, or insect nests haven't accumulated inside or around the ventilation openings.
- Mounting: Is the controller still securely mounted to the wall or board? Vibrations over time can sometimes loosen mounting screws.
- Terminal Cleaning: Even in clean environments, dust can build up on terminals. In humid or dusty conditions, light corrosion can occur.
- Dust Removal: Use a can of compressed air or a soft, dry brush to gently clear away any dust or debris from the controller's vents and around the wire terminals.
- Corrosion Check: If you notice any green or white powdery substance on the terminals (especially on lead-acid batteries and their connections to the controller), this indicates corrosion. You'll need to carefully disconnect the system, clean the corrosion with a wire brush and a baking soda solution (for lead-acid), and then re-secure the connections.
- Performance Monitoring (Periodically):
- Check Display Readings: Get into the habit of occasionally checking the charge controller's display. Are the voltages and currents what you expect for the given time of day and solar conditions? Any sudden or consistent drops might indicate an issue with your panels, wiring, or battery bank.
- Battery Voltage Trends: Observe your battery voltage over a few days or weeks. Is it consistently reaching its absorption or float voltage? If not, your panels might be undersized, or your battery is losing capacity. This continuous monitoring is a key part of how to maintain an off-grid battery bank.
Battery Health and Controller Impact
Your charge controller is the primary guardian of your battery health. Its correct operation directly impacts how long your expensive batteries will last.
- Correct Battery Type Selection: As mentioned during installation, ensure your controller is always set to the correct battery type. If you ever switch battery chemistries (e.g., from AGM to LiFePO4), you must update this setting on your controller. An incorrectly chosen battery profile is one of the quickest ways to damage or prematurely age your batteries. Many users find brands like EG4 or Battle Born for their lithium batteries, which require specific charge parameters.
- Temperature Compensation: Some advanced PWM controllers include a temperature sensor that connects directly to the battery. This sensor allows the controller to adjust charging voltages based on the battery's temperature, which is crucial for optimal lead-acid battery life (they require lower voltages when hot and higher voltages when cold). If your controller has this feature, ensure the temperature sensor is properly installed and making good contact with a battery terminal. Without it, the controller might overcharge in hot weather or undercharge in cold weather.
- Avoid Deep Discharges: The low voltage disconnect (LVD) feature of your PWM controller is there to protect your batteries. While it helps, try to avoid regularly hitting that LVD point. Constantly deep cycling lead-acid batteries drastically shortens their lifespan. Lithium batteries are more forgiving but still benefit from not being run completely flat too often. Aim to keep your battery bank above 50% state of charge for lead-acid and above 10-20% for lithium as a general rule. Understanding how the controller manages this can reveal a lot about the Lifetime Cost of an Off-Grid Solar System.
By dedicating a small amount of time to these routine checks and maintaining appropriate settings, you can ensure your PWM charge controller and your entire off-grid solar system remain reliable and efficient for years to come, providing you with consistent power wherever you are.
Disclaimer
This guide provides general information and recommendations for installing an off-grid PWM charge controller. Electrical work can be dangerous. Always consult with a qualified electrician or solar professional, and refer to your specific product manuals and local electrical codes before attempting any installation. The author and publisher are not responsible for any injury, damage, or loss resulting from the use or misuse of this information.