How to Install an Off-Grid Mppt Controller
You’ve made the fantastic decision to go off-grid, or maybe you’re just upgrading your existing setup, and now you’re staring at that shiny new MPPT charge controller, wondering where to even begin. It can feel like a daunting task, linking together all these vital components, especially when you know one wrong move could jeopardize your entire power system. This guide is designed to walk you through the precise steps of installing an off-grid MPPT controller, ensuring you understand not just what to do, but why it's so important, helping you get your solar power flowing safely and efficiently.
Understanding Your MPPT Charge Controller Before Installation
Before we even think about grabbing tools, let's get cozy with what an MPPT controller actually is and why it's such a superstar in your off-grid solar setup. This isn't just a fancy box; it's the brain that optimizes how your solar panels talk to your batteries.
Why MPPT is Critical for Off-Grid Performance
The acronym MPPT stands for Maximum Power Point Tracking, and it's exactly what it sounds like. Imagine your solar panels are trying to sing, but your batteries speak a slightly different language. A Pulse Width Modulation (PWM) controller acts like a simple translator, clipping the high notes to match the battery's pitch. It works, but you lose some of the song. An MPPT controller, however, is a sophisticated interpreter. It listens to the panels, figures out their optimal voltage and current (their "maximum power point"), and then converts that power to the correct voltage for your batteries with minimal loss.
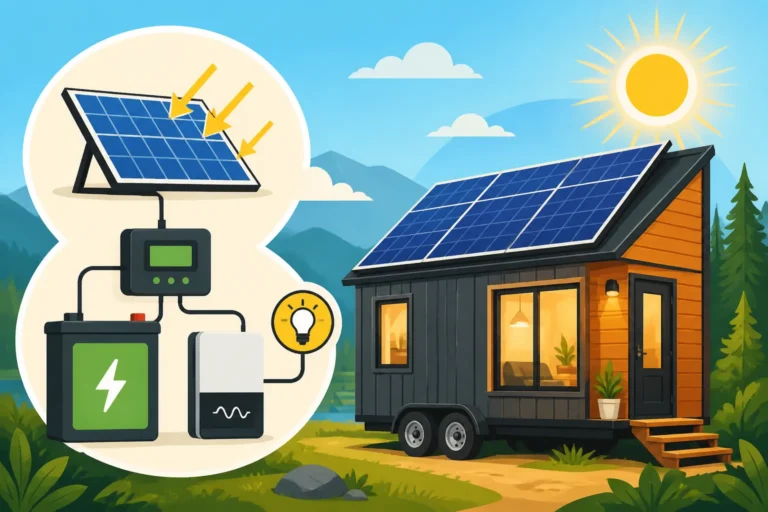
This clever conversion means you're extracting the most possible power from your solar array, especially crucial on those less-than-perfect days—think cloudy mornings, shaded afternoons, or even just variations in temperature. In real-world terms, this translates to faster charging, more available power, and a more robust off-grid system. If you're out there relying on every last watt to power your tiny home or keep your RV fridge running, that extra efficiency from an MPPT controller is absolutely invaluable. It's often the difference between struggling to keep up with your power needs and having a comfortable energy surplus.
Essential Components and Specifications to Know
When you unbox your MPPT controller, or even when you're just researching which one to buy, there are a few key specifications you absolutely need to understand. These numbers aren't just technical jargon; they dictate how your controller will integrate with the rest of your system.
First off, you'll see a nominal battery voltage (e.g., 12V, 24V, 48V). This tells you what kind of battery bank the controller is designed to charge. If your system is running on a 12V battery bank, you need a controller that can handle 12V output to the batteries. Next is the maximum PV input voltage (Voc). This is the absolute highest voltage your solar array can send to the controller without frying it. Over-voltage is a common and costly mistake, so always double-check your panel's open-circuit voltage (Voc) and ensure your series wiring doesn't exceed this limit. Many panels, like those from Renogy, provide clear specifications for their Voc.
Then there's the maximum input power (watts) and maximum charge current (amps). These tell you how much solar panel wattage the controller can effectively handle and how many amps it can deliver to your batteries. For instance, a 40A MPPT controller on a 12V system can handle roughly 480 watts of solar (40A * 12V), but on a 24V system, it could manage around 960 watts. Knowing these helps you decide How much battery capacity you need and how many panels you can connect. Finally, consider features like built-in Bluetooth or Wi-Fi for monitoring via a smartphone app (a game-changer for convenience!) and any load terminals if you plan to power small DC loads directly from the controller. Understanding these specs is foundational to a successful installation.
Step-by-Step Installation Process for Your MPPT Controller
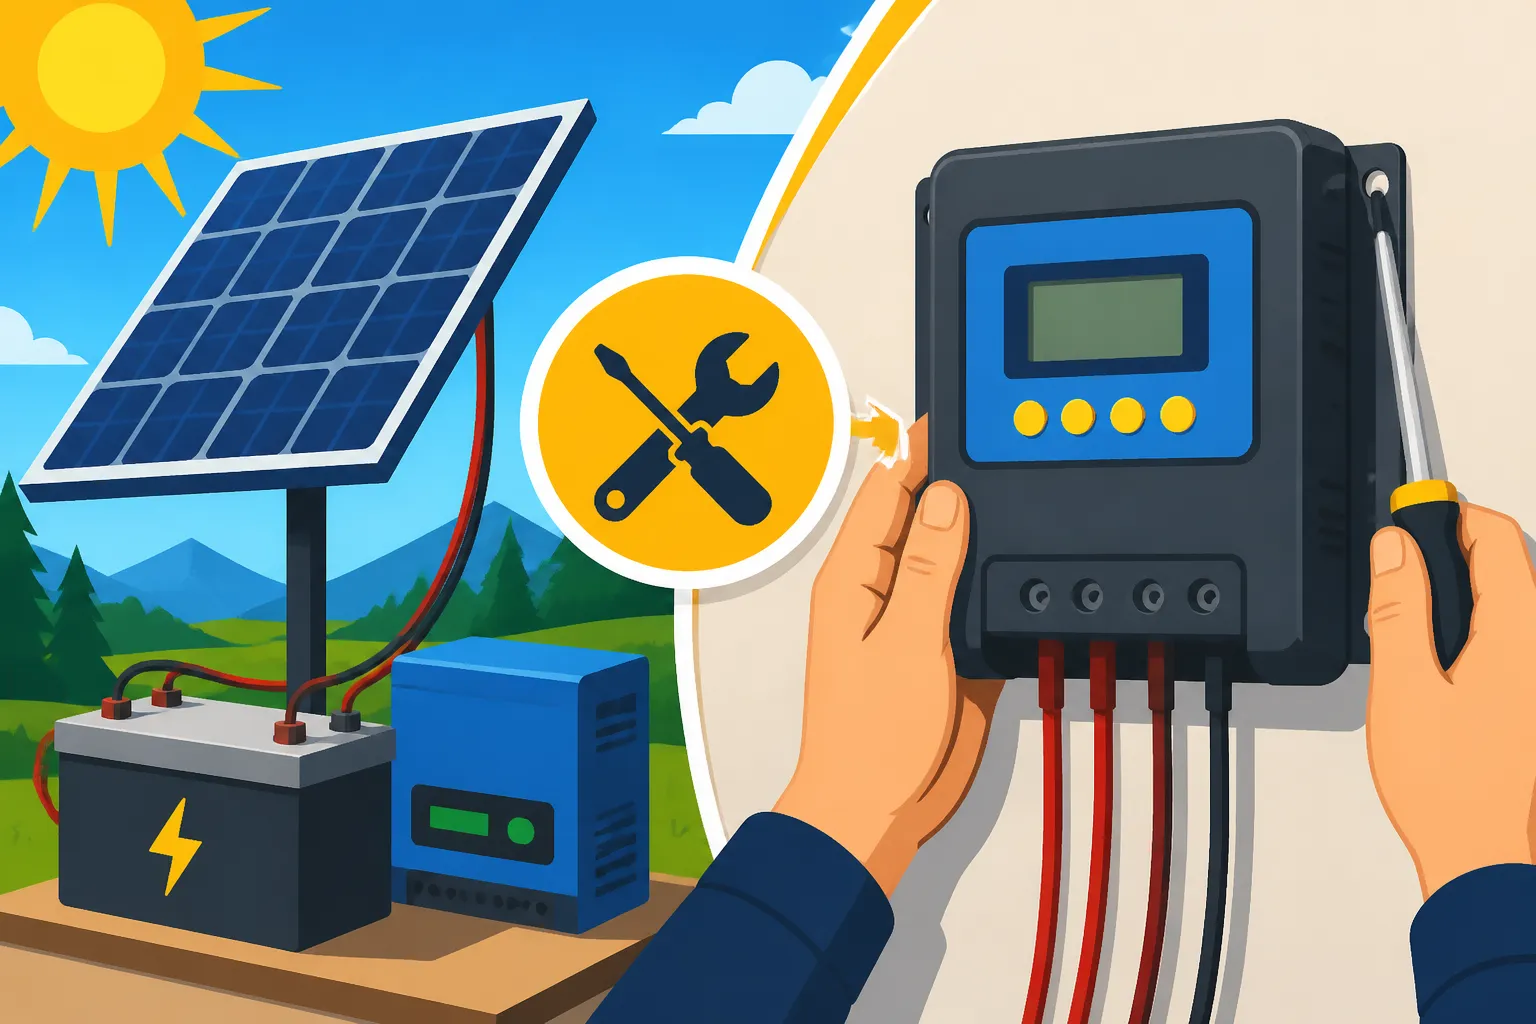
Alright, now that you’re clear on what your MPPT controller does and what all those numbers mean, it’s time to get down to the actual installation. This is where patience and precision pay off. Remember, we always connect the battery first, then the solar panels.
Prioritizing Safety and Site Preparation
Safety isn't just a suggestion; it's the golden rule when working with electricity, especially high-current DC systems. Before you touch any wires, ensure all power sources are disconnected. This means covering your solar panels with an opaque material (like a blanket or cardboard) to prevent them from producing power, and disconnecting your battery bank, typically by removing the negative terminal first. You don't want any unexpected surges or sparks.
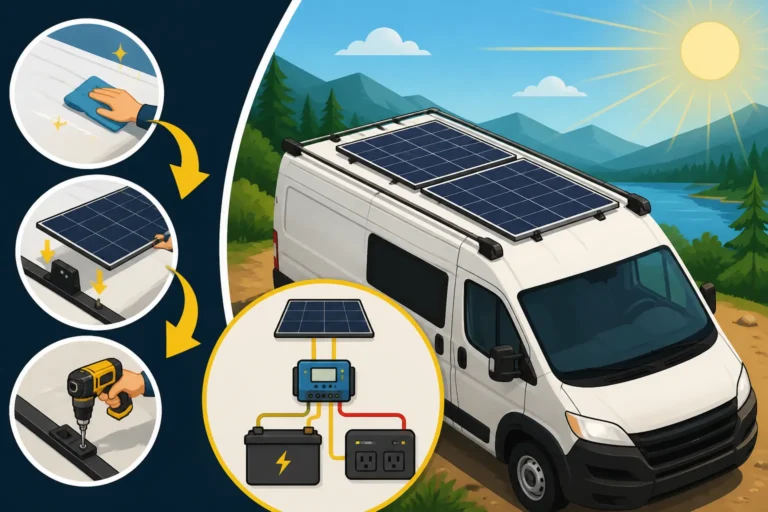
Gather your tools: You'll need wire strippers, crimpers, a multimeter (absolutely essential for checking voltages and continuity), screwdrivers, a drill for mounting, and appropriate personal protective equipment (PPE) like safety glasses and insulated gloves. Choose a mounting location that is dry, well-ventilated, and protected from direct sunlight or extreme temperatures. While some controllers are rated for outdoor use, most are better off in a garage, equipment shed, or an RV compartment. Ideally, mount it as close to your battery bank as possible to minimize voltage drop in the battery cables, which can degrade charging efficiency. Ensure there's enough space around it for airflow, as these units can generate heat during operation.
Wiring the Battery Bank to the MPPT Controller
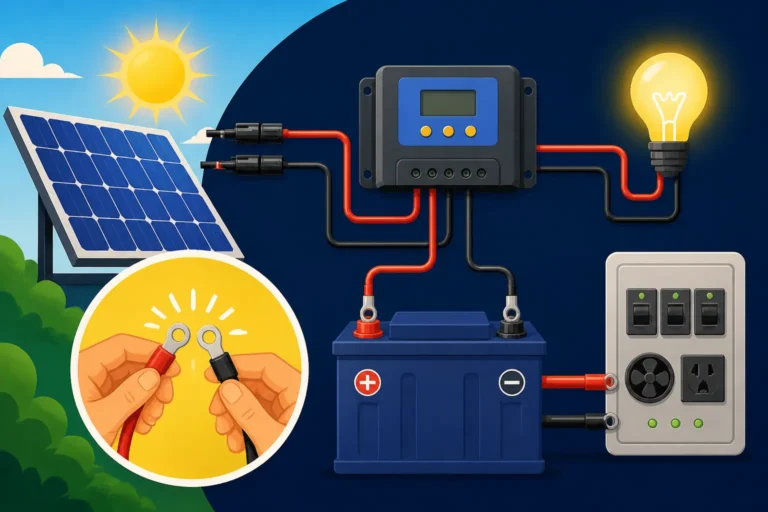
This is the most critical step, and the sequence matters. Always connect your batteries to the charge controller FIRST. Why? Because the controller needs to sense the battery voltage to know what voltage to output from the solar array. Connecting panels first without a battery can damage the controller.
-
Prepare the Battery Cables: Measure the distance between your battery bank and the MPPT controller. You want the shortest possible run to minimize voltage drop, but still allow for safe cable routing. Use appropriately sized wires. For example, if you have a 12V system and expect up to 40 amps charging, you'll need at least 8 AWG cable for short runs, and possibly 6 AWG or even 4 AWG for longer distances. Refer to a wire gauge chart to ensure you choose the correct size for your expected current and cable length. Incorrect wire sizing can lead to significant power loss and even be a fire hazard. You can find detailed information on How to size wire and cables for your system.
-
Install Fuses or Breakers: It's absolutely crucial to install a properly rated fuse or DC breaker on the positive battery cable, as close to the battery's positive terminal as possible. This protects your battery from short circuits and overcurrents that could damage the controller or, worse, cause a fire. The fuse rating should be slightly higher than the maximum charge current your controller can deliver. For example, a 40A controller should have a 50A fuse.
-
Connect to the Controller: Carefully strip the insulation from the ends of your battery cables (positive and negative) according to your controller's manual. Connect the positive battery cable to the "BATTERY +" terminal on your MPPT controller and the negative cable to the "BATTERY -" terminal. Double-check your polarity! A reverse polarity connection can instantly damage your controller. Secure the connections tightly.
-
Connect to the Battery Bank: Once the controller side is secure, connect the negative battery cable to your battery bank's negative terminal. Then, connect the positive battery cable (with the fuse/breaker inline) to your battery bank's positive terminal.
At this point, your MPPT controller should power on and display information, such as your battery voltage. If it doesn't, recheck your connections, especially the fuse.
Connecting Solar Panels to the MPPT Controller
With your battery bank successfully connected and the controller powered up, it’s now safe to connect your solar panels. This is where your understanding of voltage and series/parallel wiring comes into play.
-
Ensure Panels are Covered: Double-check that your solar panels are still covered and not producing power. This prevents voltage spikes when you make connections.
-
Prepare PV Cables: Just like with the battery cables, use appropriately sized cables for your solar array. Since solar panel voltages can be higher, but currents often lower (depending on your array configuration), the wire gauge needs to match the expected current and length. If you're using multiple panels, you'll want to review How to wire solar panels in series vs parallel to ensure your array voltage and current are compatible with your specific MPPT controller's input limits. Remember that an MPPT controller thrives on higher input voltage from the panels, as long as it stays within the maximum Voc. This typically means wiring panels in series if possible to achieve a higher voltage while keeping the current manageable. For example, if you have two 100-watt panels that each produce 18V and 5.5A, wiring them in series would give you 36V and 5.5A, which is ideal for many MPPT controllers.
-
Install PV Disconnect or Breaker: Before connecting to the controller, it's a good practice to install a PV disconnect switch or breaker between your solar array and the MPPT controller. This allows you to easily disconnect the solar input for maintenance or in emergencies without having to cover the panels again. This should be sized for your solar array's maximum current.
-
Connect to the Controller: Strip the insulation from your PV positive and negative cables. Connect the positive PV cable to the "PV +" terminal on your MPPT controller and the negative PV cable to the "PV -" terminal. Again, verify polarity! A reversed connection here could damage your controller. Secure these connections tightly.
-
Uncover Panels: Once all connections are secure and double-checked, carefully remove the covers from your solar panels. Your MPPT controller should now start actively charging your batteries. You should see a charging current displayed on the controller or through its monitoring app.
Integrating Loads and Grounding Your System
Many MPPT charge controllers, especially smaller ones, include dedicated load terminals. These are typically for connecting small DC loads directly, like LED lights or a USB charging port, that you want to power only when there’s sufficient battery voltage, or perhaps have controlled by a timer.
-
Connecting DC Loads (Optional): If your controller has load terminals and you intend to use them, connect your DC load's positive wire to the "LOAD +" terminal and the negative wire to the "LOAD -" terminal. Be mindful of the maximum current rating for these terminals, as they are usually much lower than the main battery current. For larger loads or AC loads, you'll need an inverter connected directly to your main battery bank.
-
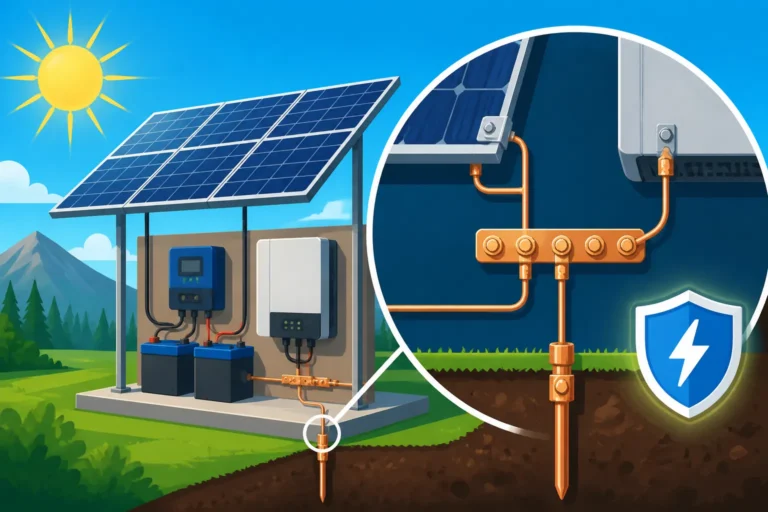
Grounding Your System: This is a crucial safety step that often gets overlooked by DIYers. Proper grounding protects you and your equipment from electrical faults and lightning strikes. Most MPPT controllers will have a designated grounding terminal (often marked with a ground symbol). You should connect this terminal to your system's common ground point, which could be a dedicated grounding rod driven into the earth for a stationary installation, or the chassis of an RV or boat. For comprehensive safety, also ensure your solar panel frames are grounded. Always refer to local electrical codes and your controller's manual for specific grounding requirements. You can find more specific guidance on Off-Grid Solar Safety and Grounding.
Initial Setup, Configuration, and Troubleshooting Tips
You've got everything wired up – congratulations! But the journey isn't quite over. Now it's time to tell your MPPT controller how to treat your specific battery bank and learn to troubleshoot any hiccups along the way.
Programming Your MPPT Controller for Optimal Charging
This is where you truly optimize your system's performance and ensure the longevity of your batteries. Every battery chemistry has specific charging requirements, and your MPPT controller needs to know them.
-
Select Battery Type: Most MPPT controllers will ask you to select your battery type: Flooded Lead-Acid, Sealed Lead-Acid (AGM/Gel), or Lithium (LiFePO4). This is a critical setting. For example, a Renogy MPPT controller, like many on the market, will have a menu or switch to select from these common types. Choosing the wrong type can severely shorten your battery's lifespan. If you're using LiFePO4 batteries, which are increasingly popular for off-grid living, make sure your controller supports their specific charging profiles. You can learn more about How battery choice affects off-grid cost.
-
Set Charge Parameters: Beyond just the battery type, you might be able to fine-tune specific charging parameters:
- Bulk Voltage: The highest voltage the battery will reach during the main charging phase.
- Absorption Voltage: The voltage at which the battery holds for a period to fully top off.
- Float Voltage: A lower voltage used to maintain the battery at 100% state of charge once it's full, preventing overcharging.
- Equalization Voltage (for flooded lead-acid): A higher voltage applied periodically to balance cell voltages and prevent sulfation. Never apply equalization to sealed lead-acid or lithium batteries unless specifically instructed by the manufacturer.
Consult your battery manufacturer's data sheet for their recommended charging parameters. Don't guess! Incorrect settings can lead to undercharging (reduced capacity) or overcharging (damage and safety risks). Many modern controllers, such as those made by Victron Energy, offer advanced programming options, often through an app, allowing for very precise control.
Common Installation Mistakes and How to Avoid Them
Even seasoned DIYers can make mistakes. Recognizing the most common ones can save you a lot of headache, time, and money.
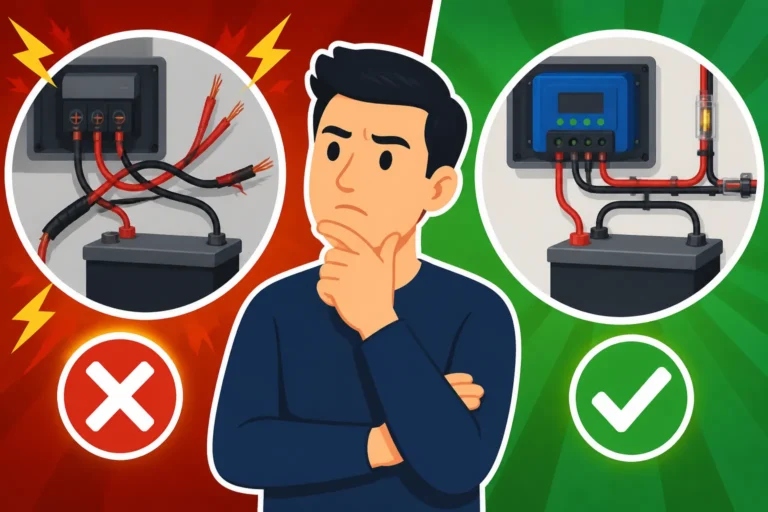
- Reverse Polarity: This is probably the most frequent and potentially damaging error. Connecting a positive wire to a negative terminal, or vice versa, almost guarantees damage to your controller and potentially other components. ALWAYS use a multimeter to double-check polarity before making final connections.
- Incorrect Wiring Sequence: As discussed, always connect batteries first, then solar panels. Reversing this sequence can send unregulated high voltage from panels to the controller, leading to internal component failure.
- Undersized Wiring: Using wires too thin for the current they carry leads to excessive voltage drop, meaning less power reaches your batteries, and the wires can overheat, posing a fire risk. Invest in proper wire gauge based on current and length.
- No Fuses or Incorrectly Sized Fuses: Fuses and breakers are your system's sacrificial lambs, designed to blow or trip before critical components are damaged. Without them, a short circuit can cause severe damage or fire. Ensure they are rated appropriately for the circuit they protect. You can delve deeper into How to install fuses and breakers for robust protection.
- Incorrect Battery Settings: Failing to program your MPPT controller with the correct battery type and charging parameters is a slow killer for your batteries. It leads to premature degradation and reduced capacity over time. Read your battery manual and your controller manual carefully.
- Ignoring Ventilation: MPPT controllers generate heat during operation, especially when working hard. Mounting them in an unventilated, enclosed space can cause them to overheat, leading to reduced efficiency and premature failure. Ensure adequate airflow around the unit.
Post-Installation Checks and Monitoring Your System
Once everything is wired and programmed, don't just walk away! A few final checks and ongoing monitoring will ensure your system is running smoothly and efficiently.
- Initial Power-Up Verification: After all connections are made and panels are uncovered, observe your controller. It should display battery voltage, solar panel voltage, and a charging current. Does it look like what you expect? Is the charging current reasonable given your panel wattage and current sun conditions?
- Multimeter Checks: Use your multimeter to confirm battery voltage at the terminals, and then check the voltage and current coming from your solar array into the controller (if accessible and safe to do so). This helps confirm that power is flowing as it should.
- Monitor Performance: Most modern MPPT controllers, especially those you might find on Amazon from reputable brands, come with built-in displays or companion apps (via Bluetooth or Wi-Fi). Use these tools to monitor your system’s performance over the first few days and weeks. Look for consistent charging, stable battery voltage, and how well your system performs during peak sun hours and cloudy periods. Keep an eye on the charging current – it should fluctuate with sunlight intensity.
- Expandability: As your off-grid needs grow, you might consider expanding your system. Most MPPT controllers are designed to be part of an expandable system, allowing you to add more panels or even another charge controller if your power demands increase. Learning How to design an expandable system from the outset can save you headaches later.
Maximizing Performance and Longevity
Installing your MPPT controller correctly is a huge win, but to truly get the most out of your off-grid solar setup for years to come, you need to understand how to optimize its performance and commit to a little regular TLC.
Understanding Environmental Factors and Panel Orientation
The world around your solar panels and controller plays a much bigger role than you might think in how efficiently they perform.
- Temperature's Impact: Solar panels are actually more efficient in cooler temperatures, but paradoxically, high temperatures can reduce the lifespan and efficiency of your MPPT controller and batteries. Ensure your controller is in a cool, shaded, and well-ventilated area. Extreme heat can cause the controller to derate its output to prevent damage, meaning less power sent to your batteries. For panels, while they love the sun, excessively hot panels generate less power.
- Shading: Even partial shading on your solar array can drastically reduce the output of your entire system. An MPPT controller can help mitigate this somewhat by continuously seeking the maximum power point, but it's no miracle worker. Design your array placement to avoid shading from trees, buildings, or even antenna masts throughout the day and across seasons. Even a small shadow can significantly impact overall power production.
- Panel Angle and Orientation: The angle and direction your solar panels face have a profound effect on how much sunlight they capture. For year-round off-grid living in the Northern Hemisphere, a tilt angle roughly equal to your latitude is often a good compromise. However, for maximum winter production, you might increase the tilt angle, and for summer, decrease it. Many RVers and cabin owners utilize adjustable tilt mounts to optimize for seasonal changes. Aiming panels due south (in the Northern Hemisphere) typically maximizes annual energy yield, but sometimes slight adjustments east or west can better suit morning or evening peak usage.
Regular Maintenance for Your MPPT Controller and System
Just like any other complex system, your off-grid solar setup, including the MPPT controller, benefits immensely from routine checks and maintenance. This isn't usually intensive work, but it's vital for ensuring long-term reliability.
- Dust and Debris: Regularly inspect your MPPT controller for dust buildup, especially in its ventilation openings. Dust acts as an insulator, trapping heat and hindering the unit's ability to cool itself, which can lead to reduced performance or even failure. A can of compressed air can work wonders for clearing out dust from fins and vents.
- Connection Integrity: Over time, vibrations or temperature fluctuations can cause electrical connections to loosen. Periodically (e.g., annually), check all wire connections to your MPPT controller – battery terminals, solar input, and load terminals – to ensure they are still tight and secure. Loose connections can create resistance, generate heat, and lead to power loss or even fire hazards.
- Cable Inspection: While you're checking connections, take a moment to inspect all cabling for any signs of wear, fraying, or damage from pests. UV exposure can degrade cable insulation over many years. Address any issues promptly.
- Firmware Updates: Some advanced MPPT controllers, particularly those from brands like Victron or Outback Power, occasionally receive firmware updates that improve performance, add features, or fix bugs. If your controller supports it, keep an eye out for these updates and follow the manufacturer's instructions for installation. This helps ensure your controller is always running at its best.
- Battery Health: Your MPPT controller is only as good as the battery bank it’s charging. Regularly monitor your battery's state of charge, voltage, and overall health. For lead-acid batteries, this might include checking electrolyte levels (if flooded). For lithium, monitor through its Battery Management System (BMS) if available. Proper battery maintenance directly impacts how well your MPPT controller can do its job and the overall lifespan of your energy storage. For more on this, check out How to maintain an off-grid battery bank.
By understanding these environmental factors and committing to simple, regular maintenance, you'll ensure your off-grid MPPT controller operates at peak efficiency for many years, keeping your power flowing reliably wherever you are.
| Potential Issue | Common Symptoms | Troubleshooting Steps |
|---|---|---|
| No Power to Controller | Screen blank, no lights, no output | 1. Check battery connections. 2. Verify battery fuse/breaker. |
| No Solar Charging | Battery not charging despite sun, "PV Disconnect" error | 1. Ensure panels are uncovered. 2. Check PV connections (polarity). 3. Check PV disconnect switch/breaker. 4. Measure panel voltage with multimeter. |
| Low Charging Current | Batteries charge slowly, low current displayed | 1. Check for panel shading. 2. Verify panel cleanliness. 3. Check wire gauge and length for voltage drop. 4. Ensure correct battery type is selected. |
| Battery Overcharging/Undercharging | Battery voltage too high/low, short lifespan | 1. Check battery type settings on controller. 2. Verify charge parameters match battery manufacturer's recommendations. |
| Controller Overheating | Unit hot to touch, reduced output | 1. Check ventilation around the controller. 2. Clear any dust or debris from vents. 3. Ensure ambient temperature isn't too high. |
| Loose Connections | Intermittent power, flickering lights, heat at terminals | 1. Power down system. 2. Inspect and tighten all terminal connections. 3. Check for signs of arcing or melting. |
Disclaimer
The information provided in this guide is for general informational purposes only. While we strive to offer accurate and helpful advice, off-grid solar system installations involve high-voltage electricity and can be dangerous if not performed correctly. Always consult with a qualified electrician or solar professional before undertaking any electrical work. Adhere to all local electrical codes and safety regulations. We are not liable for any loss, injury, or damage arising from the use or misuse of this information.