Best MC4 Connectors and Fuses
Stepping into the world of off-grid solar, it's easy to get caught up in the big, exciting components: shiny solar panels, beefy battery banks, and powerful inverters. But sometimes, it's the smallest, seemingly insignificant parts that can make or break your entire system, turning your dream of energy independence into a frustrating nightmare or, worse, a fire hazard. We're talking about MC4 connectors and fuses – the unsung heroes that ensure everything is safely and efficiently connected. This guide will dive deep into why these little components are so critical and how to choose the best ones to keep your off-grid life running smoothly and securely.
Why Quality MC4 Connectors and Fuses are Non-Negotiable for Off-Grid Solar
When you're building an off-grid solar system, every single component plays a vital role in the overall performance and, crucially, the safety of your setup. You might think, "They're just connectors, how important can they be?" But seasoned off-gridders know that the smallest weak link can lead to big problems. Your solar panels are out there in the elements, constantly feeding power into your system, and the connections they rely on need to be absolutely top-notch to withstand everything Mother Nature throws at them.
The Silent Threat of Poor Connections
Imagine this: You've just finished installing your beautiful solar array on your cabin roof or RV. The sun is shining, and everything seems to be working perfectly. But beneath the surface, a poorly crimped or low-quality MC4 connector is slowly heating up. Over time, that tiny bit of resistance turns into a significant voltage drop, meaning less power actually makes it to your batteries. It's like trying to drink through a pinched straw – you're working harder but getting less. This isn't just inefficient; it's a ticking time bomb.
Overheating connections are a leading cause of electrical fires in solar setups. The plastic housing can melt, exposing bare wires, and if conductive materials or even dry leaves are nearby, you've got a serious risk on your hands. We've all heard stories of systems failing prematurely, and often, the culprit isn't a faulty panel or inverter, but rather a cheap, corroded connection that couldn't handle the continuous current flow or the relentless exposure to sun, rain, and temperature swings. Ensuring you have high-quality, properly installed connectors is foundational to preventing these silent threats. It’s part of a robust approach to Off-Grid Solar Safety and Grounding.
How Fuses Protect Your Investment
Think of fuses as the ultimate selfless protectors in your off-grid solar system. They are designed to sacrifice themselves to save your much more expensive and vital components from damage. In any electrical system, unforeseen events like short circuits, equipment malfunctions, or even lightning strikes can cause a sudden surge of current. Without proper fusing, this runaway current could fry your charge controller, damage your battery bank, or even destroy your inverter – essentially, wiping out thousands of dollars in investment in a split second.
Fuses act as the designated weak link. They contain a conductive wire or strip that melts and breaks the circuit when the current flowing through it exceeds a safe level. This immediate interruption prevents overcurrent from reaching sensitive electronics. Different parts of your system require specific types and ratings of fuses. For instance, your solar array needs protection from reverse current flows, your charge controller needs protection from the array and the battery, and your battery bank and inverter definitely need robust fusing to prevent catastrophic damage in case of a short circuit. Understanding how to correctly place and size these fuses is as important as the fuse itself. When you're learning How to Wire an Off-Grid Solar System, proper fuse placement is a non-negotiable step.
Decoding MC4 Connectors: What to Look For
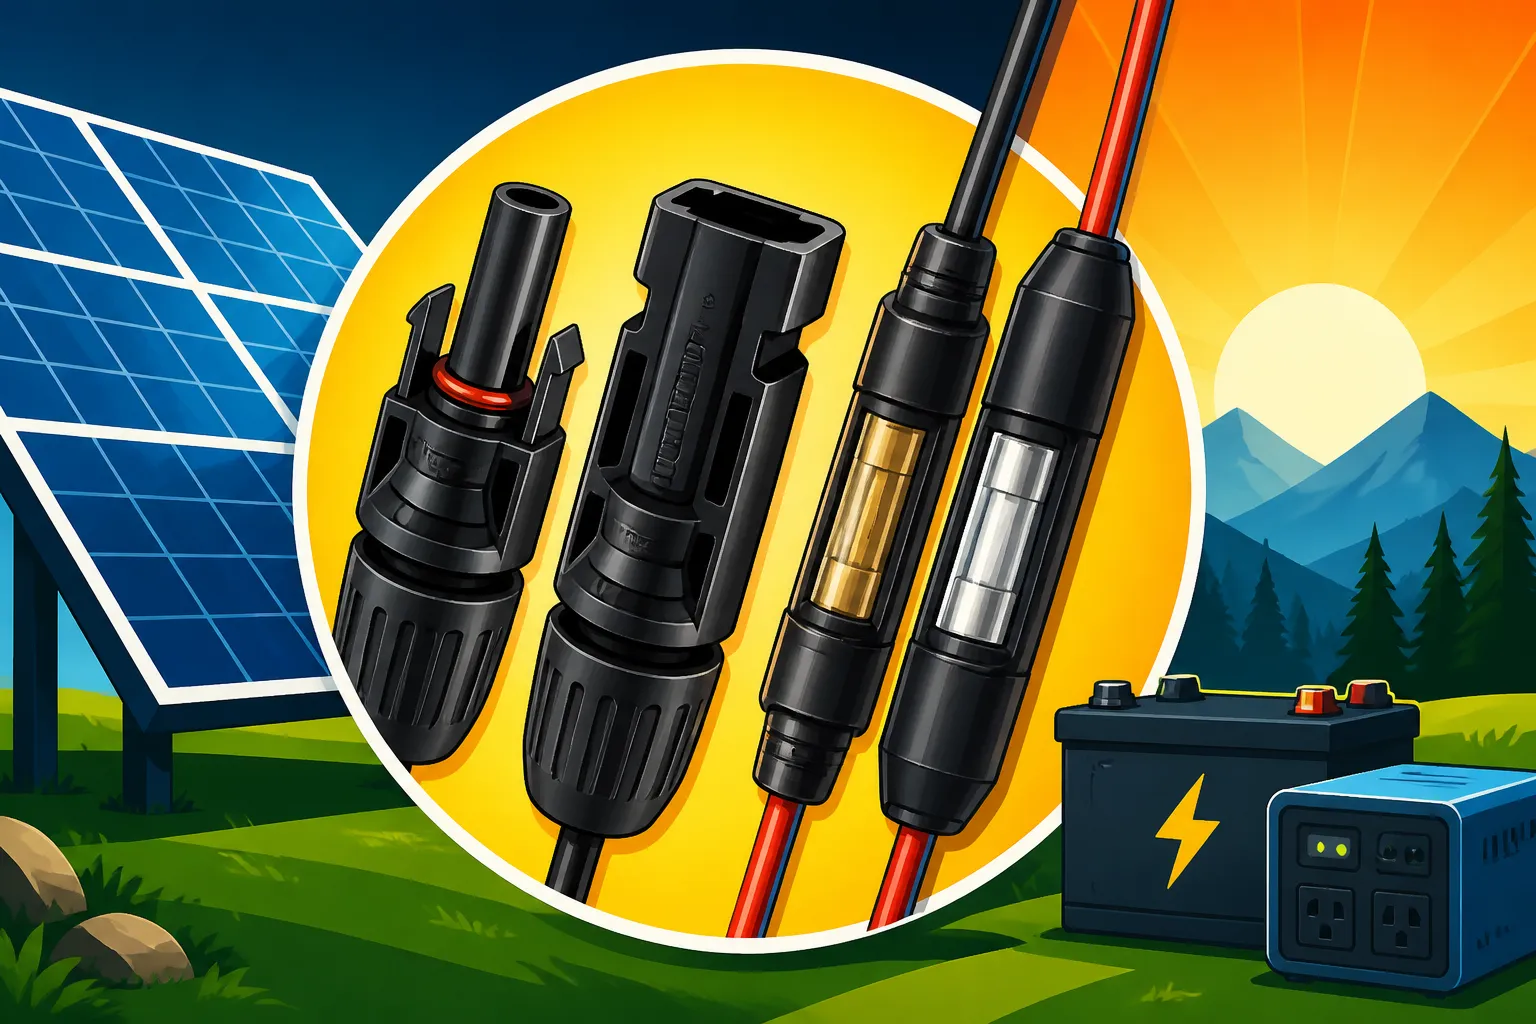
MC4 connectors are the standard for connecting solar panels in series or parallel, creating a weather-tight, durable connection that’s easy to assemble and disassemble (with the right tools!). But not all MC4s are created equal. Just walking into an electronics store or browsing online, you'll find a dizzying array of options, and it can be hard to tell the good from the questionable. Let’s break down what truly matters.
Material Matters: Durability and Conductivity
The first thing to consider with MC4 connectors is the quality of their materials. These connectors live outdoors, exposed to everything from scorching summer sun to freezing winter winds, and often torrential rain. So, the plastic housing needs to be incredibly durable and UV-resistant. Look for connectors made from high-grade, cross-linked polyethylene (XLPE) or similar materials that won't degrade, crack, or become brittle after years in the sun. Cheap plastics will fail, exposing your electrical connections and inviting corrosion and shorts.
But the exterior is only half the story. Inside, the metal contacts are where the real magic (or misery) happens. You want contacts made from tinned copper or solid copper, which offer excellent conductivity and corrosion resistance. Some lower-quality connectors use aluminum or cheaper alloys that have higher resistance, leading to heat buildup and energy loss. A good MC4 connection should have minimal resistance, ensuring that the maximum amount of power flows from your panels to your charge controller and onward to your battery bank. Brands like Renogy often include high-quality, robust MC4 connectors in their solar kits, which is a good indicator of their commitment to overall system reliability. When you're considering Cost of Off-Grid Solar Panels, remember that the connectors included can significantly impact long-term performance and safety.
Ease of Installation and Secure Locking Mechanisms
While all MC4 connectors serve the same basic function, their ease of installation and the security of their locking mechanisms can vary greatly. A quality connector should be easy to crimp onto your solar cable, forming a strong, low-resistance connection that won't pull apart. This usually requires a specialized MC4 crimping tool, but it's an investment worth making for reliable connections. When properly assembled, the male and female connectors should slide together with a satisfying, audible click, indicating a secure lock.
The locking clips are crucial. They prevent accidental disconnection, which is especially important in windy conditions or when working around your solar array. Flimsy clips can break or lose their tension, allowing moisture and dirt to ingress, leading to corrosion and connection failure. Some advanced connectors even offer tool-free assembly, which can be convenient, but always prioritize a secure, durable connection over speed if it compromises reliability. You'll thank yourself years down the line when your connections are still holding strong, rather than battling intermittent power or frustrating troubleshooting. Having reliable connections is key to understanding How to Connect Batteries, Inverter, and Panels successfully.
Genuine vs. Knock-off Connectors
This is where things can get tricky. The market is flooded with inexpensive, uncertified MC4 connectors, especially on platforms like Amazon. While the price might be tempting, these knock-offs pose significant risks. They often use inferior materials – plastics that degrade quickly, metal contacts with high resistance, and poor sealing mechanisms. This not only leads to performance issues like voltage drop but, more critically, creates fire hazards due to overheating.
Genuine MC4 connectors from reputable manufacturers like Staubli (who invented the MC4 connector) or other trusted solar brands are designed and tested to rigorous safety standards. They carry certifications like UL or TÜV Rheinland, assuring you that they meet specific performance and safety criteria. When purchasing, always check for these certifications and buy from reputable solar suppliers or verified sellers. While it might cost a little more upfront, investing in genuine connectors means investing in the safety and longevity of your entire off-grid system. Avoid the temptation to cut corners here; your peace of mind (and property) is worth it. It’s one of the Common Off-Grid Wiring Mistakes to use substandard components.
Selecting the Right Fuses for Your Off-Grid Setup
Just like MC4 connectors, fuses aren't a "one size fits all" component. Different parts of your off-grid system require different types and ratings of fuses to provide optimal protection. Choosing the wrong fuse, or worse, omitting one where it's desperately needed, can have severe consequences for your expensive equipment. Understanding the nuances here is paramount for a safe and reliable power system.
Understanding Fuse Types and Ratings
The most important thing to remember about solar fuses is that they must be DC-rated. Unlike AC systems, DC currents behave differently, and a standard AC fuse will not reliably clear a DC fault, potentially leading to continued arcing and fire. Look for fuses explicitly marked for DC applications and ensure their voltage rating exceeds your system's maximum voltage. For example, a 48V system might use fuses rated for 60V or higher.
When it comes to physical types, several are common in off-grid solar:
- ANL Fuses (Automotive-style, Bolt-down): These are heavy-duty fuses, typically used for high-current applications like protecting your main battery bank from the inverter. They are designed for large DC currents and are mounted in sturdy fuse holders that bolt directly to your cables.
- MIDI/MAXI Fuses: Similar to ANL but generally for slightly lower current ranges, these are often used for protecting individual components like a charge controller from the battery bank or for smaller inverter circuits.
- PV Fuses (Inline or Cartridge): These are specifically designed for solar photovoltaic (PV) arrays. They protect individual strings of panels or the entire array from overcurrent and reverse current, which can occur if one string shorts out. They are typically cartridge-style, often housed in weather-tight inline holders or in a combiner box.
- ATC/ATO Blade Fuses: While more common in automotive applications, smaller versions are sometimes used for low-current DC loads directly off a 12V or 24V battery, but generally not for the main solar power path.
Each fuse will also have an amp rating (e.g., 50A, 100A, 250A), which indicates the maximum current it can safely carry continuously without blowing. This rating is critical for proper sizing. You can learn more about how all these components fit together in an Off-Grid Solar Wiring Diagram Explained.
Fuse Placement and Sizing for Critical Components
The strategic placement of fuses is just as important as choosing the right type. Think of your solar system as a series of interconnected circuits, each needing its own layer of protection. Here are the key areas where fuses are absolutely essential:
- Between Solar Panels and Charge Controller: Each string of solar panels should be fused, or at minimum, a main PV fuse should be installed before the charge controller. This protects the wiring and the charge controller from overcurrent in case of a panel short or other array fault. The fuse should be sized slightly above the maximum short-circuit current (Isc) of the array string.
- Between Charge Controller and Battery Bank: This fuse protects the charge controller from overcurrent coming from the battery bank, especially in the event of a fault within the controller or a short in the battery wiring. It should be sized based on the charge controller's output current rating.
- Between Battery Bank and Inverter: This is one of the most critical fuses. The inverter draws a huge amount of current from the battery, especially during surge loads. A short circuit between the battery and the inverter, or a fault within the inverter itself, could lead to a massive, uncontrolled discharge from your battery bank, resulting in severe damage or fire. This fuse must be robustly sized for the inverter's maximum continuous current, often an ANL or heavy-duty MIDI fuse.
- Between Battery Bank and DC Loads (if applicable): If you have any direct DC loads (e.g., 12V lights, a DC fridge), each circuit should have its own appropriately sized fuse to protect the wiring and the appliance.
Sizing a fuse isn't simply about matching it to the appliance’s draw. You need to consider the wire gauge used, as the fuse's primary job is to protect the wire from overheating. Always consult the National Electrical Code (NEC) guidelines (or local equivalents) for wire sizing and overcurrent protection. Generally, a fuse should be sized at 125% of the continuous current load, but never exceed the current rating of the wire it is protecting. For a deeper dive into sizing, check out our guide on How to Install Fuses and Breakers or How to Size Wire and Cables.
Here's a quick reference table for common fuse types and their typical applications in an off-grid solar system:
| Fuse Type | Typical Application | Advantages | Considerations |
|---|---|---|---|
| PV Fuses | Solar array strings, combiner box | Specifically designed for DC PV circuits, fast-acting | Requires dedicated PV fuse holder |
| MIDI/MAXI Fuses | Charge controller, smaller inverters | Compact, good for medium current ranges | Needs appropriate fuse block/holder |
| ANL Fuses | Main inverter, large battery bank | High current rating, robust for high power loads | Larger footprint, requires bolt-down terminals |
| ATC/ATO Blade Fuses | Low-current DC loads (e.g., lights) | Widely available, easy to replace | Not suitable for main power paths or high currents |
Best Practices for Installation and Maintenance
Having the right MC4 connectors and fuses is only half the battle. Proper installation and ongoing maintenance are just as crucial to ensure the safety, efficiency, and longevity of your off-grid solar power system. Skipping these steps can lead to premature component failure, frustrating troubleshooting, or even dangerous electrical faults.
Proper Crimping and Sealing Techniques
Let's talk crimping. It might sound like a minor detail, but a bad crimp is a recipe for disaster. When you connect your solar cables to MC4 connector pins, you need a high-quality crimping tool specifically designed for MC4 terminals. Don't use pliers, don't use a hammer, and don't try to solder the connection (unless the connector explicitly states it's solderable, which is rare for standard MC4s). A proper crimp mechanically deforms the metal contact around the stripped wire, creating a gas-tight, low-resistance connection that can withstand vibrations and temperature changes.
After crimping, ensuring a watertight seal is paramount. MC4 connectors are designed with O-rings and compression seals that tighten as you screw the cable gland into place. Make sure the cable insulation is cleanly stripped to the correct length and that all sealing components are in place and undamaged. A specialized MC4 wrench can help you tighten the cable gland sufficiently without overtightening and stripping the threads. Water ingress is the enemy of any outdoor electrical connection, leading to corrosion and eventual failure. A properly sealed connector will keep moisture out, protecting the copper contacts from oxidation and maintaining a low-resistance pathway for decades. This attention to detail is essential for any long-term off-grid project, whether you're building a full How to Install an Off-Grid Solar System or just expanding your existing setup.
Regular Inspection and Troubleshooting
Just because you’ve installed everything perfectly doesn’t mean you can forget about it. Off-grid solar systems are dynamic, exposed environments, and regular inspections are a vital part of your maintenance routine. At least once a year, and ideally more frequently if you live in a harsh climate or experience extreme weather, visually inspect all your MC4 connections and fuse holders.
Look for any signs of wear, tear, or damage:
- Discoloration or Melting: Any brown or black marks on the plastic housing of MC4s or fuse holders are a red flag indicating overheating. This needs immediate attention.
- Corrosion: Green or white powdery residue on metal contacts or terminals suggests water ingress or poor sealing. Clean it thoroughly and reseal or replace the component.
- Loose Connections: Gently tug on cables connected to MC4s and fuse holders to ensure they are secure. Loose connections increase resistance and heat.
- Cracked or Brittle Plastics: UV degradation can make plastics brittle. If you see cracks, replace the connector immediately to prevent water intrusion.
If you suspect an issue, use an infrared thermometer to check for hot spots on your connections while the system is generating power. Any connection significantly hotter than the surrounding cable or components needs investigation. Replacing a faulty MC4 connector or a blown fuse is a small task compared to the cost and hassle of repairing a damaged charge controller or inverter. Being proactive with these inspections can save you a lot of headache and money down the road, ensuring your system continues to function reliably for years to come. This kind of vigilance ties into a broader approach to Off-Grid Solar Maintenance Guide.
Disclaimer
The information provided in this guide is for general informational purposes only and does not constitute professional electrical advice. Working with solar electrical systems involves inherent risks. Always consult with a qualified electrician or solar professional before installing or modifying any off-grid solar components. Improper installation can result in serious injury, property damage, or fire.