How to Commission an Off-Grid System
You’ve spent weeks, maybe even months, planning your off-grid solar system. You’ve hauled panels, wrestled with wiring, and meticulously mounted every component. The hard work of installation is done, and now you’re standing there, looking at your masterpiece, a mix of excitement and apprehension bubbling up. That final step, the one where you actually flip the switch and bring it all to life, can feel incredibly daunting. This comprehensive guide is here to walk you through the essential process of commissioning your off-grid solar system, ensuring it's not just installed, but working flawlessly and safely from day one.
Understanding the Importance of Off-Grid System Commissioning
It’s tempting, once everything is physically connected, to just throw a switch and see what happens. Believe me, I get it! After all that effort, you just want to see those lights turn on and feel the hum of your inverter. But skipping or rushing the commissioning phase is like building a beautiful house and forgetting to check if the foundation is sound. It might stand for a bit, but you're setting yourself up for serious problems down the road.
Why Proper Commissioning Prevents Headaches
Think of commissioning as the grand debut of your system. It's the moment where all the individual components – your solar panels, charge controller, battery bank, and inverter – must learn to work together as a harmonious orchestra. A properly commissioned system isn't just about functionality; it's about long-term reliability and safety. If you rush it, you might have loose connections that cause intermittent power, or settings that aren't optimized for your specific battery chemistry, leading to premature battery degradation. I once heard a story about a friend who, in their eagerness, connected their panels directly to their batteries without the charge controller properly configured. The result? Fried batteries and a costly lesson learned. Taking the time now can save you thousands in repairs, replacements, and potential hazards like electrical fires. It ensures your investment truly delivers the freedom and independence you're seeking.
What "Commissioning" Actually Means
So, what exactly is commissioning? It's much more than just powering things up. It’s a systematic, step-by-step process of verifying that every single component is correctly installed, wired, and configured according to manufacturer specifications and your system design. It involves a series of tests, checks, and calibrations to ensure optimal performance, efficiency, and safety. This meticulous process confirms that your charge controller is speaking the right language to your batteries, that your inverter is delivering clean, stable power, and that your solar array is generating the expected output. It's about confirming the integrity of the entire system, from the smallest fuse to the largest battery bank, before you ever rely on it for your daily power needs.
Pre-Commissioning Checklist: Setting the Stage for Success
Before you even think about introducing power to your system, there are some critical checks you need to perform. This pre-commissioning phase is all about catching potential errors while it's still easy and safe to fix them, preventing any nasty surprises during the actual power-up sequence.
Visual Inspection: The First Line of Defense
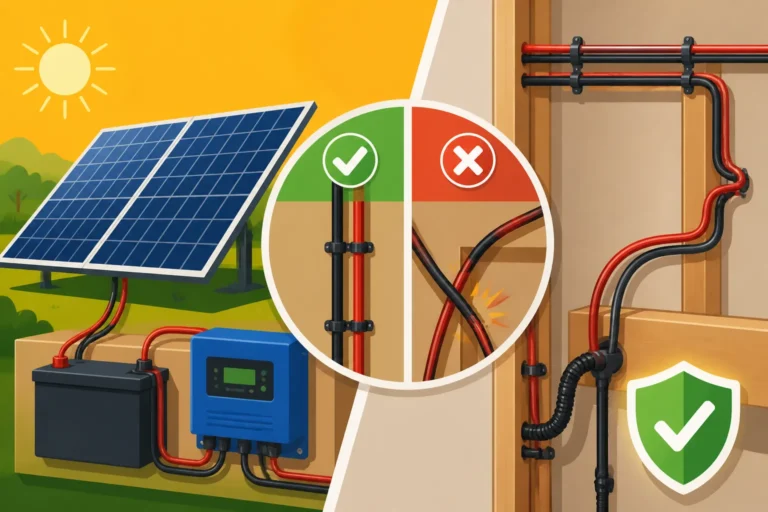
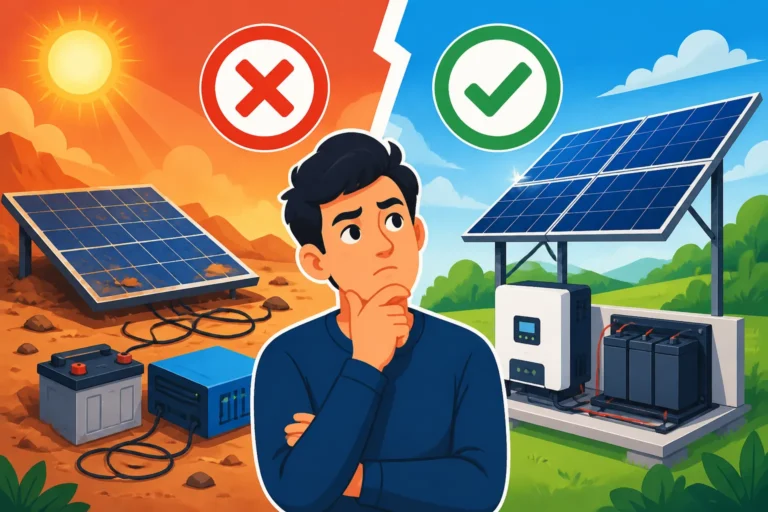
This step might seem obvious, but it's astonishing how often a simple visual check can reveal glaring issues. Take your time and go over every inch of your installation with a fine-tooth comb. Start at the solar panels. Are they securely mounted? Are all the bolts tightened? Are the Best Tilt Angle for Off-Grid Panels and orientation correct? Check for any visible damage to the panels themselves or their wiring. Follow the wiring path down to your charge controller. Are the cables neatly routed, protected from abrasion, and free from kinks? Look at all your terminal connections – are they tight and secure? Loose connections are a common culprit for system inefficiencies and can even generate heat, posing a fire risk.
Move on to your battery bank. Are the battery terminals clean and corrosion-free? Are the battery cables the correct gauge and properly connected? Check your inverter and any other components. This is also the time to ensure all enclosures are sealed properly, preventing moisture or pests from entering. You're looking for anything that seems out of place, damaged, or not quite right. It's incredible what you can spot when you're specifically looking for mistakes before the system ever goes live.
Verifying Component Specifications and Compatibility
Imagine trying to drive a car with mismatched tires – it just won't work efficiently, and it could be dangerous. The same goes for your off-grid solar system. Before commissioning, you absolutely must verify that all your components are compatible with each other and that their specifications align with your overall system design. This includes checking voltage ratings (e.g., is your charge controller rated for your solar array's open-circuit voltage?), current ratings, and power handling capacities. For example, if you purchased a 12V battery bank, ensure your charge controller and inverter are designed to operate at 12V (or a compatible voltage like 24V or 48V if you're stepping up).
Take a moment to cross-reference the datasheets for your solar panels, charge controller, batteries, and inverter against your original plan for Off-Grid Solar System Design Basics. Confirm that the maximum input voltage of your charge controller isn't exceeded by your panel array's open-circuit voltage, especially in cold weather where panel voltage can increase. Ensure your inverter's continuous power rating can handle your expected loads, and that its surge capacity can manage starting larger appliances like a well pump or a refrigerator. Even a fantastic quality inverter from a brand like Victron Energy or a robust charge controller from Renogy needs to be correctly matched to the rest of your system to perform optimally. A mismatch could lead to damaged equipment or, at best, a highly inefficient system that never quite meets your expectations.
Confirming Proper Wiring and Safety Measures
This is arguably the most crucial step before introducing power. Electrical safety is paramount. You need to confirm that every single wire, from the solar panel array down to your AC outlets, is correctly installed according to your How to Wire an Off-Grid Solar System and any applicable electrical codes. Check for proper polarity on all DC connections (positive to positive, negative to negative). Mis-wiring DC can instantly damage components or even cause fires.
Verify that all fuses and breakers are correctly sized for their circuits and properly installed. These are your system's guardians against overcurrents. Make sure your system is properly grounded, both the DC and AC components. A robust grounding system protects you and your equipment from electrical surges and faults. Don't forget to check that all wire gauges are appropriate for the current they'll carry over their respective lengths to prevent voltage drop and overheating. Use a multimeter to perform continuity checks and voltage readings (with panels covered or disconnected!) to ensure there are no short circuits or open circuits where they shouldn't be. This meticulous approach to wiring and safety will give you peace of mind and significantly reduce the risk of accidents once the system is live.
Step-by-Step Commissioning Procedure
Now that your visual and pre-power checks are complete, it's time for the exciting part: bringing your system to life! This needs to be done in a specific sequence to protect your components and ensure a smooth startup.
Initiating the DC Side: Charge Controller and Battery Bank
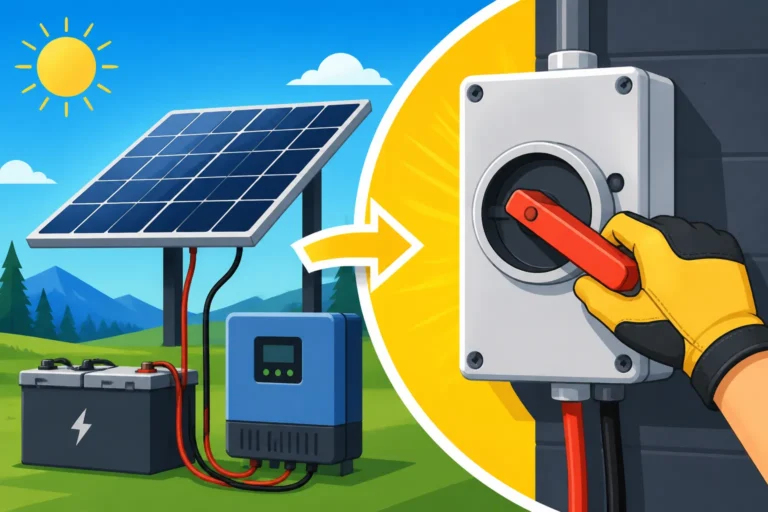
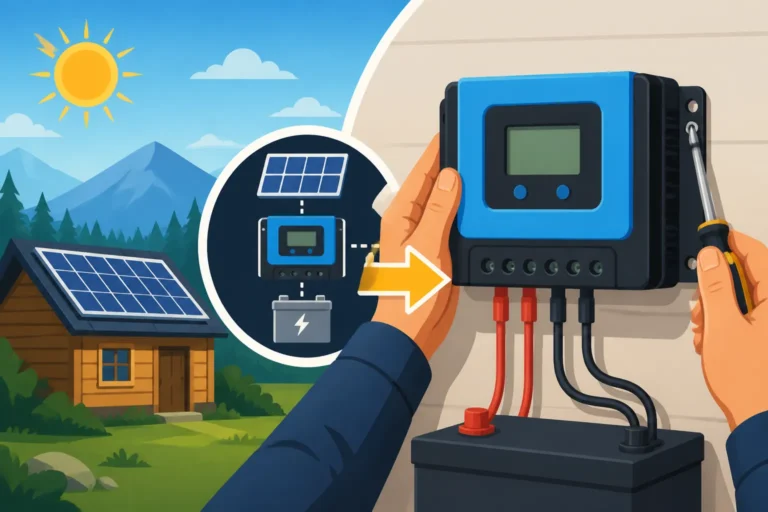
The battery bank is the heart of your off-grid system, and it's always the first component you connect to power, and the first to be connected to the charge controller. Crucially, ensure your solar panels are covered or disconnected from the charge controller inputs before proceeding. You never want to connect solar panels to a charge controller that isn't already connected to a battery bank, as this can damage the controller.
First, connect your battery bank to the charge controller's battery terminals. Pay extreme attention to polarity – positive to positive, negative to negative. Once connected, the charge controller should power up and display your battery voltage. At this point, double-check that the charge controller settings (if applicable at this stage) match your battery type (e.g., LiFePO4, AGM, flooded lead-acid) and voltage. This is critical for battery longevity. For example, a lithium battery requires different charging parameters than a lead-acid one. Most modern charge controllers, like those found in Renogy kits, have user-friendly interfaces for this.
Once the battery connection is stable and the charge controller is showing the correct battery voltage, you can now uncover your solar panels or connect them to the charge controller's PV input terminals. Again, confirm polarity. The charge controller should now sense the incoming solar power and, if the batteries are below their float voltage, begin charging. Monitor the charging current and voltage to ensure it's behaving as expected. This initial step for How to Connect Batteries, Inverter, and Panels is foundational for the entire system.
Bringing the Inverter to Life
With your DC system (panels, charge controller, batteries) operational and stable, it’s time to introduce the inverter, which transforms your battery's DC power into usable AC power for your appliances.
Before connecting the inverter to the battery bank, ensure that any AC loads are disconnected or switched off at the inverter's output. Also, verify that the inverter's DC input breaker or fuse is in the "off" or disconnected position. Now, connect the inverter's DC input cables to your battery bank terminals. Just like with the charge controller, strict adherence to polarity is non-negotiable. Once the DC cables are securely connected, engage the inverter's DC input breaker or fuse.
The inverter should now power up. Many inverters, especially advanced models from brands like Sol-Ark or Victron, will go through a self-test sequence. Watch for any error codes or warning lights. Check the inverter's display to ensure it's showing the correct battery voltage and that its AC output voltage is stable (typically 120V or 240V, depending on your system). Listen for any unusual sounds. At this stage, you’re just getting the inverter itself up and running, ensuring it’s ready to convert power. You can refer to guides like How to Connect an Inverter to Batteries for detailed wiring diagrams.
Testing AC Loads and System Performance
With the DC side and inverter operational, it's time for the real test: powering your appliances. This should be done gradually and systematically to avoid overloading the system initially and to observe how it responds to different demands.
Start with a small, known AC load, like a single light bulb or a phone charger. Plug it into one of your inverter's outlets (if it has them) or switch on a circuit from your AC breaker panel that powers this small load. Observe the inverter's display. Does the AC voltage remain stable? Does the battery voltage drop significantly? Is the inverter drawing more current than expected from the battery? Everything should remain stable.
Next, progressively introduce larger loads. Try a small appliance like a coffee maker, then perhaps a microwave for a short burst. For larger systems, you might then test a refrigerator or even a well pump. When you test a well pump, be mindful of its starting surge current, which can be significantly higher than its running current. This is where your inverter's surge capacity becomes critical. Pay close attention to the battery voltage, the inverter's output, and the solar charging input. A healthy system will show a temporary dip in battery voltage under heavy load, followed by a recovery, and the solar panels should be working to replenish that energy. If you notice severe voltage drops, frequent inverter shutdowns, or error messages, it's a sign that something isn't right, and you may need to revisit How to Test an Off-Grid Solar System.
Monitoring, Optimization, and Documentation
Commissioning isn't just a one-time event; it kicks off the ongoing process of living with and understanding your off-grid system. After the initial power-up, you'll want to set up monitoring, fine-tune settings, and create essential records for future reference.
Setting Up Your Monitoring System
One of the greatest advantages of modern off-grid solar is the ability to monitor your system's performance in real time. This isn't just a luxury; it's a necessity for ensuring efficiency and catching problems early. Most quality inverters and charge controllers come with built-in displays that show essential data like battery voltage, charging current, solar panel output, and AC load. However, to truly understand your system, you’ll want a dedicated battery monitor.
A good battery monitor, often utilizing a shunt, will give you precise information about your battery's state of charge (SoC), remaining capacity, current draw, and even historical data. Brands like Victron Energy offer sophisticated battery monitors that can integrate with their other components and provide data via a smartphone app. Many Renogy kits also include robust monitoring solutions. This allows you to track your daily energy usage, understand how different appliances impact your battery bank, and see how much power your panels are actually producing throughout the day. Setting up How to Install a Battery Monitor is an investment that pays dividends in peace of mind and system longevity. It allows you to quickly identify if your solar panels aren't producing as expected or if your battery bank isn't holding a charge, empowering you to address issues before they become major problems.
Fine-Tuning for Peak Efficiency
Once your system is up and running, the next step is to optimize its settings for peak efficiency and battery health. This involves adjusting the parameters on your charge controller and, in some cases, your inverter. Different battery chemistries have specific charging requirements, and getting these right is crucial for maximizing battery lifespan.
For instance, LiFePO4 (lithium iron phosphate) batteries require precise bulk, absorption, and float voltage settings, often different from those used for lead-acid batteries. Your charge controller, particularly an MPPT (Maximum Power Point Tracking) type, will have programmable settings for these. You might also adjust low-voltage disconnect (LVD) settings on your inverter to protect your batteries from being discharged too deeply, which is especially important for lead-acid types. You can typically access these settings through the device's display, a remote panel, or a dedicated app. Some high-end systems allow for advanced adjustments like equalization cycles for flooded lead-acid batteries or temperature compensation for optimal charging in varying climates. Getting these settings dialed in, as explained in guides like How to Set Charge Controller Parameters, can significantly impact your system's performance and the longevity of your valuable battery bank. Don't just stick with the factory defaults; customize them to your specific components and usage patterns.
Creating Essential System Documentation
Okay, so you've got your system running beautifully, humming along, lights on, fridge cold. Now what? You absolutely need to create a comprehensive set of documentation for your off-grid system. This might sound like a chore, but trust me, it’s going to be a lifesaver down the line.
Your documentation should include:
- System Design and Wiring Diagrams: Keep detailed schematics of how everything is connected, including wire gauges, fuse sizes, and component locations.
- Component Manuals: Store all user manuals for your solar panels, charge controller, inverter, batteries, and any other equipment. You can often find digital versions on manufacturers' websites (e.g., for products you bought on Amazon), but a printed copy in a binder near your system is invaluable.
- Warranty Information: Keep track of purchase dates, serial numbers, and warranty details for all major components.
- Initial Readings and Baselines: Record your system's voltages, currents, and power output during the initial commissioning. This provides a baseline for future troubleshooting.
- Maintenance Logs: Start a log for routine maintenance tasks, like battery watering (if applicable), terminal cleaning, or panel inspection.
Having this information readily available will make future troubleshooting, maintenance, or potential system expansion much, much easier. It's like having a medical record for your home's power system. A guide on How to Document Your Off-Grid Install can provide more structured templates. Seriously, don’t skip this – your future self will thank you.
Common Commissioning Challenges and Troubleshooting Tips
Even with the best planning and careful execution, sometimes things don't go exactly as expected. It's part of the off-grid journey! The key is to approach challenges methodically and safely, rather than panicking.
What to Do When Things Don't Go as Planned
It’s completely normal to encounter a hiccup or two during commissioning. Maybe your inverter isn't turning on, or your charge controller isn't showing any solar input. Don't immediately assume the worst!
- Stay Calm and Check the Obvious: Is everything plugged in? Are all switches in the "on" position? Are all breakers not tripped? Is there sufficient sunlight hitting your panels? Believe it or not, sometimes the simplest things are overlooked in the stress of the moment.
- Refer to Your Documentation: This is where those manuals come in handy. Look up error codes on your inverter or charge controller display. Manufacturers' guides often have dedicated troubleshooting sections that can point you directly to the problem.
- Retrace Your Steps: Go back through your wiring diagram and physically re-check every connection point. Loose terminals are a very common cause of issues. Use your multimeter to verify continuity and voltage at different points in the circuit. Is there DC voltage coming from your panels? Is there voltage at your battery terminals? Is the charge controller receiving power from the batteries?
- Isolate the Problem: If your inverter isn't working, try disconnecting all AC loads and seeing if it powers up. If your charge controller isn't charging, disconnect the panels and then the batteries, then reconnect them in the proper sequence (batteries first, then panels) to see if it resets.
- Look for Blown Fuses or Tripped Breakers: These are designed to fail to protect your system. A blown fuse indicates an overcurrent event, so replacing it without addressing the underlying cause will likely just lead to another blown fuse.
Remember, most problems have a logical solution. Take your time, systematically eliminate possibilities, and avoid making assumptions.
The Importance of Professional Help
While a DIY spirit is commendable and often essential for off-grid living, there are times when knowing your limits is the smartest and safest course of action. If you've gone through all the basic troubleshooting steps and your system still isn't behaving, or if you encounter any issues that make you feel uncomfortable or out of your depth, it is absolutely time to call in a professional.
This could be a licensed electrician experienced with off-grid systems, or a solar technician specializing in the brands you've installed (e.g., someone certified in Victron or Sol-Ark systems). Electrical work, especially with high-voltage DC arrays and large battery banks, can be dangerous. A professional can quickly diagnose complex issues, has specialized tools, and understands the nuances of electrical codes and safety protocols. Don't risk damaging expensive equipment or, more importantly, your own safety. A guide like When to Hire an Electrician for Off-Grid Solar can help you determine if it's time to bring in an expert. Sometimes, a consultation fee is a small price to pay for peace of mind and a safely operating system.
Off-Grid System Commissioning Checklist
| Step | Description | Status (Y/N/NA) | Notes |
|---|---|---|---|
| Pre-Commissioning | |||
| Visual Inspection Complete | Checked all physical connections, mounting, cable routing, and component integrity. | Look for loose terminals, frayed wires, physical damage. | |
| Component Specs Verified | Confirmed all components (panels, controller, batteries, inverter) match voltage, current, and power ratings per design. | Cross-referenced datasheets. | |
| Wiring & Polarity Checked | Verified all DC/AC wiring polarity, no exposed wires, correct wire gauges. | Used multimeter for continuity tests. | |
| Fuses & Breakers Sized/Installed | Confirmed correct sizing and installation of all fuses and breakers. | Checked for tight connections. | |
| Grounding System Verified | Ensured all DC and AC components are properly grounded. | Checked grounding rod/connection. | |
| DC System Startup | |||
| Panels Covered/Disconnected | Ensured solar panels are fully covered or disconnected from the charge controller. | Essential safety step. | |
| Battery Connected to Charge Controller | Connected battery bank to charge controller battery terminals (positive to positive, negative to negative). | Charge controller powered up, displaying correct battery voltage. | |
| Charge Controller Settings | Configured charge controller for specific battery type (LiFePO4, AGM, etc.) and voltage, including bulk, absorption, float. | Consulted battery and charge controller manuals. | |
| Solar Panels Connected | Connected solar panels to charge controller PV input terminals. | Charge controller initiated charging, observed current/voltage. | |
| Inverter Startup | |||
| AC Loads Disconnected | Ensured all AC loads are OFF or disconnected from the inverter output. | Prevented surge on initial inverter power-up. | |
| Inverter DC Input Connected | Connected inverter DC input cables to battery bank. | Checked polarity, tightness. | |
| Inverter DC Breaker Engaged | Turned ON inverter's DC input breaker/fuse. | Inverter powered up, self-test complete, no error codes. | |
| Inverter Output Verified | Checked inverter display for stable AC output voltage (e.g., 120V) and frequency (e.g., 60Hz). | ||
| Load Testing & Optimization | |||
| Small AC Load Test | Connected a small AC load (e.g., light bulb) to verify stable operation. | Monitored battery voltage, inverter output. | |
| Progressive Load Test | Gradually introduced larger loads (e.g., microwave, refrigerator, well pump). | Observed system response to surge and continuous loads. | |
| Monitoring System Setup | Installed and configured battery monitor and other monitoring tools (e.g., apps). | Calibrated battery monitor if necessary. | |
| System Settings Optimized | Fine-tuned charge controller and inverter settings for battery longevity and efficiency. | Adjusted LVDs, absorption times, etc. | |
| Documentation Created | Compiled all system diagrams, manuals, warranty info, initial readings, and maintenance log. | Stored securely for future reference. |
Disclaimer
The information provided in this guide is for general informational purposes only and does not constitute professional electrical advice. Off-grid solar system installation and commissioning involve working with high voltage electricity, which can be dangerous. Always consult with a qualified and licensed electrician or solar professional before installing, commissioning, or performing maintenance on an off-grid solar system. Follow all manufacturer instructions and local electrical codes. We are not responsible for any injury or damage that may result from the improper use of this information.