Best Racking and Mounting for Off-Grid
When you're diving headfirst into the world of off-grid solar, it's easy to get laser-focused on the big-ticket items: the gleaming solar panels, the powerful battery bank, and that indispensable inverter. But let me tell you, as someone who’s seen it all, one of the most overlooked yet absolutely critical components is your racking and mounting system. It’s not just about holding your panels up; it's about safeguarding your entire investment, optimizing energy harvest, and ensuring your system stands strong against everything Mother Nature throws its way. This guide will help you navigate the often-confusing landscape of solar racking and mounting, so you can make informed decisions for a resilient and efficient off-grid setup.
The Underrated Importance of Sturdy Solar Mounting
It’s easy to think of solar panel mounting as just a set of metal rails, but truly, it’s the unsung hero of your off-grid power system. Without a robust and thoughtfully designed mounting solution, even the most expensive, high-efficiency panels can underperform or, worse, be utterly destroyed. We're talking about more than just aesthetics here; we're talking about long-term reliability and peace of mind.
Protecting Your Investment from the Elements
Imagine spending thousands on solar panels only to have them ripped from your roof by a strong gust of wind or crushed under a surprise heavy snowfall. It's a nightmare scenario, but it's a very real possibility if your mounting system isn't up to par. Different regions present different challenges. If you're living off-grid in hurricane-prone Florida, your system needs to be engineered to withstand extreme uplift forces. For those nestled in the snowy mountains of Colorado, the racking must handle immense downward pressure from heavy snow loads, often accumulating several feet deep.
A quality mounting system isn't just about static strength; it's about dynamic resistance. It needs to absorb vibrations, manage thermal expansion and contraction, and resist corrosion over decades of exposure to sun, rain, and fluctuating temperatures. Poorly secured panels can become dangerous projectiles in high winds, posing a risk to property and even life. This isn't a component to skimp on or DIY without careful planning, unless you're truly confident in your engineering skills. The structure of your mounting system, the type of fasteners used, and how it’s anchored all play a crucial role in its ability to protect your valuable solar panels.
Optimizing Performance Through Proper Orientation and Tilt
Beyond mere survival, your mounting system is key to maximizing the energy your panels produce. Solar panels are most efficient when they are directly facing the sun, and the sun's position changes throughout the day and across the seasons. A well-designed mount allows you to position your panels for optimal sunlight capture.
For instance, in the northern hemisphere, panels generally face south to maximize year-round production. However, the optimal tilt angle changes with the seasons. In winter, when the sun is lower in the sky, a steeper tilt will help capture more direct sunlight and even encourage snow to slide off. In summer, a flatter angle might be better. Some mounting systems allow for seasonal adjustments, giving you the flexibility to manually change the tilt. This can significantly impact your How Many Watts of Solar You Need and overall system output. If you're designing for year-round off-grid power, considering these adjustments is vital. For more on this, you might find our guide on Best Tilt Angle for Off-Grid Panels particularly helpful. Additionally, the mounting placement helps you strategize to How to Design Around Shading, ensuring no trees or structures cast unwanted shadows on your array, which can dramatically reduce efficiency.
Exploring Diverse Off-Grid Mounting Solutions
When you're building an off-grid solar system, you have a variety of mounting options, each with its own set of advantages and disadvantages. Your choice will depend heavily on your specific location, structure, energy needs, and budget. Let’s break down the most common types.
Roof Mounts: The Go-To for Fixed Structures
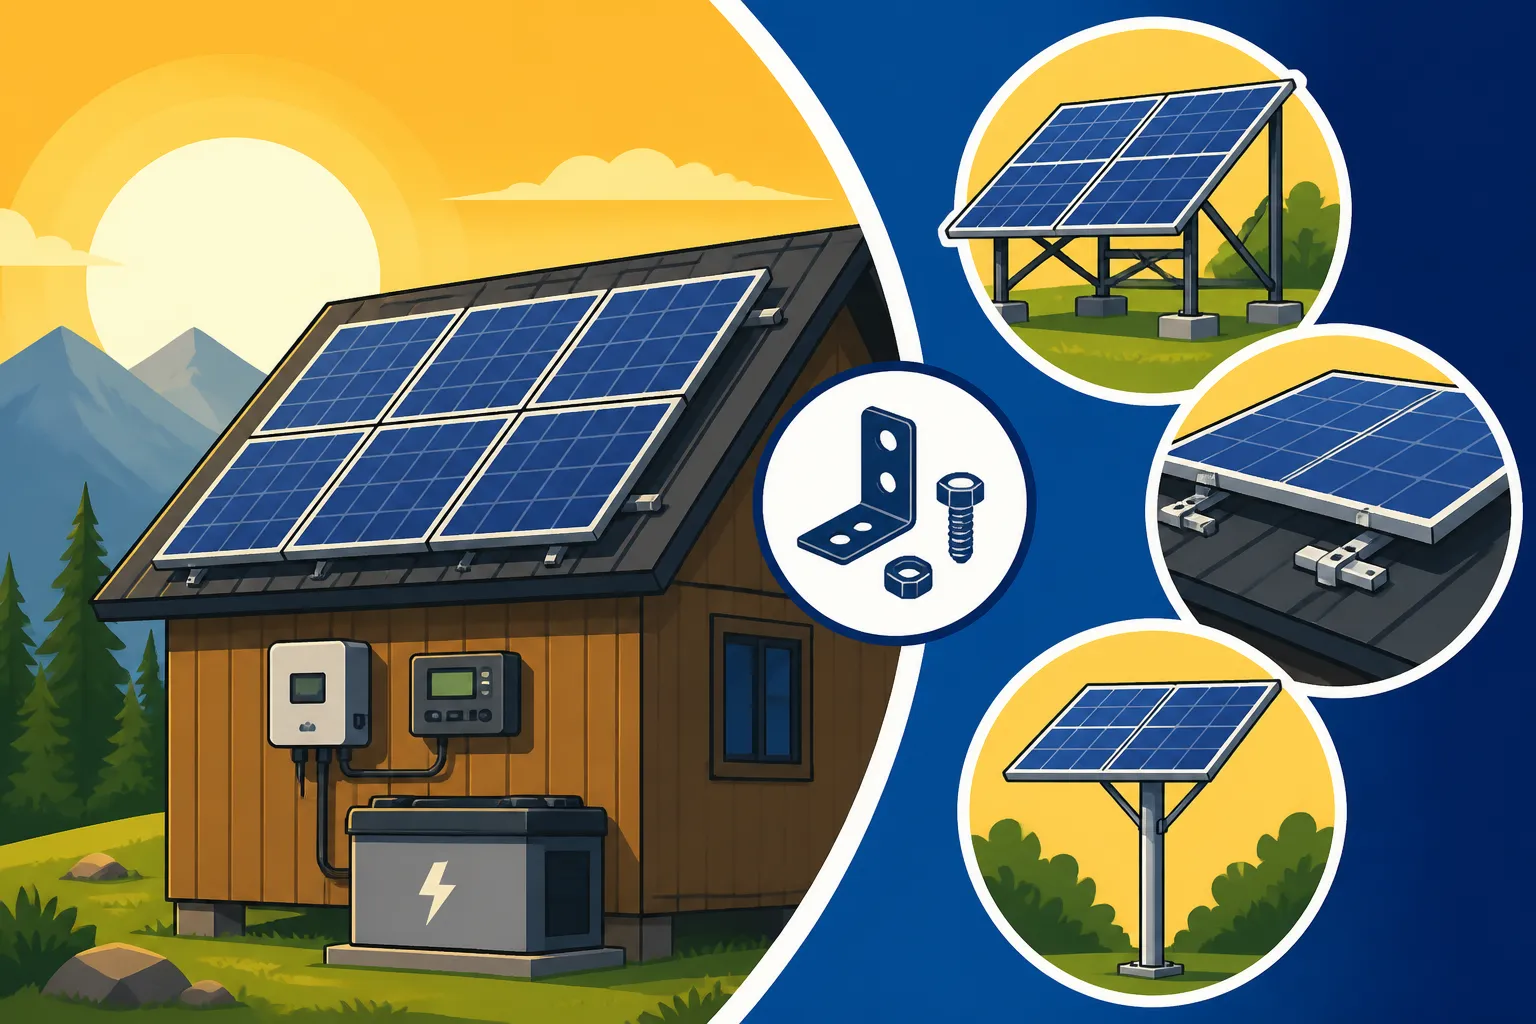
Roof mounts are incredibly popular, especially for cabins, tiny homes, and RVs, because they utilize existing space that isn't typically used for anything else. This can be a huge space-saver if you have a smaller footprint.
One of the biggest pros is that they keep your panels out of the way, often integrating seamlessly with the building's aesthetic. Wiring can sometimes be simpler, as the path from panels to your charge controller and battery bank is often more direct. You'll generally find two main types:
- Flush Mounts: These are the most common. Panels lie parallel to the roof, usually with a small gap for airflow. They are sleek, less obtrusive, and generally cheaper to install. However, their fixed tilt means you can't optimize for seasonal sun angles, and they might experience higher temperatures due to less airflow, which can slightly reduce efficiency. For many DIYers, kits with components like Renogy Z-brackets for smaller arrays or larger rail systems available on Amazon offer accessible entry points into roof mounting.
- Tilt-Adjustable Mounts: These use brackets that allow you to change the angle of your panels. This is fantastic for maximizing winter sun exposure or shedding snow, making them ideal for areas with significant seasonal changes. They are a bit more complex and expensive than flush mounts and sit higher off the roof, which can be a consideration for wind resistance or aesthetics.
However, roof mounts aren't without their drawbacks. The biggest concern is roof penetration. Every hole you make in your roof for mounting feet or anchors is a potential leak point if not properly sealed. This requires careful installation, often involving flashing and sealants, especially important when learning How to Waterproof Roof Penetrations. Furthermore, maintenance access can be tricky, requiring ladders or special safety equipment. You also need to consider your roof's structural integrity. Can it safely bear the weight of the panels and the racking, especially when covered in snow or subjected to high winds?
Ground Mounts: Flexibility and Accessibility
Ground mounts offer a different kind of freedom. Instead of being tied to a structure, your panels are installed on a freestanding frame directly on the ground.
The primary advantage here is accessibility. It’s far easier to clean panels, inspect wiring, and perform maintenance when you're not balancing on a roof. More importantly, ground mounts give you ultimate flexibility for orientation and tilt. You can position your array precisely to capture the most sunlight throughout the day and year, without worrying about roof lines or shading from chimneys. Many ground mounts offer easy seasonal tilt adjustments. For a comprehensive comparison, our article on Ground Mount vs Roof Mount for Off-Grid delves into these options in more detail.
There are several sub-types of ground mounts:
- Fixed-Tilt Ground Mounts: Similar to flush roof mounts in concept, these are set at a predetermined angle. They are robust and cost-effective but lack seasonal adjustability.
- Pole Mounts: Panels are mounted on top of a single or multiple poles. These can lift panels high enough to clear obstructions like snow or brush and can often be rotated for daily sun tracking or tilted seasonally. This makes them excellent for situations where you need to maximize generation in a specific footprint, like a remote hunting cabin.
- Tracking Systems: The most sophisticated, these mounts use motors to actively follow the sun across the sky. While they offer the highest energy yield (up to 25-45% more than fixed arrays), they come with a significantly higher initial cost, more moving parts to maintain, and higher complexity. They are rarely seen in smaller, budget-conscious off-grid setups but can be invaluable for very high energy demand systems where space is limited or generation absolutely critical.
On the downside, ground mounts take up valuable land space, and you'll often need to dig trenches to run wires back to your power center, which can add to the Off-Grid Solar Installation Cost. Security can also be a concern, as panels are more accessible to theft or vandalism.
Specialty and Portable Mounts: For Mobile and Unique Setups
Beyond traditional roof and ground mounts, a whole category of specialized mounting solutions exists for the diverse needs of the off-grid community.
For those embracing the nomadic lifestyle, How to Install Off-Grid Solar on a Van or RV, specific mounting solutions are essential. These often involve sturdy but lightweight aluminum brackets, like those from Renogy, designed to attach securely to the often curved or flexible surfaces of recreational vehicles. You might use Z-brackets or rigid spoiler mounts, depending on your panel size and vehicle type. Portability is key for some RVers or campers, leading to options like portable folding solar kits. These kits are often paired with solar generators like those from Jackery or EcoFlow, allowing you to set up your panels in the sunniest spot at your campsite, then fold them away for travel.
Then there are truly unique setups: think custom solutions for boats, off-grid greenhouses, or even remote sensor stations. For a boat, panels might be mounted on bimini tops, archways, or even flexible panels adhered directly to deck surfaces. Greenhouses might use panels integrated into the roof structure itself, or separate small ground mounts to avoid shading the plants. These scenarios often require creative problem-solving and may involve fabricating custom brackets or adapting existing solutions. When considering how to install off-grid solar panels in these unique environments, it's crucial to think about weight, aerodynamics, and structural integrity.
Key Factors in Selecting Your Off-Grid Racking
Choosing the right racking and mounting system isn't a one-size-fits-all decision. It requires a thoughtful assessment of your specific situation, balancing various practical considerations with your overall goals.
Assessing Your Site and Environment
The very first step is to thoroughly understand your installation site. This isn't just about where you want to put panels; it's about where they'll perform best and be safest.
- Sun Path Analysis: Before anything else, understand the sun's trajectory throughout the year at your specific location. This will dictate optimal orientation and tilt. Tools and apps can help you map the sun's path to identify potential shading issues from trees, buildings, or even seasonal growth. This directly influences How to Design for Low Sun Regions or How to Orient Off-Grid Panels for Winter.
- Weather Conditions: What's the typical weather like?
- Wind Load: High wind areas (coastal, open plains) require extremely robust mounting systems with strong anchors and adequate spacing between panels to prevent uplift. Consult local building codes for wind speed ratings.
- Snow Load: If you live where snow accumulates, your system needs to support the weight. Panels should be tilted sufficiently for snow to slide off, or the racking must be strong enough to bear the full load. Our guide on Off-Grid Solar Cost in Cold Climates touches on these considerations.
- Seismic Activity: In earthquake-prone areas, mounts must be designed to withstand seismic forces without panel damage or detachment.
- Corrosion: Near saltwater or in high humidity, material choice becomes critical. Aluminum or heavily galvanized steel is often preferred over untreated metals.
- Soil Type (for Ground Mounts): If you're considering a ground mount, understanding your soil is vital for foundation design. Rocky soil requires different anchoring methods than sandy or loamy soil.
- Local Regulations and Permits: Even for off-grid systems, some jurisdictions have rules about panel placement, setback requirements, and structural integrity. Always check for Off-Grid Solar Permit Requirements before you start building.
Budget, DIY Capability, and Future Expansion
The financial aspect and your personal skill set are huge drivers in this decision. Off-grid systems are an investment, and racking is part of that.
- Cost Comparison: Ground mounts typically cost more upfront due to the extra structural materials and potential concrete foundations, though they can save on roof modifications. Roof mounts are often cheaper for materials but might incur higher labor costs if you hire a professional for roof penetrations. Pre-packaged kits for smaller systems, often found on Amazon or from manufacturers like Renogy, can be very budget-friendly for DIYers, helping you understand How to Save Money on an Off-Grid Solar Build.
- DIY vs. Professional Installation: Are you comfortable with construction, electrical work, and understanding structural loads? Many people choose to DIY their off-grid solar builds, especially for smaller systems on RVs or sheds. This can significantly reduce costs. However, for larger home systems, especially roof-mounted ones, consulting with or hiring a professional is often recommended for safety and compliance. Our guide on DIY vs Professional Off-Grid Solar Cost offers a deeper look at this choice. If you're embarking on a DIY build, ensure you have the right tools and a solid understanding of structural principles.
- Material Choice: Aluminum racking is lightweight, corrosion-resistant, and commonly used. Galvanized steel is heavier and stronger, often chosen for ground mounts or very large arrays. Stainless steel is excellent for fasteners but can be pricey for larger components.
- Future Expansion: Think ahead! Will you want to add more panels down the line? Some racking systems are inherently more modular and easier to expand than others. Designing an expandable system from the start, even if it costs a little more initially, can save you significant hassle and money later.
Material Quality and Durability
This is where the rubber meets the road for long-term reliability. The quality of your racking materials directly impacts how long your system will last and how well it will perform.
- Corrosion Resistance: As mentioned, if you're in a humid or coastal environment, materials like anodized aluminum or hot-dipped galvanized steel are paramount. Even small amounts of rust can compromise structural integrity over time.
- Strength and Load Capacity: Ensure the racking material and design are rated for the combined weight of your panels, plus any potential wind and snow loads in your area. Manufacturers provide specifications, and it's always wise to err on the side of over-engineering slightly.
- UV Resistance: While not a structural component, any plastic parts or coatings on your racking should be UV-stabilized to prevent degradation from constant sun exposure.
- Manufacturer Warranty: Reputable brands, like many you'll find for sale on Amazon, offer warranties on their racking components. This indicates their confidence in the durability of their product. Look for companies known for quality solar equipment.
Installation Best Practices and Maintenance for Longevity
Once you've chosen your racking and mounting system, proper installation and ongoing maintenance are crucial to ensure its long-term performance and safety. A great system poorly installed is just as risky as a cheap system.
Ensuring Structural Integrity and Safety
This isn't just about making sure your panels don't fall off; it's about electrical safety, protection from damage, and compliance with potential regulations.
- Follow Manufacturer Instructions: This seems obvious, but it's astonishing how many DIY errors stem from skipping steps in the manual. Every component, bolt, and torque specification is there for a reason. Ignoring these can void warranties and create unsafe conditions.
- Proper Fastening and Anchoring: Whether you're attaching to roof rafters, concrete slabs, or digging footings for a ground mount, ensure your anchors are appropriate for the material and rated for the expected loads. Use the correct type and size of bolts, screws, and lag bolts. For roof mounts, locating rafters and securing into them is non-negotiable. For ground mounts, concrete piers or robust ground screws are common methods to ensure stability.
- Grounding and Bonding: This is a critical safety step that protects your system from lightning strikes and prevents electrical shock. All metal components of your solar array – panels, rails, and frames – must be properly grounded and bonded together, then connected to an earth ground. This often involves grounding lugs, bare copper wire, and grounding rods. If you're unsure about this step, it's highly recommended to consult a qualified electrician, especially for home systems. This is part of overall Off-Grid Solar Safety and Grounding.
- Wire Management: Cables need to be secured to the racking system using UV-resistant clips or ties, keeping them tidy and preventing them from chafing against sharp edges, sagging, or getting tangled. Leaving wires loose exposes them to potential damage from wind, animals, or even UV degradation, leading to costly repairs down the line. Using conduit for long runs or exposed areas is also a smart move for protection.
Maintaining Your Mounting System
Unlike the panels themselves, which might only need occasional cleaning, your mounting system requires a more proactive approach to maintenance. It's often out of sight, out of mind, until there's a problem.
- Regular Visual Inspections: Make it a habit to periodically check your entire array, ideally twice a year or after any significant weather event. Look for:
- Loose Bolts and Fasteners: Vibrations from wind, thermal expansion, and contraction can cause bolts to loosen over time. Tighten any that feel wobbly.
- Corrosion: Check for rust, especially on steel components or around bolt heads. Address it early with rust-inhibiting paint or by replacing corroded parts.
- Structural Damage: Look for bent rails, cracked welds, or any signs of stress on the frame. If you notice anything concerning, investigate immediately.
- Vegetation Growth: For ground mounts, ensure no weeds or shrubs are growing up around the panels, which can cause shading or even physical damage.
- Wire Condition: Confirm all cables are still securely fastened and that insulation isn't cracked or chewed by pests.
- Snow and Debris Removal: While proper tilt can help, heavy snowfalls may still necessitate manual removal to maximize winter production and prevent excessive load on the structure. Keep an eye out for accumulated leaves, dirt, or bird droppings that can create hotspots or reduce efficiency.
- Monitoring Panel Clearance: Over time, ground mounts might settle, or vegetation might grow taller. Ensure your panels still have adequate clearance from the ground or any surrounding objects to maintain airflow and prevent shading.
By diligently following these installation and maintenance best practices, you're not just securing your panels; you're securing your off-grid lifestyle. It's an investment in the longevity and efficiency of your entire solar power system. Remember, a well-mounted system is a reliable system.
Comparison of Off-Grid Solar Mounting Types
Choosing the best mounting solution means weighing your priorities against the practicalities of each type. Here's a quick overview to help clarify:
| Mounting Type | Pros | Cons | Best Use Case |
|---|---|---|---|
| Roof Mount (Flush) | Space-saving, low profile, typically lower material cost. | Fixed tilt (less seasonal optimization), higher panel temperatures, roof penetrations (potential leaks), harder access for maintenance. | Homes, cabins, garages with good sun exposure and stable roofs. |
| Roof Mount (Tilt-Adjustable) | Seasonal tilt optimization, better airflow than flush. | Higher profile (more wind resistance), higher cost, roof penetrations, more complex installation, still harder access. | Homes, cabins in areas with significant seasonal sun angle changes or heavy snow. |
| Ground Mount (Fixed) | Easy access for maintenance/cleaning, flexible orientation, no roof penetration. | Takes up ground space, higher material/labor for foundations, potential security issues. | Open land, remote properties, when roof space is limited or unsuitable. |
| Ground Mount (Pole) | Excellent for clearing obstructions (snow, brush), very flexible orientation/tilt. | Higher material cost, requires strong foundation, can be visually prominent. | Areas with deep snow, uneven terrain, or a need for precise sun tracking. |
| Portable Mounts | Highly flexible placement, no installation, easy to move/store. | Limited power capacity, requires manual setup, security risk (easily stolen), susceptible to wind. | RVs, camping, temporary power needs, emergency backup. |
Disclaimer
The information provided in this guide is for general informational purposes only and does not constitute professional advice. Off-grid solar system design and installation can be complex and involve electrical hazards. Always consult with qualified professionals, adhere to local building codes, and prioritize safety when working with solar equipment.