How to Size a PWM Charge Controller
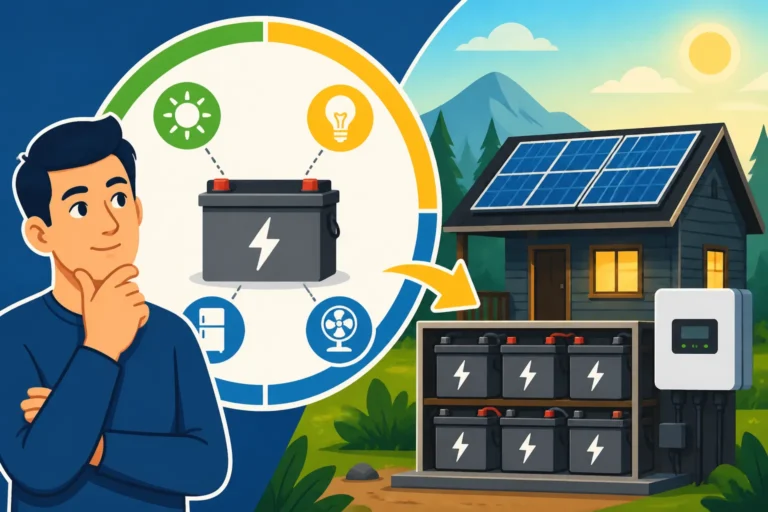
Navigating the world of off-grid solar can feel like learning a whole new language, and one of the trickiest parts is figuring out how to properly size all your components. It's especially frustrating when you just want to get your system up and running, but you're constantly second-guessing if your charge controller is actually going to handle the load. This guide is here to demystify the process of sizing a PWM charge controller, ensuring your off-grid system is both safe and efficient without any costly guesswork.
Understanding Your PWM Charge Controller Basics
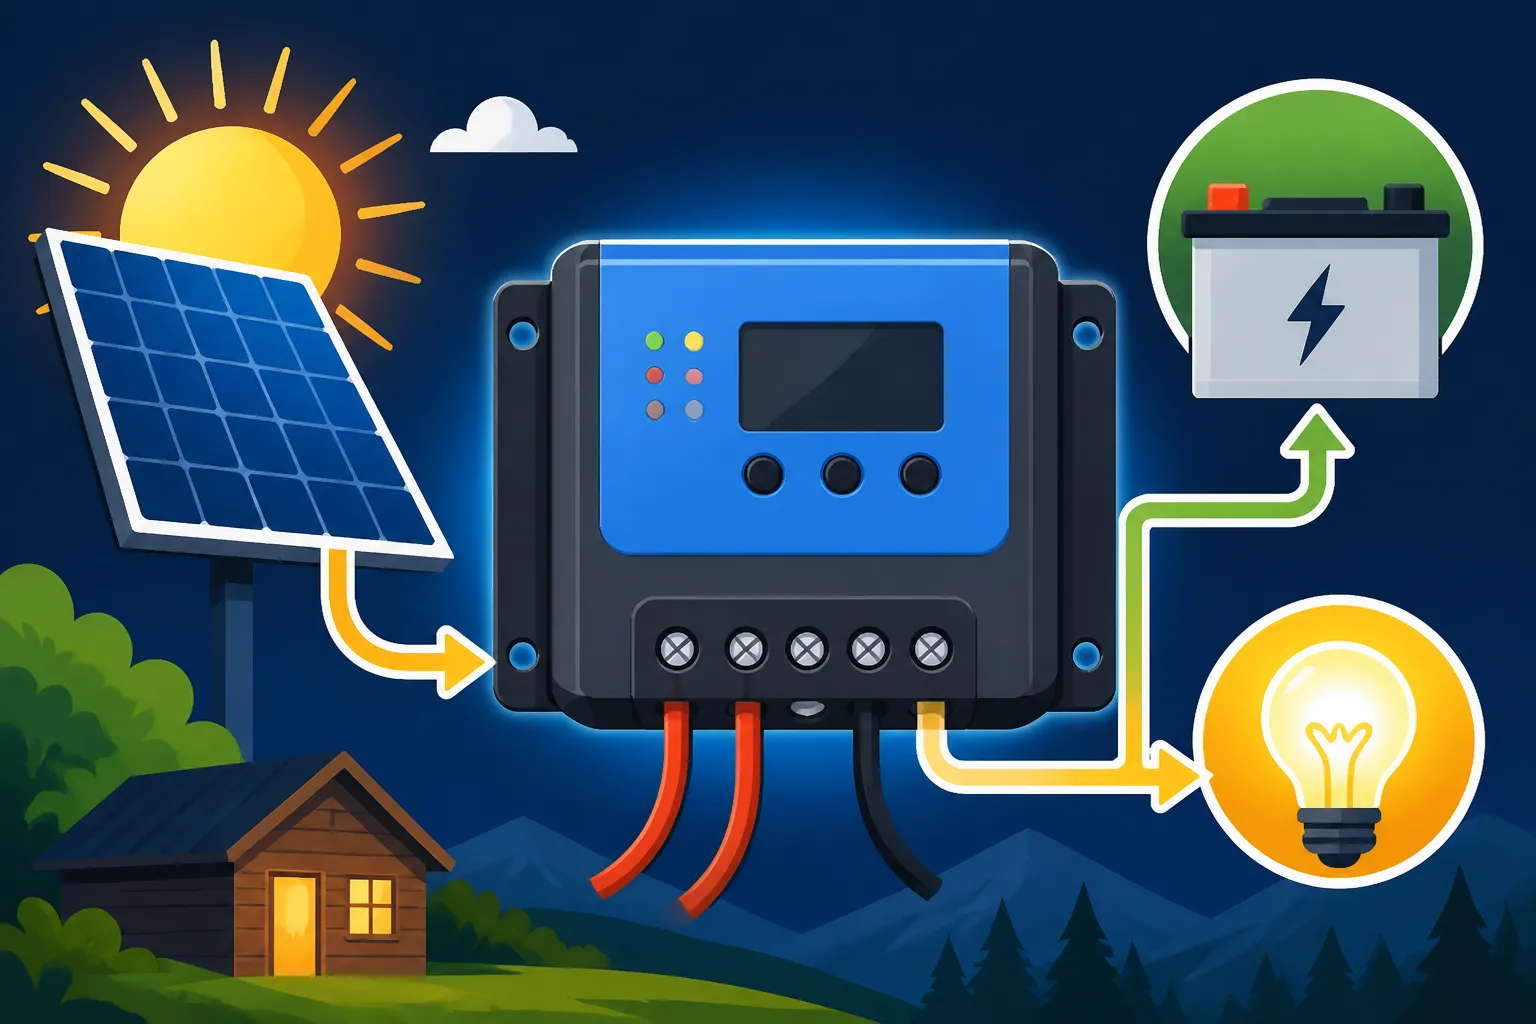
When you’re diving into off-grid living, whether it’s for a cozy cabin or a weekend RV setup, the charge controller is often a forgotten hero. It sits between your solar panels and your battery bank, quietly doing its job. But what exactly is it, and why does its size matter so much? Let’s peel back the layers and understand the core principles.
What Exactly is a PWM Charge Controller and How Does it Work?
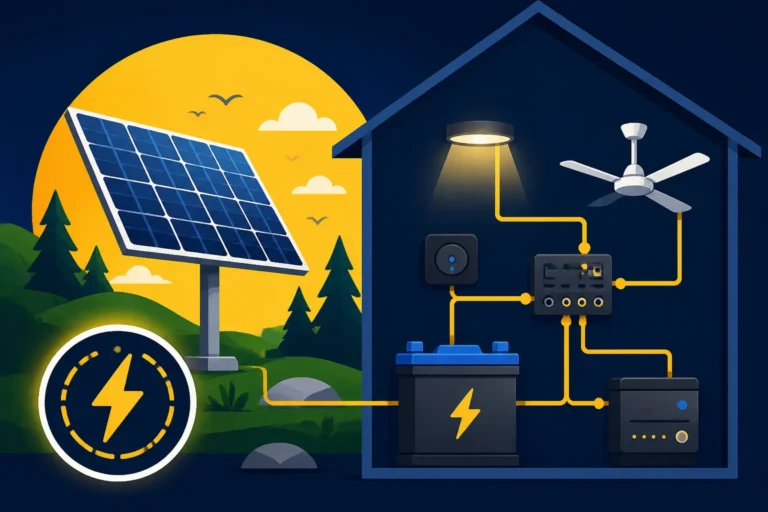
A Pulse Width Modulation (PWM) charge controller is essentially a smart switch that regulates the voltage and current coming from your solar panels before it reaches your batteries. Think of it like a meticulous gatekeeper. When your batteries need charging, the PWM controller allows the full voltage from your panels to flow through, effectively “pulsing” the power. As your batteries approach a full state of charge, the controller rapidly switches the power on and off, reducing the average voltage to prevent overcharging. This pulsing is what “modulates” the width of the electrical pulse, hence the name.
The beauty of a PWM controller lies in its simplicity and cost-effectiveness. It's a reliable choice for smaller to medium-sized systems, often seen in RVs, small cabins, or marine applications where budget and simplicity are key factors. Unlike its more advanced cousin, the MPPT controller, a PWM unit doesn't convert excess voltage into amperage. Instead, it essentially clips the panel voltage to match the battery voltage, which means any "extra" voltage from the panels (beyond what the battery needs) is effectively wasted. This is a crucial point that directly influences why proper sizing is so critical.
Why Proper Sizing is Crucial for Your Off-Grid System
Imagine trying to fill a water bottle with a fire hose – it’s inefficient, messy, and could easily damage the bottle. Similarly, an undersized charge controller trying to handle too much power from your solar array can quickly overheat, fail, and potentially damage your entire system, including your expensive batteries. On the flip side, an oversized controller won’t hurt anything, but you’ll have spent more money than necessary, eating into your budget for other essential components.
The main reason sizing is so important for a PWM controller is directly related to its operational principle. It connects the solar array and the battery in a direct circuit when charging, effectively "shorting" the panels for fractions of a second to regulate current. This direct connection means the controller must be rated to handle the maximum current that your solar panels can produce. Unlike MPPT controllers which can handle higher voltage inputs and convert them, PWM controllers are very sensitive to both the maximum voltage and maximum current output from your solar panels. Ignoring these limits can lead to system failure, reduced battery lifespan due, and safety hazards, making the initial investment in your system go to waste. You really don't want to be troubleshooting a fried controller when you're miles from the nearest hardware store.
Step-by-Step Guide to Sizing Your PWM Charge Controller
Alright, let’s get down to brass tacks. Sizing a PWM charge controller isn’t rocket science, but it does require a little bit of math and attention to detail. We’re going to break it down into manageable steps, focusing on the key electrical parameters of your solar panels and battery bank.
Calculating Your Solar Panel Current (Imp)
This is the most critical calculation for a PWM controller. You need to determine the *maximum operating current* your solar array can deliver. Grab the specification sheets for your solar panels. You’re looking for a value usually labeled “Imp” (Current at Maximum Power) or “Isc” (Short Circuit Current).
Here's how to calculate it:
-
Find Imp (or Isc) for a single panel: This will be listed in Amperes (A) on your panel's spec sheet.
-
Determine your panel wiring configuration:
- Panels in Parallel: If you're wiring panels in parallel, you add their currents together. For example, if you have two 100W panels each with an Imp of 5.75A, wired in parallel, your total Imp will be 5.75A + 5.75A = 11.5A. Remember, the voltage stays the same in parallel wiring.
- Panels in Series: If you're wiring panels in series, the current remains the same as a single panel, but the voltages add up. So, two 100W panels with Imp of 5.75A in series would still have a total Imp of 5.75A.
- Mixed Series/Parallel Arrays: For more complex arrays, calculate the current for each parallel string, and then add those string currents together. For example, if you have two strings, each with two panels in series (current is 5.75A per string), and these two strings are then wired in parallel, your total Imp would be 5.75A + 5.75A = 11.5A.
-
Apply a Safety Factor: Solar panels can produce more current than their rated Imp under ideal conditions (like a very cold, sunny day – known as the "edge of cloud effect"). It's standard practice to add a 25% safety margin to your calculated maximum current. So, if your total Imp is 11.5A, multiply that by 1.25 (11.5A * 1.25 = 14.375A). This gives you the minimum current rating your PWM charge controller should have. Most controllers will be rated for 10A, 20A, 30A, 40A, or 60A. Always round up to the next available size.
Verifying Your Solar Panel Voltage (Voc)
While current is king for PWM sizing, voltage is also super important. The PWM charge controller *must* be able to handle the maximum open-circuit voltage (Voc) of your solar array. This is the voltage your panels produce when they aren’t connected to a load, and it’s always higher than the operating voltage (Vmp).
Here's what to look for:
- Find Voc for a single panel: This will be listed in Volts (V) on your panel's spec sheet.
- Determine your panel wiring configuration:
- Panels in Parallel: If panels are in parallel, the Voc remains the same as a single panel.
- Panels in Series: If panels are in series, you add their Voc values together. Two panels with a Voc of 22V in series would have a total Voc of 44V.
- Apply a Temperature Correction Factor: Solar panels produce higher voltage in colder temperatures. This is a critical factor, especially if you live in a region that experiences freezing temperatures. For every degree Celsius below 25°C, the voltage can increase by approximately 0.3-0.5% per degree, depending on the panel. A common rule of thumb is to take your coldest anticipated temperature (e.g., -20°C) and calculate the voltage increase.
- For a simpler approach, a common practice is to multiply your array's Voc by 1.25 to account for cold weather. So, if your total Voc is 44V, multiply that by 1.25 (44V * 1.25 = 55V).
- Your PWM controller's maximum input voltage rating must be higher than this calculated cold-weather Voc. Many smaller PWM controllers are rated for 24V or 48V systems, but their maximum input voltage might be 50V or 100V. Make sure your array's boosted Voc doesn't exceed this.
This step is critical because exceeding the controller's maximum input voltage will instantly destroy it, possibly even sparking a fire. Always double-check this value, especially for systems used in cold climates, and round up to the next available voltage rating if necessary.
Accounting for Environmental Factors and Safety Margins
Beyond the raw electrical numbers, real-world conditions play a significant role. You’ve already learned about the cold weather voltage boost, but let’s dive a bit deeper into what else you should consider.
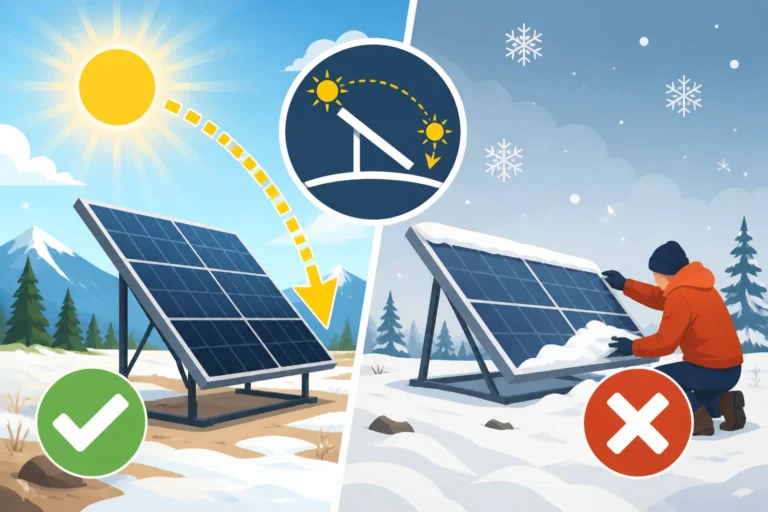
Temperature Effects on Voltage and Current: We already covered cold weather increasing voltage. Conversely, hot weather decreases voltage. However, for current, it's slightly different. While current generally increases with more sunlight intensity (which often correlates with hotter days), the voltage drop in hot conditions can reduce the overall power output. The crucial point for PWM controllers is ensuring the maximum possible current (Imp with safety factor) and maximum possible voltage (Voc with cold temperature factor) are both well within the controller's specifications. A well-designed system, especially one that considers Off-Grid Solar Cost in Cold Climates, will factor in these extremes.
Future Expansion Considerations: One common mistake many off-gridders make is sizing their system exactly for their current needs without thinking ahead. What if you decide to add another panel next year to power a new appliance? What if you realize your How Much Solar to Run A Refrigerator calculation was a bit optimistic? When you're initially buying your PWM controller, it's often wise to choose one with a slightly higher current rating than your absolute minimum requirement. For example, if your calculated maximum current is 14.375A, a 20A controller would be a much safer and more flexible choice than a 15A one (if it even exists). This provides a buffer and makes future upgrades much simpler, saving you the hassle and cost of buying a new controller down the line. Many reputable brands like Renogy offer a range of PWM controllers, making it easier to find one that fits your current and potential future needs.
Practical Scenarios and Common Sizing Mistakes
Numbers on paper are one thing, but how does this all play out in the real world? Let’s look at some common off-grid setups and highlight pitfalls people often stumble into. Understanding these practical examples can solidify your understanding and help you avoid similar headaches.
Sizing for Different Off-Grid Setups
The size of your PWM controller will vary significantly depending on what you’re trying to power.
- Small Portable Systems (e.g., camping, single battery backup): For a simple setup like charging a single 12V battery with one or two small 100W panels (Imp ~5.75A each), a 10A or 20A PWM controller is usually more than sufficient. If you have two 100W panels in parallel (total Imp = 11.5A), adding the 25% safety factor gets you to about 14.375A. A 20A controller would be perfect here. The Voc of a single 100W panel is often around 22V, so even two in parallel keep the voltage at 22V, well within typical PWM limits of 50V or more. This is often the case when you're exploring How to Size an Off-Grid System for a Rv for minimal use.
- Medium-Sized Cabins or RVs (e.g., multiple panels, small appliance loads): Let's say you have three 200W panels, each with an Imp of 10A and a Voc of 24V.
- Option 1: All in Parallel to a 12V Battery Bank. Total Imp = 10A + 10A + 10A = 30A. With a 25% safety factor: 30A * 1.25 = 37.5A. You would need at least a 40A PWM controller. Total Voc remains 24V, which is fine.
- Option 2: Two in Series, One in Parallel to a 24V Battery Bank. This setup gets tricky with PWM and is generally not recommended as panels in series boost voltage, which is then wasted by the PWM if it's not matched to battery voltage. If you decide to go with a 24V battery bank, you might wire two 24V (nominal) panels in series for a higher voltage array that would then get reduced by the PWM. However, usually for 24V systems, you'd aim for panels with a Vmp closer to 30-40V, or use an MPPT controller to take advantage of higher voltages. If your three 200W panels (Vmp 18V, Voc 24V) are arranged in two parallel strings (one with two panels in series, the other with a single panel – not ideal for balanced charging with PWM).
- Ideal for 24V battery with PWM: If using 24V nominal panels (Vmp ~36V, Voc ~45V), two of these in parallel would give Imp of 20A. With 25% safety factor, you'd be looking at 25A. A 30A PWM controller would work, provided its max input voltage rating is above the 45V Voc + cold temp factor.
The key here is that a PWM controller works best when the solar array's nominal voltage matches the battery bank's nominal voltage. For example, a "12V" panel array for a 12V battery, or a "24V" panel array for a 24V battery. If your panels have a much higher voltage than your battery bank, you're essentially discarding that extra voltage, making a PWM less efficient than an MPPT. Many users find a good range of options for these medium systems on Amazon.
When to Consider an Upgrade or a Different Controller Type
While PWM controllers are great for their simplicity and cost, there are definitely situations where they’re not the best choice, or where you’ll outgrow them.
- System Expansion: If you start with a small setup and then decide to significantly expand your solar array, you might quickly exceed your PWM controller's current limits. For example, going from two 100W panels to eight 100W panels will bump your current up considerably. Instead of buying a massive PWM controller, this might be the perfect time to switch to an MPPT (Maximum Power Point Tracking) charge controller. MPPT controllers are more efficient, especially with larger arrays and when there's a significant difference between panel voltage and battery voltage. They can convert excess voltage into usable amperage, recovering power that a PWM would simply discard. For a deep dive, check out our guide on MPPT vs PWM Charge Controllers.
- Long Cable Runs: With PWM systems, voltage drop can be a bigger issue on long cable runs from the panels to the controller and then to the batteries. Higher currents lead to more significant voltage drop over distance. MPPT controllers, by allowing you to use higher voltage arrays (panels in series), can push power over longer distances with less loss. If your panels are far from your battery bank, an MPPT might save you money on thicker (and more expensive) wiring.
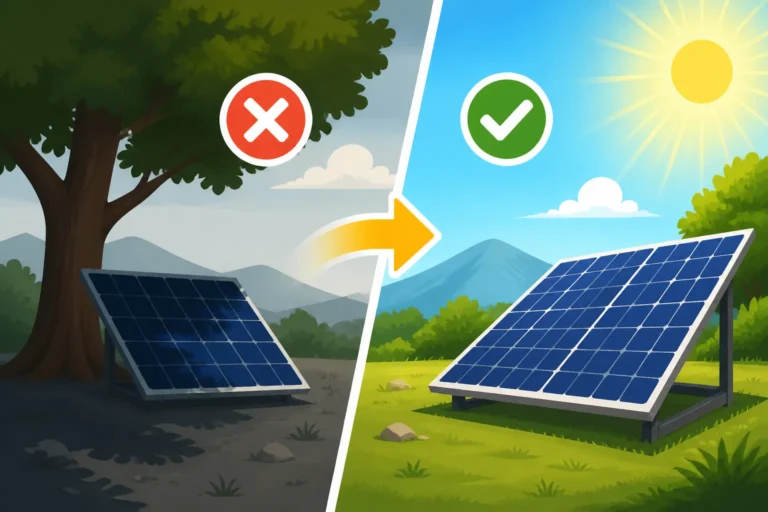
- Shading Issues: If your solar panels are prone to partial shading, an MPPT controller is often a better performer. PWM controllers are less effective at optimizing power harvest under shaded conditions.
- Higher Efficiency Desired: When you need every watt-hour you can get, or if your solar resources are limited (e.g., cloudy climates, short winter days), the 10-30% efficiency gain offered by an MPPT controller over a PWM can be substantial. For a comprehensive look at optimizing your setup, consider our article on How to Calculate Off-Grid Solar Needs.
Ultimately, the choice between PWM and MPPT often comes down to budget, system size, and efficiency goals. Don't be afraid to upgrade if your needs evolve; it's part of the journey toward a more robust off-grid system.
Final Considerations for a Robust Off-Grid System
Sizing your PWM charge controller correctly is a huge step, but it’s just one piece of the puzzle. For your off-grid system to truly sing, you need to ensure all the components are harmoniously integrated and working together effectively. This involves more than just wires and calculations; it’s about understanding the whole picture.
Integrating Other System Components
Your charge controller doesn’t operate in a vacuum. It’s an integral part of a larger ecosystem that includes your solar panels, battery bank, and inverter.
- Battery Bank Voltage: We've touched on this, but it bears repeating: your PWM controller's nominal voltage rating (e.g., 12V, 24V, 48V) must match your battery bank's nominal voltage. If you have a 12V battery bank, you need a 12V PWM controller. Trying to charge a 12V battery with a 24V PWM controller (or vice-versa) won't work and can damage components. When you're figuring out How Many Batteries for an Off-Grid System, always consider this voltage matching first.
- Inverter Compatibility: Your inverter is what converts the DC power from your batteries into AC power for your standard household appliances. The inverter's input voltage range needs to match your battery bank voltage, which in turn matches your charge controller. A common mistake is buying a 12V inverter for a system that's been designed around a 24V battery bank. Ensure your inverter can handle the full current draw from your battery bank without issues. Brands like Victron Energy and Renogy offer integrated inverter-chargers that streamline this process, often including advanced battery management features.
- Fuses and Breakers: Safety is paramount in any electrical system. You must incorporate appropriate fuses and breakers. There should be an overcurrent protection device (OCPD) between your solar array and the charge controller, and another between the charge controller and the battery bank. The size of these fuses/breakers is determined by the maximum current that will flow through that part of the circuit, typically slightly above your calculated maximum operating current (Imp) for the solar side, and based on the controller's output and battery bank's capacity for the battery side. Always follow Off-Grid Solar Wiring Best Practices and consult local electrical codes, even for off-grid applications.
- Battery Monitoring: While not directly part of the sizing equation, a good battery monitor is invaluable for understanding the health and state of charge of your battery bank. It can help you see if your charge controller is doing its job effectively and if your system is appropriately sized for your daily energy consumption. Knowing your battery's actual state of charge is crucial for extending its lifespan and ensuring you don't run out of power unexpectedly.
By considering all these elements in conjunction with your PWM charge controller, you're not just building a collection of parts; you're creating a cohesive, reliable, and safe off-grid power solution that will serve you well for years to come. Thinking about the big picture from the start will save you countless headaches and unexpected costs down the line.
PWM Charge Controller Sizing Quick Reference
Component Parameter Panel Connection Calculation / Consideration Why it Matters to The struggle to achieve truly reliable and cost-effective air conditioning in your off-grid tiny home, RV, or cabin is a very real challenge many self-sufficient folks face. It's not just about comfort; overheating can be a safety issue for electronics and even for us humans! This guide will help you understand how to pick the right air conditioner for your off-grid solar setup, focusing on efficiency and system compatibility to keep you cool without draining your battery bank.
Understanding Off-Grid Air Conditioning Demands
When you’re running on solar, every watt matters. Air conditioning is notoriously power-hungry, which means a standard AC unit from your grid-tied past simply won’t cut it. To avoid disappointment and an empty battery bank, we need to approach off-grid cooling with a focus on efficiency and careful selection.
Why Standard Air Conditioners Don’t Work for Off-Grid Solar
The air conditioner you probably have in your traditional grid-tied home is a power beast. These units are designed with the assumption of an endless, cheap supply of electricity. They typically have high starting (surge) currents and continuous running wattages that can easily overwhelm most residential off-grid solar systems, especially those using standard 12V or 24V battery banks. Imagine your typical window AC unit: it might draw 1,000-1,500 watts *running*, and its starting surge can be 3-5 times that for a brief moment. A small 3,000-watt inverter would struggle, or even trip, trying to handle that kind of surge, and your battery bank would be depleted in mere hours, even on a sunny day.
Furthermore, traditional AC units, even smaller ones, are often designed for intermittent use on the grid, not continuous operation from a finite energy source like a battery bank. They lack the sophisticated variable speed compressors and advanced inverter technology that makes modern, energy-efficient units suitable for off-grid. The sheer inefficiency and massive power draw of conventional units make them financial black holes for off-grid systems, requiring an absurdly large (and expensive) solar array and battery bank just to run them for a few hours.
Key Factors for Off-Grid AC Selection: Efficiency and Type
When you’re trying to keep cool off-grid, efficiency isn’t just a nice-to-have; it’s absolutely essential. The type of air conditioner you choose will make or break your cooling strategy.
Energy Efficiency Ratings (SEER, EER): Look for AC units with high SEER (Seasonal Energy Efficiency Ratio) and EER (Energy Efficiency Ratio) ratings. These numbers tell you how much cooling an AC unit provides per watt of electricity consumed. The higher the number, the more efficient the unit. A minimum SEER of 16-18 is a good starting point for off-grid applications, but aiming for 20+ SEER will significantly reduce your power consumption. Investing in a highly efficient unit upfront will save you thousands of dollars in solar panels, batteries, and the wear and tear on your inverter over the life of your system. This is a critical factor when figuring out your Off-Grid Solar Cost: Complete Breakdown.
Types of Off-Grid Friendly AC Units:
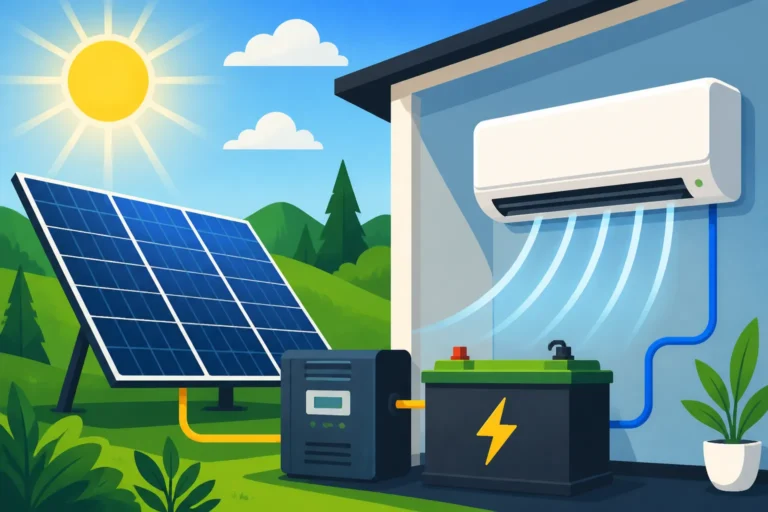
- Mini-Split Heat Pumps: These are the superstars of off-grid air conditioning. They are incredibly efficient, often boasting SEER ratings well over 20, and their inverter-driven compressors allow them to ramp up and down, matching the cooling load precisely. This means no huge starting surges and much lower continuous draws. They are quiet, effective, and can also provide heating, making them versatile. Brands like Senville, MrCool, and Pioneer are popular choices in the off-grid community for their affordability and performance.
- 12V/24V DC Air Conditioners: These units are designed specifically for mobile or off-grid applications, running directly off your battery bank without the need for an inverter. They are common in RVs, trucks, and boats. While they avoid inverter losses, their cooling capacity is generally smaller, and they can still consume a fair amount of DC power. They are great for small spaces but might not cut it for a larger cabin.
- Portable AC Units (with caveats): While readily available and seemingly convenient, most portable AC units designed for grid-tied use are highly inefficient for off-grid purposes. They typically have lower SEER ratings and often require an external exhaust hose, which can be less effective in smaller spaces. There are some newer "solar-ready" portable units appearing, but scrutinize their efficiency deeply before committing.
- Swamp Coolers/Evaporative Coolers: These aren't true air conditioners, but they can be a very low-power cooling solution in dry climates. They work by evaporating water, which cools the air. They won't dehumidify or cool to the same extent as a refrigerant-based AC, but they are incredibly efficient and can make hot, dry days much more bearable.
Calculating Your Off-Grid Air Conditioning Needs
Before you even think about buying an AC unit, you need to understand how much power it will demand from your solar system. This involves calculating its actual power draw and then translating that into the solar panels and battery capacity you’ll need.
Estimating AC Wattage and Daily Consumption
The key to successful off-grid AC is to start with realistic expectations. First, determine the BTU (British Thermal Units) needed to cool your space. A general rule of thumb is 20 BTUs per square foot, but factors like ceiling height, insulation, window area, and climate significantly impact this. Online BTU calculators can help you get a closer estimate.
Once you have your BTU requirement, look for units with corresponding cooling capacity. Now, for the critical part: actual wattage. Don't just look at the nominal wattage; look for the "rated cooling input power" or "power consumption" in watts. For mini-splits, this figure will be lower than for traditional units of the same BTU.
Let's do an example:
Suppose you need a 9,000 BTU mini-split. A highly efficient model might draw around 600-800 watts continuously while running.
- Running Watts: Let's say 700 watts.
- Hours of Operation: How many hours a day will it run? If it's 8 hours on a hot day:
- Daily Watt-hours: 700 watts * 8 hours = 5,600 Wh (or 5.6 kWh).
This 5.6 kWh per day is the bare minimum you'd need to generate and store. This is the first step in understanding How Much Solar to Run An Air Conditioner efficiently.
- Daily Watt-hours: 700 watts * 8 hours = 5,600 Wh (or 5.6 kWh).
Translating AC Demand to Solar Panels and Batteries
Now, let’s take that daily watt-hour consumption and figure out what it means for your solar array and battery bank. This is where your calculations for How to Size an Off-Grid Solar System become very concrete.
For Solar Panels:
You need to generate that 5.6 kWh daily, plus account for system inefficiencies (inverter, battery charging) and days with less sun.
- Account for Inefficiencies: Let's assume a 15% system loss (inverter, charge controller, wiring). So, 5.6 kWh / 0.85 = ~6.6 kWh.
- Peak Sun Hours: Determine your average daily peak sun hours. This varies greatly by location and time of year. Use resources like PVWatts or local solar irradiance maps. For example, if you average 5 peak sun hours:
- Required Panel Wattage: 6,600 Wh / 5 hours = 1,320 watts.
You'd need approximately 1,320 watts of solar panels. That could be four 350W panels or five 270W panels. Remember, this is for average conditions. In winter or during extended cloudy periods, you'd need significantly more, or a robust backup plan.
- Required Panel Wattage: 6,600 Wh / 5 hours = 1,320 watts.
For Batteries:
Your battery bank needs to store enough energy to run the AC for the desired hours, plus provide days of autonomy (backup for cloudy days).
- Daily AC Load: 5.6 kWh = 5,600 Wh.
- System Voltage: Let's assume a 48V system (highly recommended for AC loads to reduce current and cable size).
- Battery Capacity (Ah): 5,600 Wh / 48V = 116.67 Ah.
- Depth of Discharge (DOD): For Lithium Iron Phosphate (LiFePO4) batteries, you can safely discharge to 80-90%. For lead-acid, 50% is the practical limit. Let's use LiFePO4 at 80% DOD.
- Usable Capacity Needed: 116.67 Ah / 0.80 = 145.8 Ah.
You'd need about 146 Ah of 48V LiFePO4 battery capacity per day of AC use. If you want 3 days of autonomy, you'd need 146 Ah * 3 = 438 Ah at 48V. This would equate to roughly a 21 kWh battery bank (438 Ah * 48V). This gives you an idea of How Many Batteries for an Off-Grid System when air conditioning is in the mix.
- Usable Capacity Needed: 116.67 Ah / 0.80 = 145.8 Ah.
These calculations highlight that even efficient off-grid AC requires a substantial investment in both solar panels and battery storage. It's often the single largest power consumer and therefore the biggest driver of overall system cost.
Choosing the Right AC Unit for Your Off-Grid Lifestyle
The market for energy-efficient cooling solutions is constantly evolving. Making the right choice means looking beyond just BTUs and finding a unit that truly fits the demands and constraints of your off-grid system.
Comparing Mini-Split Brands and Models
When it comes to highly efficient, off-grid friendly air conditioning, mini-split heat pumps are usually the top recommendation. These units, designed for zonal heating and cooling, offer exceptional performance and flexibility.
- Senville, MrCool, Pioneer: These are some of the most popular brands that off-gridders consider. They offer a range of BTU sizes (from 9,000 to 36,000 BTUs) and high SEER ratings (often 18-23 SEER). Many models from these brands are also "DIY friendly," meaning some come pre-charged with refrigerant lines that don't require a special vacuum pump or HVAC technician for installation. This can significantly reduce your Off-Grid Solar Installation Cost. They are readily available on platforms like Amazon and through specialized HVAC distributors.
- Variable Speed Compressors: The key feature to look for in any mini-split is its variable speed (or "inverter-driven") compressor. This technology allows the unit to constantly adjust its output to match the precise cooling demand, rather than cycling on and off at full power. This eliminates massive start-up surges and maintains a more consistent temperature, leading to huge energy savings and less stress on your inverter and battery bank.
- Low Ambient Operation: If you plan to use your mini-split for heating in colder climates, look for models with "low ambient operation" features. These units can continue to efficiently extract heat from the air even when outdoor temperatures drop below freezing, making them a dual-purpose heating and cooling solution.
When researching, always check the specific product's rated cooling input power (watts) at its different fan speeds and operating conditions. Don't just go by the maximum BTU capacity; focus on the actual power draw during typical operation.
Special Considerations for Tiny Homes and RVs
Tiny homes and RVs have unique needs that influence AC selection.
- Space Constraints: Both types of dwellings are limited in space, so the physical size and footprint of the indoor and outdoor units matter. Mini-splits typically have slim indoor units that can be mounted high on a wall, and compact outdoor units.
- Insulation and Sealing: This is paramount. A well-insulated tiny home or RV with properly sealed windows and doors will require a much smaller (and therefore less power-hungry) AC unit. Investing in superior insulation upfront will yield massive dividends in energy savings for heating and cooling. For a tiny home, consider R-value per inch of wall thickness and air sealing strategies. For an RV, consider adding Reflectix or similar insulation to windows and improving door seals.
- 12V/24V DC Specific Units: For RVs and smaller tiny homes, dedicated 12V or 24V DC air conditioners can be an excellent choice. Brands like Mabru Power, Dometic, and Nomadic Cooling offer units designed to run directly from your DC battery bank. This bypasses the inverter, eliminating inversion losses (typically 10-15%) and reducing overall power consumption. While they may have lower BTUs, their direct DC operation makes them incredibly efficient for smaller spaces, and they often integrate well into existing RV electrical systems. They can be more expensive per BTU than mini-splits, but the overall system cost might be lower due to not needing as large an inverter.
- Mounting and Vibration: For RVs, consider how the outdoor unit of a mini-split will be mounted to withstand road vibrations, or if a rooftop RV AC unit is more practical despite often being less efficient. Dedicated RV AC units like those from Dometic or Coleman are designed for mobile use but are generally not as efficient as inverter mini-splits.
Ultimately, the best AC unit for your off-grid lifestyle is one that is perfectly matched to your specific needs, your system's capabilities, and the environmental conditions you'll be operating in. Don't underestimate the importance of robust Off-Grid Solar System Design Basics when planning for AC.
Optimizing Your System for Air Conditioning
Even with the most efficient AC unit, you’ll still be looking at a significant energy draw. Therefore, optimizing your entire off-grid system to support air conditioning is crucial. This means a holistic approach to energy management, generation, and storage.
Integrating Inverters, Charge Controllers, and Generators
For an AC-heavy off-grid setup, careful component integration is paramount.
- Inverter Sizing: Your inverter is the bridge between your DC battery bank and your AC appliances. For an air conditioner, you'll need a pure sine wave inverter capable of handling the AC unit's continuous running wattage, plus a safety margin. While mini-splits largely eliminate the massive starting surge of traditional ACs, they still require a robust inverter. If your 9,000 BTU mini-split draws 700 watts, a 2000W or 3000W inverter (like models from Victron or Sol-Ark) would be a good fit, providing headroom for other loads and protecting the inverter from overload. Remember to factor in the total simultaneous load of all your AC appliances, not just the AC unit itself. For more details on this, check out How to Size an Off-Grid Inverter.
- Charge Controller Capacity: While we focused on sizing PWM controllers earlier, for systems with AC, you'll likely be moving towards MPPT charge controllers due to the larger solar array requirements. MPPT controllers are significantly more efficient, especially when your panel voltage is much higher than your battery voltage (e.g., high-voltage grid-tie panels charging a 48V battery). This extra efficiency translates directly into more power for your AC, especially on marginal solar days. Our guide on Best MPPT Charge Controllers can offer excellent insights.
- Generator Backup: For most off-grid systems relying on AC, a backup generator is almost a necessity. There will be cloudy spells, extended heat waves, or unexpected high usage days where your solar array simply can't keep up. An inverter generator (like those from Honda or Yamaha) is ideal because it's fuel-efficient and produces clean power suitable for sensitive electronics. Look for models with auto-start capabilities that can be integrated with your inverter/charger for seamless operation, kicking in automatically when battery voltage drops below a set threshold. This allows you to comfortably run your AC even when the sun isn't shining, making your system much more reliable, as discussed in Cost of Adding a Generator to Off-Grid Solar.
Energy Conservation Strategies for Cooling
Even the best solar system has its limits, and a smart off-gridder knows that the cheapest watt is the one you don’t use. Implementing energy conservation strategies is just as important as having efficient equipment.
- Passive Cooling Design: If you're building or renovating, incorporate passive cooling elements. This includes proper orientation (minimize west-facing windows), adequate insulation (walls, roof, floor), strategic shading (awnings, pergolas, deciduous trees), light-colored roofing materials to reflect heat, and cross-ventilation. These design choices can drastically reduce your cooling load, meaning you can get away with a smaller (and cheaper) AC unit and solar system.
- Ventilation and Air Flow: Before turning on the AC, try to cool your space naturally. Use ceiling fans or strategically placed portable fans to create airflow and help evaporate sweat, making you feel cooler even if the ambient temperature hasn't dropped much. Open windows at night to bring in cool air and close them, along with blinds/curtains, during the day to keep the heat out.
- Minimize Internal Heat Gains: Appliances, electronics, and even cooking can generate a lot of heat indoors. Use a grill or outdoor cooking methods during hot weather. Opt for LED lighting which produces very little heat. Unplug electronics when not in use. Shower during the coolest parts of the day.
- Zonal Cooling: Instead of trying to cool your entire off-grid home, focus on cooling the areas where you spend most of your time. This is where mini-splits excel, as they allow you to cool individual rooms or zones efficiently. You might run a small AC in your bedroom at night, but rely on fans and passive cooling for living areas during the day. This "spot cooling" approach significantly reduces overall energy consumption.
By combining meticulous planning, high-efficiency equipment, and smart energy conservation, you can absolutely enjoy comfortable air conditioning in your off-grid sanctuary without constantly worrying about power. It’s about balance and making every watt count.
Disclaimer
Please remember that the information provided in this guide is for educational purposes only. Off-grid solar system design and installation involve electrical work that can be dangerous. Always consult with qualified professionals and adhere to all local electrical codes and regulations. Incorrect installation or sizing can lead to equipment damage, fire, or serious injury.