How to Match Panels to a Charge Controller
One of the most common headaches for anyone venturing into off-grid solar is figuring out how all the pieces fit together, especially when it comes to the technical bits like matching your solar panels to your charge controller. It's a real head-scratcher, feeling like you could fry your expensive equipment if you make the wrong move, and nobody wants that. This guide is here to clear up that confusion, giving you a clear, practical roadmap to ensure your panels and charge controller work together harmoniously, keeping your battery bank happy and your power flowing.
Understanding the Core Components of Your Off-Grid System
Before we dive deep into the matching process, let's take a moment to really understand what each of these crucial components does. Think of it like learning about the different instruments in an orchestra before you try to conduct them. Each has a specific role, and when they work together, they create something beautiful – in our case, reliable off-grid power.
The Role of Solar Panels
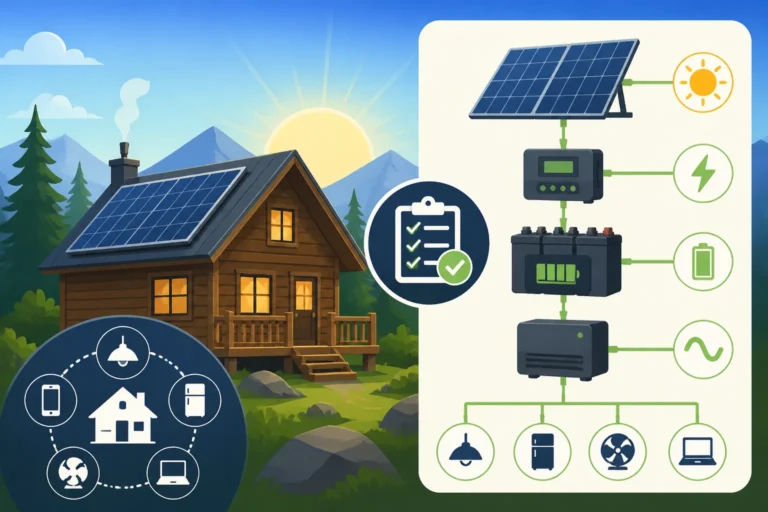
Your solar panels are the workhorses of your system; they're essentially miniature power plants on your roof or ground mount. They capture sunlight and convert it into DC (Direct Current) electricity. When you look at a solar panel's specifications, you'll see a few key electrical characteristics that are absolutely vital for matching purposes:
- Voc (Open-Circuit Voltage): This is the maximum voltage the panel can produce when it's not connected to anything (no load). It's highest in cold weather, which is an important consideration for your charge controller's maximum input voltage rating. Ignoring this can lead to serious damage to your charge controller.
- Vmp (Maximum Power Voltage): This is the voltage at which the panel produces its maximum power under standard test conditions. This is the voltage you'll typically see when the panel is actively charging your batteries through a properly functioning system.
- Imp (Maximum Power Current): This is the current (amperage) the panel produces at its maximum power voltage.
- Isc (Short-Circuit Current): This is the maximum current the panel can produce if its positive and negative terminals are directly connected (a "short circuit"). Like Voc, this is a maximum value and is critical for sizing your charge controller's current handling capacity and circuit breakers.
- Pmax (Maximum Power Output): This is the panel's wattage, calculated by Vmp x Imp, and it tells you how much power it can generate.
Understanding these values is the first step in knowing what your solar array is capable of and, more importantly, what your other components need to be able to handle. When you're looking at different options, remember that choosing the Best Off-Grid Solar Panels for your specific needs will significantly impact the overall efficiency and cost-effectiveness of your system.
The Importance of the Charge Controller
Now, if solar panels are the power generators, the charge controller is the system's brain and bodyguard. Its primary job is to manage the power flowing from your solar panels to your battery bank. Without it, your batteries would likely be overcharged, undercharged, or subjected to dangerous voltage fluctuations, severely shortening their lifespan and potentially causing a fire hazard.
Here's what a charge controller does:
- Regulates Voltage and Current: It ensures that the power going into your batteries is at the correct voltage and current for safe and efficient charging. It prevents overcharging by tapering off the charge as the battery approaches full capacity.
- Protects Batteries: It guards against overcharging, over-discharging (by disconnecting the load if the battery voltage drops too low), and reverse current flow at night (when panels don't produce power, they can actually drain batteries).
- Maximizes Charge Efficiency: Especially with MPPT (Maximum Power Point Tracking) controllers, it actively seeks the optimal voltage and current point from your solar panels to extract the most power possible, often boosting efficiency significantly, particularly on cloudy days or when panel temperature varies. If you're weighing your options, our guide on MPPT vs PWM Charge Controllers goes into much greater detail.
Choosing the right charge controller is just as important as choosing your panels. It truly is the unsung hero that keeps your whole off-grid solar system running smoothly and your batteries healthy. For a deeper dive into selection, check out our guide on How to Choose an Off-Grid Charge Controller.
The Crucial Matching Process: Solar Panels and Charge Controllers
This is where the rubber meets the road! Matching your panels to your charge controller isn't about guesswork; it's about understanding a few key electrical principles and doing some straightforward calculations. Get this right, and your system will be robust and reliable. Get it wrong, and you could face inefficiencies, damaged components, or even safety risks.
Voltage Compatibility: Getting it Right
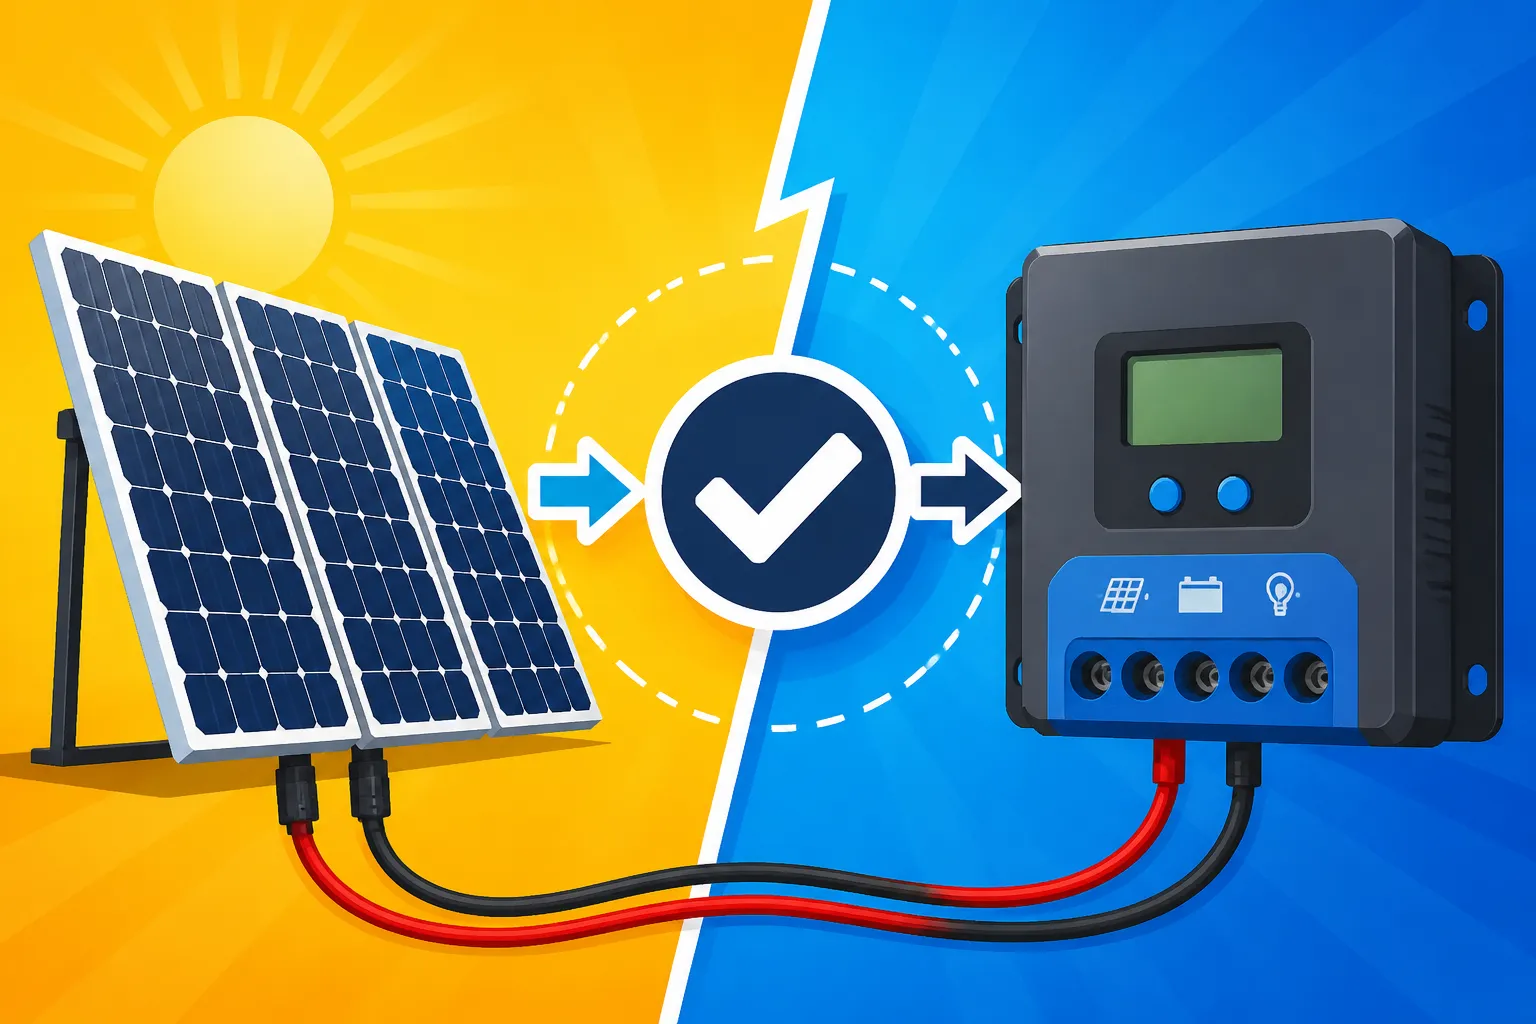
The most critical aspect of matching is ensuring voltage compatibility. Your charge controller has a maximum input voltage rating, and your battery bank has a nominal voltage (e.g., 12V, 24V, 48V). The charge controller essentially acts as a bridge, stepping down the voltage from the panels to match what your batteries need.
- Battery Bank Voltage First: The very first thing you need to determine is your battery bank's nominal voltage. This is typically 12V, 24V, or 48V for most off-grid setups. Your charge controller needs to be rated for this output voltage. For instance, a 12V battery bank requires a charge controller capable of charging 12V batteries. For larger systems, understanding 12V vs 24V vs 48V: Which to Choose is paramount.
- Charge Controller's Input Voltage: This is where your panel's Voc comes into play. Your solar array's total Voc (especially when panels are wired in series) must never exceed the maximum PV input voltage rating of your charge controller.
- PWM Controllers: These controllers are less flexible. The nominal voltage of your solar array usually needs to match the nominal voltage of your battery bank. For example, a "12V" solar panel (which might have a Vmp around 17-18V) is typically matched with a 12V battery bank. Wiring multiple panels in series will increase the voltage too much for a PWM controller designed for a single battery bank voltage.
- MPPT Controllers: These are much more versatile. They can take a much higher input voltage from your solar array and efficiently convert it down to the battery bank voltage. This is incredibly efficient, especially for larger systems or in colder climates where Voc can spike. For example, an MPPT controller designed for a 12V battery bank might have a maximum PV input voltage of 100V or even 150V. This allows you to wire several panels in series to achieve higher voltages, reducing current and allowing for smaller gauge wiring.
- Cold Weather Considerations: Remember that Voc (open-circuit voltage) increases as the temperature drops. If you live in a cold climate, you must factor this into your calculations. A panel with a Voc of 22V at 25°C might reach 26V or more at 0°C. You need to ensure your charge controller's maximum input voltage can handle the absolute highest Voc your array could produce under the coldest conditions. Many manufacturers, like Renogy, provide temperature coefficients in their panel specifications, which you can use to calculate this.
Current Considerations: Avoiding Overload
Beyond voltage, the current (amperage) flowing from your panels to your charge controller is equally important. An undersized charge controller, in terms of current, will overheat and fail, potentially damaging other components.
- Maximum Input Current: Your charge controller has a maximum rated input current (amperage). This is the absolute maximum current it can handle from your solar array.
- Calculating Array Current:
- Parallel Wiring: When you wire panels in parallel, their voltages remain the same, but their currents add up. If you have two panels with an Isc of 6A each, wiring them in parallel will result in a combined Isc of 12A.
- Series Wiring: When you wire panels in series, their voltages add up, but their current remains the same as a single panel. Two panels with an Isc of 6A wired in series will still have a combined Isc of 6A.
- Safety Factor: It's crucial to add a safety factor to your maximum short-circuit current (Isc) when sizing your charge controller and circuit breakers. The National Electrical Code (NEC) typically recommends multiplying the Isc by 1.25 (125%). So, if your array's combined Isc is 12A, you should look for a charge controller capable of handling at least 15A (12A x 1.25). This buffer accounts for unexpected spikes or optimal conditions where panels might slightly exceed their rated current.
Power Management: Efficiency and Sizing
While voltage and current are the direct electrical parameters, power (wattage) ties it all together, especially for efficiency.
- Total Array Wattage: This is the sum of the maximum power output (Pmax) of all your solar panels. This tells you how much power your array can potentially generate.
- Charge Controller Wattage Capacity: Most charge controllers are rated by their maximum input voltage and current, not necessarily a direct wattage. However, you can calculate the maximum wattage an MPPT charge controller can handle by multiplying its maximum input voltage by its maximum input current. For example, a 100V, 40A MPPT controller can theoretically handle up to 4000W of solar panels (though you'd still consider the efficiency losses and the safety factor).
- MPPT Efficiency Advantage: MPPT controllers are designed to operate your panels at their Maximum Power Point (MPP), which means they continuously adjust to find the sweet spot of voltage and current that produces the most power. This means they can take a high-voltage, low-current input from your panels and transform it into the appropriate voltage and higher current needed to charge your batteries, with very little energy lost in the conversion. This is why you can often oversize your solar array wattage by a small percentage (e.g., 10-20%) compared to the controller's nominal wattage capacity to account for less-than-ideal conditions, though always ensuring Voc and Isc limits are respected.
Getting these elements right is foundational to a successful off-grid experience. Proper Off-Grid Solar System Sizing Guide will always prioritize a careful match between these primary components.
Step-by-Step Guide to Matching Your Components
Alright, let's break this down into actionable steps. You don't need an engineering degree to figure this out, just a calculator and the specifications sheets for your chosen solar panels and potential charge controllers.
Determine Your Battery Bank Voltage
This is your starting point, your anchor. Everything else in your electrical system will revolve around this voltage. Are you planning for a small setup, perhaps for a Cost to Power an RV with Solar or a shed, which might use a 12V battery bank? Or are you aiming for a larger system, like for a full-sized cabin or tiny home, which typically benefits from 24V or even 48V systems?
Let's assume you've decided on a 12V, 24V, or 48V battery bank. Your charge controller must be able to output power at this voltage. For example, if you have two 12V batteries wired in series for a 24V system, your charge controller needs to be a 24V unit. This decision also impacts how you size your inverter and other DC loads. Our guide on How Many Batteries for an Off-Grid System can help solidify this choice.
Calculate Your Solar Array's Maximum Voltage and Current
Once you know your battery bank voltage, you can start calculating what your solar array will produce. You'll need the spec sheet for your chosen solar panels. Let's work with an example:
Imagine you have four 100-watt solar panels.
- Each panel specs: Voc = 22V, Vmp = 18V, Isc = 5.8A, Imp = 5.5A.
- You want to charge a 24V battery bank.
-
Series Wiring (Voltage Adds Up, Current Stays Same):
- If you wire two panels in series:
- Combined Voc: 22V + 22V = 44V
- Combined Isc: 5.8A (current stays the same)
- Combined Vmp: 18V + 18V = 36V
- Combined Imp: 5.5A
- If you wire four panels in series:
- Combined Voc: 22V * 4 = 88V
- Combined Isc: 5.8A
- Combined Vmp: 18V * 4 = 72V
- Combined Imp: 5.5A
Check out How to Wire Solar Panels in Series for more details.
- If you wire two panels in series:
-
Parallel Wiring (Current Adds Up, Voltage Stays Same):
- If you wire two panels in parallel:
- Combined Voc: 22V (voltage stays the same)
- Combined Isc: 5.8A + 5.8A = 11.6A
- Combined Vmp: 18V
- Combined Imp: 5.5A + 5.5A = 11A
Refer to How to Wire Solar Panels in Parallel for a comprehensive guide.
- If you wire two panels in parallel:
-
Series-Parallel Combinations:
- If you have four panels and want to maintain a reasonable voltage while boosting current, you could do two strings of two panels in series, and then connect those two strings in parallel.
- Each string: Voc = 44V, Isc = 5.8A.
- Connecting two such strings in parallel:
- Combined Voc: 44V (voltage stays the same as one string)
- Combined Isc: 5.8A + 5.8A = 11.6A
- Combined Vmp: 36V
- Combined Imp: 5.5A + 5.5A = 11A
- If you have four panels and want to maintain a reasonable voltage while boosting current, you could do two strings of two panels in series, and then connect those two strings in parallel.
-
Add a Cold Weather Factor to Voc: Find the temperature coefficient for Voc on your panel's spec sheet (e.g., -0.3%/°C). If your local lowest temperature is -10°C, and the standard test condition (STC) is 25°C, that's a 35°C drop.
- Increase in Voc = (35°C * 0.3%) = 10.5%
- New Voc for a single panel = 22V * 1.105 = 24.31V
- For the series-parallel example above (Voc = 44V): New combined Voc = 44V * 1.105 = 48.62V. This is the absolute maximum voltage your charge controller needs to handle.
-
Apply a Safety Factor to Isc: Multiply your array's maximum Isc by 1.25.
- For the series-parallel example (Isc = 11.6A): Max current for controller = 11.6A * 1.25 = 14.5A.
Select the Right Type and Size of Charge Controller
Now you have your target numbers: battery voltage, maximum array Voc (with cold weather factor), and maximum array Isc (with safety factor). You're ready to pick a charge controller.
-
Choose MPPT or PWM:
- PWM: If you have a small system (e.g., one or two panels) and your panel's nominal voltage closely matches your battery bank's nominal voltage, a PWM controller might be sufficient and more budget-friendly. However, they are less efficient and less flexible.
- MPPT: For almost all other scenarios, especially larger systems, multiple panels, or different panel and battery voltages, an MPPT controller is the clear winner. Its efficiency gains often offset its higher upfront cost. Many reliable brands like Victron Energy or Renogy offer excellent MPPT controllers.
-
Match Voltage Ratings:
- Your chosen charge controller must have a maximum PV input voltage rating that is higher than your calculated maximum array Voc (including the cold weather factor). For our example, with a max Voc of 48.62V, a charge controller rated for 60V or 100V input would be suitable.
- The charge controller's output voltage must match your battery bank's nominal voltage (e.g., 12V/24V auto-sensing, or specifically 24V).
-
Match Current Ratings:
- Your chosen charge controller must have an amperage rating that is higher than your calculated maximum array Isc (including the 1.25 safety factor). For our example, with a max current of 14.5A, a 20A or 25A charge controller would be appropriate. Buying something like a Renogy Wanderer Li 20A PWM Charge Controller on Amazon, for instance, would be well-suited for a 12V setup with a single panel string, but not for our 24V example. For that, you'd need an MPPT controller with higher voltage capacity.
It's tempting to save a few bucks by going with a smaller controller, but an undersized unit is a recipe for disaster. Always err on the side of slightly oversizing your charge controller's capacity. Think of it as investing in the longevity and safety of your entire system. If you're unsure about the overall picture, taking a look at How to Calculate Off-Grid Solar Needs can help tremendously.
Common Mismatching Mistakes and How to Avoid Them
Even with all the calculations, it's easy to make a few common blunders that can cause trouble down the line. Being aware of these pitfalls can save you a lot of grief, expense, and troubleshooting headaches.
Overlooking Open-Circuit Voltage (Voc)
This is perhaps the most frequent and dangerous mistake. Many people focus only on the Vmp (voltage at maximum power) or the "nominal" voltage of their panels, completely forgetting about Voc.
- Why it's a problem: The charge controller sees the open-circuit voltage from your panels before it starts regulating. If this Voc, especially when panels are wired in series and amplified by cold temperatures, exceeds the charge controller's maximum PV input voltage rating, you can permanently damage the controller. This usually results in a fried controller, meaning no charging and a sudden, unwelcome expense.
- How to avoid it: Always calculate the maximum Voc of your entire series string of panels, and always factor in the lowest possible ambient temperature your system will experience. Consult your panel's temperature coefficients. When buying a charge controller, double-check that its maximum PV input voltage rating comfortably exceeds this calculated peak Voc. This is a critical point for ensuring your Off-Grid Solar Equipment Explained functions safely and efficiently.
Underestimating System Current
Another common mistake is undersizing the charge controller's amperage capacity. This might happen if you calculate based on Imp (maximum power current) rather than Isc (short-circuit current) or forget the safety factor.
- Why it's a problem: If your solar array can produce more current than your charge controller is rated to handle, the controller will be consistently overloaded. This leads to excessive heat generation, reduced efficiency, and ultimately, premature failure of the charge controller. In extreme cases, it could pose a fire risk due to overheating.
- How to avoid it: Always calculate the maximum Isc of your entire parallel or series-parallel array. Then, multiply that Isc by 1.25 (the NEC safety factor) to determine the minimum current rating your charge controller needs. It’s always better to go slightly larger on the charge controller's current rating than to risk having it run at its absolute maximum capacity all the time. Our article on How to Size a Charge Controller goes through these calculations in depth.
Ignoring Future Expansion
Many off-gridders start small and plan to expand their systems later. However, failing to account for this in the initial design can lead to costly reconfigurations.
- Why it's a problem: If you buy a charge controller that's perfectly sized for your current small array, but then decide to double your panel count in a year, you might find your controller is no longer adequate. You'll either have to buy another charge controller (adding complexity) or replace your existing one entirely (adding expense).
- How to avoid it: When you're first designing your system, think about your potential future power needs. If you anticipate adding more panels down the line, consider investing in a charge controller with a higher maximum PV input voltage and current capacity than you currently need. For example, if your current array needs a 20A controller, but you know you'll add more panels later that would push it to 35A, purchasing a 40A controller upfront can save you money and hassle in the long run. Planning for expansion can be a smart move, and we cover it in more detail in How to Plan for Future Expansion.
By being mindful of these common mistakes, you can significantly increase the chances of a smooth, successful, and durable off-grid solar setup. Don't be afraid to double-check your numbers! You can also prevent Common Off-Grid Sizing Mistakes by doing your homework upfront.
Compatibility Quick Reference Table
To help you visualize how panels and charge controllers typically align, here's a quick reference table. Remember, these are general guidelines, and always refer to the specific datasheets for your equipment and perform your own calculations, especially for Voc and Isc with safety factors.
| Battery Bank Voltage | MPPT Controller Min. Input Voltage | MPPT Controller Max. Input Current (Example) | PWM Controller Panel Voltage Match |
|---|---|---|---|
| 12V | 30V (e.g., 60V or 100V rated) | 20A, 30A, 40A | "12V" Nominal Panel (Vmp ~17-19V) |
| 24V | 50V (e.g., 100V or 150V rated) | 30A, 40A, 60A | "24V" Nominal Panel (Vmp ~34-38V) |
| 48V | 100V (e.g., 150V or 250V rated) | 40A, 60A, 80A | "48V" Nominal Panel (Vmp ~68-76V) |
Note: MPPT controllers are designed to take a higher voltage input from panels and step it down efficiently to match the battery bank voltage. PWM controllers generally require the panel array's nominal voltage to match the battery bank's nominal voltage.
Final Thoughts on Matching Panels to a Charge Controller
Getting your off-grid solar system to perform optimally, and safely, truly hinges on correctly matching your solar panels to your charge controller. It might feel like a lot of numbers and technical jargon at first, but with a clear understanding of Voc, Isc, and your system's target battery voltage, you're well on your way. Take your time, do the math (and then double-check it!), and always remember those crucial safety factors for voltage spikes in cold weather and current capacity.
By diligently following these steps, you’ll not only ensure your expensive components are protected and efficient, but you’ll also build a reliable foundation for your off-grid lifestyle. It's about empowering yourself with knowledge, rather than just buying components and hoping for the best. Happy solar living!
Disclaimer
The information provided in this guide is for educational and informational purposes only and is not intended as professional electrical advice. Always consult with a qualified electrician or solar professional before designing, installing, or modifying any off-grid solar system to ensure compliance with local codes and safety standards. Working with electricity can be dangerous, and improper installation can lead to serious injury or property damage.