Best Charge Controller for Off-Grid
One of the biggest headaches when diving into off-grid solar is trying to figure out which pieces of equipment are truly essential and how they all fit together. It’s easy to get overwhelmed by the jargon and the sheer number of options, especially when it comes to something as vital yet often overlooked as the charge controller. Many folks new to solar think panels and batteries are all you need, but neglecting the charge controller is like trying to drive a car without a steering wheel—it’s just not going to end well. This guide will cut through the confusion, helping you understand precisely what a charge controller does and, more importantly, how to choose the best one to protect your investment and keep your off-grid system running smoothly.
Understanding the Heart of Your Off-Grid System: The Charge Controller
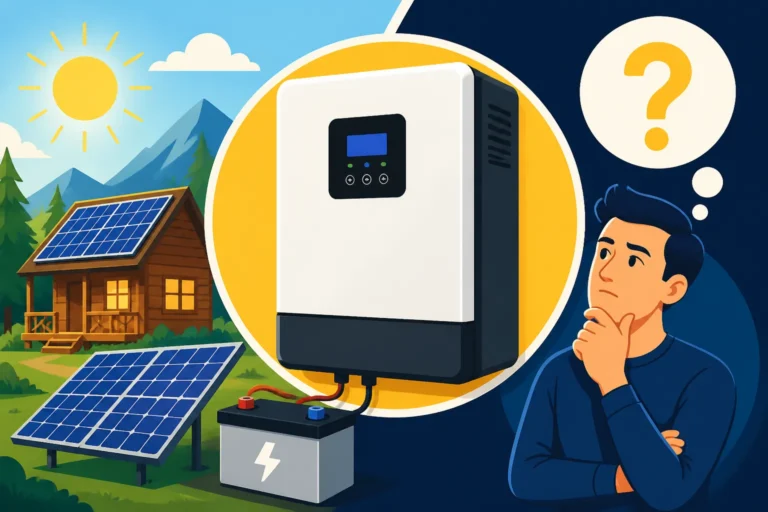
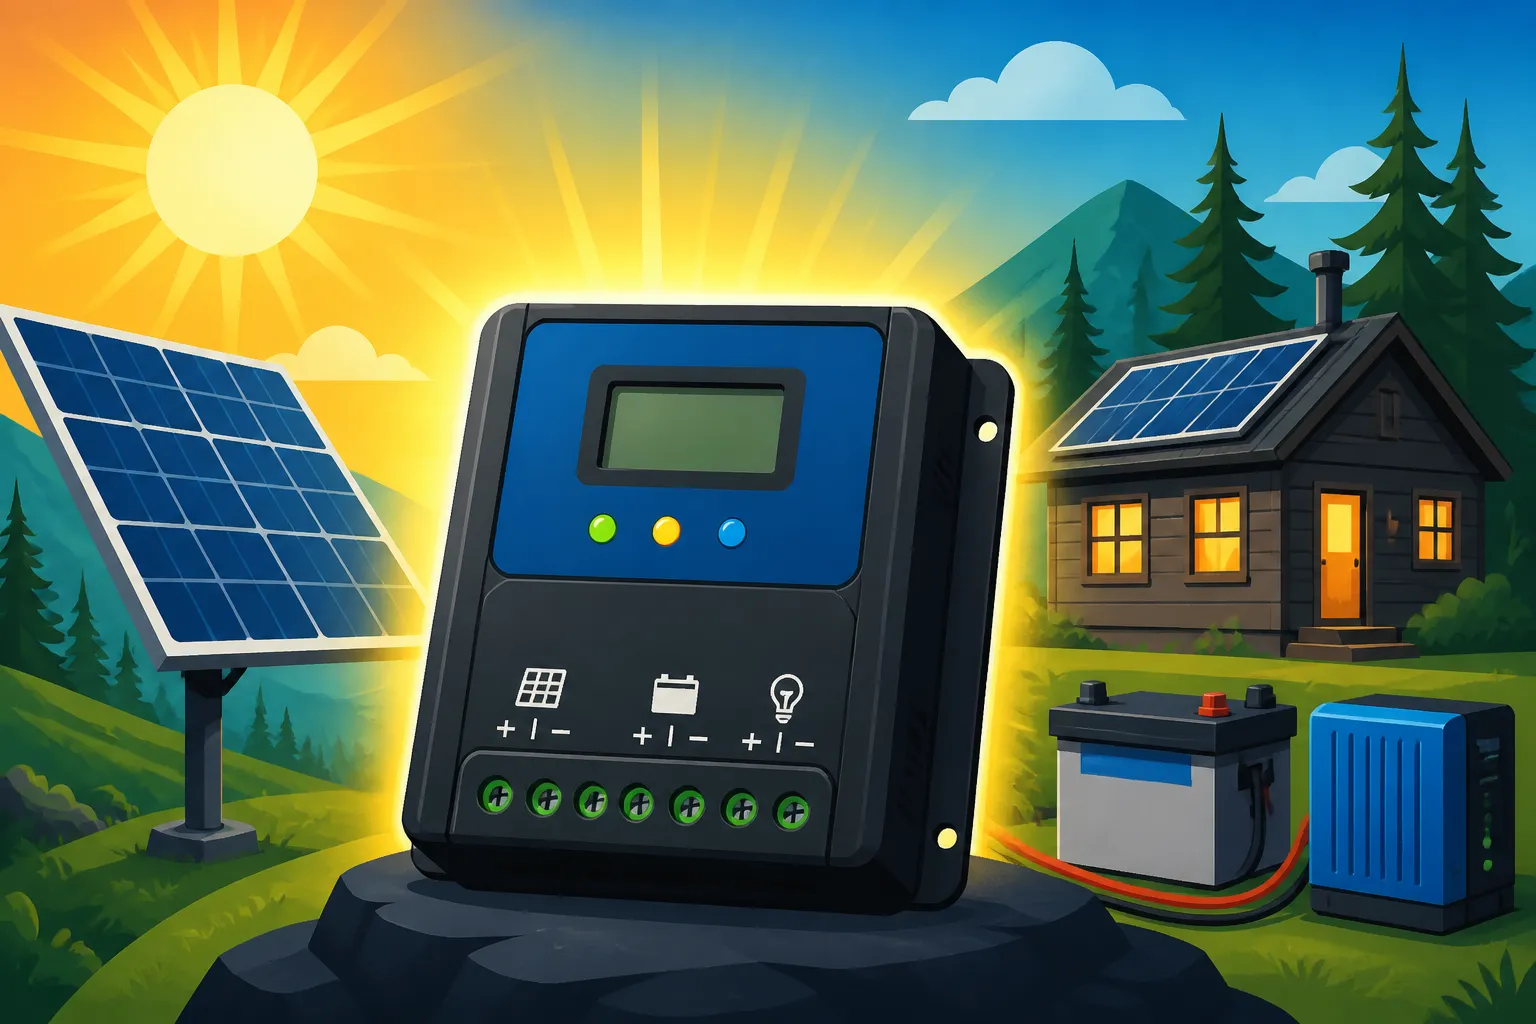
Imagine your solar panels as the busy bees collecting nectar (solar energy) and your battery bank as the beehive storing that precious honey. Without a beekeeper to manage the flow, the hive could get overfilled, or the bees might stop producing altogether if conditions aren't right. In your off-grid solar system, the charge controller is that essential beekeeper. It’s a seemingly small component that plays a monumental role in the health, safety, and longevity of your entire setup.
What Exactly Does a Charge Controller Do?
At its core, a charge controller is a voltage and/or current regulator. Its primary job is to ensure your batteries are charged safely and efficiently without being overcharged or deep-discharged. Think about it: the sun’s intensity varies throughout the day, and so does the output from your solar panels. Without regulation, this fluctuating power could damage your expensive battery bank, drastically shortening its lifespan or even causing dangerous thermal runaway in certain battery chemistries. The charge controller steps in to prevent these issues by constantly monitoring the battery's state of charge and adjusting the power flow from the solar panels accordingly. It’s all about maintaining a healthy balance.
Furthermore, a good charge controller isn't just a safety guard; it's also a performance optimizer. It ensures your batteries receive the correct multi-stage charging, which is crucial for maximizing their capacity and lifespan. This typically involves a bulk charge phase where maximum current is delivered, an absorption phase where the voltage is held constant while current tapers off, and a float phase that maintains a trickle charge to keep batteries topped off without overcharging. For more advanced systems, some controllers even offer equalization, a controlled overcharge for lead-acid batteries to balance cell voltages, or temperature compensation to adjust charging parameters based on ambient temperatures, which is a lifesaver for batteries in extreme climates.
Why a Charge Controller is Non-Negotiable for Off-Grid Setups
Some people might think, "Can't I just connect my panels directly to my batteries?" While technically possible for very small, unregulated panels (like those on a tiny garden light), for any meaningful off-grid system, the answer is a resounding no. Skipping the charge controller is a surefire way to destroy your batteries, leading to costly replacements and potential safety hazards. Without a controller, your batteries would simply keep absorbing power as long as the sun is shining, eventually boiling off their electrolyte (in lead-acid batteries) or causing irreversible damage, especially to sensitive lithium batteries. This overcharging can lead to swelling, venting of gases, and even fire in worst-case scenarios.
Beyond preventing overcharging, a quality charge controller also protects against reverse current flow at night, where batteries could discharge back into the panels. It often includes low-voltage disconnect features, which prevent your batteries from being deep-discharged by your loads. Deep discharging can be just as damaging as overcharging, severely reducing battery capacity and cycle life. In essence, the charge controller safeguards your entire electrical investment, ensuring that your solar panels generate power effectively and that your batteries store and deliver that power reliably for years to come. It’s truly the silent guardian of your off-grid power independence. Understanding Off-Grid Solar System Components Explained really highlights how each piece, especially the charge controller, fits into the grand scheme.
MPPT vs. PWM: Deciphering the Technologies
When you start looking into charge controllers, you'll quickly encounter two main technologies: Pulse Width Modulation (PWM) and Maximum Power Point Tracking (MPPT). This is often where confusion sets in, as both do the job of regulating power, but they do it in fundamentally different ways with significant implications for efficiency and cost. It’s not just about choosing one; it’s about understanding which one makes the most sense for your specific off-grid dreams.
The Efficiency Champion: MPPT Charge Controllers
MPPT (Maximum Power Point Tracking) charge controllers are the advanced, high-efficiency option, and for good reason. They are designed to extract the absolute maximum power available from your solar panels, especially under varying conditions like temperature fluctuations or partial shading. Here's how they work: solar panels have a "maximum power point" (MPP) where they produce the most power (voltage x current). This point isn't constant; it changes with temperature and solar irradiance. An MPPT controller constantly scans the output of your solar panels to find this MPP and then converts the higher voltage DC output from the panels down to the lower voltage required to charge your battery bank, while simultaneously boosting the current.
This sophisticated tracking and conversion process means that an MPPT controller can increase charging efficiency by 10% to 30% or even more compared to a PWM controller, particularly in colder weather when panel voltage is higher, or when panels are designed for higher system voltages (like 60V or 100V panels charging a 12V or 24V battery bank). For instance, if your 200-watt solar panel is producing at 17V and your 12V battery needs charging, a PWM controller would effectively "waste" the extra voltage, bringing the panel's voltage down to the battery's level. An MPPT, however, converts that excess voltage into additional amperage, pushing more power into your batteries. This makes them ideal for larger systems, systems with higher voltage panel arrays, or situations where maximizing every watt from your panels is critical, like in areas with limited sunlight. Many people building substantial systems find that the initial higher Cost of an Off-Grid Solar Charge Controller for an MPPT is quickly offset by the increased power harvest and faster battery charging.
The Reliable Workhorse: PWM Charge Controllers
PWM (Pulse Width Modulation) charge controllers are the simpler, more affordable, and still very effective alternative, particularly for smaller off-grid applications. Instead of actively tracking the maximum power point, a PWM controller works by rapidly turning the connection between the solar panels and the battery on and off. When the battery is undercharged, the controller allows a direct connection, essentially matching the panel's voltage to the battery's voltage. As the battery approaches full charge, the controller reduces the "on" time of this connection, sending short pulses of current to maintain a float charge, hence "pulse width modulation."
While less efficient than MPPT controllers, PWM controllers are robust, reliable, and have fewer complex components, which translates to a lower price point. They are best suited for smaller systems, like those powering a remote cabin for weekend use, an RV for occasional trips, or basic lighting in a shed. They work most efficiently when the nominal voltage of your solar array matches that of your battery bank (e.g., 12V panels charging a 12V battery, or 24V panels charging a 24V battery). If you're building a smaller, budget-conscious system or if your panels are physically close to your battery bank and you're not dealing with extremely cold temperatures, a PWM controller can be an excellent, cost-effective choice. Understanding MPPT vs PWM Charge Controllers in detail will help you make an informed decision for your setup.
When to Choose Which Type
Deciding between MPPT and PWM really boils down to balancing efficiency, cost, and the specific needs of your off-grid system.
Choose MPPT if:
- You have a larger system: For residential homes, full-time RVs, or cabins with significant power needs, the efficiency gains of an MPPT are invaluable.
- You're using higher voltage solar panels: If your panels have an open-circuit voltage (Voc) significantly higher than your battery bank's nominal voltage (e.g., 20V+ panels for a 12V battery, or 40V+ panels for a 24V battery), an MPPT controller will efficiently convert that excess voltage into usable current.
- You're dealing with cold temperatures: Solar panels perform better in cold weather, producing higher voltage. An MPPT controller can capture this extra voltage and convert it into more charging power.
- You have long wire runs between panels and batteries: Higher voltage from the panels (which MPPT can utilize) reduces current, which in turn minimizes voltage drop over long cable lengths, saving you money on thicker wires.
- You want to maximize every watt: If power is precious, or your solar array size is limited, an MPPT ensures you get the most out of your panels.
Choose PWM if:
- You have a smaller, simpler system: For basic setups like charging a single battery for lights in a shed, or a small RV system, PWM can be perfectly adequate.
- Your budget is tight: PWM controllers are generally significantly less expensive than MPPT controllers.
- Your panel voltage matches your battery voltage: If you're using 12V panels to charge a 12V battery, or 24V panels for a 24V battery, a PWM controller will be quite efficient.
- You're not facing extreme temperatures: In moderate climates, the efficiency difference might not be as pronounced as in very cold conditions.
Many leading brands, including Renogy, offer excellent options in both MPPT and PWM categories, allowing you to choose based on your specific system requirements and budget. For example, a basic 100W off-grid system for a hunting cabin might do perfectly fine with a robust PWM controller, while a 2000W system for a full-time tiny home would almost certainly benefit immensely from an MPPT. The table below offers a quick comparison to help you visualize the differences.
| Feature | MPPT Charge Controller | PWM Charge Controller |
|---|---|---|
| Efficiency | High (92-98%), especially with voltage mismatch | Moderate (75-85%), best with matched voltages |
| Cost | Higher upfront cost | Lower upfront cost |
| Panel Voltage | Can handle higher panel voltage than battery bank | Panel voltage should match battery voltage |
| Current Output | Converts excess voltage into higher charging current | Regulates by switching, does not boost current |
| Best For | Larger systems, colder climates, long wire runs, maximizing power output | Smaller systems, budget-conscious builds, matched voltage arrays |
| Technology | Sophisticated electronic tracking and conversion | Simple switching of power to the battery |
Key Factors to Consider When Choosing Your Charge Controller
Alright, now that we've demystified MPPT and PWM, let's drill down into the nitty-gritty details that will truly guide your selection. Picking the right charge controller isn't just about the technology; it’s about ensuring it's the perfect fit for your specific solar array, battery bank, and overall energy needs. Overlooking these crucial details can lead to inefficiency, system damage, or simply a frustrating off-grid experience.
System Voltage and Amperage Matching
This is paramount. Your charge controller must be compatible with your system's nominal voltage (e.g., 12V, 24V, 48V). Attempting to use a 12V controller in a 24V system, or vice-versa, will simply not work and could damage components. More critically, you need to match the amperage rating of the charge controller to your solar array's output. To do this, you’ll first need to calculate your total solar panel wattage. Let's say you have four 100-watt panels, totaling 400 watts.
For a 12V battery system:
- Maximum Amps = Total Watts / Battery Voltage = 400W / 12V = 33.3 Amps.
- You'll want a charge controller rated for at least 30% more than this, to account for optimal sun conditions and cold weather panel boosts. So, 33.3 A * 1.3 = ~43.3 Amps. You'd look for a 40A or 50A charge controller.
For a 24V battery system (with the same 400W array, perhaps wired differently):
- Maximum Amps = 400W / 24V = 16.67 Amps.
- Adding the 30% buffer: 16.67 A * 1.3 = ~21.67 Amps. A 20A or 30A controller would be appropriate.
It’s crucial to know the open-circuit voltage (Voc) of your solar panels and ensure the charge controller can handle it. If you're using an MPPT controller, it needs to have a maximum input voltage rating that exceeds the Voc of your entire solar array (if wired in series) or individual panels (if wired in parallel). Exceeding the controller's maximum input voltage can permanently damage it. When you're determining How to Size a Charge Controller, these calculations are absolutely non-negotiable for safe and efficient operation.
Battery Compatibility and Charging Profiles
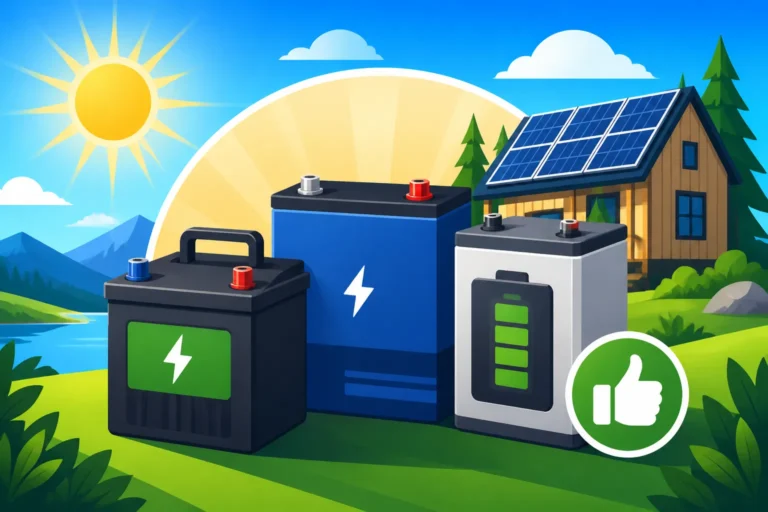
Not all batteries are created equal, and your charge controller needs to know the difference. The type of battery you're using—whether it's flooded lead-acid, sealed AGM, Gel, or the increasingly popular Lithium Iron Phosphate (LiFePO4)—will dictate the specific charging algorithm the controller needs to apply. Each battery chemistry has unique voltage requirements for its bulk, absorption, and float charge stages, as well as specific temperature compensation needs.
For example, LiFePO4 batteries require a precise charging profile that is different from lead-acid batteries. They typically charge at a higher voltage, don't require float charging (or a very low one), and are sensitive to overcharging and undercharging. Using a charge controller with a "lead-acid only" profile on a LiFePO4 battery can quickly lead to damage or reduced lifespan. Look for controllers that explicitly state compatibility with your battery type, ideally offering user-adjustable settings for voltage, current, and duration of each charging stage. Many modern controllers, especially MPPT ones from brands like Victron or EG4, offer pre-set profiles for common battery types and allow for custom programming, which is a huge advantage for optimizing battery health. This really plays into the wider discussion on How Battery Choice Affects Off-Grid Cost and performance.
Advanced Features and Monitoring
Beyond its core function, many charge controllers come packed with features that can enhance your off-grid experience, making monitoring and management much easier.
- LCD Display/Remote Meter: A built-in or optional remote display allows you to monitor vital system information at a glance: battery voltage, charging current, solar panel input, accumulated energy, and error codes. This is incredibly helpful for keeping tabs on your system's performance without needing external tools.
- Bluetooth/Wi-Fi Connectivity: Many modern controllers offer Bluetooth or Wi-Fi connectivity, allowing you to monitor and control your system from your smartphone or computer via a dedicated app. This is a game-changer for convenience, especially if your charge controller is in a hard-to-reach location. Brands like Victron Energy are renowned for their robust Bluetooth connectivity and user-friendly apps.
- Data Logging: Some controllers record historical data, showing you daily, weekly, or monthly power generation and consumption. This data is invaluable for optimizing your system, identifying trends, and planning for future expansion.
- Load Control Output: Many smaller controllers include a DC load output that can be programmed to disconnect loads when the battery voltage drops too low. This prevents deep discharge and extends battery life, especially useful in small cabin or RV setups.
- Auxiliary Port/Programmable Relay: More advanced controllers might have an auxiliary port or programmable relay that can be used for various functions, such as starting a backup generator when battery voltage is low, controlling a vent fan for a battery box, or triggering other external devices.
When considering these features, think about your lifestyle. If you're full-timing in an RV or living completely off-grid, comprehensive monitoring and remote control can be a huge comfort. For a basic setup, a simple display might be all you need.
Environmental Considerations and Durability
Off-grid systems often operate in challenging environments, so the durability and environmental ratings of your charge controller are important.
- Ingress Protection (IP) Rating: This rating indicates how well the device is protected against solids (like dust) and liquids (like water). For indoor installations, a lower IP rating might be acceptable, but if your controller is in a damp basement, a dusty workshop, or a potentially exposed area, look for a higher IP rating (e.g., IP22 for indoor use, IP65 for outdoor/dusty conditions).
- Operating Temperature Range: Extreme temperatures can affect electronic components. Ensure your chosen controller is rated for the temperature extremes it will experience in your location. Some controllers may derate their output at very high temperatures to protect internal components.
- Ventilation: All charge controllers generate some heat, especially MPPT units when converting high voltage. Adequate ventilation is crucial for their longevity. Consider where you plan to install it and ensure there’s enough airflow or space around it.
A charge controller from a reputable manufacturer found on platforms like Amazon will often have clear specifications regarding these environmental factors. Don’t skimp on these details, as a controller failing due to environmental stress can leave you without power precisely when you need it most.
Top Brands and Models: What's Out There?
With so many options on the market, it can be tough to narrow down the best charge controller for your specific needs. However, a few brands consistently stand out for their reliability, efficiency, and range of features. These companies have earned their stripes in the off-grid world, offering solutions from the simple to the highly sophisticated.
Leading MPPT Charge Controller Brands
When it comes to MPPT technology, quality, efficiency, and robust features are paramount. These brands are often at the forefront of innovation:
- Victron Energy: Widely regarded as a top-tier brand in the off-grid community, Victron Energy offers an extensive range of MPPT charge controllers, from small 75V/15A units to large 250V/100A models. Their SmartSolar series is particularly popular, boasting integrated Bluetooth for easy setup and monitoring via their VictronConnect app. Victron controllers are known for their exceptional build quality, high efficiency, and advanced charging algorithms, making them suitable for everything from small RVs to large residential off-grid homes. They come with a premium price tag, but many off-gridders consider it a worthwhile investment for reliability and performance.
- MidNite Solar: For those building larger, more complex off-grid systems, MidNite Solar is a perennial favorite. Their Classic series controllers are renowned for their incredibly high input voltage capabilities (up to 200V or 250V), which allows for longer series strings of solar panels, reducing wire costs and voltage drop. They also feature extensive programming options, advanced monitoring, and robust construction designed for harsh environments. MidNite controllers are often found in large homesteads and commercial off-grid installations.
- OutBack Power: Another industry veteran, OutBack Power offers a solid line of MPPT charge controllers, including the FLEXmax series. These controllers are celebrated for their strong build, high efficiency, and seamless integration with other Outback components like inverters. They are known for their ability to handle high power inputs and are a reliable choice for medium to large off-grid systems where system synergy is desired.
- EG4: Gaining significant traction, EG4 (via Signature Solar) offers high-performance MPPT charge controllers that often provide excellent value. Their models are known for their robust build and ability to handle various battery chemistries, including popular server-rack style LiFePO4 batteries. They often come with user-friendly displays and strong current ratings, making them a compelling option for those looking for powerful and flexible solutions without breaking the bank.
- Renogy: A hugely popular brand for both beginners and experienced off-gridders, Renogy offers a wide array of MPPT charge controllers that strike a good balance between features, performance, and price. Their Rover series MPPT controllers are a common sight in RVs, vans, and smaller cabin setups. They typically feature LCD displays, multiple battery type compatibility (including LiFePO4), and often come with optional Bluetooth modules for app-based monitoring. Renogy is a great entry point for those seeking reliable MPPT performance without the top-tier cost of some other brands. You can often find a good selection of Best MPPT Charge Controllers on platforms like Amazon.
Reliable PWM Charge Controller Options
While MPPTs grab a lot of headlines, PWM controllers still have a vital role, especially in simpler, more budget-friendly systems. Here are some trusted names:
- Morningstar: If you're looking for a PWM controller that prioritizes reliability and durability, Morningstar is a fantastic choice. Their products, such as the SunSaver and ProStar series, are known for their extremely long lifespan, robust construction, and efficient, well-designed charging algorithms. While they might be pricier than other PWM options, their proven track record in demanding off-grid environments makes them a favorite for those who value absolute dependability.
- Renogy: Again, Renogy steps up to the plate with a range of reliable PWM charge controllers, such as their Wanderer and Voyager series. These are often included in their complete solar kits and are perfect for smaller applications like charging a single battery for a boat, a small shed, or basic RV power. They are straightforward to install and operate, usually featuring a simple display and preset battery type selections. For many, a Renogy PWM controller found on Amazon offers an excellent balance of cost and functionality for their initial off-grid ventures.
- HQST: Often seen as a budget-friendly yet capable alternative, HQST offers reliable PWM controllers that are great for small, entry-level solar setups. They provide basic yet effective battery protection and are a good option if you're building a minimal system or expanding an existing small array.
Integrated Solutions and All-in-One Units
For those who prefer a more streamlined setup, some manufacturers offer all-in-one inverter-chargers that also include a built-in MPPT charge controller. These units combine the functions of an inverter (converting DC battery power to AC household power), a battery charger (if you have a generator or shore power backup), and a solar charge controller into a single device.
Brands like Victron (MultiPlus/Quattro series with external MPPTs or their EasySolar line with integrated MPPT), Sol-Ark, and Growatt offer popular hybrid inverter solutions with integrated MPPT controllers. These can simplify wiring, reduce component count, and often provide a more cohesive system management experience through a single monitoring interface. While often more expensive upfront, they can offer significant advantages in terms of installation ease and system integration, making them a compelling option for those building a comprehensive off-grid home or a sophisticated RV electrical system. Before you decide, it's worth exploring guides like Best Off-Grid Solar Kits for Beginners to see if a pre-configured solution with an integrated controller might suit your needs.
Installation, Setup, and Common Mistakes to Avoid
So, you've done your homework and picked the perfect charge controller. Fantastic! But the journey isn't over. Proper installation and setup are just as critical as the selection process itself. Even the best charge controller can underperform or fail prematurely if not installed correctly. This section will walk you through best practices and highlight pitfalls to avoid, ensuring your system runs safely and efficiently from day one.
Best Practices for Wiring and Placement
When installing your charge controller, a few fundamental principles will make a world of difference:
- Proximity to Batteries: Your charge controller should always be installed as close to your battery bank as practically possible. The shorter the distance, the less voltage drop you'll experience between the controller and the batteries, which ensures more accurate voltage sensing and more efficient charging. For longer runs from the solar panels to the controller, a higher input voltage (which MPPT controllers allow) can help mitigate voltage drop.
- Proper Wire Sizing: This cannot be stressed enough. Undersized wires create resistance, leading to voltage drop and excessive heat, which wastes power and poses a fire hazard. Always consult a wire gauge chart and factor in the current rating and the length of your wire runs. The wires connecting the charge controller to the battery bank, and from the solar panels to the charge controller, are DC circuits carrying significant current and must be adequately sized. For instance, a 40A charge controller connected to a 12V battery might require 6 AWG or even 4 AWG cable for short runs, escalating for longer distances. Learning How to Size Wire and Cables is crucial for a safe installation.
- Fuses and Breakers: Always install appropriate fuses or circuit breakers on both the solar panel input side (between panels and controller) and the battery output side (between controller and batteries). These are critical safety devices that protect your equipment and prevent fires in case of a short circuit or overcurrent. The fuse on the battery side should be rated just above the controller's maximum output current, and the fuse on the solar input should be rated appropriately for the solar array's maximum current.
- Ventilation: All charge controllers generate heat, especially MPPT models when operating at full capacity. Install your controller in a well-ventilated area, avoiding enclosed spaces that could trap heat. Follow the manufacturer's recommendations for clearance around the unit. Overheating can significantly reduce the lifespan of your controller.
- Order of Connections: Follow the manufacturer's recommended connection sequence meticulously. Typically, it goes like this:
- Connect the battery wires to the charge controller.
- Connect the solar panel wires to the charge controller.
- (If applicable) Connect the load wires to the charge controller.
Never connect solar panels before the battery is connected, as this can cause voltage spikes that damage the controller. Always disconnect in the reverse order.
Programming Your Charge Controller for Optimal Performance
Once physically installed, your charge controller needs to be programmed to match your battery type and system voltage. This is where you fine-tune its performance and ensure the longevity of your battery bank.
- Battery Type Selection: Most controllers have an option to select your battery type (e.g., Flooded, Sealed/AGM, Gel, LiFePO4). Choose this setting accurately. If your controller allows for custom settings, that's even better, as you can input the exact voltage parameters recommended by your battery manufacturer.
- Charge Voltage Settings: For each battery type, there are specific voltage setpoints for bulk, absorption, and float stages. Consult your battery manufacturer's datasheet for the precise voltages. Many controllers come with factory presets, but verifying and, if possible, adjusting them to your battery's specifications will optimize charging. For LiFePO4 batteries, ensuring the correct absorption voltage and a very low or absent float charge is critical. You can find more specific guidance in our article on How to Set Charge Controller Parameters.
- Temperature Compensation: For lead-acid batteries, temperature compensation is vital. Colder batteries require higher charging voltages, and warmer batteries require lower voltages. Many controllers come with a remote temperature sensor that you attach to the battery bank, allowing the controller to automatically adjust charging voltages based on the battery's temperature. This significantly improves battery health and prevents damage in extreme climates. LiFePO4 batteries are less sensitive to temperature compensation for charging but can be permanently damaged if charged below freezing, so some controllers will have low-temperature cut-off features.
- Low Voltage Disconnect (LVD): If your controller has a load output, you can program the LVD setting. This is the voltage at which the controller will disconnect your DC loads to prevent the battery from discharging too deeply, which can cause irreversible damage. Set this according to your battery manufacturer's recommendations; for lead-acid, it might be around 11.5V-12V, and for LiFePO4, often around 10.5V-11V per 12V segment.
Troubleshooting Common Issues
Even with the best planning, sometimes things don't go as expected. Here are some common issues and troubleshooting tips:
- No Charging/Low Output:
- Check all connections: Loose wires are a common culprit. Ensure everything is tight and secure.
- Verify fuse/breaker status: A blown fuse or tripped breaker will stop power flow.
- Inspect solar panels: Are they shaded? Are they dirty? Check for physical damage.
- Check panel voltage at the controller: Use a multimeter to verify that voltage is reaching the controller from the panels. If not, the issue is upstream (panels or wiring).
- Check battery voltage at the controller: Is the battery connected and providing voltage to the controller?
- Controller settings: Has the correct battery type been selected? Are voltage parameters correct?
- Battery Not Fully Charging:
- Insufficient solar input: Do you have enough panels for your loads and battery size, especially considering weather and seasonal changes? You might need to consider How Many Solar Panels for Off-Grid Living to meet your demands.
- Degraded batteries: Older batteries might not hold a full charge.
- Incorrect charging parameters: Double-check your absorption and float voltages and absorption duration.
- Voltage drop: Check for excessive voltage drop on the battery cables.
- Overcharging/Overheating:
- Incorrect battery type setting: This is a major cause. Ensure it matches your battery.
- Temperature compensation issue: If the sensor is not connected or faulty, lead-acid batteries can be overcharged in warm weather.
- Insufficient ventilation: If the controller is overheating, it may not be able to regulate effectively.
- Faulty controller: In rare cases, the controller itself might be defective.
Many manufacturers, including Renogy, provide comprehensive troubleshooting guides in their manuals and on their websites. When facing issues, always start with the basics and systematically work through potential problems. Remember, proper installation and vigilant monitoring are your best friends in maintaining a reliable off-grid system. You can dive deeper into these topics with resources like Off-Grid Charge Controller Installation Mistakes to Avoid.
Maximizing Performance and Longevity of Your Charge Controller
Your charge controller, like any other piece of critical equipment, benefits from a bit of care and attention. Think of it as investing in the future reliability of your off-grid system. By following a few simple practices, you can ensure it continues to perform optimally and serves you well for many years, truly making your investment worthwhile.
Regular Maintenance and Inspection
While charge controllers are generally robust, they aren't entirely maintenance-free. A little proactive care goes a long way:
- Visual Inspection (Quarterly/Annually): Take some time to visually inspect your charge controller and its connections a few times a year. Look for any signs of wear, corrosion, or overheating (discolored wires or plastic). Check for loose connections, which can lead to resistance, heat, and poor performance. Ensure the area around the controller remains clear for proper ventilation. Dust and debris can accumulate over time, potentially impacting cooling.
- Cleaning: If your controller is in a dusty environment, gently clean any vents or cooling fins. Compressed air can be effective for removing dust from hard-to-reach areas. Make sure the power is disconnected before performing any cleaning.
- Firmware Updates: Some advanced MPPT charge controllers, particularly those with remote monitoring capabilities like Victron's SmartSolar range, occasionally receive firmware updates. These updates can improve performance, add new features, or fix bugs. If your controller supports it, keep an eye out for updates and install them as recommended by the manufacturer. This is easily done via their respective apps if they have Bluetooth or Wi-Fi connectivity.
- Check Monitoring Data: Regularly review your charge controller's historical data (if available) or current readings on its display or app. Look for consistent charging patterns, healthy battery voltage, and appropriate current delivery. Any significant deviations could indicate an underlying issue that needs investigation. For instance, if your system used to charge your batteries fully by midday but now struggles until late afternoon, it might point to panel degradation, shading, or a controller issue.
System Expansion and Upgrade Considerations
Life off-grid is dynamic, and your power needs might grow over time. Maybe you add a new appliance, or perhaps your family expands, requiring more energy. When it comes to expanding your solar array, your charge controller needs to be part of the plan:
- Controller Capacity: If you plan to add more solar panels, you need to ensure your existing charge controller can handle the increased current input. Refer back to the amperage calculations we discussed earlier. If your new panels push your array's maximum current beyond your controller's rated capacity, you'll need to either upgrade to a larger controller or add a second, separate charge controller (each with its own dedicated panel array).
- System Voltage Changes: If you're considering increasing your system voltage (e.g., from 12V to 24V or 48V) for greater efficiency or to accommodate larger loads, you will almost certainly need a new charge controller that is compatible with the higher voltage. Such an upgrade typically involves changes to your inverter and battery bank wiring as well, so it's a significant undertaking. When planning, reading up on Cost of Expanding an Off-Grid System can help you budget for potential component replacements.
- Battery Upgrades: If you switch battery chemistry (e.g., from lead-acid to LiFePO4), ensure your charge controller can support the new battery type and its specific charging profile. Many modern MPPT controllers offer configurable settings for different battery chemistries, but older or simpler PWM units might not. A new battery type will almost always necessitate at least a re-programming of your controller, if not a complete replacement.
Integrating with Other System Components
Your charge controller doesn't operate in a vacuum. It's a key part of a larger ecosystem of off-grid components:
- Battery Monitors: A dedicated battery monitor (like a shunt-based system from Victron or Renogy) provides much more accurate information about your battery's state of charge (SOC) and overall health than most charge controller displays alone. It measures actual current in and out of the battery, giving you precise amp-hour readings. Integrating a battery monitor alongside your charge controller gives you a clearer picture of your system's performance and helps you make informed decisions about energy usage.
- Inverters: Your inverter converts the DC power from your batteries into usable AC power for your appliances. While separate components, some advanced inverters can communicate with charge controllers (especially from the same brand) to optimize overall system performance, such as load shedding during low battery states or coordinating generator start/stop functions.
- Backup Generators: If you have a backup generator, some advanced charge controllers or inverter-chargers can be configured to automatically start the generator when battery voltage drops below a certain threshold. This ensures your batteries are topped up even during prolonged cloudy periods, providing seamless power. For those considering this, our guide on How to Add a Generator to Your Design offers practical advice.
By thinking of your charge controller not just as a standalone device but as an integral part of your entire off-grid energy system, you can ensure it works harmoniously with other components, providing you with reliable and efficient power for years to come. Ultimately, a well-maintained and correctly integrated charge controller is central to achieving true energy independence.
Disclaimer
The information provided in this guide is for general informational purposes only and does not constitute professional electrical or solar engineering advice. Off-grid solar system design and installation can be complex and involve significant electrical hazards. Always consult with a qualified solar professional or licensed electrician when designing, installing, or servicing an off-grid solar system. Follow all local codes, regulations, and manufacturer instructions for all components. Improper installation or maintenance can lead to property damage, serious injury, or death.