How to Install an Off-Grid Battery Monitor
It’s a scenario many of us have faced: you’re relying on your off-grid solar system, enjoying the peace and quiet, when suddenly your lights dim or your inverter starts beeping a mournful tune. You glance at your battery bank, maybe a simple voltage meter shows "low," but you have no real idea how much juice is left. This lack of clear insight can be incredibly frustrating and even damaging to your system. This guide is all about empowering you to take control by walking you through the straightforward process of installing an off-grid battery monitor, giving you the full picture of your power situation.
Why You Absolutely Need an Off-Grid Battery Monitor
Living off-grid is all about managing your resources, and electricity is no exception. A battery monitor isn't just a fancy gadget; it's a fundamental tool that provides critical data for optimizing your system, extending your battery life, and preventing unexpected power outages. Without one, you're essentially flying blind.
Beyond Simple Voltage Readings
Many folks start their off-grid journey with just a basic voltmeter, thinking it's enough. And for a quick glance, it can tell you something. But here's the kicker: voltage alone is a terrible indicator of your battery's true state of charge, especially with modern lithium (LiFePO4) batteries. Imagine driving your car and only having a speedometer, but no fuel gauge. You'd know you're moving, but not how much farther you can go!
Voltage fluctuates significantly based on load, temperature, and battery chemistry. A battery under heavy load might show a lower voltage, leading you to think it's nearly empty when it's still quite full. Conversely, a battery that's mostly depleted but has been resting might show a deceptively high voltage. A proper battery monitor goes beyond this, using a "shunt" to measure every electron flowing into and out of your battery bank, giving you a real-time, accurate percentage of your State of Charge (SoC%). This is the game-changer that prevents those frustrating moments when your power suddenly cuts out because your "low" battery was actually critically depleted.
Protecting Your Battery Bank's Longevity
Your off-grid battery bank is likely one of the most significant investments in your entire system. The lifespan of these batteries, whether they are lead-acid or lithium, is directly impacted by how well they are managed. Over-discharging, in particular, is a silent killer for almost all battery types. Repeatedly draining your batteries too low can drastically reduce their usable life, sometimes by years.
A quality battery monitor acts as your battery's guardian. By providing precise State of Charge readings, it allows you to prevent deep discharges, ensuring you stop using power or start charging before your batteries hit dangerously low levels. This isn't just about avoiding a blackout; it's about making sure your batteries last as long as their manufacturer intended, saving you from the significant expense and hassle of premature battery replacement. If you're wondering about the differences in battery technology, you might want to read our guide on LiFePO4 vs Lead-Acid Battery Cost.
Gaining True Energy Insight
Beyond just telling you how much charge you have left, a good battery monitor offers a treasure trove of data that helps you understand your entire off-grid energy ecosystem. You can see exactly how many amps are flowing in from your solar panels, how much your appliances are drawing, and even estimate the "time to empty" or "time to full" based on current consumption and charging rates.
This detailed insight is invaluable for optimizing your system. Are you thinking about adding a new appliance, like a small mini-split air conditioner? Your battery monitor can show you the real impact of your current loads, helping you determine if your existing system can handle the addition or if you need to consider an upgrade. It allows you to track patterns, identify energy vampires, and make informed decisions about your daily power usage. It’s like having a detailed energy accountant working for you 24/7, providing data that’s crucial for effectively managing your How to Calculate Off-Grid Solar Needs.
Essential Tools and Materials for Installation
Before you dive into the wiring, it’s always best to gather everything you need. There’s nothing worse than being halfway through a project and realizing you're missing a crucial component or tool. Think of it as preparing for a gourmet meal – you wouldn’t start cooking without all your ingredients and utensils ready!
The Battery Monitor Kit Components
At its core, an off-grid battery monitor system typically consists of three main parts:
- The Shunt: This is the brains of the operation. It's a precisely calibrated resistor that creates a tiny, measurable voltage drop when current flows through it. The monitor then uses this voltage drop to calculate the exact current (amps) flowing into or out of your battery bank. It’s crucial that all current to and from your battery passes through this shunt.
- The Display Unit: This is where you see all your critical information: State of Charge (SoC%), voltage, current, power (watts), and often "time to go" or "time to charge." These units can range from simple LCD screens to more advanced color displays, sometimes with touch capabilities. Many modern units also come with Bluetooth functionality, allowing you to monitor your system from your smartphone or tablet via an app. Popular choices often come from brands like Victron Energy (with their SmartShunt series) or even more budget-friendly options found on Amazon.
- The Wiring Harness: This usually includes a thin data cable to connect the shunt to the display unit and a smaller gauge wire to power the display itself, typically from your battery's positive terminal.
When you purchase a kit, these components will usually be bundled together. Just be sure to verify the shunt's current rating matches or exceeds your system's maximum current draw (e.g., a 500A shunt for a system that might draw 300A peak).
General Electrical Tools You'll Need
Having the right tools not only makes the job easier but also safer and ensures a professional-looking installation. Don't skimp on these!
- Screwdrivers: Both Phillips and flathead, for terminal connections and mounting.
- Wire Strippers/Crimpers: You'll need to strip insulation from wires and crimp terminals onto them. A good quality, ratcheting crimper for larger gauge battery cables is a worthwhile investment.
- Multimeter: Absolutely essential for verifying voltage, checking continuity, and troubleshooting. You'll use this to confirm your battery bank's voltage before and after connections, and to ensure no stray voltages are present.
- Drill: For mounting the display unit and potentially the shunt, if it doesn't have existing mounting points.
- Wire Cutters: For cutting wires to length.
- Socket/Wrench Set: For tightening battery terminal connections and securing the shunt.
- Headlamp or Good Lighting: Essential for working in cramped spaces or under dim conditions, especially when dealing with wiring.
Consumables and Safety Gear
Safety is paramount when working with electrical systems, especially high-current off-grid setups.
- Heat Shrink Tubing: For insulating crimped connections, giving them a clean, professional, and protected finish.
- Zip Ties or Cable Clamps: For neatly routing and securing cables, preventing tangles and strain.
- Electrical Tape: For temporary insulation or additional protection.
- Dielectric Grease: Optional, but recommended for battery terminals to prevent corrosion.
- Safety Glasses: Protect your eyes from errant wire clippings or sparks.
- Insulated Gloves: Provides an extra layer of protection when handling battery terminals and wiring.
- Fire Extinguisher (Type ABC): Have one readily accessible, just in case. It's better to have it and not need it.
Having these items ready will ensure a smooth and safe installation process.
Step-by-Step Installation Guide for Your Off-Grid Battery Monitor
Alright, let’s get down to the nitty-gritty! Installing a battery monitor might seem intimidating at first, but by breaking it down into manageable steps, you’ll find it’s a very achievable DIY project. Just remember, safety first! Always disconnect your power sources before making any major electrical connections.
Choosing the Right Location for the Shunt
The shunt is the heart of your battery monitoring system, and its placement is absolutely critical for accurate readings. It needs to be installed in a very specific way:
- Close to the Battery Bank: Ideally, the shunt should be located as close to your battery bank as possible. This minimizes the length of the main negative cable running to it, reducing voltage drop and making for a cleaner installation. Think of it nestled right beside your battery bank in your RV, cabin, or tiny home power shed.
- On the Negative Side of ALL Loads: This is the most crucial rule. Every single electron that leaves or enters your battery bank must pass through the shunt's sense resistor. This means the shunt is installed on the negative side of your battery system. The main negative cable from your battery bank will connect to one side of the shunt, and all other negative connections from your entire system – your inverter, charge controller, DC loads (like lights, fans, pumps), and any other negative wires – must connect to the other side of the shunt.
- Isolate the Shunt: You want only your battery bank’s main negative terminal connected to one side of the shunt, and all system negatives connected to the other. There should be no other negative connections directly to your battery bank itself once the shunt is installed. This ensures the shunt captures 100% of the current. If you have multiple negative busbars, ensure they all tie back into the system-side of the shunt.
Finding a dry, secure spot where it won't be exposed to moisture or excessive vibration, and where the cables can be routed cleanly, is key. Consider mounting it on a sturdy, non-conductive surface using screws or bolts, as some shunts can get slightly warm under heavy loads.
Wiring the Shunt to Your Battery Bank
This is where the magic happens. Take your time, double-check your connections, and remember to work safely.
- Disconnect All Power: Before you do anything else, disconnect all power sources. This means turning off your inverter, unplugging your solar panels (or covering them if they don't have a disconnect), and physically disconnecting the negative terminal from your battery bank first, followed by the positive. Safety first, always! You might want to refer to our comprehensive guide on How to Wire an Off-Grid Solar System for more details on system safety.
- Identify the Main Negative Battery Cable: This is the beefy cable that currently connects the negative terminal of your battery bank to your system's main negative busbar, or directly to your inverter and charge controller's negative terminals.
- Connect Battery Negative to Shunt: Take the main negative cable that was connected to your battery bank. Connect it to the "Battery Side" (or sometimes marked "Load Side") terminal on your shunt. This ensures that the only thing directly connected to your battery bank's negative terminal is the shunt itself.
- Connect System Negatives to Shunt: Now, you'll need a new, short, heavy-gauge negative cable (the same gauge as your existing main negative cable) to connect the "System Side" (or "Load Side" if the other was "Battery Side") of the shunt to your main negative busbar. All of your other system negatives – from your inverter, charge controller, DC loads, etc. – should already be connected to this main negative busbar or will now be connected to this new system-side of the shunt.
- Crucial Point: If you previously had any other negative wires directly connected to your battery bank (other than the main negative cable you just moved), you must move those wires to connect to the "System Side" of the shunt or your main negative busbar, which then connects to the system-side of the shunt. No current should bypass the shunt.
- Tighten Connections: Use appropriate wrenches or sockets to ensure all battery terminals and shunt connections are snug and secure. Loose connections can lead to resistance, heat, and inaccurate readings.
This setup ensures that all current flowing in and out of your battery bank must pass through the shunt, allowing for accurate measurement.
Connecting the Display Unit and Power
Once the shunt is in place and correctly wired, connecting the display unit is much simpler.
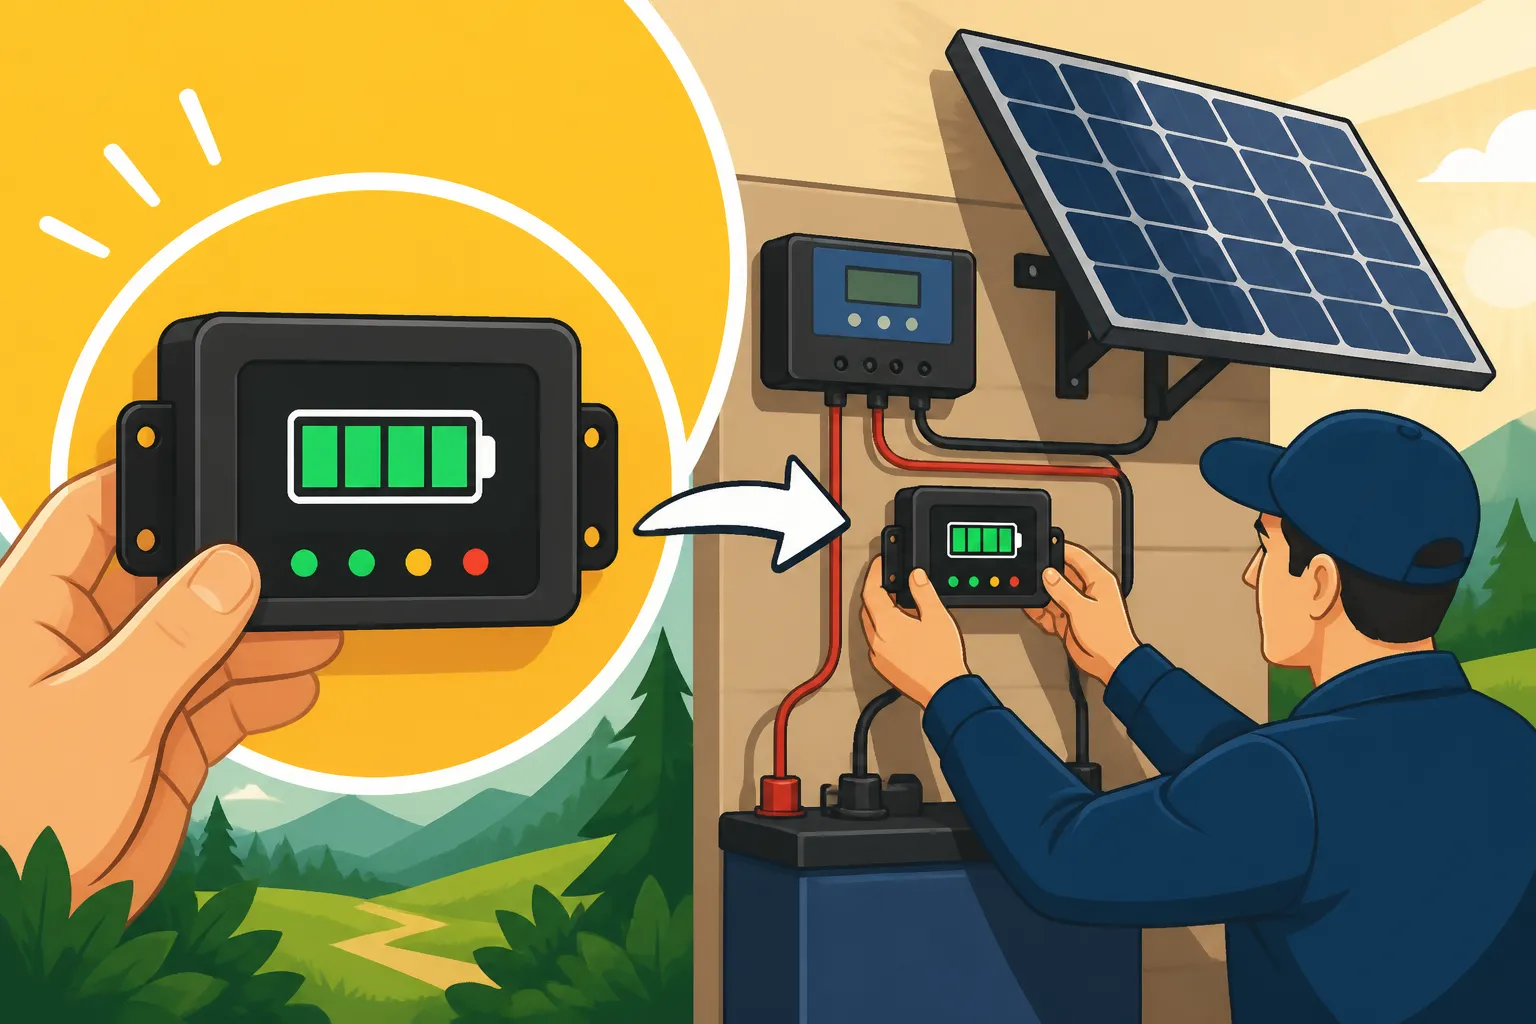
- Mount the Display: Choose an accessible and visible location for your display unit. This could be inside your RV control panel, on a wall in your cabin, or mounted near your main electrical panel. Drill pilot holes if necessary and secure the display using the provided mounting hardware. Ensure the location allows for easy routing of the data cable from the shunt and the power wire.
- Run the Data Cable: Connect the small data cable (often an RJ11 or proprietary connector) from the shunt to the corresponding port on your display unit. Route this cable neatly, using zip ties or cable clamps to secure it and keep it away from heavier power cables to minimize potential interference.
- Power the Display Unit: Most battery monitor displays require a small amount of power to operate. This is typically a small gauge wire that connects to the positive terminal of your battery bank (or a positive busbar that is also connected to your battery bank).
- Connect the positive wire from the display unit to the battery's positive terminal.
- Some shunts have a dedicated small terminal for this positive sense wire. Consult your monitor's manual. This small positive wire helps the monitor get an accurate voltage reading directly from the battery terminals.
- Add an inline fuse (usually a small 1A or 2A fuse) on this positive power wire, close to the battery, for safety.
- Reconnect Battery Power: Once all connections are secure and double-checked, carefully reconnect your battery's positive terminal, then the negative terminal. Turn on your inverter and reconnect your solar panels. Your display unit should now power on.
Initial Setup and Calibration
With everything wired, it's time to bring your monitor to life and make sure it’s giving you accurate information.
- Access Settings: Consult your battery monitor's manual to navigate to its setup menu. This might involve pressing a combination of buttons or using a connected app.
- Input Battery Parameters: This is where you tell the monitor about your battery bank. You’ll typically need to input:
- Battery Type: Select LiFePO4, AGM, Gel, Flooded Lead-Acid, etc. This helps the monitor understand charging characteristics.
- Battery Capacity (Ah): This is critical. Enter the total amp-hour capacity of your battery bank. If you have multiple batteries, sum their individual capacities. For example, if you have two 200Ah 12V batteries in parallel, your total capacity is 400Ah. If you're wiring them in series to make a 24V or 48V bank, remember the Amp-hour rating remains the same as a single battery in that series string. Getting this right is crucial for accurate State of Charge percentage readings. You can find more about sizing your bank in our article How Many Batteries for an Off-Grid System.
- Nominal Voltage: Enter the nominal voltage of your battery bank (e.g., 12V, 24V, 48V).
- Charge Efficiency (Peukert's Exponent): Some advanced monitors allow you to adjust for Peukert's effect or charge efficiency, especially for lead-acid batteries where charging isn't 100% efficient. For LiFePO4 batteries, this is typically set very close to 100% or 1.0.
- Perform a Full Charge: For the most accurate calibration, it’s best to fully charge your battery bank immediately after setup. This "synchronizes" the monitor, telling it that the battery is indeed at 100% capacity. Your charge controller should indicate when your batteries are in the absorption or float phase, signaling a full charge. If your monitor has a "sync to 100%" function, activate it once you know the batteries are truly full.
- Verify Readings: Once your system is up and running, cross-reference the voltage reading on your monitor with a multimeter directly at the battery terminals. They should be very close. Watch the current (amps) as you turn on various appliances. Does it make sense? A 100-watt light bulb on a 12V system should draw roughly 8-9 amps (Watts / Volts = Amps). If something seems wildly off, it's time to troubleshoot.
Common Pitfalls and Troubleshooting Tips
Even with the best instructions, sometimes things don't go exactly as planned. Don't worry, many common issues with battery monitor installations are easily fixable!
Incorrect Shunt Placement and Wiring
This is by far the most frequent issue people encounter. If your battery monitor isn't giving you consistent or accurate State of Charge readings, especially if the percentage drops too quickly or doesn't seem to track charging properly, chances are the shunt isn't installed correctly.
- Symptoms: Inaccurate SoC%, monitor doesn't show any current flow, or the current shown is lower than expected. Your "time to empty" might be wildly off. You might see your battery voltage dropping significantly, but the monitor still reports a high SoC%.
- Troubleshooting: Go back to basics. Remember the golden rule: ALL negative current in and out of the battery must pass through the shunt.
- Disconnect power again.
- Carefully trace every single negative wire connected to your battery bank.
- Ensure that the only negative connection directly to your battery's negative terminal is the one going to the "Battery Side" of your shunt.
- All other negative wires (from your inverter, charge controller, DC fuse panel, etc.) must be connected to the "System Side" of the shunt, or to a busbar that is directly connected to the "System Side" of the shunt.
- Check for any stray ground wires that might bypass the shunt. For example, if your RV chassis is directly grounded to your battery's negative terminal and you also have an inverter grounded to the chassis, ensure the chassis ground also goes through the shunt. This is a common oversight in vehicle installations. If you're ever in doubt, consult a wiring diagram, like those found in our Off-Grid Solar Wiring Diagram Explained article.
Calibration Issues
Your monitor is only as smart as the information you give it. If your battery capacity is entered incorrectly, your SoC% readings will be misleading.
- Symptoms: SoC% seems to jump around, doesn't reach 100% when batteries are full, or reads 0% but your lights are still on.
- Troubleshooting:
- Verify Battery Capacity: Double-check the total amp-hour (Ah) rating of your battery bank. If you have two 100Ah batteries in parallel, your total capacity is 200Ah. If they're in series, your voltage doubles, but your Ah capacity remains that of a single battery. This might be a good time to review How Many Batteries for an Off-Grid System.
- Full Charge Cycle: Ensure you've performed a complete charging cycle, allowing the batteries to reach 100% State of Charge and stay there for a period (e.g., an hour or two in float mode for lead-acid, or until BMS indicates full for LiFePO4). Then, manually or automatically (if your monitor supports it), synchronize the monitor to 100%. This is often a menu option like "Sync SOC" or "Calibrate 100%."
- Discharge Parameters: Some monitors also let you set "empty" or "low battery" voltage thresholds. Make sure these align with your battery manufacturer's recommendations.
Interference and Loose Connections
Even small issues with wiring can manifest as big problems for sensitive electronics like battery monitors.
- Symptoms: Erratic readings, monitor randomly shutting off, display flickering, or monitor not responding.
- Troubleshooting:
- Check All Connections: Go back to every single wire you connected – the main battery negative, the shunt connections, the display power wire, and the data cable. Make sure they are all tightly secured. A common culprit is a poorly crimped lug on a heavy gauge cable.
- Inspect for Damage: Look for any frayed wires, kinks in cables, or damaged insulation.
- Minimize Electromagnetic Interference (EMI): Keep the small data cable for the monitor away from large, high-current power cables, especially those connected to your inverter. Inverters can generate significant EMI, which can disrupt the monitor's readings. If possible, run the data cable perpendicular to power cables, or use shielded cables. If you are having issues, you might have to reconsider your Off-Grid Solar Wiring Best Practices.
By systematically checking these common problem areas, you'll likely resolve most issues and get your battery monitor providing reliable, accurate data in no time. For persistent issues, reviewing our guide on How to Test an Off-Grid Solar System might offer additional insights.
Getting the Most Out of Your Battery Monitor
Once your battery monitor is installed and humming along, it transforms from a simple display into a powerful dashboard for your off-grid life. Understanding the data it presents and how to react to it will dramatically improve your energy management and overall system reliability.
Interpreting Key Data Points
Your battery monitor provides a wealth of information at your fingertips. Here’s how to make sense of the most important metrics:
- State of Charge (SoC%): This is the big one, the percentage of energy remaining in your battery bank. Aim to keep this above 50% for lead-acid batteries and generally above 20% for LiFePO4 batteries to maximize their lifespan. Seeing this number allows you to make real-time decisions, like deciding if you can run the microwave or if you should conserve power.
- Voltage (V): While not the primary indicator of SoC, voltage still provides valuable context. It tells you the overall health of your battery bank and can indicate potential issues like a struggling cell or heavy sag under load. For instance, if your SoC is high but your voltage is dipping very low under a moderate load, it could signal an issue with your battery's internal resistance.
- Current (A): This shows you the flow of electricity. Positive amps mean current is entering your batteries (charging), while negative amps mean current is leaving (discharging). This is incredibly useful for understanding:
- Charging Performance: How much power are your solar panels actually putting out? If your monitor shows low amps during peak sun hours, you might have an issue with your panels or charge controller.
- Appliance Draw: How much power does that well pump or coffee maker really use? Seeing the instantaneous draw helps you calculate daily consumption.
- Power (W/kW): Often displayed as an alternative to current, power (watts or kilowatts) directly tells you the rate of energy flow. It’s calculated as Volts x Amps. This is often more intuitive for understanding appliance consumption.
- Time to Empty/Full: Many advanced monitors, especially those from brands like Victron Energy, calculate an estimated "time to empty" or "time to full" based on your current consumption or charging rate. This dynamic prediction is incredibly helpful for planning your energy usage. If it says "10 hours to empty" and a storm is rolling in, you know you need to conserve!
By regularly checking these metrics, you develop an intuitive understanding of your system's capabilities and limitations.
Integrating with Smart Systems and Remote Monitoring
Modern battery monitors have moved beyond simple displays. Many, particularly those from Best Off-Grid Solar Brands like Victron Energy or even some Renogy models, offer Bluetooth connectivity. This feature allows you to connect your smartphone or tablet to the monitor via a dedicated app.
- Remote Monitoring: Imagine being able to check your battery’s SoC from inside your cabin or even miles away if you have a remote internet connection. This is invaluable for remote properties or for those who spend time away from their systems. It means you don't have to physically go to your power shed or RV battery compartment to check on things.
- Historical Data: Apps often log historical data, allowing you to see trends in your power consumption and generation over days, weeks, or even months. This historical insight can help you:
- Optimize Solar Array: Are your solar panels consistently underperforming? Maybe it's time to adjust their tilt angle or investigate shading.
- Identify Peak Consumption: When are you using the most power? Can you shift high-draw activities to times of abundant solar production?
- Plan for Expansion: If you're consistently running low on power, the historical data makes it clear whether you need more solar panels, more battery capacity, or both. Understanding your energy usage deeply is the first step in deciding to expand your Cost of Expanding an Off-Grid System.
This integration transforms your battery monitor from a simple gauge into a powerful management tool, allowing you to make smarter, data-driven decisions about your off-grid energy lifestyle. Keeping an eye on your battery monitor is a fundamental part of a robust Off-Grid Solar Maintenance Guide.
| Feature | Basic Voltmeter (e.g., simple LED display) | Dedicated Battery Monitor (e.g., Victron SmartShunt) |
|---|---|---|
| Primary Indication | Battery Voltage (V) | State of Charge (SoC%) |
| Accuracy of SoC | Poor (highly load/temp dependent) | Excellent (measures all current flow) |
| Current (Amps) Read | No | Yes (in/out) |
| Power (Watts) Read | No | Yes (in/out) |
| Time to Empty/Full | No | Yes (dynamic estimation) |
| Historical Data | No | Yes (via app, typically) |
| Battery Protection | Limited (only voltage cutoffs) | Excellent (prevents deep discharge with alerts) |
| Complexity of Install | Very Easy (connect to battery terminals) | Moderate (requires shunt on negative side of system) |
| Cost | Very Low | Moderate to High |
| Insight Provided | Minimal | Comprehensive |
Disclaimer
The information provided in this guide is for educational and informational purposes only and does not constitute professional electrical advice. Working with electricity, especially high-voltage DC systems, can be dangerous. Always consult with a qualified electrician or solar professional before undertaking any electrical work. Ensure you comply with all local electrical codes and safety regulations. The author and publisher are not responsible for any injury, damage, or loss resulting from the use or misuse of this information.