How to Install Off-Grid Solar on a Shed
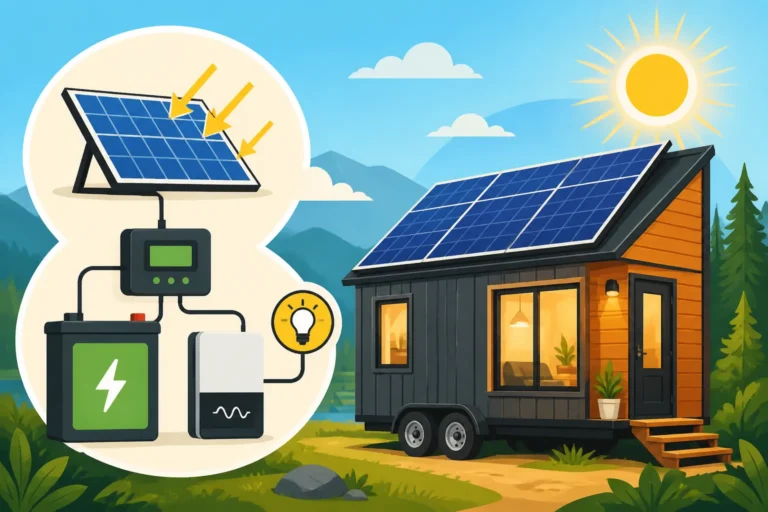
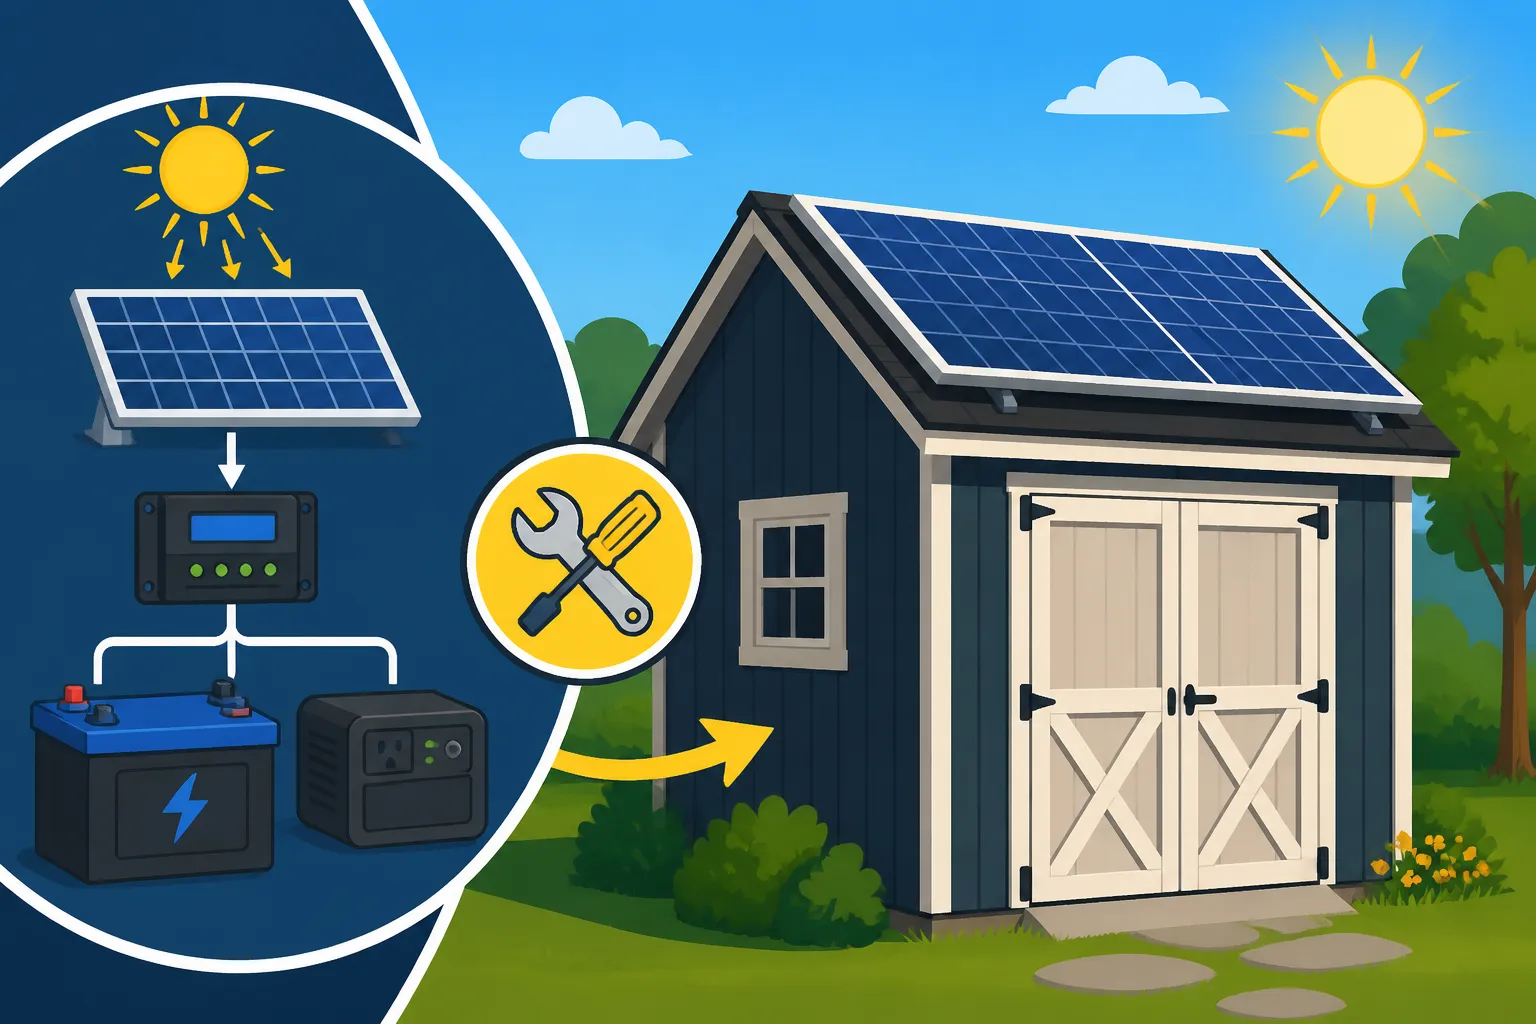
Ever stared at your shed, wishing it had reliable power without the hassle and cost of trenching power lines from your main house? Dragging those long, often flimsy extension cords across the yard every time you want to run a light or a tool isn't just inconvenient; it can be a real safety hazard. Going truly off-grid with solar for your shed offers unparalleled independence, allowing you to illuminate your workspace, charge batteries, or even power a small workbench without a single grid connection. This comprehensive guide will demystify the process, walking you through every step of installing a robust off-grid solar system on your shed.
Understanding Your Shed's Power Needs
Before you even think about buying a single solar panel, you need to get a crystal-clear picture of what you actually want to power in your shed. This isn't just about guessing; it's about making sure your system is sized correctly so you don't end up with flickering lights or dead batteries right when you need power the most. Overlooking this crucial step is one of the biggest mistakes DIYers make, leading to frustration and wasted money on undersized or wildly oversized equipment.
Assessing Your Appliance Load
Let's be realistic: your shed probably isn't going to be running a central air conditioning unit or an electric stove. But even small tools and lights add up. Start by making a detailed list of every single electrical item you intend to use in your shed. Think about LED lights, a small radio, a laptop charger, power tools like a drill, jigsaw, or even a small air compressor. Don't forget any passive loads, like a small mini-fridge if you plan to keep cold drinks out there. For each item, you'll need to find its wattage. This is usually printed on a label on the appliance itself, in the owner's manual, or easily found with a quick online search for the model number. Sometimes it's listed in amps, in which case you can multiply amps by voltage (e.g., 120V for AC appliances, 12V for DC) to get watts.
Once you have the wattage for each item, consider how long you'll run it on an average day. For example, if your LED lights are 10 watts and you plan to have them on for 3 hours, that's 30 watt-hours (Wh). A drill might be 500 watts, but you only use it for 15 minutes (0.25 hours), so that's 125 Wh. Be honest with yourself here; it's better to slightly overestimate than to run out of juice. Keep in mind that some tools, especially those with motors like saws or air compressors, have a high "surge" wattage when they first start up. Your inverter will need to be able to handle these brief, higher power demands. Understanding your overall energy usage is paramount to determining How to Calculate Daily Energy Usage
Calculating Daily Energy Consumption
Now that you have your list, it's time to crunch the numbers. Sum up all the daily watt-hours for each appliance. This total will give you your estimated daily energy consumption for your shed. Let's say, for example, your total comes out to 500 Wh per day. This number is your foundation for sizing everything else in your solar system – your solar panels, your battery bank, and even your charge controller and inverter.
Consider the seasonality of your usage as well. Will you be using more lights in the winter when days are shorter? More fans or a small swamp cooler in the summer? Factor in worst-case scenarios for solar production, like several cloudy days in a row, especially if you plan to rely on your shed's power consistently. This brings in the concept of "days of autonomy," which essentially means how many days your battery bank can power your loads without any new solar input. For a shed, you might aim for 1-3 days of autonomy, depending on how critical the power is. This thorough calculation is the first step in learning How to Size an Off-Grid Solar System.
Here's a quick table to help you estimate common shed appliance power draws:
| Appliance | Typical Wattage (W) | Est. Daily Usage (Hrs) | Daily Watt-Hours (Wh) |
|---|---|---|---|
| LED Light Bulb (x2) | 15-20 | 3 | 45-60 |
| Cordless Drill Charger | 20-50 | 1 | 20-50 |
| Small Radio | 10-30 | 2 | 20-60 |
| Laptop Charger | 45-90 | 2 | 90-180 |
| Mini-Fridge | 50-100 (running) | 8 (cycle on/off) | 400-800 |
| Jigsaw | 400-600 | 0.25 (15 min) | 100-150 |
| Small Shop Vac | 800-1200 | 0.1 (6 min) | 80-120 |
(Note: These are estimates. Always check your specific appliance's rating.)
Choosing the Right Off-Grid Components
With your power needs firmly established, it's time for the fun part: selecting the components that will bring your shed to life with solar energy. Each piece of the puzzle plays a vital role, and choosing wisely ensures efficiency, longevity, and ultimately, your satisfaction. You'll find a vast array of options available online, with platforms like Amazon offering a wide selection from various manufacturers, including reputable brands like Renogy.
Selecting Solar Panels
Your solar panels are the workhorses, converting sunlight into electricity. For a shed, you typically won't need a massive array, but you'll still want to choose panels that are efficient and durable. Monocrystalline panels are generally more efficient and perform better in low-light conditions, making them a popular choice. Polycrystalline panels are a more budget-friendly option, though slightly less efficient. The size (wattage) of your panels will depend directly on your daily energy consumption and the number of "peak sun hours" your location receives. Peak sun hours refer to the intensity of sunlight equivalent to 1,000 watts per square meter, averaged over the day. For most of the continental U.S., this ranges from 3-5 hours daily.
If your shed needs 500 Wh per day and you get 4 peak sun hours, you'd ideally need about a 125W panel (500 Wh / 4 hours = 125W). However, it's always smart to add a buffer – sometimes up to 20-30% – to account for cloudy days, panel degradation, and system inefficiencies. So, a 150W-200W panel or a couple of smaller panels might be a better fit. You can explore options like 100-watt or 200-watt panels often sold in kits by companies like Renogy, which are readily available and come with all necessary mounting hardware. When considering your options, it's helpful to look at guides like Best Off-Grid Solar Panels.
Picking the Right Battery Bank
The battery bank is your energy storage, keeping power available when the sun isn't shining. This is arguably the most critical component for an off-grid system, as it directly dictates how long your shed can operate without solar input. For a shed, you have a few common battery choices:
- Lead-Acid (Deep Cycle AGM/Gel): These are often more affordable upfront and are common for smaller, simpler setups. They require less maintenance than flooded lead-acid but are heavier, have a shorter lifespan (typically 3-5 years), and shouldn't be discharged below 50% to maximize their life.
- Lithium Iron Phosphate (LiFePO4): These are the superstars of off-grid battery technology. While more expensive initially, they offer a significantly longer lifespan (10+ years), can be discharged deeper (up to 80-100% depending on the brand), are lighter, and more efficient. For a reliable, long-term shed power solution, LiFePO4 batteries are often the best choice if your budget allows.
To size your battery bank, take your daily watt-hour usage and multiply it by your desired days of autonomy. Then, divide by the battery's usable depth of discharge (e.g., 0.5 for AGM, 0.8 for LiFePO4) and finally by your system voltage (e.g., 12V or 24V) to get the required amp-hours (Ah). For example, a 500 Wh/day system needing 2 days of autonomy with a 12V LiFePO4 battery (80% DoD) would need approximately (500 Wh * 2 days) / (12V * 0.8) = 1000 Wh / 9.6V = ~104 Ah battery. Many resources, like those discussing Best Off-Grid Solar Batteries, can help you make an informed decision.
Inverters and Charge Controllers
These two components are the brain and heart of your system.
- Charge Controller: This device regulates the voltage and current coming from your solar panels to your battery bank. It prevents overcharging, which can severely damage batteries, and optimizes the charging process. There are two main types:
- PWM (Pulse Width Modulation): More affordable and simpler, suitable for smaller systems where the panel voltage closely matches the battery voltage.
- MPPT (Maximum Power Point Tracking): More efficient, especially in varied weather conditions, as it can convert higher panel voltages down to battery voltage more effectively. This results in more power harvested from your panels, particularly valuable if your panels have a much higher voltage than your battery bank (e.g., a 24V panel charging a 12V battery). For most shed systems, an MPPT controller is worth the extra investment for its efficiency.
- Inverter: This takes the DC power from your batteries and converts it into AC power, which is what most standard household appliances use.
- Pure Sine Wave Inverters: These produce clean, stable AC power, just like the grid, and are essential for sensitive electronics (laptops, TVs) and motor-driven appliances (drills, fans) to prevent damage and ensure smooth operation.
- Modified Sine Wave Inverters: Less expensive, but they produce a "choppy" waveform that can damage sensitive electronics or cause motors to run inefficiently or overheat. For a shed, unless you're only running basic resistive loads like incandescent lights, a pure sine wave inverter is highly recommended.
The inverter's wattage rating should be able to handle the combined running wattage of all AC appliances you plan to use simultaneously, plus the surge wattage of the largest motor-driven appliance you might start. If you're running a 500W drill and a 50W light at the same time, you'll need at least a 550W inverter. If that drill has a 1500W surge, your inverter needs to be able to handle that momentary spike. A 1000W-2000W pure sine wave inverter is a common choice for a well-equipped shed.
Step-by-Step Installation Process
Once you've carefully selected your components, the real fun begins: getting everything installed. While it might seem daunting, breaking it down into manageable steps makes the process much smoother. Remember to always prioritize safety throughout the installation.
Mounting Solar Panels
The first physical step is securely mounting your solar panels on your shed. The ideal location is a south-facing roof or a sturdy ground mount that gets full, unobstructed sunlight for the majority of the day. Avoid areas with trees or other structures that cast shadows, as even partial shading can drastically reduce a panel's output.
- Roof Mount: If mounting on the shed roof, use appropriate racking specifically designed for solar panels. These usually consist of rails that attach to the roof rafters with flashing to ensure watertight seals. Brands like Renogy and EcoFlow often include sturdy mounting brackets in their smaller kits, or you can purchase universal mounting kits separately on platforms like Amazon. Ensure the roof can support the weight of the panels and any potential snow load. Drill pilot holes, secure the standoffs or L-feet to the rafters, install the flashing, and then attach the rails. Finally, clamp the panels onto the rails, ensuring they are firmly secured. For a detailed guide on roof mounting, check out resources like How to Install Roof-Mounted Solar Panels.
- Ground Mount: A ground mount offers more flexibility in aiming your panels for optimal sun exposure throughout the seasons. You can build a simple wooden or metal frame, or purchase pre-fabricated ground mount kits. Ensure the frame is level, sturdy, and anchored to the ground to withstand wind. Dig post holes, set posts with concrete, or use robust ground screws, then attach your frame and panels. This method is often easier for adjusting the tilt angle of your panels seasonally, maximizing winter production.
Regardless of your mounting choice, orient your panels to face true south (or slightly west if you want more afternoon power) and set them at an angle roughly equivalent to your geographical latitude for year-round production, or adjust for winter if that's your peak usage season.
Wiring the System Components
This is where all your carefully chosen components come together. Proper wiring is essential for efficiency, safety, and system longevity. If you're not comfortable with electrical work, it's always wise to consult or hire a qualified electrician, especially for the AC side of things.
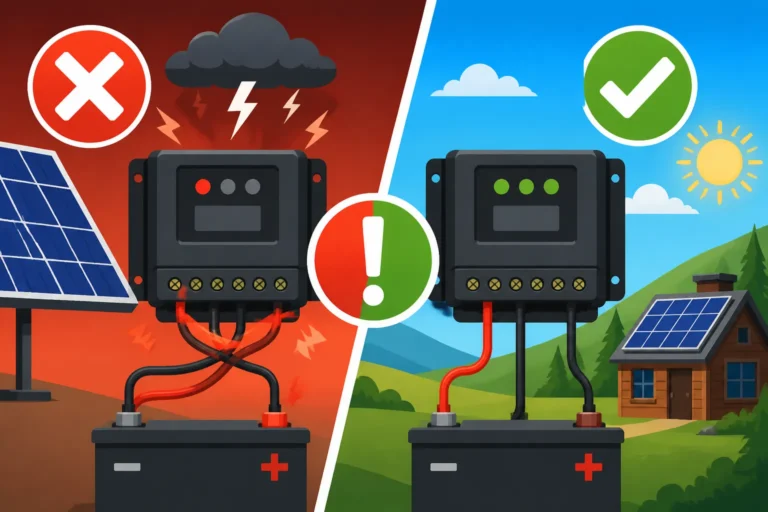
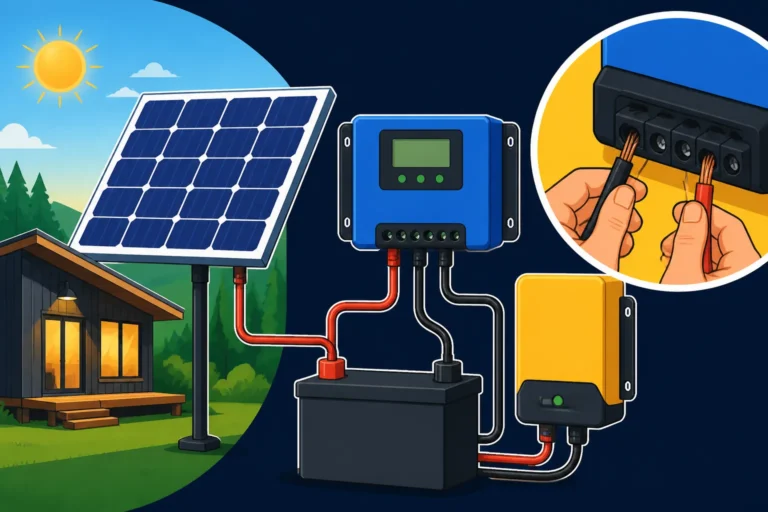
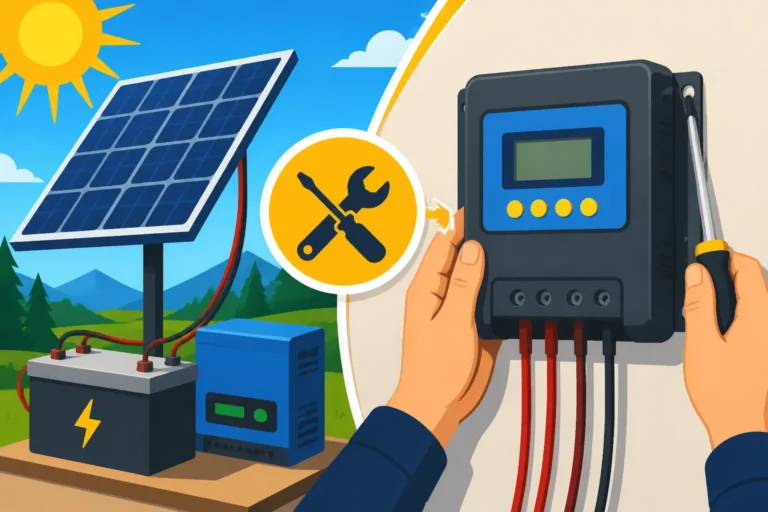
- Panel to Charge Controller: Run your solar panel cables from the mounted panels to your charge controller inside the shed. Use appropriate gauge solar PV cable (typically 10 AWG or 12 AWG) with MC4 connectors. If you have multiple panels, you'll need to wire them in series or parallel (or a combination) to achieve the desired voltage and current for your charge controller. Series wiring adds voltage, while parallel wiring adds current. For safety, install a PV disconnect switch between the panels and the charge controller, allowing you to safely shut off power from the array. This is a critical step covered in more detail in guides like How to Wire Solar Panels in Series.
- Charge Controller to Battery Bank: Connect the output of your charge controller to your battery bank. Again, use appropriately sized cables (often thicker than PV cables, like 4 AWG or 2 AWG, depending on your system size) and install a DC breaker or fuse between the charge controller and the battery. This protects your system from overcurrent. Make sure to connect positive to positive and negative to negative, ensuring polarity is correct.
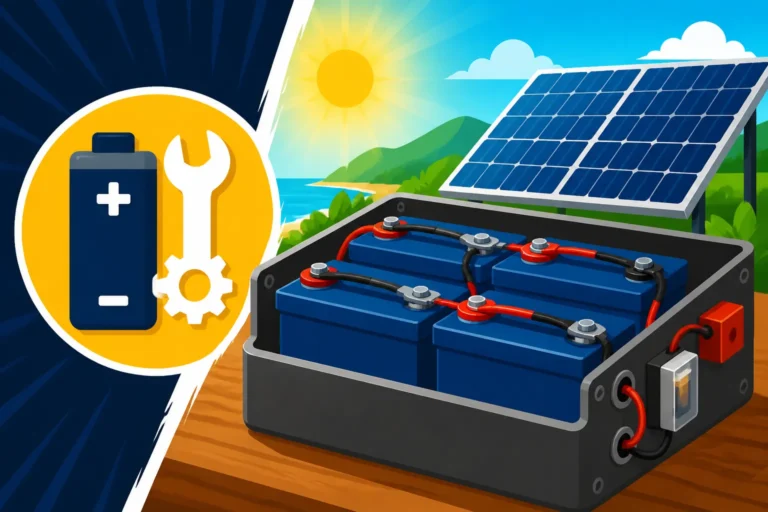
- Battery Bank to Inverter: Connect your inverter directly to your battery bank using very thick, short battery cables (typically 2 AWG to 4/0 AWG, depending on inverter size and cable length). Install a large DC fuse or breaker (e.g., 200A, 300A, or 400A) as close to the battery's positive terminal as possible. This is your main overcurrent protection for the inverter. When dealing with multiple batteries, understanding How to Wire a Battery Bank, is crucial for proper performance and safety.
- Inverter to AC Loads (Shed Wiring): From the AC output of your pure sine wave inverter, you can wire a small sub-panel or directly connect to a few outlets and lights in your shed. Use standard household electrical wiring (e.g., 14/2 or 12/2 Romex cable) and ensure all connections are properly secured within junction boxes. Install AC breakers for each circuit (e.g., 15A for lights/outlets) within your sub-panel. Always remember that any AC wiring must adhere to local electrical codes for safety. Refer to a comprehensive Off-Grid Solar Wiring Diagram Explained.
Connecting to Your Shed's Electrical System
Once all the major components are wired up, you need to bring power safely to your shed's appliances. For most shed applications, a dedicated sub-panel fed by the inverter is the cleanest and safest way to distribute power.
Inside your shed, mount a small breaker panel. This panel will be the distribution point for all your shed's AC outlets and lighting circuits. Run the AC output from your inverter into this breaker panel, treating it as your primary power source. From there, you can install standard electrical outlets (like 15A 120V receptacles) and switch-controlled lighting circuits. Each circuit should have its own appropriately sized breaker in the sub-panel. This setup allows you to protect individual circuits from overloads and makes troubleshooting much simpler.
For DC loads, if you're running any 12V lights or charging USB devices directly from your battery bank (via a 12V fuse panel or cigarette lighter adapters), ensure these circuits are also fused. This minimizes the energy conversion losses that occur when going from DC to AC and back to DC for small electronics. A common setup would be to have a small DC fuse block connected to the battery bank, protected by its own breaker, from which you run dedicated 12V circuits for specific low-power items.
Safety, Testing, and System Maintenance
Installing an off-grid solar system is a significant project, and ensuring its safety, proper function, and longevity requires careful attention even after the initial wiring is complete. Overlooking these final, critical steps can lead to system failures, reduced lifespan, or even dangerous situations.
Ensuring Electrical Safety
Safety is paramount when working with electricity. Before making any connections, always disconnect all power sources – turn off solar panel disconnects, remove battery fuses, and ensure your inverter is off. Wear appropriate personal protective equipment, including insulated gloves and safety glasses.
Proper grounding is absolutely essential to prevent electrical shock and protect your equipment from lightning strikes. All metal components of your solar array (racking, panel frames), the inverter chassis, and any metal enclosures should be properly bonded and connected to a common ground rod driven into the earth near your shed. The National Electrical Code (NEC) provides detailed guidelines for grounding, even for off-grid systems. For a detailed breakdown of these requirements, consult resources on Off-Grid Solar Safety and Grounding. Ensure all wire connections are tight and secure, and use conduit where cables are exposed to physical damage or sunlight. Label all wires and components clearly for easy identification during maintenance or troubleshooting.
Initial System Startup and Testing
Once all components are installed and wired, it's time for the moment of truth. Don't just flip all the switches at once! Follow a systematic startup procedure:
- Connect Batteries: Ensure all battery connections are clean and tight. Reinsert battery fuses or close battery breakers.
- Activate Charge Controller: With the batteries connected, turn on the charge controller. It should detect the battery voltage.
- Connect Solar Panels: Close the PV disconnect switch to allow power from the solar panels to flow to the charge controller. The controller should begin displaying charging information, indicating it's receiving power from the panels and charging the batteries.
- Activate Inverter: Finally, turn on your inverter. It should power up and indicate that it's ready to supply AC power.
- Test Loads: Start by plugging in a small, non-critical AC appliance (like a light or phone charger) into an outlet. Check for proper operation. Gradually test other circuits and appliances, making sure nothing trips a breaker or causes the inverter to fault. Monitor your battery voltage and current on your charge controller or battery monitor during these initial tests. This helps you confirm everything is working as expected and gives you a baseline for normal operation. If any issues arise, immediately consult guides like How to Troubleshoot Off-Grid Solar.
Ongoing Care and Troubleshooting
An off-grid solar system isn't a "set it and forget it" solution; it requires periodic maintenance to ensure optimal performance and extend its lifespan.
- Routine Cleaning: Keep your solar panels clean. Dust, pollen, bird droppings, and leaves can accumulate on the surface, reducing their efficiency. A gentle wash with water and a soft brush a few times a year is usually sufficient.
- Battery Health: If you have lead-acid batteries, check their water levels regularly and top them off with distilled water as needed. For all battery types, monitor their voltage and temperature. A good battery monitor will give you an accurate state of charge and historical data. Pay attention to any signs of bulging, corrosion, or unusual odors. For LiFePO4 batteries, ensure they are not consistently over-discharged. You can find excellent advice on How to Maintain an Off-Grid Battery Bank.
- Wiring and Connections: Periodically inspect all wiring connections for tightness, corrosion, or signs of damage. Loose connections can lead to resistance, heat, and poor performance. Check fuses and breakers to ensure they haven't tripped unnecessarily.
- Environmental Factors: Be mindful of extreme weather. In winter, clear snow off your panels for continued production. In very hot climates, ensure your charge controller and inverter have adequate ventilation to prevent overheating.
- Troubleshooting: If you experience a power outage or system malfunction, check your charge controller and inverter for error codes. Common issues can often be resolved by checking connections, resetting breakers, or ensuring adequate sunlight. For example, if your charge controller isn't showing a charge, verify the PV disconnect is on and panels are clean. If your inverter is faulting, check battery voltage and ensure you're not trying to draw too much power at once. Having a clear Off-Grid Solar Maintenance Guide, on hand will be invaluable.
By following these steps, you'll not only have a functional off-grid solar system powering your shed but also the knowledge and confidence to keep it running smoothly for years to come. Enjoy the freedom of truly independent power!
Disclaimer
The information provided in this guide is for general informational and educational purposes only and is not intended as professional electrical advice. Solar system installation involves electrical work and potential hazards. Always exercise caution, follow manufacturer instructions for all components, and adhere to local electrical codes and safety regulations. If you are unsure about any aspect of the installation, consult a qualified and licensed electrician or solar professional. Improper installation can result in property damage, injury, or death.