How to Install Off-Grid Solar on a Camper
If you've ever found yourself parked in a beautiful, remote spot with your camper, only to realize your battery is dying and you’re faced with the choice of running a noisy generator or packing up, you know the frustration. The dream of true off-grid independence can feel elusive, but installing a solar system on your camper is absolutely achievable. This comprehensive guide will walk you through every step, from understanding your power needs to safely wiring up your system, so you can enjoy endless adventures without a power cord.
Understanding Your Camper's Power Needs
Before you even think about buying solar panels or batteries, the absolute first step is to figure out how much power you actually use. This isn't just a guessing game; it's a critical calculation that dictates the size and cost of your entire off-grid system. Many people jump the gun, buy a generic kit, and then wonder why they're still running out of juice. Don't be that person!
Calculating Your Daily Energy Consumption
This is the bedrock of your off-grid solar system design. You need to perform a thorough load analysis to determine your total daily energy consumption in watt-hours (Wh). Think of every single electrical device you use in your camper, from the smallest phone charger to the biggest microwave, and how long you use them each day. It might seem tedious, but skipping this step is a recipe for an undersized system and constant frustration.
Start by making a list of every appliance. For each item, find its wattage (W). This is usually printed on the appliance itself, in its manual, or you can find it with a quick online search. If it only lists amps (A), multiply amps by your system voltage (e.g., 12V for most camper systems) to get watts. Then, estimate how many hours per day you'll use each appliance. Multiply the watts by the hours to get daily watt-hours. Don't forget those phantom loads, like clocks on microwaves or standby power for TVs, even if they're small, they add up over 24 hours. Consider both peak usage (like running a coffee maker) and continuous usage (like an RV fridge or charging a laptop). For a more in-depth look, check out our guide on How to Calculate Daily Energy Usage and How to Do an Off-Grid Load Analysis.
Let's take a common scenario: a small family in a camper for a weekend trip. They might have LED lights (10W for 4 hours = 40Wh), a water pump (50W for 0.2 hours = 10Wh), charging two phones (10W for 4 hours each = 80Wh), a laptop (60W for 2 hours = 120Wh), and a small DC refrigerator (40W running 50% of the time, so 12 hours = 480Wh). Adding these up, their daily consumption is around 730Wh. This number is your target, and it will inform how many solar panels you need and, crucially, the size of your battery bank.
Determining Battery Bank Capacity
Once you know your daily watt-hour consumption, you can determine how much battery capacity you need. This is arguably the most critical component of your off-grid system, as it stores the energy harvested by your solar panels for use when the sun isn't shining. The goal is to have enough stored power to last you through periods of low solar production, often referred to as "days of autonomy." For a camper, this might be 1-3 days, depending on how remote you plan to be and how much you want to rely on your solar. Our article on How Many Batteries for an Off-Grid System offers even more detailed insights.
The type of battery you choose makes a huge difference. Lead-acid batteries (like flooded or AGM) are cheaper upfront but have a shorter lifespan, can only be discharged to about 50% without damage, and are heavy. Lithium iron phosphate (LiFePO4) batteries, on the other hand, are a game-changer for campers. They are significantly lighter, can be discharged almost completely (80-100%) without major issues, last much longer, and perform better in various temperatures. While their initial cost is higher, the long-term value often makes them more cost-effective. You can dive deeper into this comparison in LiFePO4 vs Lead-Acid Battery Cost.
Here’s a simplified way to calculate your needed amp-hours (Ah) for a 12V system, assuming you want 2 days of autonomy and will discharge your battery to 80% (common for LiFePO4):
- Total Daily Wh: Let's stick with our 730Wh example.
- Total Wh needed for 2 days: 730 Wh/day * 2 days = 1460 Wh.
- Divide by system voltage (12V): 1460 Wh / 12V = 121.67 Ah.
- Account for depth of discharge (80% for LiFePO4): 121.67 Ah / 0.80 = 152.09 Ah.
So, for our example, you'd need at least 152 Ah of usable LiFePO4 battery capacity. This might mean one 200Ah battery, or two 100Ah batteries wired in parallel. This careful calculation ensures you don't find yourself in the dark when you least expect it.
Essential Components of a Camper Off-Grid Solar System
Once your power needs are mapped out, it's time to gather the gear. An off-grid solar system isn't just panels; it's a carefully coordinated ensemble of components working together to keep your camper powered. Choosing the right parts is crucial for efficiency, longevity, and overall system performance.
Solar Panels: Types and Considerations
Solar panels are what convert sunlight into electricity, and there are a few options perfectly suited for camper life. The main types you'll encounter are monocrystalline and polycrystalline. Monocrystalline panels are generally more efficient, meaning they can produce more power in a smaller footprint, which is often a critical factor on a camper roof. Polycrystalline panels are typically a bit cheaper but require more space for the same output. For high-quality, efficient options, many camper enthusiasts turn to brands like Renogy, often finding great deals and kits on platforms like Amazon. Our article on Best Off-Grid Solar Panels offers more specific recommendations.
Beyond the cell type, you'll also consider rigid versus flexible panels.
- Rigid panels are durable, typically framed in aluminum, and offer the best long-term performance and value. They require a flat surface or a sturdy mounting system.
- Flexible panels are lightweight, can conform to slightly curved surfaces, and are less obtrusive. However, they generally have a shorter lifespan due to less effective heat dissipation and can be more expensive per watt. For a small pop-top camper or a curved van roof, flexible panels might be your only practical option, but for a larger, flatter RV roof, rigid panels are often the superior choice.
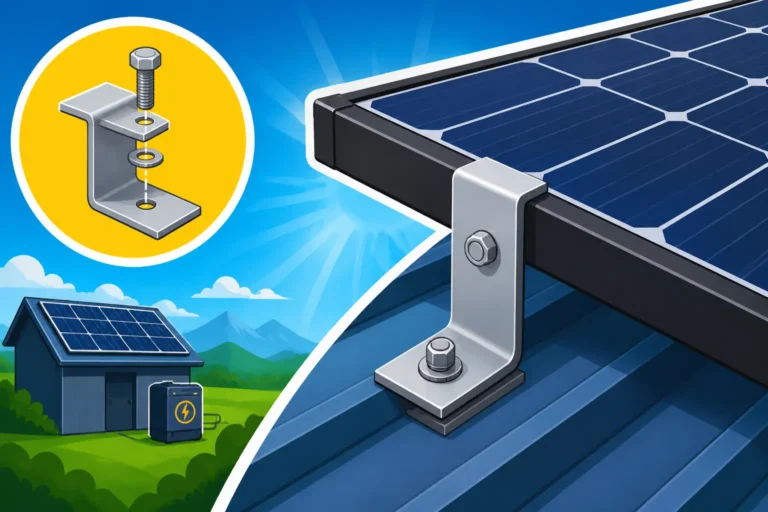
When considering mounting, think about permanent roof mounts with Z-brackets, or tilt mounts that allow you to adjust the angle for better sun exposure, especially in winter. Some campers also use portable solar panels that can be set up when parked and stored away while driving, offering flexibility but requiring setup each time you stop.
Charge Controllers and Inverters
These are the brain and muscle of your electrical system, managing the power flow and converting it into usable AC current for your everyday appliances.
-
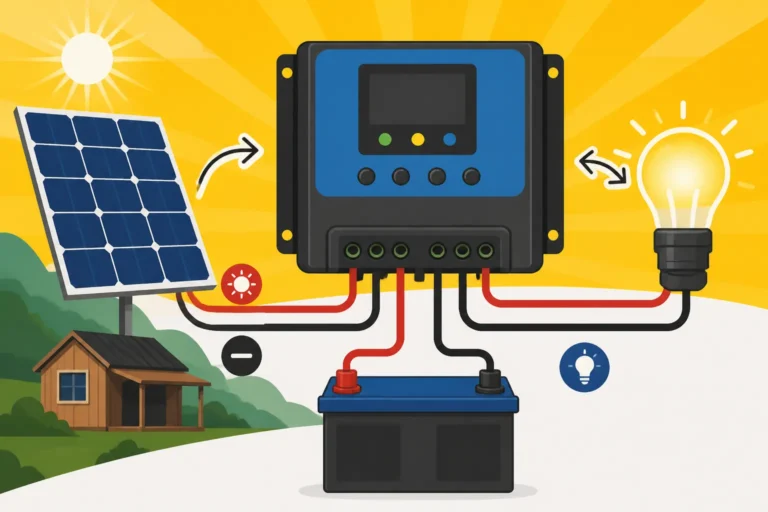
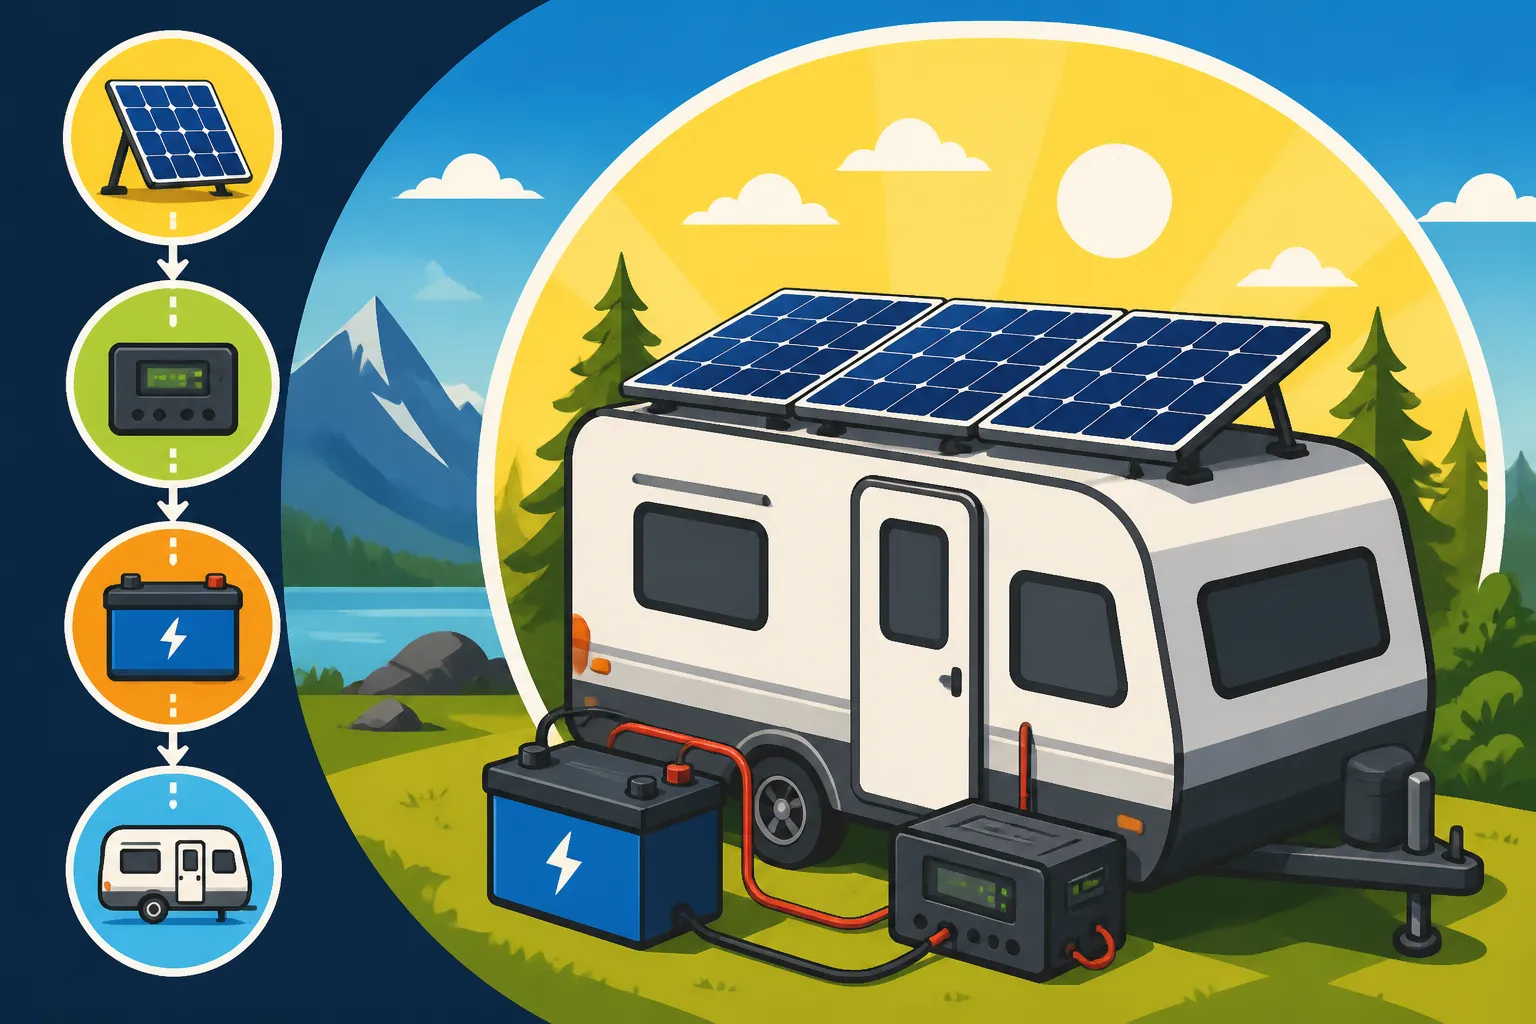
Charge Controllers: This device sits between your solar panels and your battery bank. Its job is to regulate the voltage and current coming from the solar panels, ensuring your batteries are charged safely and efficiently without overcharging. There are two main types:
- PWM (Pulse Width Modulation) controllers are simpler, less expensive, and best suited for smaller systems where the panel voltage closely matches the battery voltage (e.g., a 12V panel charging a 12V battery).
- MPPT (Maximum Power Point Tracking) controllers are more advanced and significantly more efficient, especially in varied weather conditions or when panel voltage is much higher than battery voltage (e.g., 24V or 36V panels charging a 12V battery). They "track" the optimal voltage and current point of the solar array to maximize power harvest. For most serious off-grid camper setups, an MPPT controller is worth the extra investment due to its superior efficiency. Learn more about the differences in MPPT vs PWM Charge Controllers.
-
Inverters: Your camper's lights and many small devices might run on 12V DC power directly from your battery. However, appliances like microwaves, coffee makers, laptops, and anything else you plug into a standard wall outlet require 120V AC power. That's where an inverter comes in. It takes the DC power from your batteries and converts it into AC power.
- You absolutely want a pure sine wave inverter for your camper. Modified sine wave inverters are cheaper but can damage sensitive electronics (like laptops, TVs, or medical equipment) and cause appliances to run less efficiently or hum loudly. Pure sine wave inverters replicate the clean, smooth power you get from the grid, ensuring all your devices run safely and properly. Our article on Pure Sine Wave vs Modified Sine Wave Inverters explains why this is so important.
- When sizing your inverter, consider the continuous wattage of all AC appliances you might run simultaneously, plus the surge wattage of any motor-driven appliances (like a microwave or fridge compressor) that briefly draw much more power when they start up. It's often wise to oversize your inverter slightly to handle these surges.
Batteries: The Heart of Your System
As we touched on earlier, your battery bank is your power reservoir. It’s what allows you to use power when the sun isn't shining. For campers, space and weight are often prime concerns, making battery selection even more critical.
- Lithium Iron Phosphate (LiFePO4) Batteries: These are the gold standard for camper solar. Brands like Battle Born or EG4 offer fantastic options that are incredibly popular among the RV and van life community. They are lightweight, have a very high energy density (more power in a smaller package), can be deeply discharged without damage, boast thousands of charge cycles, and require virtually no maintenance. While the upfront cost is higher, their longevity and performance often make them the most economical choice in the long run. They also perform better in a wider range of temperatures, though some models have low-temperature cutoffs to prevent charging below freezing.
- AGM (Absorbed Glass Mat) Batteries: These are sealed lead-acid batteries that are maintenance-free and can be installed in various orientations. They are heavier and typically only allow for 50% depth of discharge to maintain their lifespan, meaning you need twice the capacity compared to a LiFePO4 battery for the same usable power. They are a good mid-range option for those on a tighter budget than lithium allows, but still seeking better performance than flooded lead-acid.
The typical size for a camper battery might be a 100Ah or 200Ah 12V LiFePO4 battery, or multiple batteries wired in parallel to achieve the desired capacity. Remember, your battery bank capacity needs to align with your daily power usage and desired days of autonomy for a truly reliable off-grid setup.
Step-by-Step Camper Solar Installation
Alright, you've done your homework, you've got your components – now for the exciting part: putting it all together! Installing off-grid solar on your camper can seem daunting, but by breaking it down into manageable steps, you'll be enjoying silent, renewable power in no time. Always remember to prioritize safety during the installation process, especially when working with electricity and on your camper's roof.
Mounting Your Solar Panels
This is usually the first physical step of your installation. Your camper's roof is a prime location for solar panels, but it presents unique challenges, primarily structural integrity and waterproofing. Before drilling any holes, carefully assess the roof's construction. Most RVs and campers have aluminum or wood framing underneath the skin that you'll want to hit for a secure mount.
- Placement: Aim for a spot that gets maximum sun exposure, avoiding shading from air conditioners, vents, or satellite dishes. Try to position them away from areas you frequently walk or where tree branches might scrape. Use a tape measure and mark out your panel locations carefully.
- Mounting Hardware: For rigid panels, Z-brackets are a popular and secure choice. These elevate the panels slightly, allowing for airflow underneath which helps with cooling and efficiency. They bolt directly to the panel frame and then screw into the camper roof. For flexible panels, they can often be directly adhered to the roof, sometimes with additional screws for extra security, but be mindful of heat build-up.
- Securing and Sealing: Once your brackets or panels are in place, the most critical step is to properly seal every single screw hole with a high-quality, UV-resistant sealant. Dicor self-leveling sealant is a favorite in the RV community for horizontal surfaces, while a non-sagging sealant like Eternabond or a good marine-grade silicone might be better for vertical or sloped areas. Do not skimp on sealant – a roof leak is a nightmare you want to avoid at all costs. For more detailed instructions, our guide on How to Mount Off-Grid Solar Panels can be a great resource.
Wiring the System: From Panels to Batteries
Wiring is where the magic happens, connecting your components into a functional system. Safety is paramount here; always disconnect batteries and ensure no power is flowing from panels before making connections.
- Panel Wiring: Decide whether to wire your panels in series, parallel, or a combination.
- Series wiring (positive of one panel to negative of the next) increases voltage but keeps current the same. This is often preferred for MPPT charge controllers because higher voltage reduces current, allowing for thinner wires and less voltage drop, especially over longer runs.
- Parallel wiring (positive to positive, negative to negative) increases current but keeps voltage the same. This is common for smaller 12V systems or with PWM charge controllers.
- Most solar panels come with MC4 connectors, making connections relatively easy. You may need MC4 branch connectors for parallel wiring.
- Run the main positive and negative cables from your solar array down into your camper. Ensure these are properly rated for outdoor use and protected by conduit where exposed.
- Connecting to the Charge Controller: Connect the solar panel's positive and negative leads to the "PV Input" terminals on your charge controller. Ensure you observe polarity.
- Connecting to the Battery Bank: Connect the "Battery Output" terminals of your charge controller to your battery bank. Again, positive to positive, negative to negative. Use appropriately sized cables – typically much thicker than your panel cables due to higher current at lower voltage – and install a DC circuit breaker or fuse on the positive line close to the battery for protection. Our guide on How to Wire an Off-Grid Solar System will give you even more detailed diagrams and instructions.
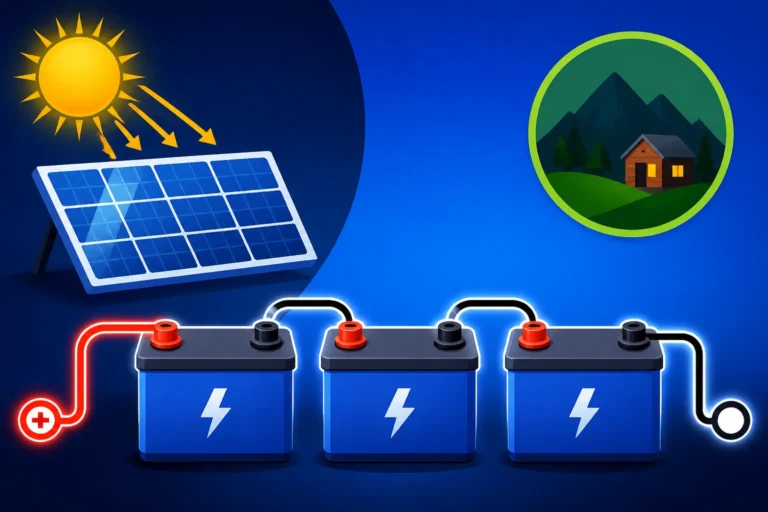
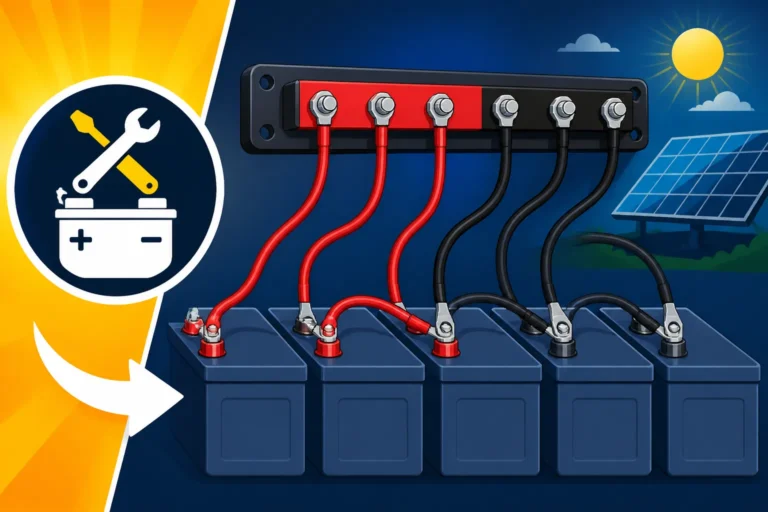
- If you're wiring multiple batteries, ensure they are connected correctly in series or parallel to achieve your desired voltage and capacity. For example, two 12V 100Ah batteries in parallel create a 12V 200Ah bank. Always use equal length, heavy-gauge cables for parallel connections to ensure even charging and discharging.
Connecting the Inverter and DC Loads
Once your panels are connected to the charge controller and the battery bank, you're ready to integrate your inverter and any direct current (DC) loads.
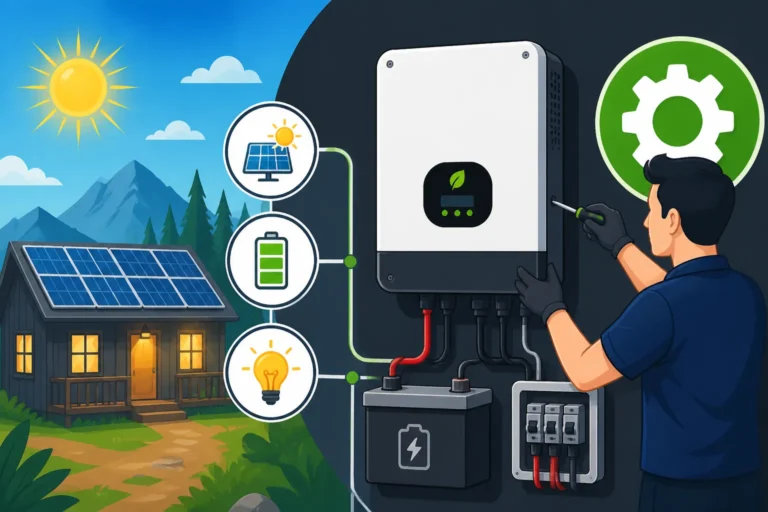
- Inverter Connection: The inverter should be connected directly to your battery bank, ideally with the shortest, thickest cables possible. This minimizes voltage drop and heat, ensuring maximum efficiency. Install a large DC fuse or circuit breaker on the positive cable close to the battery, sized appropriately for your inverter's maximum continuous output. This protects your system from short circuits.
- AC Wiring: From the inverter, you can either plug in appliances directly (if it has outlets) or wire it into your camper's existing AC breaker panel. If connecting to the breaker panel, you'll typically need a transfer switch if you also have shore power capability, to prevent backfeeding into the grid or combining power sources. This is a more advanced step and might require a qualified electrician.
- DC Loads: Many camper appliances, like LED lights, USB chargers, and 12V fans, run directly on DC power. You can connect these through a DC distribution panel, which is like a small breaker box for your 12V devices. This makes it easy to add or remove devices, and each circuit is protected by its own fuse. Avoid running all your DC loads directly off the battery terminals, as this can make troubleshooting and maintenance much harder.
Important Considerations and Tips for Camper Solar
Installing your off-grid solar system is a big accomplishment, but it's just the beginning of your journey to energy independence. To ensure your system runs smoothly and safely for years to come, there are a few ongoing considerations to keep in mind.
Safety and Maintenance
Electrical systems, especially those involving high current and large battery banks, demand respect and adherence to safety protocols. A small mistake can have serious consequences, from equipment damage to fire hazards.
- Fuses and Breakers: We've mentioned them, but it bears repeating: install appropriate fuses and circuit breakers at every critical junction. This includes between the panels and charge controller, between the charge controller and batteries, and between the batteries and inverter. These are your system's lifelines, protecting components and preventing overcurrent conditions.
- Proper Grounding: Grounding your system is crucial for safety, protecting both your equipment and yourself from electrical shocks in case of a fault. Your solar panel frames, inverter chassis, and the metal frame of your camper should ideally be connected to a common ground point. For camper installations, this usually means connecting to the vehicle's chassis ground. Always consult local codes and equipment manuals for specific grounding requirements. You can learn more about this in our article on Off-Grid Solar Safety and Grounding.
- Regular Inspections: Make it a habit to periodically inspect all your connections. Look for loose wires, corrosion, or signs of wear on cables. Check your battery terminals for cleanliness.
- Panel Cleaning: Dust, dirt, pollen, and even bird droppings can significantly reduce your solar panel's efficiency. A simple rinse with water and a soft brush or squeegee (when the panels are cool) is often all that's needed. Avoid harsh chemicals or abrasive materials.
- Battery Health: If you're using lead-acid batteries, regularly check water levels in flooded cells and ensure proper ventilation. For LiFePO4 batteries, maintenance is minimal, but occasional checks on their state of charge (SOC) and voltage are good practice.
Expanding and Monitoring Your System
Life in a camper evolves, and your power needs might too. Maybe you add a new appliance, or decide to travel to a region with less sun. Designing an expandable system from the start, and closely monitoring its performance, will save you headaches down the road.
- Planning for Expansion: When you initially set up your system, consider if you might want to add more panels or battery capacity later. This means choosing a charge controller that can handle more input current than your initial panel array, and an inverter that can manage higher loads. Leaving a little "headroom" in your components can make future upgrades much easier and more cost-effective. For instance, if you start with a 40A charge controller but anticipate adding more panels, maybe you buy a 60A controller from the get-go. Similarly, when you are learning How to Budget for an Off-Grid Solar System, factoring in future expansion costs can make a big difference.
- Battery Monitoring: A good battery monitor is an invaluable tool for any off-grid camper. Simple voltage meters are okay, but a shunt-based battery monitor (like those from Victron Energy or Renogy) provides a much more accurate reading of your battery's State of Charge (SOC) in percentage. It tracks amp-hours in and out, giving you real-time data on how much power you're consuming and how much is being put back in. This information empowers you to manage your power usage effectively and prevent accidental over-discharging, which can extend your battery's lifespan.
- Software and Apps: Many modern charge controllers and inverters, especially from brands like Victron, come with Bluetooth or Wi-Fi connectivity, allowing you to monitor your system's performance and adjust settings right from your smartphone or tablet. This kind of detailed feedback helps you understand your system's limits and how different usage patterns affect your power reserves.
Going off-grid in your camper is truly about freedom – the freedom to explore, to stay longer, and to connect with nature without worrying about where your next charge will come from. By carefully planning, installing, and maintaining your solar system, you're not just adding equipment; you're unlocking a whole new level of adventure.
Disclaimer
This guide provides general information for installing off-grid solar on a camper. Electrical work can be dangerous. Always consult with qualified professionals and refer to specific product manuals and local electrical codes. The author and publisher are not liable for any injury, damage, or loss resulting from the use or misuse of this information. Proceed with caution and ensure all safety measures are followed.