How to Size an Off-Grid System for a Van
Deciding to kit out your van for off-grid living is an exciting step, full of dreams of open roads and remote campsites. But let's be real: nothing sours that dream faster than realizing your fridge isn't cold, your laptop's dead, or you can't even make a morning coffee because your power system isn't up to snuff. The frustration of running out of juice when you need it most is something many van lifers face. This guide will walk you through the nitty-gritty of how to accurately size an off-grid solar system for your van, ensuring you have reliable power for all your adventures.
Understanding Your Van's Energy Needs: The Essential Load Analysis
Before you even think about buying solar panels or batteries, you absolutely must get a clear picture of how much power you'll actually use. This isn't just about what you want to power; it's about what you need to power, how often, and for how long. Skipping this step is like trying to build a house without a blueprint – you're just asking for trouble, and probably a very expensive system that either falls short or is massively overkill.
Identifying Your Appliances and Devices
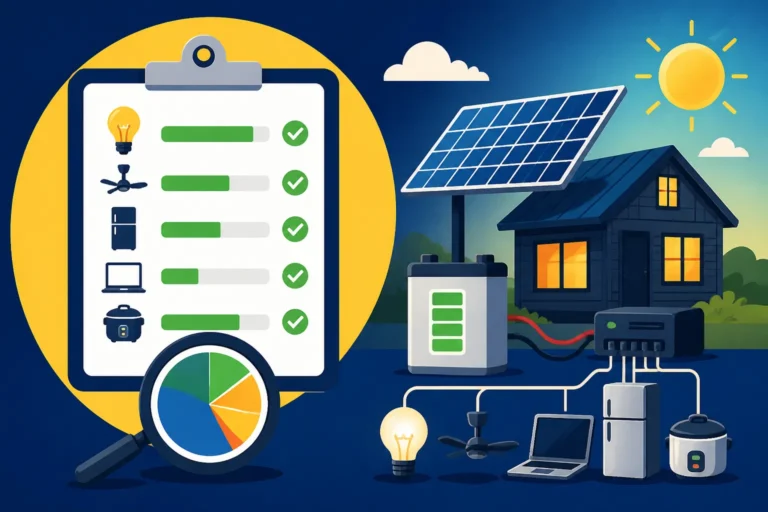
Start by making a comprehensive list of every single electrical item you plan to use in your van. Think about your daily routine. Will you be brewing coffee? Running a portable blender for smoothies? Charging camera gear? What about heating, cooling, or entertainment? No item is too small to consider. This isn't just your big ticket items like refrigerators; it's also your phone charger, your string lights, your portable fan, and even your water pump.
For each item, you'll need to find its wattage. This information is usually listed on the appliance itself, in the manual, or on the manufacturer's website. Sometimes, it's listed in amps (A) or amp-hours (Ah) if it's a 12V DC appliance. If you have an appliance that runs on 120V AC (like a household blender), remember that your inverter will convert DC battery power to AC, and there are efficiency losses involved. Don't forget that many appliances have a "starting watt" or "surge" rating that's much higher than their "running watt" rating – this is critical for inverter sizing, which we'll get to later. If you're really unsure, a handy tool like a Kill-A-Watt meter can measure the actual consumption of AC devices.
Calculating Daily Watt-Hours
Once you have your list and the wattage for each item, the next step is to estimate how many hours per day you'll use each one. This is where your lifestyle really comes into play. Are you a minimalist who only charges a phone and runs LED lights, or do you work remotely and need to power a laptop for eight hours, plus a Starlink system?
For each item, multiply its wattage by the estimated daily usage in hours. This gives you its daily watt-hours (Wh). Then, add up all these individual watt-hours to get your total estimated daily energy consumption. This number, your total daily watt-hours, is the cornerstone of your entire off-grid system design. It tells you exactly how much energy your solar panels need to generate and how much your batteries need to store. It’s also important to factor in the inefficiency of your inverter, typically around 85-90%. So, if you calculate 1000 Wh of AC usage, you’ll actually need your batteries to provide closer to 1100-1175 Wh of DC power. This detailed process is often called an "Off-Grid Solar Load Calculation Explained".
For example, a typical van setup might look something like this:
| Appliance | Wattage (W) | Est. Daily Usage (Hours) | Daily Watt-Hours (Wh) |
|---|---|---|---|
| 12V Fridge (Dometic) | 40 | 12 (compressor runs half time) | 480 |
| Laptop Charging | 60 | 4 | 240 |
| LED Lights | 10 | 5 | 50 |
| Water Pump | 30 | 0.2 (12 min) | 6 |
| Phone Charging | 10 | 2 | 20 |
| Maxxair Fan | 2 | 8 | 16 |
| Total Daily Usage | 812 Wh |
This table is a great starting point, but remember to be realistic. It’s better to slightly overestimate your usage than to run out of power.
Considering Peak Power Demands
While daily watt-hours tell you your overall consumption, peak power demand is about how much power you need at any single moment. This is crucial for sizing your inverter. If you want to run a microwave (1000W) and a coffee maker (800W) at the same time, your system needs to be able to supply 1800W instantly, plus any other background loads. Many appliances, especially those with motors like blenders, vacuums, or power tools, have a high "surge" wattage when they first start up. This surge can be 2-3 times their running wattage. Your inverter must be able to handle this momentary spike.
For instance, if your blender has a running wattage of 300W but a surge wattage of 900W, your inverter needs to accommodate that 900W, even if it's just for a second. If you miscalculate this, your inverter will trip, or worse, get damaged, leaving you powerless until you figure out the issue. This is a common pitfall for new off-gridders, so take the time to really list out what you might run simultaneously. You can dive deeper into this with a guide on "How to Do an Off-Grid Load Analysis".
Sizing Your Solar Panel Array for a Van
Once you know your daily energy needs (your watt-hours), you can start figuring out how many solar panels you’ll need to generate that power. It's not as simple as matching panel wattage to your daily needs; there are several external factors at play when designing a van system.
Accounting for Sun Hours and Efficiency
The rated wattage of a solar panel (e.g., a 100W panel) is measured under ideal laboratory conditions, often called Standard Test Conditions (STC). In the real world, you'll rarely achieve that full output. Factors like panel temperature, dirt, shading, and the angle of the sun all reduce efficiency.
Crucially, you need to consider "peak sun hours" for your typical travel areas. Peak sun hours refer to the average number of hours per day that your panels receive sunlight equivalent to 1000 watts per square meter. This varies greatly by location and season. For example, a sunny day in Arizona might give you 6-7 peak sun hours, while a cloudy winter day in the Pacific Northwest might only offer 2-3. You can find average peak sun hour data for different regions online.
To calculate the panel wattage you need, take your total daily watt-hours (from your load analysis) and divide it by the lowest average peak sun hours you anticipate encountering. Then, factor in an efficiency loss, usually around 20-30%, to account for real-world conditions.
- Formula: (Daily Watt-Hours Needed / Peak Sun Hours) / 0.75 (for 75% efficiency) = Required Panel Wattage
So, if you need 812 Wh per day and expect 4 peak sun hours on average: (812 Wh / 4 hours) / 0.75 = 270.67 Watts. This means you'd want at least 270-300 watts of solar panels. Remember that if you're planning to travel north in winter, your peak sun hours will drop significantly, and you might want to consider "How Winter Affects Off-Grid Sizing".
Panel Types and Space Considerations
Van life comes with unique space constraints. This influences the type of solar panels you choose.
- Rigid Solar Panels: These are the most efficient and durable, often providing the best watt-per-square-foot ratio. They require sturdy mounting on your roof rack or directly to the roof (with proper seals) and are generally a fantastic choice for permanent installations. Brands like Renogy offer a wide range of rigid panels perfect for van roofs.
- Flexible Solar Panels: These panels are lightweight, can bend to fit curved surfaces, and can be adhered directly to your van's roof, making for a sleek, low-profile look. However, they are generally less efficient and have a shorter lifespan than rigid panels due to heat buildup, which can degrade them faster. They can also be quite expensive for their wattage output.
- Portable Solar Panels: These are excellent for supplementing your main array or for smaller systems. You can set them out when parked, allowing you to chase the sun and avoid roof obstructions like AC units or skylights. They also provide flexibility, as you can park your van in the shade while your panels soak up the sun. However, they require daily setup and packing.
Consider your available roof space, aesthetic preferences, and how much time you're willing to spend deploying/storing portable panels. Many van lifers opt for a mix: rigid panels on the roof for baseline power, and a portable panel for extra juice on cloudy days or when parked under trees. For more on choices, check out "Best Off-Grid Solar Panels".
Over-Sizing for Reliability
It's almost always a good idea to oversize your solar panel array, especially for van life. Why? Because the weather is unpredictable! Cloudy days, rain, snow, or even heavy tree cover can drastically reduce your panel's output. Oversizing means you'll still be able to generate a decent amount of power even when conditions are less than ideal.
Think of it as an insurance policy. If your calculations show you need 300W of panels, consider installing 400W or even 500W if space and budget allow. This buffer will minimize anxiety on overcast days and give you more flexibility to use power-hungry appliances without constantly monitoring your battery levels. It also helps with the "Cost of Off-Grid Solar Panels" because adding more panels initially can save you headaches and potentially more expensive upgrades down the line.
Determining Your Battery Bank Capacity
Your battery bank is the heart of your off-grid van system. It stores the energy collected by your solar panels, making it available whenever you need it, day or night. Sizing it correctly is perhaps the most critical component of a reliable system.
Days of Autonomy and Depth of Discharge
Two key concepts come into play here:
-
Days of Autonomy: This refers to how many days your battery bank can power your van without any input from solar panels or other charging sources (like your alternator). For van life, aiming for 2-3 days of autonomy is a good starting point, especially if you plan to be stationary in one place, or if you travel to areas with frequent cloudy weather. If you only move your van a few times a week, those cloudy days can quickly drain an undersized battery bank.
-
Depth of Discharge (DoD): This is the percentage of a battery's capacity that has been discharged. Different battery chemistries handle DoD differently.
- Lead-acid batteries (AGM, Gel): Generally, you shouldn't discharge these below 50% DoD if you want them to last. Regularly draining them lower dramatically shortens their lifespan.
- Lithium-ion batteries (LiFePO4): These are the darlings of the van life world for a reason. They can be safely discharged to 80-100% DoD without significant impact on their lifespan, offering much more usable capacity per amp-hour.
When calculating your battery needs, divide your total daily watt-hours by your chosen DoD. For example, if you need 812 Wh per day and want 2 days of autonomy with LiFePO4 batteries (allowing 80% DoD):
- Total Watt-Hours for Autonomy: 812 Wh/day * 2 days = 1624 Wh
- Required Battery Bank Capacity (usable): 1624 Wh / 0.80 (80% DoD) = 2030 Wh
- To convert to Amp-Hours (Ah) for a 12V system: 2030 Wh / 12V = 169.17 Ah.
- So, you'd look for roughly 170-200Ah of 12V LiFePO4 battery capacity. Many off-gridders find that a 200Ah 12V LiFePO4 battery provides a good balance for typical van living. For a deep dive into battery choices, check out "LiFePO4 vs Lead-Acid Battery Cost".
Choosing Battery Chemistry and Voltage
As mentioned, LiFePO4 (Lithium Iron Phosphate) batteries are hugely popular for vans. They are more expensive upfront than lead-acid but offer:
- Much longer lifespan: Thousands of cycles compared to hundreds.
- Higher usable capacity: Nearly 100% DoD vs. 50%.
- Faster charging: Can accept higher charge rates.
- Lighter weight: A huge plus for vans where weight is always a concern.
- No maintenance: Sealed units, no off-gassing.
For most van setups, a 12V system is standard because many RV appliances and accessories are designed for 12V DC. However, for larger, more power-intensive builds, some might opt for a 24V or even 48V system to reduce wire size and losses, especially if running high-wattage AC appliances frequently. This decision can impact "How Many Batteries for an Off-Grid System".
Future-Proofing Your Storage
It’s often a wise move to build a battery bank with some room for expansion, or at least ensure the components you buy are compatible with future additions. Van lifers often find their power needs grow as they become more comfortable or add new gadgets. If your budget only allows for, say, 100Ah now, but you anticipate needing 200Ah within a year or two, consider purchasing a system where you can easily add another 100Ah battery later (ideally the exact same make and model). Brands like Renogy and Battle Born offer batteries designed for easy paralleling to increase capacity.
Selecting the Right Inverter and Charge Controller
These two components are the bridge between your solar panels, your batteries, and your appliances. Getting them right is critical for system safety and performance.
Inverter Sizing for AC Loads
Your inverter converts the DC power from your batteries into usable 120V AC power for your standard household appliances. The size of your inverter (rated in watts) needs to be able to handle the combined running wattage of all AC devices you plan to use simultaneously, plus any surge demands.
As discussed in the load analysis section, identify your highest simultaneous AC load. If you plan to run a 1000W microwave and a 500W hairdryer at the same time, you'd need an inverter with at least a 1500W continuous rating. Then, consider the surge: if your microwave surges to 2000W, your inverter needs to be able to handle that momentary 2000W surge. It's often recommended to select an inverter that has a continuous wattage rating 20-25% higher than your maximum anticipated simultaneous running load to give you some headroom.
For van life, a "pure sine wave" inverter is almost always recommended. Modified sine wave inverters are cheaper, but they can damage sensitive electronics (like laptops or medical devices) and cause motors in appliances to run less efficiently or hum loudly. Brands like Victron Energy and Renogy offer reliable pure sine wave inverters suitable for vans. To learn more about selecting one, you might look at "How to Size an Off-Grid Inverter".
Charge Controller Sizing for Your Panels and Batteries
The charge controller is the guardian of your battery bank. It regulates the voltage and current coming from your solar panels, ensuring your batteries are charged safely and efficiently without being overcharged.
There are two main types:
- PWM (Pulse Width Modulation) Controllers: These are simpler, less expensive, and generally suitable for smaller systems where the solar panel voltage closely matches the battery bank voltage (e.g., 12V panels charging a 12V battery). They are less efficient, as they essentially chop the higher voltage from the panels down to the battery voltage, wasting excess power as heat.
- MPPT (Maximum Power Point Tracking) Controllers: These are more sophisticated, more efficient, and more expensive. MPPT controllers can take a higher voltage from your solar panels (e.g., 24V or 36V panels) and convert it efficiently down to your battery voltage (e.g., 12V), maximizing the power harvested from your panels, especially in varying light conditions. For almost any serious off-grid van system, an MPPT controller is the way to go, particularly if you have multiple panels or higher voltage panels.
To size your charge controller, you need to know the total maximum output current (amps) from your solar array. This is usually calculated by dividing the total wattage of your panels by the voltage of your battery bank and then adding a 25% safety factor.
- Formula: (Total Panel Watts / Battery Bank Voltage) * 1.25 = Minimum Charge Controller Amperage.
For example, if you have 400W of solar panels and a 12V battery bank: (400W / 12V) * 1.25 = 41.67 Amps. You would need at least a 40-50 Amp MPPT charge controller. Always round up to the next available size. Remember, these calculations are crucial for "How to Size a Charge Controller" correctly. Many brands on Amazon, like EPEVER or Victron, have excellent MPPT controllers designed for van and RV use.
Putting It All Together: System Components at a Glance
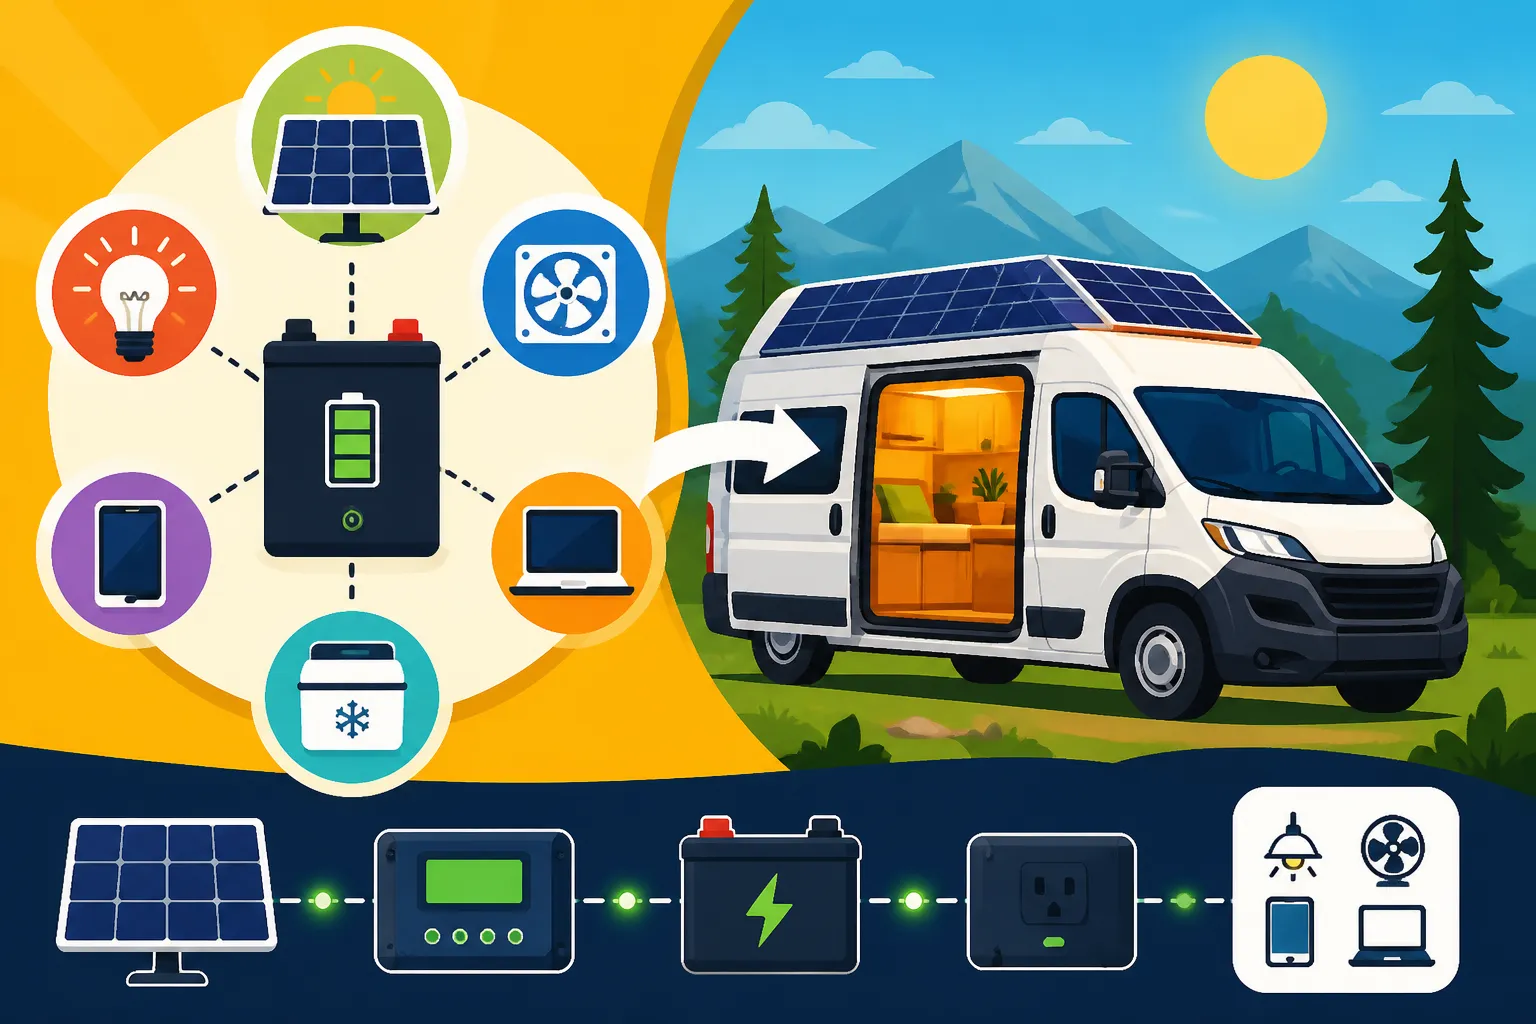
Sizing an off-grid solar system for your van involves a careful balance of all these components. Here’s a quick overview of the essential parts and what they do.
| Component | Purpose | Key Sizing Factors | Common Brands (Examples) |
|---|---|---|---|
| Solar Panels | Generate electricity from sunlight. | Daily Wh needs, Peak Sun Hours, Space, Efficiency | Renogy, Rich Solar |
| Charge Controller | Regulates power from panels to batteries. | Total panel current (amps), Battery voltage | Victron, EPEVER, Renogy |
| Battery Bank | Stores energy generated by panels. | Daily Wh needs, Days of Autonomy, Depth of Discharge, Voltage | Battle Born, EG4, Renogy |
| Inverter | Converts DC battery power to AC for household devices. | Max simultaneous AC running watts, Surge watts | Victron, AIMS Power, Renogy |
This holistic approach ensures that each part of your system works in harmony, providing you with consistent, reliable power wherever your van takes you. It's often a good idea to research "Off-Grid Solar System Components Explained" to get a full picture.
Wrapping Up Your Van Solar System Design
Designing an off-grid solar system for your van can feel like a daunting task, especially when you're just starting out and wading through all the technical jargon. But by breaking it down into manageable steps – understanding your energy usage, sizing your panels to meet those needs, ensuring your batteries can store enough power for those cloudy days, and choosing an inverter and charge controller that tie everything together safely – you can build a robust and reliable system.
Don't be afraid to take your time with the load analysis; it's truly the most important step. Many resources are available, from online calculators to detailed articles like "How to Wire an Off-Grid Solar System" or even "Best Off-Grid Solar Kits for Beginners" if you prefer a more bundled approach. If you’re ever in doubt, getting a professional opinion or thoroughly researching specific components from reputable manufacturers like Renogy can save you a lot of headaches (and money!) down the road. Happy travels, and enjoy the freedom that reliable off-grid power brings to your van life adventures!
Disclaimer
Please note that the information provided in this article is for educational and informational purposes only and does not constitute professional advice. Off-grid solar system design and installation can be complex and involve electrical hazards. Always consult with a qualified electrician or solar professional before installing or modifying any electrical system. Adhere to all local codes, regulations, and manufacturer instructions.