How to Size an Off-Grid System for a Shed
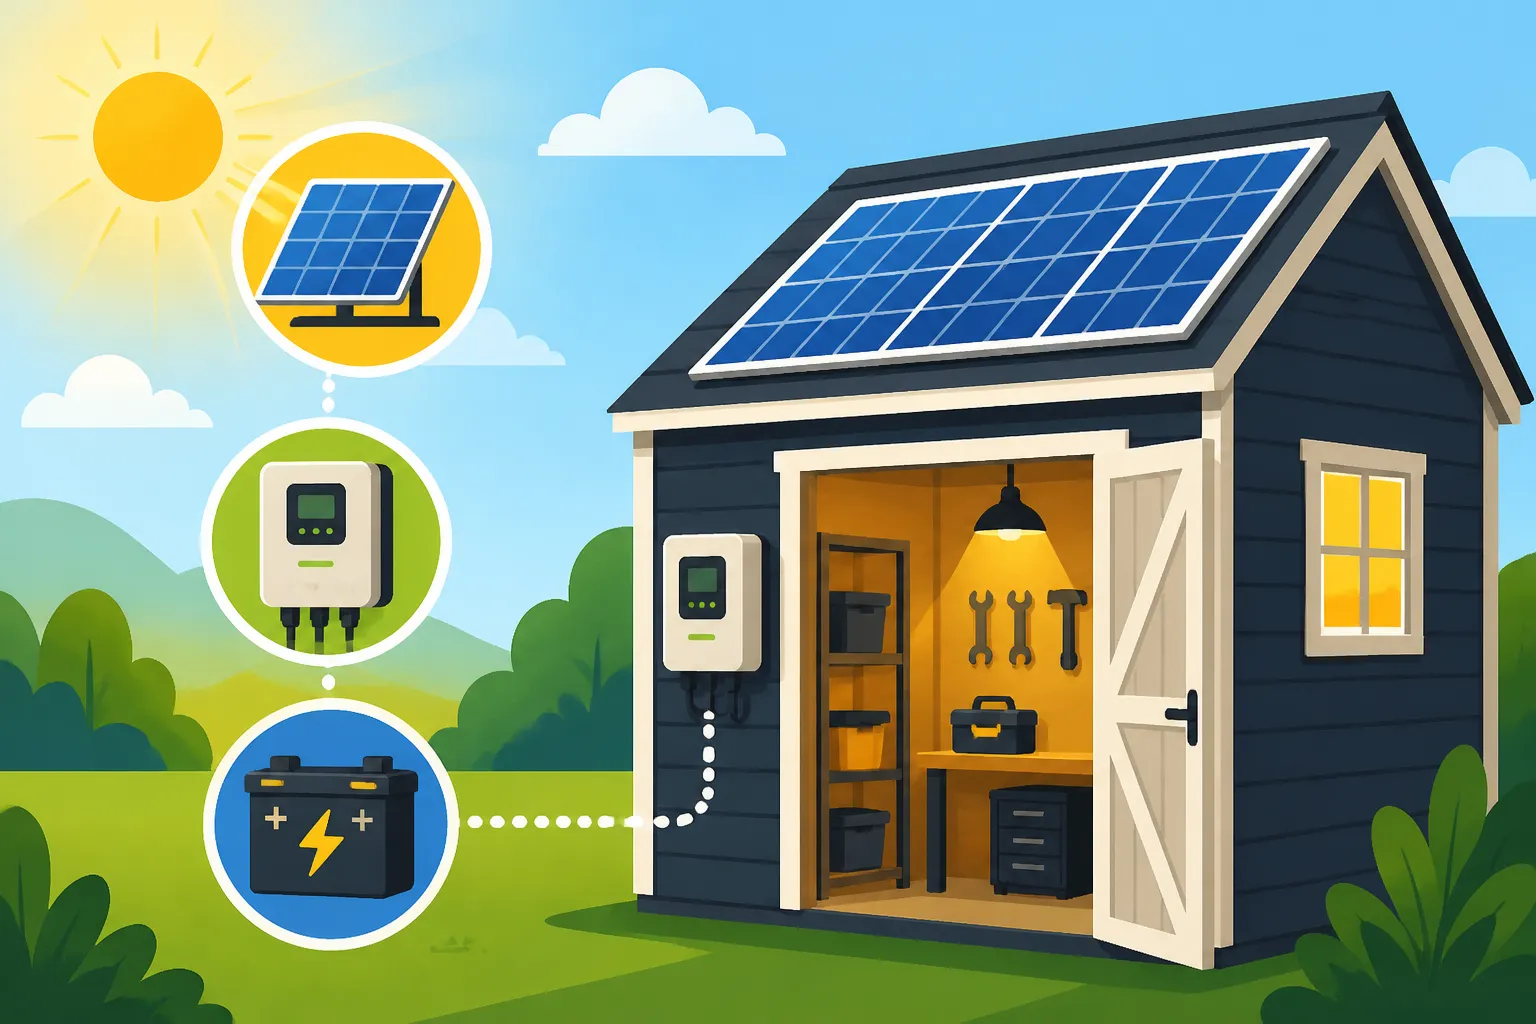
The dream of having a fully powered shed, whether it's a dedicated workshop, a cozy artist's studio, or just a place to store tools and equipment with a little light, often clashes with the reality of running expensive trenching or dealing with noisy generators. Getting reliable, independent power to a shed can feel like a puzzle, but with off-grid solar, it's totally achievable. This guide will meticulously break down how to accurately size an off-grid solar system for your shed, so you can stop dreaming and start doing.
Unveiling Your Shed's Power Demands: The Load Analysis
Before you even think about buying solar panels or batteries, you absolutely must understand what you're trying to power. This isn't just guesswork; it's a critical step called a "load analysis" and it's where most people either overspend or undersize their system, leading to frustration down the line. Trust me, I've seen it countless times – someone buys a tiny solar kit hoping to run a mini-fridge and a power tool, only to realize it barely covers their lights.
Listing Your Appliances and Their Wattage
The first step is to make a comprehensive list of every single electrical item you plan to use in your shed. Don't leave anything out, no matter how small it seems. Think about what you'll use daily, weekly, or even just occasionally.
For instance, consider:
- Lighting: Are you planning on a couple of LED shop lights, or just a single bare bulb? LED lights are fantastic for off-grid as they consume very little power.
- Small Electronics: Will you charge your phone, run a small radio, or maybe a laptop?
- Tools: This is where it gets tricky. Handheld drills, sanders, saws, and air compressors have significantly higher wattage demands, especially their "surge" or "starting" wattage.
- Comfort Items: A small fan in the summer? A tiny space heater in the winter (beware, these are huge power hogs)? A mini-fridge for cold drinks?
- Other: Any specific hobby equipment, a water pump for a small sink, or perhaps a security camera?
Once you have your list, you need to find the wattage for each item. This information is usually on a sticker or label on the appliance itself, often near the power cord or on the back. It might say "Watts (W)," "Amps (A)," or "Volts (V)." If it lists Amps and Volts, you can calculate Watts using the formula: Watts = Volts x Amps. If you can't find it on the device, a quick search online for "[appliance name] wattage" will usually give you a good average. Remember that power tools often have both a running wattage and a much higher surge wattage (what they pull for a split second when they start up). You’ll need to account for both when sizing your inverter. If you're struggling to figure out how much power your gadgets actually draw, taking a moment to learn How to Estimate Appliance Power Draw can really clarify things.
Calculating Daily Watt-Hours
Now that you have your list and wattage for each item, it's time to calculate your estimated daily energy consumption in "watt-hours (Wh)." This is the most crucial number you'll need for sizing your entire system. For each item, multiply its wattage by the number of hours you expect to use it per day.
Let's run through a hypothetical shed scenario:
| Appliance | Wattage (W) | Est. Daily Use (Hours) | Daily Watt-Hours (Wh) |
|---|---|---|---|
| LED Shop Light (2x) | 20 (each) | 4 | 80 (40W total x 2h) |
| Small Radio | 10 | 2 | 20 |
| Laptop Charger | 45 | 3 | 135 |
| Cordless Drill Charger | 50 | 1 | 50 |
| Mini-Fridge (on for 8h, cycling) | 60 (running) | 8 (actual run time likely 4h) | 240 (60W x 4h) |
| Total Estimated Daily Usage | 525 Wh |
This table is just an example. Your actual usage will vary wildly depending on your shed's purpose. If your shed is a serious woodworking shop, your power tools will significantly increase this number. Be realistic, but also consider a slight buffer for those days you might use something a little longer. It’s better to slightly overestimate than to consistently run out of power. This detailed step is often overlooked, but a solid understanding of How to Calculate Daily Energy Usage is foundational to a successful off-grid setup.
Sizing Your Solar Panel Array for Consistent Power
Once you have your daily watt-hour total, you can move on to figuring out how many solar panels you'll need to generate that energy. This step accounts for the vagaries of sunlight and system inefficiencies.
Determining Total Daily Watt-Hours Needed
You've calculated your raw daily energy usage, but your solar system isn't 100% efficient. Energy is lost at various stages: in the wiring, by the charge controller, and especially in the inverter when converting DC power to AC. Batteries also have their own efficiency losses during charging and discharging. A general rule of thumb is to add a buffer of about 20-30% to your calculated daily watt-hours to account for these system losses.
So, if our shed needs 525 Wh per day, adding a 25% buffer means we actually need to generate roughly 525 Wh * 1.25 = 656.25 Wh from our solar panels. This helps ensure that even with some inefficiencies, you're still producing enough power. When considering your overall energy goals, it’s useful to understand How Many Watts of Solar You Need to meet all your demands.
Accounting for Peak Sun Hours
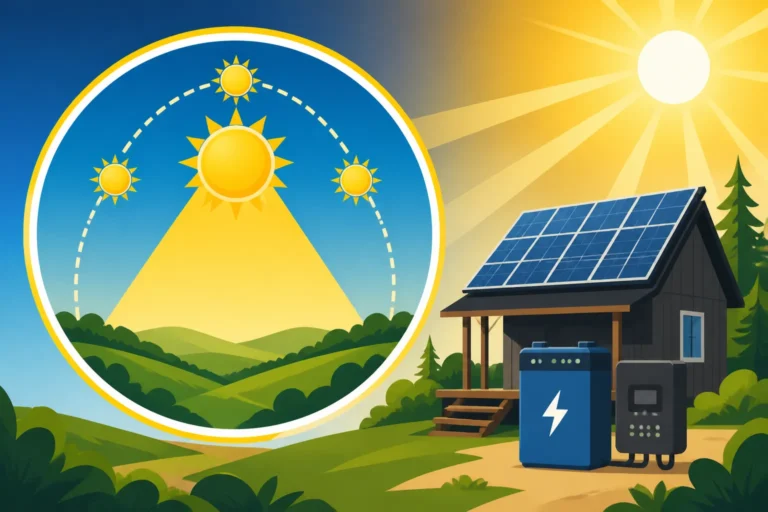
Solar panels are rated by their wattage (e.g., a 100W panel), but they only produce that full wattage under ideal conditions, known as "peak sun hours." This isn't just the number of hours the sun is out; it's the equivalent number of hours per day when the sun's intensity averages 1,000 watts per square meter. This value varies greatly depending on your geographic location and the time of year. For example, a sunny region like Arizona might get 5-6 peak sun hours in winter, while a cloudier area in the Pacific Northwest might only get 2-3.
You can find average peak sun hours for your specific location through various online resources, often by entering your zip code. Let's assume, for our example shed, we're in a moderately sunny area that gets an average of 4 peak sun hours per day.
To calculate the total wattage of your solar array, you'd use this formula:
(Total Daily Watt-Hours Needed (with buffer)) / (Average Daily Peak Sun Hours) = Required Solar Array Wattage (W)
Using our example: 656.25 Wh / 4 peak sun hours = 164.06 Watts.
So, for our hypothetical shed, we need an array that can produce at least 164 watts. If you're wondering how to properly factor this into your system, a deeper dive into Peak Sun Hours Explained is highly recommended.
Choosing the Right Panels and Quantity
Now that you know your required total solar panel wattage, you can decide on the number and size of individual panels. Solar panels come in various wattages, commonly 100W, 200W, or larger 300W+ panels.
For our 164W requirement:
- You could use two 100W panels, giving you 200W total, which is a good buffer.
- Or, if you find a single 200W panel on sale through a retailer like Amazon or from a reputable brand like Renogy, that might be a simpler installation.
Consider the physical space available on your shed roof, or if you plan on a ground mount. Shed roofs are often smaller, so compact, efficient panels might be a better choice. Always aim for a little bit of an oversized array if your budget and space allow, as it provides extra power for cloudy days or increased usage. This small buffer can make a huge difference in reliability. Deciding on the right number of panels for your setup is a key decision, so understanding How Many Solar Panels for Off-Grid Living can help you make an informed choice.
Building a Robust Battery Bank for Energy Storage
Solar panels only produce power when the sun is shining. To have electricity around the clock, or when it's cloudy, you need a battery bank. This is often the most expensive component of an off-grid system, but it's absolutely essential for energy storage.
Calculating Required Battery Capacity
Your battery bank needs to store enough energy to cover your daily needs, plus provide "days of autonomy" – essentially, how many days your system can run without any solar input (like during a string of cloudy days). For a shed, one to three days of autonomy is typically a good starting point, depending on how critical the power is and how much sun your region gets.
Let's use our 525 Wh daily usage number (before losses, as batteries store what the panels produce and deliver to them, not what the panels need to produce to overcome losses elsewhere).
- 1 Day of Autonomy: 525 Wh
- 2 Days of Autonomy: 525 Wh x 2 = 1050 Wh
- 3 Days of Autonomy: 525 Wh x 3 = 1575 Wh
Next, you need to consider the "depth of discharge (DoD)" for your chosen battery type. This refers to how much of the battery's total capacity you can safely use without damaging it or significantly shortening its lifespan.
- Lead-Acid Batteries (e.g., AGM, Gel): Typically recommended DoD is 50%. This means if you have a 100 Ah (Amp-hour) lead-acid battery, you should only use 50 Ah before recharging.
- Lithium Iron Phosphate (LiFePO4) Batteries: These are far more resilient and can be discharged up to 80-100% without significant harm, though 80% is often recommended for longevity.
The formula for calculating battery bank capacity (in Watt-hours) is:
(Total Daily Watt-Hours Needed x Days of Autonomy) / Recommended DoD = Total Usable Battery Capacity (Wh)
Let's stick with our 525 Wh daily usage and aim for 2 days of autonomy with LiFePO4 batteries (80% DoD):
(525 Wh x 2 days) / 0.80 = 1312.5 Wh. This is the usable capacity you need.
Now, batteries are often rated in Amp-hours (Ah) and Volts (V). If you're building a 12V system (common for smaller shed setups), you can convert Watt-hours to Amp-hours:
Amp-hours (Ah) = Watt-hours (Wh) / Voltage (V)
So, 1312.5 Wh / 12V = 109.375 Ah. This means you'd need roughly 110 Ah of usable capacity at 12V. You could achieve this with a single 100Ah LiFePO4 battery (like those often found on Renogy's product line or on Amazon) or two 50Ah batteries wired appropriately. For larger power needs, you might consider 24V or 48V systems, which allow for thinner wiring and less power loss over distance. Understanding How Many Batteries for an Off-Grid System will help you fine-tune this part of your design.
Understanding Battery Types and Voltage
Choosing the right battery chemistry is crucial, not just for cost but for performance and lifespan.
- Lead-Acid (AGM/Gel): These are traditionally more affordable upfront. They are heavy, require more maintenance (though sealed AGM/Gel are less so), have a shorter cycle life (number of times they can be charged and discharged), and are sensitive to deep discharges (50% DoD limit). They also perform less efficiently in cold weather.
- Lithium Iron Phosphate (LiFePO4): While more expensive initially, LiFePO4 batteries offer a much longer lifespan (thousands of cycles), are lighter, more compact, can be discharged much deeper (80-100% DoD), and are more efficient. They also tolerate colder temperatures better, though charging in freezing temperatures can damage them without proper internal heating elements or specialized battery management systems (BMS). For a deep dive into the cost implications, check out LiFePO4 vs Lead-Acid Battery Cost.
For small to medium sheds, a 12V system is often adequate and simpler to wire. However, if your power demands grow (e.g., adding a well pump or larger tools), moving to a 24V or even 48V system becomes more efficient. Higher voltage systems require less current for the same amount of power, meaning you can use thinner, less expensive wiring and experience less voltage drop, which is particularly beneficial over longer cable runs.
Wiring Your Battery Bank Safely
Once you have your batteries, you'll need to wire them together to achieve your desired voltage and capacity.
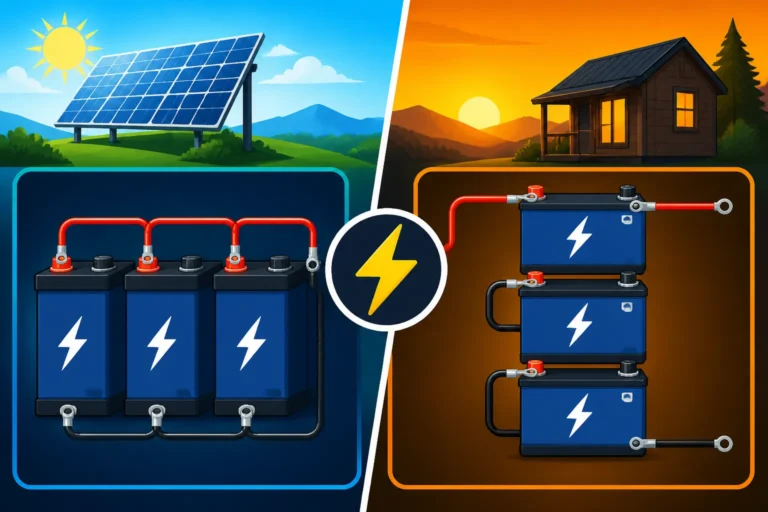
- Series Wiring: Connects the positive terminal of one battery to the negative terminal of the next. This increases the voltage while keeping the Amp-hour capacity the same. For example, two 12V 100Ah batteries in series create a 24V 100Ah bank.
- Parallel Wiring: Connects positive to positive and negative to negative terminals. This increases the Amp-hour capacity while keeping the voltage the same. For example, two 12V 100Ah batteries in parallel create a 12V 200Ah bank.
You might also combine series and parallel wiring for larger, higher-voltage battery banks. Always use appropriately sized battery cables (very thick!) and fuses to protect your system from shorts and overcurrent. Proper safety measures are non-negotiable. If you're unsure about how to properly connect your batteries, researching Battery Bank Wiring Configurations can provide detailed diagrams and instructions.
Selecting Your Inverter and Charge Controller
These two components are the brains and brawn of your off-grid shed system, managing the flow of power from your panels to your batteries and then to your appliances.
Sizing the Inverter for Your AC Loads
The inverter is the magical box that converts the direct current (DC) stored in your batteries into alternating current (AC) – the type of power most standard household appliances use.
When sizing your inverter, you need to consider two main ratings:
- Continuous Wattage: This is the maximum wattage the inverter can supply constantly. It should be equal to or greater than the sum of all AC appliances you might run simultaneously.
- Surge Wattage (Peak Power): Many appliances, especially those with motors (like power tools, refrigerators, or air compressors), draw a much higher burst of power for a few seconds when they first start up. The inverter's surge rating must be able to handle this momentary spike.
Go back to your appliance list. Identify the highest simultaneous continuous wattage you expect to use, and then find the highest surge wattage among all your appliances. Your inverter needs to meet both. For our example shed, if you're running a laptop, light, and radio simultaneously, that's roughly 135W (laptop) + 40W (lights) + 10W (radio) = 185W continuous. If you also plan to run a corded drill (say, 600W running, 1200W surge) at the same time, your inverter needs to handle a minimum of 185W + 600W = 785W continuous, and at least 1200W surge. A 1000W or 1500W pure sine wave inverter would likely be a good fit here.
- Pure Sine Wave vs. Modified Sine Wave: Always opt for a pure sine wave inverter for anything other than the most basic, resistive loads (like old incandescent light bulbs). Modified sine wave inverters are cheaper but can damage sensitive electronics (laptops, chargers, modern power tools, anything with a delicate circuit board) and cause motors to run inefficiently or loudly. For a shed, especially if it's a workspace, a pure sine wave inverter is a must. Many reputable brands, including Renogy, offer excellent pure sine wave inverters, readily available through retailers like Amazon. To avoid common pitfalls, ensure you know How to Size an Off-Grid Inverter correctly.
Matching Your Charge Controller to Your System
The charge controller is the unsung hero of your solar system. It sits between your solar panels and your batteries, regulating the voltage and current coming from the panels to ensure your batteries are charged safely and efficiently without being overcharged or damaged.
There are two main types of charge controllers:
- PWM (Pulse Width Modulation): These are simpler, less expensive, and less efficient. They effectively limit the voltage from the solar panel to match the battery voltage, discarding excess voltage. They work best in smaller, lower-power systems where the panel voltage is close to the battery voltage.
- MPPT (Maximum Power Point Tracking): These are more advanced, more expensive, and significantly more efficient (typically 20-30% more efficient than PWM). MPPT controllers intelligently track the maximum power point of the solar array, converting any excess voltage into additional current. This means they can take a higher voltage input from your panels and efficiently convert it down to the battery voltage, especially beneficial in colder weather or when your panel voltage is much higher than your battery bank voltage. For most off-grid shed systems, an MPPT controller is the better investment for maximizing solar harvest.
Sizing your charge controller depends on the total wattage of your solar array and your system voltage. You need to calculate the maximum possible current (Amps) that your solar array can produce.
Max Current (Amps) = Total Panel Wattage / System Voltage (V)
Add a 25% safety margin to this current. So, for our 200W panel array and a 12V battery bank:
200W / 12V = 16.67 Amps.
16.67 Amps * 1.25 (safety factor) = 20.84 Amps.
You would need a charge controller rated for at least 20-25 Amps. Brands like Victron Energy and Renogy offer reliable MPPT charge controllers in various sizes. Getting this step right ensures your batteries have a long and healthy life, so definitely explore How to Size a Charge Controller.
Integrated Solutions and Expandability
For smaller shed setups, you might consider an "all-in-one" unit that combines the inverter and charge controller (and sometimes even a transfer switch) into a single box. These can simplify wiring and setup, making them appealing for DIYers. Brands like Victron and Sol-Ark offer robust inverter-charger combinations that are popular in the off-grid community.
When designing your system, it’s always a good idea to think about future expandability. Maybe you only need lights and a radio now, but a year down the road, you might want to add a mini-split AC unit or a larger woodworking tool. Choosing components that allow for easy upgrades – like an inverter with headroom or a charge controller that can handle more panels – can save you money and headaches in the long run. Planning for this early on, by understanding How to Design an Expandable System, prevents costly overhauls later. And don't forget to budget accurately for your overall project; a good guide on How to Budget for an Off-Grid Solar System can be invaluable.
Disclaimer
The information provided in this guide is for general informational purposes only. Off-grid solar system design and installation involve electrical components and can be dangerous if not handled properly. Always consult with a qualified electrician or solar professional before installing or making significant changes to an off-grid solar system. Local codes and regulations regarding solar installations may vary and should be followed.