How to Plan Panel Placement and Angle
Thinking about going off-grid can feel liberating, but the reality of making your solar system work efficiently can quickly bring you back to earth with a thud. Many folks invest in panels, hook everything up, and then wonder why their batteries aren't charging as expected, especially during shorter winter days or when a shadow unexpectedly creeps across their array. The truth is, without careful consideration for how and where your solar panels are placed and angled, you're leaving a lot of potential energy on the table. This guide is all about demystifying the art and science of solar panel placement and angle, ensuring your off-grid dreams are powered reliably.
Understanding Your Property's Unique Solar Profile
Before you even think about drilling holes or pouring concrete, the absolute first step is to become intimately familiar with the sun's journey across your specific location. Every property, every piece of land, has its own unique solar profile, dictated by geographic location, natural obstructions, and even man-made structures. Ignoring this crucial initial phase is like trying to bake a cake without knowing if you have flour – you're setting yourself up for disappointment.
Mapping the Sun's Path and Solar Noon
The sun isn't a static lightbulb in the sky; it moves across the heavens in a predictable arc, but this arc changes dramatically with the seasons. Understanding its path is fundamental to maximizing your solar harvest. For those of us in the Northern Hemisphere, south-facing is generally the golden rule for maximizing year-round solar gain. However, it's not quite as simple as just pointing them south. The sun reaches its highest point in the sky at "solar noon," which rarely aligns with clock noon. This is the moment your panels receive the most direct sunlight.
To figure out your specific solar path and solar noon, you don't need fancy equipment, though there are certainly apps and tools that can help. A simple observation method, involving marking shadows at different times of day over a few weeks, can give you a surprisingly accurate picture. You'll notice the sun rises in the southeast in winter and swings more towards the northeast in summer, setting in the southwest in winter and northwest in summer. The goal is to orient your panels to face the true south (or north, if you're in the Southern Hemisphere), not magnetic south, and to capture as much of that peak solar noon intensity as possible. This foundational understanding is key to figuring out How to Size an Off-Grid Solar System effectively.
Identifying and Mitigating Shading Obstacles
Shade is the absolute enemy of solar panels. Even a small shadow from a single branch can dramatically reduce the output of an entire string of panels, especially with older or less sophisticated panel technologies. This isn't just about total darkness; even partial shading can cause a disproportionate drop in power. Think about it: if one cell is shaded, it can act like a resistor, heating up and reducing the efficiency of the entire series. It’s like a kink in a garden hose – the whole flow is affected.
You need to thoroughly survey your property for any potential shading obstacles. This means looking not just at trees in full leaf, but also considering their bare winter branches, the position of your house, outbuildings, utility poles, and even nearby hills or mountains. Remember that shadows change throughout the day and, critically, throughout the year. A tree that poses no problem in summer might cast a long, troublesome shadow over your array in the winter when the sun is lower in the sky. Tools like a solar pathfinder or even simple sun-tracking apps can help visualize these seasonal shifts. If removing the obstruction isn't an option, you'll need to strategically place your panels to avoid these shadow paths entirely. Sometimes, this might mean choosing a less-than-ideal orientation if it means avoiding constant shading. For more details on how winter conditions affect your power needs, check out our guide on How Winter Affects Off-Grid Sizing.
Analyzing Your Local Climate and Environmental Factors
Beyond the sun's path and shade, your local climate plays a significant role in where and how you place your panels. Different regions present different challenges and opportunities for an off-grid solar system. Are you in an area prone to heavy snowfall? High winds? Frequent dust storms? These aren't just minor inconveniences; they directly impact the efficiency, longevity, and even the safety of your solar array.
For example, in snowy climates, panels need to be mounted at a steeper angle to encourage snow to slide off naturally, preventing accumulation that blocks sunlight. A minimum tilt of 30-45 degrees is often recommended for effective snow shedding. In areas with high winds, mounting structures need to be incredibly robust and securely anchored to prevent damage. Think about the potential for uplift on a windy day – you don't want your expensive panels becoming airborne. Dusty or sandy environments mean your panels will require more frequent cleaning, so accessibility becomes a major factor. Even just considering humidity and potential for mold or moss growth in damp climates can influence your mounting choices. Taking these environmental factors into account from the outset will save you a lot of headaches and maintenance down the line, contributing to the overall Off-Grid Solar Installation Guide.
Strategic Panel Placement Options for Off-Grid Living
Once you've got a handle on the sun's behavior and your site's unique characteristics, it's time to consider the physical placement of your panels. This decision isn't just about convenience; it directly impacts efficiency, installation costs, maintenance, and even system security. There's no one-size-fits-all answer, as the best option depends entirely on your specific setup, whether it's a full-time homestead or a weekend cabin.
Roof Mounting for Homes and Structures
Roof mounting is a popular choice for many homeowners because it uses otherwise unused space and often offers decent sun exposure. It’s typically the most discreet option, keeping panels out of the way and less prone to ground-level tampering. Installation involves securely attaching racking systems to the roof structure, then affixing the solar panels. The main advantage is that it often requires less ground space and can be integrated cleanly with your dwelling.
However, roof mounting comes with its own set of considerations. The angle of your roof might not be ideal for optimal solar production year-round, limiting your ability to adjust for seasonal changes. Penetrating the roof for mounting hardware means careful waterproofing is absolutely critical to prevent leaks, which can be a major headache down the road. Access for cleaning and maintenance can also be more challenging and potentially hazardous, requiring ladders or specialized equipment. Furthermore, the structural integrity of your roof needs to be assessed to ensure it can safely bear the weight of the panels and withstand wind loads. A professional structural engineer's assessment is highly recommended for larger arrays. When planning this, it's a good idea to research How to Install Off-Grid Solar Panels to understand the nuances of secure roof attachments.
Ground Mounting Systems for Flexibility and Access
Ground mounting offers significant advantages, especially for off-grid setups where maximizing power and ease of maintenance are paramount. The biggest benefit is flexibility: you can precisely orient your panels to true south and set them at the optimal tilt angle, even allowing for seasonal adjustments. This level of control over angle and orientation often translates to higher overall energy production compared to a fixed roof mount. Plus, ground-mounted panels are much easier to access for cleaning, snow removal, and routine inspections, which is crucial for maintaining peak performance.
Of course, ground mounts aren't without their drawbacks. They require dedicated land space, which might be an issue on smaller properties. They can be more visible than roof mounts and, depending on your location, might be more susceptible to theft or damage from animals or severe weather. The installation process usually involves digging footings and pouring concrete for the support poles, which adds to the initial cost and labor. However, for those looking for maximum control and long-term performance, a well-designed ground mount can be an excellent investment. For a detailed comparison of options, check out our article on Ground Mount vs Roof Mount for Off-Grid.
Portable and Specialty Mounting Solutions
Not all off-grid setups are stationary. For RVs, campers, vans, or even temporary cabin setups, portable or specialty mounting solutions are often the way to go. These systems prioritize flexibility and mobility, allowing you to chase the sun or pack up your power when you're on the move.
- RV/Van Mounts: These typically involve mounting rigid panels directly to the roof of your vehicle using specialized brackets. While convenient, you're usually limited by roof space and the fixed angle of your vehicle. Some RVers opt for tiltable mounts that allow them to prop up panels when parked, improving efficiency. Brands like Renogy offer comprehensive kits that include panels and mounting hardware suitable for these applications, often found readily on platforms like Amazon.
- Portable Foldable Panels: These are fantastic for smaller power needs or as an addition to a fixed system. They can be set up quickly, angled directly towards the sun, and then folded away for storage. They're perfect for charging small electronics, running a few lights, or supplementing your main system during cloudy spells. They are an essential part of understanding How Many Solar Panels for Off-Grid Living if you need flexibility.
- Pole Mounts: These elevate panels on a single or multiple poles, often allowing for adjustable tilt and sometimes even manual or automatic tracking. They're great for situations where ground space is uneven or needs to be kept clear, and they can help overcome minor shading issues by lifting panels above obstructions. They are, however, generally more complex and costly to install than simple ground mounts.
Choosing the right placement often involves a trade-off between cost, convenience, aesthetics, and optimal power production. Consider your long-term goals and how much energy you truly need before committing to a specific mounting type.
Dialing In the Perfect Tilt Angle for Maximum Harvest
Once you've chosen where your panels will go, the next critical step is figuring out how they should be angled. This isn't just about pointing them towards the sun; it's about optimizing their tilt to capture the maximum amount of solar energy throughout the day and across the changing seasons. The right tilt angle can make a noticeable difference in your overall system's performance and efficiency, directly impacting how reliably your batteries charge and your appliances run.
Choosing a Year-Round Fixed Angle
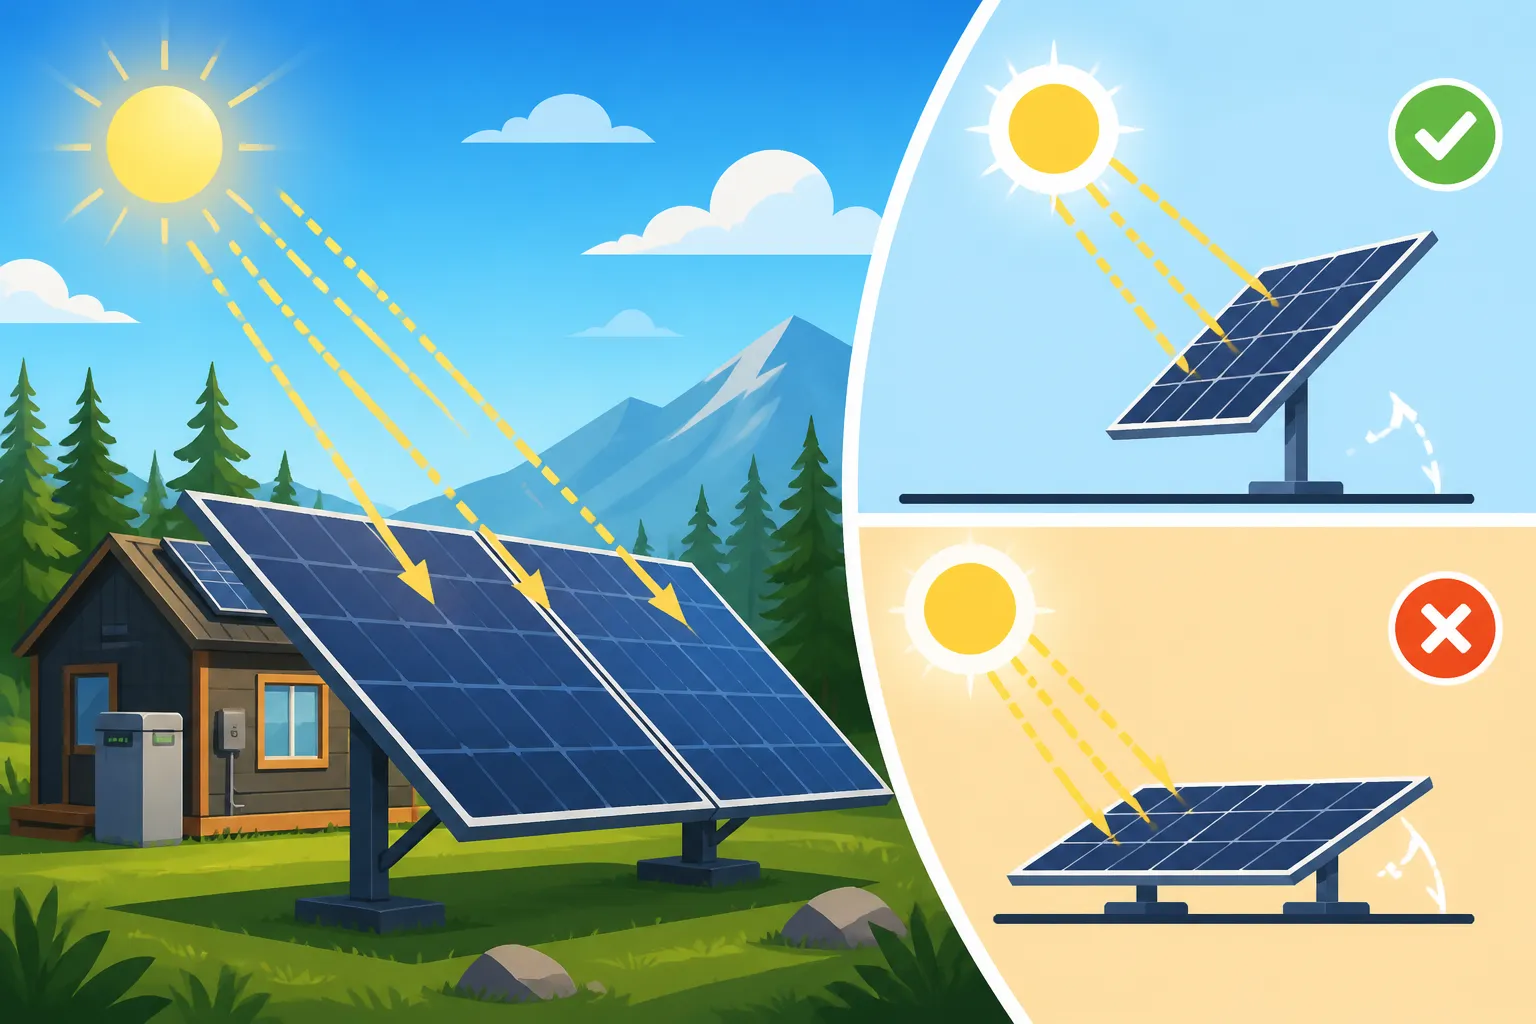
For many off-grid homeowners, especially those with roof-mounted systems or limited desire for frequent adjustments, a fixed tilt angle is the most practical solution. The goal here is to find a compromise angle that provides good, consistent output throughout the year, even if it doesn't achieve peak efficiency during specific seasons. A commonly recommended fixed tilt angle is equal to your geographical latitude. For example, if you live at 40 degrees North latitude, you would set your panels at a 40-degree tilt from horizontal. This general rule aims to balance summer and winter production.
However, if your priority is slightly skewed towards winter production, when solar resources are scarcer and heating demands might be higher, you might opt for your latitude plus 10 to 15 degrees. So, at 40 degrees latitude, you might tilt your panels at 50 to 55 degrees. This steeper angle helps the panels "look up" at the lower winter sun more effectively and can also aid in shedding snow. While it won't be perfectly optimized for every single day, a well-chosen fixed angle provides a reliable, hands-off approach to solar harvesting. Understanding this compromise is vital for making an off-grid system cost-effective, which you can explore further in Off-Grid Solar Cost: Complete Breakdown.
Adjusting for Seasonal Peak Performance
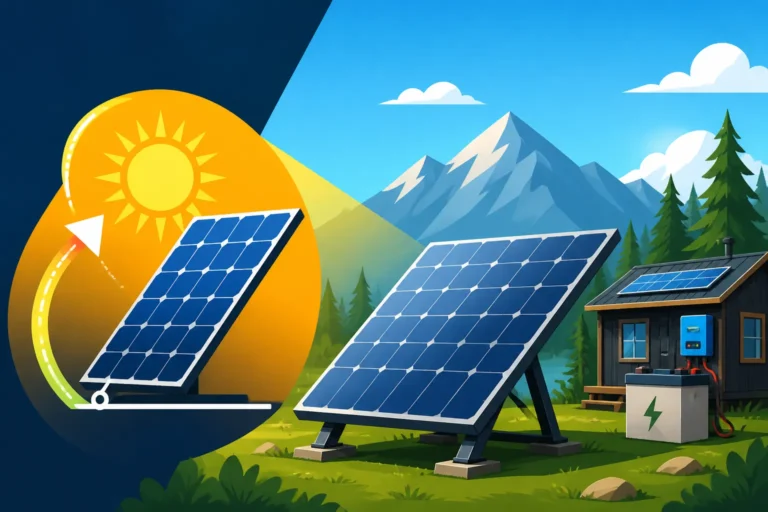
For those who are serious about maximizing their solar harvest and are willing to put in a little effort, adjusting your panel tilt angle seasonally can dramatically boost your energy production. The basic principle is simple: in the summer, when the sun is high in the sky, you want a shallower tilt angle (closer to horizontal). In the winter, when the sun's arc is much lower, you need a steeper tilt angle (closer to vertical) to catch those rays more directly.
Here’s a general guideline for seasonal adjustments:
- Summer (June-August): Set your panels to your latitude minus 10 to 15 degrees. This makes them flatter to capture the high summer sun.
- Spring/Fall (March-May, September-November): Set your panels to your latitude, serving as a good mid-range compromise.
- Winter (December-February): Set your panels to your latitude plus 10 to 15 degrees, making them steeper to maximize exposure to the low winter sun.
These adjustments can lead to significant gains in watt-hours collected, especially during those critical winter months when daylight hours are shorter and energy needs might be higher. While it requires manual effort a few times a year, the increase in usable power can be well worth it, especially if you're striving for How to Design for Year-Round Off-Grid Power. Many ground mount systems, and even some specialized roof mounts or pole mounts, are designed with adjustable tilt mechanisms to make this process easier.
Practical Considerations for Tilt and Orientation
Beyond just the optimal angle, there are several practical factors that influence your final decision on tilt and orientation. Ignoring these can lead to maintenance headaches or even system damage.
- Snow Shedding: As mentioned earlier, in snowy regions, a steeper angle (30 degrees or more) is crucial. This not only helps snow slide off but also reduces the area where snow can accumulate and freeze, which can damage panels over time.
- Wind Loading: The angle of your panels affects how much wind resistance they present. Very steep or very flat angles can increase the surface area exposed to strong winds, potentially putting strain on your mounting hardware. This is especially true for adjustable systems or those on less robust structures. Always ensure your mounting system is rated for your local wind speeds.
- Cleaning and Maintenance: Panels that are easier to access and have a decent tilt are also easier to clean. Dirt, dust, pollen, and bird droppings can accumulate on flat panels, reducing their efficiency. A good tilt, coupled with regular cleaning with a soft brush and water (or a specialized solar panel cleaning solution), will keep your system performing at its best. If you're wondering how to keep your investment pristine, our guide on How to Clean Off-Grid Solar Panels offers more advice.
- Aesthetics: For some, the visual impact of their solar array is also a factor. Roof mounts often blend in more seamlessly, while ground mounts might be more prominent. Consider how your panels will look on your property and if that aligns with any local regulations or personal preferences.
When it comes to the technical components for adjusting and monitoring your angles, reputable brands like Renogy offer robust racking systems and mounting hardware that can facilitate these adjustments. You can often find a variety of options on large marketplaces like Amazon, ranging from fixed mounts to more sophisticated adjustable tilt brackets.
Here's a quick look at typical tilt adjustments by season for a hypothetical location at 40° North Latitude:
| Season | Recommended Tilt Angle (from horizontal) | Reasoning |
|---|---|---|
| Summer Peak | Latitude – 15° (e.g., 25°) | Sun is highest in the sky; flatter angle captures more. |
| Spring/Fall | Latitude (e.g., 40°) | Balanced angle for mid-height sun. |
| Winter Peak | Latitude + 15° (e.g., 55°) | Sun is lowest in the sky; steeper angle for direct rays. |
| Year-Round | Latitude (e.g., 40°) or Latitude + 5° | Good compromise for minimal adjustment. |
Remember, these are general guidelines. Your specific site, energy needs, and willingness to perform maintenance will dictate your ideal approach. Investing time in thoughtful planning here will pay dividends in reliable power for years to come. For more specific guidance on different off-grid scenarios, you might find our article on How to Choose Off-Grid Solar for a Cabin particularly helpful.
The Impact of Panel Orientation and Advanced Considerations
Beyond just tilt, the horizontal orientation—which way your panels face—is just as crucial. For most stationary off-grid systems, facing true south (in the Northern Hemisphere) or true north (in the Southern Hemisphere) is the ideal for maximizing overall energy harvest throughout the year. However, there are nuances and advanced considerations that might lead you to tweak this standard approach, especially when dealing with specific energy demands or challenging site conditions.
Optimizing Azimuth for Specific Needs
Azimuth refers to the compass direction your panels are facing. A true south orientation (180 degrees azimuth) is typically recommended because it captures the most solar energy over the course of a full year. This symmetrical approach ensures you're harvesting power consistently from morning to evening. For example, if your off-grid cabin primarily uses power throughout the day and into the evening, true south is likely your best bet to ensure steady battery charging.
However, sometimes your energy consumption patterns might dictate a slightly different orientation. For instance, if your heaviest power usage occurs in the late afternoon and early evening (perhaps you run power tools in a workshop after lunch, or your family consumes most of its power after returning home from work), you might consider orienting your panels slightly southwest. This slight shift would prioritize afternoon sun, yielding more power later in the day, even if it slightly reduces overall daily output. This is a subtle optimization, often more relevant for grid-tied systems that sell excess power, but it’s worth considering for off-grid scenarios if your load profile is very specific. This ties into understanding your overall energy demands, which is covered in depth when discussing How Many Batteries for an Off-Grid System.
Dealing with Complex Shading and Microinverters
Even with the most careful planning, sometimes complete shade avoidance isn't possible. A nearby mountain range might cast a morning shadow, or an unavoidable building might block late afternoon sun. In these complex scenarios, traditional string inverters, where panels are wired in series, can suffer significantly. If one panel in a string is shaded, the output of the entire string can drop to the level of the weakest panel.
This is where technologies like microinverters or power optimizers become incredibly valuable for off-grid systems. Instead of having one central inverter for your entire array, microinverters are attached to each individual solar panel. This means each panel operates independently. If one panel is shaded, the others continue to produce at their maximum potential, minimizing the impact of the obstruction on your overall system. Similarly, power optimizers perform a similar function, conditioning the power at each panel before sending it to a central string inverter. While these solutions can add to the Off-Grid Solar Cost: Complete Breakdown, the enhanced performance in partially shaded or complex arrays can often justify the investment, ensuring a more reliable power supply.
Planning for Future Expansion and System Longevity
When you're planning your initial panel placement, it's really smart to think about the future. Many off-grid dwellers find their energy needs grow over time – maybe you add a new appliance, build an extension, or simply want more power autonomy. Designing your initial layout with expansion in mind can save you a lot of hassle and expense later on.
Consider leaving space for additional panels on your roof or in your ground mount area. Think about how additional panels would integrate into your existing wiring and mounting structure. Can your current inverter handle more input? Will you need to upgrade your charge controller? Thinking about these questions from the start can help you create a modular, scalable system. For example, some folks choose slightly oversized racking or leave conduit runs that can accommodate more wiring in the future. This forward-thinking approach is crucial for understanding how to design an How to Design an Expandable System. Furthermore, choosing durable mounting hardware and panels from reputable brands that offer good warranties will ensure your initial investment stands the test of time, reducing the need for costly replacements down the line.
Ultimately, the goal of planning panel placement and angle is to maximize the efficiency and reliability of your off-grid solar system. It’s a foundational step that influences every other aspect of your power production. Take your time, do your research, and don't be afraid to observe your specific location before making final decisions. The more informed you are, the more resilient and robust your off-grid power solution will be.
Disclaimer
The information provided in this guide is for general informational purposes only and does not constitute professional advice. Off-grid solar system design and installation can be complex and involve electrical hazards. Always consult with qualified professionals and adhere to all local codes and regulations when planning and installing your solar system.