How Many Panels to Charge a 48V Battery Bank
Figuring out how many solar panels you actually need to keep your 48V battery bank charged and your off-grid life humming along can feel like trying to solve a complicated math problem with a dozen unknowns. It's a common struggle, and honestly, the stakes feel pretty high when your comfort and power rely on it. This guide is here to break down that seemingly complex calculation into manageable, easy-to-understand steps, ensuring you can confidently power your 48V system.
Understanding the Foundation: Why 48V Systems Matter
When you're diving into the world of off-grid solar, one of the first big decisions you'll face (or inherit, if you're upgrading) is your system's voltage. For many serious off-gridders, especially those powering a cabin, a tiny home, or a robust RV setup, a 48V system quickly becomes the go-to choice. It's not just a number; it's a fundamental aspect that influences everything from your wiring size to your component selection.
The Benefits of a 48V System for Off-Grid Living
The primary reason 48V systems are so popular for larger off-grid installations boils down to basic electrical principles: higher voltage means lower current for the same amount of power. Think about it this way: if you need 4,800 watts to run your off-grid home, a 12V system would demand 400 amps (4800W / 12V = 400A). That's a massive amount of current, requiring extremely thick, expensive wiring to prevent voltage drop and overheating. It also means more energy is lost as heat in the wires, reducing overall system efficiency.
Now, take that same 4,800 watts and run it through a 48V system. Suddenly, you're only dealing with 100 amps (4800W / 48V = 100A). This dramatic reduction in current means you can use much thinner, more affordable wiring, making installation easier and safer. You'll experience significantly less voltage drop over longer cable runs, which is a huge advantage for properties where the solar array might be a distance from the battery bank and inverter. For anyone planning a more extensive setup, perhaps powering a full-time residence in the mountains of Colorado or a workshop in rural Texas, a 48V system minimizes losses and maximizes efficiency. It's a game-changer compared to the limitations you'd quickly hit with a 12V or 24V setup when trying to power substantial loads like a well pump or an air conditioner.
Key Components in a 48V Off-Grid Setup
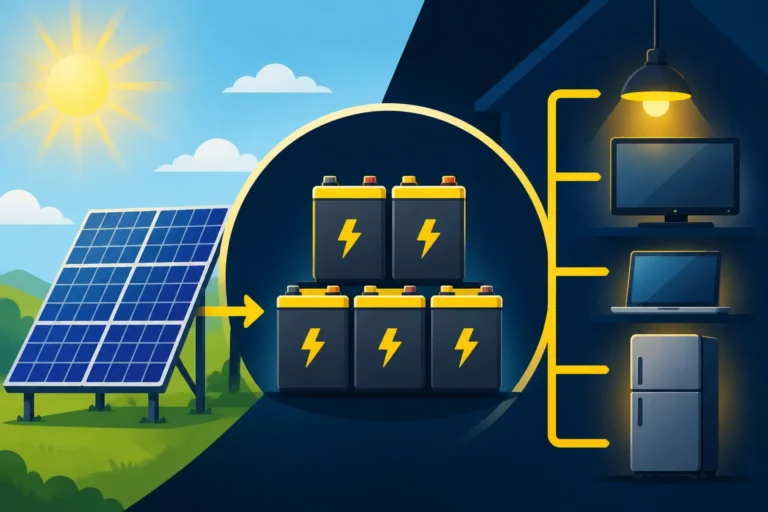
While our focus today is on solar panels, it's crucial to remember that they're just one piece of a sophisticated puzzle. A typical 48V off-grid solar system comprises several interdependent components that must be sized and chosen carefully to work in harmony. You'll have your solar panels, which convert sunlight into electricity. This electricity then flows to a charge controller, which regulates the power going into your battery bank. The battery bank, in turn, stores that energy for when the sun isn't shining. Finally, an inverter takes the direct current (DC) from your batteries and converts it into alternating current (AC) to power your household appliances.
Each of these components plays a vital role, and their individual sizing affects the overall system performance. For instance, if your charge controller is too small, it won't be able to handle the output from your solar panels, leading to wasted energy. If your battery bank isn't large enough, you'll constantly be running out of power. And if your inverter isn't sized correctly, it won't be able to handle the surge demands of appliances like refrigerators or power tools. Understanding this interconnectedness is key to designing a robust and reliable system. To delve deeper into how these elements work together, consider exploring our comprehensive guide on Off-Grid Solar System Design Basics.
The Core Calculation: Determining Your Energy Needs
Before you can even begin to think about how many panels you need, you absolutely have to know how much power you actually use. This isn't a step you can skip or guess at; it's the bedrock of your entire off-grid system. Without an accurate assessment of your daily energy consumption, you're just throwing darts in the dark, and that's a recipe for constant frustration and potential system failures.
Calculating Daily Watt-Hours Consumed
This is where the rubber meets the road. Grab a notepad or open a spreadsheet, because we're going to make a list of every electrical appliance you plan to use, how much power it draws, and for how long each day. This process is often called a "load analysis," and it's the single most important step in sizing your off-grid system.
Here's how to do it:
- List Every Appliance: Go through your space (be it your cabin, RV, or tiny home) and list everything that will plug into an outlet or be wired into your electrical system. Don't forget the small stuff like phone chargers, LED strip lights, and even a fan.
- Find the Wattage: Look for a label on each appliance, typically on the back or bottom, that indicates its wattage (W). If you only see amps (A) and voltage (V), you can calculate wattage: Watts = Amps x Volts. For AC appliances, assume 120V; for DC appliances, use their specific voltage (e.g., 12V). If an appliance has a range, use the higher number. For things like refrigerators or well pumps, note both the running wattage and the surge or starting wattage (which can be 2-7 times higher than running wattage, even if only for a few seconds).
- Estimate Daily Run Time: For each appliance, estimate how many hours per day you'll actually use it. Be realistic! A refrigerator runs 24/7, but its compressor cycles on and off, so you might estimate it runs for 8-12 hours total in a 24-hour period. Lights might be on for 4 hours, your laptop for 6, and a microwave for only 10 minutes (0.17 hours).
- Calculate Daily Watt-Hours (Wh): Multiply the wattage by the estimated daily run time for each item.
- Example: A 60W LED TV used for 5 hours a day consumes 60W * 5h = 300 Wh/day.
- Example: A mini-fridge that runs at 80W for 10 hours a day (compressor cycling) consumes 80W * 10h = 800 Wh/day.
- Sum It Up: Add all the daily watt-hour figures together. This total is your Total Daily Watt-Hours (Wh/day).
Let's imagine an off-grid cabin in Vermont. Here's a simplified example of their daily energy usage:
| Appliance | Wattage (W) | Est. Daily Run Time (Hours) | Daily Watt-Hours (Wh/day) |
|---|---|---|---|
| LED Lights (total) | 30 | 6 | 180 |
| Laptop | 60 | 4 | 240 |
| Mini-Refrigerator | 80 | 12 | 960 |
| Water Pump (on demand) | 300 | 0.5 | 150 |
| Phone Charging | 10 | 2 | 20 |
| Microwave | 1000 | 0.1 (6 minutes) | 100 |
| Total | 1650 Wh/day |
So, for this cabin, the total daily energy consumption is 1650 Wh/day. This number is absolutely critical for all subsequent calculations. For a more detailed walkthrough, check out our guide on How to Calculate Daily Energy Usage.
Accounting for Days of Autonomy and Depth of Discharge
Once you know your daily energy consumption, the next step in sizing your battery bank – and consequently, your solar array – is to consider how long you need your system to run without any new power generation. This is known as days of autonomy. For off-grid living, where cloudy days or bad weather can severely limit solar production, planning for 2 to 5 days of autonomy is generally recommended. If you're in a consistently sunny region like Arizona, you might get away with 2 days, but in the Pacific Northwest, 5 days might be a bare minimum, especially in winter.
Equally important is understanding Depth of Discharge (DoD), which refers to the percentage of a battery's total capacity that has been discharged. Different battery chemistries have different recommended DoD levels, and adhering to them is vital for the battery's lifespan.
- Lead-Acid Batteries (e.g., AGM, Flooded): These batteries generally shouldn't be discharged below 50% DoD if you want them to last. Regularly going below this can drastically shorten their cycle life. So, if you have a 100 Ah lead-acid battery, you only have 50 Ah of usable capacity.
- LiFePO4 (Lithium Iron Phosphate) Batteries: These are the superstars of off-grid battery banks. They can safely be discharged to 80-100% DoD without significant damage to their lifespan. A 100 Ah LiFePO4 battery offers 80-100 Ah of usable capacity, making them far more efficient in terms of usable energy per rated capacity.
Let's revisit our cabin example. If they consume 1650 Wh/day and want 3 days of autonomy, they need to store 1650 Wh/day * 3 days = 4950 Wh of usable energy in their battery bank. This usable energy must then be factored against the battery's voltage and DoD to determine its total capacity. Understanding how battery choice impacts your system is crucial; for more, see How Many Batteries for an Off-Grid System.
Sizing Your 48V Battery Bank to Meet Demand
Now that you have your daily energy consumption and autonomy needs, we can translate that into the actual size of the battery bank required for your 48V system. This is a critical step, as the battery bank's capacity directly dictates how much solar power you'll need to generate to keep it topped up.
From Watt-Hours to Amp-Hours at 48V
To determine the total capacity of your battery bank, we'll use the daily watt-hour consumption, your desired days of autonomy, and the usable depth of discharge. Since we're working with a 48V system, we'll convert watt-hours into amp-hours, which is how battery capacity is typically rated.
The formula looks like this:
Total Battery Bank Capacity (Ah) = (Total Daily Watt-Hours * Days of Autonomy) / (System Voltage * Usable Depth of Discharge)
Let's apply this to our cabin example:
- Total Daily Watt-Hours: 1650 Wh/day
- Days of Autonomy: 3 days
- System Voltage: 48V
Now, let's consider two battery chemistries:
-
If using LiFePO4 Batteries (90% Usable DoD):
Total Ah = (1650 Wh/day * 3 days) / (48V * 0.90)
Total Ah = 4950 Wh / 43.2V
Total Ah ≈ 114.58 Ah at 48V -
If using Lead-Acid Batteries (50% Usable DoD):
Total Ah = (1650 Wh/day * 3 days) / (48V * 0.50)
Total Ah = 4950 Wh / 24V
Total Ah ≈ 206.25 Ah at 48V
Notice the significant difference in required Amp-Hours based on the Depth of Discharge. You need a much larger lead-acid battery bank to provide the same amount of usable energy compared to a LiFePO4 bank.
Beyond these calculations, it's wise to factor in a small buffer for system inefficiencies (like inverter conversion losses, wire losses, and temperature effects), typically adding another 10-15% to your total. So, for our LiFePO4 example, you might aim for a 48V, 125-130Ah battery bank. For more in-depth calculations, check out How to Calculate Battery Amp-Hours Needed.
Choosing the Right Battery Chemistry
The choice between LiFePO4 (lithium iron phosphate) and lead-acid batteries (like AGM or flooded) is one of the most impactful decisions you'll make for your off-grid system, affecting both upfront cost and long-term performance.
-
LiFePO4 Batteries: These are often considered the gold standard for modern off-grid systems. They boast a much higher energy density, meaning more usable power in a smaller, lighter package. Their cycle life is incredibly long, often rated for 3,000 to 7,000 cycles, potentially lasting 10-20 years or more. As discussed, they tolerate deep discharges (80-100% DoD) without degradation, which means you need less overall capacity to meet your usable energy needs. While the initial investment for a high-quality LiFePO4 battery like those from brands like Battle Born or EG4 is higher, their longevity and efficiency often make them more cost-effective over the system's lifetime. They also require no maintenance and perform better in a wider range of temperatures (though charging below freezing typically requires a battery management system with low-temperature cutoffs).
-
Lead-Acid Batteries: These have been the traditional choice for off-grid power due to their lower upfront cost. AGM (Absorbent Glass Mat) batteries are sealed and maintenance-free, while flooded lead-acid batteries require regular watering. However, their lower usable DoD (typically 50%) means you need to buy double the rated capacity compared to LiFePO4 to get the same amount of usable energy. Their cycle life is also much shorter, usually 300-1200 cycles, meaning they'll need replacement more frequently, often every 3-7 years. This can make them surprisingly more expensive in the long run. If you're on a tight budget for a small, temporary setup, lead-acid might be an option, but for reliable, long-term off-grid living, LiFePO4 offers superior performance and value. For a deeper dive into the cost implications, explore LiFePO4 vs Lead-Acid Battery Cost.
How Many Solar Panels You Really Need for a 48V System
Alright, we've laid the groundwork! You know your daily energy consumption and you've got a solid estimate for your 48V battery bank size. Now comes the exciting part: calculating the solar panel array size needed to replenish that battery bank and power your loads. This is where your dreams of energy independence truly start to take shape.
Calculating the Required Solar Array Size Watts
To determine the total wattage your solar panel array needs to produce, we need to consider your total daily energy needs and the amount of effective sunlight your location receives. This effective sunlight is quantified as "Peak Sun Hours."
The formula is:
Required Solar Array Wattage (Wp) = (Total Daily Watt-Hours / Peak Sun Hours) * System Losses Multiplier
Let's break down the components:
- Total Daily Watt-Hours: This is the figure we calculated earlier (e.g., 1650 Wh/day for our cabin).
- Peak Sun Hours: This isn't just how many hours the sun is out, but rather the equivalent number of hours per day when solar irradiance averages 1,000 watts per square meter (the standard for panel ratings). Peak sun hours vary significantly by location and time of year. For instance, a sunny summer day in Arizona might have 7-8 peak sun hours, while a cloudy winter day in Seattle might only have 1-2. You can find average peak sun hour data for your specific location using tools from the National Renewable Energy Laboratory (NREL) or other local weather resources. For sizing, you should always use the lowest average peak sun hours for your worst-case month (typically winter) to ensure year-round reliability. Let's assume our Vermont cabin has an average of 3 peak sun hours in its worst winter month. For more on this, see Peak Sun Hours Explained.
- System Losses Multiplier: No solar system is 100% efficient. Energy is lost due to various factors:
- Inverter Efficiency: Typically 90-95%.
- Charge Controller Efficiency: Typically 90-98%.
- Battery Charging Efficiency: Especially for lead-acid, this can be 80-90%. LiFePO4 is higher, often 98-99%.
- Wiring Losses: Voltage drop in cables.
- Temperature Derating: Panels perform less efficiently in very hot conditions.
- Dust and Shading: Accumulation on panels, partial shading from trees or structures.
- A good conservative estimate for total system losses is usually around 20-30%. So, your multiplier would be 1 / (1 – loss percentage). For example, a 25% loss means a multiplier of 1 / 0.75 = 1.33.
Now, let's calculate the required solar array wattage for our Vermont cabin:
- Total Daily Watt-Hours: 1650 Wh/day
- Worst-Case Peak Sun Hours: 3 hours
- System Losses Multiplier: Let's assume a 25% loss, so 1.33
Required Solar Array Wattage = (1650 Wh / 3 hours) * 1.33
Required Solar Array Wattage = 550 W * 1.33
Required Solar Array Wattage ≈ 731.5 Watts Peak (Wp)
This 731.5 Wp is the minimum size of your solar array to meet your daily needs during your worst-case month. It's often wise to round up and add a bit more buffer, maybe aiming for 800-900 Wp for a little extra wiggle room.
Determining the Number of Panels
Once you know your total required array wattage, figuring out the number of panels is straightforward. You simply divide the total required wattage by the wattage of the individual solar panels you plan to use.
Let's say you're looking at solar panels that are rated at 400 watts each. Many reputable brands offer panels in this range, and you can often find good deals on platforms like Amazon or directly from suppliers like Renogy.
- Required Solar Array Wattage: 731.5 Wp
- Individual Panel Wattage: 400W
Number of Panels = Required Solar Array Wattage / Individual Panel Wattage
Number of Panels = 731.5 Wp / 400 W
Number of Panels ≈ 1.83 panels
Since you can't install 0.83 of a panel, you'd round up. In this case, 2 x 400W panels = 800W array would be sufficient to meet the minimum requirements for our cabin example.
Wiring for a 48V System: This is a crucial consideration. Most individual solar panels have a nominal voltage of 12V, 24V, or sometimes higher. To charge a 48V battery bank efficiently with an MPPT (Maximum Power Point Tracking) charge controller, you'll want to wire your panels in series to create a "string voltage" significantly higher than 48V (typically 60-150V or even higher, depending on your charge controller's specifications). This allows the MPPT controller to operate at its peak efficiency, converting the higher panel voltage down to the battery voltage while maximizing current.
- If you're using 12V nominal panels, you'd need to wire at least four of them in series (4 x 12V = 48V) just to match the battery voltage. However, for MPPT efficiency, you'd likely want to wire more in series, perhaps six or eight panels, to get a higher string voltage.
- If you're using 24V nominal panels, you'd wire two in series (2 x 24V = 48V), and again, often more for optimal MPPT performance.
- Many modern panels are actually 60-cell or 72-cell panels, with higher nominal voltages (e.g., Voc around 40-50V). Two of these in series could easily give you 80-100V, which is great for a 48V system with an MPPT charge controller.
Always check the input voltage limits of your charge controller and design your series strings accordingly. For more on wiring, you might find our guide on How to Wire Solar Panels in Series vs Parallel helpful.
Optimizing for Winter and Cloudy Days
One of the biggest pitfalls for off-gridders is underestimating power needs during the harshest conditions. The solar array size we calculated above (731.5 Wp) was based on the worst-case peak sun hours. However, even with that, you might encounter consecutive cloudy days that severely impact production.
Many experienced off-gridders choose to oversize their solar array by an additional 10-30% beyond the calculated minimum, especially if they live in areas with unpredictable weather or long, dark winters. This oversizing helps ensure that your battery bank can still get a decent charge even on suboptimal days, reducing reliance on a backup generator. For example, our cabin might choose to install 3 x 400W panels (1200W total) instead of just 2. This extra capacity is essentially an insurance policy for cloudy periods.
The trade-off, of course, is cost. More panels mean a higher upfront investment. However, for true peace of mind and reduced generator run-time, many find the extra investment well worth it. Planning for winter conditions is particularly crucial, as explained in How Winter Affects Off-Grid Sizing. It's a delicate balance between budget and desired reliability, but leaning towards a slightly larger array is usually a decision you won't regret.
Here’s a quick overview table for common 48V battery bank sizes and the approximate solar array wattage needed, assuming 4 peak sun hours and a 20% system loss, using 400W panels:
| Daily Watt-Hours (Wh/day) | Usable Battery Capacity (Wh) (3 days autonomy) | Target 48V Battery Bank (Ah) (90% DoD) | Required Solar Array (Wp) (4 Peak Sun Hours, 20% loss) | Approx. # of 400W Panels |
|---|---|---|---|---|
| 1000 | 3000 | 69.4 | 937.5 | 3 |
| 2000 | 6000 | 138.9 | 1875 | 5 |
| 3000 | 9000 | 208.3 | 2812.5 | 7 |
| 4000 | 12000 | 277.8 | 3750 | 10 |
| 5000 | 15000 | 347.2 | 4687.5 | 12 |
Note: These are estimates. Your specific needs, location, and desired autonomy may vary.
Disclaimer
The information provided in this guide is for general informational and educational purposes only and is not intended as professional advice. Off-grid solar system design and installation involve electrical work that can be dangerous if not performed correctly. Always consult with qualified professionals and ensure compliance with all local codes and regulations.