DIY Off-Grid Solar Installation Step by Step
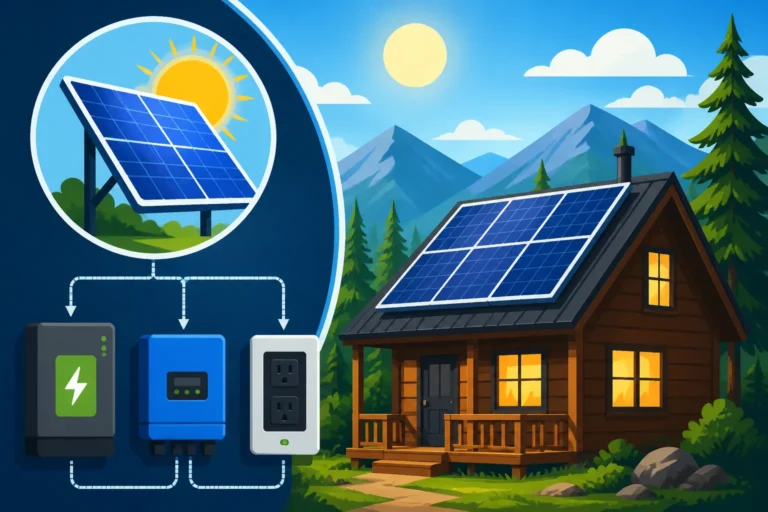
The dream of energy independence, whether for a remote cabin, an RV, or simply as a backup for your home, is incredibly appealing. But for many, the thought of actually installing an off-grid solar system themselves feels like staring up at Mount Everest — daunting, complex, and filled with potential pitfalls. We get it; the jargon, the wiring diagrams, the sheer number of components can make anyone’s head spin. This comprehensive guide is here to demystify the process, breaking down the DIY off-grid solar installation into manageable, step-by-step actions so you can confidently achieve your self-sufficiency goals.
Understanding Your Energy Needs and System Design
Before you even think about ordering panels or wiring, the absolute first and most critical step is to deeply understand your energy consumption. Skipping this part is like trying to build a house without blueprints – you’re almost guaranteed to run into problems, either by overspending on an oversized system or, more commonly, by underpowering your essential needs. This foundational work ensures your off-grid system will actually meet your lifestyle expectations.
Conducting a Detailed Load Analysis
A load analysis is essentially a detailed inventory of every single electrical device you plan to power, how much electricity each one uses, and for how long. It’s not enough to just list "refrigerator"; you need to know its wattage and how many hours it runs per day. Think about everything from your coffee maker and microwave to your laptop, phone chargers, lights, and even your well pump. Don't forget those intermittent but high-power appliances that might only run for short bursts, like power tools in a workshop or a hair dryer.
To perform this, grab a pen and paper or a spreadsheet. For each appliance, find its wattage (often listed on a label or in the owner's manual) and estimate its daily run time. For items like refrigerators, which cycle on and off, you might need a Kill-A-Watt meter, easily found on Amazon, to get an accurate daily kilowatt-hour (kWh) usage. Multiply watts by hours to get watt-hours (Wh) per day for each item, then sum them up for your total daily energy consumption. Remember to account for surge currents, especially for motors and compressors, as your inverter will need to handle these brief, high power demands. This detailed accounting is paramount to ensure your system can handle everything you throw at it. If you want to dive deeper into this critical step, explore our guide on How to Calculate Daily Energy Usage.
Sizing Your Solar Array and Battery Bank
Once you have your total daily watt-hours, you can start to size the main components of your system. Your solar array needs to generate enough power to meet your daily needs and, crucially, recharge your battery bank. This isn't just about adding up panel wattages; you need to factor in your local peak sun hours, which is the equivalent number of hours per day when the sun's intensity averages 1,000 watts per square meter. A location with 5 peak sun hours means a 100-watt panel will produce about 500 watt-hours a day. You'll likely need to oversize your array to account for cloudy days, seasonal changes, and system inefficiencies, especially if you're planning for year-round off-grid living.
Your battery bank is the heart of your off-grid system, storing the energy generated by your panels. Sizing this correctly means determining your desired "days of autonomy" – how many days your system can power your loads without any new solar input. For critical systems, aiming for 2-3 days of autonomy is common. You'll need to calculate the total amp-hours (Ah) required, taking into account the depth of discharge recommended for your chosen battery chemistry. Lithium Iron Phosphate (LiFePO4) batteries, like those offered by companies such as Battle Born or EG4, are increasingly popular for their high cycle life, deeper discharge capabilities, and lighter weight compared to traditional lead-acid batteries, though they come with a higher upfront cost. Understanding How Many Batteries for an Off-Grid System is key to a reliable setup.
Choosing the Right Inverter and Charge Controller
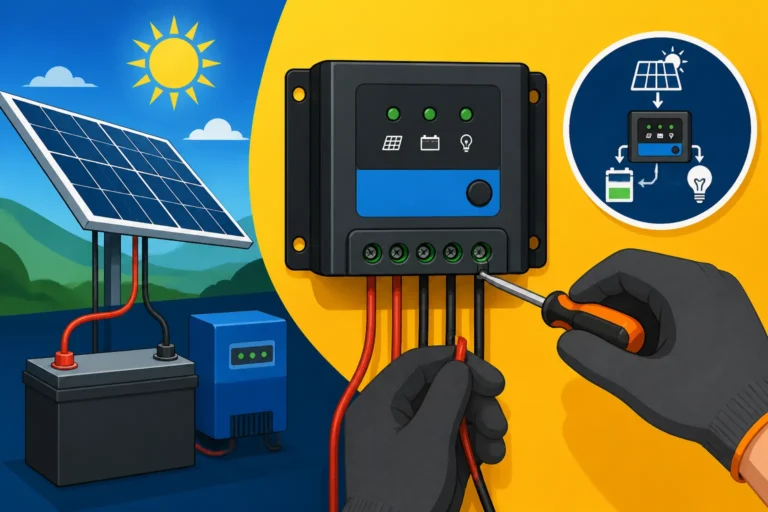
These two components are the brains and brawn that manage the flow of electricity in your system. The charge controller sits between your solar panels and your battery bank, regulating the voltage and current from the panels to prevent overcharging your batteries. You'll typically choose between a Pulse Width Modulation (PWM) or a Maximum Power Point Tracking (MPPT) controller. MPPT controllers are more efficient, especially in larger systems or fluctuating weather conditions, as they can convert excess voltage into usable amperage, maximizing the power harvest from your panels. While more expensive, the increased efficiency often makes them a worthwhile investment.
The inverter is what converts the DC (Direct Current) power stored in your batteries into usable AC (Alternating Current) power for your standard household appliances. You'll need to select an inverter with a continuous wattage rating that can handle your typical daily loads and, importantly, a surge rating that can handle the brief power spikes from motor-driven appliances like refrigerators or well pumps. A pure sine wave inverter is almost always recommended for off-grid living, as it produces clean power that is safe for all electronics, unlike modified sine wave inverters which can damage sensitive devices. Considering a system's voltage (12V, 24V, or 48V) is also crucial. Larger systems benefit significantly from higher voltages (e.g., 48V) as they allow for thinner wires and reduce power loss over distance, simplifying the overall wiring process and reducing material costs. A great starting point for understanding how these components fit together is our guide on Off-Grid Solar System Design Basics.
Gathering Your Components and Tools
Once your design is solid, it's time to gather everything you need. This stage can be exciting, seeing your system take shape piece by piece, but it also requires careful attention to detail to ensure you have all the correct parts before you begin the physical installation.
Essential Off-Grid Solar Components
You’ll need more than just panels, batteries, and an inverter. A complete off-grid system requires a suite of interconnected parts. This includes solar panels (monocrystalline are generally preferred for their efficiency and smaller footprint), a charge controller, a battery bank (LiFePO4 or lead-acid), and a pure sine wave inverter. But don't forget the necessary electrical infrastructure: DC disconnect switches (between panels and charge controller, and between batteries and inverter), AC circuit breakers for your main loads, appropriate gauge wiring for both DC and AC circuits, MC4 connectors for panels, and heavy-gauge battery cables. You’ll also need grounding wire and components to ensure system safety.
Many newcomers to off-grid solar find that starting with a comprehensive kit can significantly simplify this step. Companies like Renogy offer a wide range of off-grid solar kits that include many of the core components pre-selected and matched for compatibility, often with clear instructions. While a kit might not be perfectly tailored to every unique situation, it provides an excellent foundation and ensures you don't miss any critical pieces. For those looking to build from scratch, it’s worth spending time reading our article on Off-Grid Solar System Components Explained to ensure you understand each part's role.
Tools and Safety Gear You'll Need
A successful and safe DIY installation hinges on having the right tools and, even more importantly, wearing the proper safety gear. Electrocution and falls are real hazards, so never skimp on safety. Essential tools include a good quality digital multimeter (for checking voltage, current, and continuity), wire strippers and crimpers specifically designed for the gauge of wire you're using, a torque wrench (for battery terminals and mounting hardware), various screwdrivers, wrenches, a drill, and a level. For cutting large cables, a hydraulic crimper can be invaluable.
Safety gear must include electrical-rated gloves, safety glasses, a hard hat (especially if working on a roof or overhead), and fall protection harnesses if you're working at heights. Always ensure your tools are in good working order and rated for the voltages you'll be dealing with. It’s also wise to have a first-aid kit nearby. Remember, electricity is unforgiving, so taking shortcuts on safety is never an option. You can find many of these specialized tools, like hydraulic crimpers or a reliable multimeter, on online platforms such as Amazon, making them accessible even if your local hardware store doesn't carry them.
Sourcing Your Equipment Smartly
Where you buy your components can significantly impact cost, reliability, and support. For major components like solar panels and inverters, it's generally best to purchase new from reputable solar suppliers or direct from manufacturers. Look for companies with strong warranties and good customer service. For instance, Victron Energy and Outback Power are well-regarded brands for inverters and charge controllers, known for their robust performance in off-grid environments. For panels, brands like Renogy or Rich Solar offer good value.
While buying used equipment can sometimes save money, it introduces risks, particularly with batteries and inverters where performance degradation might not be immediately obvious. If considering used, proceed with extreme caution and thoroughly test components before integrating them into your system. For smaller items like wire, connectors, fuses, and mounting hardware, online retailers like Amazon can be a convenient and cost-effective source, but always double-check specifications and reviews. Always confirm compatibility between different brands and components before purchasing to avoid frustrating installation delays and potential system failures.
Site Preparation and Panel Mounting
The physical installation begins with careful preparation of your chosen site. The location and orientation of your solar panels are paramount to their performance, directly impacting how much energy your system can produce daily. Neglecting proper planning here can severely limit your system's output, regardless of how many panels you install.
Selecting the Optimal Location for Panels
Choosing where to place your solar panels is perhaps the most critical decision in the physical installation phase. You're looking for maximum, unobstructed sunlight exposure throughout the day, year-round. This means conducting a thorough shade analysis. Observe your property during different times of the day and, ideally, different seasons. Tall trees, neighboring buildings, or even utility poles can cast shadows that significantly reduce panel efficiency. Even a small amount of shading on one part of a panel can drastically reduce the output of the entire string of panels. Use a sun path calculator or a simple solar pathfinder tool to determine the optimal tilt angle and orientation for your specific latitude. In the Northern Hemisphere, panels should generally face true south.
The ideal tilt angle is often debated, but a good rule of thumb for year-round production in most mid-latitudes is to set the tilt equal to your latitude. However, if your primary usage is seasonal (e.g., a summer cabin or winter RVing), you might adjust the tilt to optimize for those specific periods. Ground mounts offer more flexibility for optimal angling and easy access for cleaning, while roof mounts are space-saving and may offer better security, but are fixed to the building's orientation and roof pitch. Consider factors like ease of access for maintenance, security from theft or damage, and proximity to your battery bank and inverter to minimize long wire runs and associated voltage drop. Our article on How to Install Off-Grid Solar Panels offers more detailed insights into placement.
Mounting Solar Panels Securely
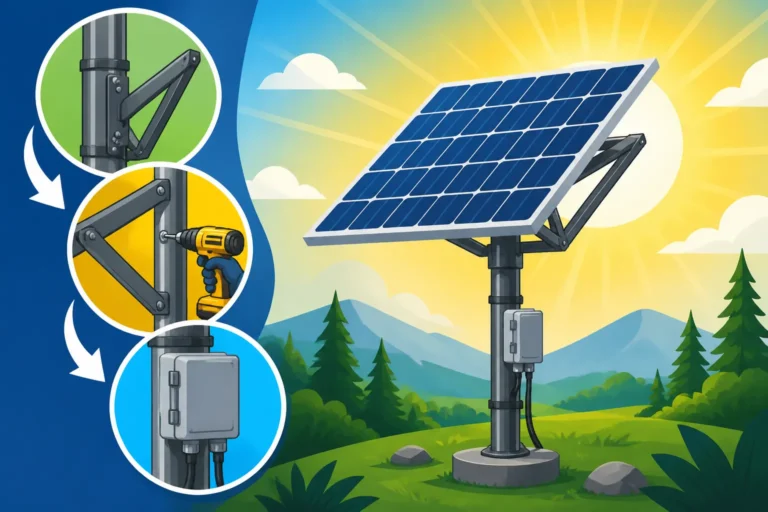
Once the location is set, securely mounting your panels is crucial for safety and longevity. This step is not just about attaching panels; it's about creating a robust, weather-resistant structure that can withstand local wind loads, snow loads, and other environmental factors for decades. For roof mounts, this process involves installing flashing to prevent leaks, attaching sturdy rails to the roof rafters, and then clamping the solar panels to these rails. It's vital to locate the rafters accurately and use appropriate lag bolts to ensure the mounting system is firmly anchored. Sealing all roof penetrations with high-quality, weather-resistant sealant is non-negotiable to protect your building from water damage.
For ground mounts, the process typically starts with digging post holes, setting robust poles (often galvanized steel or aluminum) in concrete, and then constructing a racking system. The racking must be designed to hold the panels at the correct tilt and orientation, with enough clearance from the ground to prevent shading and allow for snowmelt. Ensure all connections are tightened to specification, and the entire structure is level and plumb. Whether roof-mounted or ground-mounted, always consult the manufacturer's instructions for your specific mounting hardware and local building codes for any structural requirements. Investing time in a sturdy, well-installed mount will protect your investment and prevent costly damage down the line.
Wiring the Solar Array
Wiring your solar array correctly is where the electricity truly begins its journey into your off-grid system. Precision and adherence to safety standards are critical here, as mistakes can lead to system inefficiencies, damage to components, or even fire hazards.
Connecting Panels in Series and Parallel
To achieve the desired voltage and current output from your solar array, you'll need to connect individual solar panels in either series, parallel, or a combination of both. When connecting panels in series, you connect the positive terminal of one panel to the negative terminal of the next, effectively adding their voltages together while keeping the current (amps) the same. This is common for higher voltage systems (e.g., 24V or 48V) and allows for smaller gauge wiring over longer distances, reducing voltage drop. However, if one panel in a series string is shaded or malfunctions, it can significantly reduce the output of the entire string.
Connecting panels in parallel involves connecting all positive terminals together and all negative terminals together. This configuration adds the currents of the panels while keeping the voltage the same. Parallel connections are useful for increasing the total amperage of your array, which can be beneficial for lower voltage systems or when you want to minimize the impact of shading on individual panels, as the others can continue to produce power. Many larger arrays use a series-parallel combination, grouping panels into series strings and then connecting those strings in parallel. Always refer to your charge controller and inverter specifications for their maximum voltage and current inputs, and calculate your array's output carefully to ensure compatibility. Understanding How to Wire Solar Panels in Series vs Parallel is fundamental to optimizing your array's performance.
Running DC Wiring Safely to the Charge Controller
Once your panels are connected, the next step is to safely route the DC wiring from the array to your charge controller. This wiring carries high voltage and current, so careful planning and execution are essential. Use UV-resistant, outdoor-rated solar cables (typically 10 AWG for most residential systems, but check calculations based on distance and current) to prevent degradation from sunlight exposure. All cables should be routed securely, avoiding sharp bends or pinch points that could damage insulation. Conduit is highly recommended, especially where cables are exposed to the elements or potential physical damage, offering protection from UV, weather, and animals.
Before the cables reach the charge controller, you must install appropriate overcurrent protection and a DC disconnect switch. The disconnect allows you to safely shut down the solar array for maintenance, troubleshooting, or in emergencies, preventing power from reaching the charge controller and batteries. Fuses or breakers must be sized correctly based on the maximum current output of your solar array and the wire gauge used, providing crucial protection against short circuits and overloads. Always install these protective devices in an easily accessible location and clearly label them. Proper sizing of the wire and protection devices is not just about system efficiency; it's a critical safety measure to prevent electrical fires.
Setting Up the Battery Bank and Inverter
The battery bank and inverter form the core power delivery system of your off-grid setup. This is where the power from your panels is stored and then converted into the usable electricity for your home or cabin. Getting these connections right is paramount for safety and reliable operation.
Wiring Your Battery Bank
Wiring your battery bank requires meticulous attention to detail, as incorrect connections can lead to serious hazards, including fire or explosions, especially with lead-acid batteries. Most off-grid battery banks consist of multiple batteries connected in series, parallel, or a combination, depending on your desired system voltage (12V, 24V, 48V) and capacity. When connecting batteries in series, the voltage adds up, while parallel connections increase the amp-hour capacity. Always use heavy-gauge battery cables, often 2/0 or 4/0 AWG, to minimize voltage drop and handle the high currents involved. Ensure all terminal connections are clean, tight, and secured with a torque wrench to the manufacturer’s specifications. Loose connections can generate heat and reduce efficiency.
Proper ventilation is crucial, particularly for lead-acid batteries, which can off-gas hydrogen during charging. A dedicated, well-ventilated battery enclosure is highly recommended. For LiFePO4 batteries, while off-gassing isn't an issue, temperature management is still important, and protection from extreme cold is often necessary. Always install a main battery disconnect switch and appropriate fusing as close to the battery bank as possible to protect the entire system from potential short circuits or overloads. This allows for safe system shutdown and isolates the high-power battery bank from the rest of your components. You can read more about safe battery connections in our article on How to Wire a Battery Bank.
Connecting the Charge Controller and Inverter
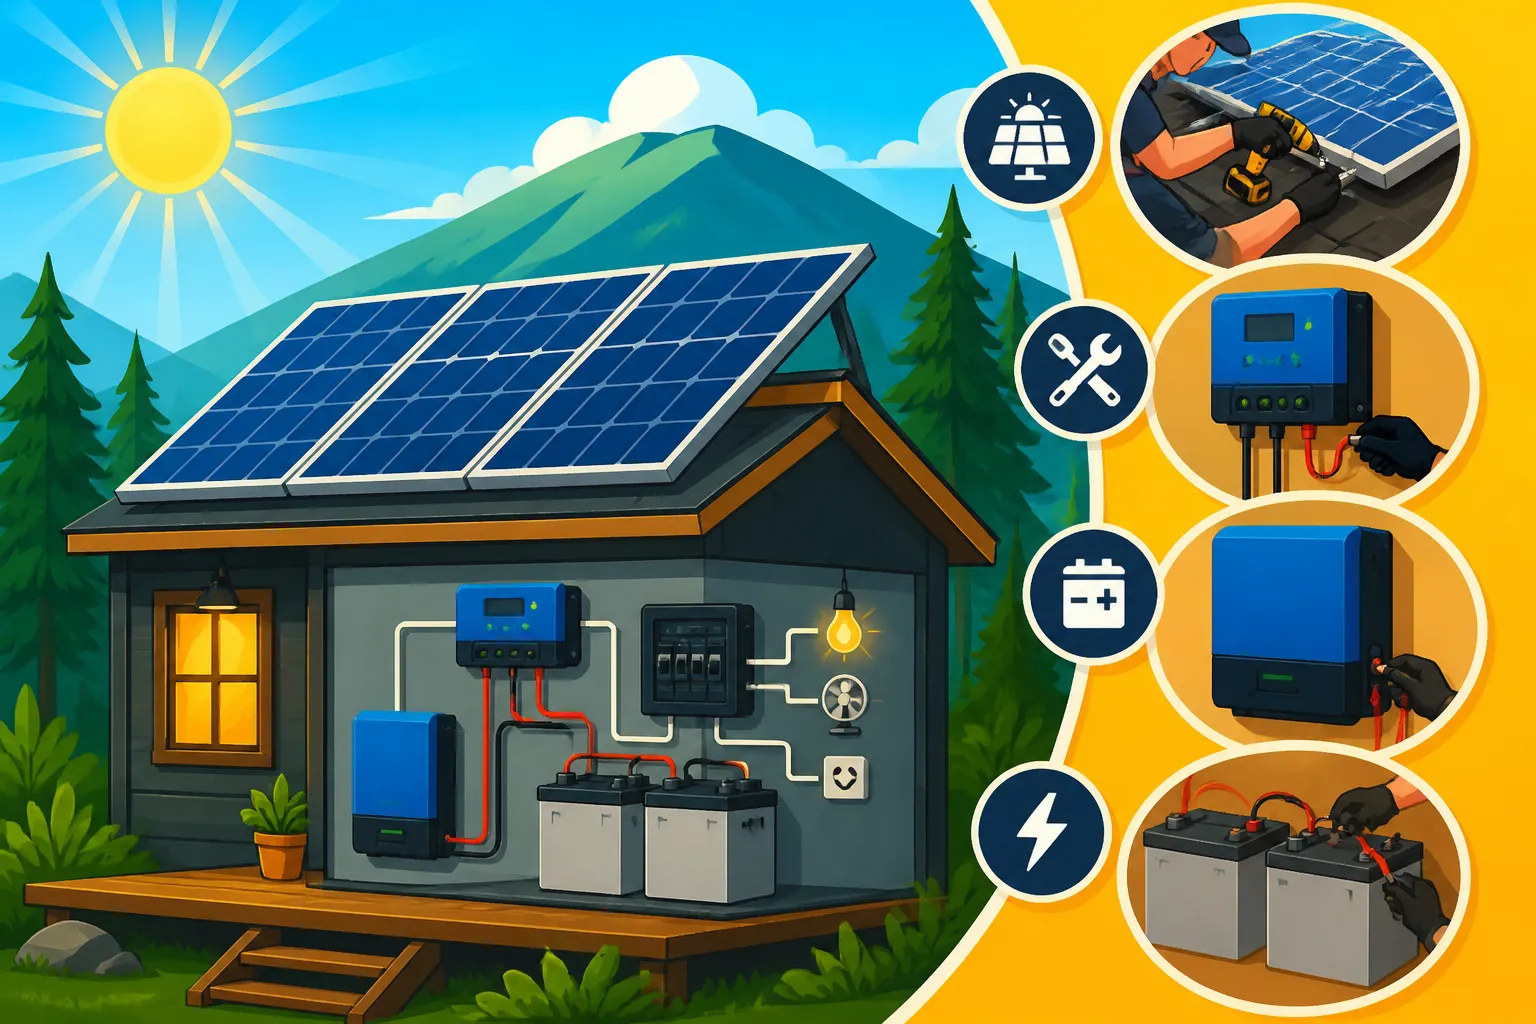
With the battery bank wired and safely enclosed, the next step is to connect your charge controller and inverter. The correct wiring order is absolutely critical: always connect the charge controller to the battery bank FIRST. This allows the charge controller to sense the battery voltage and properly configure itself before any power comes in from the solar panels. Once the battery connection is established, then you connect the solar array wiring to the charge controller's PV input terminals. This sequence prevents damage to the charge controller from excessive voltage or current from the panels without a battery to regulate.
Next, the inverter connects directly to the main battery terminals, typically through a high-current DC disconnect and fuse, again, sized appropriately for the inverter's maximum input current. It’s essential to ensure all DC connections are secure and properly insulated. Your inverter will then provide the AC power to your loads. Many modern off-grid inverters, especially those from brands like Sol-Ark or Victron Energy, are often "inverter-chargers" that integrate the functions of an inverter, a battery charger (for generator or grid backup), and sometimes even a solar charge controller into a single unit, simplifying wiring and system management. Properly connecting these components ensures a smooth and efficient conversion of solar energy into usable household power.
Integrating AC Loads and Distribution
After the inverter is connected, it's time to route the AC output to your household electrical panel, or a dedicated subpanel for your off-grid loads. This essentially makes your inverter the "utility" for your off-grid home. The inverter's AC output should connect to a main AC breaker, just like a grid connection, which then feeds into your home's breaker panel. Each circuit in your home (lights, outlets, appliances) will then be protected by its own circuit breaker within this panel, allowing you to distribute power safely and manage individual loads. Always ensure your wiring follows standard electrical codes for AC wiring, including proper wire gauge, grounding, and conduit where required.
If you plan to have a backup generator, this is also the point where a manual or automatic transfer switch would be integrated. A transfer switch allows you to safely switch your home's power source between the inverter and the generator, preventing dangerous backfeeding of power into your inverter or generator. For larger, more complex systems or if you’re unsure about AC wiring, consulting with a licensed electrician is always a wise decision to ensure safety and compliance with local codes. Running AC power safely and efficiently is just as important as the DC side of your system for a truly reliable off-grid setup.
Grounding, Safety, and Commissioning
Safety is not just a consideration; it's the foundation of any reliable electrical system, especially an off-grid one. Proper grounding protects both your equipment and, more importantly, yourself and your loved ones from electrical hazards. Once all connections are made, commissioning your system carefully is the final critical step before enjoying your newfound energy independence.
Essential Grounding and Overcurrent Protection
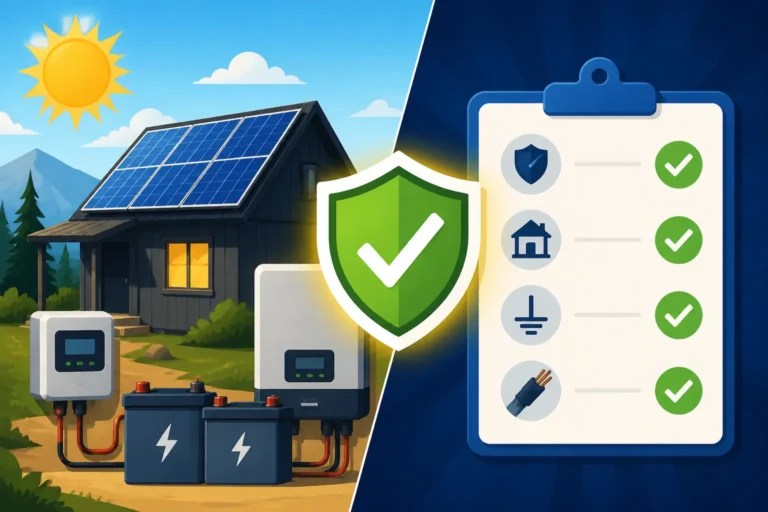
Proper grounding is a non-negotiable safety feature in any electrical system, off-grid or not. It provides a safe path for fault currents to dissipate into the earth, protecting equipment from surges (like lightning strikes) and preventing electrocution in the event of a short circuit. All metallic components of your solar system – including panel frames, mounting racks, inverter chassis, and battery enclosures (if metal) – must be bonded together and connected to a common ground rod driven into the earth. This creates an equipotential bonding system, ensuring that if any part of the system becomes energized due to a fault, the current immediately flows to ground, tripping protective devices.
Beyond grounding, robust overcurrent protection is vital at multiple points in your system. We’ve already discussed DC fuses/breakers for the solar array and battery bank. You’ll also need AC breakers for the output of your inverter feeding your home’s electrical panel. These protective devices are designed to interrupt the flow of electricity if current exceeds safe levels, preventing damage to wiring and components, and crucially, mitigating the risk of electrical fires. Always size these components according to the National Electrical Code (NEC) or your local electrical codes, which provide strict guidelines based on wire gauge, component ratings, and anticipated currents. When in doubt, always err on the side of caution or consult a professional. Our detailed guide on Off-Grid Solar Safety and Grounding provides more in-depth information.
Initial System Startup and Testing
The moment of truth! Before flipping any switches, perform a thorough visual inspection of all wiring. Double-check every connection point for tightness, correct polarity, and proper insulation. Verify that all fuses and breakers are correctly installed and sized. Use your multimeter to confirm voltages at various points: panel output, charge controller input/output, and battery bank terminals. Ensure all readings are within expected ranges. This methodical approach helps catch potential issues before they can cause damage.
Once you’re confident in the connections, follow a specific commissioning sequence:
- Connect the battery bank: Ensure the main battery disconnect is open, then connect all battery cables. Close the battery disconnect.
- Connect the charge controller to batteries: Verify the charge controller powers on and reads battery voltage.
- Connect the solar array to the charge controller: Open the PV disconnect, connect the solar array cables, then close the PV disconnect. The charge controller should begin regulating power.
- Connect the inverter: With the inverter's AC output breaker open, connect the DC input cables from the battery bank to the inverter. Turn on the inverter's DC breaker/switch. Wait for the inverter to initialize.
- Enable AC output: Close the main AC breaker from the inverter to your household panel, then flip individual circuit breakers.
Carefully monitor your system for the first few hours, observing battery voltage, charge controller status, and inverter output. Any unusual noises, smells, or error messages should prompt an immediate shutdown and troubleshooting.
Monitoring and Maintenance for Longevity
Congratulations, your system is up and running! But going off-grid isn’t a set-it-and-forget-it endeavor. Regular monitoring and maintenance are crucial for maximizing the lifespan and efficiency of your solar investment. Install a good battery monitor (like a Victron SmartShunt) to keep tabs on your battery's state of charge, voltage, current, and overall health. Many modern inverters and charge controllers also come with integrated displays or smartphone apps that provide real-time data, allowing you to track energy production and consumption.
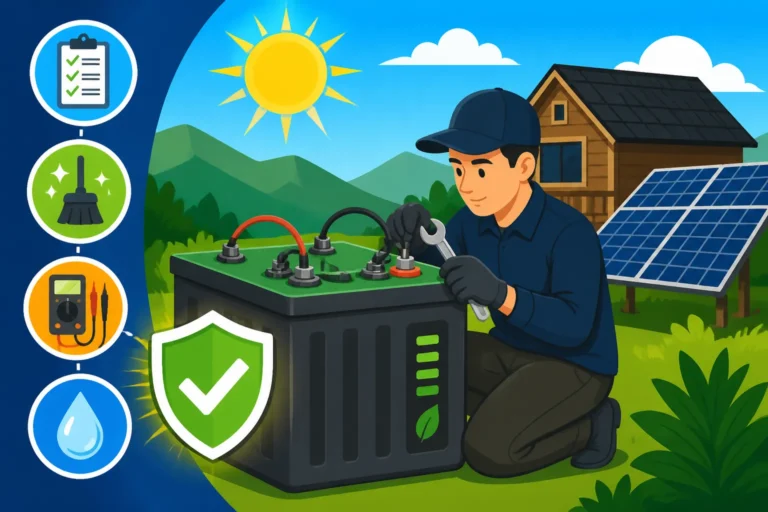
Routine maintenance includes keeping your solar panels clean from dust, dirt, bird droppings, and snow; dirty panels can significantly reduce energy production. Periodically inspect all wiring connections for corrosion or loosening, especially battery terminals, and retorque them if necessary. Check your batteries regularly; for lead-acid batteries, this means monitoring electrolyte levels and specific gravity. For LiFePO4 batteries, ensure they are operating within their specified temperature range. Also, periodically test your disconnect switches and circuit breakers to ensure they are functioning correctly. A proactive approach to maintenance will catch small issues before they become major problems, ensuring your off-grid solar system provides reliable power for many years to come. For more tips on keeping your system in top shape, check out our guide on Off-Grid Solar Maintenance Costs.
Permitting and Code Compliance
It might seem counterintuitive for an "off-grid" system, but even self-contained power setups often require permits and must adhere to local electrical and building codes. Ignoring this step can lead to significant headaches, fines, or even forced removal of your system.
Understanding Local Regulations
The world of permits and codes for off-grid solar can feel like a labyrinth, and unfortunately, it varies widely by location. While you might be generating your own power and not connecting to the utility grid, most jurisdictions still consider any electrical system, especially one attached to a structure, subject to building and electrical codes. These regulations are in place for public safety, ensuring that installations are structurally sound and electrically safe. Depending on your county or municipality, you might need a building permit for the solar array mounting structure, an electrical permit for the wiring and components, or both. Some remote, unincorporated areas might have fewer requirements, but it's dangerous to assume.
The best course of action is always to contact your local building department or planning office before you start your installation. Explain your plans for an off-grid solar system and ask about specific permitting requirements, necessary inspections, and applicable codes (such as the National Electrical Code or local amendments). They can guide you on the necessary paperwork, fees, and the specific diagrams or plans you'll need to submit. Ignoring this step, even if you’re building your dream cabin far from anyone, can lead to problems down the road, especially if you ever decide to sell the property or if an issue arises and your insurance company gets involved. A little research upfront can save a lot of trouble later. If you want a deeper dive, read our article on Off-Grid Solar Permit Requirements.
Navigating Inspections and Documentation
Once you've submitted your plans and obtained the necessary permits, you'll likely face one or more inspections during and after the installation process. An electrical inspector will typically review your wiring, grounding, and overcurrent protection to ensure compliance with the electrical code. A building inspector might examine the structural integrity of your panel mounts, especially for roof-mounted systems, to ensure they can withstand local wind and snow loads. This can be intimidating, but remember that inspectors are primarily concerned with safety and adherence to established standards.
To prepare for inspections, keep meticulously organized documentation. This includes your system design, wiring diagrams, component datasheets, and any permits. Having a clear, labeled schematic of your entire system, showing the flow of power and the location of all safety devices, will be incredibly helpful for the inspector. Be prepared to explain your design choices and demonstrate that all connections are secure and properly terminated. If you’ve followed best practices for wiring, grounding, and component sizing, and adhered to code, passing the inspection should be a straightforward process. Think of it as an extra layer of expert review to ensure your system is as safe and reliable as possible.
| System Voltage | Typical Application | Advantages | Disadvantages |
|---|---|---|---|
| 12V | Small RVs, Vans, Cabins, Portable setups | Simple, widely available components, good for small loads. | High current for moderate loads requires very thick wires, significant voltage drop over distance, less efficient for larger systems. |
| 24V | Medium RVs, Tiny Homes, Small to Medium Cabins | Better efficiency than 12V, smaller wire gauges for same power, wider range of components. | Components can be slightly less common than 12V, still experiences some voltage drop with larger loads. |
| 48V | Whole Homes, Large Cabins, Workshops, Larger RVs | Most efficient, lowest current for high power, allows for thinner wires, minimizes voltage drop, compatible with powerful inverters. | More complex initial setup, fewer small 48V appliances, requires more expensive, higher-voltage components. |
Disclaimer
The information provided in this guide is intended for educational purposes only and should not be considered a substitute for professional advice. Off-grid solar installation involves working with high voltages and currents, which can be extremely dangerous. Always exercise extreme caution, follow all safety protocols, and consult with qualified electricians or solar professionals to ensure your system design and installation comply with all applicable electrical codes and local regulations. The author and publisher assume no responsibility for any loss, injury, or damage incurred as a result of using or relying upon the information provided herein.