Designing an Off-Grid Solar System Step by Step
Feeling overwhelmed by the sheer thought of going off-grid with solar? You're not alone. Many folks dream of energy independence but get stuck trying to figure out where to even begin designing a system that actually works for their unique needs. This comprehensive guide is here to demystify the process, walking you through each crucial step to design a reliable and efficient off-grid solar setup for your home, cabin, or RV.
Understanding Your Energy Needs: The First Crucial Step
Before you even think about panels or batteries, the absolute first thing you must do is understand your energy consumption. Skipping this step is like trying to build a house without blueprints – you're almost guaranteed to run into problems, undersizing components, or worse, wasting money on a system that doesn't meet your demands. This isn't just about what you think you'll use; it's about what you actually use, or plan to use, down to the last watt.
Conducting a Detailed Load Analysis
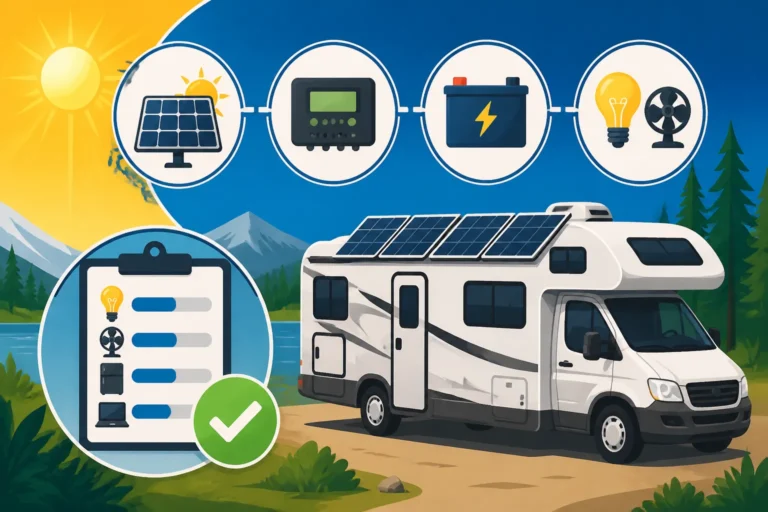
A load analysis is essentially an inventory of every electrical appliance and device you plan to power, along with how much electricity each one consumes and for how long. It's the bedrock of your entire off-grid solar design. Without this granular data, you're just guessing, and guesswork usually leads to frustration and unexpected power outages. Think about everything from your refrigerator and lights to your laptop, phone chargers, well pump, and even that obscure kitchen gadget you only use once a week.
Many people underestimate their true consumption, especially when transitioning from grid-tied living. On the grid, power is seemingly endless and always there, so we rarely consider the individual draw of each appliance. For example, a modern refrigerator might cycle on and off throughout the day, drawing power for hours, not just minutes. A well pump, though it runs for short bursts, can have a massive "starting surge" that needs to be accounted for. Don't forget those phantom loads either – devices that draw a small amount of power even when turned off or in standby mode. To get really accurate, consider using a watt meter, like a Kill A Watt, to measure the actual power draw of your appliances over a few days or even a week. It plugs right into the wall and tells you exactly how much electricity a device is using. This hands-on approach provides invaluable, real-world data that generic online calculators might miss. If you're wondering How to Calculate Daily Energy Usage, this is where you start.
Calculating Your Daily Watt-Hour Consumption
Once you have your appliance list and their individual wattages (or approximate wattages if you can't measure them directly), it's time to crunch the numbers. For each appliance, you need to estimate how many hours it will run per day. Some things, like lights, are straightforward. Others, like a refrigerator or freezer, require an estimate of their run-time percentage over 24 hours (often 1/3 to 1/2 of the day, depending on insulation and ambient temperature).
Here’s the basic formula: Appliance Wattage (W) x Hours Used Per Day (H) = Daily Watt-Hours (Wh). You'll do this for every single item on your list.
Let's take an example:
- LED Lights (5 x 10W bulbs): 50W x 4 hours/day = 200 Wh
- Laptop Charger: 60W x 3 hours/day = 180 Wh
- Refrigerator (Energy Star, 150W): 150W x 8 hours/day (assuming 1/3 run time) = 1200 Wh
- Well Pump (1000W peak, runs for 15 minutes total over the day): 1000W x 0.25 hours/day = 250 Wh (though its surge will impact inverter sizing).
Sum all these daily watt-hour totals, and you'll have your estimated total daily watt-hour consumption. This number is absolutely critical. It tells you exactly how much energy your solar system needs to generate and store each day to keep your life running smoothly. This calculation often highlights appliances that are major energy hogs, allowing you to consider more energy-efficient alternatives or adjust your usage habits. Remember, you're designing for consistency, so this needs to be an average daily total, accounting for both peak and intermittent loads.
Accounting for Seasonal and Future Demands
Your energy needs aren't static. They fluctuate based on the season, your activities, and potential future additions to your off-grid lifestyle. It's crucial to factor these variables into your design from the very beginning. For instance, winter days typically mean fewer peak sun hours and potentially lower temperatures, which can affect battery performance and solar panel output. You might use more lights in winter, or require a small heater, while in summer, a fan or an air conditioner might become essential.
Consider your geographic location: a cabin in snowy Montana will have vastly different solar needs than a homestead in sunny Arizona. You’ll need to design for the worst-case scenario – usually the darkest, shortest days of winter – to ensure year-round reliability. Many experienced off-gridders suggest adding a buffer, perhaps 20-30% above your calculated daily average, to account for unforeseen circumstances, prolonged cloudy spells, or small increases in consumption. Furthermore, think about how your energy needs might evolve. Are you planning to add a workshop with power tools next year? Maybe you'll get an electric vehicle down the line? Designing an expandable system from the start will save you significant headaches and costs later on. It's far easier and more cost-effective to incorporate room for growth into your initial plan than to completely overhaul an undersized system.
Sizing Your Off-Grid Battery Bank for Reliability
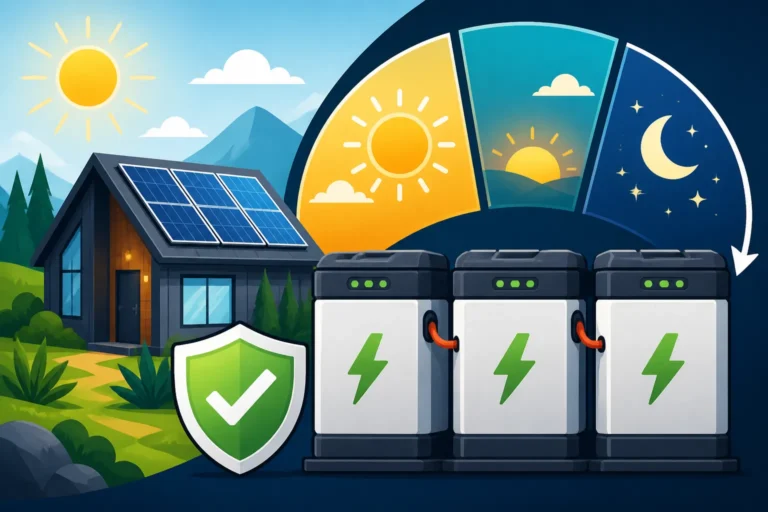
Your battery bank is the heart of your off-grid solar system. It stores the energy your panels collect during the day, making it available for use at night or on cloudy days. Without a properly sized battery bank, your system is essentially useless once the sun goes down or decides to take a few days off. This is one area where cutting corners can lead to very real, very frustrating power outages, not to mention significantly reduced battery lifespan.
Determining Required Battery Capacity (Amp-Hours or Watt-Hours)
To figure out how much battery capacity you need, you'll start with your total daily watt-hour consumption from your load analysis. But it's not enough to just store one day's worth of power. You need to consider "days of autonomy" – how many days your system can power your loads without any new input from the sun. For most residential off-grid setups, 2 to 5 days of autonomy is a good target, depending on your location's weather patterns and your tolerance for potential power interruptions.
The calculation for battery capacity needs to account for the battery's Depth of Discharge (DoD) and your system voltage.
First, calculate the total watt-hours needed based on your days of autonomy: Total Daily Watt-Hours x Desired Days of Autonomy = Total Required Watt-Hours.
Next, you need to convert this to Amp-Hours (Ah) if your batteries are typically rated in Ah, which is common. Divide by your chosen system voltage (e.g., 12V, 24V, 48V): Total Required Watt-Hours / System Voltage (V) = Total Amp-Hours.
Finally, you must account for the battery's usable capacity, or Depth of Discharge (DoD). Lead-acid batteries generally shouldn't be discharged more than 50%, while LiFePO4 batteries can safely handle 80-100% DoD. So, if you have a 50% DoD lead-acid battery, you'll need twice the calculated Amp-Hours to get the usable capacity.
Example: If you need 3000 Wh per day and want 3 days of autonomy, that's 9000 Wh total.
For a 48V system: 9000 Wh / 48V = 187.5 Ah.
If using LiFePO4 (80% DoD): 187.5 Ah / 0.80 = 234.375 Ah total battery bank capacity.
If using lead-acid (50% DoD): 187.5 Ah / 0.50 = 375 Ah total battery bank capacity.
This step is critical because undersizing your battery bank is a common and expensive mistake. It leads to constant low-voltage cutoffs, shortens battery life, and leaves you in the dark. For a deeper dive into this, check out our guide on How Many Batteries for an Off-Grid System or How to Size an Off-Grid Battery Bank.
Choosing the Right Battery Chemistry
The world of off-grid batteries has seen significant advancements, and choosing the right chemistry is a big decision that impacts cost, lifespan, and performance. The two main contenders are lead-acid and lithium-ion, specifically LiFePO4 (Lithium Iron Phosphate).
-
Lead-Acid Batteries: These are the traditional workhorses, often more affordable upfront. They come in flooded (FLA), Absorbed Glass Mat (AGM), and Gel varieties.
- FLA: Cheapest, but require regular maintenance (checking water levels, ventilation) and have the shortest lifespan. Deep cycle FLA batteries are typically rated for 50% DoD.
- AGM & Gel: Sealed, maintenance-free, and can be placed in various orientations. More expensive than FLA, but generally have better performance and slightly longer lifespans. Still limited to around 50% DoD for optimal life.
- Pros: Lower initial cost, widely available.
- Cons: Shorter lifespan (3-7 years), limited DoD, sensitive to temperature, heavier, slower charging, can off-gas (FLA).
-
LiFePO4 Batteries: These are quickly becoming the gold standard for off-grid systems. Brands like Battle Born and EG4 offer excellent performance.
- Pros: Much longer lifespan (10-15+ years), high DoD (80-100% usable capacity), faster charging, lighter weight, very high energy density, consistent voltage output, often come with built-in Battery Management Systems (BMS) for safety and longevity.
- Cons: Higher upfront cost. However, when you factor in their lifespan and usable capacity, the LiFePO4 vs Lead-Acid Battery Cost often favors lithium in the long run.
For most modern off-grid homes aiming for long-term reliability and minimal maintenance, LiFePO4 batteries are the superior choice despite the initial sticker shock. Their efficiency and longevity often make them the more economical option over the life of the system.
Selecting System Voltage (12V, 24V, 48V)
The voltage of your off-grid system is another foundational design decision. While 12V systems are popular for smaller applications like RVs, vans, and basic cabins, larger energy demands usually benefit greatly from higher voltages like 24V or 48V.
-
12V Systems: Ideal for smaller loads, simple setups, and systems with lower daily watt-hour needs (typically under 1000 Wh/day). Common in vehicles and small portable setups.
- Pros: Simpler wiring, more readily available DC appliances, easier to understand for beginners.
- Cons: Higher current (amps) for the same amount of power, requiring thicker and more expensive wires to avoid voltage drop, less efficient for larger loads.
-
24V Systems: A good mid-range option for small to medium-sized cabins or larger RVs with moderate loads (e.g., 1000-3000 Wh/day).
- Pros: Reduces current by half compared to 12V, allowing for thinner wires and less voltage drop. Still a good balance of complexity and efficiency.
- Cons: Fewer readily available 24V DC appliances compared to 12V.
-
48V Systems: The preferred choice for full-sized off-grid homes and systems with significant energy demands (over 3000 Wh/day, especially those running large appliances like well pumps, air conditioners, or multiple refrigerators).
- Pros: Reduces current by a quarter compared to 12V, significantly minimizing voltage drop and allowing for much thinner, more cost-effective wiring. Higher efficiency, especially for long wire runs between components. Most high-power inverters and charge controllers are designed for 48V.
- Cons: Requires more batteries in series or a combination of series/parallel, making the battery bank slightly more complex to wire. Fewer direct 48V DC appliances, though DC-DC converters can address this.
The higher your system voltage, the lower the amperage for a given power output (P = V x I). Lower amperage means less heat generated in wires, less energy lost as heat (voltage drop), and the ability to use smaller gauge wire, which saves money and simplifies installation. For substantial residential off-grid systems, 48V is almost always the most efficient and practical choice in the long run.
Designing Your Solar Array: Panels and Charge Controllers
With your energy needs quantified and your battery bank sized, the next logical step is to design the solar array – the workhorses that capture the sun's energy. This involves not only determining how many panels you need but also selecting the right type and the crucial component that manages their output: the charge controller.
Sizing Your Solar Panel Array (Total Watts)
The goal here is to generate enough electricity to meet your daily watt-hour consumption and fully recharge your battery bank, especially after several cloudy days. This calculation depends heavily on your "peak sun hours." Peak sun hours are not the total hours the sun is visible in the sky; rather, they represent the average number of hours per day when the intensity of sunlight reaches 1000 watts per square meter (1kW/m²). This value varies significantly by season and geographical location. A quick search for "peak sun hours [your location]" will give you a good average. Remember, you'll want to use the lowest peak sun hours for your design, usually during the winter months, to ensure year-round reliability.
Here's the general formula to estimate your required solar panel wattage:Total Daily Watt-Hours (from load analysis) / Peak Sun Hours (for your location's worst month) = Daily Watt-Hours Needed from Panels.
Then, account for system losses (inverter inefficiency, wiring losses, temperature effects, dirt/shading on panels). A common system loss factor is 1.25 to 1.5 (meaning you need to generate 25-50% more power than your pure consumption).Daily Watt-Hours Needed from Panels x System Loss Factor = Adjusted Daily Watt-Hours from Panels.
Finally, divide this by your panel rating (e.g., if you're using 400W panels): Adjusted Daily Watt-Hours / Peak Sun Hours = Total Watts Required from Solar Panels.
Example: If you need 3000 Wh/day, your winter peak sun hours are 3, and you use a 1.3 loss factor:
3000 Wh / 3 Peak Sun Hours = 1000 W needed continuously during those peak hours.
1000 W x 1.3 (loss factor) = 1300 W of total panel capacity.
If you're using 400W panels, you'd need 1300 W / 400 W/panel = 3.25 panels. So, you'd round up to 4 panels.
Many people think more panels automatically mean more power, but if your charge controller or battery bank isn't sized correctly, or if you don't account for peak sun hours, you're not maximizing your investment. This calculation ensures you have enough panels to efficiently recharge your batteries daily. For more guidance, see our article on How Many Solar Panels for Off-Grid Living.
Selecting the Right Charge Controller
The charge controller is the unsung hero of your off-grid solar system. It acts as the brain between your solar panels and your batteries, regulating the voltage and current coming from the panels to prevent overcharging and optimize the charging process. There are two main types: PWM and MPPT.
-
PWM (Pulse Width Modulation) Charge Controllers:
- How they work: These controllers essentially connect the solar panel directly to the battery when charging, but pulse the connection rapidly to regulate voltage. They "pull" the panel's voltage down to match the battery voltage.
- Pros: Simpler, less expensive, good for small, basic systems (e.g., a single panel charging a 12V battery), often more robust in extreme temperatures.
- Cons: Less efficient, especially in cooler weather or when panel voltage is significantly higher than battery voltage. You lose power that could otherwise be converted. Best suited when the panel's nominal voltage matches the battery bank's nominal voltage (e.g., 12V panel for 12V battery).
-
MPPT (Maximum Power Point Tracking) Charge Controllers:
- How they work: These are much more sophisticated. They actively track the maximum power point of the solar array, converting excess panel voltage into additional current. This allows them to maximize the power harvest from your panels, regardless of temperature or battery voltage.
- Pros: Significantly more efficient (15-30% more efficient than PWM in many scenarios), especially with higher voltage panels or in cooler climates. Can use higher voltage solar arrays (e.g., 24V or 48V panels) to charge lower voltage battery banks (e.g., 12V), reducing wire thickness and loss.
- Cons: More expensive, more complex electronics.
For almost any serious off-grid solar system, especially those with 24V or 48V battery banks and multiple panels, an MPPT charge controller is the superior choice. The increased efficiency often pays for the higher initial cost over time. When sizing an MPPT controller, you need to ensure it can handle the maximum open-circuit voltage (Voc) of your solar array in series and the maximum short-circuit current (Isc) of your array in parallel. Always factor in temperature coefficients, as Voc can increase in cold weather. Many reliable brands like Victron Energy offer excellent MPPT controllers that are a cornerstone of efficient off-grid systems. Learn more about How to Size a Charge Controller for your setup.
Panel Types and Placement Considerations
Choosing the right solar panels involves more than just wattage. You'll encounter different types and physical configurations, each with its own advantages.
-
Monocrystalline vs. Polycrystalline:
- Monocrystalline: Made from a single crystal silicon, these panels are generally more efficient, have a sleeker, darker appearance, and perform better in low-light conditions. They are often more expensive per watt but require less space for a given output.
- Polycrystalline: Made from multiple silicon fragments, these are slightly less efficient than monocrystalline panels and have a blue, speckled appearance. They are typically more affordable per watt. For large arrays where space isn't an issue, they can be a cost-effective choice.
-
Rigid vs. Flexible Panels:
- Rigid Panels: The most common type, encased in an aluminum frame and tempered glass. Durable, long-lasting, and generally offer the best performance and value. Ideal for ground mounts, roof mounts, and stationary applications.
- Flexible Panels: Lighter, thin, and can be mounted on curved surfaces. Often used for RVs, vans, or boats where weight and aerodynamics are concerns. Generally less efficient and have a shorter lifespan than rigid panels, and are more susceptible to heat degradation if not properly ventilated.
Placement is paramount for maximizing energy harvest.
- Orientation: In the Northern Hemisphere, panels should face true south (not magnetic south). In the Southern Hemisphere, they face true north. This maximizes exposure to the sun throughout the day.
- Tilt Angle: The optimal tilt angle changes with the seasons. Many off-gridders choose a fixed tilt angle based on their latitude for year-round production, or, ideally, they install adjustable mounts to change the tilt for winter (steeper angle) and summer (flatter angle). For example, a common compromise is to set the tilt angle equal to your latitude plus 15 degrees for winter, and minus 15 degrees for summer.
- Shading: This is the absolute enemy of solar panels. Even partial shading on one panel can drastically reduce the output of an entire series string. When planning placement, meticulously check for potential shading from trees, buildings, antennas, or even chimneys throughout the day and across seasons. If unavoidable, consider microinverters or optimizers for individual panels, though these are more common in grid-tied systems. For off-grid, simply minimizing shade is usually the best approach. Ground mounts offer more flexibility for optimal orientation and tilt compared to roof mounts, which are dictated by the structure's existing angle.
Inverter Selection: Converting DC to AC Power
Your solar panels and batteries operate on direct current (DC) power. However, most common household appliances, from your refrigerator to your television and power tools, run on alternating current (AC) power. This is where the inverter comes in. It's the critical component that converts the DC power stored in your batteries into usable AC power for your home. Choosing the right inverter is vital for ensuring your appliances run safely and efficiently.
Determining Inverter Size (Continuous and Surge Watts)
Sizing your inverter correctly is one of the most common stumbling blocks for new off-gridders. An undersized inverter can't handle your loads, leading to tripped breakers or frustrating appliance failures. You need to consider two key power ratings:
-
Continuous Wattage: This is the total wattage of all AC appliances you expect to run simultaneously. Go back to your load analysis. Which devices might be on at the same time? A refrigerator, a few lights, your laptop, and maybe a microwave for a few minutes? Sum their running wattages. Your inverter's continuous rating must be higher than this total.
- Example: Refrigerator (150W) + Lights (50W) + Laptop (60W) + TV (100W) = 360W. Your inverter would need a continuous rating comfortably above this, perhaps 500W-1000W to give some headroom.
-
Surge Wattage (Peak Power): This is where many people get tripped up. Appliances with motors, like refrigerators, freezers, well pumps, microwaves, and power tools, require a much higher burst of power for a very short period (milliseconds to seconds) when they first start up. This "starting surge" can be 2 to 7 times their continuous running wattage. Your inverter's surge rating must be able to handle the largest single surge load you anticipate.
- Example: A well pump that runs at 1000W might have a starting surge of 3000-5000W. If your inverter can't provide that instantaneous power, the pump won't start, or the inverter will trip.
When selecting an inverter, you'll want to ensure its continuous rating covers your simultaneous loads, and its surge rating can handle the highest starting load you expect. Don't forget that larger systems often benefit from having two smaller inverters in a split-phase configuration to deliver 120V/240V AC power, mimicking grid utility. For more detailed calculations, our guide on How to Size an Off-Grid Inverter is a must-read.
Pure Sine Wave vs. Modified Sine Wave
This distinction is critically important for appliance compatibility and longevity:
-
Pure Sine Wave Inverters: These inverters produce a smooth, clean AC waveform that is virtually identical to the power supplied by the utility grid.
- Pros: Safe for all electronics, including sensitive medical devices (like CPAP machines), modern appliances, variable speed tools, and anything with a delicate microprocessor. Prevents buzzing in audio equipment and improves the longevity of motors.
- Cons: More expensive than modified sine wave inverters.
-
Modified Sine Wave Inverters (also known as "modified square wave" or "quasi-sine wave"): These inverters produce a stepped, blocky AC waveform that is a crude approximation of a sine wave.
- Pros: Much cheaper to manufacture.
- Cons: Can cause humming or overheating in motors (like refrigerators or fans), can damage sensitive electronics, reduce the lifespan of some appliances, and may not work with certain devices at all (e.g., laser printers, some battery chargers).
For any modern off-grid system, especially one powering a home or vital electronics, a pure sine wave inverter is absolutely essential. The potential damage and headaches caused by modified sine wave inverters are simply not worth the upfront cost savings. It's a fundamental investment in the reliability and safety of your entire electrical system.
Understanding Inverter Features and Brands
Beyond pure sine wave, modern off-grid inverters come with a host of features that can significantly enhance your system's performance and ease of use.
- Inverter-Chargers: These versatile units combine an inverter and a battery charger into one device. They can convert DC battery power to AC, but also charge your batteries from an AC source, such as a backup generator or even shore power (for RVs). This integration simplifies wiring and system management.
- Low-Frequency vs. High-Frequency: Low-frequency inverters use large transformers, making them heavier but more robust, especially for handling large surge loads and inductive loads (like motors). High-frequency inverters are lighter, more compact, and often more efficient at low loads, but may not handle large surges as well. For serious off-grid applications with substantial motor loads, low-frequency inverters often get the nod for their brute strength.
- Generator Integration: Many advanced inverters offer seamless generator integration, including auto-start capabilities. When battery voltage drops to a preset level, the inverter can signal a compatible generator to start, recharge the batteries, and then shut down once the charge is complete. This provides an excellent layer of backup and automation.
- Bypass Functionality: This allows AC power (from a generator or shore power) to directly power your loads, bypassing the inverter, while simultaneously charging the batteries. This is useful for running very heavy loads that exceed the inverter's capacity or for providing power during maintenance.
- Stackability/Parallel Operation: Some inverters can be stacked or run in parallel to increase total power output (e.g., two 4kW inverters creating an 8kW system) or to create split-phase 120V/240V output.
When it comes to brands, reliability and customer support are key. Reputable manufacturers like Victron Energy, Sol-Ark, and Outback Power are popular choices in the off-grid community for their robust designs, advanced features, and proven track records. While they might have a higher price point, their longevity and performance often justify the investment, preventing costly failures down the line. Look for models with comprehensive monitoring and configuration options that allow you to fine-tune your system's behavior.
Wiring and Safety: The Unsung Heroes of Off-Grid Design
You've got your main components – panels, batteries, and inverter – conceptually sized. Now it’s time to talk about the crucial, yet often overlooked, elements that tie everything together: wiring, fuses, breakers, and grounding. These are not just accessories; they are fundamental to your system's efficiency, longevity, and, most importantly, your safety. Skimping on these can lead to fire hazards, component damage, and inefficient power delivery.
Sizing Wires and Cables
Proper wire sizing is paramount. Undersized wires act like resistors, heating up, losing energy (voltage drop), and potentially posing a fire risk. Oversized wires are safe but unnecessarily expensive and harder to work with. The gauge of wire you need depends on three main factors:
- Current (Amps): The higher the amperage, the thicker the wire needs to be. This is why higher voltage systems (24V, 48V) are more efficient, as they carry less current for the same amount of power, allowing for thinner wires.
- Distance (Length of the wire run): The longer the wire run, the more resistance it encounters, and thus the more voltage drop you'll experience. Longer runs require thicker wires to compensate.
- Voltage (of the circuit): While not directly in the wire calculation, voltage influences the acceptable percentage of voltage drop. A 2% voltage drop on a 12V system means a loss of 0.24V, which is significant. On a 48V system, 2% is 0.96V, less impactful percentage-wise.
- Wire Material: Copper is the standard for solar applications due to its excellent conductivity.
For DC circuits (panels to charge controller, charge controller to batteries, batteries to inverter), voltage drop is a significant concern. A generally accepted guideline is to keep voltage drop under 2-3% for critical circuits, especially between the charge controller and batteries. You'll need to use charts or online calculators that factor in current, distance, and voltage to select the appropriate wire gauge (e.g., AWG – American Wire Gauge). Larger AWG numbers mean thinner wire, smaller AWG numbers mean thicker wire. For example, battery cables often need to be very thick, like 2/0 AWG or 4/0 AWG, due to the high currents involved over relatively short distances. Always ensure your chosen wire is rated for outdoor use (if applicable) and the specific voltage and temperature conditions.
Fuses, Breakers, and Disconnects
These are your system's protective devices, designed to prevent damage to components and, more importantly, protect you from electrical hazards.
- Fuses: Single-use devices that melt and break a circuit when current exceeds a safe level. They are often used in critical locations for one-time protection, such as individual solar panel strings or directly at the battery bank terminal. ANL, Class T, and MC4 inline fuses are common in off-grid setups.
- Circuit Breakers: Reusable electrical switches that automatically trip when current exceeds their rating, or can be manually switched off. They provide both overcurrent protection and a convenient means of disconnecting power for maintenance or emergencies. You'll find DC-rated breakers for solar panel circuits and battery connections, and standard AC breakers for the inverter output.
- Disconnect Switches: These are vital for safely isolating components for maintenance or in an emergency. You should have a DC disconnect between your solar array and your charge controller (a PV disconnect), and another between your battery bank and your inverter. Many charge controllers and inverters have integrated disconnects, but external ones provide an extra layer of safety.
Placement is critical:
- PV Array: Fuses or breakers should be installed between your solar panels and your charge controller to protect the wiring and controller from overcurrent.
- Battery Bank: Fuses or breakers are absolutely essential as close to the battery positive terminal as possible, protecting the wiring to the inverter and charge controller from short circuits. This is usually the highest current point in your system.
- Inverter Output: Standard AC breakers protect your AC circuits from overloads from the inverter.
Always ensure that fuses and breakers are properly rated for the maximum current and voltage of the circuit they are protecting, and that they are DC rated for DC circuits, as AC breakers will not work reliably or safely on DC.
Grounding and System Protection
Grounding isn't just a recommendation; it's a non-negotiable safety requirement for any electrical system, including off-grid solar. Proper grounding protects against electrical shock, dissipates lightning strikes, and helps safeguard equipment from surges.
- Equipment Grounding: All metallic components of your solar array (panel frames, racking), charge controller, inverter, and battery enclosures must be bonded together and connected to a common ground point. This creates a safe path for fault currents to travel to earth, preventing dangerous voltage buildup on accessible metal parts.
- Grounding Electrode System: A dedicated grounding electrode (usually copper rods driven into the earth) provides the connection from your system's main ground bus to the actual earth. The size and depth of these rods are typically specified by electrical codes.
- Lightning Protection: For remote off-grid locations, lightning is a serious concern. While a direct strike is hard to defend against, proper grounding and the use of surge protective devices (SPDs) on both the DC and AC sides of your system can help mitigate damage from indirect strikes or nearby surges. These devices divert excess voltage away from sensitive electronics to the ground.
Consulting local electrical codes (like the National Electrical Code – NEC in the US) is highly recommended, even for off-grid systems, to ensure your grounding and wiring meet safety standards. While off-grid installations often have more flexibility than grid-tied, adhering to safety best practices is paramount. If you're unsure about this aspect, it's wise to hire a qualified electrician for the grounding and main panel connections.
Putting It All Together: System Diagram and Integration
You’ve calculated your needs, selected your components, and understand the critical safety measures. Now, it's time to visualize how all these pieces connect. Creating a comprehensive system diagram and planning for future integration are the final steps in the design phase, bringing your theoretical plan to life.
Creating a Comprehensive Wiring Diagram
A detailed wiring diagram is your system's blueprint. It shows every component and every connection, ensuring that during installation, you know exactly where each wire goes and what size it needs to be. This isn't just for installation day; it's invaluable for troubleshooting, maintenance, and future expansions. Trying to install an off-grid system without a clear diagram is like trying to navigate a dense forest without a map – you're almost guaranteed to get lost and make mistakes.
Your diagram should clearly illustrate:
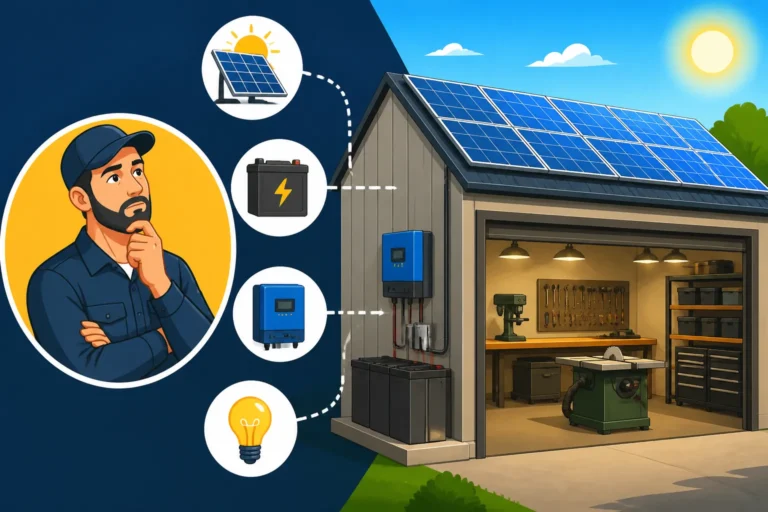
- Solar Array: Show individual panels, how they are wired (series, parallel, or series-parallel), combiner boxes (if used), and the main PV disconnect.
- Charge Controller: How the PV input connects, and how the output connects to the battery bank.
- Battery Bank: All individual batteries, how they are wired (series, parallel), the main battery disconnect, and the primary fuses (like a Class T fuse) closest to the battery terminals.
- Inverter: The heavy gauge cables connecting it to the battery bank, the inverter disconnect, and the AC output going to your main breaker panel or AC distribution.
- Safety Devices: Clearly label all fuses, circuit breakers, and manual disconnects, indicating their ratings and locations.
- Grounding: Show all grounding connections from components to a common ground bus bar, and then to your grounding electrode system.
Don't be afraid to make your diagram as detailed as possible. Include wire gauges, component model numbers, and voltage ratings. There are many online resources and software tools that can help you create professional-looking diagrams, or a simple hand-drawn sketch with all details is often sufficient. Referencing an Off-Grid Solar Wiring Diagram Explained can give you a great head start. This document will become one of the most important pieces of your off-grid system documentation.
Incorporating System Monitoring and Management
Once your system is up and running, you'll want to know what it's doing. System monitoring provides invaluable insights into performance, battery state of charge, and potential issues, allowing you to optimize usage and preempt problems. Without monitoring, you're flying blind, unable to know if your batteries are truly full or if a panel isn't producing as expected.
Key monitoring components include:
- Battery Monitors: A shunt-based battery monitor (like those from Victron Energy, Renogy, or Bogart Engineering) is essential. It precisely measures current flowing in and out of your battery bank, calculating the real-time state of charge (SoC) in percentage, not just voltage. Voltage alone is a poor indicator of battery capacity, especially for lithium batteries. A good monitor will also track cumulative amp-hours, voltage, and current.
- Charge Controller and Inverter Displays: Most modern charge controllers and inverters have built-in displays that show input/output voltage, current, and power. Many also offer logging capabilities and error codes.
- Remote Monitoring: For those who want to keep an eye on their system from afar, many premium brands offer remote monitoring platforms. For example, Victron's Cerbo GX device allows you to access detailed system data and even configure settings via a smartphone app or web portal, as long as you have an internet connection. This is particularly useful for cabins or remote properties where you might not be on-site every day.
Consistent monitoring helps you understand your power habits, optimize appliance usage, and identify when your system might need more solar input or when batteries are nearing the end of their life. It's a proactive approach to managing your off-grid power.
Planning for Backup Power and Expansion
Even the best-designed solar system can face challenges – unusually long stretches of cloudy weather, unexpected surges in demand, or a component failure. That's why planning for backup power is a critical part of a robust off-grid design.
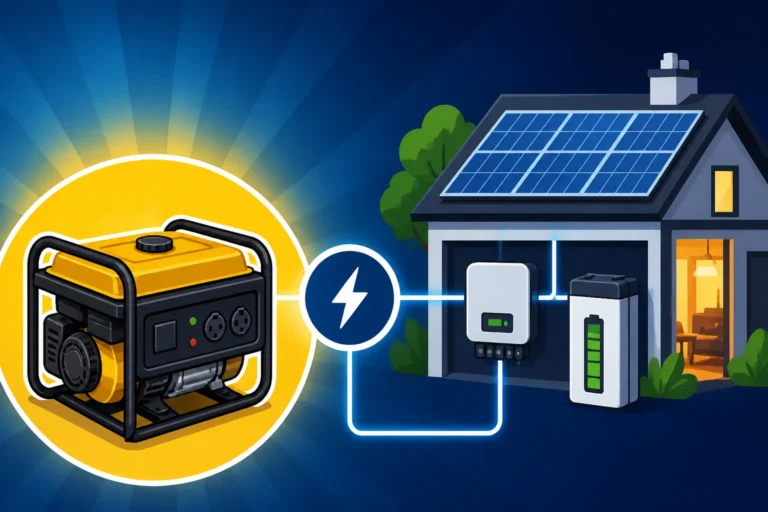
- Generator Integration: A fossil fuel generator is the most common backup power source. You can design your system to automatically start a compatible generator when battery voltage drops below a certain threshold and shut it off once batteries are recharged. This requires an inverter-charger with generator start capabilities and often a transfer switch. Having a backup generator provides peace of mind and ensures continuous power even in the toughest conditions. Consult our guide on How to Add a Generator to Your Design for more specifics.
- Propane/Wood Heat: Beyond electrical backups, consider non-electrical heating sources like wood stoves or propane heaters. These reduce your electrical load during colder months, taking pressure off your solar system.
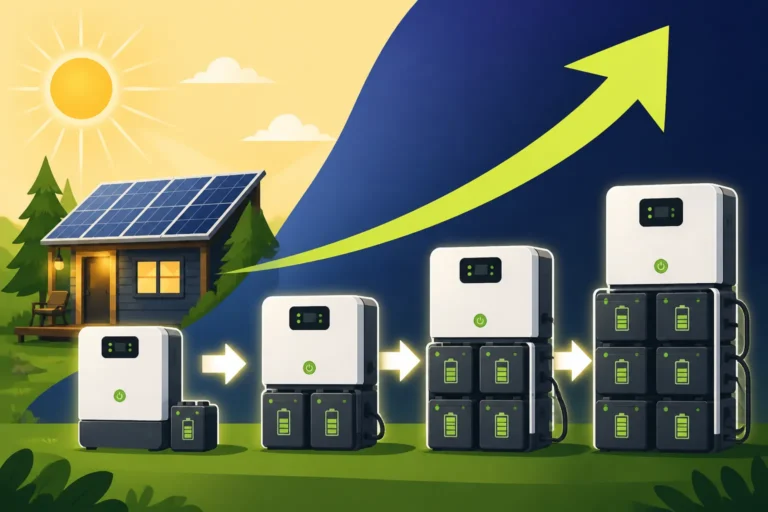
- Designing for Expansion: Life changes, and so do energy needs. When you're laying out your initial design, think about how you might expand in the future. Can you add more solar panels to your existing array without needing a new charge controller? Is your battery bank designed to easily add more capacity (e.g., leaving space for additional batteries of the same type and age)? Is your inverter sized with some headroom, or can you easily add another identical inverter in parallel? Building an expandable system from the outset is far more cost-effective than having to replace major components entirely if your needs grow. This might mean initially oversizing certain components slightly (like the charge controller or inverter) or simply ensuring you have the physical space and wiring pathways to add more panels or batteries later.
Real-World Considerations and Common Pitfalls
Designing an off-grid solar system isn't just about formulas and components; it's also about anticipating real-world challenges and avoiding common mistakes that can derail your project. Thinking holistically about your environment, your skills, and your budget will save you immense frustration down the line.
Dealing with Environmental Factors
Your local environment plays a huge role in the performance and longevity of your off-grid system. Ignoring these factors is a recipe for disappointment.
- Temperature Extremes:
- Cold Weather: Batteries perform less efficiently in the cold. Lead-acid batteries lose capacity, and LiFePO4 batteries generally cannot be charged below freezing without risking permanent damage (though many have low-temperature cutoffs). Panels, surprisingly, perform better in cold, sunny conditions, but snow accumulation can block them entirely. You might need battery heating pads or insulated battery enclosures for protection.
- High Heat: Extreme heat can degrade solar panel efficiency and shorten battery lifespan. Ensure good ventilation for batteries and inverters, and consider mounting panels with an air gap beneath them to allow for cooling.
- Dust and Dirt: Panels covered in dust, pollen, or bird droppings will produce less power. Regular cleaning, especially in dusty or agricultural areas, is essential.
- Humidity and Salt Air: For coastal locations, saltwater spray and high humidity can corrode electrical connections and metal components. Use marine-grade components, corrosion-resistant hardware, and dielectric grease on connections.
- Wind and Snow Loads: Your panel mounting structure must be engineered to withstand local wind speeds and potential snow loads. This is crucial for safety and preventing costly damage. A ground-mounted system might need a sturdier frame than a roof-mounted one, or vice-versa, depending on exposure.
Always research the specific climate challenges of your location and factor them into your component choices and installation plan.
DIY vs. Professional Installation Implications
The decision to DIY your off-grid solar installation or hire professionals has significant implications for cost, complexity, and safety.
- DIY Installation:
- Pros: Significant cost savings on labor, a deep understanding of your system, immense satisfaction of building it yourself. With clear guides and readily available components (many available on Amazon or direct from suppliers like Renogy), it's more accessible than ever.
- Cons: Requires a significant time commitment, electrical knowledge, and physical labor. High risk of making dangerous mistakes if not properly educated on wiring, safety codes, and component compatibility. Troubleshooting can be challenging. Might not qualify for certain warranties or insurance without professional installation.
- Professional Installation:
- Pros: Expertise ensures a safe, efficient, and code-compliant system. Professionals handle complex wiring, permitting, and troubleshooting. Systems are typically warrantied, and you might qualify for tax incentives more easily.
- Cons: Significantly higher upfront cost due to labor. Less direct knowledge of the system's inner workings.
For many, a hybrid approach works best: DIY the simpler parts (panel mounting, basic wiring) but bring in a qualified electrician for critical connections, inverter wiring, and final system commissioning, especially if you're dealing with a main electrical panel. Regardless of your approach, understanding DIY vs Professional Off-Grid Solar Cost is key to budgeting. It's important to remember that even for off-grid systems, some local jurisdictions might require permits and inspections, particularly for permanent structures. Neglecting these can lead to fines or safety issues down the road.
Budgeting and Phased Approaches
Let's be realistic: a comprehensive off-grid solar system can be a substantial investment. The costs can range from a few thousand dollars for a small RV setup to tens of thousands for a full-sized off-grid home. Don't let the upfront cost deter you; there are strategies to make it more manageable.
- Phased Approach: Many off-gridders start small and expand their system over time as their budget allows or as their energy needs grow. You might begin with enough solar and battery storage to power essential loads (lights, phone charging, a small refrigerator), then add more panels, batteries, or a larger inverter later on to power bigger appliances like air conditioning or a well pump. This allows you to spread out the cost and learn as you go.
- Component Prioritization: Focus on high-quality core components first (reliable batteries and a good inverter). You can always add more panels later, but a cheap, unreliable inverter or battery bank will cause endless headaches.
- Shopping Smart: Research different brands and suppliers. While premium brands like Victron Energy and Sol-Ark offer top-tier performance, many excellent mid-range options are available from companies like Renogy, often sold as complete kits that can offer good value. Keep an eye on online marketplaces like Amazon for deals on panels, wiring, and accessories, but always prioritize quality and positive reviews, especially for electrical components.
Understanding How to Budget for an Off-Grid Solar System and recognizing that it's a long-term investment rather than a single purchase can make the journey to energy independence much smoother. Remember, you're not just buying equipment; you're investing in freedom, resilience, and a significantly reduced (or eliminated) utility bill for years to come.
Disclaimer
This guide provides general information and recommendations for designing an off-grid solar system. While we strive for accuracy, individual results may vary based on specific circumstances, local regulations, and equipment choices. It is highly recommended to consult with qualified electricians or solar professionals for personalized advice, complex installations, and to ensure compliance with all applicable electrical codes and safety standards in your area. Working with electricity can be dangerous, and improper installation can lead to property damage, injury, or death.