Off-Grid Solar Kit Checklist
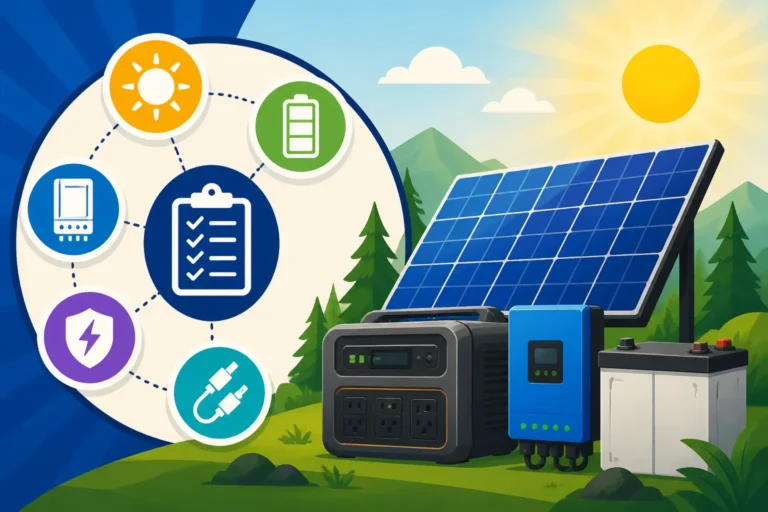
Embarking on the journey of off-grid solar can feel incredibly overwhelming, especially when you're faced with a seemingly endless list of components and technical jargon. Many folks get stuck wondering if they've forgotten something critical, or if all the pieces will actually work together once they arrive. This comprehensive guide is here to cut through that confusion, providing you with a definitive off-grid solar kit checklist to ensure you're prepared for every step, from planning to powering your independent lifestyle.
Understanding the Basics of an Off-Grid Solar Kit
Before we dive into the nitty-gritty of what goes on your checklist, it's really important to understand what an off-grid solar kit actually is and how it differs from other solar solutions out there. It’s not just a collection of random parts; it's a carefully assembled system designed to generate, store, and deliver electricity completely independently of the utility grid.
What Defines an Off-Grid System
An off-grid system, at its heart, is all about self-sufficiency. Unlike grid-tied systems that remain connected to your local power company and often feed excess energy back to them, an off-grid setup means you are your own power utility. Every electron you consume must either be generated by your solar panels or drawn from your stored battery reserves. There's no safety net of the grid to fall back on when the sun isn't shining or your batteries run low. This fundamental difference means that system resilience and adequate storage are paramount.
The core principle is to capture the sun's energy, convert it into usable electricity, store it for later, and then deliver it to your appliances. This full cycle requires specific components that work in harmony. It's a closed-loop system, so any weak link or missing piece can compromise your entire power independence. Understanding this comprehensive nature is the first step toward building a reliable system.
This kind of setup is perfect for remote cabins, RVs, tiny homes, or even full-time homesteads where grid extension is either impossible, prohibitively expensive, or simply undesirable. It offers freedom and a sense of preparedness that traditional grid power can't match, but it also demands a thorough understanding of its operational requirements. For a deeper dive into the financial aspects, you might want to explore articles like How Much Does an Off-Grid Solar System Cost.
Why Kits are a Popular Choice
For many, the idea of assembling an off-grid solar system from scratch can be daunting. You're trying to figure out voltage, amperage, compatibility, and sizing for each individual component, which can quickly lead to decision fatigue and potential mistakes. This is where off-grid solar kits shine. They're designed to take a lot of that guesswork out of the equation by providing a pre-selected, compatible set of components.
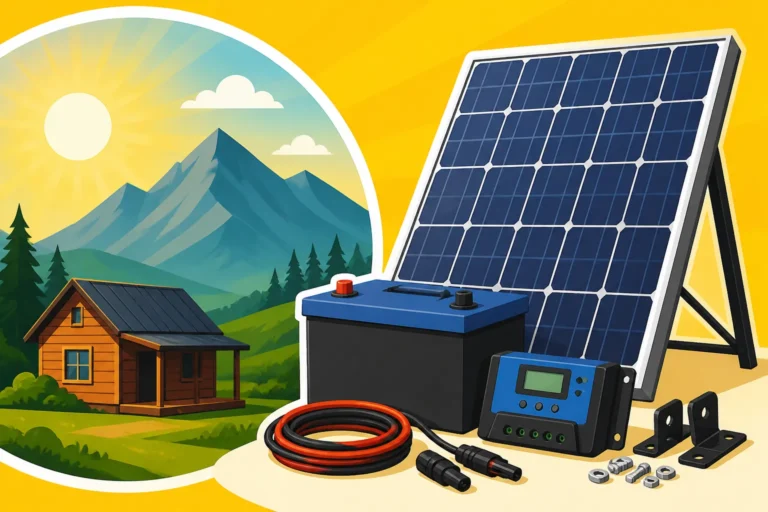
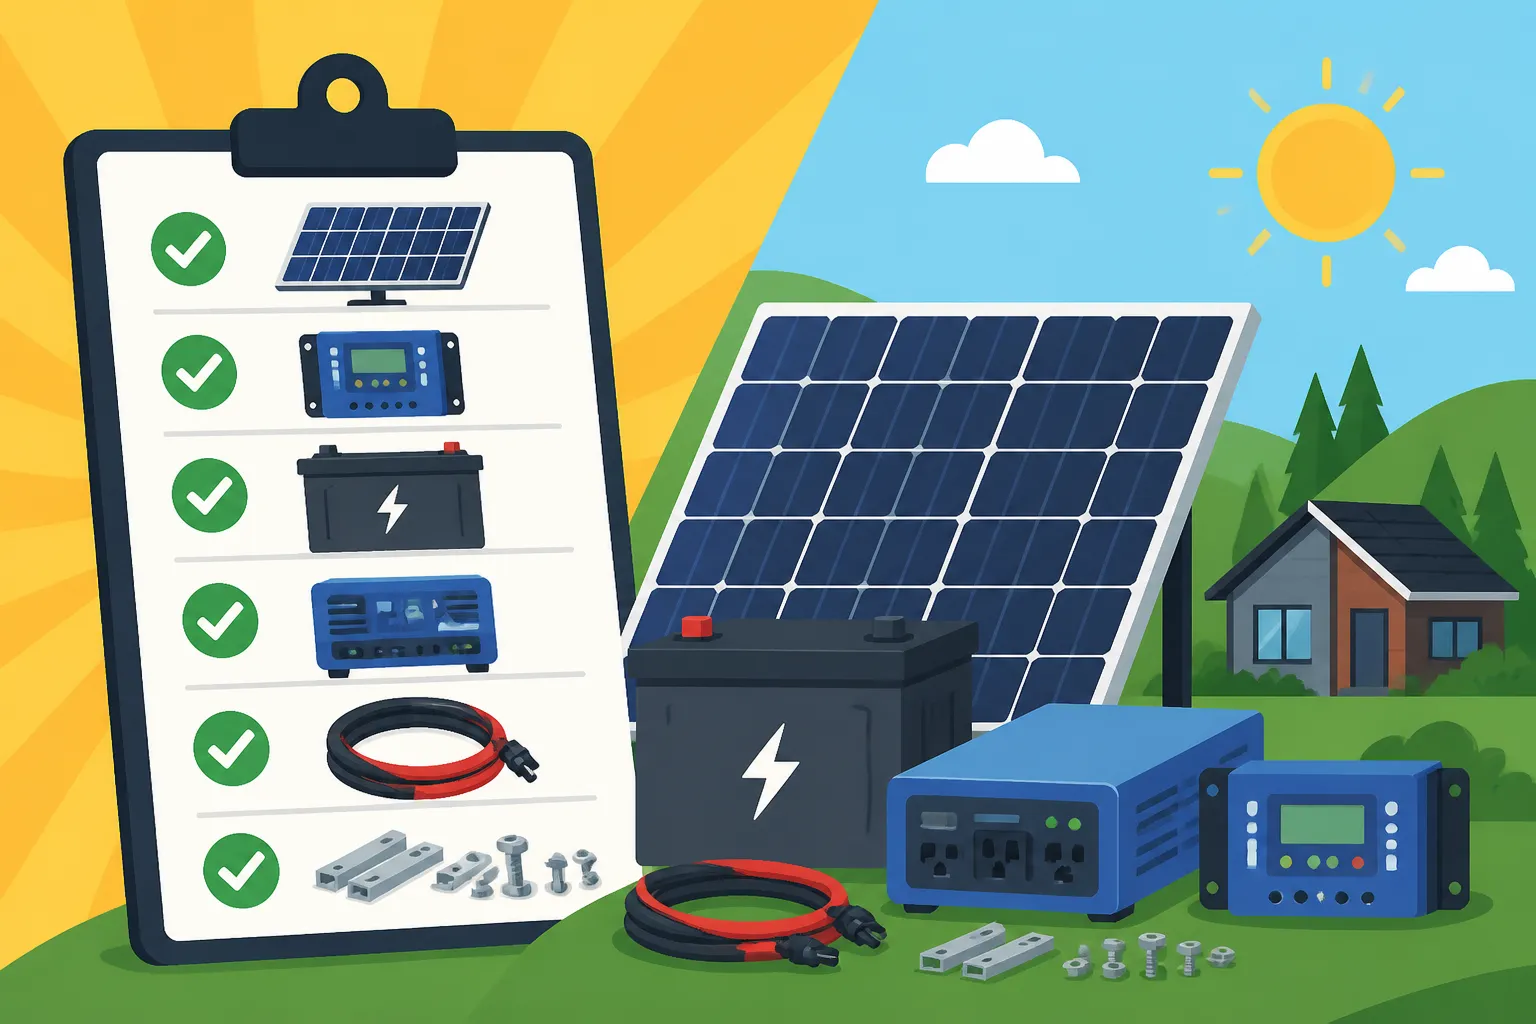
These kits typically include the major players: solar panels, a charge controller, an inverter, and often, the necessary cables and mounting hardware. Some even come with batteries. The convenience of a kit is undeniable – you get a package deal where the manufacturer has (hopefully) done the legwork to ensure everything works together seamlessly. This can save a tremendous amount of time and reduce the likelihood of ordering incompatible parts.
However, it's crucial to remember that not all kits are created equal. Just because it's a "kit" doesn't mean it's automatically the right kit for your specific needs. You still need to understand your power consumption and the environment your system will operate in. A kit designed for a small RV might not cut it for a remote workshop, so having a checklist helps you evaluate if a given kit truly meets your requirements.
Differentiating Kits from Custom Builds
While kits offer convenience, custom builds provide ultimate flexibility and optimization. A kit is like buying a pre-built computer – it works, it's usually good value, but it might not have the exact graphics card or RAM configuration you truly desire for specialized tasks. A custom build, on the other hand, is like building your own PC from individual components, allowing you to hand-pick every single part for maximum performance and efficiency tailored to your exact demands.
Custom builds allow you to choose specific brands and models for each component – perhaps a high-efficiency panel, a specialized inverter, or the exact battery chemistry and capacity you need. This often results in a more efficient and robust system, perfectly tuned to your energy profile and future expansion plans. However, the trade-off is the added complexity, research, and potential for compatibility issues if you're not well-versed in solar electricity.
For newcomers, a well-chosen kit can be an excellent starting point, offering a manageable entry into the off-grid world. As your needs evolve or your expertise grows, you can always expand or upgrade individual components, gradually turning your kit into a more customized solution. Ultimately, both approaches are valid, but your personal comfort level with electrical systems and your budget will often dictate the best path for you.
The Indispensable Role of a Pre-Purchase Checklist
Thinking about going off-grid without a detailed checklist is like planning a cross-country road trip without checking your tires or packing a map. You might get there eventually, but you're likely to encounter unexpected detours, frustrating breakdowns, and considerable stress along the way. A checklist isn't just a formality; it's your navigational tool and safety net for building a successful off-grid solar system.
Avoiding Costly Mistakes and Oversights
The biggest pain point for many aspiring off-gridders is the fear of making an expensive mistake. Imagine ordering a perfectly good inverter, only to realize it's not compatible with your battery bank's voltage, or buying panels that don't produce enough power to keep your fridge running during cloudy days. These kinds of oversights don't just cost money; they cost time, generate immense frustration, and can delay your off-grid independence significantly.
A detailed checklist forces you to consider every component and its specifications before you click "buy." It prompts you to think about wire gauges, fuse ratings, mounting hardware types, and even small but crucial items like crimpers or cable ties. By meticulously going through each item, you minimize the chances of a "gotcha" moment where you're halfway through an installation only to discover you're missing a critical connector or that your chosen components simply don't play well together.
This proactive approach saves you from the cycle of ordering, returning, and re-ordering, which is not only costly in terms of shipping but also in lost time. The cost of an off-grid solar system is a significant investment, and protecting that investment starts with thorough planning, guided by a robust checklist.
Ensuring System Compatibility and Efficiency
Compatibility is the bedrock of a functional off-grid solar system. It's not enough to just have a solar panel, a battery, and an inverter; these components must be designed to work together within a unified electrical system. For example, your charge controller needs to be rated for the voltage and amperage coming from your solar array and designed to properly charge your specific battery chemistry (e.g., LiFePO4 vs. lead-acid).
Your checklist should prompt you to confirm these compatibility points. Are your panels generating the right voltage for your charge controller? Is your inverter appropriately sized for your peak appliance loads, including surge capacity for things like well pumps or microwaves? Are your batteries suitable for deep cycling and rated for the temperatures they'll experience? Each piece of equipment has a role, and they need to speak the same electrical language.
Beyond compatibility, a well-planned system built with a checklist in mind often leads to greater efficiency. By selecting components that are optimized for your unique energy profile and environmental conditions, you maximize the energy harvest and minimize losses. This means more power available when you need it, and a longer lifespan for your expensive equipment, ultimately contributing to a better return on investment over the long term. If you’re interested in how different battery types compare, check out LiFePO4 vs Lead-Acid Battery Cost.
Tailoring the Kit to Your Unique Needs
One size rarely fits all, especially when it comes to off-grid solar. A pre-packaged kit might seem convenient, but if it's not tailored to your specific energy consumption and lifestyle, it could quickly become a source of frustration. Your checklist is your opportunity to personalize the standard kit offering or to build a custom system that genuinely serves your power needs.
Are you powering a weekend cabin, a full-time RV, or a year-round homestead? Do you run energy-hungry appliances like air conditioners or well pumps? Do you live in an area with abundant sunshine or frequent cloudy days? These factors drastically impact the size and type of solar panels, battery capacity, and inverter power you'll require. Your checklist should incorporate these crucial sizing considerations, pushing you to perform a thorough Off-Grid Solar Load Calculation Explained before making any purchases.
By going through your personalized checklist, you can identify if a standard kit is sufficient or if you need to augment it with additional panels, a larger battery bank, or a more robust inverter. It allows you to prioritize components based on your budget and most critical power needs, ensuring that your final system is not just functional, but optimized for your journey towards energy independence.
Core Components Checklist for Any Off-Grid Solar Kit
Alright, let's get down to brass tacks. These are the absolute, non-negotiable essentials that form the backbone of any off-grid solar system. Think of them as the main ingredients for your energy recipe.
Solar Panels: The Power Harvesters
Solar panels are the very first step in your off-grid power generation. They're what capture the sun's energy and convert it into DC (direct current) electricity. Without them, you literally have no solar power. When adding panels to your checklist, you need to consider a few key things:
First, Wattage and Quantity: How many watts do you need? This directly correlates to how much power you can generate daily. A larger household might need 3000W-5000W or more, while a small cabin could get by with 500W-1500W. You'll need to figure out your total daily energy consumption (in Watt-hours) and then calculate how many panels, based on their individual wattage and your local peak sun hours, you'll need to meet that demand, plus a bit extra for cloudy days. For help with this, refer to How Many Solar Panels for Off-Grid Living.
Second, Type of Panel: Monocrystalline panels are generally more efficient and perform better in low light conditions, making them a popular choice for off-grid systems where every watt counts. Polycrystalline panels are typically less expensive but also less efficient. There are also flexible panels for RVs or curved surfaces, though these tend to have shorter lifespans and lower efficiency. Your choice here depends on your budget, space constraints, and efficiency priorities. For example, brands like Renogy and Rich Solar offer a good range of options.
Third, Voltage: Panels come in various voltage configurations (e.g., 12V, 24V, 48V nominal). It's crucial that the panels' voltage output is compatible with your charge controller and system voltage. While your charge controller will manage the voltage down to what your batteries need, having a panel array that can produce sufficient voltage to efficiently charge your battery bank (especially 24V or 48V systems) is key. Don't forget to account for temperature coefficients, as extreme heat can reduce panel voltage.
Battery Bank: Energy Storage Explained
If solar panels are the heart of your system, then the battery bank is undeniably the lungs, holding the breath of energy for when the sun isn't shining. Without adequate storage, your system is essentially useless after dusk or during extended cloudy periods. This is often the most expensive single component in an off-grid system, so careful consideration is vital.
Capacity (Amp-hours or kWh): This is arguably the most critical factor. Your battery bank needs to store enough energy to power your essential loads for a certain number of "days of autonomy" – typically 2 to 5 days, depending on your climate and risk tolerance. Calculate your total daily Watt-hour consumption and then translate that into Amp-hours based on your system voltage. For example, a 48V system needs fewer Amp-hours than a 12V system to store the same amount of Watt-hours. Understanding How Much Battery Capacity You Need is crucial here.
Battery Chemistry: The big players are lead-acid (flooded, AGM, Gel) and lithium-ion (specifically LiFePO4). LiFePO4 batteries are increasingly popular for off-grid due to their long cycle life, higher depth of discharge (DOD), lighter weight, and consistent voltage output. While they have a higher upfront cost, their longevity often makes their Lifetime Cost of an Off-Grid Solar System more favorable. Lead-acid batteries are cheaper upfront but require more maintenance and have a shorter lifespan and lower usable capacity.
System Voltage (12V, 24V, 48V): Your battery bank's nominal voltage must match your inverter's input voltage and be compatible with your charge controller. For smaller systems (RV, tiny shed), 12V might suffice. For medium to larger systems (cabin, full-time RV, homestead), 24V or 48V systems are far more efficient, as higher voltage reduces current, allowing for thinner wires and less power loss. Many modern off-grid inverters operate at 48V for maximum efficiency and power handling. Brands like Battle Born and EG4 are known for their reliable LiFePO4 options.
Inverter: Converting Power for Your Appliances
Your solar panels and batteries primarily produce and store DC (Direct Current) power. However, most household appliances, from your refrigerator to your television, run on AC (Alternating Current). The inverter is the crucial bridge that converts DC power from your batteries into usable AC power for your home.
Wattage (Continuous and Surge): This is key. The continuous wattage rating of your inverter must exceed the sum of all the AC appliances you plan to run simultaneously. For instance, if your fridge, microwave, and a few lights might all be on at once, add up their running wattages. Even more critical is the surge wattage. Many appliances, especially those with motors (refrigerators, well pumps, power tools), draw a much higher "starting wattage" for a brief moment. Your inverter's surge rating must be high enough to handle these brief spikes, or it will trip and shut down. Consider What Size Inverter to Run A Refrigerator or other specific appliances.
Pure Sine Wave vs. Modified Sine Wave: Always, always, always opt for a pure sine wave inverter for an off-grid system that powers anything more than basic resistive loads. Modified sine wave inverters are cheaper but produce a "choppy" power wave that can damage sensitive electronics (computers, TVs) and make inductive loads (motors in fridges, pumps) run inefficiently, get hot, or even fail prematurely. Pure sine wave output replicates grid power, ensuring your appliances run smoothly and safely.
System Voltage Compatibility: Just like with your batteries, your inverter must be rated for the DC voltage of your battery bank (12V, 24V, or 48V). Most robust off-grid systems, especially for homes or cabins, will utilize 48V inverters for their efficiency and power handling capabilities. Hybrid inverter-chargers, like some from Victron Energy or Sol-Ark, are also popular, combining the functions of an inverter and a battery charger (useful if you have a backup generator). For premium performance, consider checking out the Best Off-Grid Solar Inverters.
Charge Controller: The Battery Guardian
The charge controller is often the unsung hero of your off-grid solar system. Its primary job is to manage the power flowing from your solar panels to your battery bank, ensuring the batteries are charged efficiently and, more importantly, safely. Without a charge controller, you risk overcharging your batteries, which can severely damage them or even pose a fire hazard.
MPPT vs. PWM: These are the two main types. PWM (Pulse Width Modulation) controllers are simpler and cheaper, but less efficient. They effectively "clip" the panel voltage down to match the battery voltage, wasting some of the available power. They are best suited for smaller, lower-power systems (e.g., a simple setup for a shed light) where the solar panel voltage closely matches the battery voltage.
MPPT (Maximum Power Point Tracking) controllers are the industry standard for most off-grid setups, especially larger ones. They are far more sophisticated and efficient, capable of harvesting significantly more power from your solar panels (often 15-30% more) by actively tracking and optimizing the voltage and current to maximize charge to the batteries. This is particularly crucial in colder weather or when panel voltage varies. For any significant investment in panels, an MPPT controller like those offered by Victron or Renogy is worth the extra cost.
Amperage Rating: Your charge controller needs to be rated for the maximum current (amps) that your solar array can produce. If you have 1000 watts of panels, you'll need to calculate the maximum amperage output at peak sun and ensure your charge controller can handle it with a safety margin. Over-sizing your controller slightly is always a good idea to prevent damage. Consider consulting How to Choose an Off-Grid Charge Controller for more details.
Battery Chemistry Settings: A good charge controller will have settings or profiles for different battery chemistries (LiFePO4, AGM, Gel, Flooded Lead-Acid). It's crucial to select the correct profile so that the controller charges your specific batteries at their optimal voltage, preventing damage and maximizing their lifespan. This is especially important for LiFePO4 batteries, which have very specific charging requirements.
Essential Supporting Components and Accessories
While the core components are the big-ticket items, a successful off-grid solar system relies heavily on a multitude of smaller, equally critical parts and accessories. Neglecting these details can lead to inefficiencies, safety hazards, or even a non-functional system.
Wiring and Cabling: Crucial Connections
Just like the circulatory system in our bodies, proper wiring and cabling are vital for the healthy flow of electricity throughout your solar system. This isn't an area to cut corners; undersized or improper wiring can lead to voltage drop, overheating, and fire risks.
Wire Gauge (AWG): This refers to the thickness of the wire. The longer the run and the higher the current (amps), the thicker the wire (smaller AWG number) you'll need to prevent excessive voltage drop. Voltage drop means power is lost as heat in the wires, reducing efficiency and potentially stressing components. You'll need different gauges for different parts of your system: thicker battery cables for high current between batteries and the inverter, and appropriate PV wire for connecting panels to the charge controller. It's also important to differentiate between DC-rated and AC-rated wiring.
Type of Cable: For outdoor panel connections, you need UV-resistant, outdoor-rated PV (photovoltaic) wire. For connections within your battery bank and to your inverter, flexible welding cable or dedicated battery cable is often used due to its high current capacity and durability. For AC wiring from your inverter to your breaker panel, standard household Romex or conduit-rated THHN/THWN wire is appropriate. Always ensure all wiring is properly insulated and protected from abrasion and environmental factors.
Connectors (MC4, Lugs, etc.): Panels typically use MC4 connectors for easy, weatherproof, and secure connections. You'll need MC4 connectors to link panels in series or parallel, and to connect them to your charge controller. For battery and inverter connections, crimped and heat-shrinked copper lugs are standard for heavy-gauge cables. Ensure you have the proper crimping tools and techniques for reliable, low-resistance connections. A good connection is as important as the wire itself. You can find more specific guidance in How to Wire an Off-Grid Solar System.
Fuses, Breakers, and Disconnects: Safety First
Electricity is powerful, and with great power comes great responsibility – specifically, the responsibility to protect your system and yourself from electrical faults. Fuses, breakers, and disconnect switches are your primary lines of defense against overcurrents, short circuits, and system damage.
Fuses: These are one-time-use protective devices designed to melt and break a circuit when current exceeds a safe level. You'll typically find fuses protecting individual solar panel strings, the input to your charge controller, and the main battery bank output (especially important for lithium batteries). ANL fuses, Class T fuses, or circuit breakers are common for high-current battery protection.
Circuit Breakers: Unlike fuses, breakers can be reset after tripping due to an overcurrent. They are used on both DC and AC sides of your system. You'll have DC breakers between your charge controller and battery bank, and between your charge controller and solar array. On the AC side, a standard household breaker panel will protect your various AC circuits. They also serve as convenient disconnects for maintenance.
Disconnect Switches: These provide a safe way to completely isolate parts of your system for maintenance, troubleshooting, or in an emergency. You'll want a DC disconnect between your solar array and charge controller (to turn off power coming from the panels) and often another one between your battery bank and inverter. An AC disconnect may also be required between your inverter and any connected loads or subpanel, depending on local codes. Always adhere to local electrical codes for proper sizing and placement of these critical safety components.
Mounting Hardware: Securing Your Panels
Your solar panels need to be securely mounted to capture sunlight efficiently and withstand environmental forces like wind and snow. The type of mounting hardware you need will depend on where you're installing your panels.
Roof Mounts: For structures like cabins or homes, roof mounts are common. This typically involves racking systems that attach to your roof rafters, with rails that the panels then clamp onto. These need to be robust, weather-sealed, and installed in a way that doesn't compromise the structural integrity of your roof. Consider tilt mounts if you need to adjust panel angles for seasonal optimization, especially in areas with significant winter sun angle changes.
Ground Mounts: If roof space is limited, shaded, or if you prefer easier access for cleaning and maintenance, ground mounts are an excellent option. These can be fixed-tilt, adjustable, or even pole-mounted for areas with deep snow. Ground mounts often require a concrete foundation or sturdy footings and can be more involved to install, but they offer great flexibility in orientation and tilt.
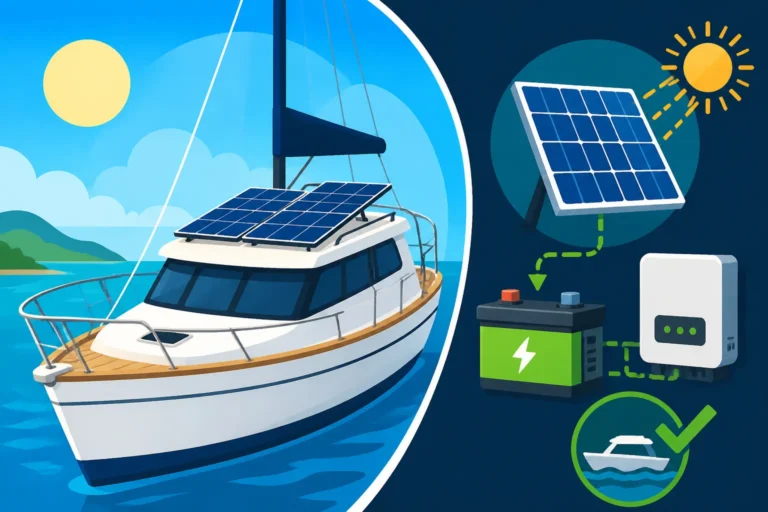
RV/Vehicle Mounts: For mobile applications like RVs, vans, or boats, specialized mounting brackets are used. These are often Z-brackets or low-profile mounts designed to be lightweight, aerodynamic, and securely attached to the vehicle roof without causing leaks. Given the vibrations and movement, durable and well-sealed mounts are paramount. Many popular off-grid brands, including Renogy and Go Power!, offer specific mounting solutions for mobile applications.
Monitoring Systems: Keeping an Eye on Performance
You've put all this effort and investment into your off-grid system – how do you know it's actually working as it should? This is where monitoring systems come into play. They provide crucial insights into your system's health and performance, helping you optimize usage and troubleshoot issues.
Battery Monitors (Shunts): A battery monitor is essential for accurately tracking the state of charge (SOC) of your battery bank. Unlike simple voltage readings, a good battery monitor (which typically uses a shunt) measures all current flowing in and out of the battery, giving you a precise percentage of remaining capacity, power consumption, and charge cycles. This is particularly important for LiFePO4 batteries, which have a very flat voltage discharge curve. Products from Victron Energy, often paired with their SmartShunt, are highly regarded for their accuracy and integration.
Inverter/Charge Controller Displays: Most modern inverters and charge controllers come with built-in displays or companion apps that allow you to see real-time data on power generation from your panels, current going into your batteries, power being drawn by your loads, and various fault codes. These integrated displays are your window into the immediate operation of your core components.
Remote Monitoring (Optional but Recommended): For those who want to keep tabs on their system from afar, many higher-end charge controllers and inverters offer remote monitoring capabilities via Bluetooth or Wi-Fi. This allows you to check system status, historical data, and even adjust settings from your smartphone or computer, which is incredibly useful if your off-grid setup is in a remote location or if you're frequently away. Some portable power stations, like those from Jackery, also offer app-based monitoring for their integrated systems.
Sizing and Design Considerations for Your Kit Checklist
Choosing components for your off-grid solar system isn't just about picking items; it's about making sure they are the right size and correctly designed to meet your specific energy demands. This section focuses on the critical calculations and design choices that need to be part of your checklist.
Assessing Your Energy Needs: Load Calculation
This is arguably the single most important step in designing any off-grid solar system. You cannot adequately size your panels, batteries, or inverter until you know exactly how much electricity you're going to use. Without a thorough load calculation, you're essentially guessing, which almost always leads to an undersized and frustrating system, or an oversized and unnecessarily expensive one.
Identify All Appliances: Go through every single electrical item you plan to use in your off-grid setup. This includes everything from the refrigerator and lights to your laptop, phone chargers, well pump, and even that obscure tool you use once a month. Don't forget parasitic loads that draw power even when "off," like standby modes on electronics.
Determine Wattage and Daily Use: For each appliance, find its running wattage (often listed on the appliance label or easily found online). Then, estimate how many hours per day you'll use it. For intermittent loads like a microwave or a well pump, estimate the total run time over a 24-hour period. Multiply wattage by hours to get daily Watt-hours (Wh) for each item. For items with high surge currents, note both the running and starting watts. For a comprehensive guide, check out How to Calculate Daily Energy Usage.
Sum Your Total Daily Watt-Hours: Add up the daily Watt-hours for all your appliances. This gives you your total estimated daily energy consumption. This number is your target for what your solar array needs to generate and what your battery bank needs to store. Always add a buffer of 10-20% to account for unforeseen usage, varying efficiency, and future additions.
Days of Autonomy and Battery Sizing
Once you know your daily energy consumption, the next critical step is to determine how many "days of autonomy" you need. This refers to how many days your battery bank can power your system without any additional charge from your solar panels (e.g., during extended cloudy weather or heavy snow).
Determine Your Autonomy Needs: This depends heavily on your location and risk tolerance. If you live in an area with reliable sunshine, 2-3 days of autonomy might be sufficient. In regions prone to long stretches of cloudy or stormy weather, 3-5 days, or even more, might be necessary. For critical loads like medical equipment or well pumps, you might opt for higher autonomy.
Calculate Required Battery Capacity: Take your total daily Watt-hour consumption and multiply it by your desired days of autonomy. This gives you the total Watt-hours your battery bank needs to supply. Then, divide this by your battery bank's nominal voltage (e.g., 12V, 24V, 48V) to get the required Amp-hour capacity. Remember to factor in the Depth of Discharge (DOD) for your chosen battery chemistry. For LiFePO4, you can typically use 80-100% of the rated capacity. For lead-acid batteries, it's usually recommended to stay above 50% DOD to prolong their lifespan.
Consider Future Expansion: It's often wise to design your battery enclosure and wiring to accommodate future battery additions. While you might start with a smaller bank to fit your budget, having the infrastructure in place to easily expand later can save you significant time and effort down the road. This also relates to how you'll manage Cost of Expanding an Off-Grid System if you choose to upgrade.
System Voltage: 12V, 24V, or 48V
The voltage of your overall off-grid system is a fundamental design choice that impacts everything from wire sizing to inverter selection. It's often one of the first decisions you make after determining your load.
12V Systems: These are generally suitable for very small systems, like a simple shed, an occasional camper, or basic van life setups. They are easy to understand and work with, and many readily available DC appliances are 12V. However, for anything beyond minimal power needs, 12V systems require very thick and expensive wiring to handle the high currents, leading to greater voltage drop and efficiency losses over distance.
24V Systems: This is a good intermediate choice for small to medium-sized cabins, RVs with moderate loads, or tiny homes. A 24V system halves the current compared to a 12V system for the same amount of power, meaning you can use thinner wires, reduce voltage drop, and often find more efficient components. Most entry-level off-grid inverters and charge controllers are available for 24V.
48V Systems: This is the gold standard for larger off-grid homes, homesteads, or any system with significant power demands (e.g., running air conditioning, well pumps, or multiple large appliances). A 48V system reduces current by a factor of four compared to a 12V system, drastically cutting down on wire size requirements and maximizing overall system efficiency. Most high-capacity inverters and charge controllers are designed for 48V operation, offering the best performance and scalability. When designing for larger power needs, exploring How to Choose System Voltage is a critical planning step.
Practical Installation and Maintenance Checklist Items
Once you've meticulously planned your system and acquired all the components, the next phase is getting it all installed and ensuring it runs smoothly for years to come. This part of the checklist focuses on the hands-on aspects, from site preparation to ongoing care.
Site Assessment and Panel Placement
Even the best components won't perform optimally if they're not installed in the right location. A thorough site assessment is crucial to maximize energy harvest and ensure a safe installation.
Sun Exposure Analysis: Before mounting anything, spend time observing your site. What areas receive full, unobstructed sunlight throughout the day, year-round? Are there any trees, buildings, or other structures that might cause shading, especially during winter months when the sun is lower? Even partial shading on a single panel can drastically reduce the output of an entire string of panels. Use a sun path calculator or a simple shade study tool to identify the best locations.
Orientation and Tilt Angle: For fixed installations (like a cabin or ground mount), panels should ideally face true south (in the Northern Hemisphere) for maximum annual energy production. The optimal tilt angle will depend on your latitude and whether you prioritize summer or winter production. Many off-gridders choose a tilt angle that optimizes for winter, as that's when sunlight is weakest and energy needs are often higher. Adjustable tilt mounts can offer the best of both worlds. For mobile setups like RVs, you might prioritize a flat mount for aerodynamics, but be prepared for reduced efficiency.
Structural Integrity and Accessibility: If mounting on a roof, ensure the structure can safely support the weight of the panels and withstand local wind and snow loads. For ground mounts, ensure the chosen location is level and stable. Consider accessibility for future cleaning, maintenance, or troubleshooting. Will you be able to safely reach the panels to clear snow or debris? Will your battery bank be in a protected, well-ventilated area with appropriate temperature control? Reviewing the basics of How to Mount Off-Grid Solar Panels can be incredibly helpful here.
Tools and Safety Gear Required
Attempting a solar installation without the right tools and safety gear is asking for trouble. This isn't just about convenience; it's about efficiency, quality, and your personal well-being.
Essential Tools: Your toolkit should include basic hand tools like screwdrivers, wrenches, wire cutters, strippers, and a crimping tool for MC4 connectors and cable lugs. A multimeter is absolutely indispensable for testing voltages, currents, and continuity at various stages of the installation and for future troubleshooting. A drill, level, tape measure, and stud finder (for roof mounts) are also crucial. For precise battery terminal connections, a torque wrench is highly recommended.
Safety Gear: Never, ever skimp on safety. At a minimum, you'll need sturdy work gloves, safety glasses, and appropriate footwear. When working on roofs or elevated structures, a safety harness and fall protection equipment are mandatory. For electrical work, wear insulated gloves, and ensure you have a fire extinguisher rated for electrical fires nearby. Always de-energize circuits before working on them and double-check with your multimeter. Remember, electricity is unforgiving.
Specialized Tools: Depending on the complexity of your system, you might need specialized tools. This could include a solar cable entry gland for waterproofing, a cable fishing tool for routing wires through walls, or even a hydraulic crimper for very thick battery cables. While a full professional toolkit might be overkill for a small DIY kit, understanding what tools are needed for each step of DIY Off-Grid Solar Installation Step by Step will save you headaches.
Post-Installation Testing and Maintenance Schedule
Installing your system is a major accomplishment, but it's not the end of the journey. Proper testing immediately after installation and adherence to a regular maintenance schedule are vital for long-term reliability and performance.
Initial System Testing: Once everything is wired up (and before connecting any sensitive loads), perform thorough tests. Use your multimeter to confirm voltages at various points: panel output, charge controller input/output, battery bank, and inverter output (both AC and DC). Check for proper polarity. Ensure all connections are tight and secure. Turn on components one by one, verifying correct operation. The goal is to catch any wiring mistakes or faulty components before they cause damage.
Routine Maintenance: Off-grid solar systems, particularly those with lead-acid batteries, require ongoing maintenance. Panels should be cleaned periodically to remove dust, dirt, and debris that can reduce efficiency. Connections should be checked for corrosion or looseness. If you have flooded lead-acid batteries, check electrolyte levels and top up with distilled water as needed. Keep your battery bank area clean and well-ventilated. Even LiFePO4 batteries benefit from occasional terminal checks and software updates.
Performance Monitoring and Troubleshooting: Regularly check your monitoring system. Are your panels producing as expected? Is your battery bank charging fully? Are there any unexpected voltage drops or component warnings? Keeping an eye on performance trends can help you identify potential issues before they become major problems. If something isn't working right, a systematic troubleshooting approach, often starting with the simplest checks (like loose connections or blown fuses), is key. Having a resource like Off-Grid Solar Maintenance Guide can prove invaluable.
Off-Grid Solar Kit Checklist Table
This table summarizes the essential components and considerations for your off-grid solar kit. Use it as a quick reference as you plan and purchase your system.
| Category | Component | Key Considerations & Checklist Items |
|---|---|---|
| Core Power Generation | Solar Panels (PV Modules) | [ ] Panel Wattage (e.g., 100W, 300W) & Quantity |
| [ ] Panel Type (Monocrystalline highly recommended) | ||
| [ ] Panel Voltage (Vmp, Voc) compatible with charge controller | ||
| Energy Storage | Battery Bank | [ ] Total Capacity (Ah or kWh) based on daily usage & days of autonomy |
| [ ] Chemistry (LiFePO4 recommended for performance/lifespan) | ||
| [ ] System Voltage (12V, 24V, 48V) | ||
| [ ] Battery Cables (proper gauge and length with lugs) | ||
| Power Conversion | Inverter | [ ] Continuous Wattage (sum of simultaneous loads) & Surge Wattage (motor starting loads) |
| [ ] Pure Sine Wave (essential for sensitive electronics) | ||
| [ ] Input Voltage (matches battery bank voltage) | ||
| [ ] Inverter-Charger functionality (if using generator backup) | ||
| Charge Management | Charge Controller | [ ] Type (MPPT highly recommended for efficiency) |
| [ ] Amperage Rating (sufficient for max solar array current) | ||
| [ ] Battery Chemistry Settings (compatible with your batteries) | ||
| Wiring & Safety | DC Wires & Cables | [ ] PV Wire (UV-rated, proper gauge for panel runs) |
| [ ] Battery Interconnect Cables (proper gauge for parallel/series connections) | ||
| [ ] Main Battery Cables (proper gauge for battery to inverter/busbar) | ||
| [ ] Fuses (DC rated for battery bank, charge controller input/output) | ||
| [ ] DC Circuit Breakers (for solar input, battery output) | ||
| [ ] DC Disconnect Switches (for solar array and battery bank) | ||
| [ ] AC Wires & Cables (standard household Romex/THHN for inverter to loads) | ||
| [ ] AC Breaker Panel (if powering multiple AC circuits) | ||
| [ ] AC Disconnect (if required by code or for isolation) | ||
| Mounting Hardware | Panel Mounts | [ ] Roof, Ground, Pole, or Mobile mounts (specific to your installation) |
| [ ] Racking/Rails, Clamps, Fasteners (ensure compatibility with panels and structure) | ||
| [ ] Tilt Kit (if adjustable tilt is desired) | ||
| Monitoring | Battery Monitor | [ ] Shunt-based for accurate State of Charge (SOC) reading (e.g., Victron SmartShunt) |
| [ ] Integrated Inverter/Charge Controller Display | ||
| [ ] Remote Monitoring Capability (Bluetooth/Wi-Fi, e.g., for Jackery systems, if desired) | ||
| Accessories | Cable Entry Glands/Boxes | [ ] For waterproof cable routing into structure/vehicle |
| [ ] MC4 Connectors & Branch Connectors (for series/parallel wiring) | ||
| [ ] Terminal Lugs & Heat Shrink (for battery/inverter connections) | ||
| [ ] Conduit/Cable Management | ||
| [ ] Proper Grounding Rods & Grounding Wire/Busbar | ||
| Tools & Safety | Multimeter | [ ] For testing voltage, current, continuity |
| [ ] Wire Strippers, Crimpers, Wrenches | ||
| [ ] Safety Glasses, Gloves, Fall Protection (if working at heights) | ||
| [ ] Fire Extinguisher (rated for electrical fires) | ||
| [ ] Torque Wrench (for precise terminal connections) |
Disclaimer
The information provided in this article is intended for educational and informational purposes only and should not be taken as professional electrical or construction advice. Off-grid solar system installation involves working with high voltage electricity and potentially heavy equipment. Improper installation can lead to serious injury, electrocution, fire, or damage to property. Always consult with qualified and licensed professionals for system design, installation, and compliance with local electrical codes and permitting requirements. Your specific energy needs and local conditions will vary, and a professional assessment is highly recommended before undertaking any off-grid solar project.