Best Off-Grid Solar Kit for a Tiny Home
Choosing to live in a tiny home is all about intentionality, simplifying, and often, embracing a more self-sufficient lifestyle. But when it comes to powering that cozy space off-grid, it can feel like you're staring up at Mount Everest with a plastic spoon. The sheer number of options, the jargon, and the fear of making a costly mistake can be truly overwhelming. This comprehensive guide is here to cut through the confusion and help you navigate the world of off-grid solar kits, ensuring your tiny home stays powered, comfortable, and truly independent.
Understanding Your Tiny Home's Energy Needs
Before you even start looking at shiny solar panels or robust batteries, the very first, and arguably most critical, step is to truly understand your tiny home's energy appetite. Without this foundational knowledge, you're essentially throwing darts in the dark, hoping to hit a bullseye. Many folks skip this, or just eyeball it, and that's where disappointment, underpowered systems, or overspending often begin. Tiny homes, while small, still have unique energy profiles that demand a detailed assessment.
Calculating Your Daily Watt-Hour Consumption
This isn't as intimidating as it sounds, I promise! Think of it like creating a grocery list for your electricity. You need to identify every single appliance and device you plan to use, how many watts it consumes (its "power draw"), and for how long you'll use it each day. Most appliances have this information right on a sticker or in the manual. If not, a quick web search for "[appliance name] wattage" usually does the trick.
Let's say you have a tiny home and plan to run a mini-fridge (60W for 12 hours), an LED lighting string (10W for 5 hours), charge a laptop (45W for 3 hours), and occasionally use a blender (300W for 10 minutes). You'd calculate:
- Mini-fridge: 60W * 12 hours = 720 Wh
- LED lights: 10W * 5 hours = 50 Wh
- Laptop: 45W * 3 hours = 135 Wh
- Blender: 300W * (10/60) hours = 50 Wh
Add these up: 720 + 50 + 135 + 50 = 955 Wh per day. This is your total daily load. This step is crucial for determining How to Calculate Daily Energy Usage accurately. Remember, every tiny home is different, so resist the urge to just copy someone else's calculations; yours will be unique to your lifestyle.
It’s also important to consider peak loads – those moments when multiple high-wattage appliances might run simultaneously. While your average daily consumption might be modest, if you simultaneously turn on a microwave, a coffee maker, and a hairdryer, your inverter needs to be able to handle that temporary surge. Not accounting for this can lead to frustrating system shutdowns right when you need power most. Jot down a list of your most power-hungry items and estimate how often you might use them together to get a realistic peak demand number.
Accounting for Seasonal Variations and Autonomy
Living off-grid, especially in a tiny home, means becoming intimately familiar with the sun. Solar panel output isn't constant; it changes dramatically with the seasons, cloud cover, and even the time of day. In winter, or during extended periods of cloudy weather, your panels might produce significantly less power. This is where "days of autonomy" comes in – how many days your battery bank can sustain your tiny home without any new charge coming in from your solar panels.
For a tiny home, aiming for 2-3 days of autonomy is a good starting point, especially if you live in an area prone to bad weather or short winter days. This means your battery bank needs to store enough energy to cover your daily watt-hour consumption for that many days. For our example tiny home using 955 Wh/day, a 3-day autonomy would require a battery bank capable of storing 2865 Wh (955 Wh * 3). Understanding How Many Batteries for an Off-Grid System for your specific needs is a vital aspect of reliable off-grid living. This buffer ensures your lights stay on even when the sun takes a vacation.
Prioritizing Essential Appliances
In a tiny home, every square inch and every watt counts. It’s a fantastic opportunity to evaluate what truly matters. Do you really need that electric kettle and a coffee maker, or can one suffice? Could you swap your incandescent bulbs for super-efficient LEDs? Think about your "must-have" appliances versus your "nice-to-have" ones. Your fridge, lights, and charging ports are likely non-negotiables, but perhaps a clothes dryer could be replaced with a clothesline, or a power-hungry toaster oven with a stovetop toaster.
Making smart choices about your appliances, opting for energy-efficient models (look for Energy Star ratings on larger items), and even embracing some manual alternatives can drastically reduce your overall energy footprint. This, in turn, allows you to get by with a smaller, more affordable solar system, which is a huge win for any tiny home owner. Every watt saved means less money spent on panels and batteries, and less space consumed by your system. This careful planning directly impacts your Cost to Power a Tiny Home with Solar.
Key Components of an Off-Grid Solar Kit for Tiny Homes
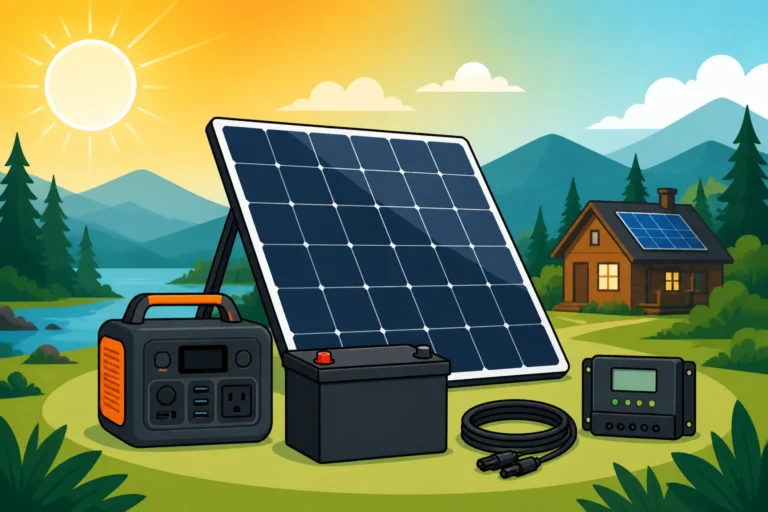
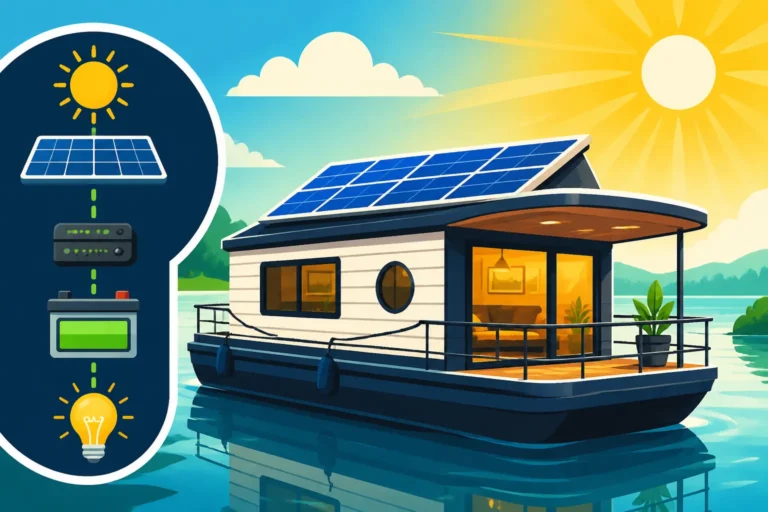
An off-grid solar system, whether it’s a full-blown custom setup or a pre-packaged kit, is essentially a collection of components working in harmony to capture, store, and deliver electricity. For tiny homes, space efficiency and reliability are often paramount, making the selection of each part even more critical. Understanding what each component does is like learning the language of your power system, empowering you to make informed decisions.
Solar Panels: Types and Efficiency
Solar panels are your energy gatherers, converting sunlight into electricity. For tiny homes, considerations like roof space, aesthetics, and ease of installation are often at the forefront.
- Monocrystalline Panels: These are typically the most efficient, meaning they generate more power per square foot. They're identifiable by their dark, uniform appearance. While they might be a bit pricier upfront, their higher efficiency can be a huge advantage for tiny homes with limited roof real estate. They perform well in bright, sunny conditions.
- Polycrystalline Panels: A bit less efficient than monocrystalline, these panels are usually more affordable. They have a speckled, bluish appearance. If you have ample roof space and a tighter budget, these can be a good option.
- Flexible Panels: Lightweight and able to conform to curved surfaces, flexible panels are fantastic for RVs, vans, and some tiny homes with unconventional roof designs. However, they are generally less efficient and have shorter lifespans than rigid panels, and they can suffer from heat issues if not properly mounted with airflow.
When selecting panels, consider your tiny home's roof angle, orientation, and potential shading. You'll want to maximize the "peak sun hours" your panels receive each day. How to Install Off-Grid Solar Panels on a tiny home often requires creative solutions, so research different mounting options to ensure they fit your specific structure and aesthetics.
Battery Banks: Lithium vs. Lead-Acid for Tiny Homes
The battery bank is the heart of your off-grid system; it stores the energy your panels collect during the day for use at night or on cloudy days. The choice here dramatically impacts performance, lifespan, and cost.
- Lead-Acid Batteries (Flooded, AGM, Gel): These are the traditional workhorses of off-grid systems. They are generally more affordable upfront. Flooded lead-acid batteries require regular maintenance (checking water levels and ventilation), while AGM (Absorbed Glass Mat) and Gel batteries are sealed, maintenance-free, and more tolerant to vibration, making them popular for mobile tiny homes. However, lead-acid batteries have a shorter lifespan (typically 2-7 years), are heavy, and can only be discharged to about 50% without damaging them, meaning you need twice the stated capacity for usable power.
- Lithium Iron Phosphate (LiFePO4) Batteries: These are quickly becoming the gold standard for off-grid living, especially in tiny homes. While the upfront cost is higher, they offer significant advantages:
- Longer Lifespan: Often 10-15 years or more, outlasting lead-acid batteries by a wide margin.
- Deeper Discharge: Can be safely discharged to 80-100%, meaning a 100Ah LiFePO4 battery provides nearly double the usable energy of a 100Ah lead-acid battery.
- Lighter Weight & Compact: Perfect for tiny homes where weight and space are critical concerns.
- Maintenance-Free: No watering or specialized ventilation needed.
- Faster Charging: Can accept a higher charge current, leading to quicker recharging.
For a tiny home, the deeper discharge, lighter weight, and longer lifespan of LiFePO4 batteries often make them the superior choice in the long run, despite the higher initial investment. If you're comparing options, a deeper dive into LiFePO4 vs Lead-Acid Battery Cost can help you weigh the financial implications. Considering the space constraints, a compact, high-performance battery like those offered by Battle Born or EG4 can be a game-changer for a tiny home.
Inverters and Charge Controllers
These two components are the unsung heroes, managing the flow of electricity.
- Charge Controller: This device sits between your solar panels and your battery bank. Its job is to regulate the voltage and current coming from the solar panels to prevent overcharging your batteries, which can severely damage them. There are two main types:
- PWM (Pulse Width Modulation): More affordable, but less efficient, especially in colder weather. They basically match the panel voltage to the battery voltage.
- MPPT (Maximum Power Point Tracking): More expensive but significantly more efficient. MPPT controllers can convert excess voltage from your panels into additional current for your batteries, maximizing the power harvest. For tiny homes where every watt counts, an MPPT controller is almost always the recommended choice. For more details, explore Best MPPT Charge Controllers.
- Inverter: Your solar panels and batteries produce DC (Direct Current) power, but most household appliances run on AC (Alternating Current). The inverter converts DC power from your batteries into usable AC power for your tiny home.
- Pure Sine Wave Inverters: These produce a clean, stable waveform that is identical to grid power. This is essential for sensitive electronics (laptops, TVs, medical devices) and ensures all your appliances run smoothly and efficiently. Always opt for a pure sine wave inverter for your tiny home.
- Modified Sine Wave Inverters: These are cheaper but produce a "choppier" waveform that can damage sensitive electronics and cause motors to run hot or inefficiently. Avoid these for anything beyond very basic, resistive loads.
Many modern off-grid kits, especially those for tiny homes, integrate the charge controller and inverter into a single, compact unit called an inverter-charger. This saves space, simplifies wiring, and often includes advanced features like generator integration, making them very attractive for tiny home applications.
Factors to Consider When Choosing a Kit
Choosing the "best" off-grid solar kit for your tiny home isn't about finding the most expensive or the cheapest option; it's about finding the right fit for your unique energy needs, budget, and lifestyle. Tiny homes often come with their own set of constraints and opportunities, so a thoughtful evaluation of these factors will lead you to a system that truly serves you.
Budgeting and Cost Implications
Let's be real: money talks. The cost of an off-grid solar system can vary wildly, from a few hundred dollars for a very basic setup to tens of thousands for a robust, whole-home system. For tiny homes, a good starting point for a capable system might range from $5,000 to $15,000, but this is highly dependent on your energy demands and component choices. Understanding Off-Grid Solar Cost: Complete Breakdown can help you set realistic expectations.
Think of it as an investment. While the upfront cost might seem daunting, remember you're eliminating monthly utility bills and gaining energy independence. When budgeting, consider not just the initial purchase price of the kit, but also potential installation costs (if you're not DIYing it), any necessary wiring and safety components (fuses, breakers, disconnects), and even future maintenance or replacement costs for batteries. Don't be tempted to cut corners on critical components like batteries or inverters, as this often leads to premature failure and higher costs down the road.
Scalability and Future Expansion
Tiny home living evolves, and so might your energy needs. Maybe you start with just lights and phone charging, but later decide you want to add a mini-split AC unit or a more powerful water pump. A well-designed off-grid solar kit for a tiny home should ideally offer some degree of scalability.
- Modular Systems: Kits that allow you to easily add more solar panels, batteries, or even upgrade your inverter are fantastic for tiny homes. Look for systems that use standard connections and components. For example, some battery brands allow you to simply "stack" additional battery modules to increase capacity.
- Oversizing Slightly: While you don't want to wildly oversize your initial system (it costs more!), a little bit of wiggle room can be beneficial. Having a charge controller that can handle a few more panels than you currently have, or an inverter with a slightly higher capacity, can save you from a complete system overhaul down the line.
Consider your long-term vision for your tiny home. Are you planning to add more appliances? Will your family size change? Thinking ahead about Cost of Expanding an Off-Grid System can save you headaches and expenses in the future. It's often cheaper to plan for expansion from the start than to rip out and replace an entire system.
Climate and Sun Exposure
Your geographical location plays a massive role in how much solar power your panels can generate.
- Peak Sun Hours: This is the equivalent number of hours per day when the intensity of sunlight averages 1,000 watts per square meter. A tiny home in sunny Arizona will have many more peak sun hours than one in cloudy, rainy Oregon. This directly impacts how many solar panels you need.
- Temperature: Solar panels actually perform better in colder temperatures (up to a point) but can suffer efficiency losses in extreme heat. Batteries, especially lead-acid, are also sensitive to temperature extremes. You'll need to factor this into your sizing and consider housing your battery bank in a climate-controlled space within your tiny home or an insulated outdoor enclosure.
- Shading: Even partial shading on one panel can significantly reduce the output of your entire solar array. Consider the location of trees, other buildings, and even self-shading from your tiny home's own structure when planning panel placement.
If you anticipate significant cloudy periods or live in a region with short winter days, you'll need a larger solar array and/or a larger battery bank to compensate. Conversely, in sun-drenched areas, you might get away with a more modest setup. This information is critical when determining How Many Solar Panels for Off-Grid Living.
Comparing Popular Off-Grid Solar Kit Options
When you start browsing for off-grid solar kits for your tiny home, you'll quickly notice there isn't a one-size-fits-all solution. Instead, the market offers a spectrum of approaches, from fully integrated portable units to customizable component bundles. Each has its pros and cons, especially when applied to the unique context of a tiny home, where space, mobility, and ease of use are often top priorities.
All-in-One Portable Power Stations
These are perhaps the simplest entry point into off-grid solar for smaller tiny home needs or as a supplementary power source. Brands like Jackery, Goal Zero, EcoFlow, and Bluetti have popularized these units. They essentially combine a battery, an inverter, and a charge controller into a single, often suitcase-sized, box.
Pros for Tiny Homes:
- Portability: You can move them around your tiny home, take them outside, or even bring them with you if you relocate your tiny home.
- Simplicity: Minimal wiring or installation required. Just plug in your solar panels and your appliances.
- Compact Design: Extremely space-efficient, which is a huge benefit in a tiny home.
- User-Friendly: Often come with clear displays, app monitoring, and multiple output ports (AC outlets, USB-C, 12V DC).
Cons for Tiny Homes:
- Limited Capacity: While some larger models are impressive, they generally can't power a full-sized tiny home with typical appliances for extended periods. They're more suited for minimalist setups or partial power.
- Less Expandable: Most units have fixed battery capacities and often limited solar input capacity, making them less flexible for future growth.
- Higher Cost per Watt-Hour: Often more expensive than building a comparable modular system from individual components.
For a tiny home that's primarily used for seasonal camping, a minimalist lifestyle, or as a backup power source, a powerful portable power station like the Jackery Explorer 2000 Plus could be an excellent choice. It’s ideal for running essentials like lights, charging devices, and perhaps a small fridge or a well pump occasionally. However, for a full-time, robust tiny home system powering a wider array of appliances, you'll likely need something more substantial.
Pre-configured Kits for DIY Enthusiasts
These kits bundle all the major components you need (panels, batteries, charge controller, inverter, and sometimes mounting hardware and basic wiring) into one package. They are designed for those who want a complete solution without the hassle of individually sourcing every component. Companies like Renogy, Eco-Worthy, and Rich Solar offer a variety of these kits, often tailored for RVs, cabins, or small homes – categories that often overlap with tiny home needs.
Pros for Tiny Homes:
- Convenience: All major components are matched and shipped together, saving you research time and compatibility worries.
- Cost-Effective: Often a better value than buying individual components, especially for beginners.
- Designed for DIY: Typically come with comprehensive instructions and wiring diagrams, making DIY Off-Grid Solar Installation Step by Step more manageable.
- Sized for Common Needs: Many kits are designed to meet typical energy demands for small living spaces.
Cons for Tiny Homes:
- Less Customization: You might get components that are "good enough" but not necessarily optimized for your exact needs or preferences.
- May Lack Specifics: Some kits might skimp on wiring gauges, fuses, or specific mounting hardware, requiring additional purchases.
- Shipping Logistics: A large kit with panels and batteries can be heavy and require freight shipping.
These kits are a fantastic middle ground for many tiny home owners. They provide a solid foundation and take much of the guesswork out of component matching. Just ensure the kit's capacity aligns with your calculated energy needs and that you're comfortable with the DIY installation aspect. Many offer variations to help you choose the Best Off-Grid Solar Kit for a Tiny Home that's just right.
Modular Systems for Customization
For those with specific requirements, a larger budget, or a desire for maximum flexibility, building a modular system from individual components is often the way to go. This involves selecting each solar panel, battery, inverter, and charge controller separately. This approach gives you the ultimate control over quality, brand, and system design, allowing you to create a truly bespoke off-grid solar system.
Pros for Tiny Homes:
- Optimized Performance: You can choose top-tier components specifically suited to your climate, energy load, and space constraints. For instance, you could opt for high-efficiency monocrystalline panels and premium LiFePO4 batteries from a brand like Victron Energy or EG4.
- Maximum Scalability: Easier to expand your system by adding more panels, batteries, or upgrading specific components as your needs change.
- Brand Preference: You can stick with trusted brands for each component, ensuring quality and reliability. For example, if you prefer Renogy panels for their durability and a specific inverter from Sol-Ark for its advanced features, you can combine them.
Cons for Tiny Homes:
- Complexity: Requires more research, planning, and understanding of electrical systems to ensure compatibility and proper sizing. This is where a guide like Off-Grid Solar System Sizing Guide becomes invaluable.
- Higher Upfront Cost: Individually purchased premium components can often be more expensive than bundled kits.
- DIY Skills: A higher level of DIY expertise is usually required for installation, though you could always hire an electrician for the wiring phase.
For tiny homes aiming for full-time, robust off-grid living with a wide range of appliances, or those planning to live off-grid for many years, a modular system offers the best long-term value and reliability. It truly allows you to design for How to Design for Year-Round Off-Grid Power.
Here's a quick comparison of these common off-grid solar kit approaches:
| Feature | All-in-One Portable Power Stations | Pre-configured Kits for DIY Enthusiasts | Modular Systems for Customization |
|---|---|---|---|
| Ease of Setup | Very Easy (Plug & Play) | Moderate (Assembly & Wiring) | Complex (Component Sourcing & Wiring) |
| Initial Cost | Moderate to High (per Wh) | Moderate (Good Value) | Variable (Potentially Highest) |
| Capacity | Low to Medium (Best for minimalist use) | Medium to High (Good for most tiny homes) | Unlimited (Tailored to your exact needs) |
| Expandability | Very Limited | Limited to Moderate | Excellent |
| Portability | High | Low (Stationary or semi-permanent) | None (Stationary) |
| Customization | None | Limited (Component selection fixed) | Unlimited (Choose every component) |
| Best For Tiny Homes | Minimalist setups, backup, mobile use | Most typical full-time tiny home residents | High energy demands, long-term residents, specific needs |
Installation Considerations for Tiny Homes
Installing an off-grid solar kit on a tiny home presents a unique set of challenges and opportunities. Unlike a fixed cabin or a massive residential roof, tiny homes often prioritize compact design, mobility, and sometimes, aesthetic integration. Thoughtful planning during the installation phase can prevent headaches, ensure safety, and maximize the efficiency and longevity of your solar investment.
Mounting Options for Tiny Homes
The way you mount your solar panels on a tiny home is crucial, impacting both energy production and the home's overall appearance and mobility.
- Roof Mounts: This is the most common option. For tiny homes, flush mounts (panels lie close to the roof) are popular for their low profile and aerodynamic benefits, especially if the tiny home is mobile. Tilt mounts, while sometimes less aesthetically pleasing or aerodynamic, allow you to adjust the panel angle for optimal sun exposure throughout the seasons, which can significantly boost winter performance. Consider the structural integrity of your tiny home's roof; solar panels, especially multiple rigid ones, add considerable weight.
- Ground Mounts: If your tiny home is stationary and you have available land, ground mounts offer excellent flexibility. You can orient them perfectly south (in the Northern Hemisphere) and set the ideal tilt angle without worrying about roof constraints. They are also easier to clean and maintain. The downside is they take up ground space and might not be an option for mobile tiny homes or those on small lots.
- Side Mounts/Integrated: Some innovative tiny home designs integrate panels directly into the siding or use unique pop-up or fold-out designs. While these are custom solutions, they can be highly aesthetic and space-saving. This often involves working with your tiny home builder.
Regardless of the method, ensure your mounting system is robust enough to withstand local wind loads and weather conditions. Proper How to Mount Off-Grid Solar Panels is not just about efficiency but also safety.
Wiring Safety and Best Practices
Electricity, even low-voltage DC, demands respect. Incorrect wiring is not only inefficient but can also be a serious fire hazard.
- Wire Sizing: This is critical. Undersized wires create resistance, leading to voltage drop and wasted energy, and can overheat, posing a fire risk. Always size your wires according to the current they'll carry and the length of the run. A good rule of thumb is to err on the side of slightly thicker wire.
- Fuses and Breakers: These are your system's safety nets. Fuses protect individual components, while breakers protect circuits from overcurrent. Every major component (panels, battery bank, inverter) needs appropriate overcurrent protection.
- Grounding: Proper grounding protects you and your equipment from electrical surges and faults. Your entire system, including panel frames and inverter chassis, should be securely grounded.
- Conduit and Protection: Run all wiring in appropriate conduit (flexible or rigid) to protect it from physical damage, UV exposure, and pests. Use marine-grade, outdoor-rated wiring for any exterior runs.
If you're unsure about any aspect of wiring, don't hesitate to consult or hire a qualified electrician. It's an investment in safety and peace of mind. There are many resources available for learning How to Wire an Off-Grid Solar System safely and effectively.
Permitting and Local Regulations
This is one area where tiny homes often navigate a grey area, but it's essential not to ignore. While an RV-style tiny home might fall under vehicle regulations, a permanently sited tiny home might be subject to local building codes, electrical codes (like the National Electrical Code – NEC), and zoning laws.
- Local Authorities: Always check with your local planning department or building inspector's office. They can clarify if you need a permit for your off-grid solar installation. Many localities consider solar installations, even off-grid, to be a permanent structural or electrical addition.
- HOA/Community Rules: If your tiny home is on a property with a homeowner's association or within a planned community, there might be specific rules regarding exterior modifications, including solar panels.
- Safety Standards: Even if a permit isn't strictly required, adhering to electrical safety standards (like the NEC) is always a good practice. It ensures your system is safe, reliable, and potentially easier to sell or insure later.
Ignoring permits can lead to fines, forced removal of your system, or difficulties with insurance claims. It's always best to be proactive and understand Off-Grid Solar Permit Requirements in your specific location before you start drilling holes or running wires.
Maximizing Your Tiny Home Solar Investment
Getting your off-grid solar kit up and running is a huge accomplishment, but it's just the beginning. To truly make the most of your investment and ensure your tiny home remains reliably powered for years to come, proactive steps in energy efficiency, maintenance, and backup planning are crucial. These aren't just good ideas; they're essential elements of a successful off-grid lifestyle.
Energy Efficiency Upgrades
The cheapest watt-hour is the one you never use! Before even thinking about adding more panels or batteries, focus on minimizing your energy consumption. This approach has a direct, positive impact on your solar system's performance and longevity, allowing a smaller system to do more.
- LED Lighting: This is a no-brainer. If you're still using incandescent or even CFL bulbs, switch to LEDs immediately. They use a fraction of the power and last significantly longer.
- Insulation: A well-insulated tiny home is an energy-efficient tiny home. Proper insulation in walls, ceiling, and floor reduces the demand on heating and cooling systems, which are typically the biggest energy hogs in any home. Even small drafts can significantly impact your energy load.
- Efficient Appliances: As mentioned earlier, prioritize DC-specific appliances where possible (especially 12V fridges, fans, and lights) or invest in high-efficiency AC appliances. Look for Energy Star ratings. For example, a modern, highly efficient DC compressor fridge might draw 40W compared to an older AC fridge drawing 100W, making a huge difference over 24 hours.
- Passive Design: Incorporate passive solar heating (south-facing windows) and natural ventilation strategies into your tiny home's design to reduce reliance on active heating and cooling.
Every watt you save means your solar panels have less work to do, your batteries last longer between charges, and your overall system experiences less strain. This holistic approach makes your Off-Grid Solar System Design Basics much more robust.
Maintenance and Longevity Tips
Like any complex system, your off-grid solar kit requires regular care to perform optimally and last its full lifespan. Neglecting maintenance is a surefire way to shorten component life and reduce efficiency, leading to unexpected costs and power outages.
- Panel Cleaning: Dust, dirt, pollen, and bird droppings can significantly reduce solar panel output. Clean your panels regularly with water and a soft brush or cloth, especially after dry, dusty periods.
- Battery Care:
- Lead-Acid: Regularly check water levels (for flooded batteries) and top up with distilled water. Ensure proper ventilation. Keep terminals clean and free of corrosion.
- LiFePO4: Generally maintenance-free, but monitor their performance via your battery monitor. Ensure they are kept within their recommended temperature range.
- Wiring and Connections: Periodically inspect all wiring for fraying, cracks, or signs of rodent damage. Check all connections (terminals, MC4 connectors) to ensure they are tight and corrosion-free. Loose connections can generate heat and cause system failures.
- Component Monitoring: Use your charge controller and inverter displays or associated apps to monitor system performance. Look for any unusual readings or error codes. Early detection of issues can prevent minor problems from becoming major ones.
Regular maintenance, even simple tasks, can drastically extend the life of your system components and ensure consistent power. Many resources are available on Off-Grid Solar Maintenance Costs and best practices.
Integrating Backup Solutions
Even the most robust off-grid solar system can face challenges – extended periods of bad weather, unexpected component failure, or a sudden surge in energy demand. Having a backup plan provides crucial peace of mind and ensures continuous power for your tiny home.
- Portable Generator: A small gasoline, propane, or diesel generator is a common and effective backup. It can charge your batteries directly (if your inverter-charger has this capability) or provide AC power for your home during emergencies. Ensure you have a safe and well-ventilated space for its operation. Remember, even a small generator for occasional use has a Cost of Adding a Generator to Off-Grid Solar.
- Secondary Power Station: A smaller portable power station, like another Jackery Explorer or similar, can serve as an excellent backup for essential loads (phone charging, lights, CPAP machine) during a main system outage or if you need to perform maintenance on your primary system.
- Manual Alternatives: Don't underestimate the power of simplicity! A hand-crank charger, a propane stove for cooking, or even a small wood stove for heating can be invaluable during a prolonged power outage, reducing your reliance on electricity for critical functions.
Thinking through these backup options isn't about distrusting your solar system; it's about being a prepared and resilient off-grid tiny home dweller. It’s all part of designing a reliable off-grid system for total independence.
Disclaimer
Please be aware that the information provided in this guide is for general informational purposes only and does not constitute professional advice. Off-grid solar system design and installation can be complex and involve electrical hazards. Always consult with qualified professionals, adhere to local building codes, and prioritize safety when working with electrical systems.