Best Off-Grid Solar Kit for a Van
Living the van life is all about freedom, adventure, and waking up to a new view every day. But let's be real, nothing squashes that freedom faster than running out of power in the middle of nowhere, or constantly worrying if your fridge will keep your groceries cold. The endless cycle of charging phones at coffee shops, struggling with noisy generators, or finding your lights dimming just when you need them most can be incredibly frustrating. This comprehensive guide is designed to cut through the confusion, helping you find the absolute best off-grid solar kit for your van so you can enjoy reliable, sustainable power, no matter where your travels take you.
Understanding Your Van's Unique Power Needs
Before you even start looking at shiny solar panels or hefty batteries, the absolute first step is to get a handle on your personal power consumption. Every van dweller is different, and what works for a weekend warrior might leave a full-time digital nomad in the dark. It’s not just about getting some solar; it's about getting the right amount for your lifestyle.
Calculating Your Daily Energy Consumption
This is where the rubber meets the road. You can't budget your power if you don't know what you're spending. Think of every electrical item in your van, from the smallest phone charger to your refrigerator, and even that beloved espresso machine. Each of these draws power, and we need to quantify it. Start by making a list of every appliance you plan to use, how many watts it consumes (check the label or do a quick online search), and for how many hours a day you anticipate using it.
For instance, your 12V Dometic fridge might pull around 50 watts but only runs for about 8-12 hours a day, cycling on and off. Your laptop could be 40-60 watts for 4 hours, and your LED lights perhaps a total of 10 watts for 5 hours. Don't forget those smaller, often overlooked items like a water pump, a fan for ventilation, or charging camera batteries. It's easy to underestimate, especially when you're caught up in the excitement of planning. Seasonal variations play a huge role too; a powerful diesel heater or an AC unit in extreme weather will dramatically increase your demand, while simple fans might suffice in milder climates. Taking the time to accurately calculate your daily energy usage in watt-hours (watts x hours of use) is foundational. It’s the single most important step to avoid costly oversizing or, even worse, being consistently underpowered. For a deeper dive, check out our guide on how to calculate daily energy usage.
Space Constraints and Mounting Options
Vans, by their very nature, are compact. Unlike a sprawling off-grid cabin, you're working with a finite and often curved surface area. Your roof real estate is precious, and every inch needs to be considered. Rigid solar panels are typically more efficient per square foot and more durable, but they require a sturdy mounting system and can add noticeable height and wind resistance, which might impact fuel efficiency or your ability to fit under low clearances. If you have a pop-top roof, fixed rigid panels might not be an option at all.
This is where flexible solar panels can shine. They adhere directly to the van roof, maintaining a low profile, which is great for stealth or if you frequently encounter height restrictions. However, they can be less efficient and more prone to overheating in direct sun, potentially reducing their lifespan. Some van lifers opt for portable solar panels, perhaps a foldable array you can set out when parked, which gives you the flexibility to chase the sun and park in the shade. However, this means daily setup and pack-down. Consider your specific van model – a Mercedes Sprinter will have different roof space and contours than a Ford Transit or a smaller Ram ProMaster. The choice isn't just about power; it's about aerodynamics, aesthetics, security against theft, and how much effort you’re willing to put in each day. Our article on rigid vs flexible solar panels can offer more insights.
Key Components of an Off-Grid Van Solar Kit
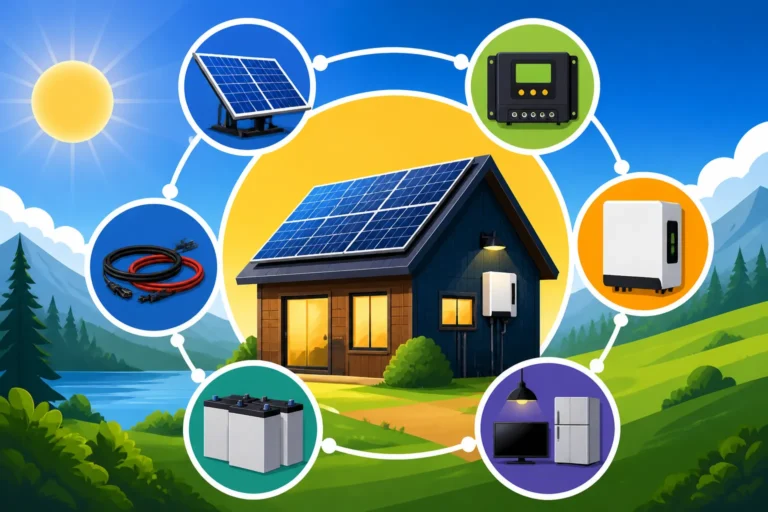
An off-grid solar system isn't just a panel and a battery; it's a carefully integrated network of components working in harmony. Understanding each part is essential to building a reliable and efficient system for your van.
Solar Panels: Your Energy Harvesters
The solar panels are literally your power generators, converting sunlight into electricity. For van life, the choice often comes down to balancing efficiency, durability, and form factor. Monocrystalline panels are generally the most efficient, meaning they produce more power per square foot, which is critical when roof space is at a premium. They are also known for their longevity and performance in various light conditions. However, they are rigid and require robust mounting, which can add to the overall height and weight of your van.
Flexible panels, while often slightly less efficient, offer immense advantages in terms of stealth and easy installation on curved surfaces. They can be glued directly to the roof, eliminating bulky mounting hardware and significantly reducing wind resistance. This is a huge plus for those who prefer their van to look less like a science experiment and more like a regular vehicle. Then there are portable options, which aren't permanently attached and can be deployed when needed. These are fantastic for supplementing a fixed array or as a primary source for minimal power users, allowing you to park your van in the shade while your panels soak up the sun. The wattage of your panels should directly correspond to your calculated energy needs and the peak sun hours available in your typical travel locations. Choosing the right panels is a critical first step, and you can learn more in our guide on how to choose an off-grid solar panels.
Batteries: Your Power Bank on Wheels
Batteries are the heart of your off-grid system, storing the energy your panels collect for use when the sun isn't shining. For van life, the battery choice is even more crucial due to weight, space, and vibration considerations. Lithium Iron Phosphate (LiFePO4) batteries have become the gold standard for van conversions. They are significantly lighter than traditional lead-acid batteries (like AGM), offer a much longer cycle life (meaning they can be discharged and recharged many more times), and allow for a deeper depth of discharge without damage, essentially giving you more usable capacity. They also perform better in a wider range of temperatures, though extreme cold does require some insulation or heating for optimal charging.
While the upfront cost of LiFePO4 is higher, their longevity and performance often make them more cost-effective in the long run. Lead-acid batteries, especially sealed AGM batteries, are a cheaper alternative initially, but they are heavier, have a shorter lifespan, and shouldn't be discharged below 50% regularly, cutting their usable capacity in half. Sizing your battery bank involves determining how many "days of autonomy" you want – how long you can run your essentials without any sun. For a full-time van lifer, having at least two to three days of autonomy is a good safety net for cloudy weather. Our in-depth comparison of LiFePO4 vs lead-acid battery cost delves into the financial aspects.
Charge Controllers and Inverters: The Brains of the System
These two components act as the intelligence and muscle of your solar setup. The charge controller regulates the power coming from your solar panels to your batteries, preventing overcharging and ensuring efficient charging. For van life, where panel space is often limited, a Maximum Power Point Tracking (MPPT) charge controller is almost always the superior choice over a Pulse Width Modulation (PWM) controller. MPPT controllers are significantly more efficient (10-30% more power harvest) because they can adjust to varying voltage and current conditions from your panels, maximizing the energy captured, especially in fluctuating light. This efficiency gain can mean the difference between having enough power and constantly feeling depleted, a common frustration for van lifers.
The inverter takes the DC (direct current) power from your batteries and converts it into AC (alternating current), which is what most common household appliances (like laptops, microwaves, and blenders) use. For sensitive electronics, a pure sine wave inverter is essential. It produces a clean, consistent power wave, mirroring what you get from grid power, preventing damage to your devices. Modified sine wave inverters are cheaper but can harm or operate less efficiently with certain electronics. When sizing your inverter, you need to consider the surge power (starting watts) of your largest appliance, not just its running watts. A microwave, for example, might draw 700-800 running watts but require 1200-1500 watts for a few seconds to start up. Many modern van systems also utilize an inverter-charger, which combines the inverter function with a battery charger that can be used to charge your house batteries from shore power or a generator, adding another layer of versatility. Understanding the differences between MPPT vs PWM charge controllers is crucial for optimizing your energy harvest.
Exploring Different Van Solar Kit Options
When it comes to outfitting your van with solar power, you've got a few paths you can take. Each has its own advantages and disadvantages, depending on your technical skill, budget, and power needs.
All-in-One Portable Power Stations (Solar Generators)
For those just dipping their toes into van life, or for weekend adventurers who don't need to run a full mobile office, portable power stations, often called "solar generators," are an incredibly popular and convenient option. Brands like Jackery, EcoFlow, and Bluetti have made a name for themselves in this space. These units integrate the battery, inverter, and charge controller into a single, compact box. They're essentially plug-and-play: you connect your solar panels (often proprietary or with specific adapters), and then plug in your appliances directly to the unit.
The main benefits are simplicity and portability. There's no complex wiring, no separate components to mount, and you can easily move the unit in and out of your van, or even from your van to a campsite picnic table. For someone using power sparingly – charging phones, running a fan, maybe a small cooler – a Jackery Explorer 1000 or similar might be perfect. They often include a variety of AC outlets, DC ports, and USB chargers, making them incredibly versatile. However, their limitations include generally smaller battery capacities compared to custom setups, limited expandability, and a higher cost per watt-hour than building a component-based system. They are fantastic for their ease of use, but typically not robust enough for full-time living with higher power demands. For more insights, check out our comparison of solar generator vs off-grid solar system.
DIY Component-Based Systems
If you're handy with tools, enjoy the learning process, and want the most tailored system possible, a DIY component-based approach is often the way to go. This involves buying each major component – solar panels, batteries, charge controller, inverter – separately and assembling them yourself. The primary advantage here is ultimate customization. You can choose precisely the right size and type of each component to match your exact power needs, budget, and the unique layout of your van. Want specific high-efficiency panels? A massive LiFePO4 battery bank? A specialized inverter-charger? You have total control.
This route also often allows for significant cost savings, as you can shop around for the best deals on individual parts and avoid the labor costs of professional installation. However, it requires a much higher level of technical knowledge. You'll need to understand wiring diagrams, proper wire gauge selection, fusing requirements, and safe installation practices. Mistakes in a DIY setup can be costly, inefficient, or even dangerous. For those who are comfortable with electrical work and enjoy a project, the satisfaction of building your own robust system is immense. However, for beginners, the learning curve can be steep. You can explore the pros and cons in our guide on DIY vs professional off-grid solar cost.
Pre-Packaged Off-Grid Van Kits
Sitting somewhere in the middle of portable power stations and full DIY builds are pre-packaged off-grid solar kits. These kits are designed to provide a complete, compatible system tailored for specific applications, often including everything from panels and batteries to controllers and inverters, sometimes even the necessary wiring and mounting hardware. Brands like Renogy and Victron Energy offer excellent comprehensive kits.
The main draw of pre-packaged kits is convenience and peace of mind. All the components are pre-selected to work together, eliminating much of the guesswork and compatibility issues that can arise with a DIY build. This significantly reduces the complexity for someone who wants a robust system without having to become an electrical engineer overnight. While they might be slightly less customizable than a purely component-based system, many kits offer various sizes and options to suit different power demands. They typically offer better performance and expandability than portable power stations, making them suitable for more rigorous full-time van living. The installation might still require some technical skill, but the electrical design is already done for you. This is an excellent option for those who want a reliable, integrated system without the headache of sourcing and matching every single part. Our guide on off-grid solar kits: what to buy can help you navigate these options.
| Kit Type | Ideal User | Pros | Cons | Example Use Case |
|---|---|---|---|---|
| Portable Power Station | Weekend Warrior, Light User, Renters | Extremely simple, no installation, portable, versatile ports | Limited capacity, less expandable, higher cost per Wh, no permanent install | Charging phones, laptop, running a small fan for a weekend camping trip |
| Pre-Packaged Kit | Intermediate DIYer, Moderate Power Needs | Components matched, less guesswork, expandable, good performance | Less customizable than DIY, still requires installation | Full-time living with fridge, lights, laptop, and occasional appliances |
| DIY Component System | Experienced DIYer, High/Specific Power Needs | Fully customizable, potentially most cost-effective, robust | Requires significant technical knowledge, complex installation | Running AC, well pump, multiple high-draw appliances for extended periods |
Installation Considerations and Best Practices for Vans
Even with the best components, a poor installation can lead to frustrating inefficiencies, safety hazards, and premature system failure. Van installations have their own unique set of challenges compared to a fixed home, primarily due to movement, vibrations, and limited space.
Securing Your Panels and Cabling
Vans are constantly moving, experiencing vibrations, wind, and varying weather conditions. Improperly mounted solar panels can become dangerous projectiles at highway speeds, or suffer damage themselves. For rigid panels, robust, corrosion-resistant mounting brackets are essential, typically bolted through the roof with proper sealing. Many van builders use heavy-duty VHB tape in conjunction with bolts for extra security and to minimize new roof penetrations. If you have a roof rack, that provides an excellent base for mounting.
Crucially, every hole drilled in your van's roof for wiring or mounting points must be meticulously sealed to prevent water leaks. Using marine-grade sealants like Sikaflex 221 or Dicor lap sealant is critical. Cable management is equally important. All wiring on the exterior should be housed in UV-resistant conduit or loom to protect it from sun degradation and physical abrasion. Inside the van, cables need to be neatly routed, secured, and protected from pinching or rubbing against sharp edges. Loose cables can chafe, short, or simply become a nuisance. Take your time here; a hurried job will almost certainly cause problems down the road. Our article on how to waterproof roof penetrations is a must-read for any van solar installer.
Battery Placement and Ventilation
Batteries, especially larger LiFePO4 banks, are heavy and need to be securely fastened to prevent movement during driving or in the event of an accident. They should be placed in a dry, protected location, often under a bed, seat, or in a dedicated cabinet. Proper ventilation is paramount, especially for lead-acid batteries which off-gas hydrogen during charging. Even LiFePO4 batteries, while not gassing, benefit from airflow to prevent overheating, which can reduce their lifespan. A dedicated, well-ventilated battery box is a smart investment.
Temperature management is another critical factor. While LiFePO4 batteries are more robust than lead-acid, they generally prefer not to be charged when their internal temperature is below freezing (around 32°F or 0°C). If you plan on cold-weather van adventures, consider batteries with built-in heaters or house them in an insulated, perhaps even heated, compartment. Leaving batteries exposed to extreme cold or heat can significantly impact their performance and longevity. Our guide on how to protect batteries from cold offers practical advice for chilly climates.
Safety, Fusing, and Wiring
This is the non-negotiable part of any solar installation, especially in a mobile environment where vibrations and potential impacts are common. Proper wiring and fusing protect your system, your van, and most importantly, you from electrical fires, short circuits, and component damage. Every major component – panels, battery bank, charge controller, and inverter – must have appropriate overcurrent protection (fuses or circuit breakers) in place. The wire gauge used for each run must be correctly sized for the current it will carry and the length of the run to prevent voltage drop and overheating. Undersized wires are a major fire hazard.
It's also essential to install master disconnect switches for both your solar array and your battery bank. These allow you to safely shut down the system for maintenance, troubleshooting, or in an emergency. Grounding your system properly is also vital, typically connecting all metal enclosures and the negative battery terminal to the van's chassis or a dedicated grounding point. If you're unsure about any aspect of wiring or safety, consult a certified electrician or delve into resources like our comprehensive guide on off-grid solar safety and grounding. It's an area where cutting corners simply isn't an option.
Choosing the Right Kit for Your Van Life Style
Ultimately, the "best" off-grid solar kit for a van isn't a one-size-fits-all product. It's the one that perfectly aligns with your specific needs, travel style, and budget. What works for a solo minimalist might be a disaster for a family of four.
Weekend Adventurer vs. Full-Time Van Dweller
Your typical usage pattern is arguably the most significant factor in choosing a solar kit. If you're a weekend adventurer who mostly uses their van for short trips, maybe a few times a month, your power demands are likely minimal. You'll probably be fine with a smaller, simpler system, perhaps a powerful portable power station like a Jackery Explorer 1500 paired with a couple of 100W portable or flexible panels. Your primary needs might be charging phones, running LED lights, and keeping a cooler or small fridge humming. Such a setup offers maximum flexibility and minimal permanent installation, allowing you to easily store it when not in use.
On the flip side, if you're a full-time van dweller, especially if you work remotely or enjoy modern conveniences, your needs are entirely different. You're looking for a robust, reliable system that can keep up with daily refrigerator use, laptop charging for hours, a powerful fan or even an air conditioner in warmer climates, a water pump, and perhaps even cooking appliances. For this lifestyle, a comprehensive, higher-capacity system featuring a large LiFePO4 battery bank (200Ah or more), 300-600W+ of solar panels, and a pure sine wave inverter is essential. You'll want a system designed for year-round resilience, capable of handling cloudy days and consistent demand. Our guide on off-grid solar design for full-time living provides excellent strategies for these more intensive setups.
Budgeting for Your Van Solar Setup
The cost of an off-grid solar system for a van can vary dramatically, from a few hundred dollars for a basic portable setup to well over $10,000 for a high-end, custom-installed system for full-time living. It’s crucial to set a realistic budget from the outset. While the initial investment might seem steep, remember that you're investing in energy independence and comfort on the road. Factor in not just the core components (panels, batteries, controller, inverter) but also mounting hardware, wiring, fuses, connectors, sealants, and any tools you might need.
Don't be afraid to start small and expand later. Many van lifers begin with a basic system to cover their essentials and then add more panels or battery capacity as their needs evolve or their budget allows. This phased approach can make the initial leap into solar more manageable. For instance, a Jackery power station might be a lower upfront cost, offering immediate power, but for the long haul of daily living, a custom-built system with quality components from brands like Victron or Renogy will offer better long-term value and reliability. Always aim for quality components where possible; cheaper alternatives often fail sooner or perform poorly, leading to more expenses down the line. To help you plan, take a look at our article on how to budget for an off-grid solar system.
Expandability and Future-Proofing
One of the wisest decisions you can make when designing your van's solar system is to think about future expandability. Your power needs might change. You might add a new appliance, decide to work from the road more often, or travel to areas with less sunlight. Designing a system that can grow with you saves time, money, and hassle later on.
This means choosing a charge controller that can handle more solar input than you initially install, and an inverter that has a bit of headroom beyond your current peak loads. Selecting a battery bank that allows for easy addition of more batteries in parallel (especially true for many LiFePO4 batteries) is also a smart move. For example, installing wiring that is rated for a higher capacity than your initial setup, or leaving space for an additional panel on your roof, can make future upgrades significantly easier and cheaper. Thinking ahead prevents you from having to completely overhaul your system if your lifestyle evolves. Our guide on how to design an expandable system offers practical tips for building in future flexibility.
Disclaimer
Please note that the information provided in this guide is for general informational purposes only and does not constitute professional electrical advice. Working with solar electrical systems can be dangerous. Always consult with a qualified electrician or solar professional for specific guidance tailored to your project, and ensure all installations comply with local electrical codes and safety regulations.